

Page 1
Instruction Manual
Wrist Strap & Footwear Combination Tester
GTS600
T R A N S F O R M I N G T E C H N O L O G I E S , L L C
O U T S T A N D I N G A L T E R N A T I V E S I N S T A T I C C O N T R O L
Ohm Metrics™
Page 2

Contents
1 Description
GTS 600 1
2 Installation
Battery Installation 2
Stationary Installation 2
Freestanding Installation 3
3 Testing
Wrist Strap 4
Footwear 5
4 Calibration 7
4 Parts Included List 7
5 Specifications 8
6 Service and Warranty 9
Page 3

1
Description
Ohm Metrics
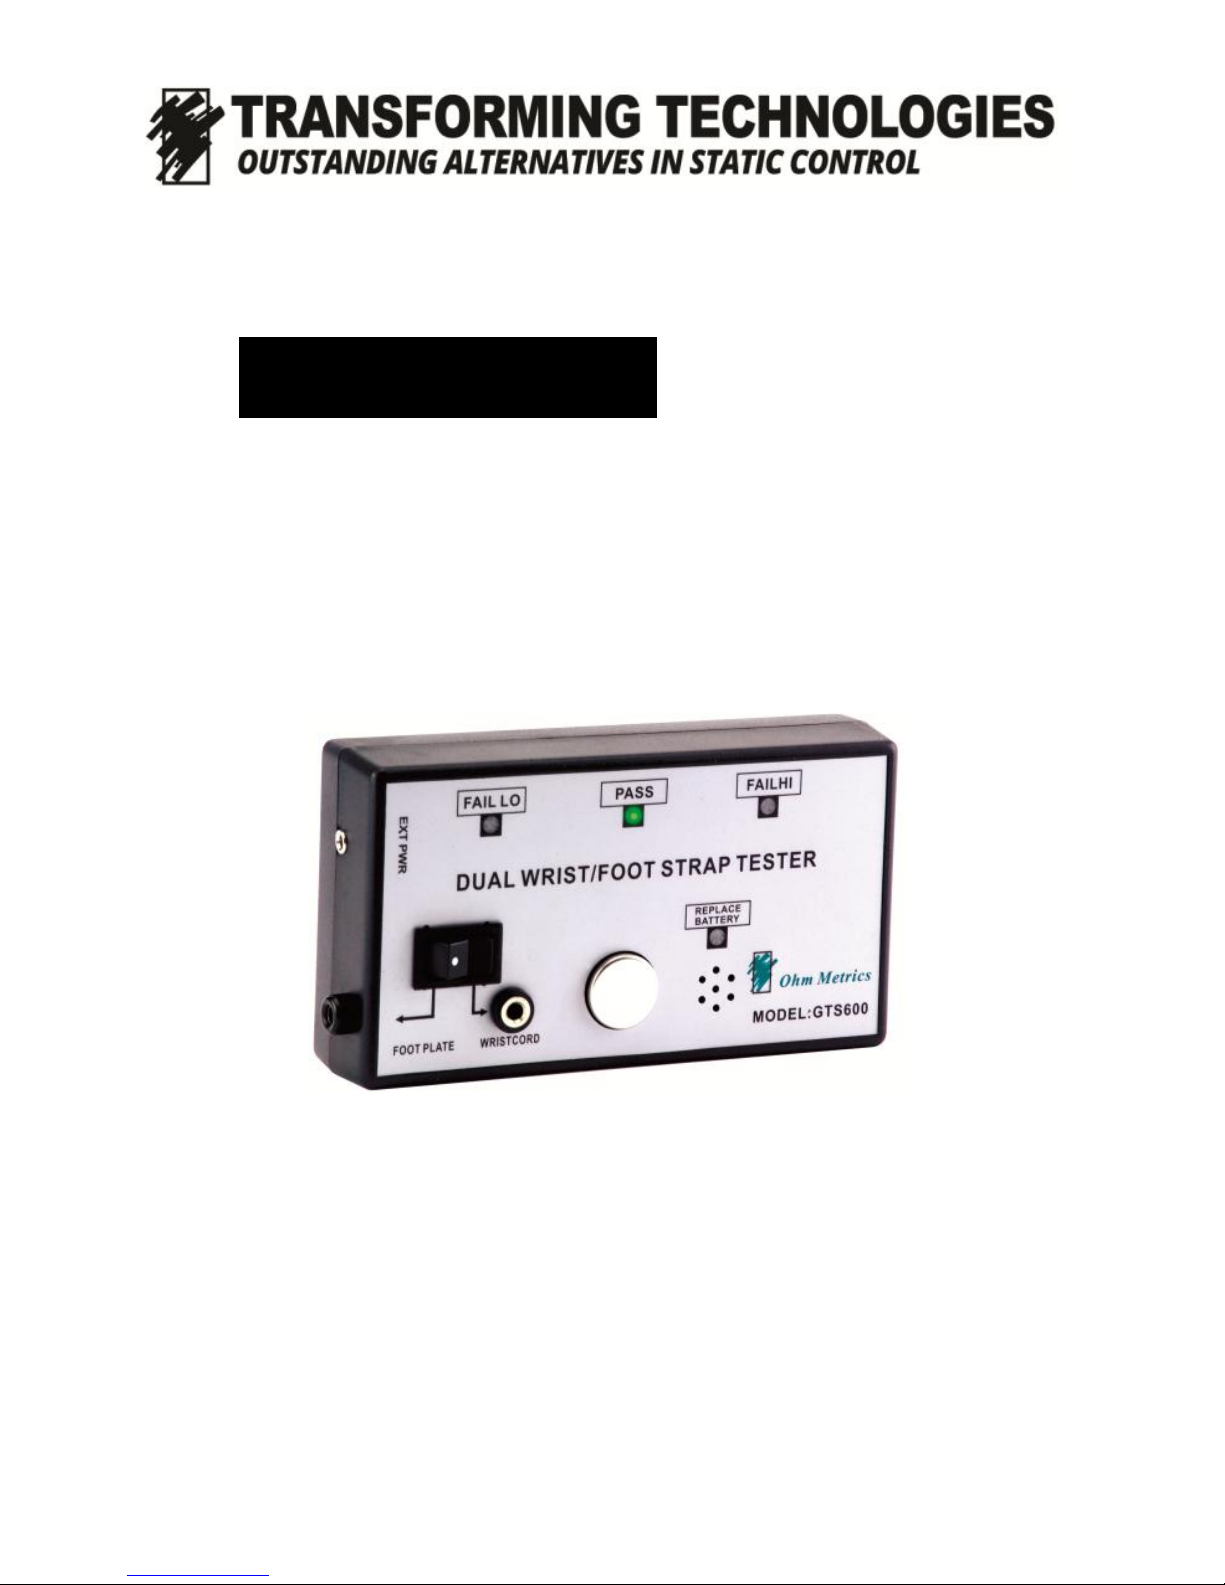
Duel Footwear/Wrist Strap Tester:
Model GST 600
The GST 600 tester is a space saving, versatile combo
grounding tester that allows for accurate and cost effective testing of ESD ground devices. The dual test circuits
in the GTS600 gives the option for both wrist strap and
footwear testing and a positive rocker switch makes test
mode selection easy.
This tester fully supports the “Compliance
Verification Plan” requirements as stated
in the ANSI ESD S20.20.
Reliable, Repeatable Results
Accuracy and reliability are key strengths of the
GST 600. Test parameters are standard but can
be adjusted to match your own specifications.
Features include:
Dual test circuits: test footwear or wrist straps
Positive rocker switch
LED's lights and audible alarm signal test results
Battery powered with low-battery indicator
Optional AC adapter
Provided with calibration to NIST traceable standards
Wrist Strap Range: 750 Kilohms - 10 Megohms
Footwear Range: 750 Kilohms - 100 Megohms
Page 4

2
Battery Installation
The GST600 monitor requires 1(one) 9volt battery. The battery housing is found on the back of unit. Slide battery
cover off and insert only a 9volt battery.
Only new and valid batteries can be used.
The “Replace Battery” LED located on the front of unit in-
dicates when battery power is low. When the LED lights,
stop testing and replace with fully charged 9v battery.
Stationary Installation
The GTS600 has two options for installation: Stationary installation or Free-standing installation with optional footplate and stand.
1. Remove all items from carton and confirm you have re-
ceived all items contained in the “Parts Included List.” lo-
cated on Page 8.
2. Choose a location in the work area that is easily accessible and safe for both test equipment and users.
The GST 600 can be mounted on to any flat, stationary surface. Frequently, the unit is mounted on a table or wall
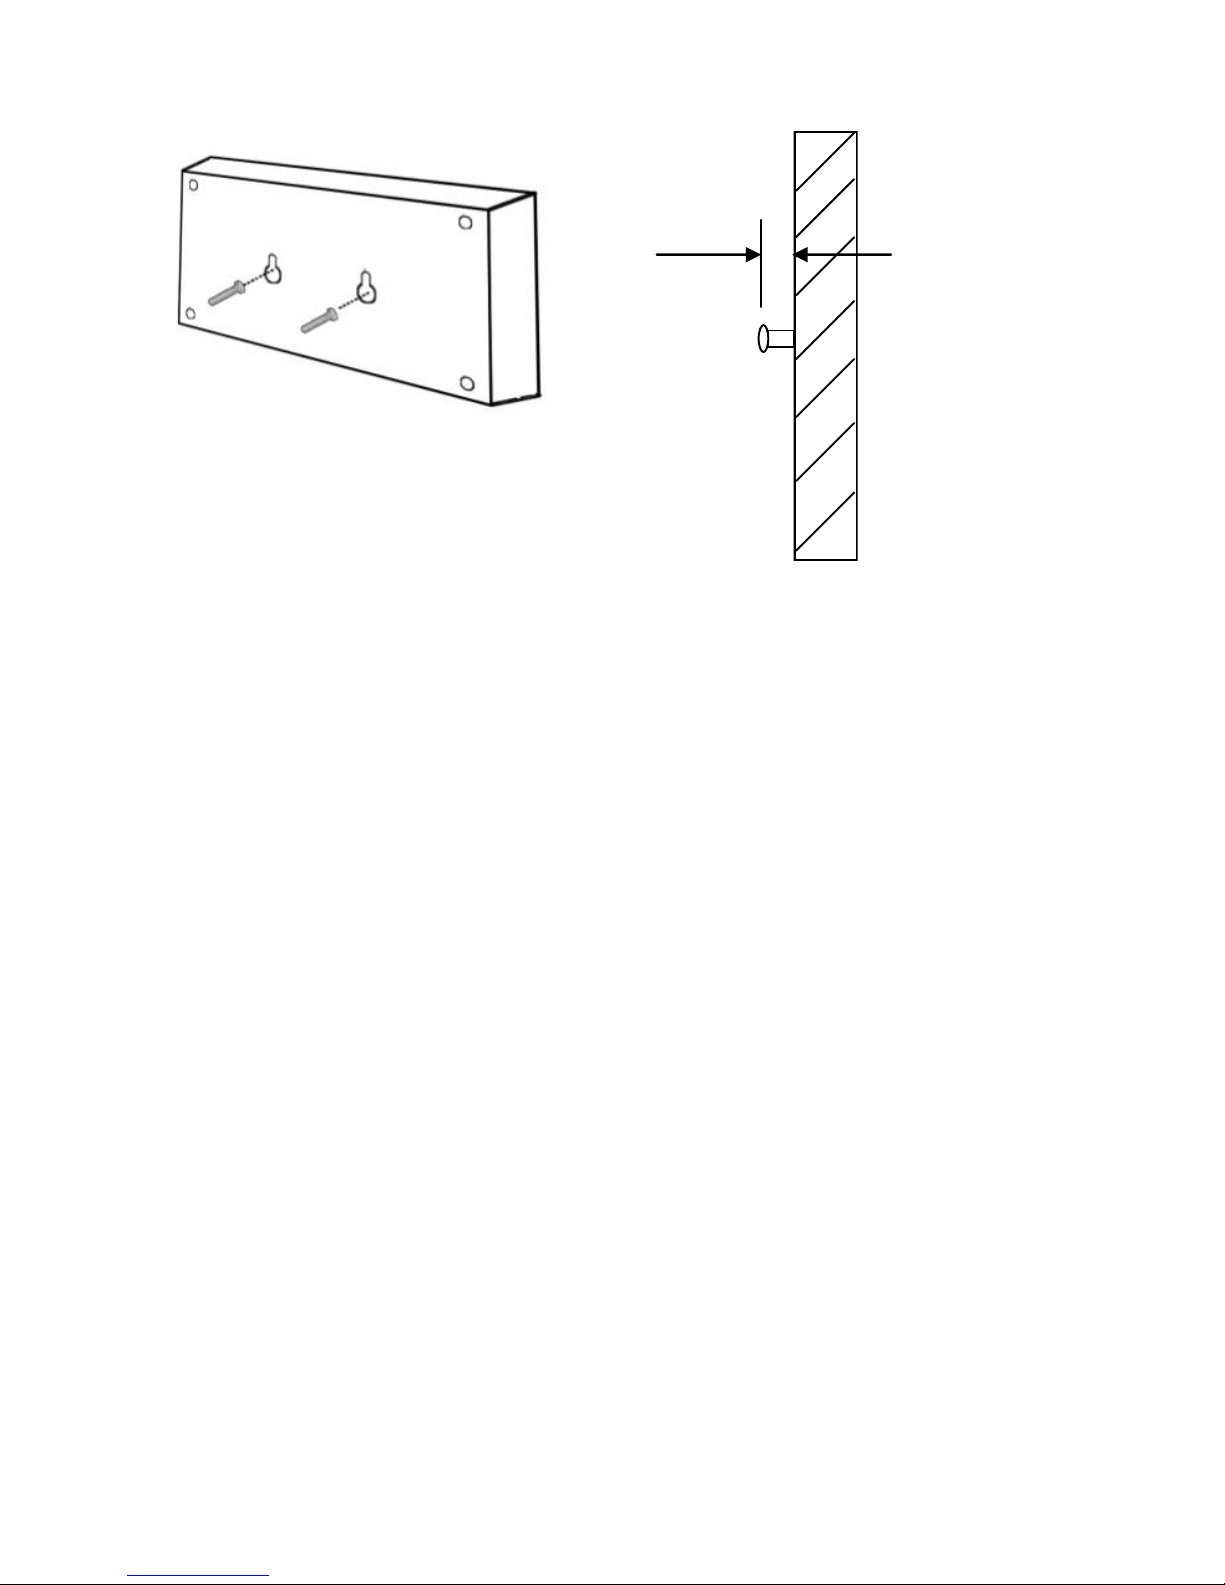
3. WALL MOUNT: Two keyhole slots on the back of the unit
allow you to attach the unit using two (2) screws. See
figure 1.
4. Install two(2) screws 1 1/2” apart, leaving 1/4” of screw
head from mounting surface.
5. Mount the tester on the screws, pulling gently down to
lock into place.
Page 5
3
Free Standing Installation
NOTE: Free standing installation requires Model: GTS600FP
or GTS600k.
The Rugged stainless steel footplate and pedestal allows
for both footwear and wrist strap testing in a free standing
moveable unit.
Assembly
1. Remove the four screws from the base of unit using included HEX wrench.
Note the pedestal comes in two pieces: One with the base
mount that has a length of 23.4” (Pedestal A) and one
with unit mount that has a length of 19.6”(Pedestal B).
Figure 1. Mounting Hole Location
1/4”
Figure2: Mounting Screw
Location on wall
Page 6

4
Testing
The GTS600 safely tests for proper ESD protection. The
GTS600 can function as solely a wrist strap tester or in
combination with the GTS600FT as duel wrist strap and
foot wear tester.
Wrist Strap Testing
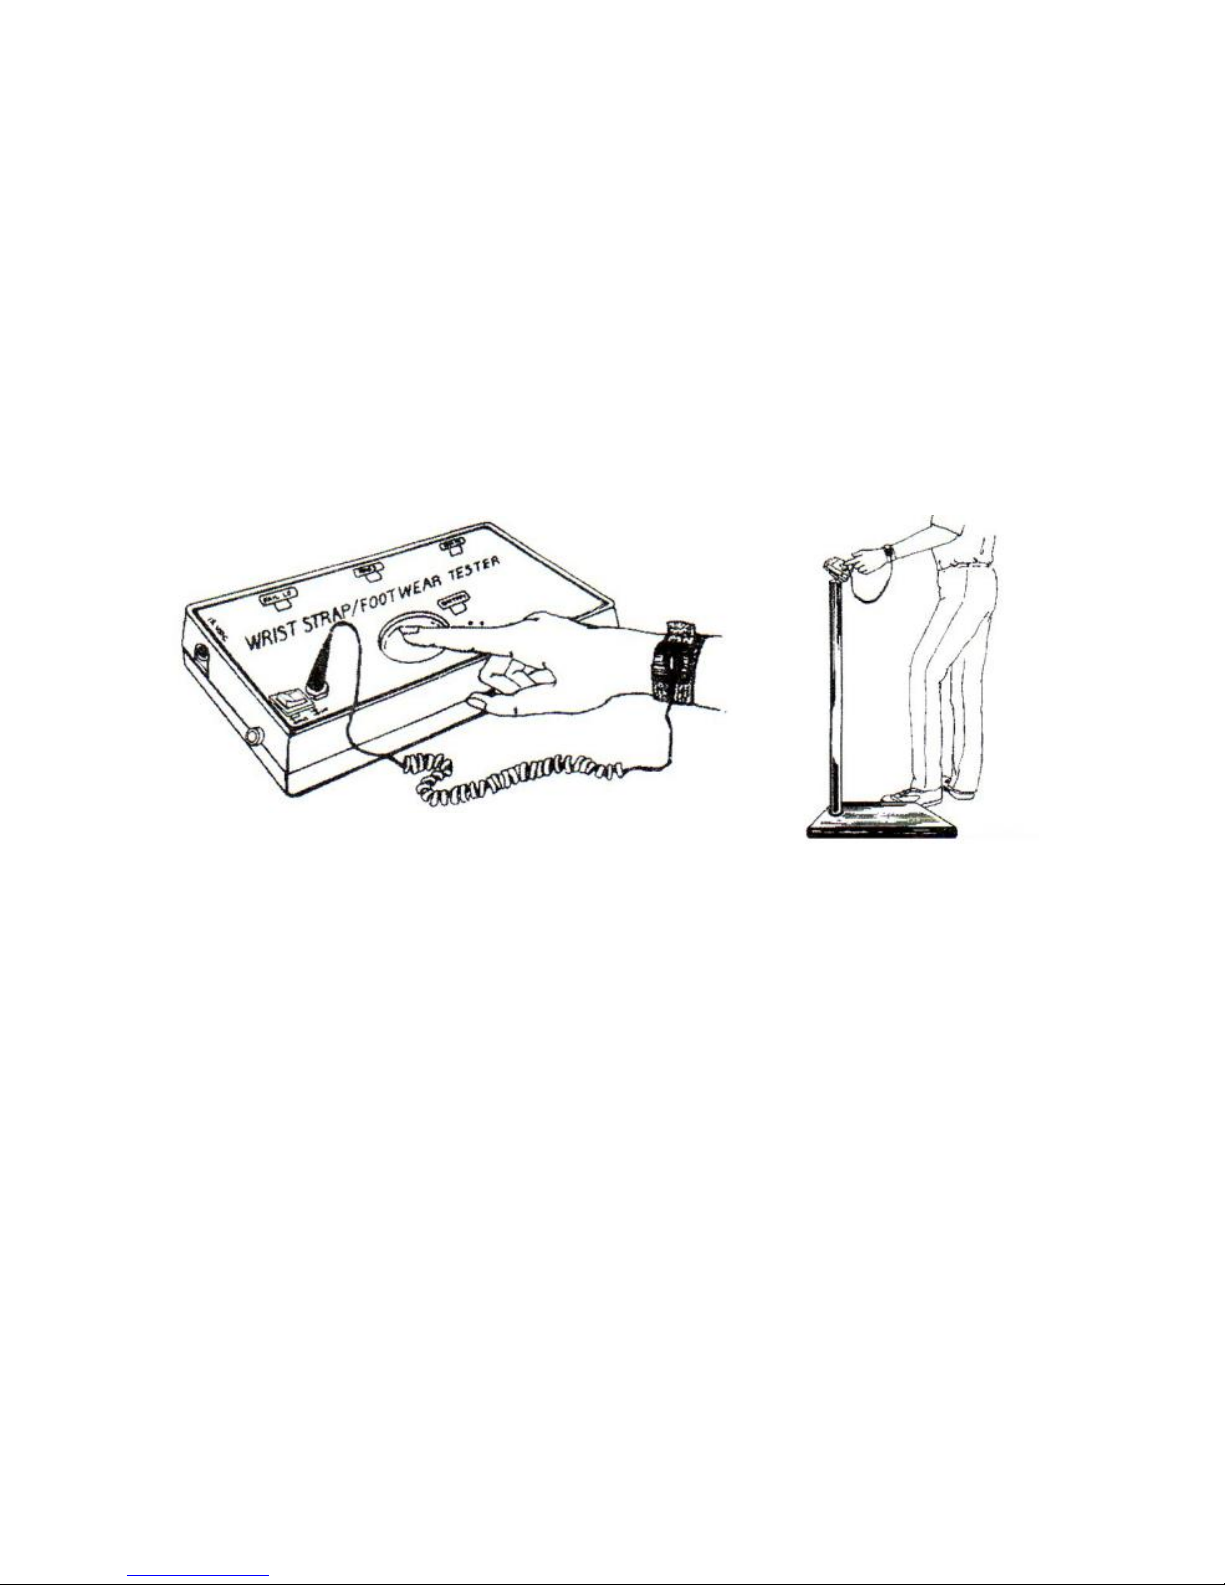
1. While wearing wrist strap, plug banana plug end of
cord in the jack labeled “WRISTCORD”
2. Press rocker switch toward “WRISTCORD”.
3. Press the test button and hold for 2-3 seconds.
Free Standing Installation Cont.
2. Line up pedestal A with four screw base mount on footplate and attach with the four screws. Tighten with HEX
wrench.
3. Slide pedestal B on to pedestal A.
4. Line up Monitor with mounting screws and gently pull
down to lock in place.
5. Install the 4” banana plug connector into jack labeled
“FOOT PLATE” on the left side of unit.
6. Locate the connection screw and two bolts on the underside of monitor mount and unscrew first bolt.
7. Place eye of plug connector on screw and return bolt and
gently tighten it with fingers.
Page 7
5
Work Station Mat
Footwear Testing
In order to test footwear you will need the GTS600 and
GST600FT or the GST600K. For the following testing, one
must be wearing foot grounding ESD protection.
1. Press rocker switch to “FOOTPLATE”
2. Place one foot on the plate. If the floor is conductive, lift
the opposite foot off the floor during the test.
NOTE: No cord should be plugged into “WRIST CORD”
jack.
Figure 2. Wrist Strap testing
Wrist Strap Testing Cont.
4. The green LED labeled “PASS” indicates that the wrist
strap and cord are functioning properly.
5. If either the yellow LED “FAIL LO” or the red LED “FAIL
HI” light and audible alarm sound, then check the wrist
strap and cord set immediately.
Figure 3. Wrist Strap testing
with foot plate
Page 8
6
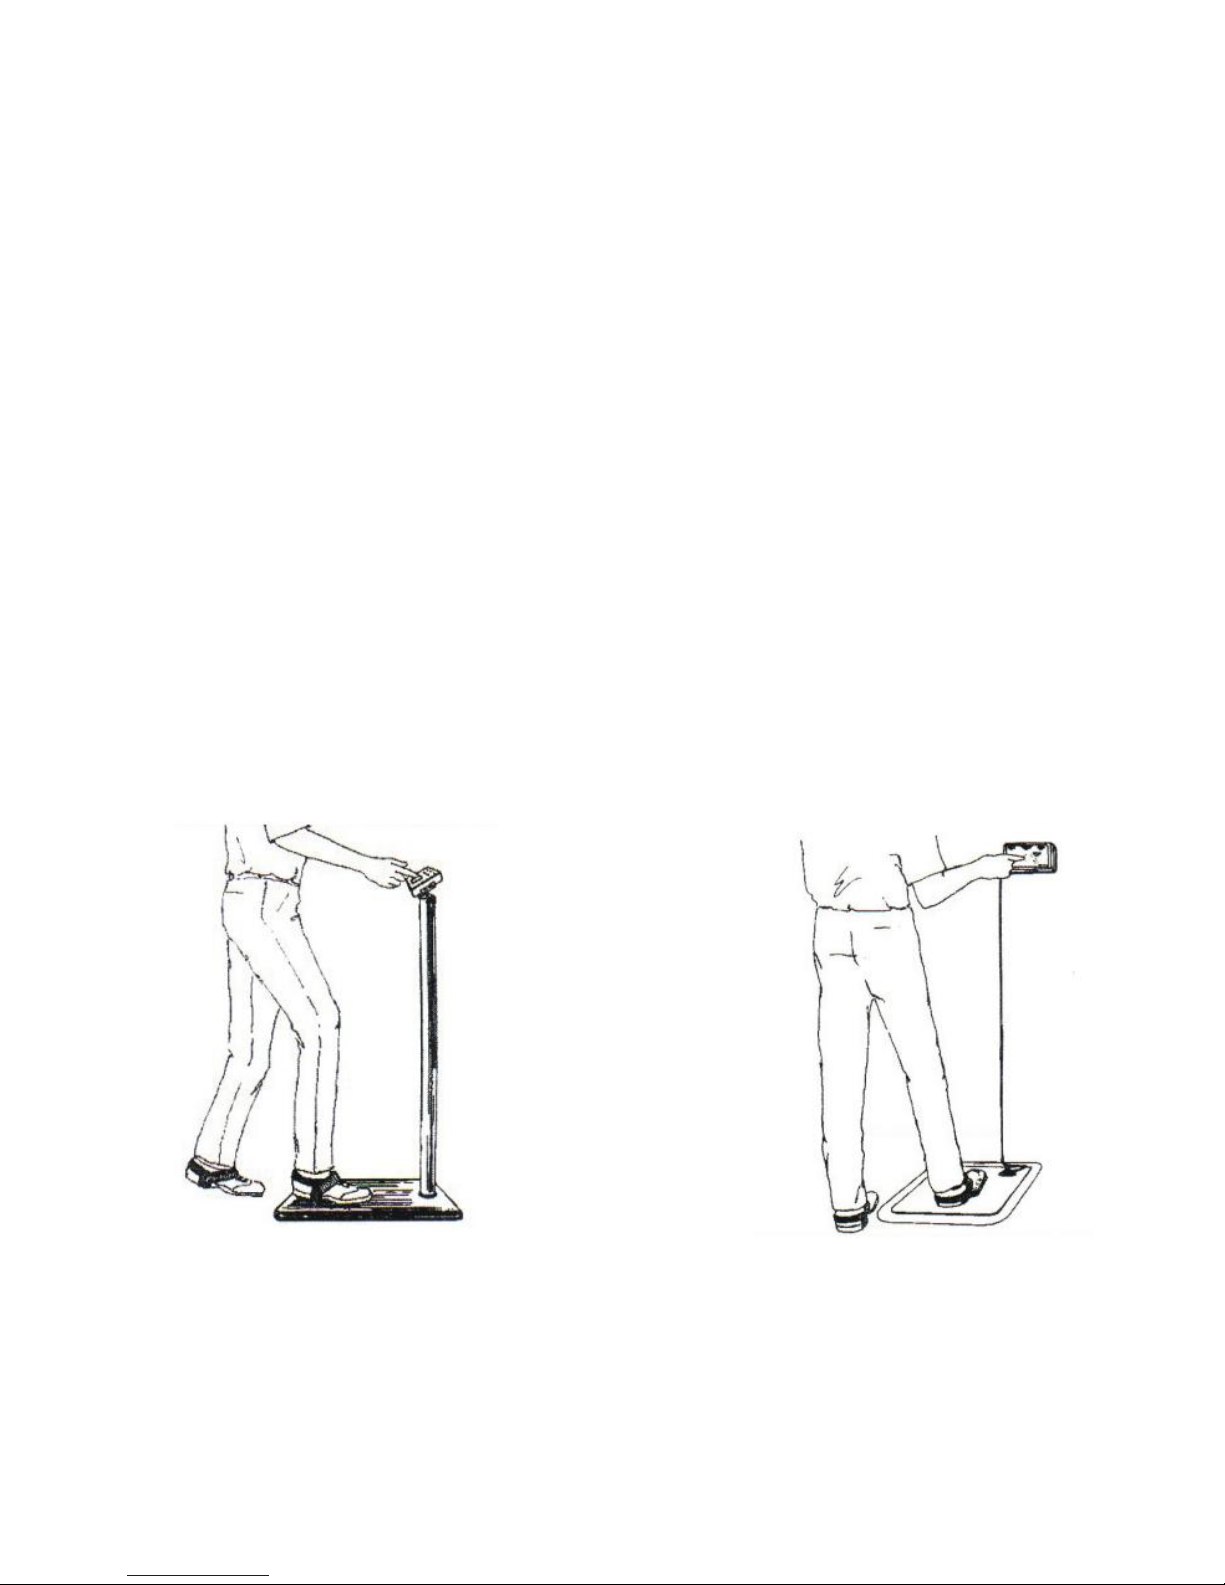
Figure 3. Free standing footwear
testing with the GTS600K
Figure 4. Footwear testing
with out pedestal
3. Press the test button and hold for 2-3 seconds
4. The green LED labeled “PASS” indicates that the foot
ground is functioning properly.
5. If either the yellow LED “FAIL LO” or the red LED
“FAIL HI” light and audible alarm sound, then check
the foot ground set immediately.
6. Repeat steps 1-5 with opposite foot.
Footwear Testing Cont.
Page 9

Product Specifications
7
Wrist Strap Circuit
FAIL HI: 10 Megohms
FAIL LO 750 Kilohms
Footwear Circuit
FAIL HI: 100 Megohms
FAIL LO 750 Kilohms
Product Number
GTS600 Tester
GTS600K Tester and Foot Plate
GTS600FP Foot Plate only
General
Power 9v Battery
or AC adapter
Operation Resistance Bridge
Output Three LED indicators and audio signal
Accuracy +10% for wrist strap tester
+10% for anti-static foot wear tester
CALIBRATION AND PERIODIC TESTING:
The GTS600 is calibrated to NIST traceable standards. We
recommend that calibration is performed annually to ensure proper testing standards. Due to duel testing circuits,
both test circuits must be calibrated individually. Transforming Technologies offers a calibration unit CAL1000 to
perform these tasks.
Page 10

8
Parts Included List
GTS600k
1. GTS600 tester.
2. GTS600FT foot plate.
3. AC adapter
4. 2 piece pedestal.
5. Connection cord for pedestal.
6. Connection cord for Foot plate.
GTS600 only
1. GTS600 tester
2. AC adapter
Testing Range 750K-10M for wrist strap
750K-100M for footwear
GST600 Tester only
Weight 0.44lbs
Dimensions 5.5” × 3.1” ×1.5”
GTS600FT
Weight 15lbs
Dimensions 19.75” x 16” x 2”
Product Specifications Cont.
Page 11

Service and Warranty
Transforming Technologies, LLC provides a limited
warranty for the Model CM2015. All new products are
guaranteed to be free from defects in material and workmanship for a period of one (1) year from the date of
shipment. Liability is limited to servicing (after evaluating, repairing or replacing) any product returned to
Transforming Technologies. The company does not warrant damage due to misuse, neglect, alteration or accident. In no event shall Transforming Technologies be liable for collateral or consequential damages.
To receive service under warranty, please contact
Transforming Technologies Technical Support.
About Transforming Technologies
Since 1998, Transforming Technologies has helped
electronic manufacturing facilities to protect their products and processes from the many serious problems associated with static electricity.
Transforming Technologies offers a wide range of
unique and outstanding products to detect, protect, eliminate and monitor electrostatic charges. Our products are
integral components of an effective static control pro-
gram.
9
Page 12

3719 King Rd | Toledo, OH 43617 | P: 419-841-9552 | F: 419-841-3241 | [email protected]
 Loading...