

Page 1

User Manual
Wi-Fi SD
(Version 0.94)
Page 2

Table of Contents
Introduction ...........................................................................................3
Package Contents.................................................................................3
Features .................................................................................................4
System Requirements...........................................................................4
Installing the Wi-Fi SD App...................................................................5
Connecting to the Wi-Fi SD Card using iOS and Android De vice s..6
DIRECT SHARE....................................................................................................................................6
INTERNET MODE..................................................................................................................................7
Connecting to a Smartphone Personal Hotspot ................................9
Using the Wi-Fi SD App on iOS Devices...........................................10
BROWSE ............................................................................................................................................11
SHOOT & VIEW..................................................................................................................................18
Using the Wi-Fi SD App on Andr oid Devices....................................19
BROWSE ............................................................................................................................................21
SHOOT & VIEW..................................................................................................................................26
Settings ................................................................................................27
DIRECT SHARE SETTINGS.................................................................................................................29
INTERNET MODE SETTINGS...............................................................................................................30
Set Administrator Password ..............................................................31
Wi-Fi SD Information...........................................................................32
Connecting to the Wi-Fi SD Card using Other Devices...................33
Restore Defaults (Return to Original Settings).................................37
Upgrading Firmware ...........................................................................38
T r oubleshooting..................................................................................39
Specifications......................................................................................41
Get more help ......................................................................................41
T ranscend Limited Warranty..............................................................44
Page 3

Introduction
Congratulations on purchasing Transcend’s Wi-Fi SD card that transforms your
digital camera into a wireless device so that you can wirelessly stream digital photos
and videos to your iPad, iPhone, Android, and other Wi-Fi enabled devices. Thanks
to the use of a free downloadable App, developed for use with Apple iOS and Android
devices, the Wi-Fi SD card is able to organize all of your photos and videos ready for
easy playback and viewing. Up to 5 devices can access content from the Wi-Fi SD
card at the same time, making it easier than ever to share your favorite digital files
with friends and family. This User Manual will give you step-by-step instructions and
advice to help you get the best experience from your new device. Please read it
carefully before using the Wi-Fi SD card.
Package Contents
Wi-Fi SD Card
Quick Start Guide
Warranty Card
Page 4

Features
View photos (JPG, BMP, PNG)
Playback videos* (AVI, MOV, WMV, MP4)
Fully compliant with the SD 3.0 standard
SDHC Class 10 speed rating
Supports iOS, Android, Windows, Linux, and Mac OS X
Special App for iOS and Android devices
Instantly share photos and videos wirelessly
Shoot & View on iOS and Android devices
*For video streaming, we suggest the following resolution and video bit rate:
Resolution: HD-720p 1280x720@30fps, Video bit rate: 1472kbps.
System Requirements
Operating system requirements for uploading files from your computer to Wi-Fi SD:
®
Microsoft Windows
Microsoft Windows Vista
Microsoft Windows
Microsoft Windows
Mac
Linux
®
OS X 10.5 or later
®
Kernel 2.4 or later
XP
®
7
®
8
®
Device requirements for running the Wi-Fi SD App:
iPhone (3GS, 4, 4S with iOS4.0+) and iPad.
Android device requires Android 2.1, or later.
Apple, iPhone and iPad are trademarks of Apple Inc. App Store is a service mark of Apple Inc.
Wireless performance depends on environment and distance from device or
hotspot. To obtain the best possible connection speed, try adjusting the
location and orientation of the Wi-Fi SD card.
Please DISABLE power saving (automatic power off) on your camera for a
better user experience.
Page 5

Installing the Wi-Fi SD App
Developed specifically for iOS (iPhone/iPad) and Android devices, the free to
download Wi-Fi SD App allows you to wirelessly browse and download photos and
videos stored on the Wi-Fi SD card, and customize wireless network settings.
Installing the App on an iOS device:
1. Using your iOS device, open the App Store and search for the Wi-Fi SD App.
Here is Apple store searching picture
2. Select the suitable Wi-Fi SD App (iPhone or iPad version).
3. Click the FREE button to start the
download process.
4. Then click INST ALL APP to complete
installation.
Installing the App on an Android device:
1. Using your Android device, open Google Play (for Kindle Fire users, please open
the Amazon Appstore) and search for the Wi-Fi SD App.
Here is Google Play searching picture
2. Select the suitable Wi-Fi SD App.
3. Click the FREE button to start the
download process.
4. Then click OK button to complete
installation.
Here is Apple store picture
Here is Apple store picture
Here is Google Play picture
Here is Google Play picture
Once installation is complete, the App will be displayed on the home screen of your
device. To begin using the App, please see Using the Wi-Fi SD App.
Page 6
Connecting to the Wi-Fi SD Card using iOS and Android Devices
To wirelessly access Wi-Fi SD card digital content on your iOS/Android device, you
must first connect to the Wi-Fi SD card’s dedicated wireless network.
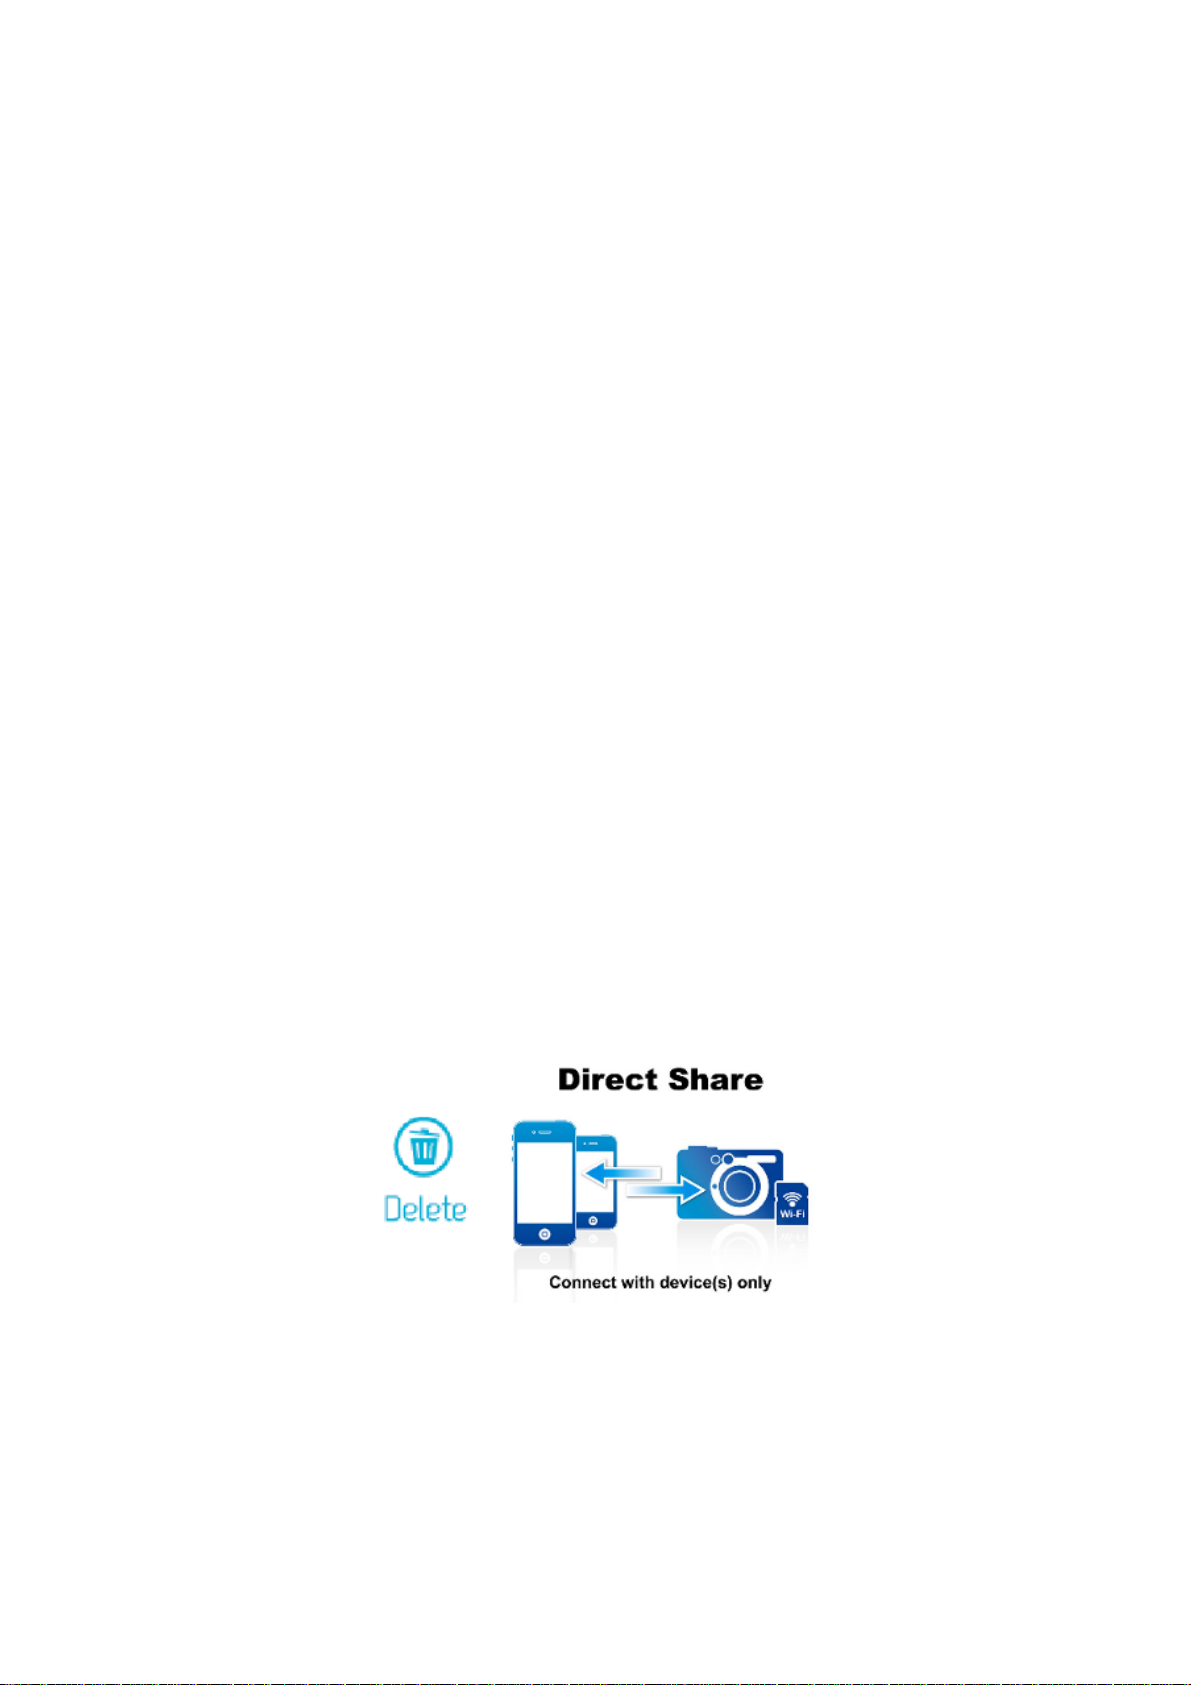
Direct Share
(Peer-to-peer connection with iOS/Android device(s))
Direct Share mode allows you to browse photos and videos stored on the Wi-Fi SD
card on your iPhone/iPad/Android device. When connected to the Wi-Fi SD card in
Direct Share mode, your device will not have Internet access.
(On your camera)
1. Insert the Wi-Fi SD card into your camera. (For directions on inserting an SD card
into your camera, please see your camera’s user manual.)
2. Power-on the camera and press the display button to view camera images. (For
directions on viewing images on your camera, please see your camera’s user
manual.)
3. Scroll to the Direct Share image and press the delete button to delete the image.
Deleting the image activates the Wi-Fi SD card’s network signal broadcast. (For
directions on deleting images from your camera, please see your camera’s user
manual.)
(On your iOS device)
4. On your iOS device, tap Settings, then Wi-Fi.
5. Under Choose a Network… select Wi-Fi SD. (After deleting the Direct Share
image, please wait around 25 seconds for the network to appear. Default Wi-Fi
security key: ‘12345678’. To change the default SSID and setup a Wi-Fi security
key, please see the Settings section for detailed instructions.)
Page 7

(On your Android device)
4. On your Android device, tap System Settings, then Wi-Fi.
5. Under Wi-Fi, select Wi-Fi SD. (After deleting the Direct Share image, please wait
around 25 seconds for the network to appear. Default Wi-Fi security key:
‘12345678’. To change the default SSID and setup Wi-Fi security key, please see
the Settings section for detailed instructions.)
Internet Mode
(Connect with iOS/Android device(s) and Internet hotspot)
Internet mode allows you to browse photos and videos stored on the Wi-Fi SD card
on your iPhone or iPad while connected to an Internet hotspot. In this mode, your
device has Internet access, allowing you to share photos through the Internet.
First time setup:
Before you can use the Wi-Fi SD card in Internet mode, you must be within range of
an Internet hotspot to enter the network details.
1. While connected to the Wi-Fi SD card in Direct Share mode (see previous section
for instructions), launch the Wi-Fi SD App from your iOS/Android home screen.
2. Tap Settings and enter the admin username and password, then tap Internet
Mode.
Note: The default username and password are both admin (all lower case)
3. Enter the SSID and password of the Internet hotspot and tap Done.
4. Power the camera off and on to save changes to settings.
Note: Although the Wi-Fi SD App can only save the details of one Internet hotspot, it
can be changed in the Settings menu at any time.
General use:
(On your camera)
1. Insert the Wi-Fi SD card into your camera. (For directions on inserting an SD card
into your camera, please see your camera’s user manual.)
2. Power-on the camera and press the display button to view camera images. (For
directions on viewing images on your camera, please see your camera’s user
manual.)
3. Scroll to the Internet Mode image and press the delete button to delete the
Page 8

image. Deleting the image will allow the Wi-Fi SD card to connect to the Internet
hotspot that was set up in Direct Mode. (For directions on deleting images from
your camera, please see your camera’s user manual.)
(On your iOS device)
4. On your iOS device, tap Settings, then Wi-Fi.
5. Under Choose a Network… select the SSID of the Internet hotspot you set up in
previously while in Direct Share mode.
(On your Android device)
4. On your Android device, tap System Settings, then Wi-Fi.
5. Under Wi-Fi, select the SSID of the Internet hotspot you set up in previously
while in Direct Share mode
Note: Only one mode can be used at any time. To switch modes, please turn off the
camera and repeat the steps of the desired mode above.
Note: Preloaded images are not deleted permanently and will display again each
time the camera is turned off and back on.
Page 9

Connecting to a Smartphone Personal Hotspot
By using its personal Wi-Fi hotspot function, a smartphone can share its wireless
data connection with the Wi-Fi SD card via Wi-Fi. In any location that the smartphone
has a mobile Internet connection, the smartphone acts as an Internet hotspot,
allowing you to share photos over the Internet instantly.
1. While connected to the Wi-Fi SD card in Direct Share mode (see Direct Share
for instructions), launch the Wi-Fi SD App from your iOS/Android home screen.
2. Tap Settings and enter the admin username and password, then tap Internet
Mode.
Note: The default username and password are both admin (all lower case)
3. Enter the smartphone’s personal Wi-Fi hotspot SSID and password and tap Done.
4. Power the camera off and on to save changes to settings.
5. Press the display button to view camera images.
6. Scroll to the Internet Mode image and press the delete button to delete the
image. Deleting the image will allow the Wi-Fi SD card to connect to the personal
Wi-Fi hotspot of the smartphone.
Page 10
Using the Wi-Fi SD App on iOS Devices
When your iOS device and Wi-Fi SD card are connected wirelessly in Direct Share or
Internet Mode (via Internet hotspot or smartphone personal hotspot), you can browse
content using the Wi-Fi SD App. The following sections provide instructions on how
to view and playback your digital content using the App.
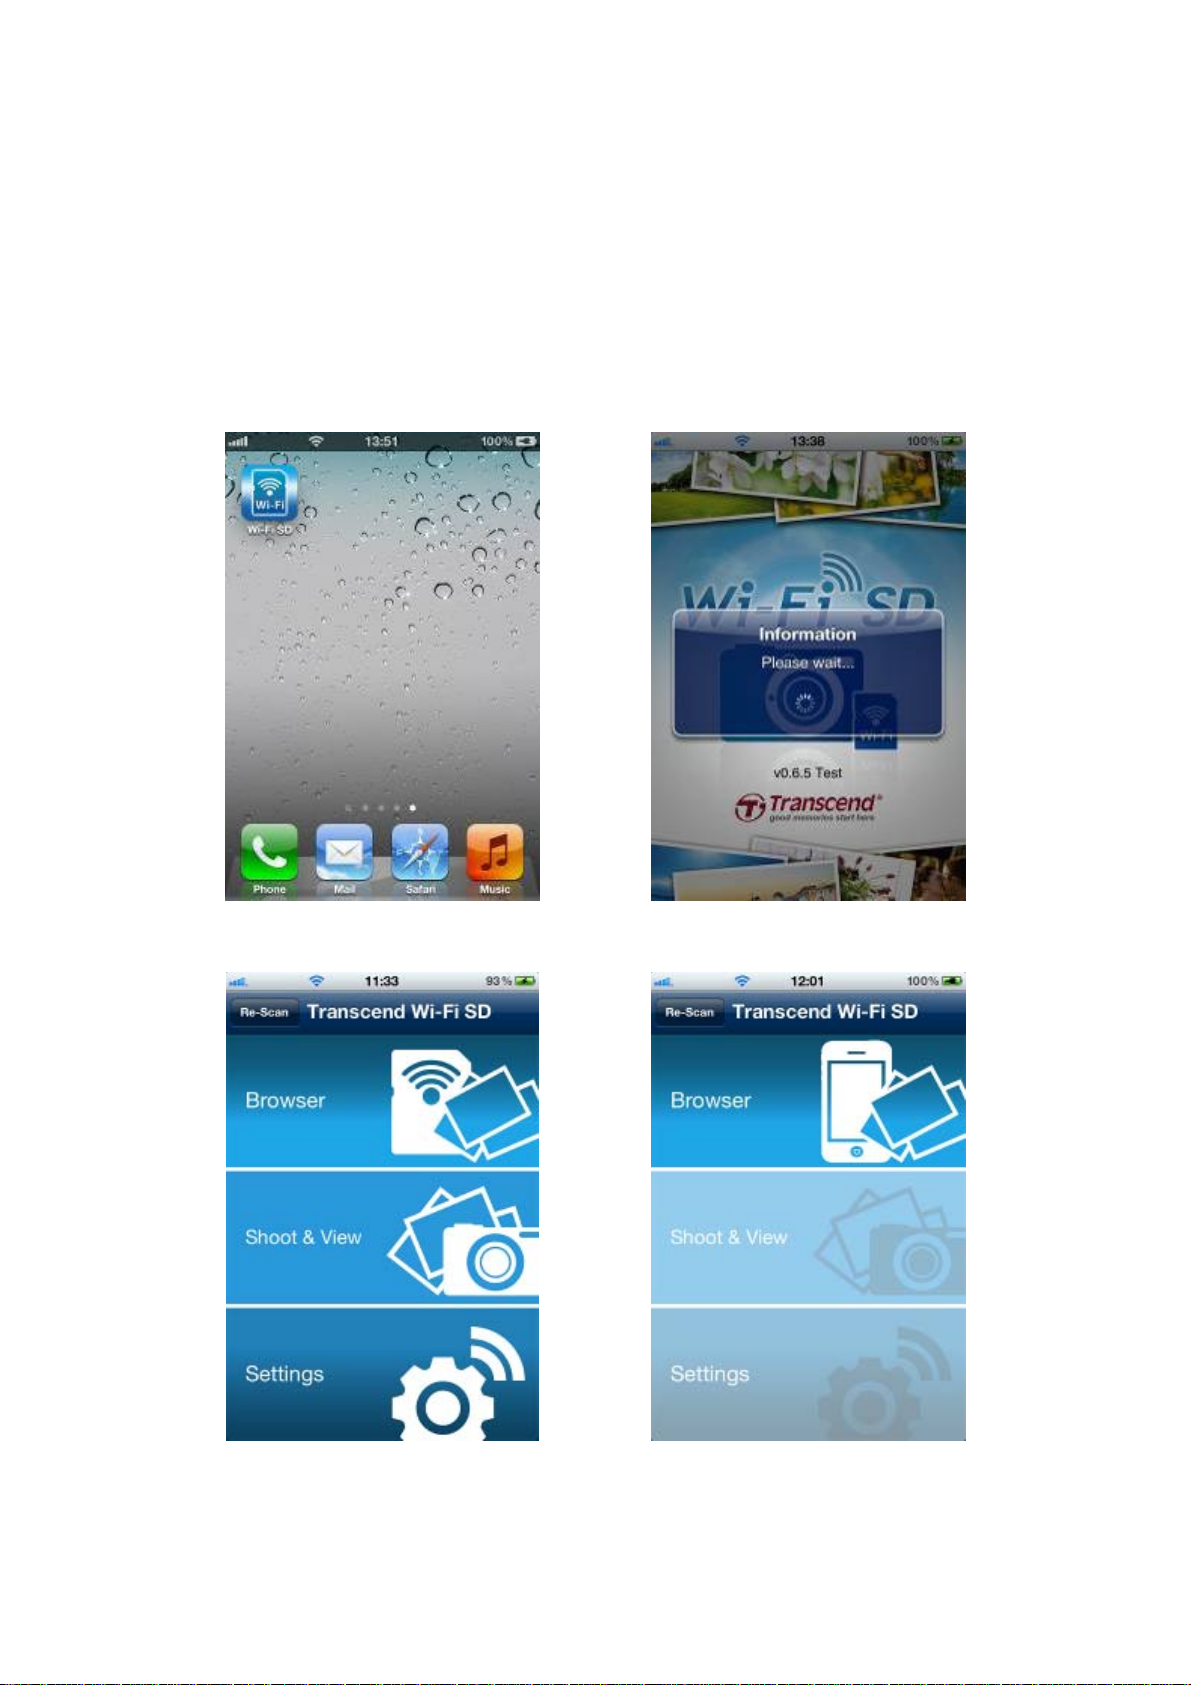
Launch App from the iOS device
Wi-Fi SD Home screen (When connected
Wi-Fi SD App loading screen
Wi-Fi SD Home screen (When not
to the Wi-Fi SD card)
connected to the Wi-Fi SD card)
Page 11
Browse
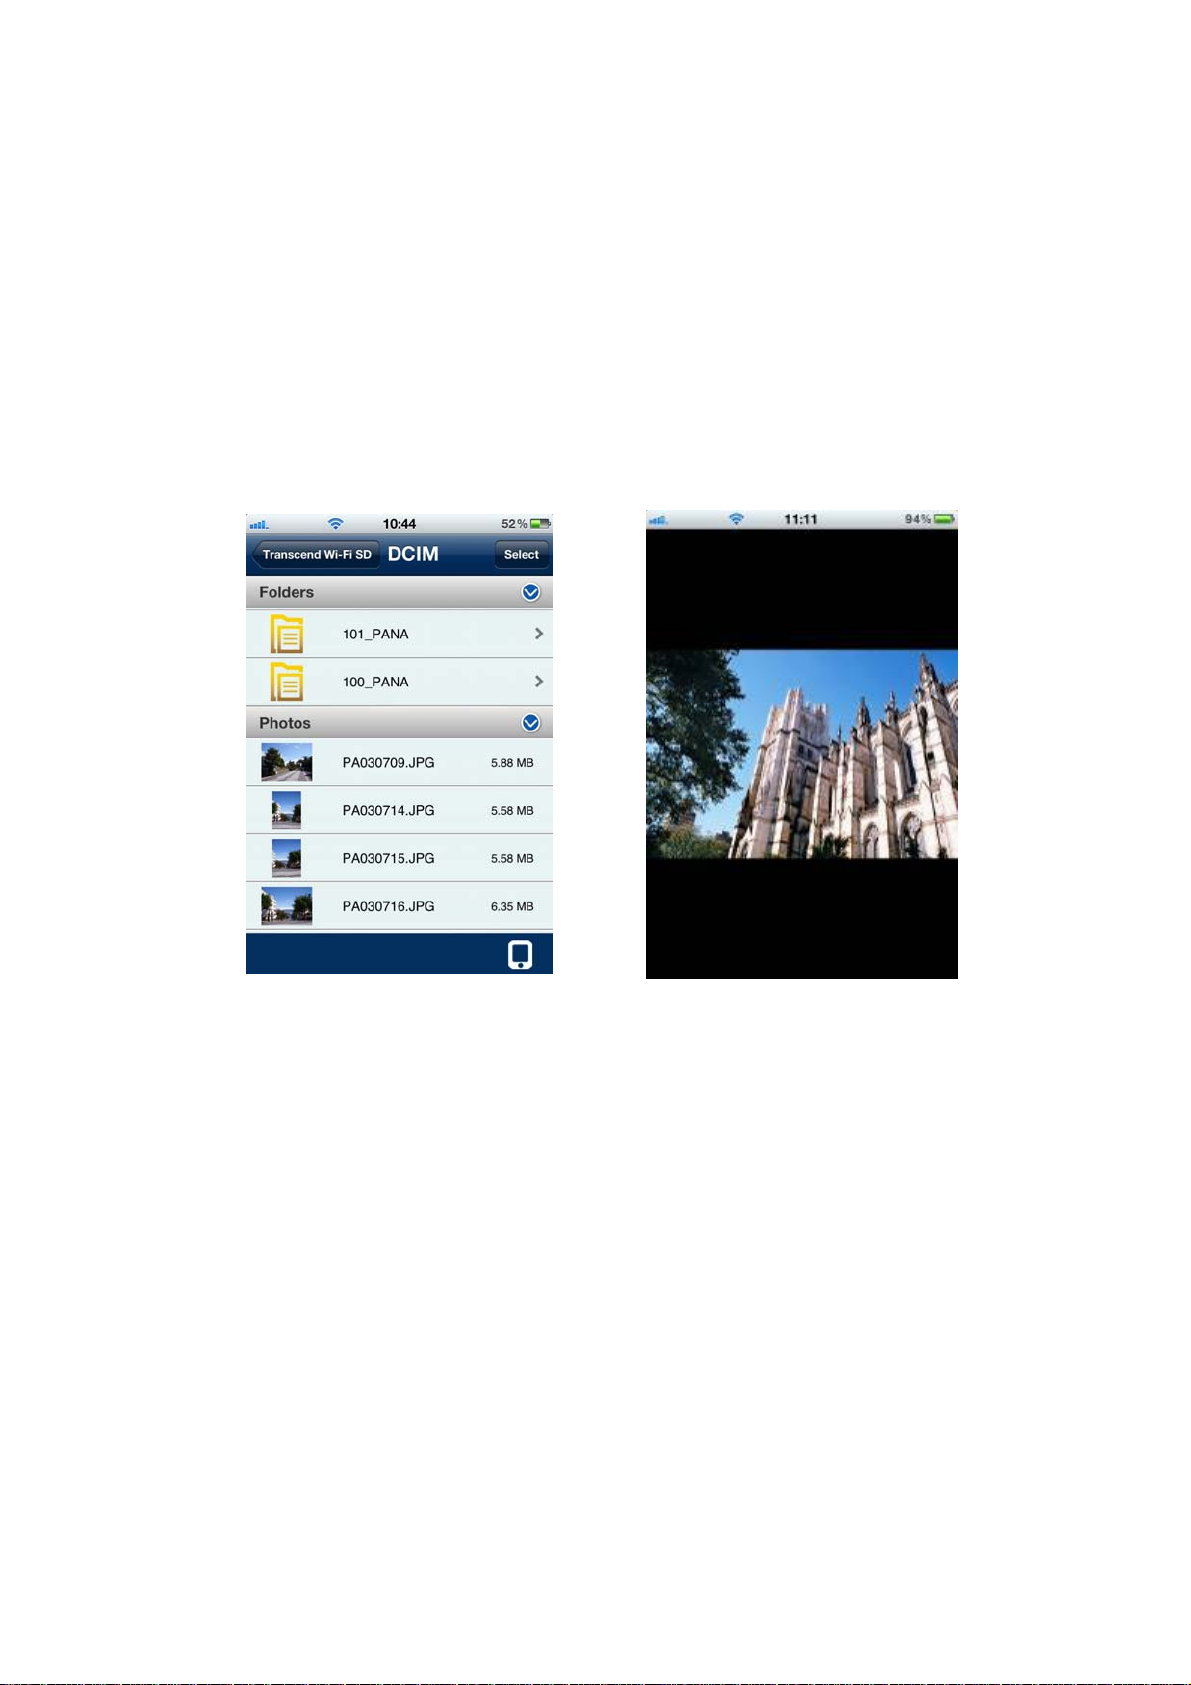
Viewing Photos
1. From the Wi-Fi SD App home page, tap Browse.
2. Under Photos, select the desired photo to display.
3. Use your finger to swipe sideways through each photo as a slideshow or go back
to the file list and select the next desired photo.
Browse photo file list, tap to select Photo displayed in portrait mode
Page 12
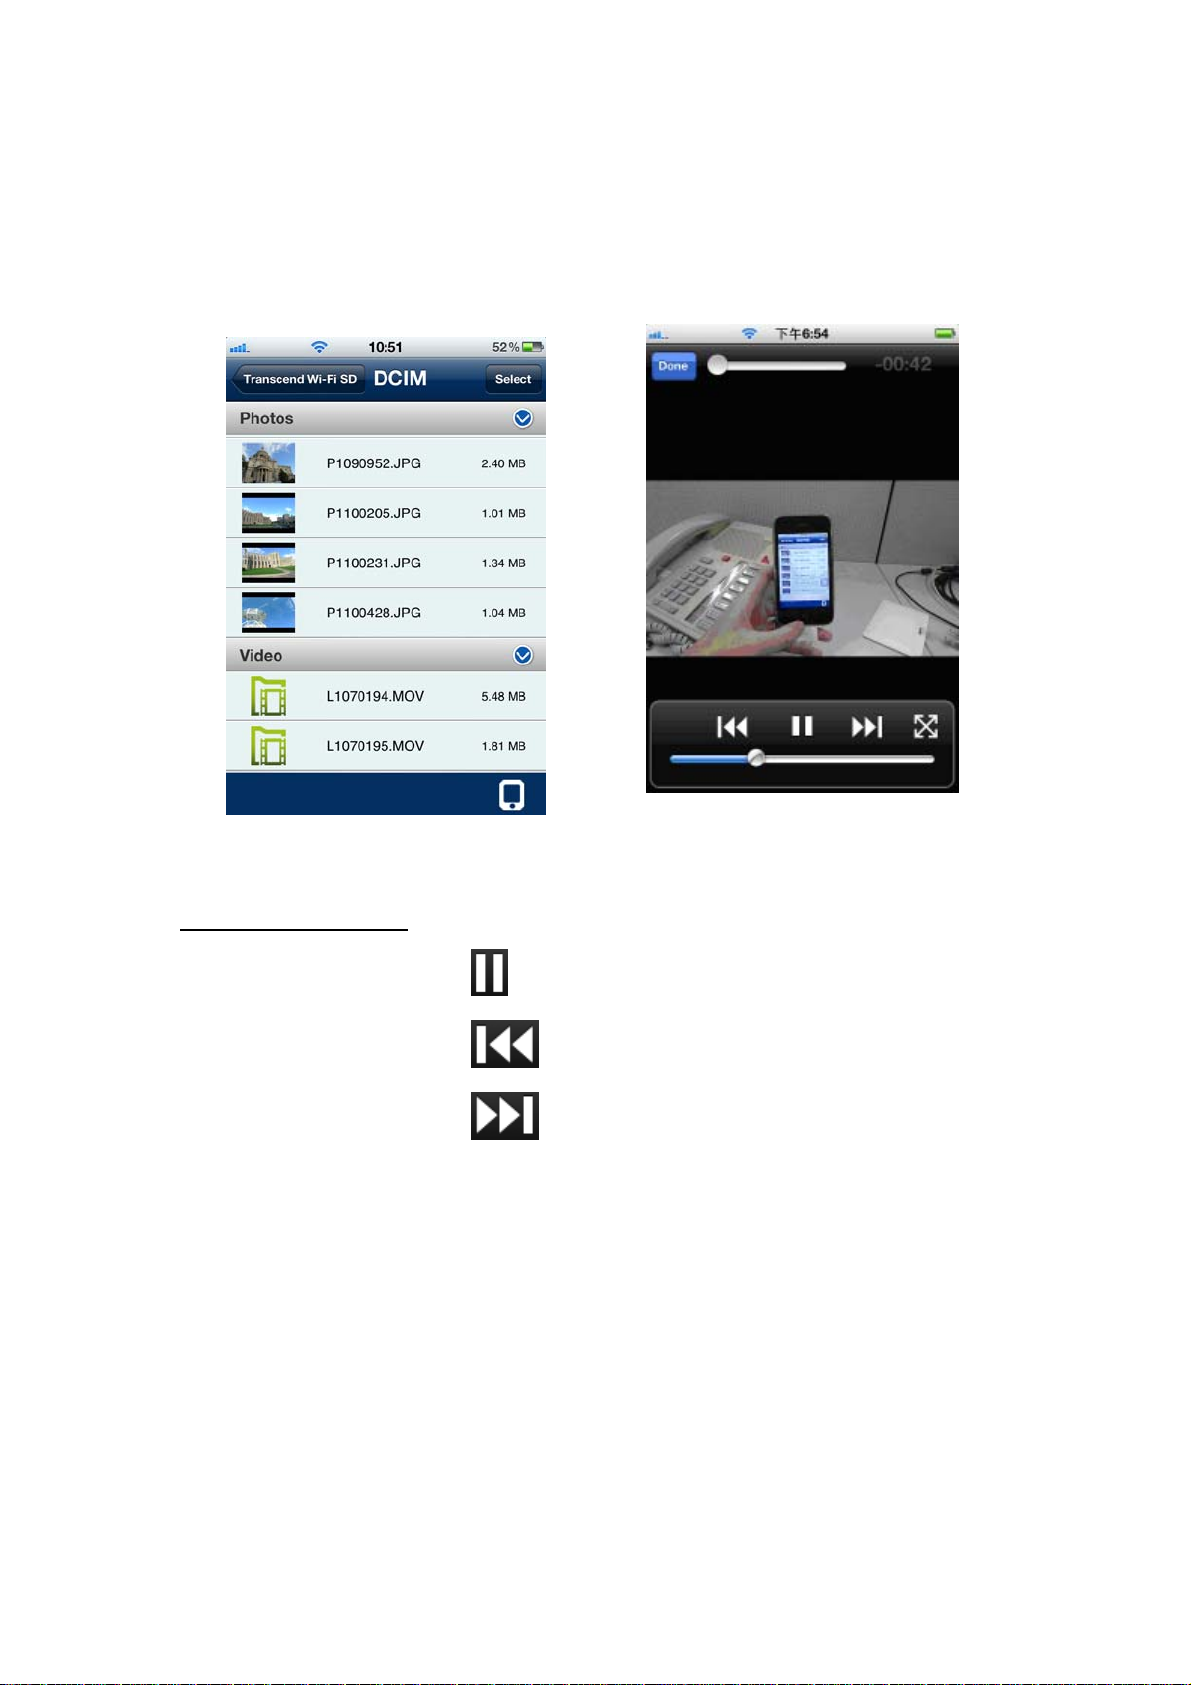
Playing Videos
1. From the Wi-Fi SD App home page, tap Browser.
2. Under Videos, select the desired video to view, it will play automatically.
Browse video file list, tap to select Video displayed in portrait mode
Video Player Controls
Pause playback -
Play previous video -
Play next video Adjust volume - Slide the volume bar at the bottom to the desired level
Fast-forward / Rewind -
View / Hide controls -
:
Slide the playback scroll bar at the top to the desired
track time
Tap once on the iOS device screen to switch between
the view control modes
Double-tap on the iOS device screen to switch
Here needs to change a screen shot
Tap the Pause icon
Tap the Previous icon
Tap the Next icon
Normal / Full-screen -
between the different view modes
or
Tap the full/normal-screen icon
Page 13

Return to file list -
Tap the Done button
Page 14

Downloading Files to Your iOS Device
The Wi-Fi SD App allows you to select multiple files to download to the App folder for
playback when not connected to the Wi-Fi SD card’s wireless network.
1. From the file list, tap the Select button.
2. Select the desired files to download by tapping the check box next to each file.
3. Tap the Download button
Download to App Folder for playback when not connected to the Wi-Fi SD card.
(To view files downloaded to the App folder, please see the next chapter on
Switch Between Wi-Fi SD/Local Mode)
Or
Tap Download To Camera Roll to download it from the Wi-Fi SD card to the iOS
device camera roll.
to display the download menu and then tap
Select desired photos from the file list Select a download option
Page 15

The Wi-Fi SD App also features a function menu that allows you to download
individual files to the App Folder or to the iOS device camera roll.
1. From the file list, tap the photo you want to download.
2. Tap the Download button
Download to App Folder for playback when not connected to the Wi-Fi SD
card. (To view files downloaded to the App folder, please see the next chapter
on Switch Between Wi-Fi SD/Local Mode)
Or
Tap Download To Camera Roll to download it from the Wi-Fi SD card to the
iOS device camera roll.
to display the download menu and then tap
From photo viewer, tap the download
button
Select a download option
Page 16

Switch between Wi-Fi SD/Local Mode
Tap the button at the bottom-right of the folder directory to switch between Wi-Fi SD
and local mode. Any files downloaded to the iOS device using the Download to App
Folder function are stored in the local directory.
Tap to view Local Directory Tap to view the Wi-Fi SD Directory
The Wi-Fi SD App features a function menu when in Local Mode that allows you to
delete files from the App.
1. From the file list, tap the Select button.
2. Select the desired files to delete by tapping the check box next to each file.
3. Tap the delete button
and then tap Delete to delete the file.
Here needs to change a screen shot
Tap Select to select files Tap Delete to delete the files
. Here needs to change a screen shot
Page 17

Uploading Photo Directly to Facebook
Note: You must be a registered Facebook user and have the Facebook App installed
on your iOS device to use this function.
1. To upload a photo on Facebook, tap the desired photo from the file list.
2. Tap the Share button
3. When the Facebook authorization screen appears, tap Login.
4. Tap Allow on the Facebook permission request screen.
5. The photo will be uploaded to the album “Transcend Wi-Fi SD” in your
Facebook account.
and then tap Upload to Facebook.
Here needs to change a screen shot
From photo viewer, tap the share button
and then tap Upload to Facebook
Here needs to change a screen shot
Tap Login then Allow to upload photo to
the album “Transcend Wi-Fi SD”
Page 18

Shoot & View
Shoot & View allows you to view the latest photo you took from camera on your iOS
device instantly.
From the home screen, tap Shoot & View.
Image of
camera taking
this pic
Blank screen awaiting latest
photo
To download photos taken in Shoot & View mode to the App folder or to your iOS
device camera roll:
1. Press the download button
2. Press Download To App Folder to download it from Wi-Fi SD to the App for
playback when not connected to the Wi-Fi SD device.
Or
Press Download To Camera Roll to download it from the Wi-Fi SD card to the
iOS device camera roll.
Take new photo
Latest photo appears instantly
on your camera
to display the function menu.
Page 19

Using the Wi-Fi SD App on Android Devices
When your Android device and Wi-Fi SD card are connected wirelessly in Direct
Share or Internet Mode (via Internet hotspot or smartphone personal hotspot), you
can browse content using the Wi-Fi SD App. The following sections provide
instructions on how to view and playback your digital content using the App.
Launch App from the Android device Wi-Fi SD App loading screen
Page 20

Here needs to change a screen shot
Here needs to change a screen shot
Wi-Fi SD Home screen (When
connected to the Wi-Fi SD card)
Wi-Fi SD Home screen (When not
connected to the Wi-Fi SD card)
Page 21

Browse
Viewing Photos
1. From the Wi-Fi SD App home page, tap Browse.
2. Tap the photos icon
3. Use your finger to swipe sideways through each photo as a slideshow or go
back to the photo gallery and select the next desired photo.
on the tool bar and select the desired photo to display.
Change to black background color
Browse photo gallery, tap to select Photo displayed in portrait mode
Page 22

Playing Videos
1. From the Wi-Fi SD App home page, tap Browser.
2. Tap the videos icon
will play automatically.
Here needs to change a screen shot
Browse video file list, tap to select Video displayed in portrait mode
Video Player Controls
Pause playback -
Play previous video -
Play next video -
Adjust volume -
on the tool bar and select the desired video to view, it
Here needs to change a screen shot
:
Slide the volume bar at the bottom right to the desired
level
Tap the Pause icon
Tap the Previous icon
Tap the Next icon
Fast-forward / Rewind -
View / Hide controls Return to video gallery -
Slide the playback scroll bar at the top to the desired
track time
Tap once on the Android device screen to switch
between the view control modes
Tap the back button (←)
Page 23

Downloading Files to Your Android Device
The Wi-Fi SD App allows you to select multiple files to download to the App folder for
playback when not connected to the Wi-Fi SD card’s wireless network.
1. From the photo gallery page, tap the Select icon
2. Select the desired files to download by tapping each photo.
3. Tap the Download icon
then tap Download. (To view files downloaded to the download folder, please
see the next chapter on Switch Between Wi-Fi SD/Local Mode or check folder
path: sdcard\WiFiSD on your Android device)
on the tool bar to display the download menu and
.
Select desired files from the photo
gallery
Tap Download to download to the
sdcard\WiFiSD folder
Page 24

Uploading Photo Directly to Facebook
Note: You must be a registered Facebook user and have the Facebook App installed
on your Android device to use this function.
1. To upload a photo on Facebook, tap the desired photo from the file list.
2. Tap the Share button
3. When the Facebook authorization screen appears, tap Login.
4. Tap Allow on the Facebook permission request screen.
5. The photo will be uploaded to the album “Transcend Wi-Fi SD” in your
Facebook account.
and then tap Upload to Facebook.
Here needs to change a screen shot
From photo viewer, tap the share button
and then tap Upload to Facebook
Here needs to change a screen shot
Tap Login then Allow to upload photo to
the album “Transcend Wi-Fi SD”
Page 25

Switch between Wi-Fi SD/Local Mode
Tap the button at the bottom- of the folder directory to switch between Wi-Fi SD and
local mode. Any files downloaded to the Android device using the Download function
are stored in the local directory: sdcard\WiFiSD.
Tap to view Local Directory Tap to view the Wi-Fi SD Directory
The Wi-Fi SD App allows you to delete files when in Local Mode.
1. From the photo gallery, press and hold on the file you want to delete, the function
menu will display.
2. Press Delete to delete the file from the download folder.
Page 26

Shoot & View
Shoot & View allows you to view the latest photo you took from camera on your
Android device instantly.
From the home screen, tap Shoot & View.
Image of
camera taking
this pic
Blank screen awaiting latest
photo
To download photos taken in Shoot & View mode to the download folder
sdcard/WiFiSD:
1. Press the download button
2. Press Download to download it from the Wi-Fi SD card to the download folder
for playback when not connected to the Wi-Fi SD device.
Take new photo
Latest photo appears instantly
on your camera
to display the function menu.
Page 27

Settings
This menu lets you manage important functions of the Wi-Fi SD card software, such
as setting wireless preferences and security, restoring the Wi-Fi SD card to its default
settings, setting administrator password, and checking firmware version.
Note: You must turn the camera off and back on to save any changes.
To open the Wi-Fi SD Settings menu:
1. From the home screen, tap Settings.
2. Enter administrator username and password.
Note: The default username and password are both admin (all lower case)
3. Tap Done to access Wi-Fi SD Settings.
Enter admin username and password
on iOS device
Wi-Fi SD card Settings menu on iOS
device
Page 28

Enter admin username and password on
Wi-Fi SD card Settings menu on
Android device
Android device
Page 29

Direct Share Settings
To configure basic wireless settings, tap Direct Share Settings.
WPA2 wireless security is enabled by default (Default password ‘12345678’). It is
recommended that you change the default SSID and password to differentiate your
Wi-Fi SD card from others that may be transmitting in your area.
Note: The password must be at least 8 characters long and no more than 64
characters. All ASCII characters are acceptable.
Direct Share settings on iOS device Direct Share settings on Android device
Page 30

Internet Mode Settings
To enable the Wi-Fi SD card to connect to the Internet through an Internet hotspot,
tap Internet Mode.
Internet Mode settings on iOS device Internet Mode settings on Android device
1. SSID: Enter the SSID of the Internet hotspot you want to connect to.
2. Security Key: Enter the Internet hotspot security key.
3. Select Apply and confirm the action by pressing OK.
Page 31

Set Administrator Password
This function allows you to set an administrator username and password to prevent
unauthorized users from changing any Wi-Fi SD card settings.
Security settings on iOS device Security settings on Android device
1. From the Settings menu tap Security Settings.
2. Enter a new username and password for the administrator account.
Note: Username: 5-12 characters. Password: 3 - 10 characters.
3. Tap Apply to save the new username and password.
Page 32

Wi-Fi SD Information
Wi-Fi SD Information displays the MAC Address and Firmware version of the Wi-Fi
SD card.
From the settings menu tap SD Information.
Wi-Fi SD information on iOS device Wi-Fi SD information on Android device
Page 33

Connecting to the Wi-Fi SD Card using Other Devices
To wirelessly access digital content on your laptop, smartphone, or tablet:
1. Direct Share: Delete the Direct Share mode image from your camera, and then
on your Wi-Fi enabled device, use the Wi-Fi connection settings to search and
connect to the Wi-Fi SD card’s dedicated wireless network.
2. Once connected, launch an Internet browser and type “192.168.1.1” into the
browser address bar.
3. Enter administrator username and password.
Note: The default username and password are both admin (all lower case)
4. You will now be able to see the home screen of the Wi-Fi SD card, where you can
view and download photos and videos from the Wi-Fi SD card, change Wi-Fi SD
card settings, and view Wi-Fi SD information.
Internet browser Wi-Fi SD card home screen
Page 34

View Photos & Videos
Internet browser Wi-Fi SD card Photo gallery
Internet browser Wi-Fi SD card Video gallery
View Photos / Videos
Download Photos / Videos
- Tap the desired photo / video thumbnail.
-
Tap Download to save the file to local storage.
Download all Photos /
Videos in single folder
-
Tap SELECT_ALL to select all files in the current
folder then tap DOWNLOAD_SELECTED.
Page 35

Settings
This menu lets you manage important functions of the Wi-Fi SD card such as, setting
wireless preferences, wireless security, and setting administrator password.
Internet browser Wi-Fi SD card Settings
Administrator Account
Internet Hotspot Settings
Wi-Fi Settings
Tap Submit to submit any changes.
- Setup new Username and Password.
- For Internet Mode: setup Internet hotspot
information.
- For Direct Share Mode: setup the Wi-Fi SD
SSID, security WPA2 Key and IP address.
Note: You must turn the camera off and back on to save any changes.
Page 36

Information
LAN
Firmware
Wireless
Wireless
Client
Internet browser Wi-Fi SD card Network Device Information
- MAC address, IP Address and Subnet Mask.
- Firmware version and Build Date.
- Wi-Fi SD Card Mode, SSID, and Channel.
- The Host name, IP and Mac address of the Wi-Fi devices
connected to the Wi-Fi SD.
Page 37

Restore Defaults (Return to Original Settings)
This function allows you to reset the Wi-Fi SD card wireless settings to the original
factory defaults. None of the files stored on the Wi-Fi SD card are deleted when
performing this action.
(On your camera)
1. Insert the Wi-Fi SD card into your camera. (For directions on inserting an SD card
into your camera, please see your camera’s user manual.)
2. Power-on the camera and press the display button to view camera images. (For
directions on viewing images on your camera, please see your camera’s user
manual.)
3. Scroll to the Restore Defaults image and press the delete button to delete the
image. Deleting the image will reset the Wi-Fi SD card wireless settings to the
original factory defaults. (For directions on deleting images from your camera,
please see your camera’s user manual.)
4. After deleting image, please power-off your camera and reinsert the Wi-Fi SD
card again. All settings will be reset to their defaults.
Page 38

Upgrading Firmware
Use this function to keep your Wi-Fi SD card up-to-date with the latest firmware
version. When a newer version is released, go to www.transcend-
info.com/downloads to download it.
Note: To prevent data loss, it is recommended that you backup your data to another
location before upgrading the firmware of your Wi-Fi SD card.
1. Download the firmware files and insert the Wi-Fi SD card into your computer.
(depending on your computer setup, you may need to use an SD card reader)
2. Copy the firmware files to the root directory of Wi-Fi SD card.
3. Eject the drive and remove the Wi-Fi SD card from your computer.
4. Re-insert the Wi-Fi SD card into your camera.
5. Power on the camera and wait for 5 minutes.
6. After 5 minutes, turn camera power off and on again to complete firmware
upgrade.
IMPORTANT: Please disable power saving and do NOT power off your
camera during firmware upgrade. Any interruption during the process
may cause unexpected results.
 Loading...