

Page 1
Operators Guide
PN 100-11681 Rev A, October 2012
Page 2

This page intentionally left blank
Page 3

Change History
Rev A Initial version October 2012
100-TBD - Rev A Page i
Page 4

This page intentionally left blank
Page ii 100-TBD - Rev A
Page 5

adio Frequency Interference Statement
R
This device complies with Part 15 of the FCC Rules and Industry Canada
licence-exempt RSS standard(s) . Operation of the device is subject to
the following two conditions: (1) The device may not cause harmful interference,
and (2) The devices must accept any interference that may cause undesired
operation.
This unit has been tested and complies with limits for a Class A digital device
under Part 15 of the FCC Rules and Industry of Canada ICES-003. These limits
are designed to provide reasonable protection against harmful interference when
the equipment is operated in a commercial environment. This equipment
generates, uses, and can radiate radio frequency energy and, if not installed
and used in accordance with the instruction manual, may cause harmful
interference to radio communications. Operation of this equipment in a
residential area is likely to cause harmful interference in which case the user
will be required to correct the interference at his own expense..
Changes or modifications not expressly approved by TransAct Technologies,
Inc. could void the user's authority to operate the equipment.
The manufacturer declares that this product conforms to the following
standards or other normative documents:
EN 300 330-2 V1.5.1 (2010-02) Electomagnetic compatibility and Radio
spectrum Maters (ERM); Short-Range Devices (SRD); Radio equipment
in the frequency range 9 kHz to 25 MHz inductive loop system in the
frequency range 9 kHz and 30 MHz
EN 301 489-1 V1.9.2 (2011-09) Electomagnetic compatibility and Radio
spectrum Maters (ERM); ElectroMagnetic Compatibility (EMC) standard
for radio equipment and services; Part 1: Common technical requirements
EN 301 489-3 V1.4.1 (2002-08) Electomagnetic compatibility and Radio
spectrum Maters (ERM); ElectroMagnetic Compatibility (EMC) standard
for radio equipment and services; Part 3: Specific conditions for Short-Range
Devices (SRD) operating on frequencies between 9 kHz and 40 GHz
Safety: EN 60950-1:2006 Safety of information technology equipment
including electrical business equipment, including amendments A12:2011
100-TBD - Rev A _dp Page iii
Page 6

Disclaimer
NOTICE TO ALL PERSONS RECEIVING THIS DOCUMENT:
The information in this document is subject to change without notice. No part
of this document may be reproduced, stored or transmitted in any form or by
any means, electronic or mechanical, for any purpose, without the express
written permission of TransAct Technologies, Inc. ("TransAct"). This
document is the property of and contains information that is both confidential
and proprietary to TransAct. Recipient shall not disclose any portion of this
document to any third party.
TRANSACT DOES NOT ASSUME ANY LIABILITY FOR DAMAGES
INCURRED, DIRECTLY OR INDIRECTLY, FROM ANY ERRORS,
OMISSIONS OR DISCREPANCIES IN THE INFORMATION CONTAINED IN
THIS DOCUMENT.
TransAct cannot guarantee that changes in software and equipment made by
other manufacturers, and referred to in this publication, do not affect the
applicability of information in this publication.
Copyright
© 2012 TransAct Technologies, Inc. All rights reserved. Printed in USA
Revision Level A, October 2012
Trademarks
Some of the product names mentioned herein are used for identification
purposes only and may be trademarks and/or registered trademarks of their
respective companies.
TransAct, Printrex, and Atlantek are registered trademarks of TransAct
Technologies, Inc.
ZINK and Zero Ink are trademarks of Zink Imaging, LLC.
Microsoft and Windows are registered trademarks of Microsoft Corporation in
the United States and/or other countries.
Adobe and the Adobe logo are trademarks of Adobe Systems, Inc.
Page iv 100-TBD - Rev A
Page 7

able of Contents
T
Change History ................................................................................................ i
Federal Communications Commission Radio Frequency Interference
Statement ...................................................................................................... iii
Canadian Department of Communications Radio Interference Statement ...... iii
Disclaimer ...................................................................................................... iv
Copyright ....................................................................................................... iv
Trademarks .................................................................................................... iv
Table of Contents ............................................................................................ v
Introducing your Printrex® 920 Printer ......... 1
About your Printrex® 920 Printer ...................................................................... 3
Who Should Read This Guide? ....................................................................... 4
What Is Included in This Guide? ...................................................................... 4
Technical and Sales Support........................................................................... 5
On-line Technical Support .......................................................................... 5
Telephone Technical Support ..................................................................... 5
Warranty Information .................................................................................. 5
Return Materials Authorization and Return Policies .................................... 6
Sales Support ............................................................................................. 6
Contact Information .................................................................................... 7
Safety Precautions ..................................... 9
Important Safety Precautions ........................................................................ 11
General Precautions ................................................................................. 11
Grounding ................................................................................................ 11
Power Supply and Power Cord ................................................................. 11
Step-by-Step Installation Procedures ..........13
Unpack the Printer ........................................................................................ 15
Printer Part Names and Function .................................................................. 16
Front View ................................................................................................ 16
Back View ................................................................................................ 17
Inside the Printer ...................................................................................... 18
Operation Panel ....................................................................................... 19
Connecting the Communication Cable .......................................................... 20
Paper Loading Procedure ............................................................................. 22
Printrex® 920 Specifications and Requirements
..............................................................29
Printrex® 920 Specifications and Requirements ............................................ 31
Standard Features ........................................................................................ 31
Physical Printer Specifications ...................................................................... 32
Environmental Conditions ......................................................................... 32
Electrical Specifications ................................................................................ 32
Media Specifications ..................................................................................... 33
Paper ....................................................................................................... 33
USB Interface ................................................................................................ 33
Printer Maintenance ..................................35
Cleaning the Printer ...................................................................................... 37
Protecting the Thermal Head......................................................................... 37
100-TBD - Rev A Page v
Page 8

Cleaning the Thermal Head .......................................................................... 37
Cleaning the Form ......................................................................................... 38
Clearing Paper Jams ..................................................................................... 39
Troubleshooting ........................................41
Appendix A: Ordering Supplies ...................45
Drivers Available ........................................................................................... 45
Index .......................................................47
Page vi 100-TBD - Rev A
Page 9

Chapter 1
Introducing your Printrex® 920 Printer
100-TBD - Rev A Page 1
Page 10

This page intentionally left blank
Page 2 100-TBD - Rev A
Page 11

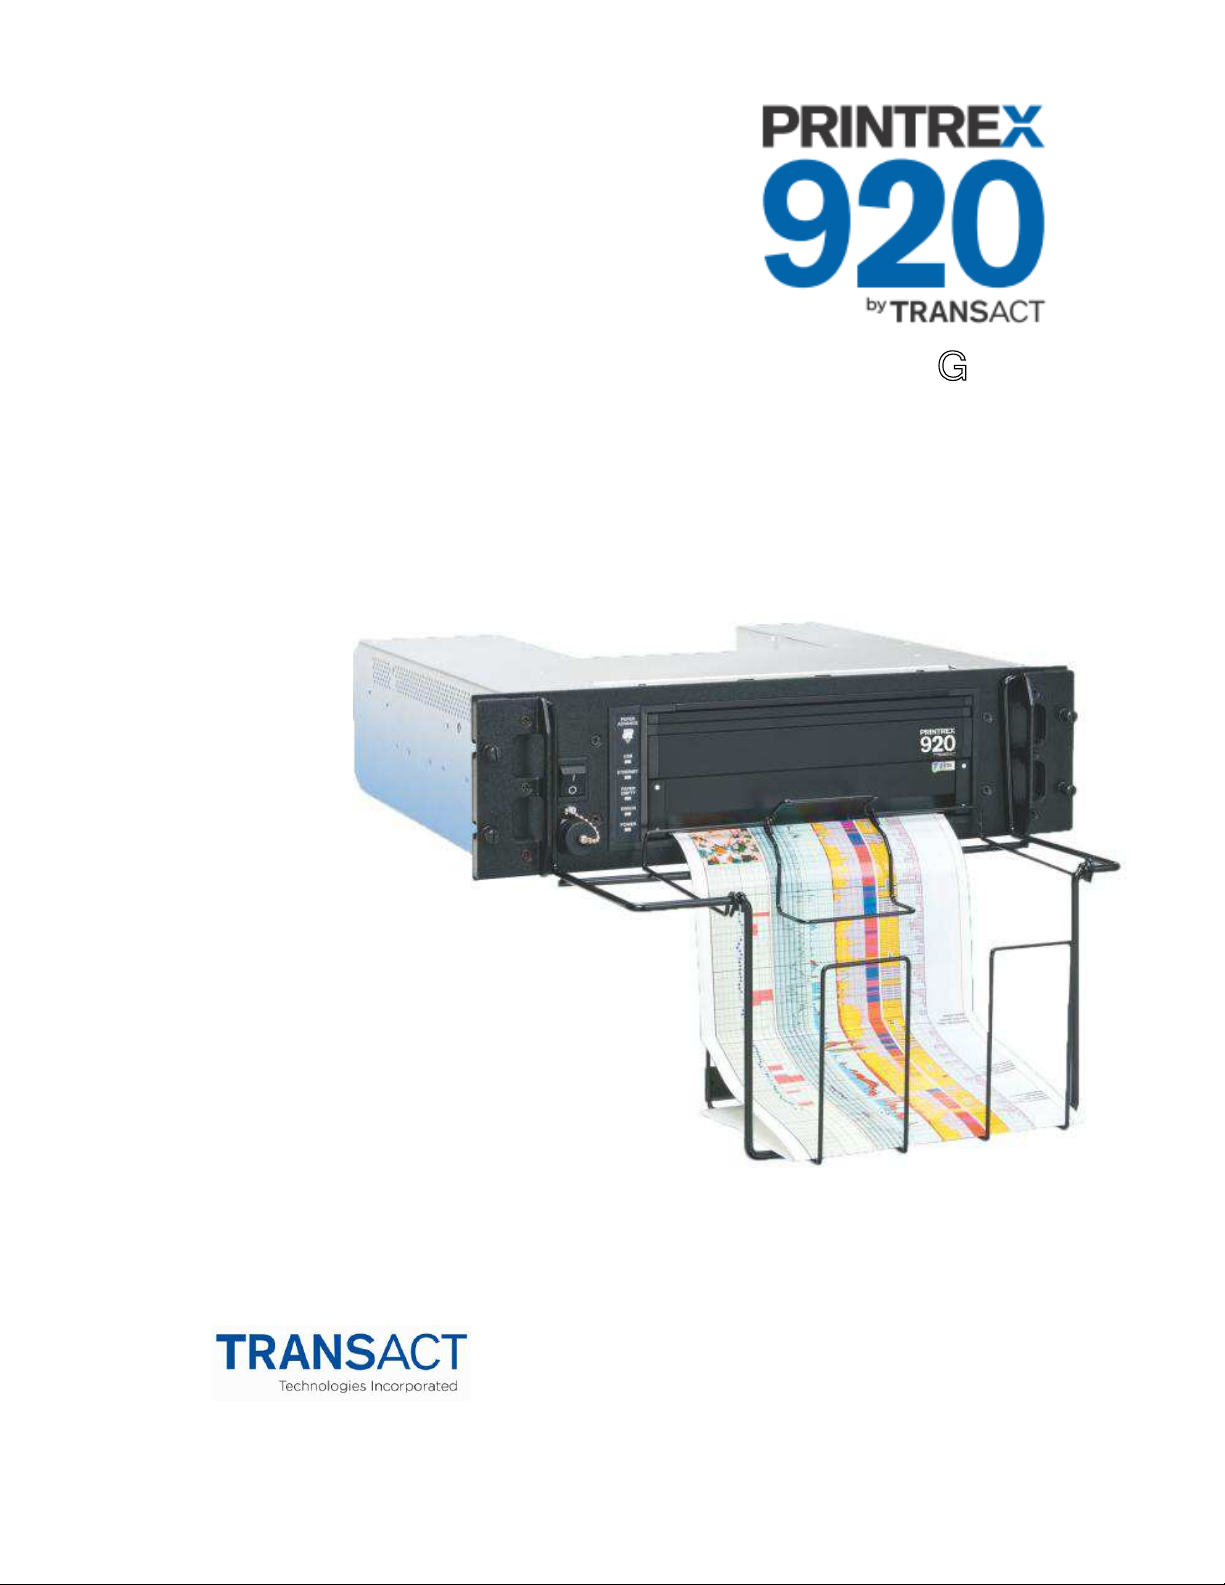
About Your Printrex® 920 Printer
About your Printrex® 920 Printer
The Printrex® 920 printer by TransAct® represents the very latest technology
for rack-mountable continuous form plotting, specifically designed to perform
in adverse environments such as logging trucks or offshore platforms. It builds
upon the experience of the Printrex® line of printers with a host of features
specifically designed to improve the performance of your plotting applications
in the field, including:
x Prints in full color without ink cartridges or ribbons using ZINK® (Zero Ink)
x Capable of printing black and white on standard thermal paper
x Designed and built with rugged reliability
x Available in both desktop and rack-mount configurations
x Easy path to upgrade existing logging systems to full color
x Print drivers for Windows ® and CUPS configurations for Linu[8QL[
x Low total cost of ownership
These features and more let you quickly and easily integrate the Printrex® 920
with your plotting applications, while giving you the quality, durability and
uptime you have come to expect from Printrex® by TransAct® printers.
100-TBD - Rev A Page 3
Page 12

About Your Printrex® 920 Printer
Who Should Read This Guide?
This document provides information useful for end users who will install,
configure, and operate the Printrex® 920 printer in their operations.
What Is Included in This Guide?
This Operators Guide includes information on the installation, specifications,
and operation of the Printrex® 920 printer. It provides the following information
to support your installation and operational efforts:
x Warranty and technical support information
x Specifications and functionality description
x Installation and operational procedures
x Configuration, testing, and troubleshooting procedures
We want you to have a trouble-free implementation with your TransAct®
printer. For any issues not covered in this guide, quality technical support is
available on-line at www.printrex.com, or by telephone or fax ± consult the
following pages for more details about our support services.
Page 4
100-TBD - Rev A
Page 13

About Your Printrex® 920 Printer
Technical and Sales Support
Your printer is backed by the resources of Printrex, a division of TransAct
Technologies, a global technology firm with dedicated technical support and
sales assistance. Here is how we can help you:
On-line Technical Support
Our web site at www.printrex.com is your on-line portal to obtaining technical
assistance with your Printrex® printer. Click on the Support link to find support
information for your Printrex® 920 printer, including online access to drivers
and documentation, or contact us via e-mail at support@printrex.com.
Telephone Technical Support
Live telephone support is available by contacting Printrex or one of its regional
affiliates via the contact information listed in this section. To help us serve you
faster, please have the following information ready when you call:
x The Model Number and Serial Number of the printer.
x A list of any other peripheral devices attached to the same port as the
printer.
x What application software, operating system, and network (if any) you are
using.
x What happened and what you were doing when the problem occurred.
x How you tried to solve the problem.
W
arranty Information
Printrex® 920 Printers come with a standard warranty that commences upon
shipment from factory, and covers parts and labor. An optional warranty,
covering both parts and labor, may be purchased separately.
100-TBD - Rev A Page 5
Page 14

About Your Printrex® 920 Printer
Return Materials Authorization and Return Policies
If a support technician determines that the printer should be serviced at a
Printrex facility, and you want to return the printer for repair, we will issue you
the Returned Materials Authorization (RMA) number that is required before
returning the printer. Please prepare the printer being returned for repair as
follows:
x Pack the printer to be returned in the original packing material.
x Do not return any accessories unless asked to do so by a support
technician.
x Write the RMA number clearly on the outside of the box.
Sales Support
To order supplies, receive information about other Printrex products, or obtain
information about your warranty, contact our Sales Department at the contact
telephone or fax numbers listed below or visit our web site at
www.printrex.com.
Page 6
100-TBD - Rev A
Page 15

About Your Printrex® 920 Printer
ontact Information
C
USA
Printrex Inc.
276 East Gish Road
San Jose, CA 95112-4703, USA
Telephone 408.573.1200
Fax 408.573.1600
Web Site: www.printrex.com
R ± Associates Inc.
6610 Gant Road
Houston, Texas 77066 USA
Telephone 713.973.1500
Fax 713.598.8311
Web Site: www.r-associates.com
United Kingdom
Trident Microsystems
Pilgrims Court
15 ± 17 West St.
Reigate, Surrey, RH2 9BL UK
Telephone (0845) 603 2770
Web Site: www.trident-uk.co.uk
Unicomp Limited
Unit 13 Bourne Estate
Borough Green, Kent, TN15 8DG UK
Telephone (01732) 781400
Fax (0172) 78064
Web Site:
Canada
Kesh Downhole Measurements, Inc.
P.O. Box 246
Clyde, Alberta T0G 0P0 Canada
Telephone 780.348.5278
Fax 780.348.5731
Email: kevindm@telusplanet.net
Germany
Elkutec Electronic GmbH
Postfach 11 33
D-85386 Eching bei München
Erfurter Straße 31 Germany
Telephone (49)-89-31-90-91-0
Fax (49)-89-31-90-91-91
Web Site:
Email: sales@elkutec.de
www.unicomp.co.uk
www.elkutec.de
100-TBD - Rev A Page 7
Page 16

About Your Printrex® 920 Printer
hina
C
Star-Luck Enterprises, Inc.
Beijing Office
Room 328, Grand Vision Business Building,
No.2 Jiuxianqiao Road,
Chaoyang District
Beijing 100015 China
Telephone 86-10-51305677
Fax 86-10-51305658
Singapore
HABS Industries Pte Ltd.
2 Kensington Park Drive
#04-04
Singapore 557320
Telephone 65-967 32002 or 65 816 32322
Fax 65-234 3158
Email: habsindustries@gmail.com
Page 8
100-TBD - Rev A
Page 17

Chapter 2
Safety Precautions
100-TBD - Rev A Page 9
Page 18

This page intentionally left blank
Page 10
100-TBD - Rev A
Page 19

Safety Precautions
Important Safety Precautions
General Precautions
x Use this equipment only for the intended use described in this guide.
x Do not use power supplies outside the specified voltage/hertz range.
x Do not block any openings on the equipment.
x Do not use corrosive chemicals or vapors on or near the equipment.
x Do not expose equipment to rain, spills, or moisture.
Grounding
x This equipment must be grounded to conform with legal and safety
standards. Connect only to a properly grounded outlet.
Power Supply and Power Cord
To avoid the risk of fire, electrical shock, personal injury, or damage to the
printer:
x Always use the power cord provided with this printer. The power cord
supplied with the equipment is rated and approved for service to this
equipment.
x Make sure that the power plug is securely and completely inserted into the
power source.
x Do not cut, damage, or otherwise alter the power cord. Never place a
heavy object on the power cord, never expose it to heat, and never pull the
cord to disconnect it. If the power cord is damaged in any way
(condensation on exposed wires, broken wires, etc.) contact customer
service where you purchased the printer.
x Do not immerse the power cord or plug in water. Never handle the power
cord or plug when your hands are wet.
x Never knot the power cord or wrap it around itself.
x Turn off the main power before removing the power plug from the outlet.
x Check the power plug and cord for any problem (abnormal heat, rust,
bend, cracks, scratches, etc.) at least once a month.
x If any problem is found with the power plug or cord, contact customer
service regarding a replacement cord/
x Never pull on the power cord to unplug the cord from the power supply.
Always grip the plug to remove it from the power supply.
x Always keep the area around the power plug free of obstacles so that you
can unplug it easily. This allows you to unplug the power cord quickly in an
emergency.
100-TBD - Rev A Page 11
Page 20

Safety Precautions
x Never use any power source other than the one rated for the printer. This
printer is designed to be used in the region where you purchased. Also,
make sure that the power source can supply sufficient power for the
printer.
Supply Voltage:
AC 100-240 V, 50/60 Hz
Power Consumption:250 W (max.)
Page 12
100-TBD - Rev A
Page 21

Chapter 3
Step-by-Step Installation Procedures
100-TBD - Rev A Page 13
Page 22

This page intentionally left blank
Page 14
100-TBD - Rev A
Page 23

Step-by-Step Installation Procedures
Unpack the Printer
Be sure to save the box and packing materials in case you need to send the
printer in for service. TransAct Technologies is not responsible for damaged
return items that are not packaged in original shipping material. Refer to
³Return Materials Authorization and Return Policies´RQSDJH6 for information
on what to do if you have to return your printer for repair.
100-TBD - Rev A Page 15
Page 24

Step-by-Step Installation Procedures
[1]
[2]
[3]
[4]
[5]
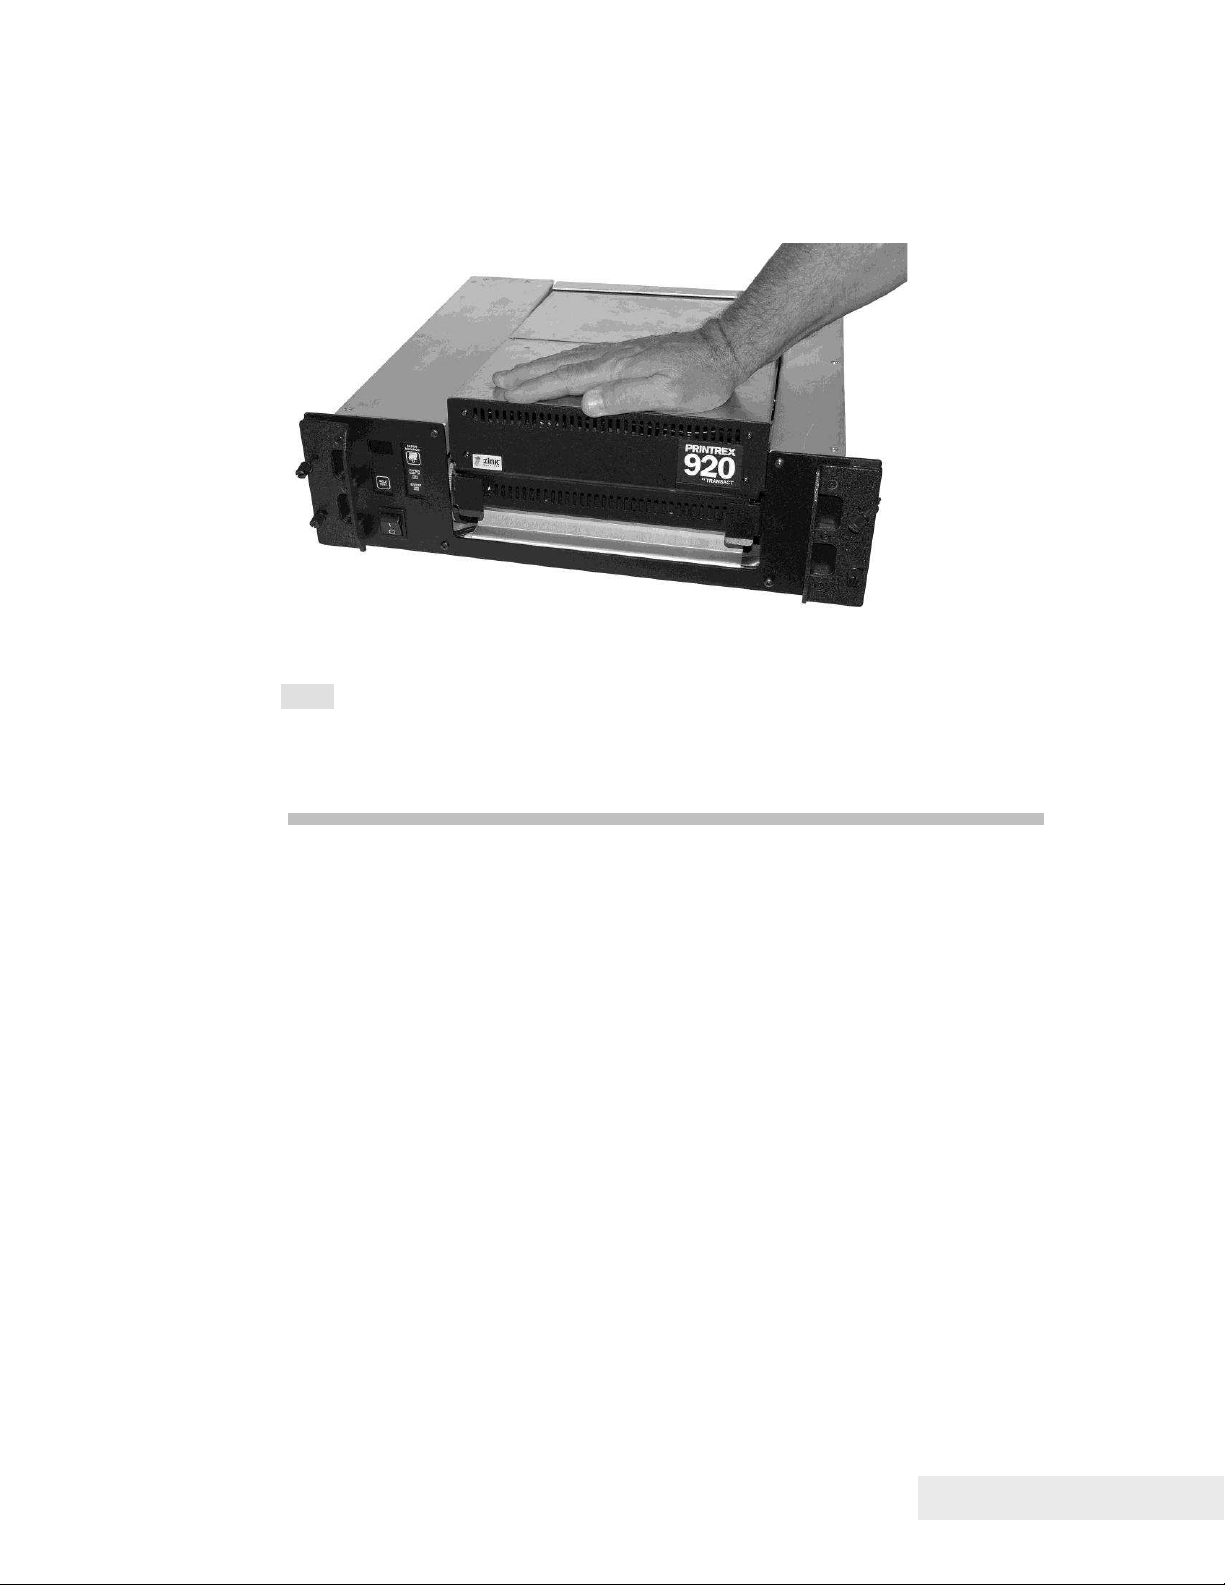
Printer Part Names and Function
Front View
[1] Upper unit
Open this unit when set paper or removing the paper jammed in the paper
feed path or cleaning inside of the machine.
[2] Operation panel
This panel has the key switches necessary for printer operation and the lamps
that indicate printer status.
[3] Power switch
Use this switch when the printer is scheduled to be unused for a long period of
time or it is relocated.
[4] Front latches
These must both be flipped up to rotate open the upper unit to load paper or
for maintenance.
[5] Paper delivery slot
Paper is ejected through this slot.
Note: Never attempt to open the Upper unit by force or hit the door. This could
damage the printer or result in poor print quality. Always open and close the
Upper unit slowly.
Page 16 100-TBD - Rev A
Page 25

Step-by-Step Installation Procedures
[2]
[3]
[1]
Back View
[1] LAN port
Connect a LAN cable here to connect to the computer.
[2] USB port
Connect a USB cable here to connect to the computer.
[3] Power connector
Connect the power cord here.
100-TBD - Rev A Page 17
Page 26

Step-by-Step Installation Procedures
[1]
[2]
[3]
Inside the Printer
[1] Upper unit release levers
Push these levers up to release the upper unit.
[2] Paper tray
Load paper in this tray.
Note: Color thermal paper is loaded with a surrounding cartridge box, while
black and white paper is loaded directly as a fanfold stack of paper.
[3] Transport unit
Paper is fed by this unit. Clean it if soiled by paper dust or other foreign
material.
Page 18 100-TBD - Rev A
Page 27

Step-by-Step Installation Procedures
[1]
[2]
[3]
[4]
[5]
[6]
Operation Panel
[1] Power switch
Rocker switch that turns power on and off.
[2] SELF TEST key
Pressing this key down for about 1 second initiates an automated status
check.
[3] Status display
Displays error message codes (TBD) when the ERROR lamp is lit.
[4] PAPER ADVANCE key
Pressing this key in the offline mode feeds paper.
[5] PAPER EMPTY lamp
This lamp displays if the printer is out of paper.
[6] ERROR lamp
This lamp displays when there is an error within the printer.
100-TBD - Rev A Page 19
Page 28

Step-by-Step Installation Procedures
Connecting the Communication Cable
The Printrex® 920 is equipped with two interface ports. These interfaces are:
x USB 2.0 High Speed
x Ethernet 10/100 Base TX
Connect the appropriate communications cable to the corresponding port on
the printer as shown in the following figure. Cables are provided by your
dealer, the system installer or are available through Printrex.
Connect the cable to the printer first, as shown in the figure, and then to the
computer.
Note: You can disconnect the USB cable even while the printer and computer
are on, but do not disconnect the USB cable in the cases described below.
This could prevent the printer from operating normally.
x While the computer is starting up (until the desktop display appears).
x While the printer is printing.
x While you install the printer driver.
To disconnect the USB cable while the computer and the printer are on,
disconnect it at the computer or the USB hub. To reconnect the USB cable,
wait at least 5 seconds before you connect it again. If you reconnect it
immediately, the printer may not operate correctly.
Note: A USB cable is not provided with the printer. Please prepare a cable
that matches the port on your computer.
Note: Please consult your network administrator when connecting to an office
LAN using an Ethernet cable.
Note: If a printer driver has not been installed in the computer to which you
want to connect your printer, install it before connecting the USB cable or LAN
cable.
Page 20 100-TBD - Rev A
Page 29

Step-by-Step Installation Procedures
Ethernet port
USB port
100-TBD - Rev A Page 21
Page 30

Step-by-Step Installation Procedures
Paper Loading Procedure
This section describes how to load paper.
1. If the printer is installed in a rack-mounted configuration, slide the printer out
forward from the rack. Paper is loaded from the top of the printer.
2. Flip the two front latches upward to release the upper unit.
Page 22 100-TBD - Rev A
Page 31

Step-by-Step Installation Procedures
3. Rotate the upper unit upward to open the printer.
100-TBD - Rev A Page 23
Page 32

Step-by-Step Installation Procedures
4a. Color thermal paper stock is loaded from a plastic cartridge container.
Lower the container into the paper tray as shown. Ensure that the top of the
container is open and paper can feed out of it.
Page 24 100-TBD - Rev A
Page 33

Step-by-Step Installation Procedures
4b. Black and white thermal paper stock is loaded as a fanfold stack of paper.
Lower the stack into the paper tray as shown.
100-TBD - Rev A Page 25
Page 34

Step-by-Step Installation Procedures
Note: Load paper with the black mark located on the tip right side of the back
of the printing surface.
5. Unfold the top sheet of paper and lay it across the platen as shown in the
figure.
Page 26 100-TBD - Rev A
Page 35
Step-by-Step Installation Procedures
8. After loading paper, push the upper unit down until it clicks into place. Press
the PAPER ADVANCE button on the front console to advance the first sheet.
Slide the printer back into the rack if appropriate.
Note: Load paper in printer immediately after unpacking it. Paper remaining
after completion of printing may be held loaded in printer or stored in the paper
storage box. If printer is not used for an extended period of time, be sure to
store paper in the paper storage box.
100-TBD - Rev A Page 27
Page 36

Page 37

Chapter 4
Printrex® 920 Specifications and
Requirements
100-TBD - Rev A Page 29
Page 38

This page intentionally left blank
Page 30 100-TBD - Rev A
Page 39

Printrex® 920 Specifications and Requirements
Printrex® 920 Specifications and Requirements
Standard Features
The following features are standard for Printrex® 920 printers:
x Prints in full color without ink cartridges or ribbons using ZINK® (Zero Ink)
x Capable of printing black and white on standard thermal paper
x Color Printing: 18 inches per minute
x Black & White Printing: 120 inches per minute
x Resolution of 300 dots per inch horizontal/200 dots per inch vertical
x Extended operating and storage temperature ranges
x Available in both desktop and rack-mount (3U space) configurations
x Easy path to upgrade existing logging systems to full color
x USB 2.0 High Speed and Ethernet 10/100 Base TX
x Low total cost of ownership
Optional features:
x Output stacker for rack-mount configuration
x Combination input tray/output stacker for desktop configuration
100-TBD - Rev A Page 31
Page 40

Printrex® 920 Specifications and Requirements
Max Dimensions
W D
H
Desktop
19.0
20.0
5.0
Rack mount
12.0
20.0
5.0
20.0"
5.0"
(Rack mount configuration shown)
Physical Printer Specifications
Weight: approx. 18 lbs. (8.2 kg) desktop, 24 lbs. (10.9 kg) rack mount
Interface
USB 2.0 High Speed and Ethernet 10/100 Base TX
Environmental Conditions
The Printrex® 920 printer is designed for use in rugged environments, within
the temperature and humidity conditions described below.
Operating temperature (printing): -15°C to 40°C / 5°F to 104°F
Operating temperature (non-printing): -40°C to 70°C / -40°F to 158°F
Storage temperature: -55°C to 85°C / -67°F to 185°F
Electrical Specifications
Universal input (100/230 volts, 50/60 Hz)
250 watts maximum
Page 32 100-TBD - Rev A
Page 41

Printrex® 920 Specifications and Requirements
Media Specifications
Paper
ZINK ® Color Fan Fold Paper
Printrex p/n 2316-0027
Width: 8.5 inches (216 mm)
640 sheets/box
Black & White Fan Fold Paper
Printrex p/n 2316-0011
Width: 8.75 inches (222 mm)
800 sheets/box
USB Interface
The USB interface is a Version 2.0 interface card is implemented through a
standard Series "B" receptacle as defined in the USB Specification. The
printer is self-powered and does not draw power from the standard Type B
USB interface cable.
The standard USB Type B connector has the following pin functions:
Pin Signal
1 Vbus (+5 V dc)
2 Minus data
3 Plus data
4 Ground
Note: The standard USB interface does not have sufficient power to run the
printer.
100-TBD - Rev A Page 33
Page 42

Page 43

Chapter 5
Printer Maintenance
100-TBD - Rev A Page 35
Page 44

This page intentionally left blank
Page 36
100-TBD - Rev A
Page 45

Printer Maintenance
leaning the Printer
C
There is no regular cleaning required for proper operation of the printer,
however the printer surfaces are designed and manufactured to permit
cleaning with the following cleaning agents:
x Isopropyl alcohol
x Ammonia
x Chlorine bleach (1:10 concentration with water)
x Hexachlorophene (PhisoHex)
x Glutaraldehyde (Cidex)
Use a soft cloth dampened with the cleaning agent to clean the surfaces of the
printer. Do NOT submerse the printer or allow spills onto or into it.
Note:
x Before cleaning the printer, switch it off and disconnect the power plug
from the power source. This can prevent personal injury or damage to the
printer if you make a mistake during cleaning.
Protecting the Thermal Head
The thermal head incorporates a protective glaze coating and is generally
resistant to harsh environments, but follow these guidelines to protect it:
x Do not allow the thermal head to come into contact with sharp or hard
objects.
x Do not allow thermal paper debris to accumulate on the thermal head. See
below.
x Do not allow condensation to accumulate on the thermal head.
x Use only Printrex approved thermal paper.
x Do not use abrasive cleaning substances on the thermal head. See below.
Cleaning the Thermal Head
Paper dust or other foreign material may occasionally accumulate on the
thermal print head. This will be indicated by light printing or no printing in a
narrow band down the length of the paper. In order to eliminate the thermal
paper debris buildup, use a soft cloth moistened with one of the following
cleaning agents:
x Isopropyl alcohol
x Ethanol
A light wiping along the length of the print head is adequate. Allow the print
head to dry before resuming printing. It can be wiped dry with a soft, clean
cloth. Do NOT submerse the print head or allow spills onto it.
100-TBD - Rev A Page 37
Page 46

Printer Maintenance
Cleaning the Form
Sensor paper dust or other foreign material may occasionally accumulate on
the form sensor. This will be indicated by paper advances missing the top of
form position (some time after it has been correctly stopping at the top of
form). The form sensor can be cleaned with an aerosol air spray or soft
bristled brush. It is located just under the form sensor window.
Page 38
100-TBD - Rev A
Page 47

Printer Maintenance
learing Paper Jams
C
If paper has been loaded askew, has been torn off forcefully, or is damp, the
paper may feed abnormally and wrap around the platen roller. These
occurrences are extremely rare, but it is important to know how to clear the
jam:
1. Turn off power to the printer.
2. Open the printer door and remove the paper holder.
3. Tear off the incoming paper (either from the roll, or fanfold supply).
4. Pull on the free end of paper with one hand, while turning the platen roller
with the other hand to unroll paper from the platen.
5. Do not use a razor, knife or sharp object of any kind to cut the paper off of
the platen roller. Nicking or cutting the roller surface will result in progressive
damage to the platen with continued use of the printer.
6. Be very careful not to damage the print head exposed on the underside of
the door. Use bare hands to free the paper to avoid accidental contact with
metal or hard surfaces
100-TBD - Rev A Page 39
Page 48

Page 49

Chapter 6
Troubleshooting
100-TBD - Rev A Page 41
Page 50

This page intentionally left blank
Page 42 100-TBD - Rev A
Page 51

Troubleshooting
This section lists a few common questions that are received by Printrex
support staff and the answers most likely to fix the problem. For further
LQIRUPDWLRQVHHWKH3ULQWUH[6\VWHP$GPLQLVWUDWRU¶V*XLGH
he printer seems to be working, but nothing is printed.
T
The thermal paper has one side that has a thermal sensitive coating while the
other side is not coated. Be sure the thermally coated side is facing upward
(as the paper is exiting the printer).
,¶PXVLQJIDQIROGSDSHUZLWKIRUPPDUNHUs, but the printer stops in the
wrong place. What driver settings should I use?
%HVXUHWRVHW3DSHU6L]HWRWKHDFWXDOVL]HRIWKHSDSHUHJ´[´
and enable End-of-Job Form Feed.
Also, see that the Form Marker setting (in the Windows XP/Vista driver)
matches the actual printed location of the marker.
Check that the paper is loaded correctly: looking at the front of the printer, the
marker should be on the right side, on the bottom of the paper.
,¶PWU\LQJWRSULQW7,))ILOHVEXWWKHSULQWed output is clipped off. How do
I print the whole log?
Commonly, users view TIFF logs in Windows Imaging, the free viewer
provided in the Accessories folder. Unfortunately, this is a single-page
application. It is designed for simple photograph-size viewing and printing.
In addition, the Windows printing subsystem formerly limited printer pages to
32,766 raster lines (approximately 163 inches long for 200 dpi Printrex
printers, or 109 inches for 300 dpi Printrex printers), so the longest log that
could be printed from Windows Imaging was just 13 feet long.
In Windows XP, the Imaging applet was replaced by a new Paint applet that
uses multiple printer pages. In this case, set the printer page size to the
SDSHU¶VSDJHVL]HHJ´[´KDOISDJHDQd Paint will generate as
many printer pages as needed to print the log.
In most of the larger geotechnical organizations, proprietary viewers have
been written for internal use by staff and customers. There are very few
options for users of TIFF log files who are not using Windows XP, or who find
the XP Paint application too primitive.
Printrex welcomes comments regarding requirements and features for log
viewing tools, to help us evaluate customer viewer application needs.
E
very time I start my program, I have to change printer settings. How do I
change the default driver settings?
Changes to the printer settings done from within an application are generally
not saved unless some unusual program coding is done.
Self test prints out OK but when I print from the computer I get garbage.
The most common culprits for this symptom are the printer cable or printer
GULYHU%HVXUHWKHFDEOHLVDSSURSULDWHO\FRQQHFWHGVHH³&RQQHFWLQJWKH86%
100-TBD - Rev A Page 43
Page 52

Troubleshooting
&DEOH´$OVREHVXUHWKHSULQWHUGULYHULVIRUWKHVSHFLILFPRGHORISUinter in
use.
ometimes the fan-fold paper skews to one side or the other. How do I correct
S
this?
The Printrex printers work with a wide variety of media. A paper skewing
problem is normally corrected by realigning the paper manually, by opening
the door, straightening the paper, and closing the door.
In some cases (generally with very thin paper) the problem may persist. If this
is the case, thread the paper over a full internal roll of paper (as shown) to
remedy the situation.
Page 44
100-TBD - Rev A
Page 53

Appendix A: Ordering Supplies
Appendix A: Ordering Supplies
Printrex® 920 supplies can be ordered easily direct from the Printrex website
(www.printrex.com) or our telephone number within the US: 408.573.1200.
When calling by phone, pleDVHDVNIRUWKH6DOHV'HSDUWPHQW6HH³Contact
Information´in the first section of this document for more details.
Drivers Available
(TBD)
100-TBD - Rev A Page 45
Page 54

Page 55

Index
Index
Canadian Radio Interference
Statement, iii
Cleaning the printer, 37
Clearing paper jams, 39
Communication cable, 20
Connecting communiation
cables, 20
Contact information, 7
Federal Communications
Commission Radio Frequency
Interference Statement, iii
Overview, 3
Paper loading, 22
Part names and function, 16
Printer maintenance, 35
Product information
Warranty information, 5
Return Materials Authorization, 6
Safety precautions, 11
Specifications
Electrical, 32
Environmental conditions, 32
Interface, 32
Media, 33
Printer dimensions, 32
Specifications and
Requirements, 31
Supplies, ordering, 45
Technical support, 5
Troubleshooting, 41
Unpacking the printer, 15
100-TBD - Rev A Page 47
Page 56

adio Frequency Interference Statement
R
This device complies with Part 15 of the FCC Rules and Industry Canada
licence-exempt RSS standard(s) . Operation of the device is subject to
the following two conditions: (1) The device may not cause harmful interference,
and (2) The devices must accept any interference that may cause undesired
operation.
This unit has been tested and complies with limits for a Class A digital device
under Part 15 of the FCC Rules and Industry of Canada ICES-003. These limits
are designed to provide reasonable protection against harmful interference when
the equipment is operated in a commercial environment. This equipment
generates, uses, and can radiate radio frequency energy and, if not installed
and used in accordance with the instruction manual, may cause harmful
interference to radio communications. Operation of this equipment in a
residential area is likely to cause harmful interference in which case the user
will be required to correct the interference at his own expense..
Changes or modifications not expressly approved by TransAct Technologies,
Inc. could void the user's authority to operate the equipment.
The manufacturer declares that this product conforms to the following
standards or other normative documents:
EN 300 330-2 V1.5.1 (2010-02) Electomagnetic compatibility and Radio
spectrum Maters (ERM); Short-Range Devices (SRD); Radio equipment
in the frequency range 9 kHz to 25 MHz inductive loop system in the
frequency range 9 kHz and 30 MHz
EN 301 489-1 V1.9.2 (2011-09) Electomagnetic compatibility and Radio
spectrum Maters (ERM); ElectroMagnetic Compatibility (EMC) standard
for radio equipment and services; Part 1: Common technical requirements
EN 301 489-3 V1.4.1 (2002-08) Electomagnetic compatibility and Radio
spectrum Maters (ERM); ElectroMagnetic Compatibility (EMC) standard
for radio equipment and services; Part 3: Specific conditions for Short-Range
Devices (SRD) operating on frequencies between 9 kHz and 40 GHz
Safety: EN 60950-1:2006 Safety of information technology equipment
including electrical business equipment, including amendments A12:2011
100-TBD - Rev A _dp Page iii
 Loading...