

Page 1
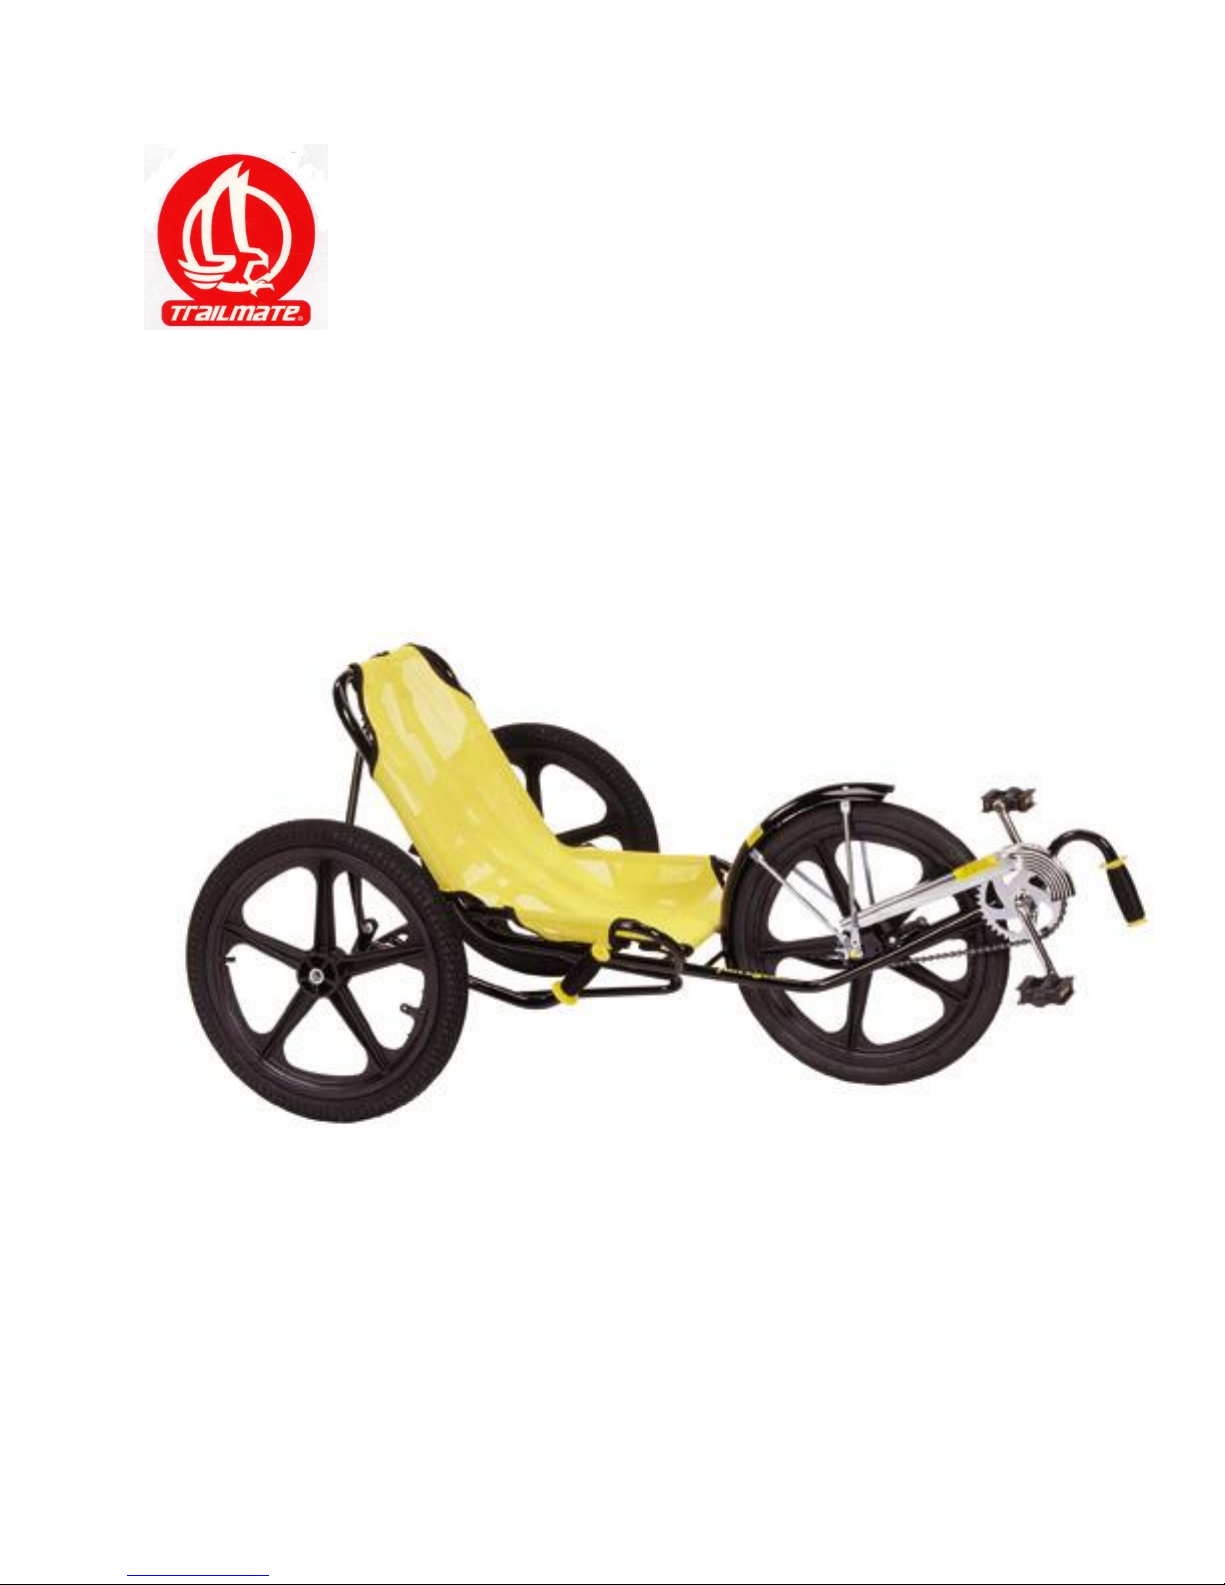
Fun Cycle
Owner’s Manual
Page 2
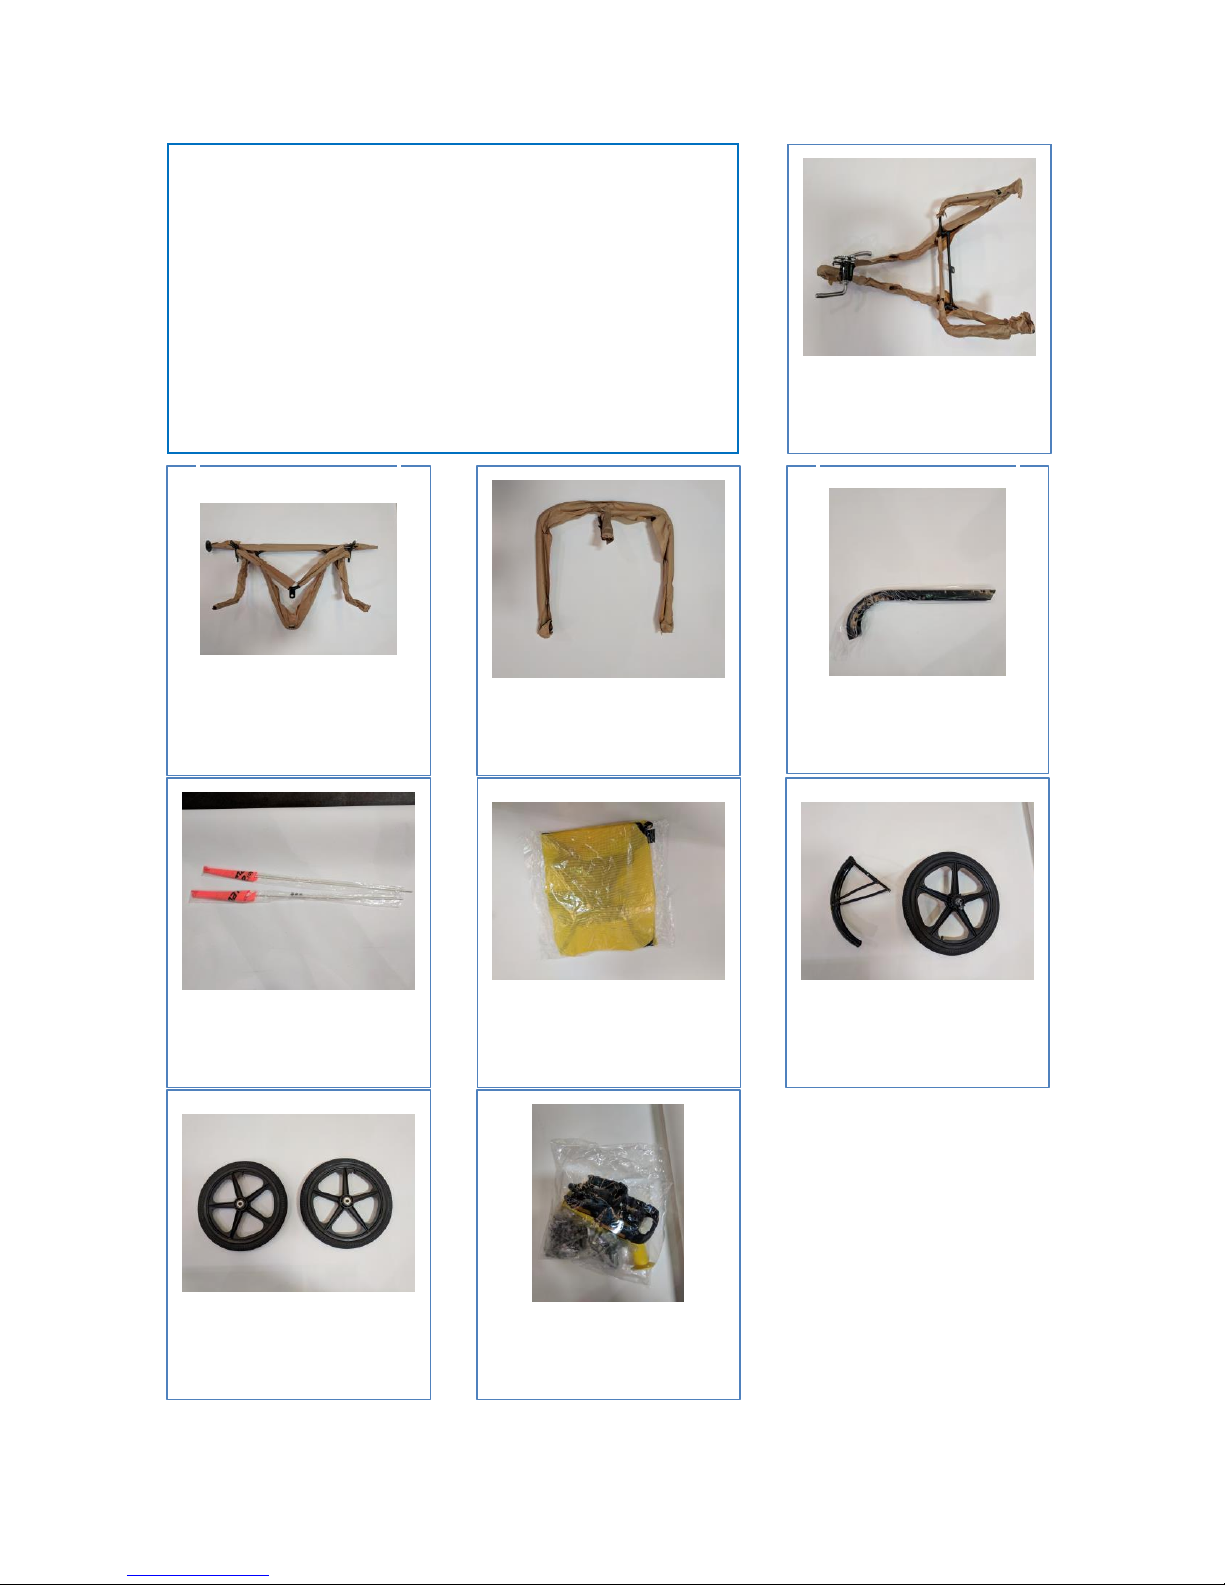
Front Frame
Assembly
Rear Frame
Assembly
Backrest
Chainguard
Flags Seat
Front Wheel and
Fender
Rear Wheels
Parts Bag
What’s in
the Box?
Page 3
Assembly Instructions
Tools Required: 3/8” wrench, 1/2” wrench, 9/16” wrench, flat blade screwdriver, Phillips head
screwdriver, Air Pump, Air Gauge, Allen wrenches, 15/16” socket wrench, Adjustable wrench,
pliers, rubber mallet.
1. Preparation: Remove all parts from the box, and carefully unwrap all parts.
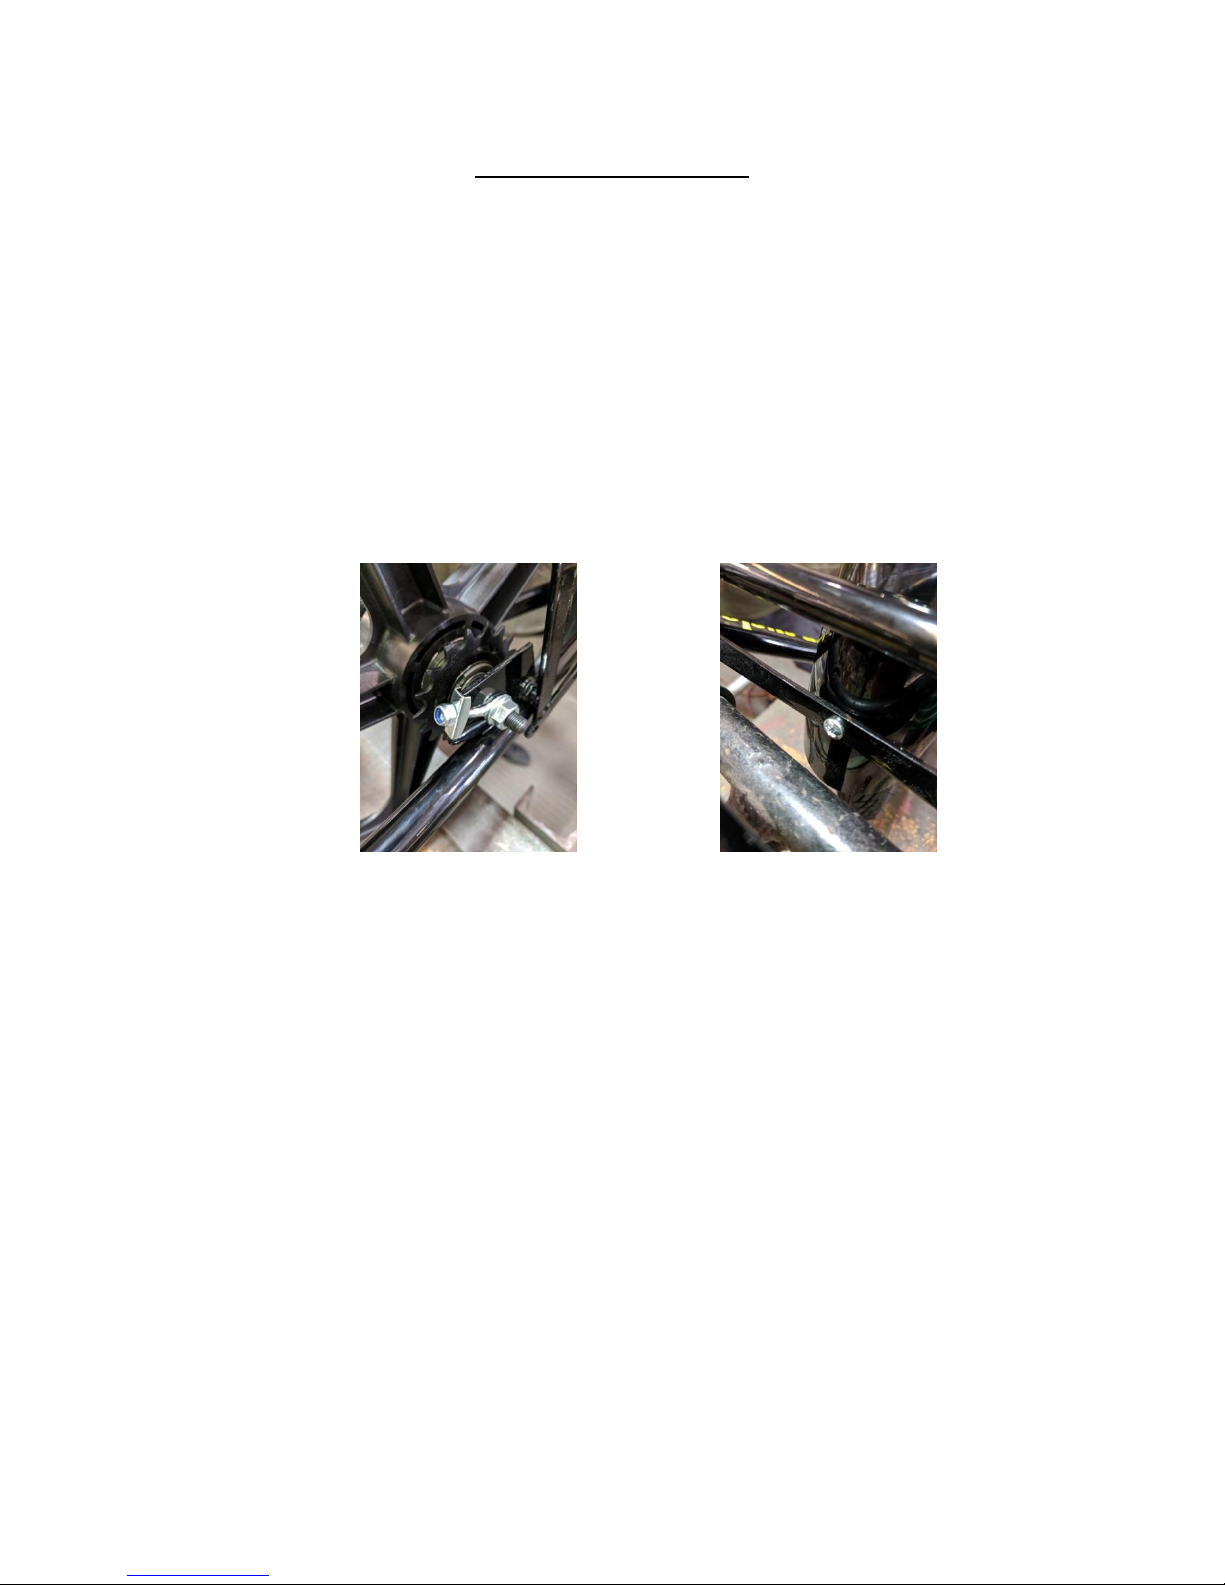
2. Front Wheel: Insert front wheel into the slots in the frame with the brake lever pointing
forward and above the left frame tube. Tighten Loosely. Install the front fender over the
wheel. Use the screw and nut to attach it to the main frame. A zip tie on the tire may be
used to make this step easier. Tighten down the nuts for the front fender.
Wheel set into frame with Screw installed on back of fender
accompanying hardware
3. Pedals: Install pedals by threading the pedal marked “R” into the right side of the crank
(clockwise) and the pedal marked “L” into the left side of the crank (counterclockwise).
4. Drive Chain: Install the drive chain by wrapping it around the two sprockets and then
clipping the ends together with the connecting link, shown below. Adjust the wheel until
the chain lines up. Install the brake strap onto the brake arm loosely. Tighten down
chain adjusters until the chain is tight (approximately ¾” up and down movement is
permissible). Tighten down the wheel nuts. Rotate the crank and confirm that there is
no binding. Adjust the wheel as necessary. Tighten down brake strap fully.
Page 4
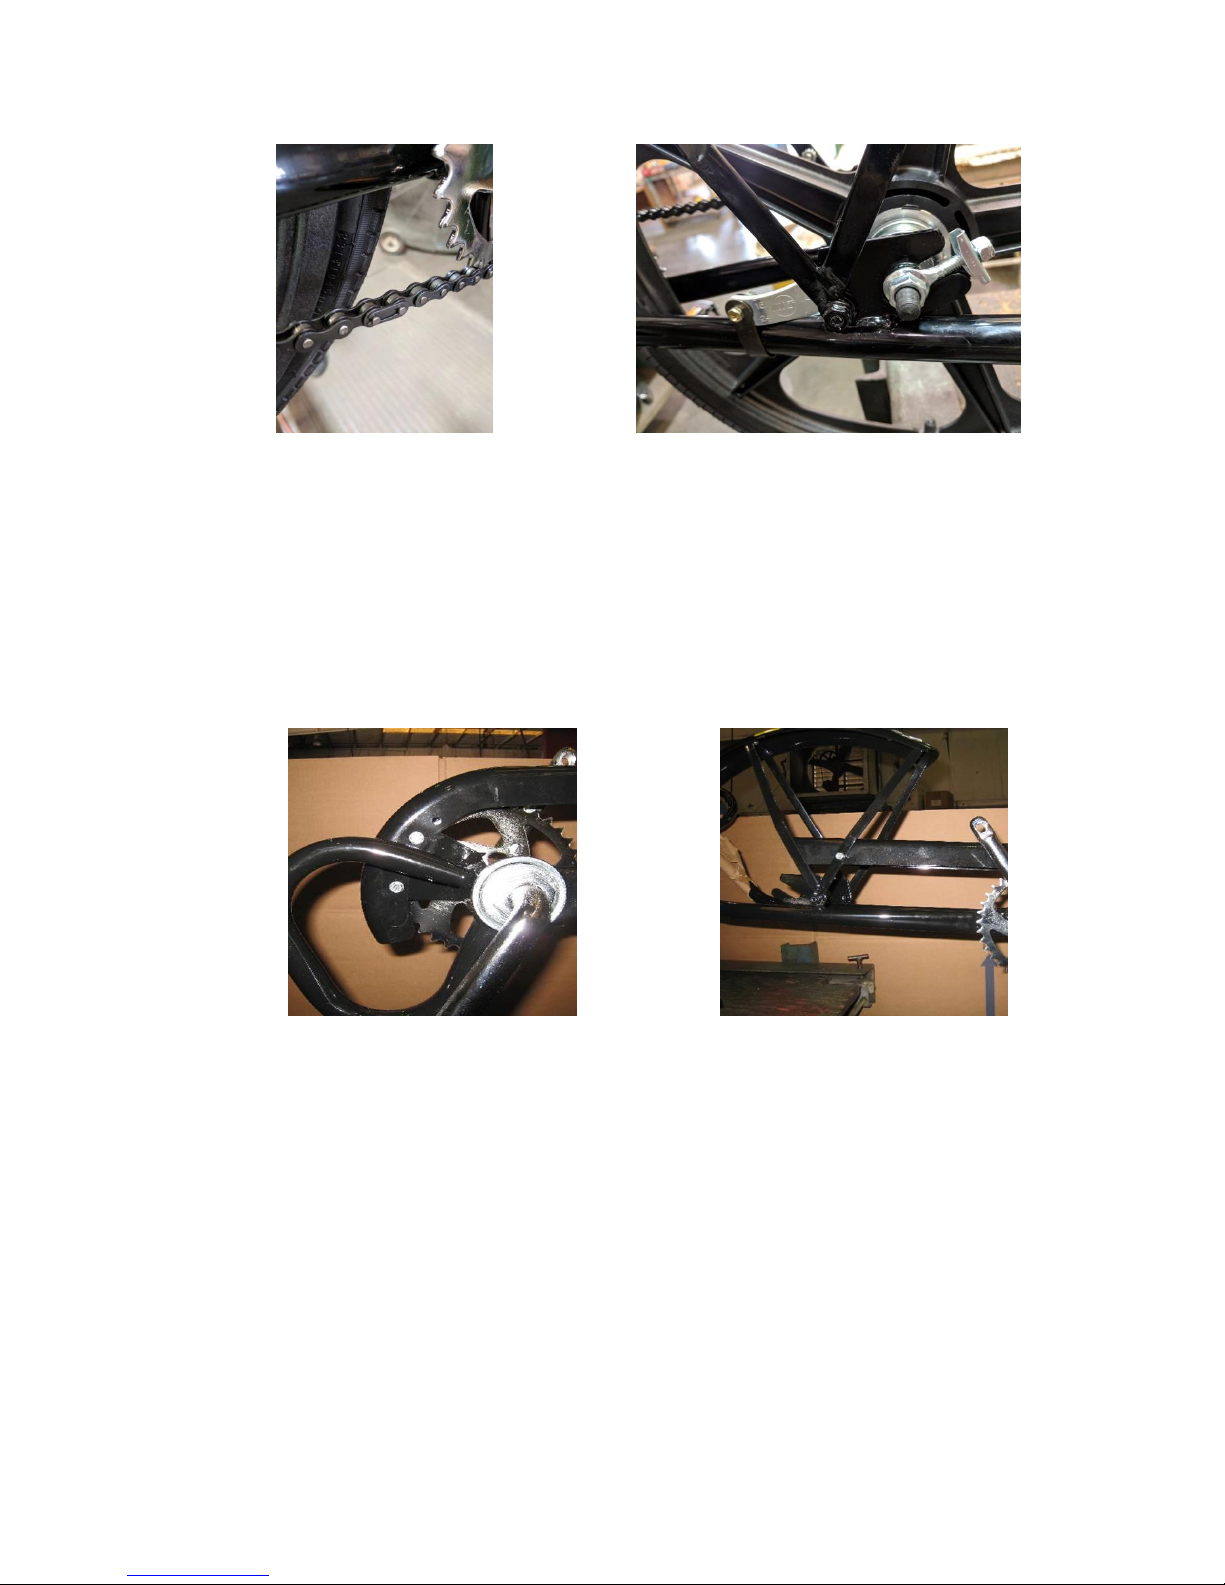
Chain connecting link Front assembly completed, prior to
chain adjuster being tightened
5. Chainguard: Install the chainguard using the first and third hole from bottom in the
front and the hole on the fender brace in the back. Tighten down with the matching
nuts and make sure that the chain does not rub anywhere on the chainguard. Adjust as
necessary.
Front chainguard installation Rear chainguard installation
6. Backrest: Insert backrest onto front frame assembly with pivot mounting tub pointed
downwards and to the rear. The backrest should slide evenly onto the frame about 1.5”
to 2” on both sides. Note: This may be a tight fit and it may be necessary to lubricate the
frame and tap the backrest on with a rubber mallet. Insert bolts into the backrest
clamps from the outside and loosely install washers and nuts. Note: On some backrest
clamps, it may be necessary to squeeze with pliers before inserting screws.
Page 5
Backrest installed into front frame
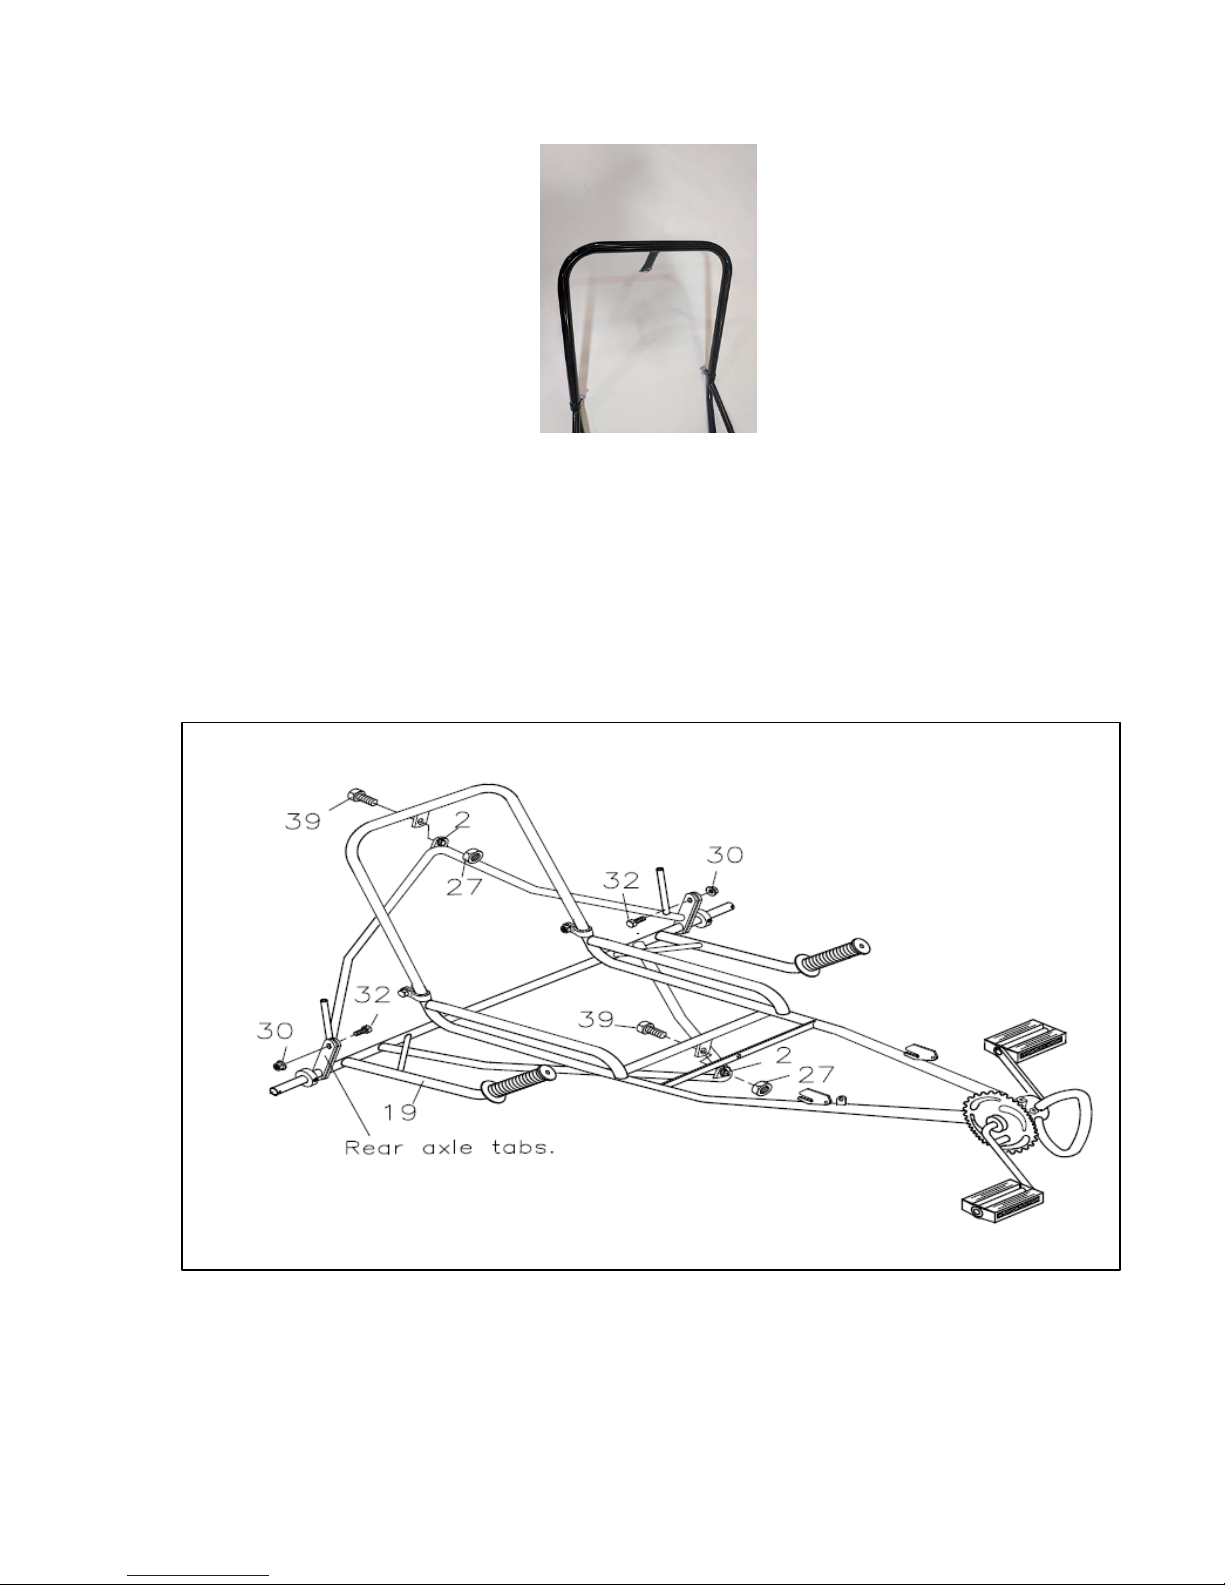
7. Rear Frame: Insert the screws in the holes on rear axle tabs. Loosely tighten with the
nuts. Assemble front frame with the back rest on top of rear frame section (shown
below). Insert screws into nylon bushings that are preassembled into frame sections.
Secure with nylon jam nuts. Tighten nuts so that the frame sections are securely held
together, but not so tight to cause binding when pivoted. Tighten backrest clamps.
Tighten axle tab screws.
Rear Frame assembly points
Page 6
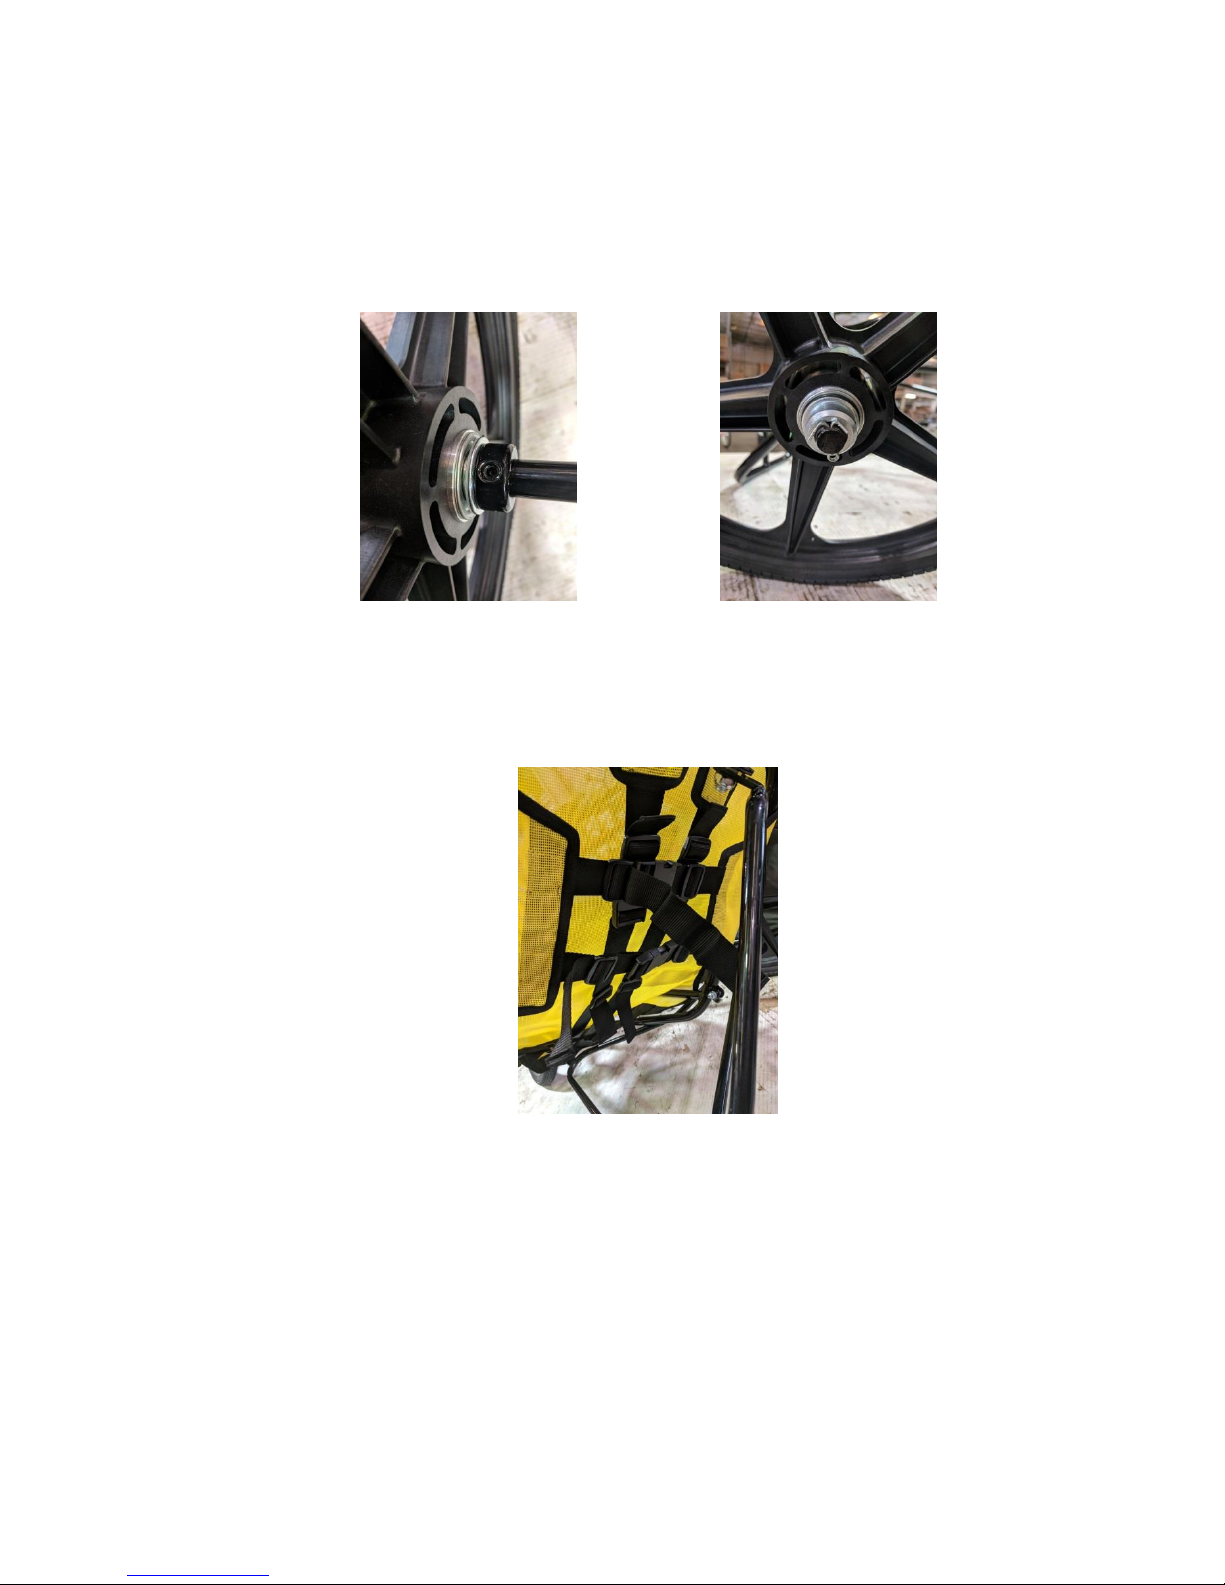
8. Rear Wheels: Loosen set collar on axle. Slide one washer onto each rear axle against set
collar. Slide wheel onto axle along with washer and another set collar. Secure cotter pin
into end of axle. Slide outside set collar against cotter pin and tighten. Move remaining
components against outside set collar and tighten inside set collar.
Inner set collar and washer Outer washer, set collar and cotter pin
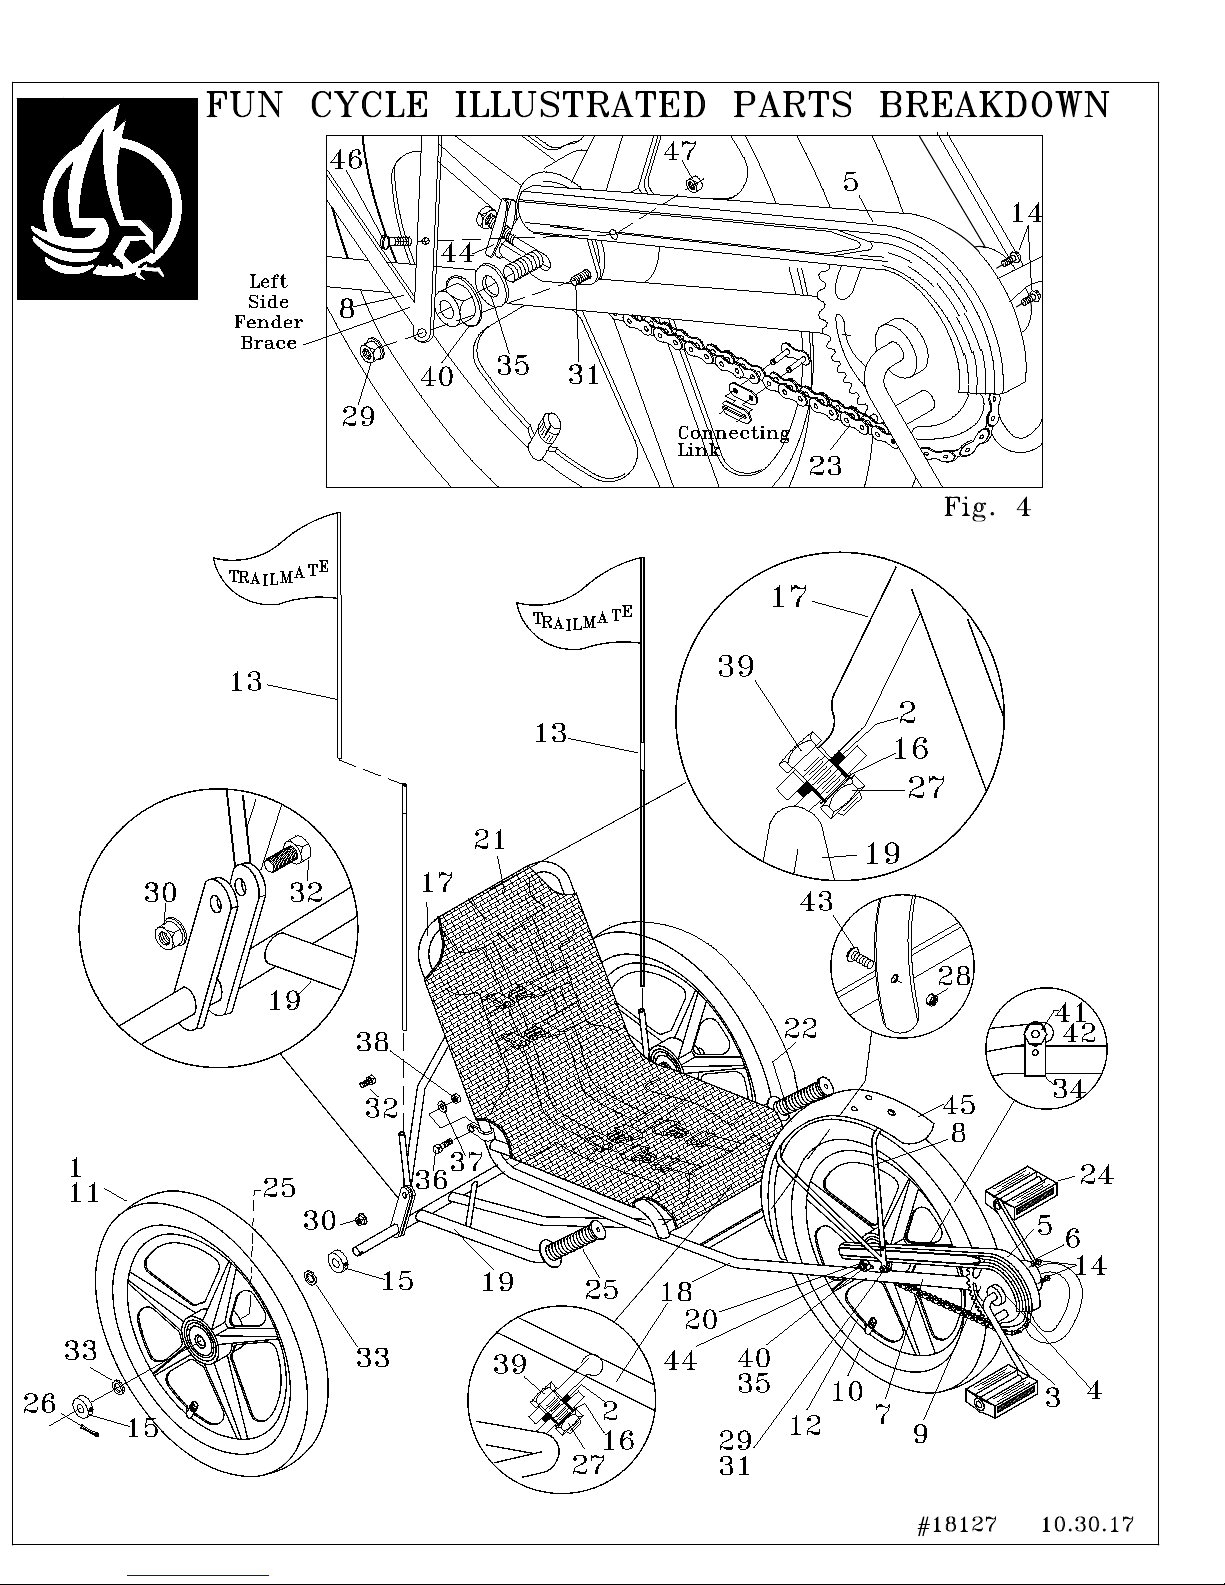
9. Seat: Place seat on back rest with the wide flap at top. Install flaps around outside frame
and buckle from top to bottom and side to side. Sit in seat and readjust tension until
comfortable.
10. Final Check: Install the handle grips to the handlebars and put the safety flags into the
holders. A bit of water inside the handle grips may make it easier to install them. Check
all connecting bolts and screws for tightness. Pump tires to the proper pressure.
Seat buckle installation
Page 7

MAINTENANCE
AND INSPECTION
REGULAR MAINTENANCE: Bi-Monthly
1. Keep all painted parts cleaned and waxed for a long-lasting luster.
2. Spray all chrome parts with recommended protective spray coating (LPS-1, WD-40, etc.).
When spraying with protective coatings, it is recommended that you let parts set overnight so
the coating will penetrate.
3. Lubricate the following:
a. Pivot points at top and bottom of seat
b. Axle shafts
c. Inside bearings of both pedals
d. Chain – turn pedal crank forward and spray freely
4. When storing over prolonged periods, turn upside down to prevent flat spots from occurring on
the tires. If stored outside, cover to protect finish and moving parts.
PREVENTATIVE MAINTENANCE: Every Six Months
These are services that should be performed by your local bicycle shop. A fee may be charged.
1. Check tires for wear, rim cuts, and valve core alignment (usually caused by improper air
pressure).
2. Check wheels for cracks and alignment.
3. Check brakes for proper operation.
4. Clean and repack all bearings and adjust all cones.
5. Check for worn bearings, cones, and cups.
6. Check chain for adjustment and clean as needed.
7. Check for loose bolts and nuts.
Attention: While your unit is new, some noises may occur when the unit is breaking in.
Should they continue for more than 30 days, see your local bike shop.
INSPECTION
Check the following, as it applies to your cycle, on a regular basis:
1. Coaster brake – Make sure the brake engages, by pedaling backwards.
2. Wheels – Check wheels for alignment.
3. Pedals – Inspect pedal bearings and make sure pedal is tightly attached to crank.
4. Handle grips – Replace worn or loose grips.
5. Chain – Check for proper tightness. Replace damaged chain immediately.
6. Seat – Adjust seat for rider comfort and safety.
7. Tires – Keep tires inflated to the recommended tire pressure, as indicated on the tire’s
sidewall.
8. Chainguard – Replace damaged or missing chainguard immediately.
9. Frame – Replace damaged frame immediately.
Page 8
fun cycle!
fun cycle!
Trailmate
Page 9
Page 10
1851 67th AVE East
Sarasota, Fl 34243
Tel:(941) 755-5511
Fax: (941) 758-5141
Visit us @www.trailmate.com
For service or to order
replacement parts
please contact your
local Trailmate dealer.
FUN CYCLE
This is a recreational unit, not designed for excessive
speeds or misuse.
Do not brake or turn at high speeds. This may cause cycle
to roll over. Careless operation may cause rider to lose
control and result in serious injury.
Things to know before riding your cycle:
1. Know your local bicycle laws and wear a helmet.
2. Do not exceed the recommended weight limit of 250 lbs.
3. No more than one rider at one time.
4. Do not stand on unit.
5. Be sure to install safety flags.
6. Wear light-colored clothing and protective gear.
7. Do not ride at night.
8. Children must be supervised by an adult at all times.
 Loading...