

Page 1
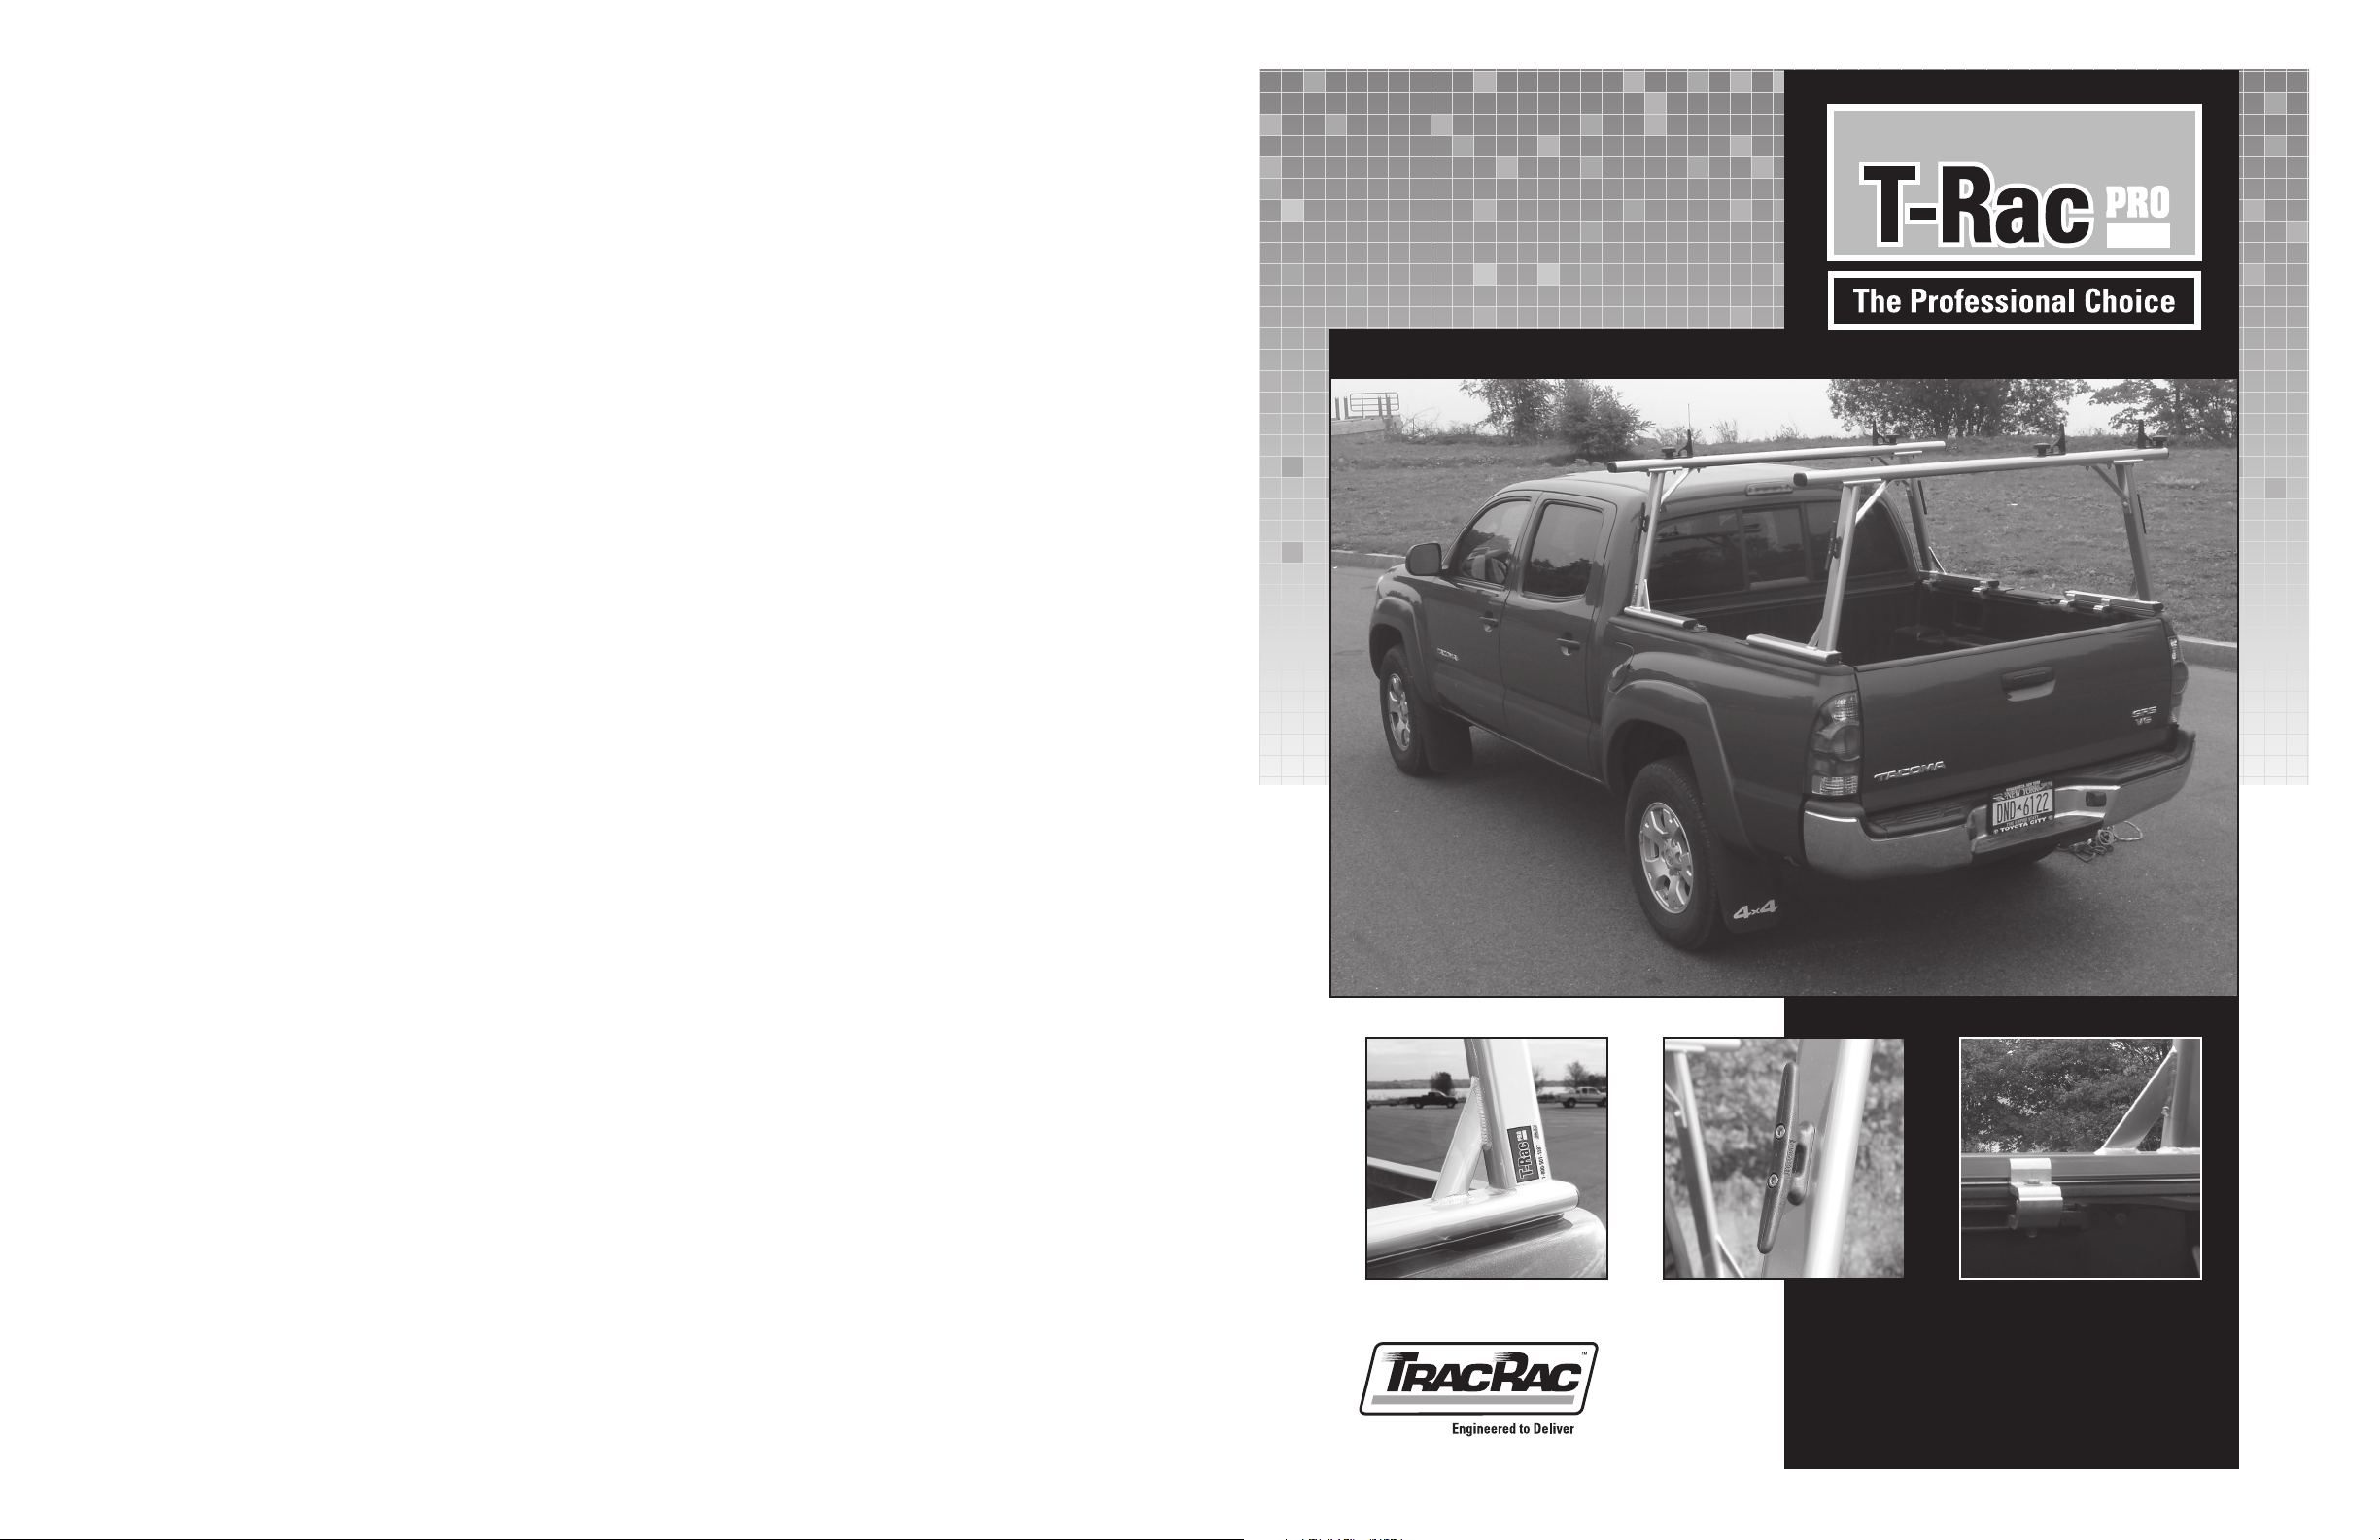
TOYOTA TACOMA
Installation Manual
Trac Rac, Inc.
994 Jefferson Street • Fall River, MA 02721
800.501.1587
www.tracrac.com
SKU# 25000
Page 2
Installation Notes:
• The T-Rac mounts onto the side rails of your truck without drilling.
• Installation is straight forward, and should take approximately 45 minutes to complete.
Toyota Tacoma T-Rac Pro
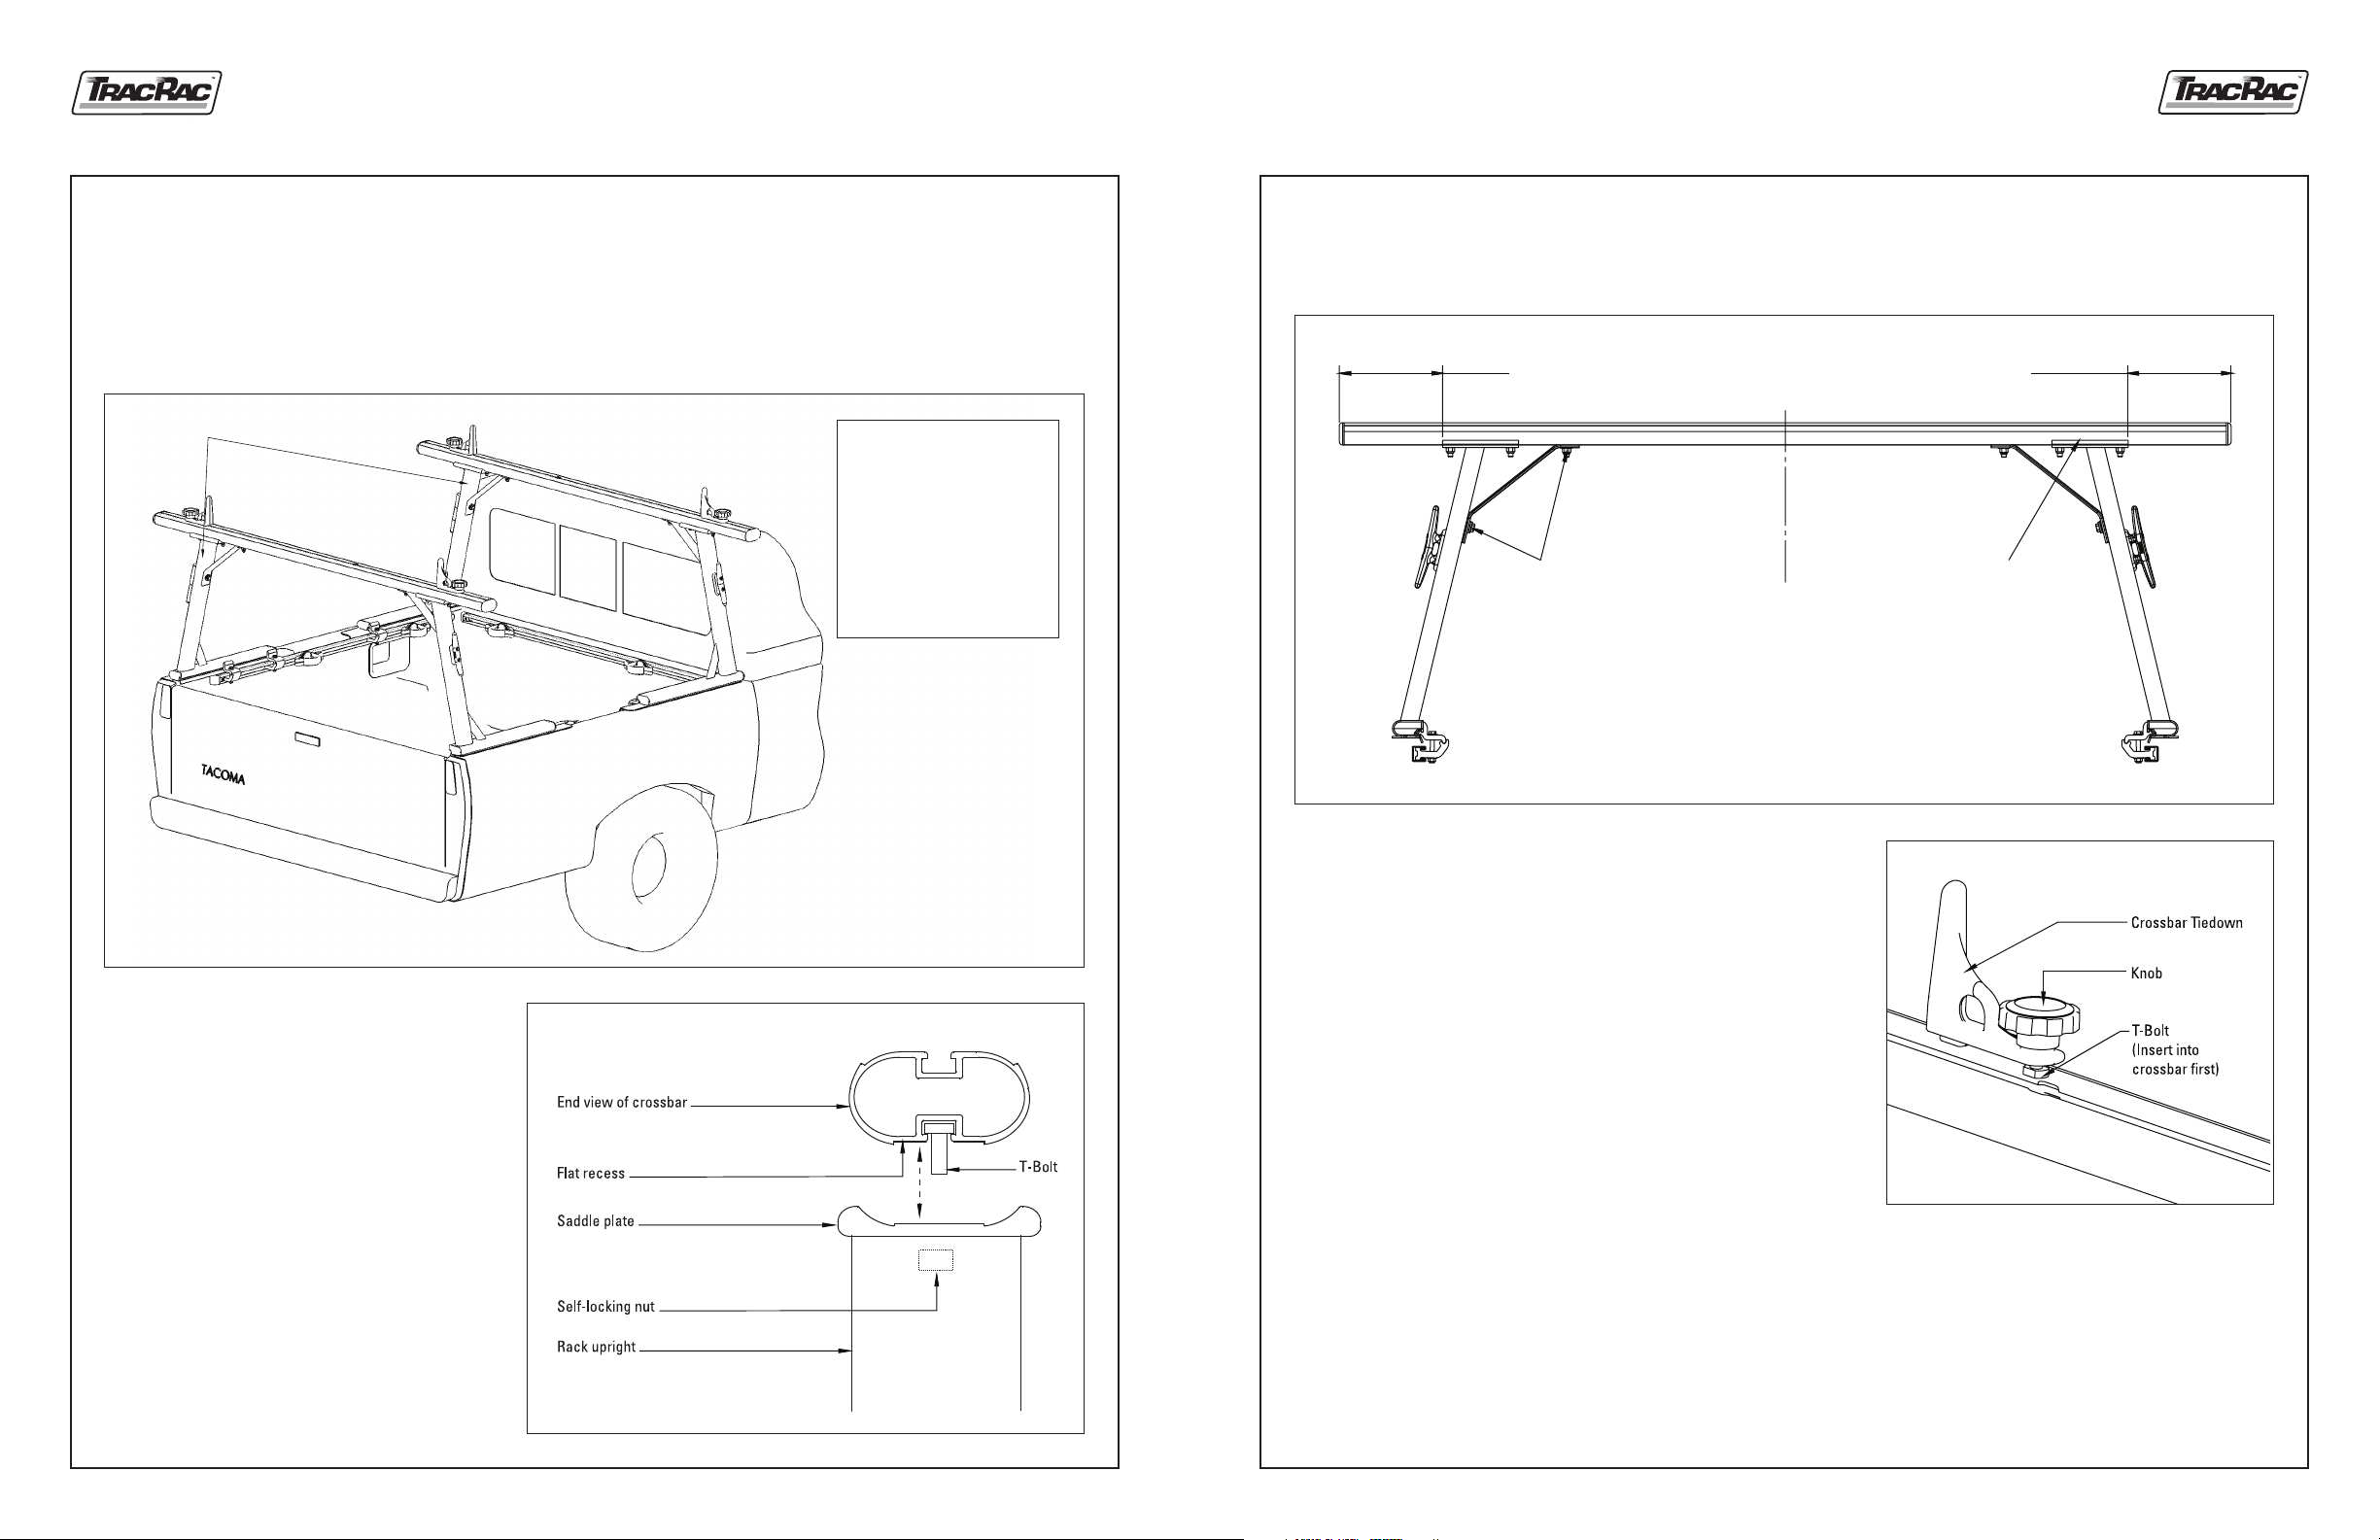
7. Once a set of corners has been loosely tightened to the truck, center the crossbar lef t to right. Crossbar should fit
flat on the saddle plates, (Figure 8) then tighten the saddle plate T-bolt nuts (Torque T-bolt nuts to 240 in-lbs.).
Next tighten corner brace fasteners to 240 in-lbs. Fully tighten 5/16” bolts on base rail clamps (Torque to 90-110 in-lbs).
1. Verify that you have received the correct parts using the assembly drawing and packing list.
TACOMA T-RAC PRO
Tools Required
1) Socket Wrench
2) 9 /16” Socket
3) 1/2” Socket
4) 5/16” Allen Wrench
Recommended
1) Torque Wrench
Equal Distance Equal Distance
Fastener
Crossbar Center
8. Now you’re ready to install the crossbar tie downs. Slide the tie-
down, T-bolt first, into the notch in the top of the crossbar
and lock them in place with the knob. (See Figure 9).
Saddle PlateCorner Brace
Figure 8. Crossbar Adjustment
2. Slide 6 T-bolts into slot under crossbar.
(3 per side)
Note: The flat recess must face down.
(See Figure 1).
Figure 1. Crossbar cross section
2 Toyota Tacoma T-Rac Pro
INSTRUCTION MANUAL
TracRac Inc. 994 Jefferson Street, Fall River, MA 02721-4893 • 800-501-1587
Notes:
Although the T-Rac is capable of carrying a maximum of 500 lbs.,
evenly distributed between both racks, the capacity is limited to
the strength of the truck sidewall and road conditions.
For good performance and safety, we recommend re-torquing all
clamps and fasteners to the proper specifications after the first 500
miles and every 5000 miles thereafter.
Carrying high loads over rough roads with excess speed may damage
the system or your truck. Exercise good judgement at all times.
Please review the enclosed CAUTION sheet for additional guidelines.
Figure 9. Crossbar Tiedown install
• We’re confident about the structural integrity of our racks, but less sure about the strength of the new truck beds.
• The solution for greater capacity?
The Original TracRac System, which provides enough support for your truck to handle a full 1,000 Lbs.
Please call us with questions or concerns: 800.501.1587 or email: info@tracrac.com
TracRac Inc. 994 Jefferson Street, Fall River, MA 02721-4893 • 800-501-1587
Toyota Tacoma T-Rac Pro
INSTRUCTION MANUAL
Toyota Tacoma T-RacPro_IM_SKU 25000_10.10.07
7
Page 3

5. Now, place the rack assemblies on top of the mounting plates. Slide the bottom portion of the clamp assembly into the Tacoma
Side Rail. (Note: Replace Tacoma Tiedowns where desired.) Spread them as far apart as possible. Next slide the top portion of the
clamp assembly into the T-Rac Base Rail and into each bottom clamp. (See Figure 5 and Figure 6). Replace end caps, if desired.
Fron t Upright
Fron t T-Rac
Base Rail
Figure 5.
Base Rail
Channel
Tacoma
Side Rail
Mount Plates
01-1104 6
Clamp
Assembly
Rear
Upright
Rear
T-Rac
Base
Rail
3. Attach each crossbar onto a left and right corner unit by inserting the 2 T-bolts through the saddle plate holes,
and attaching locknuts. Next fasten the corner brace to the crossbar with the remaining T-bolts and washers, leaving
the 3/8” self-locking nuts loose for adjustments later. Attach the bot tom of the corner brace (with boss) using a
3/8-16 x 1-1/4” hex head cap screw with washer (Figure 2) to the corner unit. Fasten cleats to uprights using two
1/4 x 1-3/4“ socket screws, as shown below.
Figure 2.
Crossbar Assembly, Rearview
Base Rail
Clamps
Tacoma Truck
Side Wall
6. Loosely fasten top and bottom clamp using hex
bolt, flat washers and lock nut. (See Figure 7).
Figure 7. Clamp Mounting Detail
FX-11046
Top Clamp
FX-11047
Bot tom
Clamp
Base Rail
HD-80139
Lock Nu t 5/16-18
Clamps
HD-80112-2
Hex Bol t 5/16-18 x 2.5
Figure 6.
HD-80115
Flat Washer
5/16
4. Remove end caps and Tacoma Tiedowns from Tacoma Side Rails. Place the mount plates on the truck side rails.
Position the front mount plates as far forward as possible and the rear plates as far back as you can, without going
beyond the tailgate. (See Figure 3).
Tacoma
Tiedowns
Rail Endcap
Rear Mount Plates
/F X-14500 /
Tacoma
Side Rail
Fron t Mount Plates
/F X-14500 /
Figure 3. Rack Configuration
6 Toyota Tacoma T-Rac Pro
INSTRUCTION MANUAL
TracRac Inc. 994 Jefferson Street, Fall River, MA 02721-4893 • 800-501-1587 TracRac Inc. 994 Jefferson Street, Fall River, MA 02721-4893 • 800-501-1587
Toyota Tacoma T-Rac Pro
INSTRUCTION MANUAL
3
Page 4

Toyota Tacoma T-Rac Pro Assembly
SKU #25000
FX-11046
Top Clamps
(8 )
HD-80112-2
Hex Bol t
5/16-18 x 2.5
and
HD-80115
Washer 5 /16
(8 )
FX-14500
Mount Plates
(4)
FX-11047
Bot tom Clamps
(8 )
HD-80115
Washer
(8 )
HD-80139
Lock Nu t 5/16-18
(8 )
Tacoma Side Rails
(Truck Bed Not Shown)
4 Toyota Tacoma T-Rac Pro
INSTRUCTION MANUAL
TracRac Inc. 994 Jefferson Street, Fall River, MA 02721-4893 • 800-501-1587
TracRac Inc. 994 Jefferson Street, Fall River, MA 02721-4893 • 800-501-1587
Toyota Tacoma T-Rac Pro
INSTRUCTION MANUAL
5
 Loading...