

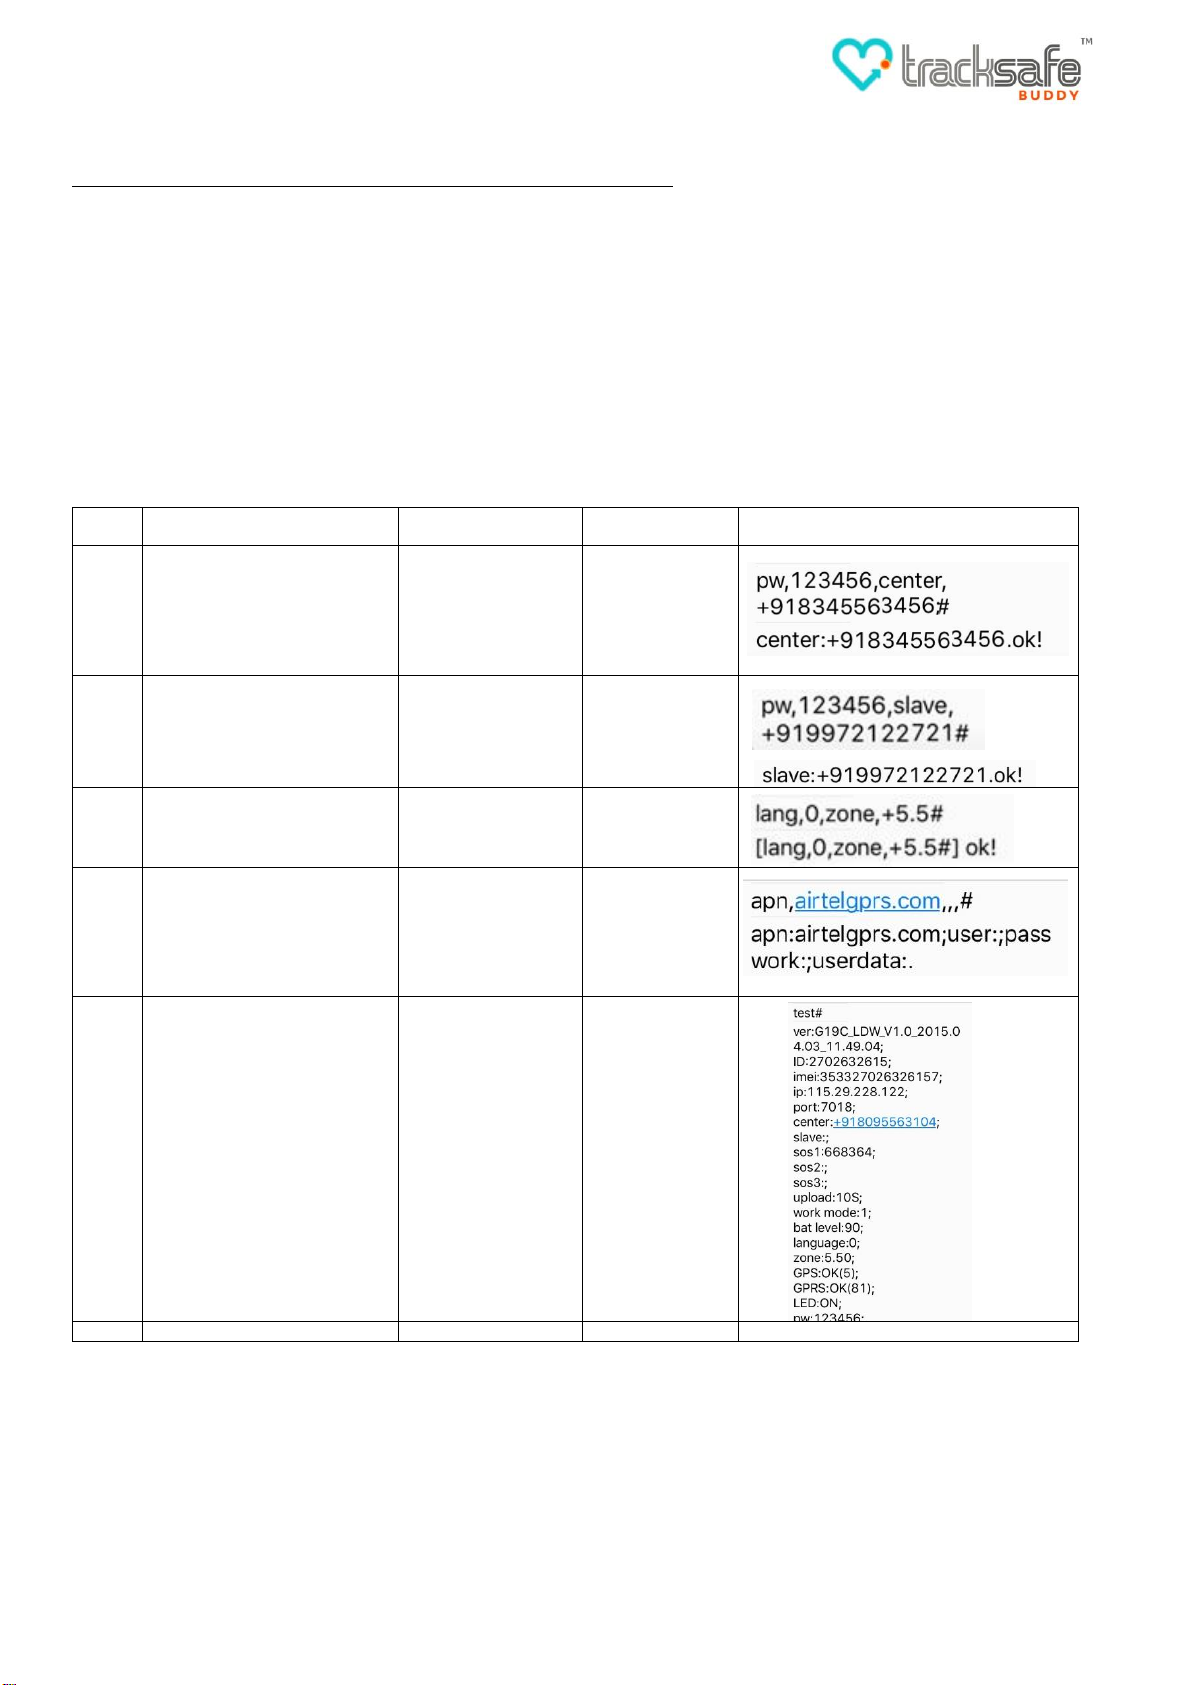
Step
Action
Command (Msg Sent)
Response (Reply
received)
Sample
1
Setting up the admin number
(Primary mobile number that will
be used to control the device,
e.g. Owner of the pet)
pw,123456,center,Ad
minNumber#
center:adminnum
ber.ok!
2
Setting up the alternate admin
number (Secondary mobile
number that will be used to
control the device, e.g. Owner of
the pet)
pw,123456,slave,alte
rnateAdminNumber#
slave:adminnum
ber.ok!
3
Setting time zone to India
lang,0,zone,+5.5#
[lang,0,zone,+5.5#
]ok!
4
Setting up GPRS* based on
carrier. E.g. Airtel been provided
as an example
apn,airtelgprs.com,,,#
Apn:airtelgprs.com
;user:;password:;u
serdata:.
5
Get your User ID and password
test#
You will get
response stating
GPS is ok, GPRS
is ok, LED is on,
ID number
displayed and
password
displayed
6
Tracksafe Buddy Quick Start Guide
1. Get Started
Note: You can ignore points 1.1 - 1.5 if the SIM card comes preinstalled in the device
1.1. Carefully unscrew the back of the Pet tracker to avoid damaging the wiring, you will have to unscrew all 4 screws
1.2. Partially pull the battery out till the Micro Sim slot is visible
1.3. Insert the Micro Sim in the visible slot
1.4. Screw back the 4 screws at the back of the device
1.5. Put the Tracker on the charging dock with the pins aligning with inputs, you will see a blue and amber light blinking alternately indicating that’s
its charging
1.6. Please charge the Pet tracker (Tracksafe Buddy) fully for 2-3 Hours before first use. The Amber and Blue LED indicators will blink alternatively
during charging.
2. Set up your device ( Alongside images for easy understanding)
Note: Set up the device using SMS commands (Response time could be up to 5 minutes depending on the operator network). These commands
have to be sent to the mobile number mapped to the SIM card
*Other GPRS operator commands are listed below for your perusal.
For Airtel – apn,airtelgprs.com,,,#
For Docomo – apn,tata.docomo.internet,,,#
For Idea – apn,imis,,,#
For Vodafone – apn,portalnmms,,,#
For Aircel - apn.aircelgprs.po,,,# (postpaid) and apn,aircelgprs.pr,,,# (Prepaid)
For Videocon – apn,vgprs.com,,,#
For Reliance GSM – apn,smartnet,,,# or apn,rcomwap,,,#, apn,smartwap,,,#
3. Login and Device mapping
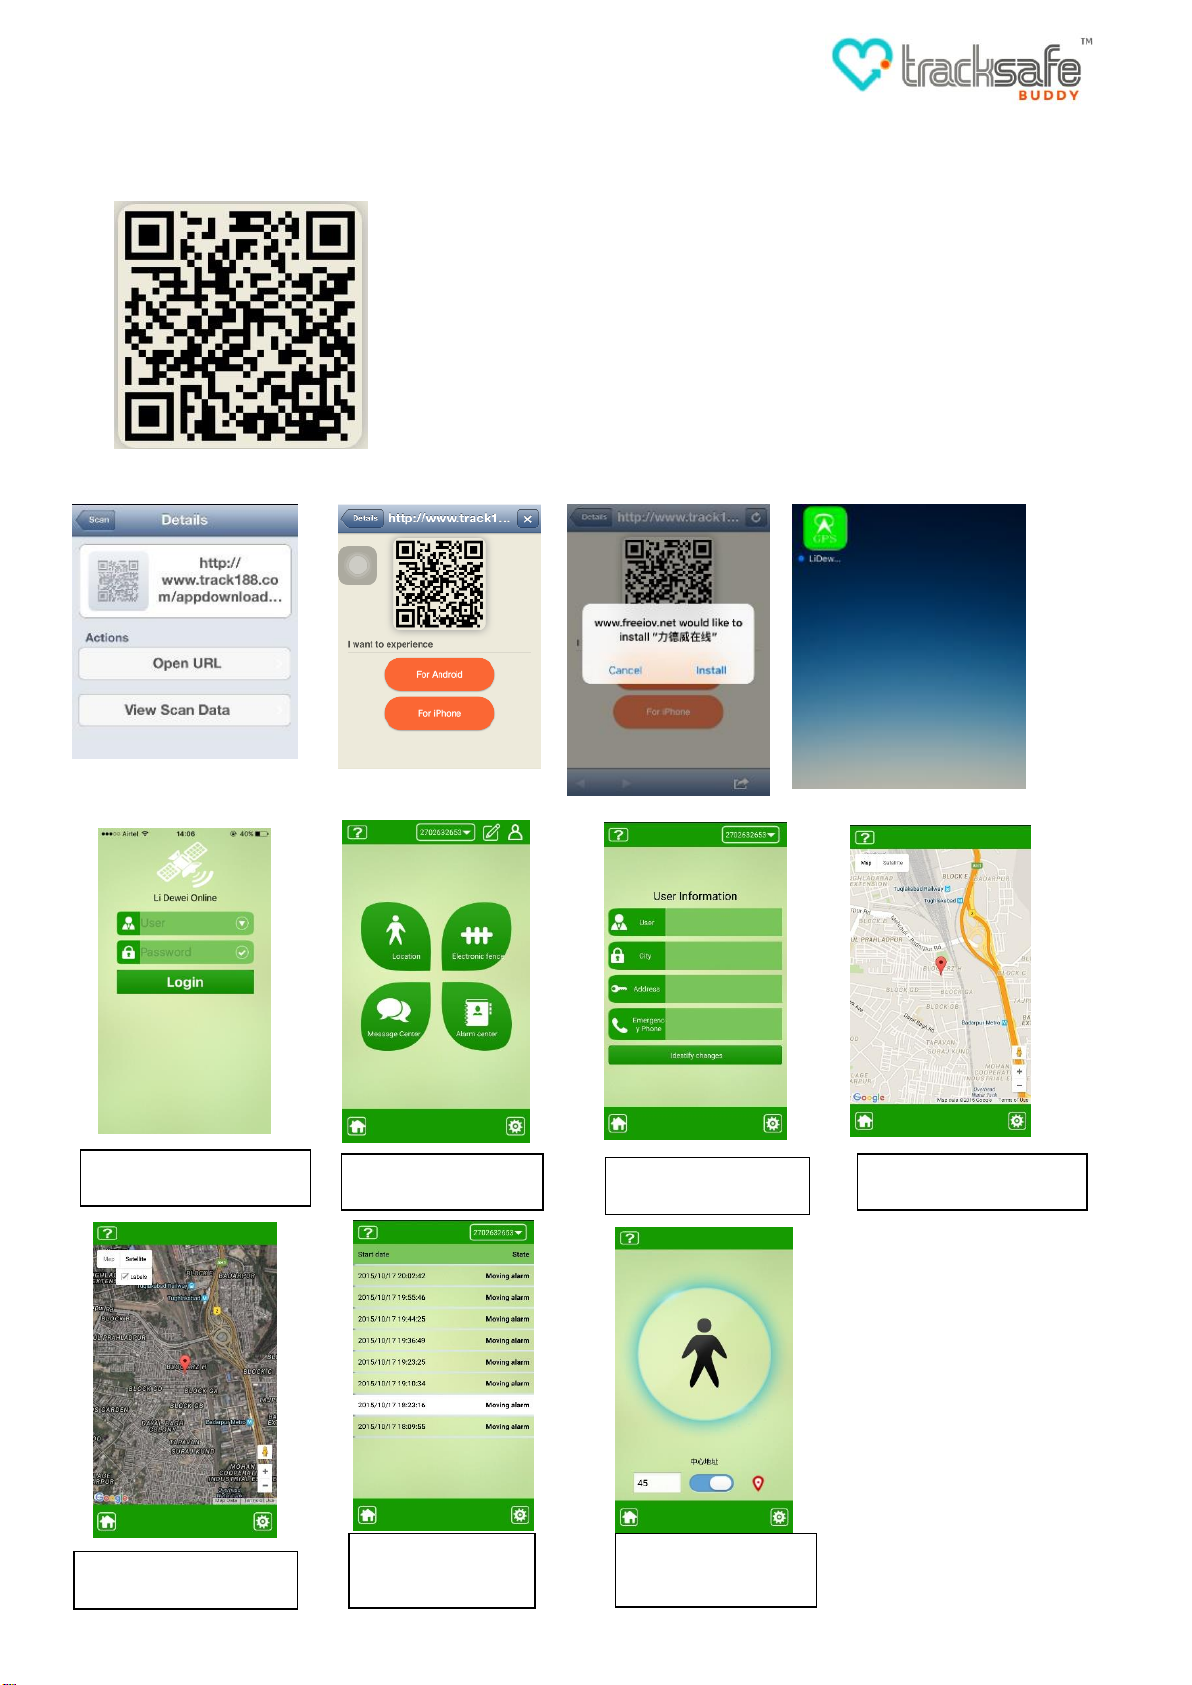
Home page: Shows the
navigation menu
User Info Tab: Top row:
Shows the user info
Message centre tab:
Shows alert SMS
navigation menu
Location tab map view:
Shows different map views
Electronic fence tab:
Shows the safe zone
area set up
Location tab: Shows the
GPS location of the Device
Log in Screen: Log in using
ID and password received
3.1. Scan the QR code provided below or in the booklet and download the application for Android or
iOS
3.2. Follow the steps mentioned in the screen shots below
3.3. Scan the QR code to download iOS and Android mobile applications
 Loading...