

Page 1
TP-8648
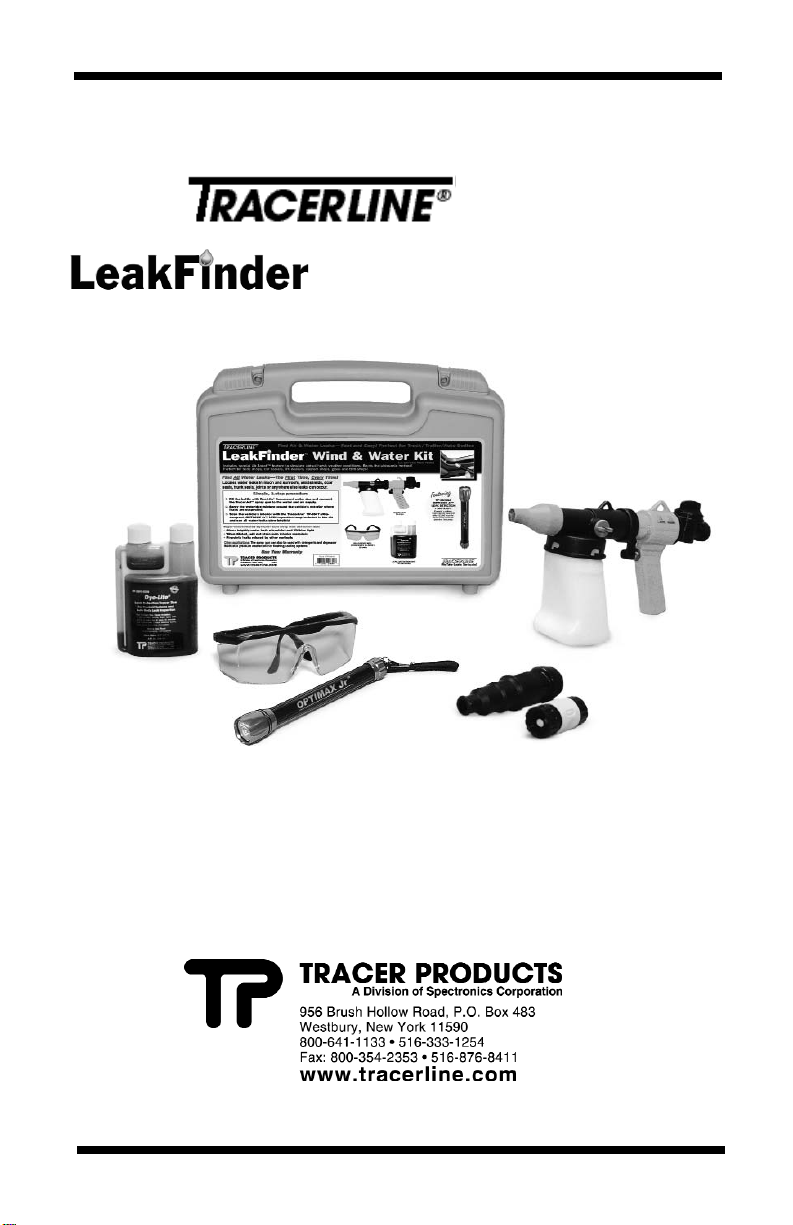
Wind and Water Kit
TM
Manual No. AM06054
Printed in U.S.A. Issued: December 2006
OPERATOR’S MANUAL
English — page 2
French — page 5
Spanish — page 8
German — page 11
Page 2

English
Tracerline®TP-8648
LeakFinder™ Wind and Water Kit
THE LEAK DETECTION KIT CAN BE USED WITH OR WITHOUT THE AIR BOOST™
FEATURE.
• Use the TP-1131 TracerJet™ spray gun to spray the water/dye mixture on the vehicle’s
exterior where a leak is suspected.
• Scan the interior of the vehicle with the TP-8640 OPTIMAX Jr™ inspection lamp to find
leaks.
• Use the spray gun without the Air Boost feature whenever possible. Most leaks will show
without the additional overspray and splashing.
• NOTE: The green-dyed water running off the vehicle will not stain, is nontoxic and
environmentally friendly. Any green color remaining on the work area ground will
disappear as the water evaporates
• Start with a strong water flow until a bright stream of dye shows. Control the water
flow with the water valve. The dye will not draw from the reservoir if the water flow
is too slow.
• The water/dye mixture will become more diluted as the gun is used and the
fluorescence will weaken. If fluorescence seems weak, add fresh dye, 0.25 ounce
(7.4 ml) at a time.
• Diluted dye cleans off with water and will not stain the interior or exterior surfaces of
the vehicle. Dye concentrate may stain. Do not detach or fill the dye reservoir over
materials that may stain.
USING WITHOUT THE AIR-BOOST FEATURE (See Figure 1)—
1. Detach the reservoir bottle from the TracerJet spray gun and fill half full with water.
Add 0.50 ounce (15 ml) Dye-Lite
gun and to the water supply and mix.
2. A medium rate of water flow will provide approximately 5 minutes of use before more
dye must be added. Additional dye can be used without harm if a brighter water
stream is desired.
3. Adjust the water flow with the valve on top of the gun.
4. Start the dye flow with the valve on the side of the gun.
5. Spray the water/dye mixture over the outside of the vehicle where a leak is suspected.
6. Depress the trigger to produce a stronger water/dye stream. This will slightly increase
the fluorescence of the water/dye stream if the flow was too slow.
7. Bring the vehicle inside to provide the darkest environment for leak inspection. The
fluorescence will show best under low light conditions.
8. Inspect the interior of the vehicle with the TP-8640 OPTIMAX Jr
TP-9940 fluorescence-enhancing glasses to protect your eyes and make leaks clearly
visible.
9. Turn OFF the dye flow and use the spray gun to clean the exterior of excess dye.
10. Always discard any dyed water remaining in the bottle and rinse the bottle well
between applications.
START-UP TIPS!
®
TP-3900 fluorescent dye, attach the bottle to the
TM
lamp. Wear the
USING WITH THE AIR-BOOST FEATURE:
If the leaks continue to be elusive, use the Air Boost feature to simulate leaks that may
appear only when the vehicle is traveling at high speed or under harsh weather
conditions. Follow procedures above with these additions.
1. Attach the gun to the water supply and to the air compressor.
2. Use the lock lever on the gun trigger to produce a continuous high-pressure flow.
3. To limit overspray and splashing, reduce the water flow.
2 19
Page 3

PROBLEM SOLVING:
No fluorescence in the water flow.
• Make sure the dye valve is in the ON position.
• Increase the water flow to increase the dye flow.
• To clean a clog from the small end of the gun, run hot water over it or probe the clog
with a fine wire.
• Add 0.25 ounce (7.4 ml) dye at a time to the bottle.
ADDITIONAL USES FOR THE TracerJet™ SPRAY GUN
FLUSH THE COOLING SYSTEM (See Figure 2)—
CAUTION
Extreme care should be taken when flushing
cooling systems in poor condition
• Loosen the retaining collar and twist off the bottle assembly.
• Twist the stepped nozzle into place.
• Remove the thermostat from the system and turn the heater to the ON position.
• Disconnect the lower cooling hose from the engine block.
• Insert the stepped nozzle into the lower hose and secure with a clamp.
• Turn on the water supply.
• With water running, give short, intermittent blasts of air until water runs out clear.
• Reassemble the system and refill with recommended coolant and pressure test for
leaks.
AIR BLOW FUNCTION (See Figure 3)—
• Remove the bottle assembly from the gun.
• Unscrew the tap fitting from the rear of the gun.
• Install the accessory tail fitting.
• Attach to the air compressor.
PRESSURE WASHER—
• Fill the bottle with detergent or degreaser fluids.
• Rinse the bottle well between uses.
Tracerline®TP-8640 OPTIMAX Jr™
Cordless, LED Leak Detection Flashlight
To Operate:
Press the button in the end cap once to turn the lamp on. Press it again to turn the lamp
off. The solid-state LED bulb offers long-lived operation (approximately 100,000 hours).
Batteries are included.
Fast, Easy Leak Detection:
• Add the appropriate fluorescent dye and run the engine or A/C system to circulate. (See
instructions included with dyes.)
• For best results, use the OPTIMAX Jr™ in low-light conditions. Wear the TP-9940
glasses provided to make leaks clearly visible.
• Scan the system with the OPTIMAX Jr. You'll see every leak easily by its bright
fluorescent glow.
Page 4

Cleanup/Reinspection:
After the leaks are repaired, clean the remaining dye from the leak sites with Tracerline
®
GLO-AWAY™ or a shop solvent. Remaining dye could be mistaken for a leak.
Check all areas again with the lamp to make sure no dye remains. Run the system for
another 5 to 10 minutes and reinspect with the OPTIMAX Jr. No glow means that all
leaks have been properly repaired.
To Replace Batteries:
Twist the end cap counterclockwise to open. Insert 3 AA batteries positive end toward the
lamp head and replace the end cap
SPECIFICATIONS:
Complete Kit TP-8648
Includes:
TracerJet™ spray gun TP-1131
Fluorescent water dye TP-3900
Glasses, fluorescence-enhancing TP-9940
Carrying case TP-1142
TracerJet™ Spray Gun TP-1131
Air pressure 80 psi (550 kPa) min;130 psi
(900 kPa) max
Air consumption 13 cfm (380 l/min) @ 100 psi
(688 kPa)
Air connection 1/4 NPT
OPTIMAX Jr™ LED Flashlight TP-8640
Power 3 AA batteries (included)
Fluorescent Water Dye, 8 oz TP-3900-0008
LIMITED WARRANTY
Tracer Products warrants that this product will be free from defects in manufacture.
Tracer Products' obligation under this warranty is limited to repairing or replacing, at the
option of Tracer Products, any part(s) of the product which, if properly installed, used and
maintained, proves upon factory examination to have been defective in material or
workmanship within 12 months from the date of purchase.
This warranty does not apply to any product or part that (1) is normally consumed in
operation or (2) has a normal life inherently shorter than the warranty stated. For example,
bulbs are warranted for 30 days.
This warranty is in place of all other warranties of quality. There are no other warranties
either oral, written, express, implied or statutory. IMPLIED WARRANTIES OF FITNESS
FOR PURPOSE AND MERCHANTABILITY ARE EXCLUDED. This warranty and your
remedies thereunder are solely as stated here. In no event shall Tracer Products be liable
for special, indirect, incidental or consequential damages, nor for any damages arising out
of delay in shipment or production.
NOTE: For assistance of any kind, contact the Customer Service Department at Tracer
Products at 1-800-641-1133. Outside the United States call 516-333-1254.
Retain this information for your record.
Date of Purchase ________________________________
4 17
Page 5

French
Tracerline®TP-8648
Kit de détection de fuites
LeakFinder™ pour carrosserie
LE KIT DE DÉTECTION DE FUITES PEUT ÊTRE UTILISE AVEC OU SANS LA
CARACTÉRISTIQUE AIR BOOST™
• Utilisez le TracerJet™ pistolet TP-1131 afin de vaporiser le mélange d'eau et de colorant
sur les parties extérieures du véhicule là où une fuite est suspectée.
• Balayez l'intérieur du véhicule avec la lampe d'inspection TP-8640 OPTIMAX Jr™ afin
de rechercher des fuites.
• Utilisez autant que possible le pistolet sans la caractéristique Air Boost™. La majorité
des fuites apparaîtra sans devoir répandre trop de mélange.
• REMARQUE: L’eau contenant du colorant vert qui s’écoule du véhicule ne tachera
pas, n’est pas toxique et ne nuira pas l’environnement. Toute couleur verte
demeurant au sol dans la zone de travail disparaîtra lorsque l’eau s’évaporera.
UTILISATION SANS LA CARACTÉRISTIQUE AIR-BOOST (voir figure 1)––
1. Détachez la bouteille du pistolet TracerJet et remplissez-la à moitié avec de l’eau.
Ajoutez 15 ml de colorant fluorescent Dye-Lite
®
TP-3900, fixez la bouteille au pistolet
et à l’alimentation d’eau puis mélangez.
2. Un débit d’eau modéré vous donnera environ 5 minutes d’utilisation avant de devoir
rajouter du colorant. Vous pouvez rajouter du colorant sans danger si vous désirez
obtenir un flux d’eau plus clair.
3. Réglez le débit d’eau en utilisant le robinet situé sur le dessus du pistolet.
4. Libérez le débit du colorant avec la vanne sur le côté du pistolet.
5. Vaporisez le mélange d'eau et de colorant en direction de l'extérieur du véhicule à
l'emplacement supposé d'une fuite.
6. Appuyez sur la détente pour augmenter la puissance du jet d'eau et de colorant. Ceci
augmentera légèrement la fluorescence du jet si le débit en était trop faible.
7. Amenez le véhicule à l'intérieur afin d'obtenir un environnement le plus sombre
possible pour faciliter la détection des fuites. La fluorescence reste plus visible avec
un éclairement faible.
8. Inspectez l'intérieur du véhicule avec la lampe TP-8640 OPTIMAX Jr™. Portez les
lunettes TP-9940 améliorant la fluorescence pour protéger vos yeux et rendre
clairement visibles les fuites.
9. Arrêtez (OFF) le débit du colorant et utilisez le pistolet de pulvérisation pour nettoyer
l'extérieur de l'excédent de colorant.
10. Veillez à toujours jeter toute eau restante de la bouteille contenant du colorant et
rincez complètement la bouteille entre chaque utilisation.
CONSEILS DE DÉMARRAGE!
• Démarrez avec un débit d'eau puissant jusqu'à ce que le jet présente une couleur
brillante. Réglez le débit d'eau avec la valve à cet effet. Le colorant ne quittera pas
le réservoir si le débit d'eau est trop faible.
• Le mélange d'eau et de colorant deviendra plus dilué au fur et à mesure que le
pistolet est utilisé et la fluorescence ira en s'amenuisant. Si la fluorescence diminue,
ajoutez 7,4 ml de colorant neuf à chaque fois.
• Le colorant s'affadit s'il est dilué dans l'eau et ne marquera pas les surfaces
intérieures et extérieures du véhicule. Le colorant concentré risque de tacher. Ne
détachez pas ou ne remplacez pas le réservoir de colorant au-dessus de matériaux
qui pourraient être tachés.
5
Page 6
UTILISATION AVEC LA CARACTÉRISTIQUE AIR-BOOST :
Si les fuites continuent à être difficiles à repérer, utilisez la caractéristique Air-Boost pour
simuler des fuites qui n'apparaissent que si le véhicule est en déplacement à grande
vitesse ou dans des conditions climatiques rigoureuses. Suivez les procédures ci-dessus
en ajoutant celles qui suivent :
1. Attachez le pistolet à l'alimentation en eau et au compresseur d'air.
2. Utilisez le levier de verrouillage sur la gâchette des pistolets afin de produire un
débitcontinu à haute pression.
3. Pour limiter les éclaboussures et l'accès de vaporisation, diminuez le débit d'eau.
RÉSOLUTION DES PROBLÈMES:
Absence de fluorescence dans le débit d'eau.
• Assurez-vous que la valve de colorant se trouve sur la position MARCHE (ON).
• Augmentez le débit d'eau afin d'augmenter le débit de colorant.
• Pour nettoyer un colmatage sur la petite extrémité du pistolet, faites-y passer un courant
d'eau chaude ou introduisez un fil de fer fin pour déloger le colmatage.
• Ajoutez 7.4 ml de colorant à chaque fois à la bouteille.
UTILISATIONS COMPLÉMENTAIRES DU
TracerJet™ PISTOLET DE VAPORISATION
RINÇAGE DU SYSTÈME DE REFROIDISSEMENT (voir figure 2)––
Toutes les précautions doivent être prises lors du rinçage des circuits
de refroidissement dans de mauvaises conditions
• Desserrez le collier de retenue et faites tourner la bouteille.
• Faites tourner la buse en place.
• Démontez le thermostat du système et mettez le chauffage sur la position
MARCHE (ON)
• Déconnectez la tuyauterie inférieure de refroidissement du bloc moteur.
• Insérez la buse dans la tuyauterie inférieure et serrez-la avec un serre-joint.
• Ouvrez l'alimentation d'eau.
• Pendant que l'eau s'écoule, introduisez brièvement et par intermittence des jets d'air
jusqu'à ce que l'eau revienne claire.
• Remontez le système, remplissez-le avec le liquide de refroidissement recommandé
et effectuez un test de pression à la recherche de fuites.
FONCTION DE SOUFFLAGE D'AIR (voir figure 3)––
• Démontez la bouteille du pistolet.
• Dévissez le raccord de robinet à l'arrière du pistolet.
• Installez l'accessoire de raccordement arrière.
• Vissez-le au compresseur d'air.
NETTOYEUR HAUTE PRESSION
• Remplissez la bouteille avec du détergent ou du dégraissant.
• Rincez parfaitement la bouteille entre utilisations.
ATTENTION
6 15
Page 7

Tracerline®TP-8640 OPTIMAX Jr™
Lampe de poche DEL de
détection de fuites
Utilisation:
Pressez le bouton situé au bout de la lampe pour l'allumer. Pressez à nouveau le bouton
pour éteindre la lampe. L'ampoule à diode luminescente offre une longue durée de
service (environ 100 000 heures). Les piles ne sont pas fournies.
Pour détecter les fuites facilement et rapidement :
• Ajoutez le colorant fluorescent recommandé au système et faites fonctionner le moteur
ou la climatisation afin de faire circuler le colorant. (Consultez les instructions fournies
avec le colorant.)
• Pour mieux détecter les fuites, utilisez la lampe OPTIMAX Jr™ sous un faible éclairage.
Portez les lunettes révélatrices TP-9940 qui sont fournies afin de voir clairement les
fuites.
• Balayez le circuit avec la lampe OPTIMAX Jr. Les fuites apparaîtront sous forme d'une
fluorescence brillante.
Nettoyage et nouvelle inspection:
Après avoir réparé les fuites, nettoyez les traces de colorant avec le nettoyant
GLO-AWAY™ de Tracerline
®
ou tout autre nettoyant pour atelier. Les résidus de colorant
peuvent indiquer une fuite inexistante. Procédez à une nouvelle vérification avec la lampe
afin de vous assurer que toutes les traces de colorant ont bien été nettoyées. Les résidus
de colorant peuvent indiquer une fuite inexistante. Faites fonctionner le système pendant
5 à 10 minutes de plus et inspectez à nouveau avec la lampe OPTIMAX Jr. L'absence de
fluorescence signifie que toutes les fuites ont été réparées.
Pour remplacer les piles :
Tournez l'embout inférieur de la lampe dans le sens inverse à celui des aiguilles d'une
montre pour ouvrir. Insérez 3 piles AA avec le côté positif vers la tête de la lampe et
remettez en place l'embout.
SPÉCIFICATIONS
Kit complet TP-8648
Comprend:
TracerJet™ pistolet pulvérisateur TP-1131
Colorant fluorescent à l'eau TP-3900
Lunettes améliorant la fluorescence TP-9940
Boîtier de transport TP-1142
TracerJet™ pistolet pulvérisateur TP-1131
Pression d'air 80 psi (550 kPa) minimum;
130 psi (900 kPa) maximum
Consommation d'air 380 l/min
Connecteur d'air 1/4 NPT
Lampe d'inspection OPTIMAX Jr™ TP-8640
Alimentée 3 piles AA (fournies)
Colorant fluorescent à l'eau, 23 ml TP-3900-0008
GARANTIE LIMITEE
Tracer Products garantit que ce produit est indemne de défauts de fabrication.
L'obligation de Tracer Products au titre de cette garantie est limitée à la réparation ou
au remplacement, à sa convenance, de n'importe quelle pièce du produit qui, si il est
correctement installé, utilisé et entretenu, s'avère à la suite d'un examen en usine, être
défectueux au niveau du matériel ou au niveau de la main-d'oeuvre, dans les 12 mois
7
Page 8

suivant la date d'achat.
Cette garantie ne s'applique à aucun produit ou pièce dont (1) le fonctionnement
provoque une usure normale ou dont (2) la durée normale d'utilisation est plus courte que
ne le stipule la garantie. Par exemple, les ampoules et les filtres sont garantis pendant 30
jours.
Cette garantie remplace toute autre garantie de qualité. Il n'existe aucune autre
garantie, orale ou écrite, explicite, implicite ou d'origine légale. TOUTE GARANTIE
D'ADÉQUATION À UN OBJECTIF ET DE QUALITÉ MARCHANDE EST EXCLUE. Cette
garantie et les remèdes sont tels qu'ils sont explicités ici. En aucun cas Tracer Products
ne pourra être tenu pour responsable de dommages spéciaux, indirects, connexes ou
corrélatifs.
REMARQUE: Pour toute assistance, contacter le service à la clientèle chez Tracer
Products au 1-800-641-1133. En dehors des États-Unis, composer le 516-333-1254.
Conserver ces informations en archives et prendre note de la date d'achat.
Date d'achat ________________________________
Spanish
Tracerline®TP-8648
Juego de Detector de Fugas en la Carrocería,
LeakFinder
EL JUEGO DE DETECTOR DE FUGAS PUEDE USARSE CON EL MECANISMO DE
REFUERZO DE AIRE AIR BOOSTTMO SIN EL.
• Ese la TracerJet™ pistola TP-1131 para rociar la mezcla de tintura y agua sobre el
exterior del vehículo en la zona donde se sospecha que existe una fuga.
• Examine el interior del vehículo con la lámpara de inspección de rayos ultravioleta
TP-8640 OPTIMAX Jr
• En cuanto sea posible, use la pistola sin el mecanismo de refuerzo de aire Air Boost.
La mayoría de las fugas puede detectarse sin el flujo de rocío adicional del refuerzo
de aire y el desorden consiguiente.
• NOTA: El agua verdosa que escurre del vehículo no es tóxica, ni mancha, ni
afecta el medio ambiente. El color verdoso que quede en el piso del área de
trabajo desaparecerá a medida que el agua se evapore.
TM
para buscar las fugas.
TM
• Comience con un flujo fuerte de agua hasta que note la corriente brillante que indica
el comienzo de la salida de la tintura. Controle el flujo de agua con la válvula del
agua. La tintura no fluirá de su reservorio si la corriente de agua es demasiado lenta.
• La mezcla de agua y tintura disminuye su concentración a medida que la pistola se
usa y la fluorescencia se va debilitando. Si la florescencia parece débil, añada tintura
fresca, 7,4 ml, cada vez que sea necesario.
• La tintura diluida se puede limpiar con agua y no mancha las superficies interiores o
exteriores del vehículo, pero la tintura concentrada puede mancharlas. No desmonte
ni llene el reservorio de tintura sobre materiales que puedan mancharse.
• Si la florescencia parece débil, añada tintura fresca, 7,4 ml, cada vez que sea
necesario.
SUGERENCIAS PARA COMENZAR!
8 13
Page 9

USO DE LA PISTOLA SIN EL MECANISMO DE REFUERZO DE AIRE
(Vea la Figura 1)––
1. Desconecte la botella del cañón de rocío TracerJet y llénela con agua hasta la mitad.
Agregue 15 ml de tintura fluorescente Dye-Lite
®
TP-3900, conecte la botella al cañón
y, luego, al suministro de agua y agite la mezcla en la botella.
2. Con un flujo mediano de agua el cañón podrá usarse aproximadamente por 5 minutos
antes de que sea necesario añadir más tintura. Puede usarse tintura adicional, sin
que cause daño, si se desea un chorro de agua con mayor fluorescencia.
3. Ajuste el flujo de agua con la válvula que se encuentra encima del cañón.
4. Inicie el flujo de la tintura controlándolo con la válvula que se encuentra en el costado
de la pistola.
5. Rocíe la mezcla de agua y tintura sobre el exterior del vehículo en la zona donde se
sospecha que hay fugas.
6. Oprima el gatillo para producir un flujo más fuerte de la mezcla agua-tintura. Con esto
se aumenta ligeramente la fluorescencia de la corriente agua-tintura, en caso de que
el flujo no fuera lo suficientemente rápido.
7. Lleve el vehículo al interior de un recinto para que el ambiente oscuro facilite la
detección de las fugas. La fluorescencia se observa mejor en condiciones de poca luz.
8. Inspeccione el interior del vehículo con la lámpara TP-8640 OPTIMAX Jr
TM
. Use gafas
TP-9940 las que realzan la fluorescencia, protegen los ojos y hacen claramente
visibles las fugas.
9. Cierre—OFF—el flujo de tintura y use las corriente de agua le la pistola para limpiar
del exterior del vehículo el exceso de tintura.
10. Descarte siempre cualquier cantidad de agua con tintura que quede en la botella y
enjuague bien la botella después de cada aplicación.
USO DEL REFUERZO DE AIRE:
Si las fugas continúan siendo difíciles de identificar, use la característica de Refuerzo
de Aire—Air Boost—para simular fugas que solo aparecen cuando el vehículo marcha a
alta velocidad o bajo severas condiciones climáticas. Siga los procedimientos indicados
arriba, agregando los siguientes pasos:
1. Conecte la pistola tanto al suministro de agua como al compresor de aire.
2. Use la palanca de cierre para mantener el gatillo de la pistola produciendo un flujo
continuo de alta presión.
3. Para evitar el demasiado rocío y el salpique del líquido, reduzca el flujo de agua.
RESOLUCION DE PROBLEMAS:
No hay fluorescencia en el flujo de agua.
• Verifique que la válvula de la tintura está en la posición ON—posición de flujo.
• Aumente el flujo del agua para aumentar el flujo de tintura.
• Para limpiar cualquier obstrucción en la boquilla de la pistola, lave la boquilla con agua
caliente o trate de destaparla con un alambre fino.
• Agregue 7,4 ml de tintura cada vez que agregue tintura a la botella.
OTROS USOS DE LA TracerJet PISTOLA DE ROCIO
LAVADO DEL SISTEMA DE ENFRIAMIENTO (Vea la Figura 2)––
PRECAUCION
Tenga un extremado cuidado cuando esté lavando sistemas de enfriamiento
que se encuentren en malas condiciones.
Page 10

• Afloje el collar de retención y desmonte el conjunto de la botella, girándolo.
• Coloque la boquilla escalonada, atornillándola en su lugar.
• Remueva el termostato del sistema y gire el control del calentador a la posición
ON –encendido.
• Desconecte del bloque del motor la manguera inferior de enfriamiento.
• Inserte la boquilla escalonada en la manguera inferior y asegúrela con una abrazadera.
• Abra el suministro de agua.
• Con el agua fluyendo, dé golpes de aire, cortos e intermitentes, hasta que el agua fluya
limpia.
• Vuelva a armar el sistema, llénelo con el líquido de enfriamiento recomendado y
póngalo a la presión necesaria para probar las fugas.
SOPLADOR DE AIRE (Vea la Figura 3)––
• Quite de la pistola el conjunto de la botella.
• Destornille el accesorio de macho de rosca de la parte trasera de la pistola.
• Instale el accesorio de cola.
• Conecte la pistola al compresor de aire.
PISTOLA PARA LAVADO A PRESION
• Llene la botella con el detergente o el líquido para desengrasar.
• Lave bien la botella cuando termine de usarla.
Tracerline®TP8640 OPTIMAX Jr™
Linterna LED sin cable para detección de fugas
Uso de la linterna:
Para encender la linterna, oprima una vez el botón en el extremo de la linterna. Para
apagarla, oprima el botón nuevamente. La bombilla de estado sólido LED –– diodos
emisores de luz –– le ofrece una larga vida útil de funcionamiento (aproximadamente
100,000 horas). Las pilas vienen incluidas.
Detección de fugas fácil y rápida:
• Agregue la cantidad de tintura fluorescente apropiada, al motor, al sistema de
calefacción o al de aire acondicionado y haga funcionar la unidad para que el líquido
circule. (Observe las instrucciones que se incluyen con las tinturas.)
• Para obtener los mejores resultados use la linterna OPTIMAX Jr
TM
en condiciones de
poca luz. Use las gafas TP-9940, que se incluyen, para hacer las fugas más claramente
visibles.
• Examine el sistema con la linterna OPTIMAX Jr. Usted verá cada una de las fugas
fácilmente con un brillante resplandor fluorescente.
Limpieza e inspección final:
Una vez que haya reparado las fugas, limpie los residuos de tintura que hayan quedado
en los lugares de fuga usando Tracerline
®
Glo-AwayTMo un limpiador de taller. Los
residuos de tintura pueden crear una falsa indicación de fuga. Vuelva a inspeccionar con
la linterna OPTIMAX Jr para asegurarse de que todo residuo de tintura ha sido removido.
Haga funcionar el sistema por unos cinco a diez minutos y vuelva a examinarlo con la
linterna OPTIMAX JR. Si no observa resplandores, esto indica que todas las fugas se han
reparado.
Reemplazo de las pilas:
Gire la tapa del extremo de la linterna en la dirección contraria a las manecillas del reloj
para abrir la linterna. Introduzca tres pilas AA, con el extremo positivo hacia el frente de la
linterna, y vuelva colocar tapa del extremo.
10 11
Page 11

ESPECIFICACIONES
Juego completo TP-8648
Incluye:
TracerJet™ pistola de rocío TP-1131
Tintura de agua fluorescente TP-3900
Gafas de realce de fluorescencia TP-9940
Estuche de transporte TP-1142
Tracer Jet pistola de rocío TP-1131
Presión de aire 80 psi (lbs./pulg.2) (550 kPa) mínima;
130 psi (lbs./pulg.2) (900 kPa) máxima
Consumo de aire 380 l/min a 100 psi (lbs./pulg.2) (688 kPa)
Conexión de aire 1/4 NPT
Lámpara de inspección OPTIMAX Jr
TM
TP-8640
Energía 3 pilas AA (incluídas)
Tintura de agua fluorescente, 23 ml TP-3900-0008
GARANTIA LIMITADA
Tracer Products garantiza que este producto estará libre de defectos de fabricación.
La obligación de Tracer Products bajo esta garantía está limitada a reparar o
reemplazar, a opción de Tracer Products, cualquier parte o partes del producto que
debidamente instaladas, usadas y mantenidas muestren, al hacer un examen de fábrica,
que su material o mano de obra resultaron defectuosos dentro de los doce (12) meses a
partir de la fecha de la compra.
Esta garantía no se aplica a cualquier parte del producto que (1) normalmente se
consume durante la operación o (2) tiene una vida útil normal inherentemente más corta
que el período de garantía. Por ejemplo, bombilla y filtros están garantizados solamente
por 30 días.
Esta garantía reemplaza cualquier otra garantía de calidad. No existen otras
garantías, orales, escritas, expresas, implícitas o reglamentarias. LAS GARANTIAS
IMPLICITAS DE MERCANTILIBILDAD O FUNCIONALIDAD PARA UN CIERTO
PROPOSITO ESTAN EXCLUIDAS. Esta garantía y los remedios o satisfacción que
ofrece están descritos únicamente aquí. Por ningún motivo Tracer Products se hará
responsable por daños especiales, indirectos, incidentales o consecuenciales.
NOTA: Para obtener asistencia de cualquier clase, sírvase ponerse en contacto con el
Departamento de Servicio al Cliente de Tracer Products. llamando al teléfono libre de
cargo 1- 800-641-1133. Si está fuera de los Estados Unidos, llame al 516-333-1254.
Guarde esta información para sus archivos y anote la fecha en que realizó la compra.
Fecha de Compra ___________________________________
German
Tracerline®TP-8648
Karosserie LeakFinder™-Set
DAS LECKORTUNGSSET KANN MIT ODER OHNE AIR BOOST™-EINRICHTUNG
BENUTZT WERDEN.
• Sprühen Sie die Wasser-Farbstoff-Mischung mit der TP-1131 TracerJet™ Pistole auf
die äußere Seite des Fahrzeugs, wo Sie ein Leck vermuten.
• Suchen Sie die Innenseite des Fahrzeugs mit der TP-8640 OPTIMAX Jr™
Inspektionslampe ab, um Lecks zu finden.
• Verwenden Sie die Pistole wenn möglich ohne Air Boost-Einrichtung. Die meisten Lecks
lassen sich ohne zusätzliches Übersprühen und zusätzliche Verschmutzung finden.
Page 12

• HINWEIS: Das grüngefärbte Wasser, das vom Fahrzeug herunterläuft, hinterlässt
keine Flecken, ist nicht giftig und ist umweltfreundlich. Grüne Farbe, die auf der
Arbeitsfläche zurück bleibt, verschwindet, sobald das Wasser verdampft.
• Beginnen Sie mit starkem Wasserfluss, bis ein heller Farbstofffluss sichtbar wird.
START-TIPPS!
Regeln Sie den Wasserfluss mit dem Wasserventil. Wenn der Wasserfluss zu gering
ist, wird kein Farbstoff aus dem Behälter gezogen.
• Die Wasser-Farbstoff-Mischung wird mit längerer Benutzung der Pistole wässriger
und die Fluoreszenz nimmt ab. Wenn die Fluoreszenz schwach erscheint, geben Sie
jeweils 7,4 ml frischen Farbstoff hinzu.
• Verdünnter Farbstoff lässt sich mit Wasser abwischen und hinterlässt keine Flecken
auf den Oberflächen der Innen- und Außenseite des Fahrzeugs. Farbstoffkonzentrat
kann Flecken hinterlassen. Sie sollten deshalb den Farbstoffbehälter nicht über
Material abnehmen oder auffüllen, auf dem Flecken hinterlassen werden könnten.
VERWENDUNG OHNE DIE AIR BOOST-EINRICHTUNG (siehe Abbildung 1)—
1. Nehmen Sie die Reservoirflasche von der TracerJet Spritzpistole ab und füllen Sie sie
halb voll mit Wasser. Fügen Sie 15 ml Dye-Lite
®
TP-3900 fluoreszierenden Farbstoff,
bringen Sie die Flasche an der Pistole und der Wasserzufuhr an und mischen Sie.
2. Bei mittlerem Wasserstrom können Sie die Pistole ungefähr 5 Minuten anwenden,
bevor mehr Farbstoff zugegeben werden muss. Darüber hinaus kann problemlos
mehr Farbstoff verwendet werden, wenn Sie einen helleren Wasserstrom wünschen.
3. Regeln Sie den Wasserstrom mit dem Ventil oben auf der Pistole.
4. Starten Sie den Farbstofffluss mit dem Ventil an der Seite der Pistole.
5. Sprühen Sie die Wasser-Farbstoff-Mischung über die Außenseite des Fahrzeugs, wo
Sie ein Leck vermuten.
6. Drücken Sie auf den Abzug, um einen stärkeren Wasser-Farbstofffluss zu erzielen.
Dies führt zu einer geringen Erhöhung der Fluoreszenz des Wasser-Farbstoffstroms,
wenn der Fluss zu gering war.
7. Bringen Sie das Fahrzeug nach drinnen, damit Sie das dunkelste Umfeld für die
Leckortung haben. Die Fluoreszenz zeigt sich am Besten bei schwachen
Lichtverhältnissen.
8. Inspizieren Sie das Innere des Fahrzeugs mit der TP-8640 OPTIMAX Jr
TM
Lampe.
Tragen Sie dabei die TP-9940 fluoreszenzverstärkende Brille, um Ihre Augen zu
schützen und Lecks deutlich sichtbar zu machen.
9. Schalten Sie den Farbstofffluss ab und benutzen Sie die Sprühpistole, um die
Außenseiten von überschüssigem Farbstoff zu reinigen.
10. Leeren Sie die Flasche immer völlig von Farbstoffwasserresten und waschen Sie die
Flasche nach jeder Anwendung gründlich aus.
VERWENDUNG MIT DER AIR BOOST-EINRICHTUNG:
Wenn Sie die Lecks immer noch nicht gefunden haben, verwenden Sie die Air
Boost-Einrichtung zur Simulation von Lecks, die u.U. nur dann sichtbar werden, wenn
das Fahrzeug mit hoher Geschwindigkeit gefahren wird oder bei rauhen
Witterungsverhältnissen. Befolgen Sie die oben angegebene Vorgehensweise mit diesen
zusätzlichen Schritten:
1. Befestigen Sie die Pistole an die Wasserzufuhr und an den Luftkompressor.
2. Benutzen Sie den Schließhaken am Abzug der Pistole, um einen kontinuierlichen
Hochdruckfluss zu erzeugen.
3. Verringern Sie den Wasserstrom, um Übersprühen und Spritzen zu vermeiden.
12 9
Page 13

PROBLEMLÖSUNGEN:
Keine Fluoreszenz im Wasserstrom.
• Vergewissern Sie sich, dass sich das Farbstoffventil in der EIN-Position (ON) befindet.
• Erhöhen Sie den Wasserfluss, um den Farbstofffluss zu verstärken.
• Um eine Verstopfung am kleinen Ende der Pistole zu beseitigen, lassen Sie heißes
Wasser darüber laufen oder stechen Sie die Verstopfung mit einem feinen Draht durch.
• Geben Sie jeweils 7,4 ml Farbstoff in die Flasche.
ZUSÄTZLICHE VERWENDUNGSMÖGLICHKEITEN
FÜR DIE TracerJet™ SPRÜHPISTOLE.
SPÜLUNG DES KÜHLSYSTEMS (siehe Abbildung 2) ––
VORSICHT
Beim Spülen von Kühlsystemen, die sich in schlechtem
Zustand befinden, sollten Sie äußerst vorsichtig sein!
• Lösen Sie den Haltering und drehen Sie die Flaschenteile ab. Drehen Sie die gestufte
Düse an die richtige Stelle.
• Entnehmen Sie das Thermostat vom System und drehen Sie das Heizgerät in die
EIN-Position (ON).
• Trennen Sie den unteren Kühlschlauch vom Motorblock.
• Setzen Sie die gestufte Düse in den unteren Schlauch und sichern Sie sie mit einer
Klammer.
• Starten Sie die Wasserzufuhr.
• Geben Sie bei laufendem Wasser kurze, unterbrochene Luftstöße, bis das Wasser klar
herausläuft.
• Bauen Sie das System wieder zusammen und füllen Sie es mit dem empfohlenen
Kühlmittel und führen Sie Drucktests für Lecks durch.
LUFTBLASFUNKTION (siehe Abbildung 3)—
• Entnehmen Sie die Flaschenteile von der Pistole.
• Schrauben Sie das Hahnanschlussstück hinten an der Pistole ab.
• Bringen Sie das Endanschlussstück (Zubehörteil) an.
• Verbinden Sie es mit dem Luftkompressor.
DRUCKWASCHANLAGE—
• Füllen Sie die Flasche mit Reinigungsmittel oder Entfettungsflüssigkeit.
• Spülen Sie die Flasche nach jeder Verwendung gut aus.
Tracerline®TP-8640 OPTIMAX Jr™
Kabellose LED-Leckortungstaschenlampe
Betriebshinweise:
Betätigen Sie den Schalter in der Bodenkappe der Lampe einmal, um diese
einzuschalten. Betätigen Sie diesen erneut, um die Lampe auszuschalten. Die voll
transistorisierte LED-Birne hat eine lange Betriebsdauer im Betrieb (etwa 100,000
Stunden). Batterien sind im Lieferumfang enthalten.
Page 14

Rasche, einfache Leckortung:
• Fügen Sie dem Motor bzw. der Klimaanlage den passenden fluoreszierenden Farbstoff
hinzu und lassen Sie das System laufen, um diesen darin zu zirkulieren. (Näheres finden
Sie in den Anleitungen, die den Farbstoffen beiliegen.)
• Um beste Ergebnisse zu erzielen, verwenden Sie die OPTIMAX Jr™ in gedämpften
Lichtverhältnissen. Wenn Sie die mitgelieferte Brille TP-9940 aufsetzen werden Lecks
klar sichtbar.
• Prüfen Sie das System mit der OPTIMAX Jr genauestens. Aufgrund des hellen
fluoreszierenden Leuchtens erkennen Sie jedes Leck recht einfach.
Gründliche Reinigung / erneute Inspektion:
Reinigen Sie, nachdem die Lecks repariert sind, die Leckorte mit Hilfe von Tracerline
®
GLO-AWAY™ oder einem Werkstattreinigungsmittel gründlich von verbliebenem
Farbstoff. Verbliebener Farbstoff könnte sonst für ein Leck gehalten werden. Prüfen Sie
alle Bereiche nochmals mit Hilfe der Lampe, um sicherzustellen, dass kein Farbstoff
zurückgeblieben ist. Lassen Sie das System nochmals für 5 bis 10 Minute laufen und
untersuche Sie es anschließend erneut mit der OPTIMAX Jr. Sofern kein Leuchten mehr
auftritt, sind alle Lecks ordnungsgemäß repariert worden.
Austauschen der Batterien:
Drehen Sie die Bodenkappe zum Öffnen entgegen dem Uhrzeigersinn. Legen Sie 3 AABatterien mit dem Plus-Pol zum Lampenkopf hin ein und schrauben Sie die Bodenkappe
wieder auf.
SPEZIFIKATIONEN:
Vollständiges Set TP-8648
enthält:
TracerJet™ Sprühpistole TP-1131
Fluoreszierender Wasser-Farbstoff TP-3900
Brille, fluoreszenzverstärkend TP-9940
Tragetasche TP-1142
Tracerjet™ Sprühpistole TP-1131
Luftdruck 80 psi (550 kPa) min.;
130 psi (900 kPa) max.
Luftverbrauch 380 l/min bei 100 psi (688 kPa)
Luftanschluss 1/4 NPT
OPTIMAX Jr™ Inspektionslampe TP-8640
Power 3 AA-Batterien (mit inbegriffen)
Fluoreszierender Wasser-Farbstoff, 23 ml TP-3900-0008
BEGRENZTE GARANTIE
Tracer Products gewährleistet, dass dieses Produkt frei von Fabrikationsfehlern ist.
Die Verpflichtung von Tracer Products im Sinne dieser Garantie beschränkt sich auf
die Reparatur oder den Ersatz (dies entscheidet Tracer Products) aller Teile des
Produkts, die sich innerhalb von 12 Monaten nach dem Kaufdatum bei der Prüfung im
Werk als fehlerhaft in Bezug auf Material oder Arbeit herausstellen und ordnungsgemäß
installiert, verwendet und gewartet wurden.
Diese Garantie erstreckt sich nicht auf Produkte oder Teile, die (1) normalem
Verbrauch während des Betriebs unterliegen oder (2) eine normale Lebensdauer haben,
die kürzer alsdie genannte Garantie ist. Die Garantie für Birnen und Filter beträgt
beispielsweise 30 Tage.
Diese Garantie gilt an Stelle aller anderen Qualitätsgarantien. Es gibt keine anderen,
weder mündlichen, schriftlichen, ausdrücklichen, implizierten noch gesetzlichen Garantien.
14
Page 15

IMPLIZIERTE GEWÄHRLEISTUNGEN DER EIGNUNG FÜR EINEN BESTIMMTEN
ZWECK UND GEWÄHRLEISTUNGEN, DASS DAS PRODUKT VON DURCHSCHNITTLICHER QUALITÄT UND FÜR DEN NORMALEN GEBRAUCH GEEIGNET IST, SIND
AUSGESCHLOSSEN. Diese Garantie und Ihre Rechtsbehelfe nach dieser Garantie
umfassen ausschließlich das hierin Genannte. Tracer Products ist unter keinen
Umständen für besondere, indirekte, beiläufig entstandene Schäden oder Folgeschäden
haftbar.
HINWEIS: Wenden Sie sich bei Fragen jeglicher Art an die Kundendienstabteilung
(Customer Service Department) von Tracer Products, Telefonnummer: 1-800-641-1133.
Außerhalb der USA wählen Sie bitte die Nummer: [+1] 516-333-1254.
Bewahren Sie diese Informationen in Ihren Unterlagen auf und tragen Sie das
Kaufdatums unten ein.
Kaufdatum: _____________________________________________
Page 16

Figure 1
3
2
4
1
English
1. Bottle
2. Water connection
3. Water control valve
4. Bottle control valve
5. Trigger
French
1. Bouteille
2. Connexion à la source d'eau
3. Valve de contrôle de l'eau
4. Valve de contrôle de la bouteille
5. Gâchette
Spanish
1. Botella
2. Conexión del agua
3. Válvula de control del agua
4. Válvula de control de la botella
5. Gatillo
5
German
1. Flasche
2. Wasseranschluss
3. Wasserregelventil
4. Flaschenregelventil
5. Abzug
16
Page 17

English
1. Remove bottle assembly
2. Attach stepped fitting
3. Attach water supply
4. Air compressor connection
(Not included in kit)
Figure 2
1
3
2
4
French
1. Dépose de la bouteille
2. Fixation de la buse
3. Fixation de l'alimentation d'eau
4. Connexion du compresseur d'air (n'est
pas inclus dans le kit)
Spanish
1. Remueva el conjunto de la botella
2. Instale la boquilla escalonada
3. Conecte a la línea de suminist de agua
4. Conexión del compresor de aire
(no viene incluida en el juego)
German
1. Flaschenteile entnehmen
2. Gestuftes Anschlussstück anbringen
3. Wasserzufuhr anbringen
4. Luftkompressorverbindung (im Set
nicht enthalten)
Page 18

Figure 3
1
2
3
4
English
1. Remove bottle assembly or
stepped fitting
2. Remove tap fitting
3. Install tail fitting
4. Attach to the air compressor
Spanish
1. Remueva el conjunto de la botella
o la boquilla escalonada
2. Remueva el tapón macho de rosca
3. Instale el accesorio de cola
4. Conecte al compresor de aire
French
1. Dépose de la bouteille ou de
la buse
2. Dépose du raccord pour
robinet
3. Installation du raccord arrière
4. Fixation au compresseur d'air
German
1. Flaschenteile oder gestuftes
Anschlussstück abnehmen
2. Hahnanschlussstück
abschrauben
3. Endanschlussstück
anbringen
4. Mit Luftkompressor
verbinden
18 3
Page 19

TP-8640 OPTIMAX Jr
TP-9940 fluorescence-enhancing glasses
On/Off Button
 Loading...