


‘Er2’ is displayed when the unit
is exposed to rapid changes in
the ambient temperature. ‘Er3’
is displayed when the ambient
temperature of this unit exceeds
-10 to 50°C. In both cases allow
plenty of time (minimum 30 minutes) for this device to stabilize
to the working/ room temperature
(0 to 40°C).
‘Er’ for all other error messages
it is necessary to reset this unit.
To reset, turn off the unit, remove
the battery and wait for a minimum of one minute, reinsert the
battery and turn on (see battery
replacement Instructions).
ALL OPERATIONAL DIFFICULTIES
If this unit does not function properly for any reason,
replace the battery with a new high quality battery (see
“Battery Replacement” section). Low battery power can
occasionally cause any number of “apparent” operational
difculties. Replacing the battery with a new fresh battery
will solve most difculties.
BATTERY REPLACEMENT
Erratic readings, a faint display, no display or a ashing
display are all indicators that the battery must be
replaced. Make certain the unit is off before replacing
the battery. Turn the battery compartment panel on the
back of the unit in the direction the arrow. Replace the
exhausted battery with a new 3-volt lithium battery. Note
that the lip of the battery must be placed under the upper
metal contact. Turn the panel back into place. Replacement battery Cat. No. 1005.
5 Commonwealth Ave
Woburn, MA 01801
TestEquipmentDepot.com
MiniiiIR
TRACEABLE
THERMOMETER
INSTRUCTIONS
®
SPECIFICATIONS
Range: −7 to 230°F / −22 to 110°C
Resolution: 0.1°
Accuracy: ± 1°C between 15.0 to 40.0°C
and ± 1.5°C outside of this range
Emissivity: 0.95
Sampling Rate: 1 second
Measurement
Distance: 0 to 10 inches (0 to 2.5cm)
Features: Fast reading, eld view 1:1, auto
power off, minimum/maximum
Size/Weight: 2½ x 1½ x ½ in. / 1 oz
(18 x 37 x 68 mm / 32 gm)
Attachments: Key chain and stand
Battery: 3-Volt Lithium
CONTROLS AND INDICATORS
1. MEASUREMENT Button - (large button) Turns unit
on, displays temperature, and changes display from
°C (Celsius) to °F (Fahrenheit).
2. MODE Button - Changes mode to minimum or
maximum or lock.
OPERATION
Measurement
Press the MEASUREMENT button twice to capture and
display a single temperature reading. The temperature
will be displayed for approximately 15 seconds and the
unit will turn off. Press and continuously hold down the
MEASUREMENT button to continuously take temperatures. See the Lock Mode instructions for continuous
measurements without holding down the button.
°C/°F CONVERSION
To change from °C to °F or °F to °C turn the unit on by
pressing the MEASUREMENT button once, then press
the MODE button four times. The °C or °F symbol will
ash on the display, press the MEASUREMENT button
to change the symbol, press the MEASUREMENT button
again to conrm the symbol change.
MINIMUM OR MAXIMUM MODE
Use this mode for targets that are continuously changing
temperatures and you wish to capture only the lowest
temperature achieved or only the highest temperature
achieved. The unit will not simultaneously display minimum and maximum, one or the other must be selected.
Turn the unit on by pressing the MEASUREMENT button
once, then press the MODE button once for minimum
only readings or twice for maximum only readings. The
MIN or MAX symbol will ash on the display, then press
and continuously hold down the MEASUREMENT button
to continuously take temperatures. The unit will display
the minimum temperature achieved or the maximum
temperature achieved during the time the button is held
down.
LOCK MODE
The lock mode permits continuous monitoring of
temperatures without continuously holding the MEASUREMENT button down. Turn the unit on by pressing
the MEASUREMENT button, then press the MODE
button three times. The LOCK symbol will ash, then
press the MEASUREMENT button to conrm the lock
measurement mode. The unit will continuously display
temperatures for up to 60 minutes or until the MEASUREMENT button is pressed.
MEASUREMENT DISTANCE
To take a temperature, point the unit at the surface to be
measured and press the MEASUREMENT button. The
unit should be positioned as close to the target as possible. Distance from an object can affect accuracy. The
target must completely ll the spot diameter seen by the
infrared sensor; otherwise, the reading will be inuenced
by the surface temperatures surrounding the target. The
ratio of distance to the size of the spot being measured is
1:1. For example: an object 15 cm away has an infrared
measurement spot diameter of 15 cm, and object 25 cm
away has an infrared measurement spot diameter of 25
cm. For best accuracy, measure as close to the target
object as possible.
STAND/KEY CHAIN
Use the ip-open stand on the back of the unit on a
bench or desk.. Use the key chain to fasten the unit to a
button hole or loop.
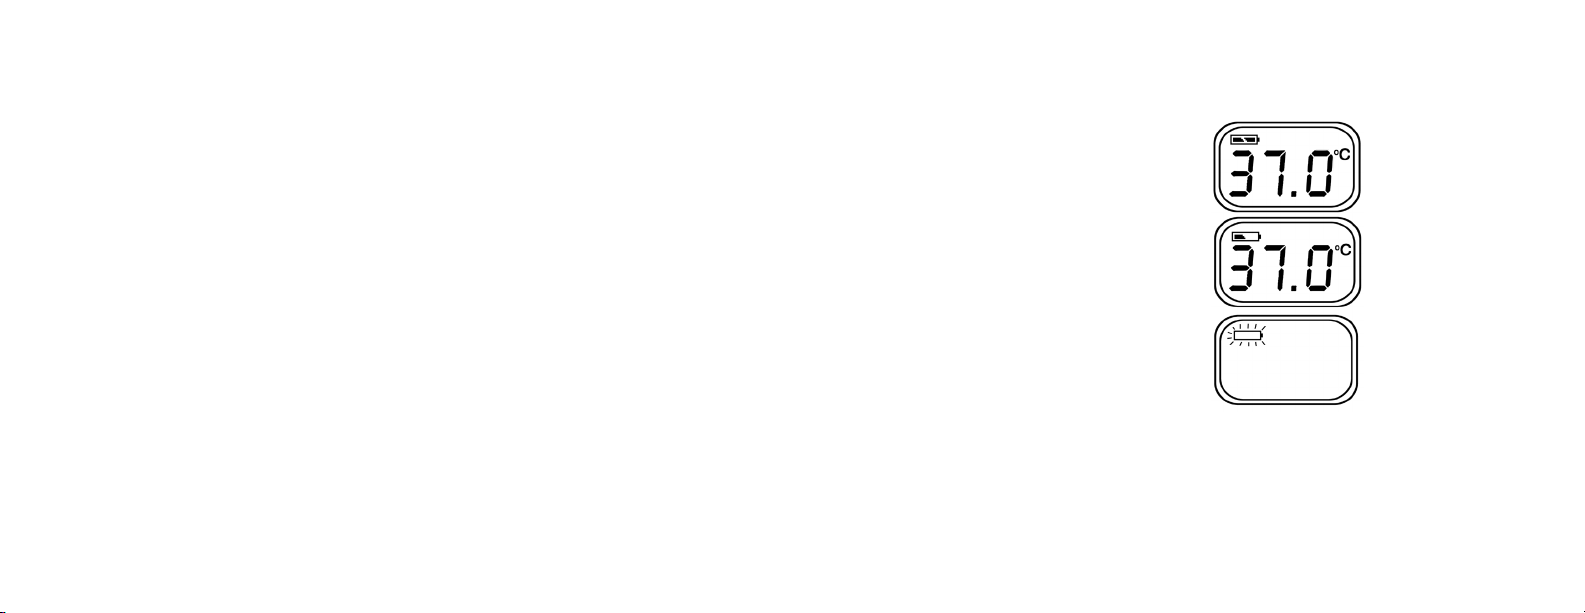
Battery Indicator Display
‘Battery OK’: measurements
are possible.
‘Battery Low’: battery needs
to be replaced, measurements are possible.
‘Battery Exhausted’: measurements are not possible.
ERROR MESSAGE DISPLAY
‘Hi’ or ‘Lo’ is displayed when the temperature being measured is outside of the range of the unit, ‘Hi’ when higher
than 110°C and ‘Lo’ when lower than -22°C.
 Loading...