


TQC MANUAL CUPPING TEST
SP4400
1 SAFETY PRECAUTIONS
• Never put limbs in the clamping area.
• Always have the clamp properly tightened during testing
• Never test chattering or breaking materials like glass or acrylics that chatter when
exerted to high forces.
• Avoid using it in over-high or over-low temperature environment .
• Avoid humidity .
2 PRODUCT DESCRIPTION
Revolutionary apparatus for testing the resistivity of coatings at various stages of deformation in accordance
with ISO 1520. The built in gear-box minimizes the manual force which is required to deform the test panel,
allowing to perform a smooth deformation. The degree or deformation is digitally displayed at a resolution of
0.01 mm. Mandatory test in Qualicoat, QIB and GSB accredited laboratories.
2.1 Specifications
Max. sample thickness steel: : 0,8 mm
Max. sample thickness aluminum: : 1,2 mm
Max. sample width : 95 mm
Max sample length : infinite
Punch diameter : 20 mm /hardened steel
Die diameter : 27 mm /hardened steel
Gauge resolution : 0,01 mm
Cupping range/stroke : 14 mm
Displacement per revolution : 0.50 mm per handle revolution
Instrument height : 370 mm (excl. lamp/magnifier)
Instrument diameter : 230 mm (excl. lamp holder)
Cylinder diameter : 236 mm
Base diameter : 300 mm
Total weight : 16 kg.
Materials : Anodized aluminum, Stainless steel, Powdercoated steel, Tungsten
Carbide steel
3 STANDARDS
EN-ISO 1520, BS 3900 E4
Look up the appropriate standard for a correct execution of the test.
4 WHAT’S IN THE BOX?
• TQC Manual cupping test
• Digital micrometer
• Calibration plate
• 1mm Allen key
• User manual
1 |
5 PREPARATIONS
• Place the instrument onto a firm strong bench, orientate the instrument with panel holder to the operator,
permitting sufficient room to operate the handle and observe the deformation of substrates.
• As standard the device is supplied for right-handed operating. Make sure there is enough room at the side
of the handle and this side is clear of sharp objects.
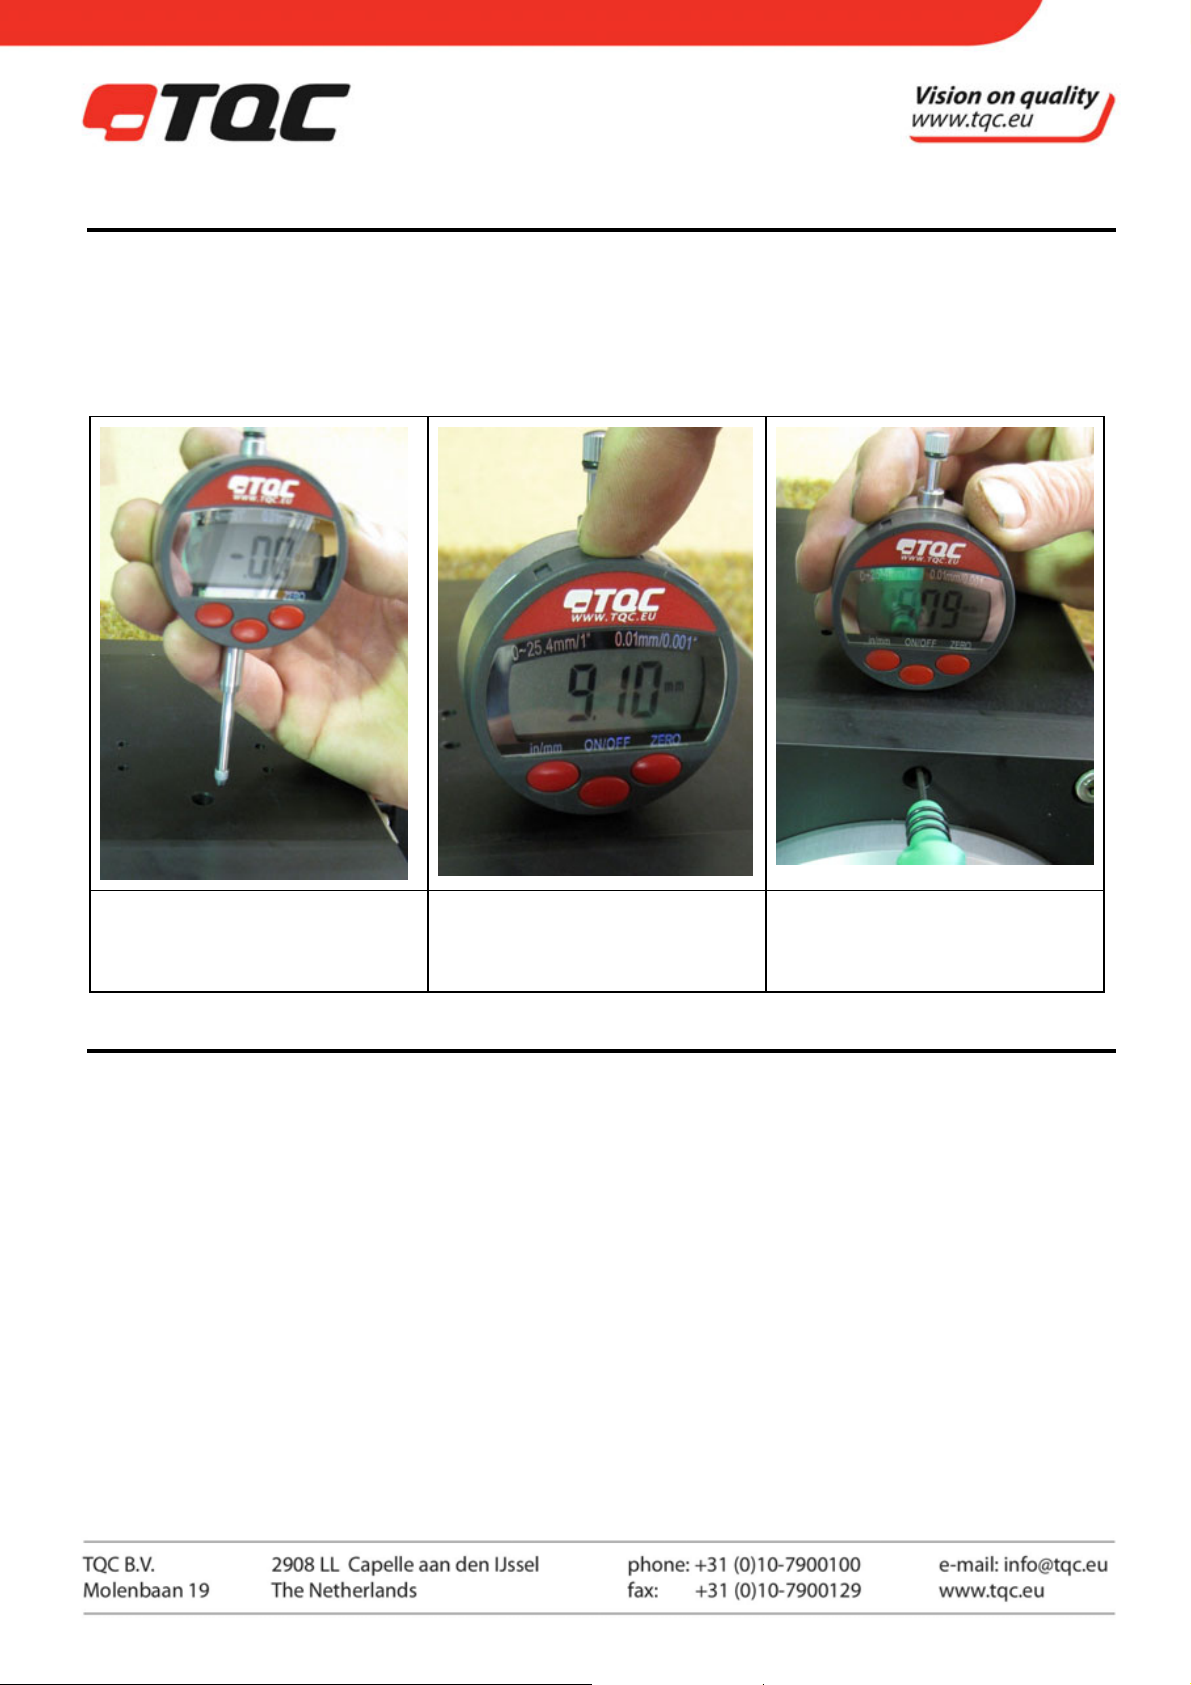
• Place the digital micrometer on the cupping tester as shown below.
Insert the micrometer in the
designated hole on top of the TQC
Manual Cupping Test.
6 PERFORM A MEASUREMENT
• Place the test sample with the coated side up inside the clamp. Do not exceed the panel thickness as stated
in the specifications and on the machine. Testing on thicker panels can damage the drive shaft and cause
deformations that could render the device unusable.
• Close the camp to hold the panel in place. Do not use force when clamping, otherwise when removing the
panel the required force to release the panel can be to high for the operator.
• Turn on the micrometer.
• Gently turn the handle to raise the indenter. To get an indentation speed of about 0.2mm/s requires about
half a revolution per second.
• The test is carried out either to a predetermined indentation depth at where the panel is evaluated or
defects in the coating or to the depth where the first defects in the coating form.
• After the results have been determined turn the indenter back to below the zero position.
• Release the sample clamp and remove the sample.
Ensure it is straight and pressed
against the housing.
Keep the micro meter secure and
straight and fix the micrometer by
using a 1mm Allen key.
2 |

7 INTERPRETATION OF THE RESULTS
Cracks and defects in the coating will form when the stresses exceed the max flexibility of the coating. Generally
the forming of such cracks is preceded by a small discoloration of the coating. The visibility of the cracks is very
depending on the type and color of the coating, just as the visual capability’s of the operator. An optional
maximum magnification of 10x may be used when evaluating the samples. Please refer to the appropriate
standard for further information and possibility’s regarding magnification and illumination.
8 CALIBRATIONS
• Prior to the first use and later at regular intervals the TQC Manual Cupping Test should be calibrated.
• Check the indenter and panel clamps for any dirt or impurities. If dirty clean by using a soft cloth and non
aggressive solvent like Iso Propyl Alcohol.
• Turn the handle such that the indenter has recited below the support
ring.
• Place the calibration plate such that any possible large dents or
deformities are not above the indenter.
• Close the clamp by turning both handles. Do not use excessive force
during closing.
• Turn on the micrometer by pressing the on/off button.
• Slowly and Gently turn the handle using the most sensitive finger, by
turning it as close to the center as possible. When any extra
resistance can be felt immediately stop and hold the handle in place
• Press the zero key of the Micrometer to set this as the zero level.
• Turn back the indenter several mm and again very delicately turn the
indenter up. again resistance should be felt at the zero mm.
9 REPLACING BATTERIES
• To change the battery open the battery compartment on to of the micrometer.
• Carefully take out the battery and note the orientation of the battery.
• Replace the battery and carefully reinsert the holder into the
micrometer
• Turn the micrometer on and test if it is working.
• After changing the battery the micrometer needs to be calibrated.
Please follow the steps as described in 8
10 MAINTENANCE
• Though robust in design, this instrument is precision-machined. Never drop it or knock it over
• Always clean the instrument after use.
• Clean the instrument using a soft dry cloth. Never clean the instrument by any mechanical means such as a
wire brush or abrasive paper. This may cause, just like the use of aggressive cleaning agents, permanent
damage.
• Do not use compressed air to clean the instrument.
• Always keep the instrument in its case when not in use.
• We recommend annual calibration
3 |

11 DISCLAIMER
The right of technical modifications is reserved.
The information given in this manual is not intended to be exhaustive and any person using the product for any
purpose other than that specifically recommended in this manual without first obtaining written confirmation
from us as to the suitability of the product for the intended purpose does so at his own risk. Whilst we
endeavour to ensure that all advice we give about the product (whether in this manual or otherwise) is correct
we have no control over either the quality or condition of the product or the many factors affecting the use and
application of the product. Therefore, unless we specifically agree in writing to do so, we do not accept any
liability whatsoever or howsoever arising for the performance of the product or for any loss or damage (other
than death or personal injury resulting from our negligence) arising out of the use of the product. The
information contained in this manual is liable to modification from time to time in the light of experience and
our policy of continuous product development.
.
4 |
 Loading...