


TQC CYLINDRICAL BEND TEST 100MM INCL MANDREL SET
SP1820
1 SAFETY PRECAUTIONS
• Make sure to keep fingers and other body-parts clear from the
bending area when performing a test.
• Make sure all actions such as the clamping and bending are
carried out without using any heavy forces
• Don’t exceed the max. Panel thickness.
• Check the mandrel visually for mechanical damages or marks.
2 PRODUCT DESCRIPTION
The TQC Cylindrical Bend Test is a very robust yet elegant testing instrument to indicate the elasticity,
elongation and adhesion of a paint film at bending stress. The TQC Cylindrical Bend Test is designed to perform
tests according to the latest ISO standards. ISO 1519: “Assessing the resistance of a coating, paint, varnish or
related products to cracking and/or detachment from a surface when, subjected to bending around a cylindrical
mandrel under standard conditions.
3 STANDARDS
Complies to ISO 1519, type 2 bender. Look up the appropriate standard for a correct execution of the test. Also
refer to ISO 1512-ISO 1514-ISO 2808-ISO 3270.
4 WHAT’S IN THE BOX?
• TQC Cylindrical Bend Test 100 mm
• Desk holder wit set of 14 mandrels with a diameter of 2, 3, 4, 5, 6, 8, 10, 12, 13, 16, 19, 20, 25 and 32 mm.
5 PREPARATIONS
• Apply the paint film on a test panel of max. 100 x 150 mm. , and a thickness of max. 1mm. Coat and dry
film carefully.
• Install the apparatus on the table with the clenching wheel on the left side.
6 PERFORM A MEASUREMENT
Remarks
• The test results strongly rely on the selected test panel, thickness of the coating, drying conditions and
ambient conditions. (See ISO1519)
• Also refer to ISO 1512-ISO 1514-ISO 2808-ISO 3270.
• Note any deviations for a reproducible test result.
1|
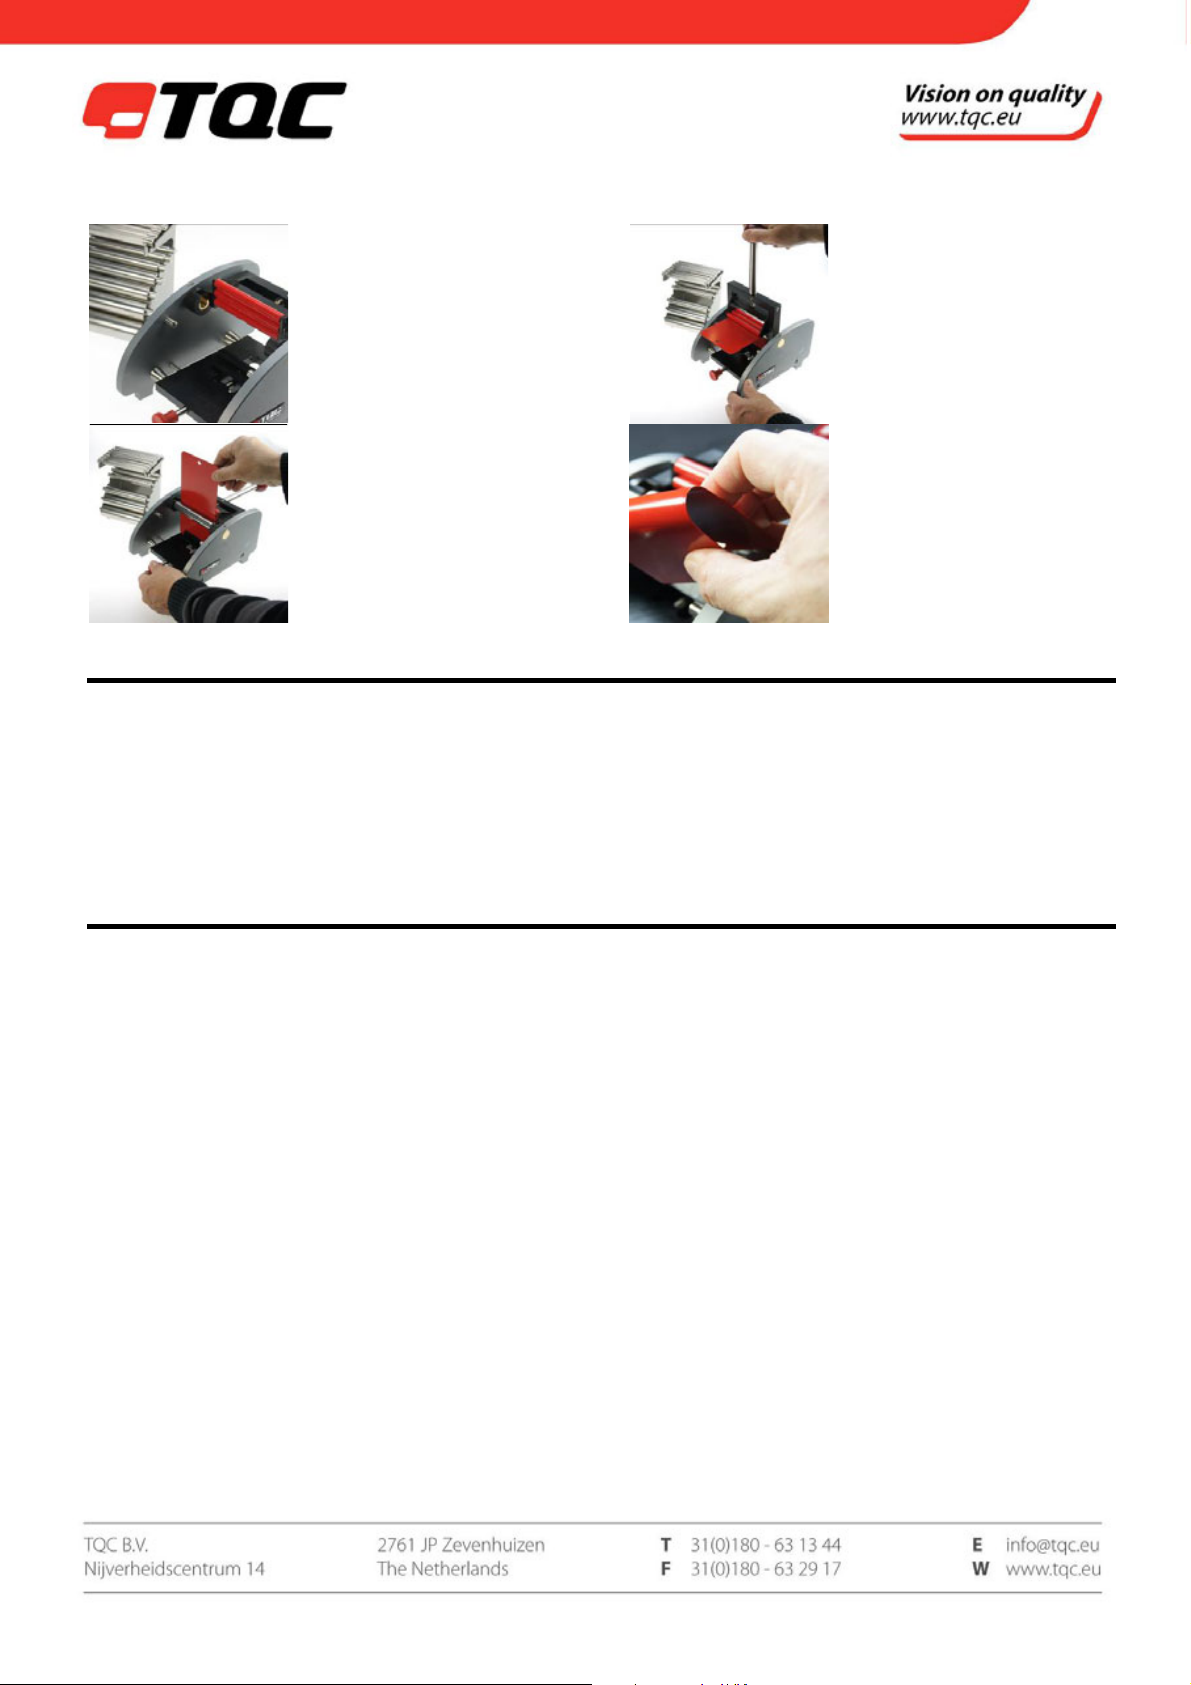
1. Sufficiently open the apparatus
to insert the mandrel with the
correct dia. turning the handle
of the pressure rollers anti
3. Pull the handle, and with a
smooth movement, taking
1 - 2 seconds, make an even
180° bend.
clockwise.
2. Place and secure a test-panel in
the apparatus, positioned
against the mandrel. Fix it
4. Release the test-panel from
the test-apparatus and
examine results immediately.
upright into the clamp. The
coated side of the panel should
face outwards once the bend
has been made.
7 MAINTENANCE
• Though robust in design, this instrument is precision-machined. Never drop it or knock it over
• Always clean the instrument after use.
• Clean the instrument using a soft dry cloth. Never clean the instrument by any mechanical means such
as a wire brush or abrasive paper. This may cause, just like the use of aggressive cleaning agents,
permanent damage.
• Do not use compressed air to clean the instrument.
8 DISCLAIMER
The right of technical modifications is reserved.
The information given in this manual is not intended to be exhaustive and any person using the product for any
purpose other than that specifically recommended in this manual without first obtaining written confirmation
from us as to the suitability of the product for the intended purpose does so at his own risk. Whilst we
endeavour to ensure that all advice we give about the product (whether in this manual or otherwise) is correct
we have no control over either the quality or condition of the product or the many factors affecting the use and
application of the product. Therefore, unless we specifically agree in writing to do so, we do not accept any
liability whatsoever or howsoever arising for the performance of the product or for any loss or damage (other
than death or personal injury resulting from our negligence) arising out of the use of the product. The
information contained in this manual is liable to modification from time to time in the light of experience and
our policy of continuous product development.
2|
 Loading...