How it Works
Log In / Sign Up
Buy Points
How it Works
FAQ
Contact Us
Questions and Suggestions
Users
TP Link
Loading...
A
AV600
5
AX10
2
AX10V1
AX11000
AX1500
AX1800
2
AX20
2
AX3000
AX50
3
AX6000
7
AX73
2
B
BS1001
C
C100
3
C110
c1200
5
C1200V2
C1200V3
C2
C20
3
C200
2
C20I
C20V4
C20V5
C210
C2300
4
C2600
C2700
C28HP
C2V3
C2V5
2
C3150
5
C3150V2
C3200
3
C4000
2
C4000V3
C5
4
C50
C50V2
C50V3
C50V5
C54
C5400
5
C5400X
6
C5 4G GRIS
C58
C59
C59V3
C5A
2
C5AV1
C5L
C5LV1
C5 Max
2
C5MAXV1
C5 Plus
C5PLUSV1
C5S
C5SPV4
C5SV1
2
C5SVI
2
C5V1
C5V2
C6
C60
3
C60V3
C6U
C7
4
C7A
C7AV1
4
C7 Gold
C7 Grey
C7 Lite
C7LITEV1
C7s
C7SV1
C7V1
2
C7V2
2
C7V3
C7V4
C7V5
C8
C80
C8V2
C8V4
C9
4
C9A
C9AV1
4
C9 Max
C9SV1
C9V1
4
C9V4
2
C9V5
Camera Control for Windows
CAP1200
2
CAP1750
2
CAP300
5
CAP300OD
CAP300-OUTDOOR
3
Cloud Camera
CP220
2
CP230
Loading...
Loading...
Nothing found
C5AV1
User Manual
23 pgs
295.25 Kb
0
Table of contents
Loading...
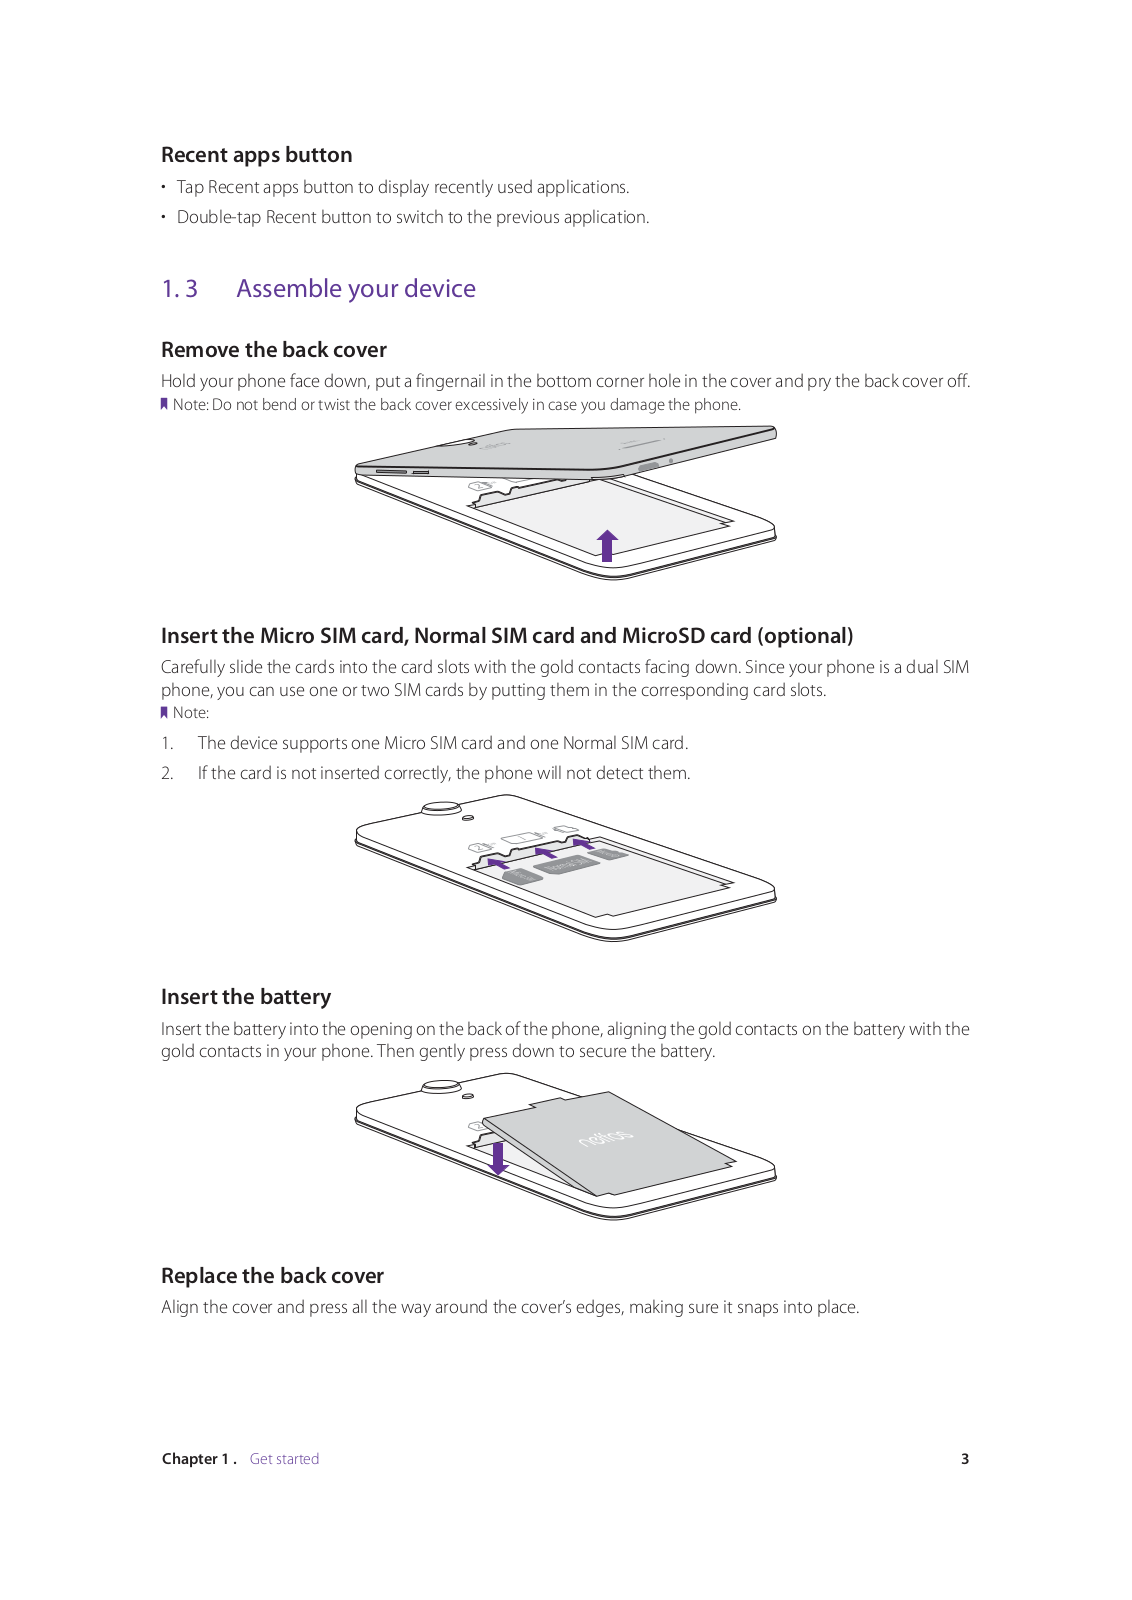
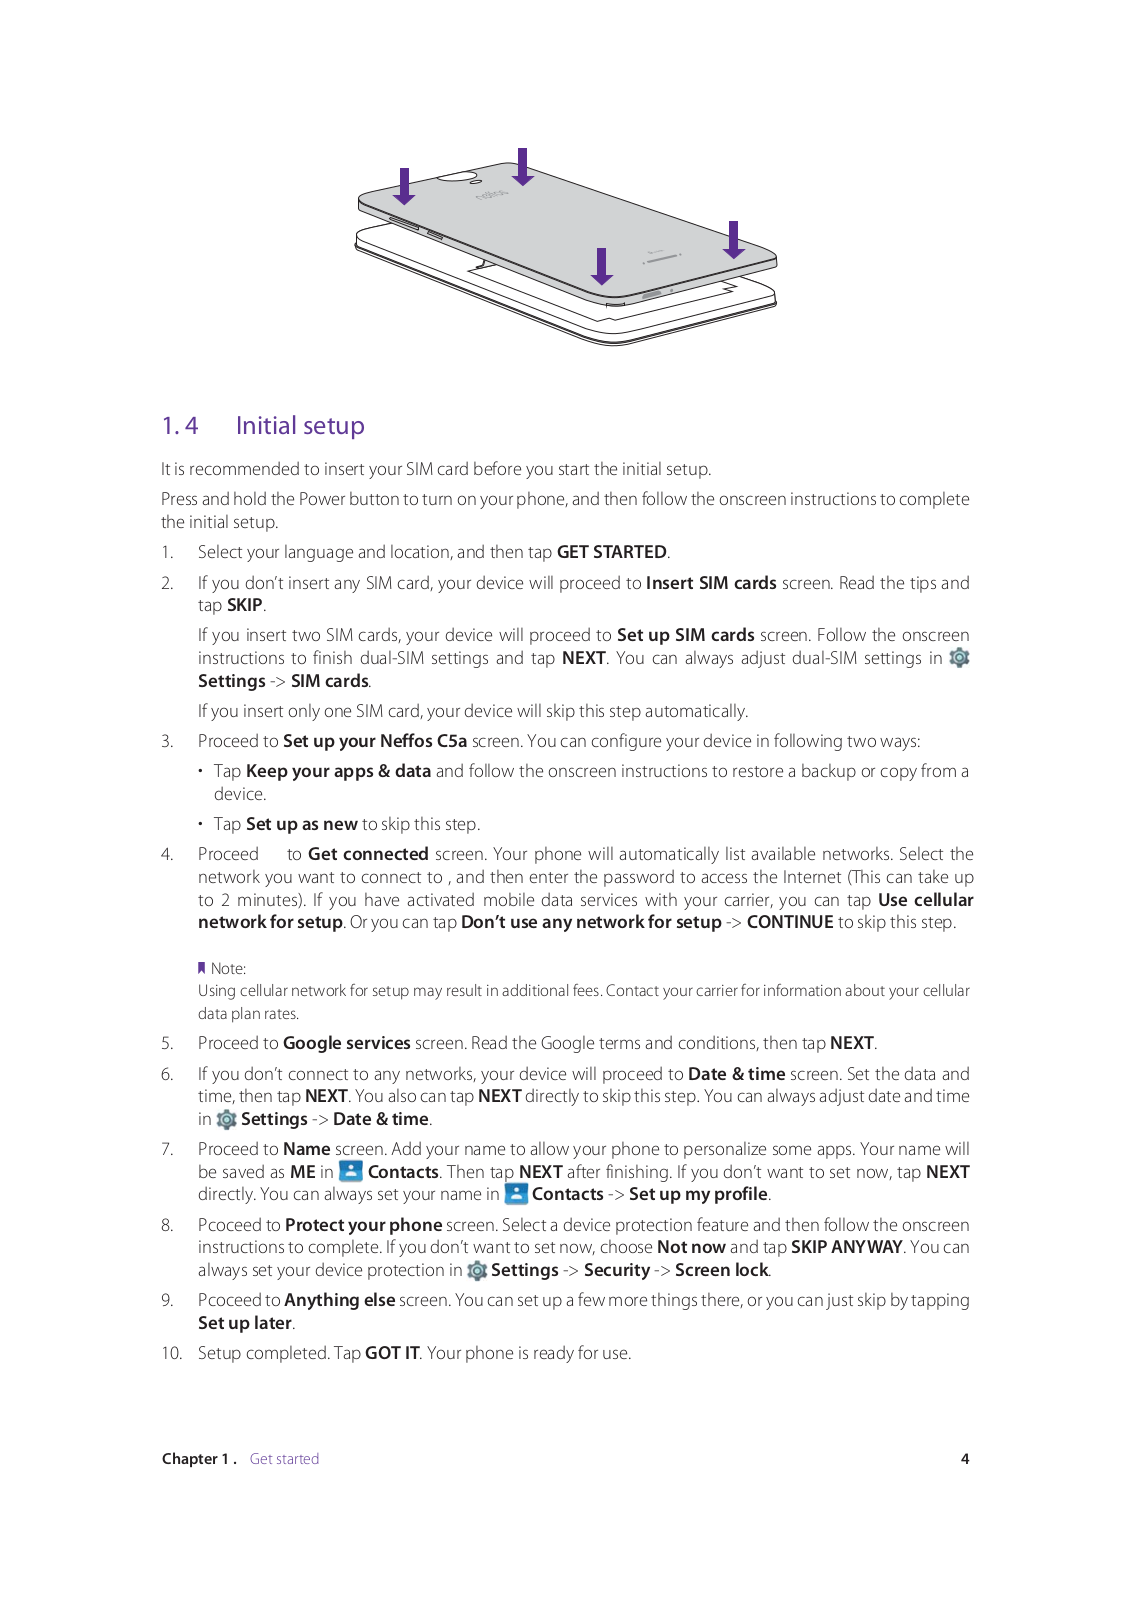
TP Link C5AV1 User Manual
...
TP Link User Manual
Download
Text View
Picture View
Page 1
Page 2
Page 3
Page 4
Page 5
Page 6
Page 7
Page 8
Page 9
Page 10
Page 11
Page 12
Page 13
Page 14
Page 15
Page 16
Page 17
Page 18
Page 19
Page 20
Page 21
Page 22
Page 23
Loading...
+
hidden pages
Unhide
You need points to download manuals.
1 point = 1 manual.
You can buy points or you can get point for every manual you upload.
Buy points
Upload your manuals
 Loading...