

Page 1
TP-LINK Groovi Ripple Portable Bluetooth Speaker
BS1001
User Manual
Cauti on: 1) Phot os are for re ference o nly, actual product may vary! 2)
TP-LI NK is commi tted to imp roving pr oduct qua lity and pe rforman ce,
but pro duct tech nology an d design ar e subject t o change wi thout pri or notice .
Page 2
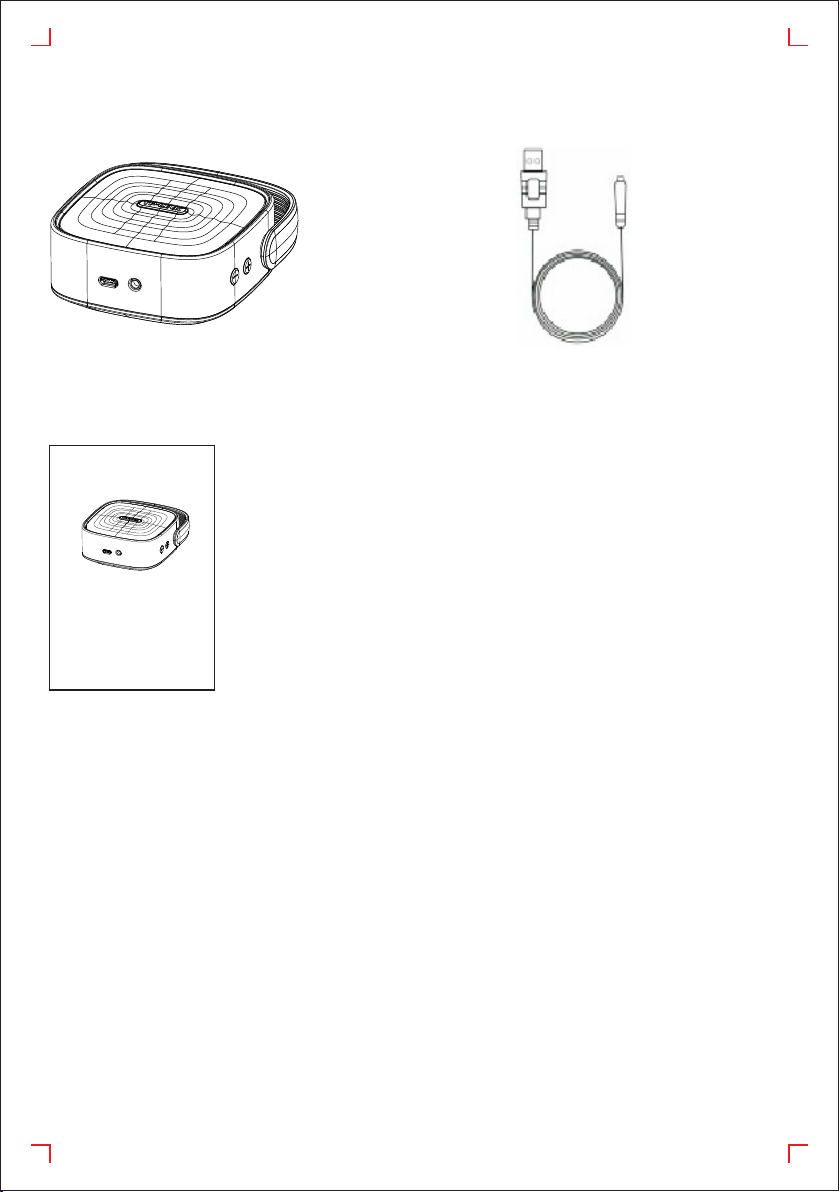
CONTENTS IN THE B OX:
1. BS1001: 2.USB charging cable
TP-LI NK Groo vi Ripp le Port able Bl uetoo th Spea ker
BS10 01
Use r Manua l
Cautio n: 1) Pho tos are f or refe rence o nly, actu al prod uct may v ary! 2)
TP-LIN K is comm itted t o impro ving pr oduct q ualit y and per forma nce,
but prod uct tec hnolo gy and de sign ar e subje ct to cha nge wit hout pr ior not ice .
3. Manual 4. Guarantee card
Important safety instructions:
1. Ple ase car efull y read an d follo w the saf ety ins truct ions be fore us ing the p rod uc t.
2. Ple ase avo id leav ing the p roduc t in a damp e nviro nment , expos ing i t to s unl ig ht,
or pla cing it n ear re .
3. Ple ase do no t use the p roduc t near wa ter.
4. Ple ase do no t place t he prod uct nea r heat- gener ating a pplia nce s su ch as a r ad iat or,
air co nditi oner, or s tove.
5. Ple ase use t he reco mmend ed powe r volta ge.
6. Ple ase do no t disas sembl e the pro duct wi thout a uthor izati on.
7. Exp losio n may occ ur if bat tery is r eplac ed inco rrect ly. Please r eplac e bat te ry on ly w ith
the sa me or equ ivale nt type .
8. Ple ase avo id leav ing the p roduc t expos ed to sun light , rain, w ate r dr opl et s, or a h ot o r
mois t envir onmen t.
9. Ple ase enj oy the mu sic at an a pprop riate v olume t o prote ct your h ealth a nd so un d equ ip men t.
10. Pl ease un plug th e charg ing cab le when i t is not in u se.
Page 3

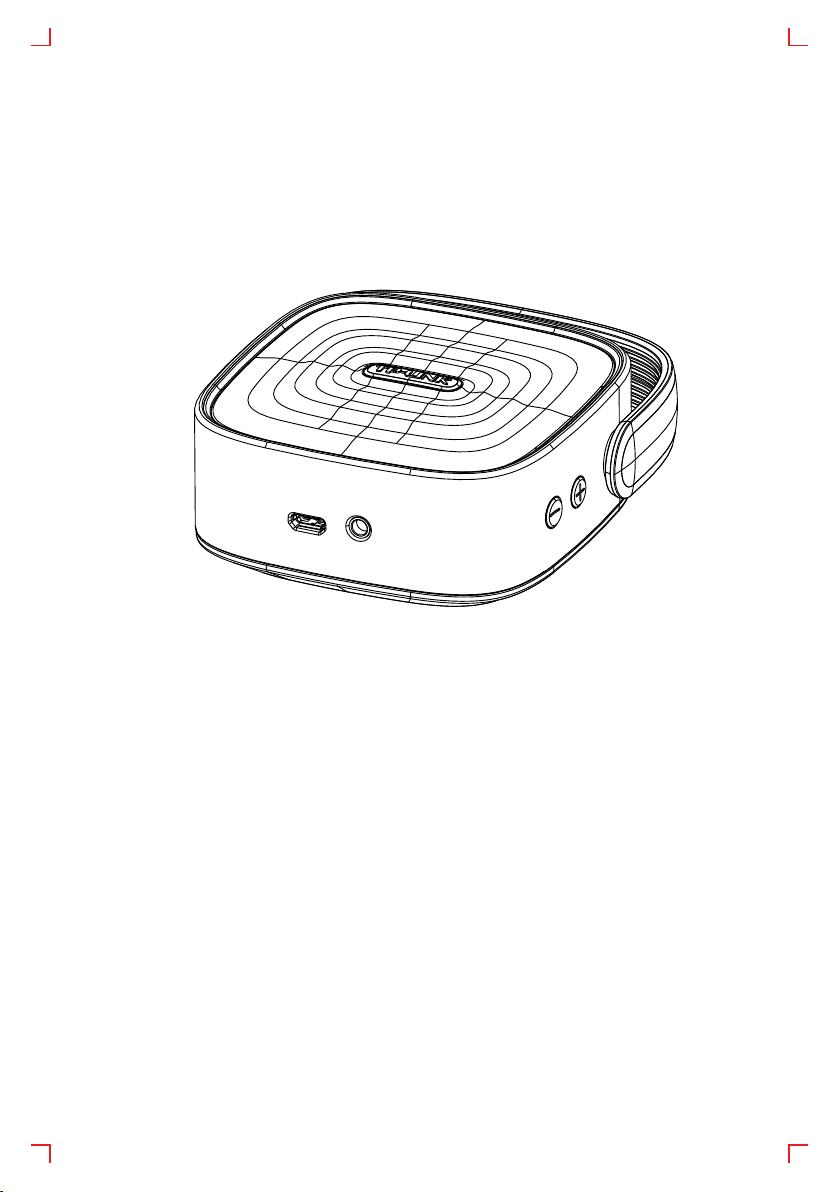
PRODUCT DESCR IPTION:
1
Indi cate le d
2
Powe r butto n
3
Vol+ bu tton
4
Vol- bu tton
5
Micr o USB cha rging p ort
3.5 mm a udio in put int erfac e 3.5mm
6
2
1
65
4 3
TECHNICAL DATA:
Outp ut powe r: 3.5W
Dist ortio n: ≤1%
Freq uency r espon se: 120 Hz~20 KHz
SNR: > 65dB
Spea ker uni t: 4Ω
Powe r input : USB/D C 5V
Sens itivi ty: 600 mV
Prod uct siz e: 88 x 88 x 41 mm
Recharging Ba ttery:
1. This pr oduct h as a buil t-in re charg eable l ithiu m batte ry. Plea se c onn ec t the U SB c har gi ng
cabl e to a work able US B port (a P C/Mac o r a USB pow er adap ter).
2. Whe n the bat tery is l ow, the re d power i ndica tor wil l turn on .
3. Whe n the spe aker is b eing re charg ed, the r ed powe r indic ator tr uns on. W hen t he
rech argin g is comp leted , the ind icato r will tu rn off.
4. Whe n the bat tery is c omple tely di schar ged, th e produ ct cann ot be tur ned on be for e be ing
rech arged f or a whil e.
The Sp eaker P aired w ith a Blu etoot h Devic e (Firs t Conne ction ):
1. Mak e sure th at the pr oduct h as suc ient po wer or ha s been co nnect ed to pow er.
2. Sho rt Pres s the pow er butt on.
3. The blu e power i ndica tor tur ns on and t he Blue tooth p airin g blu e in dic at or a sh es.
4. Sta rt the Bl uetoo th devi ce (for e xampl e, a mobi le phon e) to sea rchin g mod e (j ust a s yo u
woul d when se archi ng for a ne w Bluet ooth de vice on t he phon e)
5. “Gr oovi Ri pple” i s displ ayed in t he list o f Bluet ooth de vices .
6. Sel ect “Gr oovi Ri pple” . Enter “ 0000” i f promp ted to en ter a pai ring co de.
7. The blu e LED sto ps blin king an d stays b lue. This i ndica tes a suc ces sf ul pa ir ing .
8. Che ck the Bl uetoo th devi ce to mak e sure th at the co nnect ion is su ccess ful.
9. Pre ss the po wer but ton to tu rn off the pr oduct . Th e produ ct will s hut dow n autom atica lly
afte r 30 minu tes if no a udio in put is re ceive d.
Page 4

ATTENT ION:
● To connect t he prod uct to an other B lueto oth dev ice, yo u must r st disc onnec t the cur ren t
Blue tooth c onnec tion. L ong Pre ss Powe r butto n to ente r a new dev ice sea rch in g and p ai rin g
mode .
● When t he prod uct is re start ed, it wi ll auto matic ally re conne ct to the p revio usl y pa ire d de vic e
by def ault. I f the aut omati c conne ction f ails, y ou need t o do the co nnect ion man ual ly.
AUX IN M ode Ope ratio n Instr uctio ns:
1. Ins ert one e nd of a 3.5 m m stere o audio c able in to the “A ux in” in terfa ce on the b ack of th is
prod uct.
2. Put t he othe r end of th e stere o audio c able in to the he adpho ne jack o f an exte rna l au dio
devi ce.
Page 5

Page 6

 Loading...