

Page 1
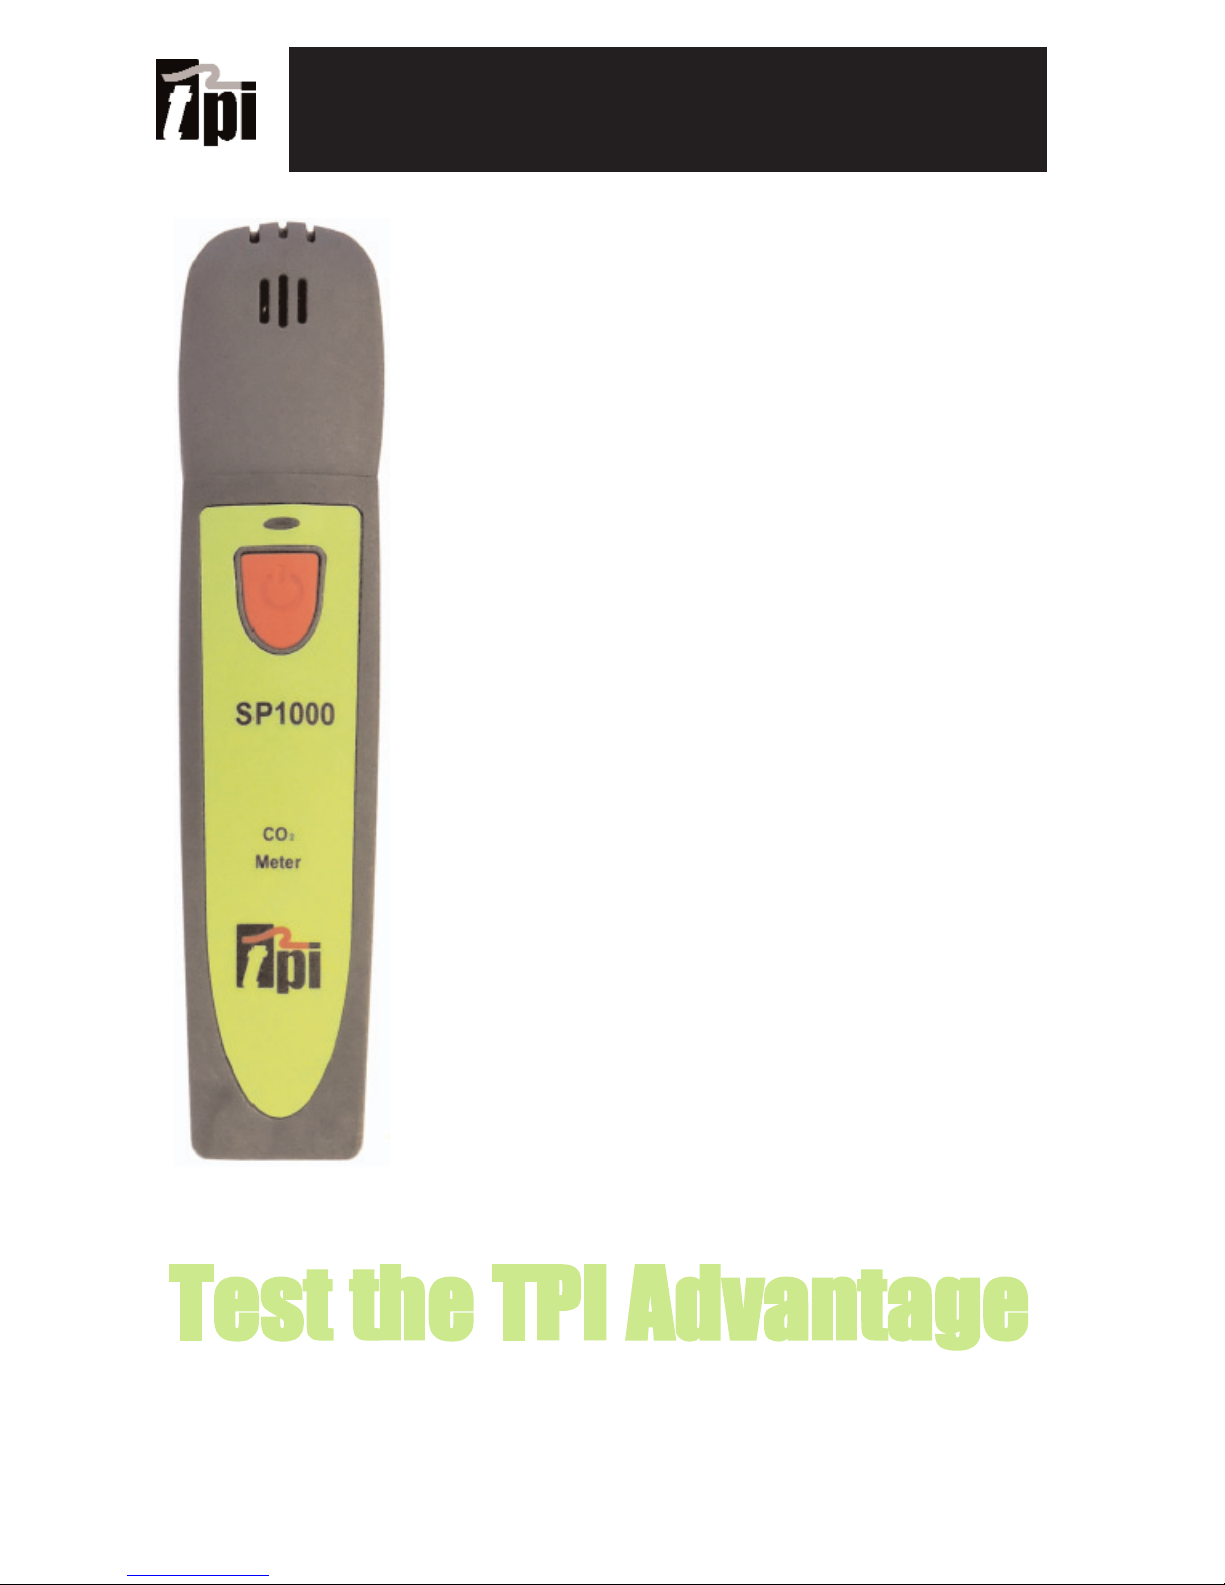
SP1000 CO2 Smart Probe
Test Products International, Inc.
Test the TPI Advantage
Visit www.testproductsintl.com
Uses NDIR CO2 sensor for accuracy
Connects to smart phone and uses the
TPI Smart Probe App
Perform ambient CO2 level checks
Up to 6 SP1000 smart probes can connect
to a single mobile device (most devices)
3 Year Limited Warranty
Page 2

TABLE OF CONTENTS
A. Introduction............................................................... 1
B. Safety Considerations................................................ 1
C. Specifications............................................................. 1
D. Instrument Overview.................................................. 2
E. Taking a Measurement................................................ 3
F. Additional App Features.............................................. 4
G. Drop Down Menu........................................................ 5
H. Entering Company and Customer Information............ 5
I. Performing Ambient Air Tests...................................... 6
J. Maintenance................................................................. 7
K. Trouble Shooting.......................................................... 7
L. Accessories.................................................................. 7
M. Warranty...................................................................... 8
N. Replacing Batteries...................................................... 8
Page 3
A. INTRODUCTION
1. Congratulations: Thank you for purchasing TPI products. The SP1000
is easy to use and built to last. It is backed by a 3 year limited warranty
.
2. Product Description: The SP1000 is an ambient CO2 “Smart Probe”. It
connects to your mobile device and uses the TPI Smart Probe App to
display temperature readings. Data can be exported to a CSV file as
well.
B. SAFETY CONSIDERATIONS
1. Never attach the SP1000 to a hot surface.
2. Never breath directly into the SP1000 while performing measurements.
Doing so will skew the actual ambient reading.
3. Do not expose the unit to damp environments for extended periods of
time.
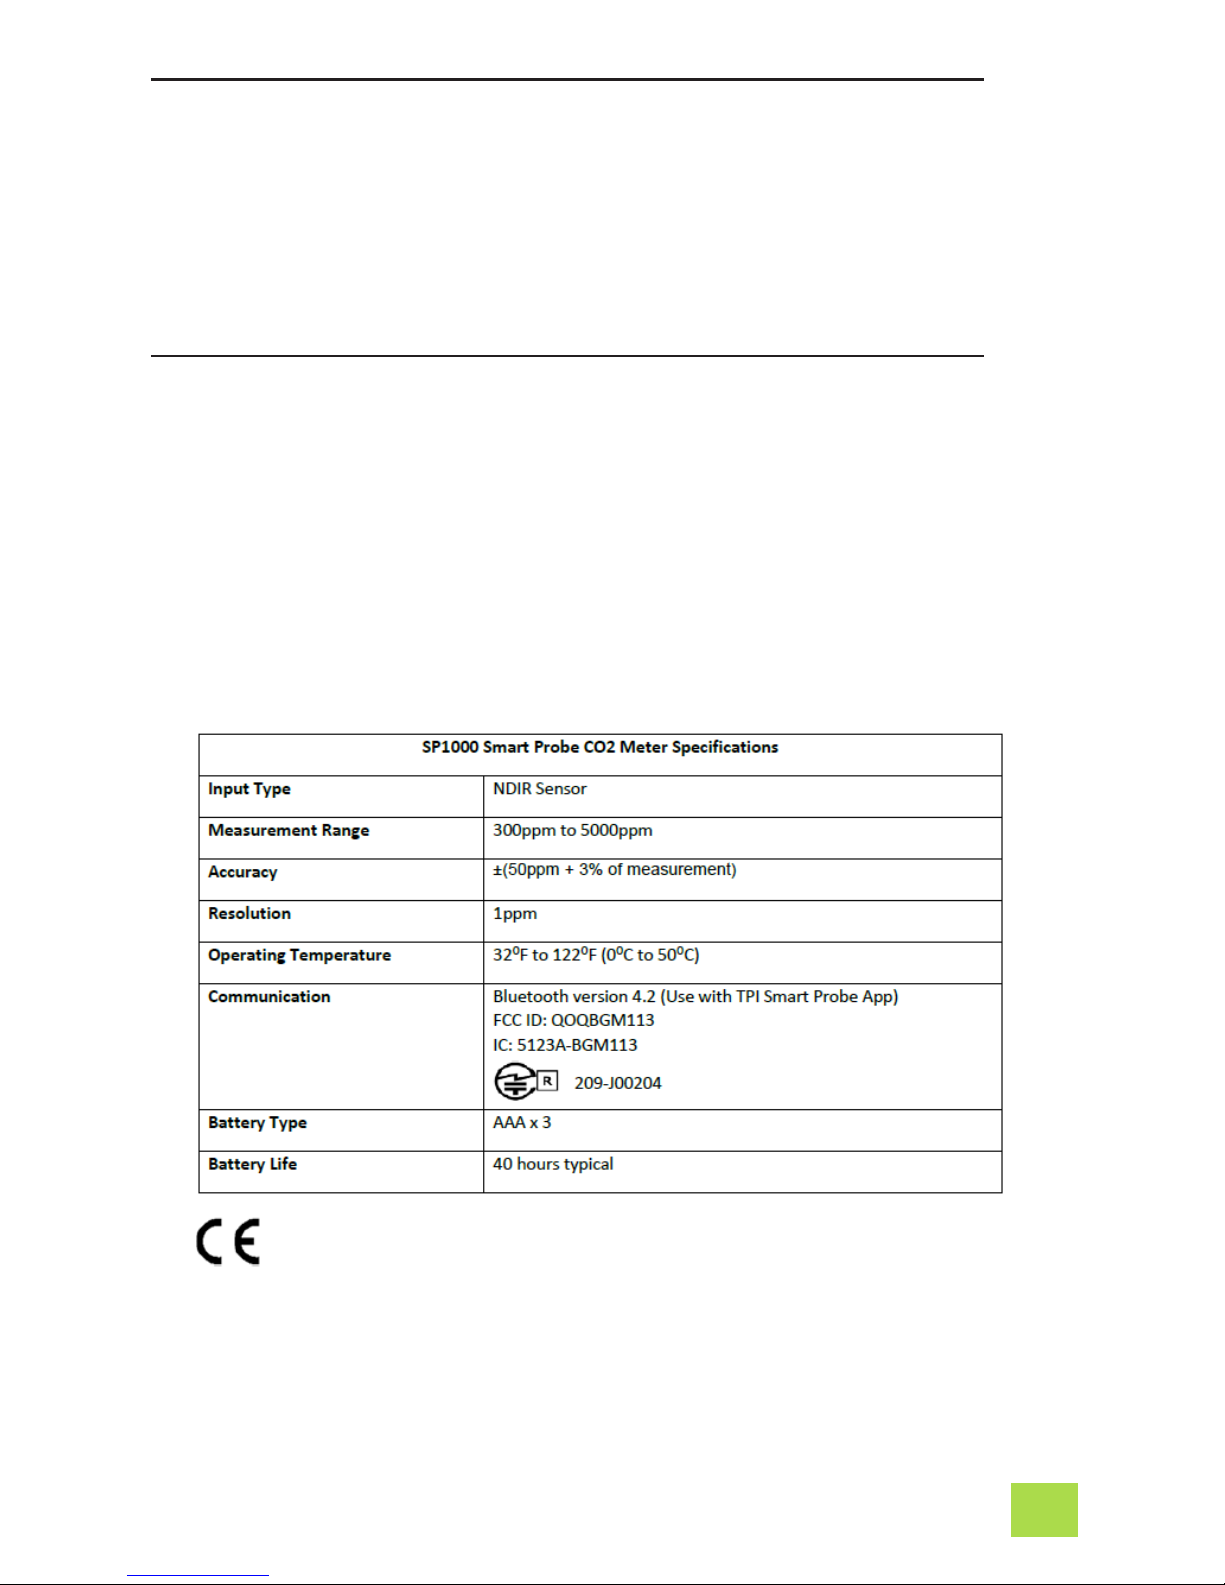
C. SPECIFICATIONS
1
Page 4
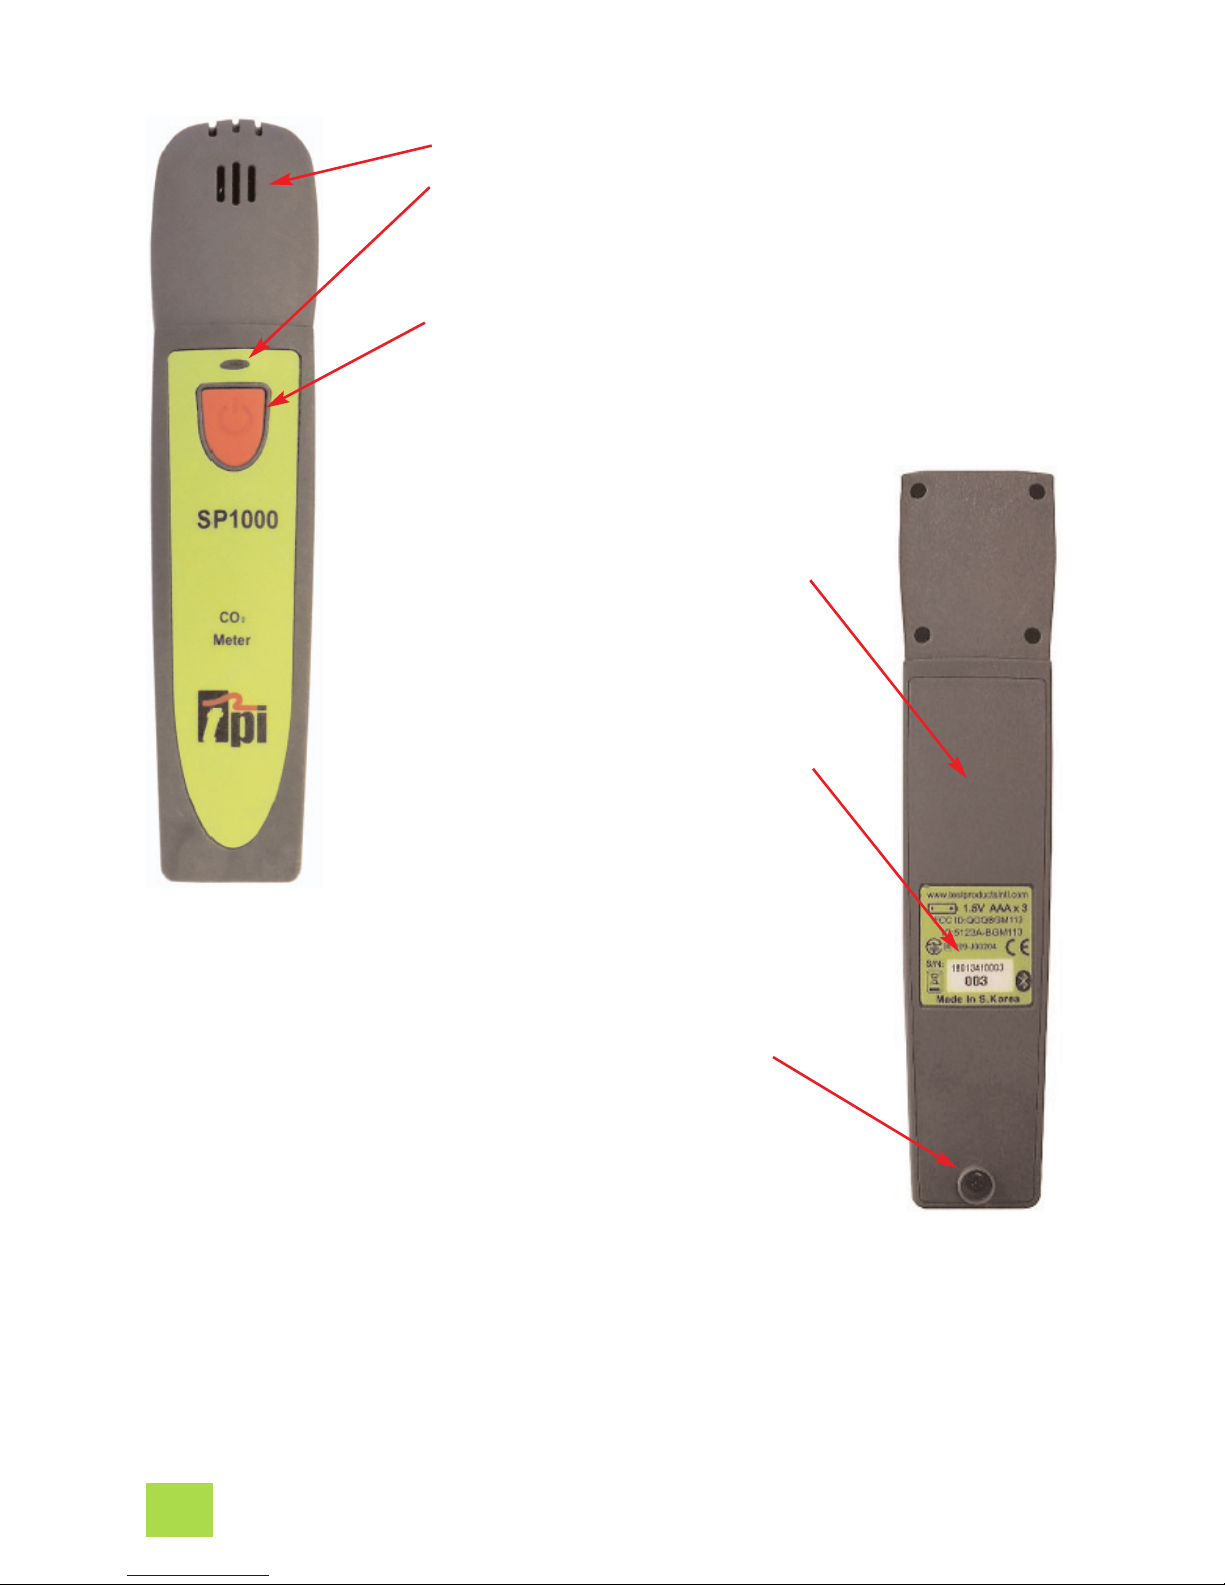
D. INSTRUMENT OVERVIEW
1. Sensing area.
2. SP341 status LED indicator.
Orange and blinking = Bluetooth not connected
Green and blinking = Bluetooth connected
Blinking Red with either of the above = Low battery
3. Power Key. Press and hold to turn the instrument on.
Press and hold to turn the instrument off.
4. Built-in magnet. Attach to
metal surfaces for hands free
operation. Ensure surface is
not hot.
5. Serial number location. Last
three digits are the product
identification number and
marked in bold. Use this number to distinguish between
models when several SP1000’s
are connected to a phone or
tablet.
6. Screw to open battery compartment. Turn the screw
counter clockwise until it is
just above the compartment
door. Lift on the screw to open
the compartment.
2
Page 5

E. TAKING A MEASUREMENT
1. Download and install the TPI
Smart Probe App onto your
mobile device. Run the App. The
“Main-Real Time” screen will be
displayed.
The App will say “No Devices”
until a smart probe has been
connected.
2. Press and hold the SP1000
On/Off key down until it turns on.
The LED indicator will initially be
orange and blink.
The SP1000 will auto connect to
your mobile device. The LED
indicator will turn Green and
blink to indicate a link has been
established. The App will display
the model and ID number of the
smart probe connected.
If the SP1000 does not auto connect tap refresh on the App.
Refresh
This also clears any data
accumulated.
Displays the measured CO2
in ppm.
3. Tapping the list icon allows
optional functions to be
accessed. These include
Show/Hide, Unit, and Zeroing
Sensors.
Show/Hide : Allows a device
to be seen or hidden. Useful
when multiple devices are
connected.
Unit : Select unit of measure. PPM is the only unit
available.
Zeroing Sensors: This does
not work with the SP1000.
This function works with
other smart probe models.
3
Page 6

F.
ADDITIONAL APP FEATURES
1. Tapping “Graph” switches the
display to graph mode. The temperature will be displayed as a
line graph.
If multiple SP1000’s are being
used, each will have a different
color in the App.
2. Tapping “Data” switches the display to show the measured data
in a list format.
Each reading in the list will be
dated and time stamped.
Tap “Data”.
The measurement data is
shown in a list with a date
and time stamp.
Tapping the Refresh icon
clears this data.
Tap the mail icon.
Test data will be exported in
a CSV file via email.
Company Name : Test Products Intl
Company Address : 9615 SW Allen Blvd
Customer Name : Sample Customer
Customer Address : 1111 Sample Way
Building Name : Bldg 3
Building Address : 2222 Sample Ave
Date Time SP1000-008(ppm)
5/9/2018 13:30:42 601
5/9/2018 13:30:40 599
5/9/2018 13:30:38 597
5/9/2018 13:30:36 595
5/9/2018 13:30:34 593
5/9/2018 13:30:32 590
5/9/2018 13:30:30 589
5/9/2018 13:30:28 587
4. Exported data in the CSV file display with the date and time
stamp.
If a company and customer name
has been entered they will be
exported too. See page 5 for setting up the customer and company name.
Tap “Graph”.
Each SP1000 is displayed in
a different color in the line
graph.
3. Tapping the mail icon enables
test data to be exported in a CSV
file via email.
4
Page 7

H. ENTERING COMPANY AND CUSTOMER INFORMATION
1. Tap the Drop Down Menu icon to access additional features.
2. Select “Company Info” to enter your information to show up on
the CSV file report. You can enter your company name, address,
and email.
3. Select “Customer Info” to enter the information of the customer
the tests are being performed for. You can enter the customer
name, address, and email. You can also enter the building information in cases where the tests are being performed somewhere off-site from the customer.
The Smart Probe App allows you to enter your company information and the customer
information who the test is being performed for. This information will be exported in the
CSV file (see page 4).
5
G. DROP DOWN MENU
1. Tap the Drop Down Menu icon to access additional features.
Main - Real Time: Tapping this returns you to the main screen.
Select Application: Tapping this pulls up sub applications for
variious smart probes. These include Temperature differential
(SP341), Air Volume Calulation (SP565), and Tightness Test
(SP620). Note: There are no sub applications for the SP1000.
Company Info: Allows you to enter your information to show up
on the CSV file report. You can enter your company name,
address, and email.
Customer Info: Allows you to enter the information of the customer the tests are being performed for. You can enter the customer name, address, and email. You can also enter the building
information in cases where the tests are being performed somewhere off-site from the customer.
Exit: Closes the Smart Probe App.
The Smart Probe App has a Drop Down menu allowing access to additional app features.
Page 8

1. Start the app on your smart device.
2. Turn the SP1000 on. If multiple SP1000’s are being used
turn each one on after one has connected to the smart
device.
3. Move from room to room with the SP1000 allowing the
readings to stabilize in each area. Take care not to breath
directly into the sensor area. Doing so will cause the readings to rise and be inaccurate.
Another option is to leave the SP1000 in an area on a table
face up or use the magnet on the back to attach it to
something metal. This will prevent any chance of breathing
into the sensor area and skewing the readings.
4. The measurement data can be exported in a CSV file for
report generation.
I. PERFORMING AMBIENT AIR TESTS
6
Page 9

7
J. MAINTENANCE
1. Clean the surface of the instrument with a damp cloth.
2. Replace the three AAA batteries when the low battery indicator appears.
K. TROUBLE SHOOTING
Symptom
Probable Cause
CO2 seems inaccurate. • Low battery.
• Make sure not to breath into the
sensor area during tests.
• Ensure connection with phone is
working.
SP1000 does not turn on. • Dead or low batteries.
• Not holding down power switch
until unit turns on.
• Defective POWER ON switch.
CO2 reads high all the time. • Make sure not to breath into the
sensor during tests.
L. ACCESSORIES
Included Accessories
Part Number Description
A1000SP Soft pouch
Optional Accessories
Part Number Description
A925 Carrying case for 4 smart
probes
A926 Carrying case for 1 or 2
smart probes
Test Products International offers a variety of K-Type thermocouple probes for many
applications. Visit www.testproductsintl.com for additional information.
Page 10

This product is warranted to the purchaser against defects in material and workmanship for three years from the
date of purchase.
Covered by Warranty: Repair parts and labor; or replacement of the product at company’s option. Normal transportation charges to the purchaser are also covered.
Not Covered by Warranty: Damages to the product which are the result of abuse, improper use or maintenance are
not covered. Any other expense, consequential damages, incidental damages, or incidental expenses including damages to property are not covered. Transportation expenses to the company are not covered.
Some states do not allow the exclusion or limitation of incidental or consequential damages, so the above limitations or exclusions may not apply to you.
To Obtain Warranty Performance: Include with the product: your name, address, phone number, written description of the problem and proof of purchase date. Carefully package and return to:
TPI, Inc. TPI Canada TPI, Europe Ltd..
9615 SW Allen Blvd. 342 Bronte Rd. S., Unit 6 Longley House, International Drive
Beaverton, OR 97005 Milton, Ontario L9T 5B7 Southgate Crawley
USA Canada West Sussex RH10 6AQ England
503-520-9197 905-693-8558 44(0) 1293 530196
www.testproductsintl.com www.tpicanada.com www.tpieurope.com
Implied Warranties: Any implied warranties including implied warranties of merchantability and fitness for a par-
ticular purpose, are limited in duration to three years from date of purchase. To the extent any provision of this warranty is prohibited by federal or state law and cannot be preempted, it shall not be applicable. This warranty gives
you specific legal rights, and you may also have other rights which vary from state to state.
8
N. REPLACING BATTERIES
1. Turn the battery
compartment screw
counter clockwise
until it is just above
the compartment
door. Lift on the
screw to open the
compartment.
2. Replace the three
AAA batteries.
3. Re-install the battery cover and tighten the
screw by turning it clockwise.
M. WARRANTY
Page 11

NOTES
Page 12

Test Products International, Inc.
9615 SW Allen Blvd., Ste. 104
Beaverton, OR 97005
Tel: 503-520-9197
www.testproductsintl.com
Test Products International, Ltd.
342 Bronte Road South, Unit #6
Milton Ontario Canada L9T 5B7
Tel: 905-693-8558
www.tpicanada.com
Test Products International Europe Ltd.
Longley House, International Drive
Southgate, Crawley, West Sussex RH10 6AQ
Tel:: +44 (0) 1293 530196
www.tpieurope.com
 Loading...