

Page 1
A771
CO Accessory
Instruction Manual
Page 2
CONTENTS
1. Caution
2. Product Features
3. General Description
4. Operation
5. Battery Replacement
6. Specifications
7. Alarm Adjustment
8. Calibration
CAUTION
The A771 is factory calibrated and designed to measure
quantitative readings and alarm in the presence of
Carbon Monoxide only. The A771 can be used with any
digital multimeter with a 2-4 volt DC range capable of
measuring 0.001 volts DC.
The A771 is factory set to alarm at 30ppm, both when
new or when returned from an authorized repair center.
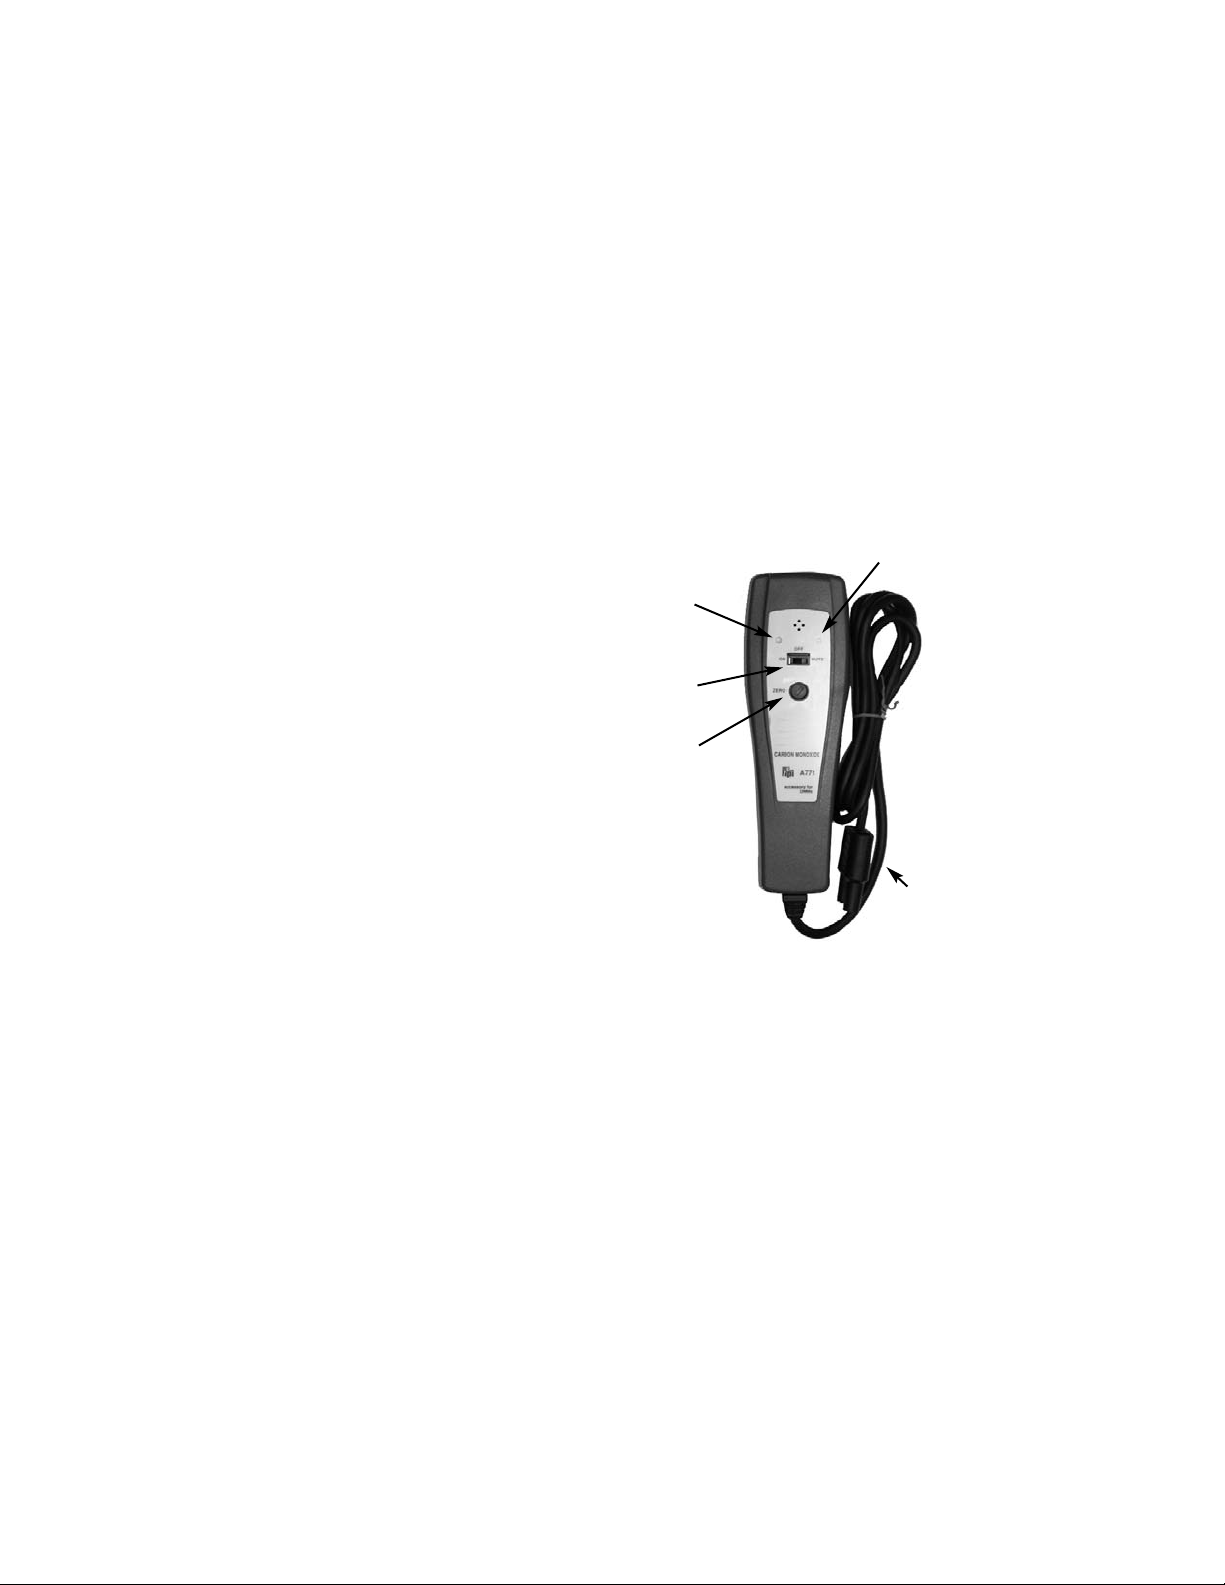
PRODUCT FEATURES
1. ON/OFF switch
2. Power LED
3. Alarm LED
4. Zero adjustment
5. Cord
1
2
3
4
5
Page 3

GENERAL
DESCRIPTION
The A771 is an advanced state-of-the-art Carbon
Monoxide monitor that may be used to measure
levels of carbon monoxide (CO) in th part per
million (ppm) range when used with a digital
multimeter (DMM).
The instrument has both audible and visual alarms
when CO has reached the preset level. This unit
may be operated as an alarm only personal
monitor.
NOTE: The product may be used with any DMM
capable of measuring 2-4 volts DC. The signal
output is 1 mV DC = 1 ppm CO.
The A771 uses and advanced electrochemical
sensor that measures Carbon Monoxide only. A
built-in filter reduces most cross-sensitivity to
other gases. This product should be used with
DMM’s with greater than or equal to 10 megohm
impedance.
OPERATION
(Investigation Use)
1. Attach the banana jack to the COM and V input jacks
of the DMM.
2. Turn on the DMM and select the 2 or 4 volt range
DC.
3. If the voltage reading is below 4 VDC with the A771
in the off position, replace the 9 volt battery in the
A771.
4. Turn on the A771. The alarm LED with flash and the
green LED should stay on.
5. In a clean environment, adjust the zero knob until
the DMM reads zero.
6. Place the A771 in the area to be tested and read the
CO in ppm on the DMM.
7. To deactivate the alarm sound, set the slide switch
to MUTE.
OPERATION
(Monitor Use)
1. Follow steps 1-5 above.
2. Unplug the A771 from the DMM.
3. Place the A771 in the belt pouch with the sensor
facing outward.
4. If an alarm occurs, use a DMM to measure the
concentration.
5. The red LED will illuminate continuously during
alarms
Page 4

BATTERY REPLACEMENT
1. Remove the single screw in the case back.
2. Slide open the battery compartment cover in the
direction of the arrow.
3. Replace the 9 volt battery and reassemble the unit.
SPECIFICATIONS
Size: 6.5” x 2.0” x 1.25”
(65 x 50 x 29mm)
Weight: 5.0 oz (142g)
Battery: 9 volt alkaline
Duty Cycle: 2,000 hours
Sensor: Long life Electrochemical
Range: 0 - 1999 ppm
Alarms: Visual, Audible
Alarm Set Range: 0-200 ppm
Calibration: 100ppm
Response Time: 90% of reading in 60 seconds
Temperature: 0 - 120 F
Relative Humidity: 5 - 95%
Accuracy: +/- 5ppm or 5% of reading,
whichever is greater
ALARM ADJUSTMENT
The alarm on the A771 is factory set at 30ppm. Use
the following procedure to select a different level
between 0 and 200ppm:
1. Remove the battery compartment cover on the
A771.
2. Using a DMM set to the DCmV range, touch the tips
of the test leads to the GND and Alarm test points on
the PCB (located on the left and right next to the
VR1 and VR2 adjustment pots).
3. Reading the DMM, set the alarm to the desired level
(1ppm = 1mV DC) by adjusting VR2.
4. Remove the leads and reassemble the A771.
CALIBRATION
1. Attach the banana jack to the COM and V input jacks
of the DMM.
2. Turn on the DMM and select the 2 or 4 volt range
DC.
3. If the voltage reading is below 4 VDC with the A771
in the off position, replace the 9 volt battery in the
A771.
4. Turn on the A771. The alarm LED with flash and the
green LED should stay on.
5. In a clean environment, adjust the zero knob until
the DMM reads zero.
6. Attach proper gas, regulator and adapter assembly
to the A771.
7. Allow to stabilize for 1 minute.
8. Adjust VR1 in the battery compartment to the
proper gas value.
9. Disconnect gas and allow A771 to zero.
Page 5

WARRANTY
The A771 is warranted to be free from defects in
materials and workmanship for the period of one year
from the date of purchase. If within the warranty period
your instrument should become inoperative from such
defects, the unit will be repaired or replaced at our
option. This warranty covers normal use and does not
cover damage which occurs in shipment or failure
which results from alteration, tampering, accident,
misuse, abuse, neglect or improper maintenance.
Instruments out of warranty will be repaired for a
service charge.
Return unit freight prepaid to:
TPI Service Center
9615 SW Allen Blvd. Ste 104
Beaverton, OR 97005
(503) 520-9197
This warranty gives you specific legal rights. You may
have other rights which vary from state to state.
 Loading...