

Page 1
TPI Corporation
P.O. Box 4973
Johnson City, 37602
WWW.TPICORP.COM
MTM
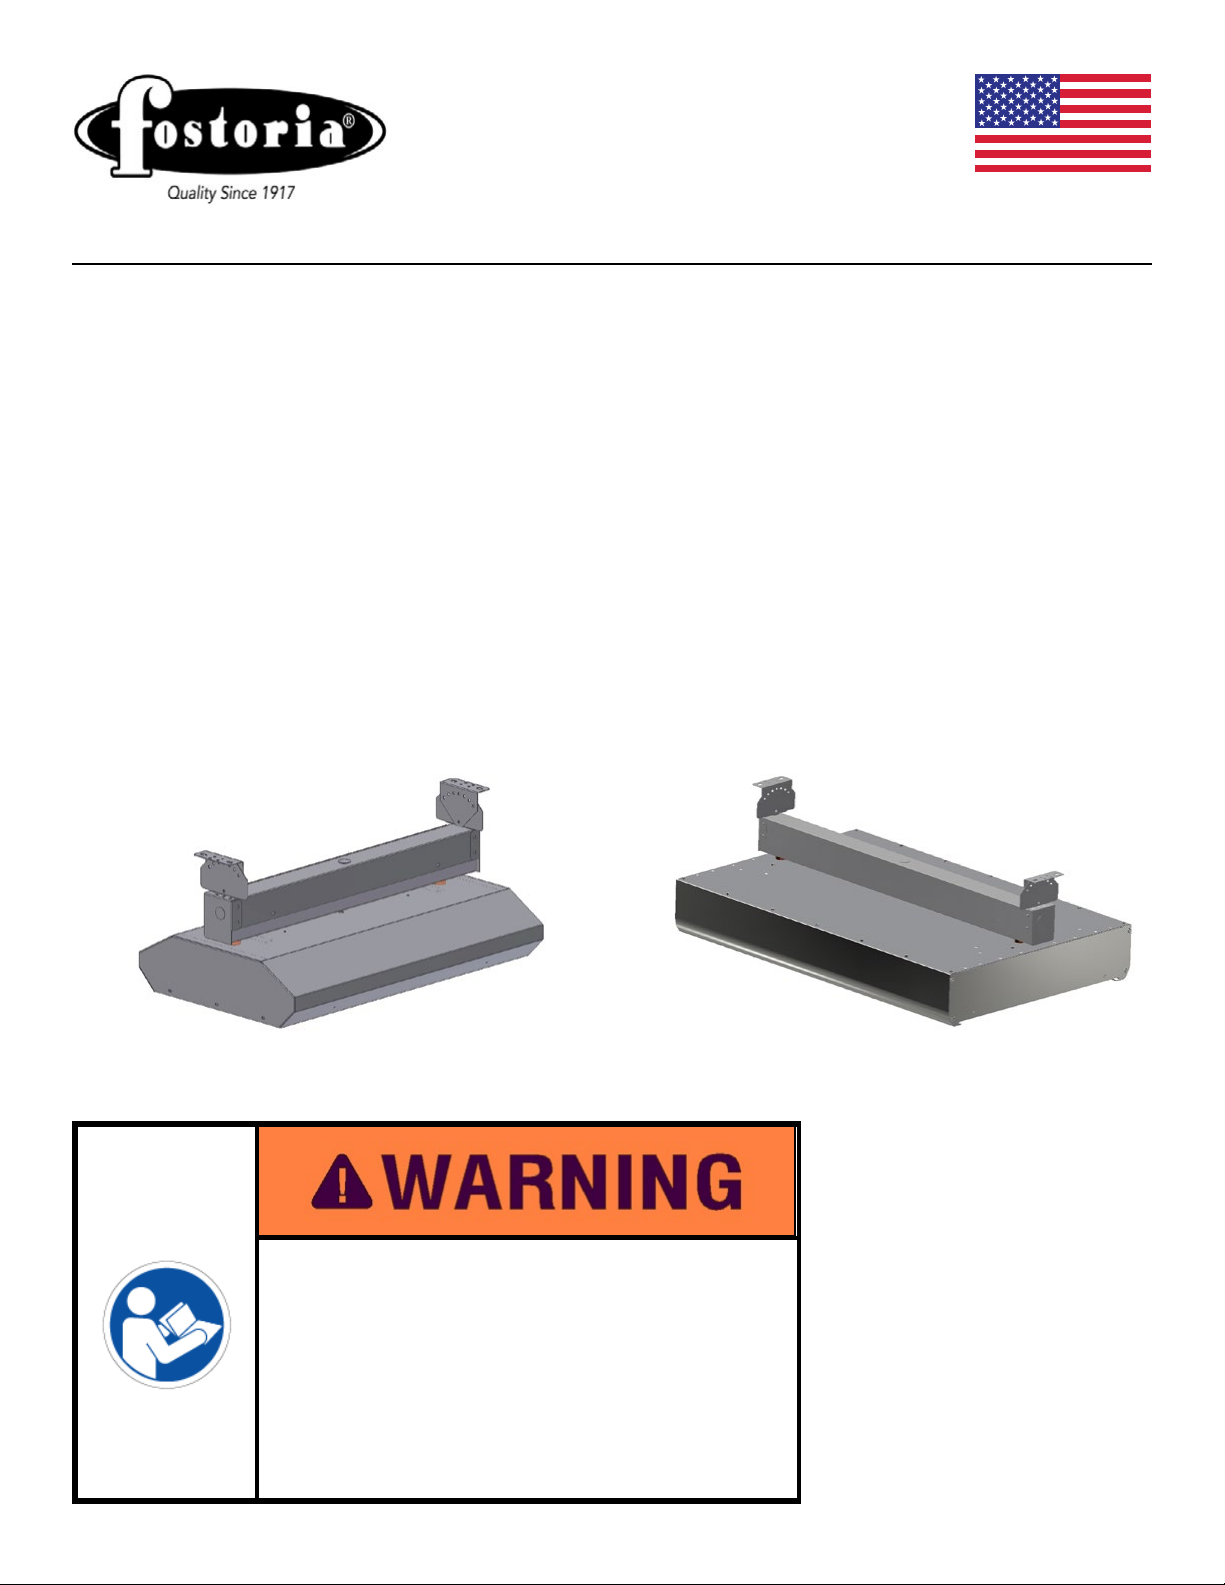
Models ‘TH’, ‘THSS’ and ‘THA’
Series 222,223,342,343,462,463
2 and 3 Lamp Units
OVERHEAD ELECTRIC INFRARED HEATER
MODELS TH AND THSS
IMPORTANT SAFETY INFORMATION INSIDE
• Serious injury or death possible
• Read, understand, and follow all safety
information and instructions in this manual
before using or servicing this product.
• Retain these instructions for future reference.
MODEL THA
REFER TO
COMPLETE
INDEX OF
INFORMATION
ON
PAGE 2
ISSUE DATE 10-09-03 REV. DATE 12/17 REV. LEVEL: 17 ECO 1-7383 OIPM P/N 8329
Page 2
TABLE OF CONTENTS
Warnings Page 3
Important Instructions Page 4
Specications Page 5
Installation Planning & Layout Design Page 6
Application Guide Page 7
Clearances to Combustibles Page 8
Mounting Instructions Page 9
Totally Exposed Outdoor Applications Page 10
Lamp Installation & Replacement Page 10
Electrical Wiring for Models 222, 342, & 462 Page 11
Electrical Wiring for Models 223, 343, & 463 Page 12
Maintenance, Troubleshooting Page 13
Optional Recessed Mounting Frame Installation Page 14
Optional Wire Guard Installation Models ‘TH’ and ‘THSS’ Page 15
Optional Wire Guard Installation Models ‘THA’ Page 16
ATTENTION:
The table to the right provides
denitions of the signal
words that can be found
throughout this manual.
These signal words are used
to express the severity of the
hazard at hand. The signal
words are generally used
in conjunction with safety
symbols that correspond to
the text for that particular
hazard. As you read this
manual, refer back to this
table when you are unsure
of the signal word denition.
ISSUE DATE 10-09-03 REV. DATE 12/17 REV. LEVEL: 17 ECO 1-7383 OIPM P/N 8329
2
Page 3

SAFETY INFORMATION
READ THIS MANUAL CAREFULLY before
installing or servicing this product. Improper
installation, operation, or maintenance can result
in death, severe injury, or property damage!
NOT FOR INDOOR RESIDENTIAL USE!
FOR INDOOR COMMERCIAL/INDUSTRIAL USE.
FOR PROTECTED AND UNPROTECTED OUTDOOR USE.
NOT FOR USE IN HAZARDOUS OR EXPLOSIVE
ATMOSPHERES!
INSTALLATION AND SERVICE OF THESE
PRODUCTS MUST BE CONDUCTED BY TRAINED
PERSONNEL EXPERIENCED WITH ELECTRICAL
EQUIPMENT.
CLEARANCES TO COMBUSTIBLES A S
DOCUMENTED IN THIS MANUAL AND ON THE
HEATER MUST BE MAINTAINED AT ALL TIMES!
Combustibles: Failure to maintain minimum
clearances to combustible materials can result in
serious re hazard. Locations used for storage of
combustible materials must have signs posted to
specify maximum permissible stacking heights such
that required clearances are maintained. These signs
must be conspicuously located or adjacent to heater
thermostats.
Vehicles: These heaters must be installed such that
the minimum clearances described in this manual are
maintained from vehicles parked below the heater.
Suspension: The use of appropriate mounting
hardware (beam clamps, chains, rods, turnbuckles,
etc.) are a must. The weight of the heater must
be entirely supported from a permanent part
of the building structure having adequate load
characteristics.
Do not attach ductwork to this heater or attempt to
use it as a make-up air heater. Such use voids the
warranty and may create unsafe conditions.
Do not insert ngers or foreign objects into the heater.
Do not block or tamper with the heater while it is in
operation. Do not touch heater while it is in operation
or just after it has been turned off, as some parts may
be hot enough to cause injury.
Make certain that the power source conforms
to the electrical requirements of the heater.
Disconnect power before installing or servicing.
If the power disconnect is out of sight, lock
it in the open position and tag it to prevent
unexpected application of power. Failure to do
so could result in fatal electric shock.
WARNING: DO NOT DEPEND UPON A
THERMOSTAT OR OTHER SWITCH AS THE SOLE
MEANS OF DISCONNECTING POWER WHEN
INSTALLING OR SERVICING THE HEATER. FOR
CE APPLICATIONS AN ALL POLE DISCONNECT
WITH CONTACT SEPARATION OF AT LEAST
3mm MUST BE USED. ALWAYS DISCONNECT
BREAKER AS DESCRIBED ABOVE. FAILURE
TO DO SO COULD RESULT IN FATAL ELECTRIC
SHOCK.
This heater is intended ONLY for permanent
installation in accordance with the National
Electric Code (NEC), all applicable local codes
and ordinances, and all sections of this manual.
Any variance voids the warranty and may create
unsafe conditions.
USE COPPER WIRING ONLY
Special attention must be given to any bonding*
(grounding) information pertaining to this
heater. To prevent the risk of electrocution, the
heater must be securely and adequately bonded.
This should be accomplished by connecting a
conductor between the service panel and the
green grounding screw provided on the heater.
To ensure a proper bond, the bonding means
must be tested by a qualied electrician.
Check branch voltage. Heaters should be
operated at voltages no higher than the heating
elements and the heater are designed for. (Lower
voltages, however, pose no problem other than
a loss of wattage). Heaters are not intended for
process heating applications.
In cases where property damage may result from
malfunction of the heater, a back-up system or a
temperature alarm should be used.
*Bonding is the term that describes the completion of the
electrical circuit back to its source, which allows a breaker or
fuse to clear if a short occurs in the line.
ISSUE DATE 10-09-03 REV. DATE 12/17 REV. LEVEL: 17 ECO 1-7383 OIPM P/N 8329
3
Page 4
IMPORTANT INSTRUCTIONS
1. Read all instructions before installing or using the heater
2. This heater is hot when in use. To avoid burns, do not let bare skin touch hot surfaces. Keep away
from combustible materials at minimum, the following required distances.
CAUTION:
ceiling. Heaters MUST BE SEPARATED by more than 36 inches and 72 inches
from any combustible surface in direct radiation path.
ATTENTION: NE PAS installer à moins de 24 pouces à une surface verticale ou 6 pouces à un
plafond. Chauffe doivent être séparés par plus de 36 pouces et 72 pouces de toute
surface combustible dans le chemin de rayonnement direct
3. Extreme caution is necessary when any heater is used by or near children or invalids and whenever
the heater is left operating and unattended.
4. Do not operate any heater after it malfunctions. Disconnect power at service panel and have heater
inspected by a reputable electrician before reusing.
5. Do not use outdoors.
6. To disconnect heater, turn controls to off, and turn off power to heater circuit at the main disconnect
panel (or operate internal disconnect switch if provided).
7. Do not insert or allow foreign objects to enter any ventilation or exhaust opening as this may cause
an electric shock or re, or damage to the heater.
8. To prevent a possible re, do not block air intakes or exhaust in any manner.
9. A heater has hot and arcing or sparking parts inside. Do not use it in areas where gasoline, paint, or
ammable vapors or liquids are used or stored.
10. Use this heater only as described in this manual. Any other use not recommended by the manufacturer
may cause re, electric shock, or injury to persons.
SAVE THESE INSTRUCTIONS
DO NOT install closer than 24 inches to a vertical surface or 6 inches to a
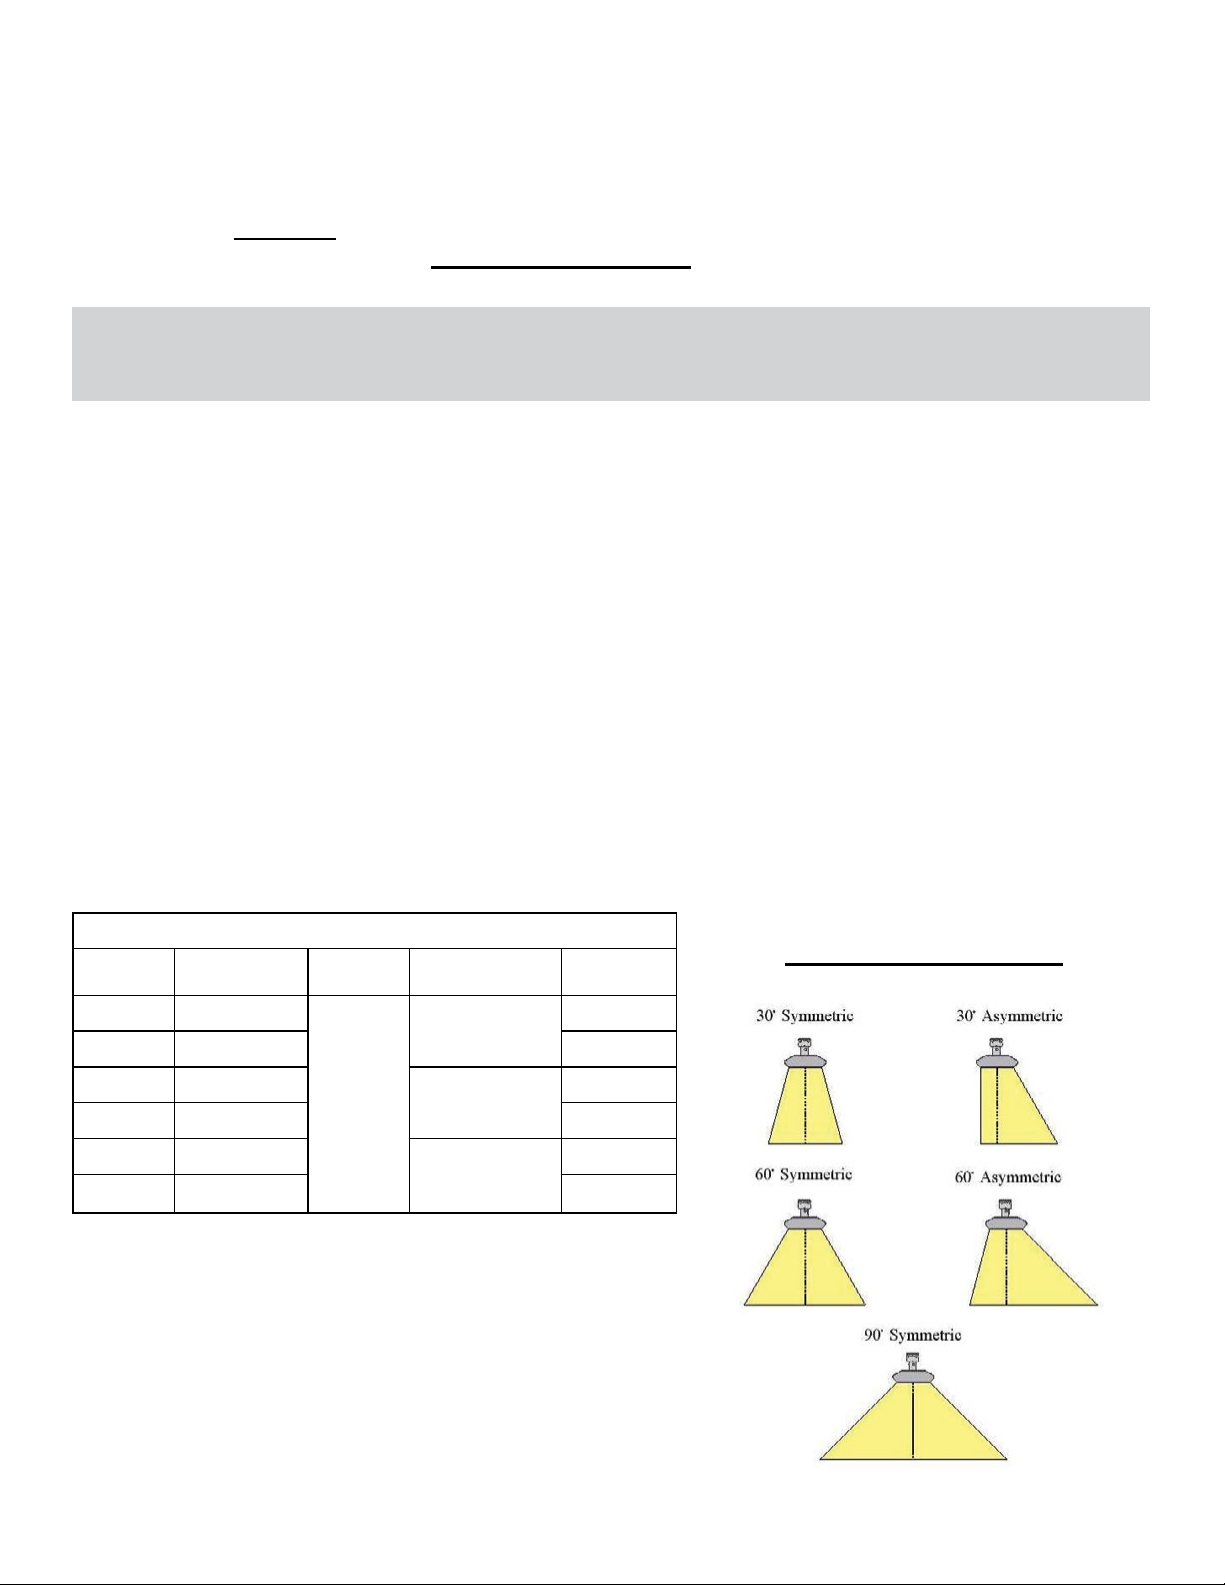
MODEL NUMBER DESIGNATION CHART
SERIES
222 30
223 60 220V
342 90
343 A30 277V
462 A60
463 480V
REFLECTOR
PATTERNS
TAB
HINGE
TH
HOUSING
MATERIAL
BLANK =
BROWN
SS=
STAINLESS
STEEL
A=
ARCHITECTURAL
ALUMINUM
EXTRUSION
VOLTAGES
208V
240V
380V
MODEL CONFIGURATION EXAMPLES:
222-30-TH-240V; 222 SERIES, 30
PAINTED HOUSING
O
PATTERN, BROWN
342-60-THSS-277V; 342 SERIES, 60O PATTERN
STAINLESS STEEL HOUSING
463-90-THA-480V; 463 SERIES, 90O PATTERN
PAINTED ALUMINUM
EXTRUSION HOUSING
REFLECTOR PATTERNS
ISSUE DATE 10-09-03 REV. DATE 12/17 REV. LEVEL: 17 ECO 1-7383 OIPM P/N 8329
4
Page 5
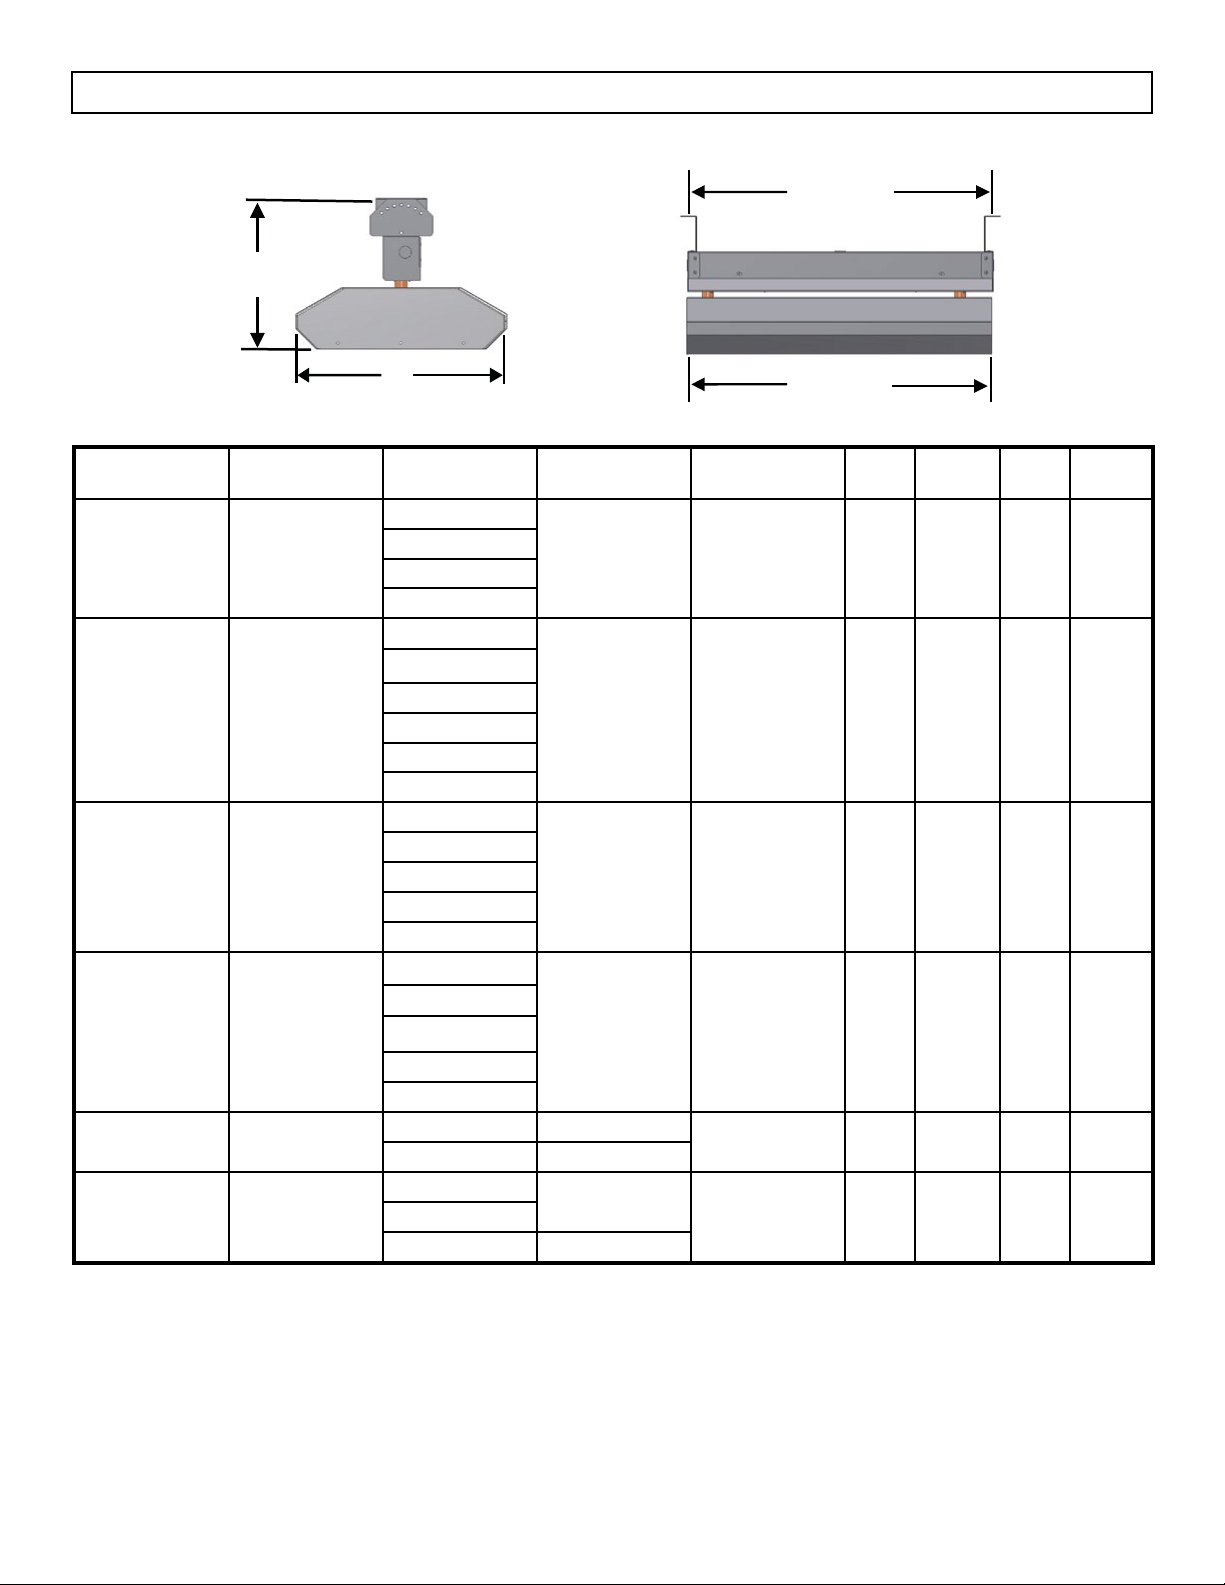
SPECIFICATIONS
MOUNTING CENTERS
D
c
HEATER
SERIES
222 2
223 3
342 2
343 3
462 2
463 3
NUMBER
OF LAMPS
B
VOLTAGE
and PHASE
208; 1ph
240; 1ph
277; 1ph
480; 1ph
208; 1 or 3ph
220; 1 or 3ph
240; 1 or 3ph
277; 1 or 3ph
380; 1 or 3ph
480; 1 or 3ph
208; 1ph
240; 1ph
277; 1ph
480; 1ph
600; 1ph
208; 1 or 3ph
240; 1 or 3ph
277; 1 or 3ph
480; 1 or 3ph
600; 1 or 3ph
480; 1ph 7300
600; 1ph 7600
380; 1 or 3ph
600; 1 or 3ph 11400
WATTAGE BTU’S A B C D
A
3200 10,992 24” 15” 11” 23-1/2”
4800 16,382 24” 21-1/2” 11” 23-1/2”
5000 17,065 33” 15” 11” 32-1/2”
7500 25,298 33” 21-1/2” 11” 32-1/2”
24,915 46” 15” 11” 45-1/2”
10950
37,372 46” 21-1/2” 11” 45-1/2”480; 1 or 3ph
ISSUE DATE 10-09-03 REV. DATE 12/17 REV. LEVEL: 17 ECO 1-7383 OIPM P/N 8329
5
Page 6

INSTALLATION PLANNING
The Fostoria Mul-T-Mount Series offers the highest watt density and heating efciency in an
electric infrared heater. All models are listed for spot-heat or total building heat indoors
(excluding residential), or for totally unprotected outdoor applications. Fixtures are also
listed for recessed applications, such as in ceilings or canopies.
2 and 3-Lamp models are available in either Stainless Steel , a Hi-Temp Brown Powder
Coated or an Architectural extruded aluminum housing with powder coat nish.
The specially designed “T” Tab wire channel allows for one-man installation.
No asbestos or mercury is used in the manufacture of these heaters.
CHECKING YOUR SHIPMENT
Upon receipt of your shipment, check the carton(s)
for damage.
Any accessory items ordered for heater will be
shipped in their own carton.
Claims for damaged material or shortages that
were not evident upon receipt of shipment must be
reported to carrier and Fostoria customer service
immediately.
Before starting to install the heater, make sure
that all components and accessories ordered are
available.
INSTALLER QUALIFICATIONS
Only rms or individuals qualied to perform work
in accordance with the applicable specications for
electrical equipment should be engaged to install
Fostoria MTM systems. Consult local building
inspectors, re marshals, your local Fostoria
representative or the factory for guidance.
INSTALLER RESPONSIBILITY
National and local codes and ordinances together
with specications provided by Fostoria Industries
comprise the information needed for proper
installation. The installer must furnish all materials
that have not been purchased from Fostoria
Industries or its representatives. It is the installer’s
responsibility that the materials and methods of
installation result in a job that is workmanlike and
in keeping with all applicable codes.
In storage areas where stacking of materials
may occur, the installer must provide signs which
specify the maximum stacking height so as to
maintain the required clearances to combustibles.
ELECTRICAL BONDING (GROUNDING)
A protective non-corrosive conductor terminal
must be rmly attached to a protective bonding
conductor (both supplied by customer). This must
then be secured to the heater with the supplied
green screw and lock washer in the heater wireway to ensure a proper bond (ground).
LAYOUT DESIGN
When positioning heaters, keep in mind the clearance to combustible materials, lights, sprinkler heads,
overhead doors, storage areas with stacked materials, gas and electrical lines, parked vehicles, cranes,
etc. Refer to page eight (8) for minimum clearance to verify that a safe installation condition exists.
ISSUE DATE 10-09-03 REV. DATE 12/17 REV. LEVEL: 17 ECO 1-7383 OIPM P/N 8329
6
Page 7

APPLICATION GUIDE
OUTDOOR COMFORT HEATING
Two (2) watts per square foot is equal to One (1) degree temperature rise. Heater installation
shall comply with all OIPM, NEC, and local restrictions.
SPOT HEATING (OUTDOOR) APPLICATION CHART
MODEL
SERIES
222-60 8-10 10.5 X 9.5 32 15”
223-60 8-10 10.5 X 9.5 48 24”
342-60 10-12 14 X 12 30 15”
343-60 10-12 14 X 12 45 23”
462-60 10-12 15 X 12 41 20”
463-60 10-12 15 X 12 61 30”
RECOMMENDED
MOUNTING HEIGHT (FT.)
COVERAGE OF HEATHER
LENGTH X WIDTH (FT.)
WATT PER
SQUARE
FOOT
TEMPERATURE
RISE EXPECTED
INDOOR SPOT HEATING
One (1) watt per square foot is equal to One (1) degree temperature rise. When comfort spot heating
people, two heaters should be used to heat both sides of the individual. Heater installation shall comply
with all OIPM, NEC, and local restrictions.
SPOT HEATING (INDOOR) APPLICATION CHART
MODEL
SERIES
222-60 8-10 13 X 12 21 20”
223-60 10-12 15 X 14 23 23”
222-30 12-14 8.5 X 7.5 50 50”
342-60 8-10 14 X 12 30 30”
343-60 10-12 16 X 14 24 34”
462-60 12-14 19 X 16 24 24”
463-60 12-14 19 X 16 36 36”
RECOMMENDED
MOUNTING HEIGHT (FT.)
A*
COVERAGE OF HEATER
LENGTH X WIDTH (FT.)
WATT PER
SQUARE
FOOT
TEMPERATURE
RISE EXPECTED
*Clearances to combustibles must be maintained regardless of recommended mounting height. See
page 8 for clearance distances.
6’ 8”
A
ISSUE DATE 10-09-03 REV. DATE 12/17 REV. LEVEL: 17 ECO 1-7383 OIPM P/N 8329
7
Page 8

MINIMUM CLEARANCES TO COMBUSTIBLES
EXPLOSION HAZARD
FIRE HAZARD
BURN HAZARD
•
Serious injury or death may
occur.
• Do not use in locations containing
hazardous atmospheres.
• Do not touch any part of heater
while in operation or directly
thereafter. It is very HOT.
END VIEW – 0 DEGREE TILT
6”
• Dimensions are listed in inches
•
Dimension “B” indicates the
required clearance to combustibles;
it DOES NOT indicate the required
mounting height.
TOP VIEW - 2 UNITS SHOWN
Multiple Heaters may be butted
together on end surfaces
C”
C”
B”
C”
END VIEW – 0-45 DEGREE TILT
6”
24” FROM A
VERTICAL OR
COMBUSTIBLE
SURFACE
OR
B”
36” FROM
ANOTHER
HEATER
B”
B”
WARNING!
B” Dimension
2-Lamp units:
-72” for a single unit
-72” for (2) or more
heaters being
mounted end-to-end.
3-Lamp units:
-72” for a single unit
-96” for (2) or more
heaters being
mounted end-to-end.
C” Dimension
TYP. BOTH SIDES AND
ENDS
24” FROM A VERTICAL
OR COMBUSTIBLE
SURFACE
36” FROM ANOTHER
HEATER
Heaters should be installed so that the minimum clearance to vehicles, as marked on the
heater, will be maintained. If vehicle lifts are present, ensure that the minimum clearance
to combustibles will be maintained from the highest raised vehicle
.
ISSUE DATE 10-09-03 REV. DATE 12/17 REV. LEVEL: 17 ECO 1-7383 OIPM P/N 8329
8
Page 9

MOUNTING INSTRUCTIONS
CLEARANCES TO COMBUSTIBLES AS ON PAGE 8 OF THIS MANUAL AND ON THE HEATER MUST BE
MAINTAINED AT ALL TIMES!
NOTE: If asymmetrical reectors are used, be sure to mount the wireway with the “T” slots facing
away from the wall or obstruction, and toward the area to be heated.
CAUTION: Install heater so that the quartz lamps are horizontal. Failure to do this may cause the
heating element within the tube to sag and cause premature burnout.
Mounting Centers
Heater Series “A” dimension
222 & 223 23-1/2
342 & 343 32-1/2
462 & 463 45-1/2
Top channel assembly
1. Attach the adjustment hanging brackets to the top wire
channel. On each end, place (1) 10-32 x ½ screw
through the bottom hole of the adjustment hanging
bracket and through the bottom hole of the top wire
channel. Place (1) 10-32 lock nut on the screw. Don’t
tighten completely. NOTE: The adjustment hanging
brackets are NOT required for chain suspension.
2. Adjust bracket to desired mounting angle (see gure B).
3. Place (1) 10-32 x ½” screw through the slot in the
adjustment hanging bracket and the hole in the top wire
channel. Place (1) 10-32 lock nut on the screw and
tighten.
4. Tighten 10-32 lock nuts from step #1.
5. Hook heater body into mounted wire channel cover.
Unit will hang freely by the “T” tabs, leaving both hands
free to wire unit (see gure C).
6. Close wire channel using the (4 or 6) 8-32 x 3/8 screws
provided in hardware pack. NOTE: Quantity will vary
depending on heater length.
Figure B
Figure A
WIRE CHANNEL COVER CONTAINS
KNOCKOUTS ON BOTH ENDS AND
TOP CENTER
screws (provided) to secure
Use blunt tip #8-32 X 3/8
top channel to wiring
channel
Figure C
MOUNTING OPTIONS
CHAIN SUSPENSION: Use 14 gauge jack chain and “S”
hooks (not supplied). “S” hooks must be crimped shut so
the heater cannot be inadvertently lifted off of its mounting.
*NOTE – 462 & 463 Series heaters are not designed for
chain suspension. One of the three mounting options
to the right should be used for these heaters.
ISSUE DATE 10-09-03 REV. DATE 12/17 REV. LEVEL: 17 ECO 1-7383 OIPM P/N 8329
STEM SUSPENSION: Use solid rods (1/4” diameter min.)
or suitable tubing. Drill holes in top wire channel 4” from
each end for mounting.
VMB-41-SS: Wall Mounting Bracket.
RECESSED MOUNTING: Refer to page 14 of this
manual.
9
Page 10

TOTALLY EXPOSED OUTDOOR APPLICATIONS
For totally exposed outdoor applications (not
ceiling protected) the connections must be made
as illustrated at right.
Red sleeves used for visible light reduction are
not recommended for applications near coastal
waters. Purchase lamps with integral light lter
from factory for these applications.
LAMP INSTALLATION & REPLACEMENT
CAUTION: Disconnect power before installing
or replacing supplied quartz lamps or quartz
tubes. These elements can and should be
installed prior to mounting heater.
1. Remove the housing end caps and open
positioning clips.
Note: All conduit, conduit ttings and junction
boxes are supplied by the customer.
2. Position heating elements in “L” slots at ends of
reector. Avoid handling quartz glass as much
as practical. Quartz glass should be wiped off
with a clean cloth before energizing heater.
3. Close positioning clips to secure the heating
element in the slot (see gure A).
4. Carefully wrap heating element pigtail clockwise
around terminal screws (see gure B).
5. Tighten terminal screws (see gure B).
CAUTION: Do not draw pigtail so tight
that pressure is put on heating element.
Maintain a partial loop (or looseness) in the
pigtail 1/2” max. see FIGURE B.
NOTE: Cut excess pigtail off at terminal to
prevent lead from touching metal parts.
6. Install end caps using sheet metal screws
supplied in parts kit.
Note: The Mul-T-Mount heaters are designed for
use with Fostoria quartz lamp infrared heating
elements only. They are NOT intended to be
used with straight metal rod heating elements.
POSSIBLE LAMP FAILURE
The heating elements used in this product can be damaged
by contamination (salt deposits from perspiration or
coastal air) on the surface of the quartz sleeve. At high
temperatures, these salts will cause the quartz to become
porous and leak, allowing air to come in contact with the
tungsten element. When this occurs, the element will burn
out quickly and the outer quartz sleeve can break. The
instructions below must be followed.
• Always wear cotton or latex gloves when installing or
replacing elements.
• Always clean the quartz sleeve with an alcohol
moistened soft cloth before using the heater
• Whenever contamination (milky white appearance
on quartz sleeve) is observed, the element must be
immediately replaced
.
ISSUE DATE 10-09-03 REV. DATE 12/17 REV. LEVEL: 17 ECO 1-7383 OIPM P/N 8329
10
Page 11

WIRING FOR UNITS WITH (2) LAMPS
ELECTRICAL SHOCK HAZARD
• Serious injury or death may
occur.
TWO-STAGE WIRING
Two-stage operation allows one or both lamps in the heater(s)
to be energized, depending on the signal from an appropriate
two-stage control device (e.g. two-stage thermostat). This will
allow the heater(s) to operate at 50% on, 100% on, or 100% off;
instead of limiting the operation to 100% on or 100% off.
Two circuits are required for two-stage wiring.
• Disconnect from electrical
supply before installing or
servicing this heater.
• This appliance must be
connected to a properly
bonded (grounded)
electrical source.
This xture is equipped with 4 high-temperature silicone
lead wires to accommodate either single phase or three
phase electrical service. They are shipped wire-tied
together. Remove the wire-tie before making electrical
connections.
Wiring connections should always be made through
one of the knockouts in the top wire channel. Consult
the factory, or a qualied electrician for details on
staging.
For two-stage operation connect L1 & L2 of circuit #1 to lamp #1
and connect L1 & L2 of circuit #2 to lamp #2 as illustrated below.
CIRCUIT #1
L1 L2
L1 L2
LAMPNO.1
LAMPNO.2
CIRCUIT #2
Common component layout for controlling
Fostoria Mul-T-Mount heaters
(2 Stage wiring shown)
This is NOT a wiring schematic
Wires in wiring channel are identied with wire markers.
Markers indicate lamp number.
Supply wires must be copper and rated for at least 90º
C. Wire connectors should also have a minimum rating
of 90º C.
For use in TOTALLY EXPOSED OUTDOOR
APPLICATIONS refer to page 10.
SINGLE-STAGE WIRING Connect both wires from
one end of heater to L1 and the remaining wires from
the other end to L2 in the control panel.
LAMPNO.1
L1 L2
LAMPNO.2
ISSUE DATE 10-09-03 REV. DATE 12/17 REV. LEVEL: 17 ECO 1-7383 OIPM P/N 8329
11
Page 12

WIRING FOR UNITS WITH (3) LAMPS
ELECTRICAL SHOCK HAZARD
• Serious injury or death may
occur.
• Disconnect from electrical
supply before installing or
servicing this heater.
• This appliance must be
connected to a properly
bonded (grounded)
electrical source.
This xture is equipped with 6 high-temperature silicone
lead wires to accommodate either single phase or three
phase electrical service. They are shipped wire-tied
together. Remove the wire-tie before making electrical
connections.
Wiring connections should always be made through
one of the knockouts in the top wire channel. Consult
the factory, or a qualied electrician for details on
staging. Refer to Figure A on page 9.
Supply wires must be copper and rated for at least
90º C. Wire connectors should also have a minimum
rating of 90º C.
For use in TOTALLY EXPOSED OUTDOOR
APPLICATIONS refer to page 10.
SINGLE PHASE, SINGLE STAGE WIRING
Connect all three wires from one end of heater to L1
and the remaining three wires from the other end to
L2; refer to diagram below.
LAMPNO.1
LAMPNO.2
LAMPNO.3
L1 L2
THREE PHASE, SINGLE STAGE WIRING
Balance each leg throughout the three elements in
each heater, as shown below.
LAMPNO.1
LAMPNO.2
LAMPNO.3
L3
L2
L1
Control Panel
TYPICAL SINGLE PHASE WIRING
Wire markers on lead wires indicate lamp number
TYPICAL THREE PHASE WIRING
Wire markers on lead wires indicate lamp number
Control Panel
ISSUE DATE 10-09-03 REV. DATE 12/17 REV. LEVEL: 17 ECO 1-7383 OIPM P/N 8329
12
Page 13

MAINTENANCE
Pre-Season Maintenance and Annual Inspection
To ensure your safety and for years of trouble-free operation of the heating system, annual service
and inspections must be done by a qualied contractor.
To obtain maximum performance from your heater(s) each year, we recommend the following be
performed at the start of the heating season:
1.Clean reector surface with a damp cloth.
2. Clean quartz lamp with alcohol moistened soft cloth.
3. Make sure heater is secure on all hanging points.
4.Maintain the Clearance to Combustibles. Immediately remove objects in violation of the
clearance to combustibles.
If additional service to the heater is required, contact the factory or your local representative.
TROUBLESHOOTING
SYMPTOM POSSIBLE CAUSE(S) CORRECTIVE ACTION
Element does not energize
Not enough heat.
Too much heat.
1. Defective element.
2. Improper connection.
3. Pigtail loose from socket connection.
1. Heater too small for application.
2. Heater mounted too high or too far.
1. Heater too large for application.
2. Heater mounted too low or too close.
1. Replace element.
2. Check connection to power source.
3. Rewind or re-insert pigtail into socket.
1. Add more heaters.
2. Decrease mounting height or distance.
1. Replace with smaller heater.
2. Increase mounting height or distance.
WARNING: WHEN ADJUSTING MOUNTING HEIGHT FOR MORE OR LESS HEAT, STAY WITHIN
RECOMMENDED MOUNTING HEIGHTS ON PAGE 7.
ISSUE DATE 10-09-03 REV. DATE 12/17 REV. LEVEL: 17 ECO 1-7383 OIPM P/N 8329
13
Page 14

OPTIONAL RECESSED MOUNTING FRAME INSTALLATION
MOUNTING INSTRUCTIONS
‘TH’ AND ‘THSS’ MODELS ONLY
1. Mount frame to heater with #8 x 1/2" long sheet metal screws supplied by customer. Four screws are
required on the RMF-222-A, six required on the RMF-342-A and eight on the RMF-462-A and RMF-223-SS
units; ten screws are required on the RMF-343-SS and twelve on the RMF-463-SS models. Use the frame
as a template for laying out the holes.
2. Mount the frame to the ceiling, using the outside slots only, with 1/4" lag screws provided by the customer.
Four lag screws are required on the RMF-222-A and RMF-223-SS units, six on the RMF-342-A and RMF343-SS, and eight on the RMF-462-A and RMF-463-SS units. Tabs will center frame in opening. CAUTION:
To maintain required clearance above heater, refer to minimum clearances to combustible on page 8.
FIELD WIRING CONNECTIONS
A. Select the appropriate knockout on the top wiring channel, and install a 12" conduit nipple and
splice box (customer supplied).
B. Route the leads from the wiring channel through the conduit and connect with the supply wiring
inside the splice box.
C. Follow local and national electric codes.
NOTE: Hold dimensions A
and B to + 1/8” for rough
opening in the ceiling.
Heater Series Model Part No. D DIM. A (IN.) DIM B (IN.)
222 Painted RMF-222-A 04494402 27 1/4
Stainless RMF-222-SS-A 04419902
342 Painted RMF-342-A 04418702 36 1/4
Stainless RMF-342-SS-A 04420702
462 Painted RMF-462-A 04494502 49 1/4
Stainless RMF-462-SS-A 04421002
223 RMF-223-SS 08811039 32 1/4
463 RMF-463-SS 08811139 54 1/4
18
29 5/8343 RMF-343-SS 08811339 41 1/4
ISSUE DATE 10-09-03 REV. DATE 12/17 REV. LEVEL: 17 ECO 1-7383 OIPM P/N 8329
14
Page 15

OPTIONAL WIRE GUARD INSTALLATION MODELS TH AND THSS
Heater Series Wire Guard Part Number
222 CHWG-222 08511500
223 CHWG-223 08543600
342 CHWG-342 08511400
343 CHWG-343 08543500
462 CHWG-462 08516200
463 CHWG-463 08543400
CAUTION: DISCONNECT POWER BEFORE
INSTALLING OR SERVICING. IF THE POWER
DISCONNECT IS OUT OF SIGHT, LOCK IT IN
THE OPEN POSITION AND TAG IT TO PREVENT
UNEXPECTED APPLICATION OF POWER.
FAILURE TO DO SO COULD RESULT IN FATAL
ELECTRICAL SHOCK.
Mounting holes for attaching the lamp guard are provided in
heater housing. NOTE: Mounting holes are not provided on
older models. Using the drill starts provided in the heater
housing, drill a 1/8” diameter hole at each location. (See
dimensional details.)
1. Place mounting clips provided, on the loops of the lamp
guard (see Detail A below).
2. Attach the lamp guard to the heater using the #8 sheet
metal screws provided.
MAINTENANCE
CAUTION: Disconnect power before installing or
servicing. If the power disconnect is out of sight, lock
it in the open position and tag it to prevent unexpected
application of power. Failure to do so could result in
fatal electrical shock.
To service the heater in the overhead position, it will be
necessary to remove the screws from only one side of the
lamp guard. The lamp guard will then swing clear of the
heater.
Detail A
ISSUE DATE 10-09-03 REV. DATE 12/17 REV. LEVEL: 17 ECO 1-7383 OIPM P/N 8329
15
Page 16

OPTIONAL WIRE GUARD INSTALLATION ‘THA’ MODELS
1. Slide wire guard into track on the bottom of the extrusion.
2. Secure wire guard with the provided screw(s) into the end cap of the heater, being
carefull not to strip screws.
Optional Wire Guards For ‘THA’ Series
Heater Series Wire Guard Part Number
222 THA-222 04898602
223 THA-223 04898702
342 THA-342 04898802
343 THA-343 04898902
462 THA-462 04899002
463 THA-463 04899102
ISSUE DATE 10-09-03 REV. DATE 12/17 REV. LEVEL: 17 ECO 1-7383 OIPM P/N 8329
16
 Loading...