

TPG USB E1762 Quick Setup Manual
TPG MOBILE BROADBAND
QUICK SETUP GUIDE
TPG USB E1762 Modem

TPG MOBILE BROADBAND QUICK SETUP GUIDE
Thank you for choosing TPG Mobile Broadband and USB E1762 modem.
This User Guide provides step by step instructions that will take you through the setup
process to get started.
Content:
1. Getting to know your USB E1762 modem
2. Installing USB E1762 modem
3. Installing TPG Mobile Broadband Connection software (For Windows XP)
4. Installing TPG Mobile Broadband Connection software (For Mac OSX)
5. Your rst connection to TPG Mobile Broadband
6. Using the Software and USB E1762 modem
7. Checking your data usage online
TPG MOBILE BROADBAND QUICK SETUP GUIDE
SIMPLE STEPS TO GET CONNECTED
TPG MOBILE BROADBAND QUICK SETUP GUIDE 1
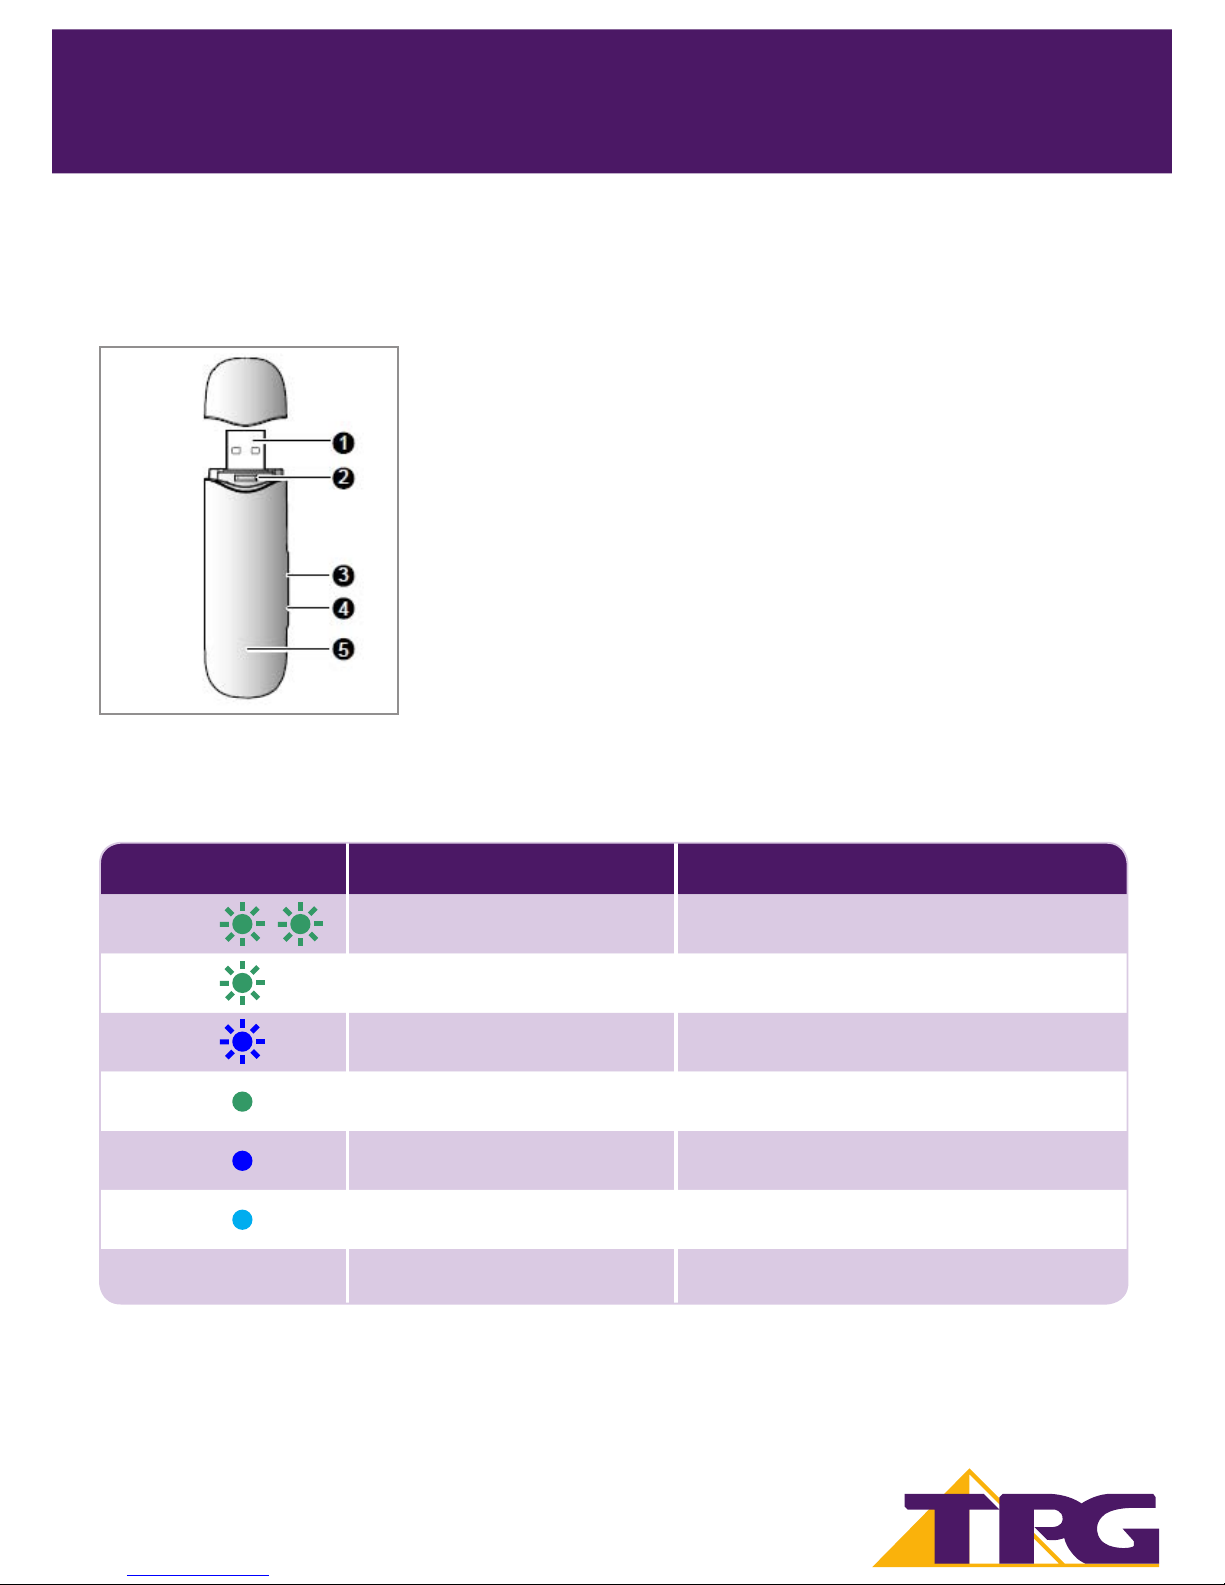
1. Getting to Know Your USB Modem
1. USB Interface – It connects the E1762 Modem to the USB Port of your PC.
2. SIM/Micro SIM Card Holder – Insert your TPG Mobile Broadband SIM or
Micro SIM here.
3. Micro SDCard Slot – This holds the Micro SD card (optional, not pro-
vided by TPG).
4. External Antenna Connection - Connect an external antenna
(optional, not provided by TPG) to boost your reception.
5. Indicator Light - Indicates the status of the USB modem.
Indicator Light Staus
Colour Status Meaning
Green Blinking twice every 3 seconds. The USB modem is on
Green Blinking once every 3 seconds.
2G network (GPRS network
- Weak coverage strength/slow speeds).
Blue Blinking once every 3 seconds.
3G network (UMTS network
- Good coverage strength/fast speeds).
Green On
2G network (GPRS network
- Weak coverage strength/slow speeds).
Blue On
3G network (WCDMA network
- Good coverage strength/fast speeds.
Cyan On
3G+ network (HSDPA network
- Strong coverage strength/super fast speeds.
No colour O The USB modem is removed.
TPG MOBILE BROADBAND QUICK SETUP GUIDE
SIMPLE STEPS TO GET CONNECTED
1
TPG MOBILE BROADBAND QUICK SETUP GUIDE 2
2
TPG MOBILE BROADBAND QUICK SETUP GUIDE
SIMPLE STEPS TO GET CONNECTED
2. Installing USB Modem
NOTE: YOU MUST ACTIVATE THE SIM CARD BEFORE PROCEEDING TO THE NEXT STEP.
SIM ACTIVATION STEPS:
Step 1: Go to www.tpg.com.au/account
Step 2:
Login with your Mobile Number or Customer ID and Password (Mobile Number and Customer
ID can be found in the Welcome Letter with SIM card attached. Password is what you nominated
during registration.)
Step 3: Choose “Mobile Broadband Service”
Step 4: Click on the ‘SIM Activation’ button
Step 5: Click on ‘Activate SIM now’
After you’ve completed the activation steps above, please allow up to 24 hours for your activation
request to be processed.
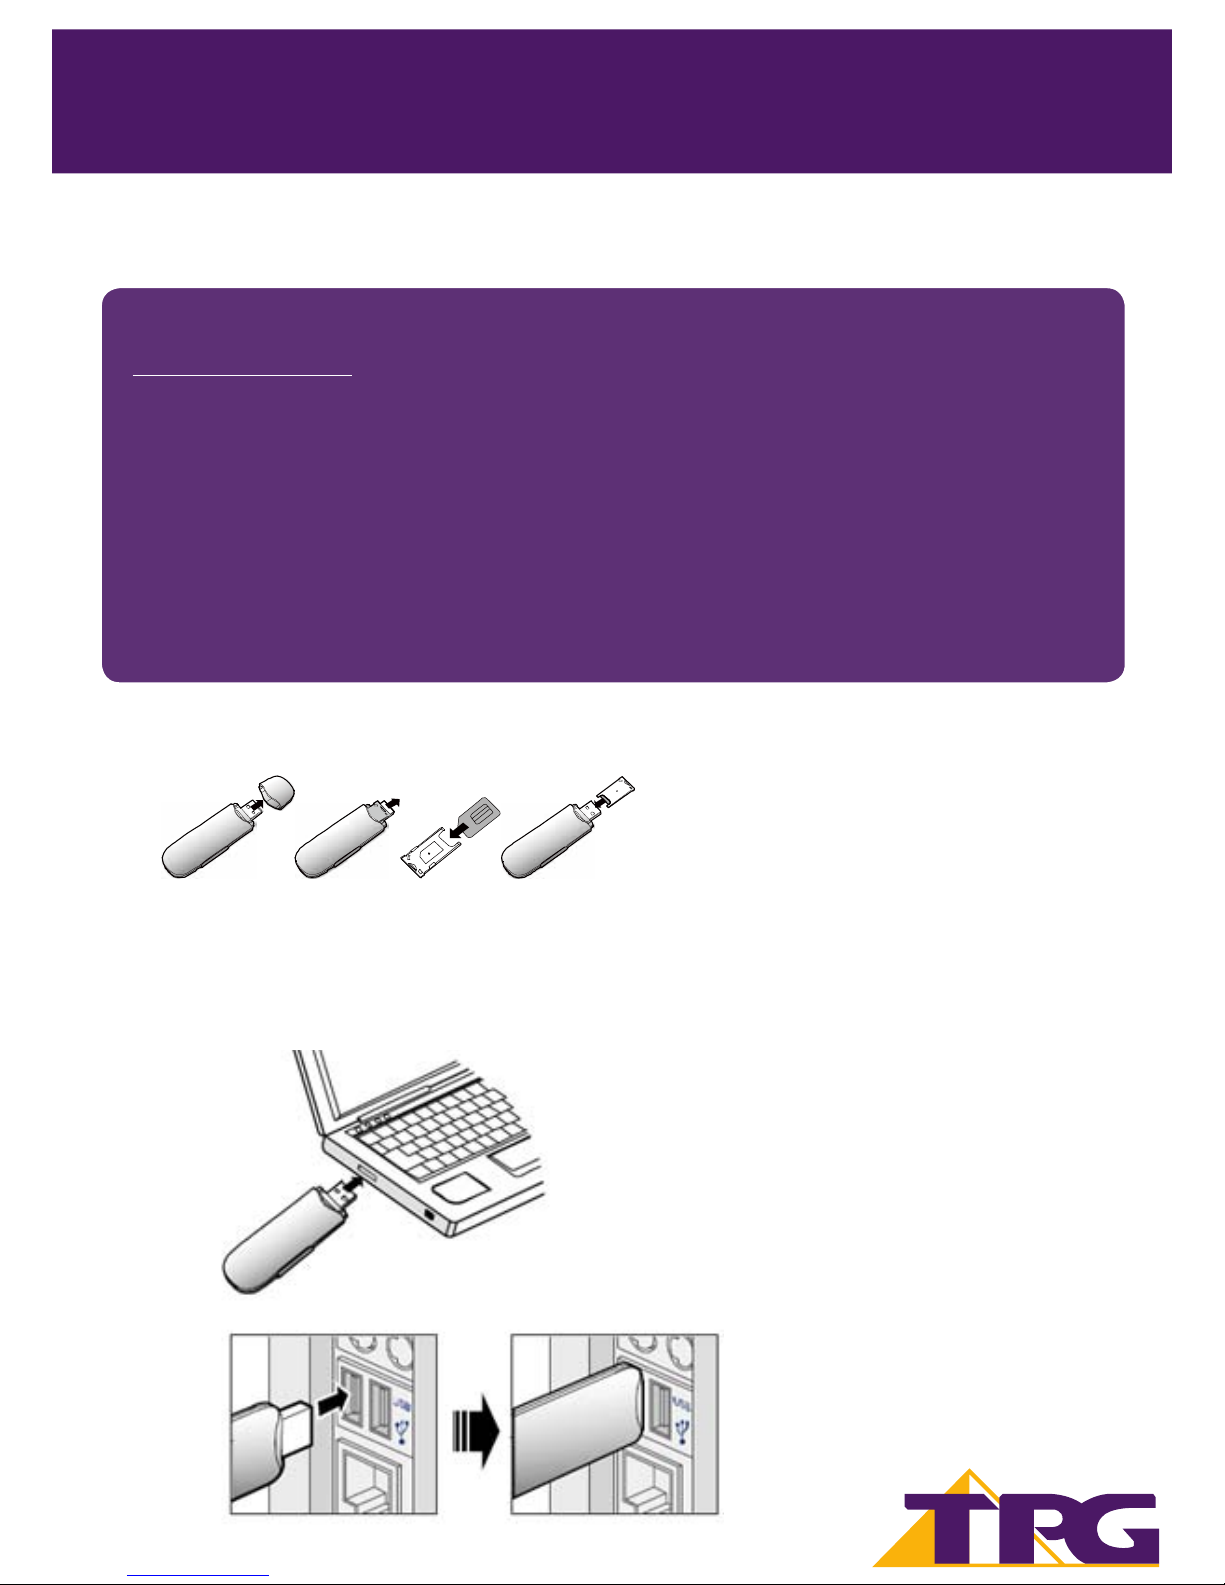
2.1. Insert the TPG SIM/Micro SIM card into the card holder. Make sure the SIM is properly inserted.
2.2. Power on your PC before connecting the USB modem with the PC. Otherwise the normal installation may
be aected.
Method 1: Plug the E1762 Modem into the USB interface of the PC. OR
TPG MOBILE BROADBAND QUICK SETUP GUIDE 3
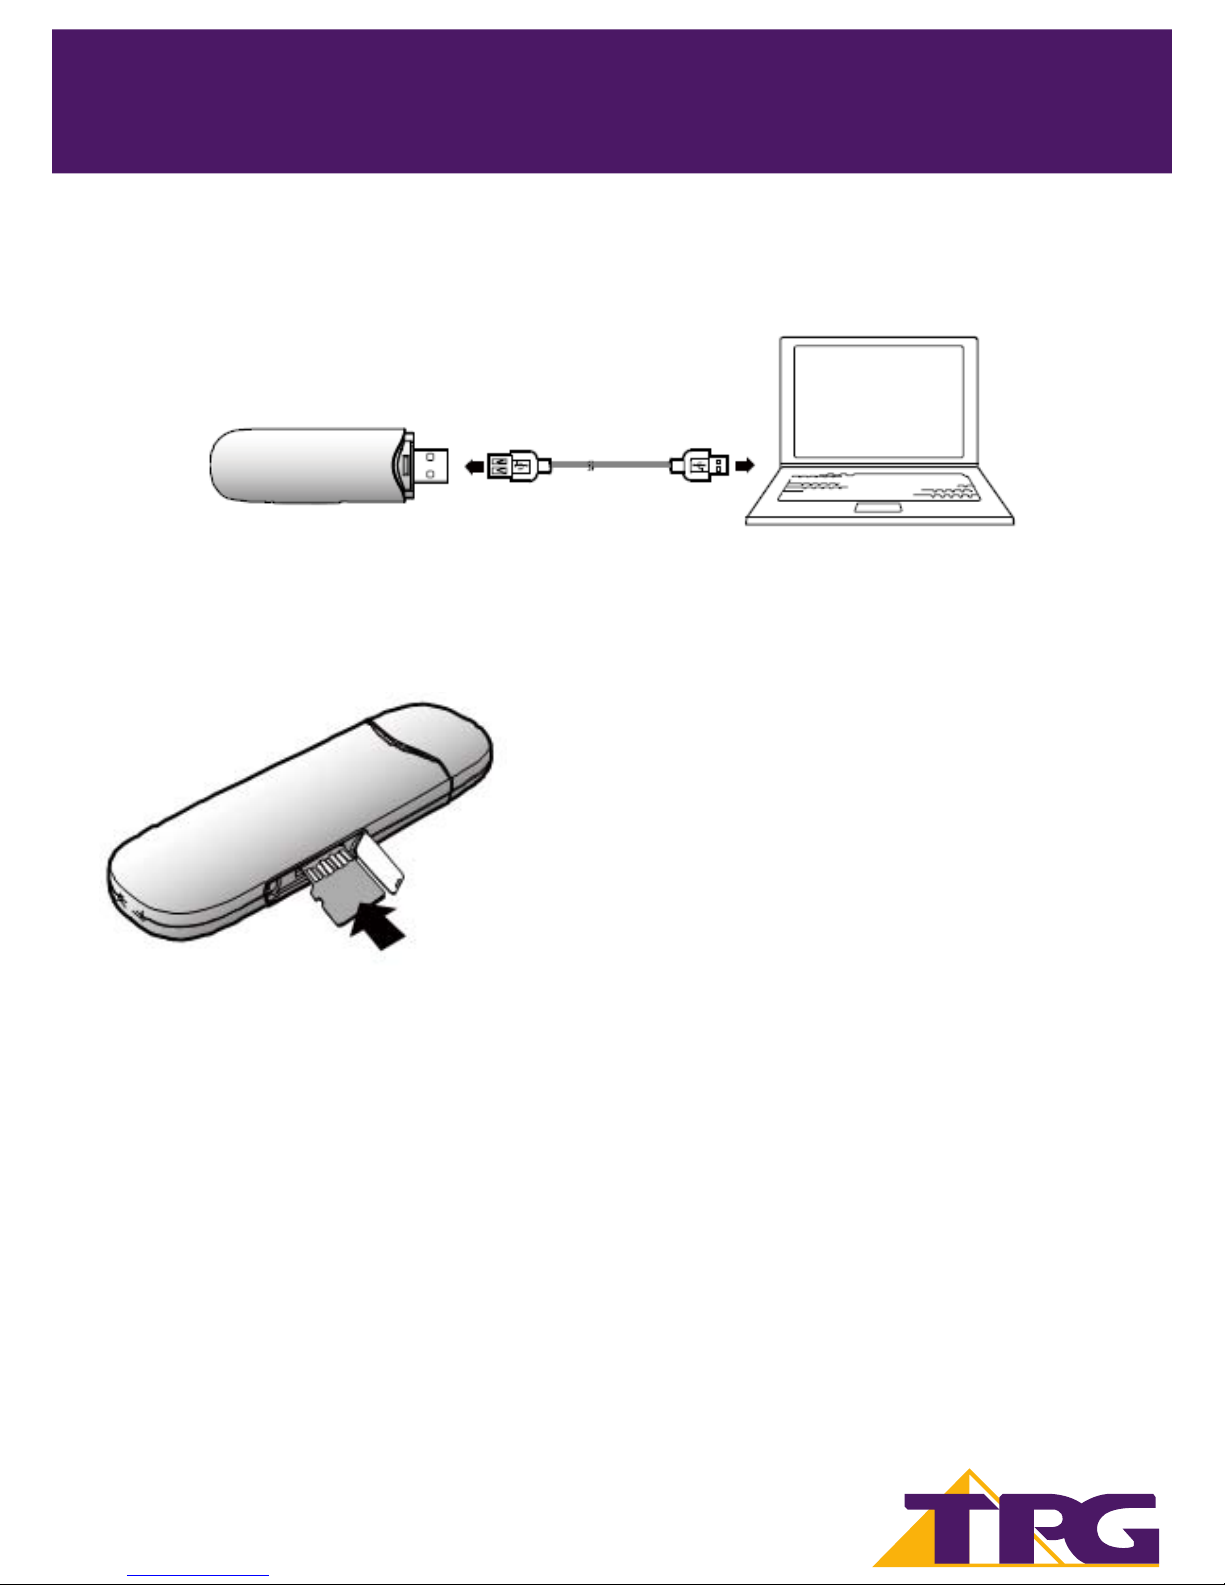
Method 2: Connect the E1762 to a PC using the USB extension cable (included in the USB Modem pack).
2
TPG MOBILE BROADBAND QUICK SETUP GUIDE
SIMPLE STEPS TO GET CONNECTED
2.3. Follow the relevant steps below to install the TPG Mobile Broadband Software.
Optional Step: Insert the Micro SD card into the USB modem, as shown in the following gure.
Do not remove the Micro SD and the SIM/Micro SIM card when they are being used. Removing cards during
an operation may damage the cards as well as the device, and data stored on the cards may be corrupted.
Note: Micro SD card is an optional accessory
and is not provided by TPG in the package.
 Loading...