

Page 1
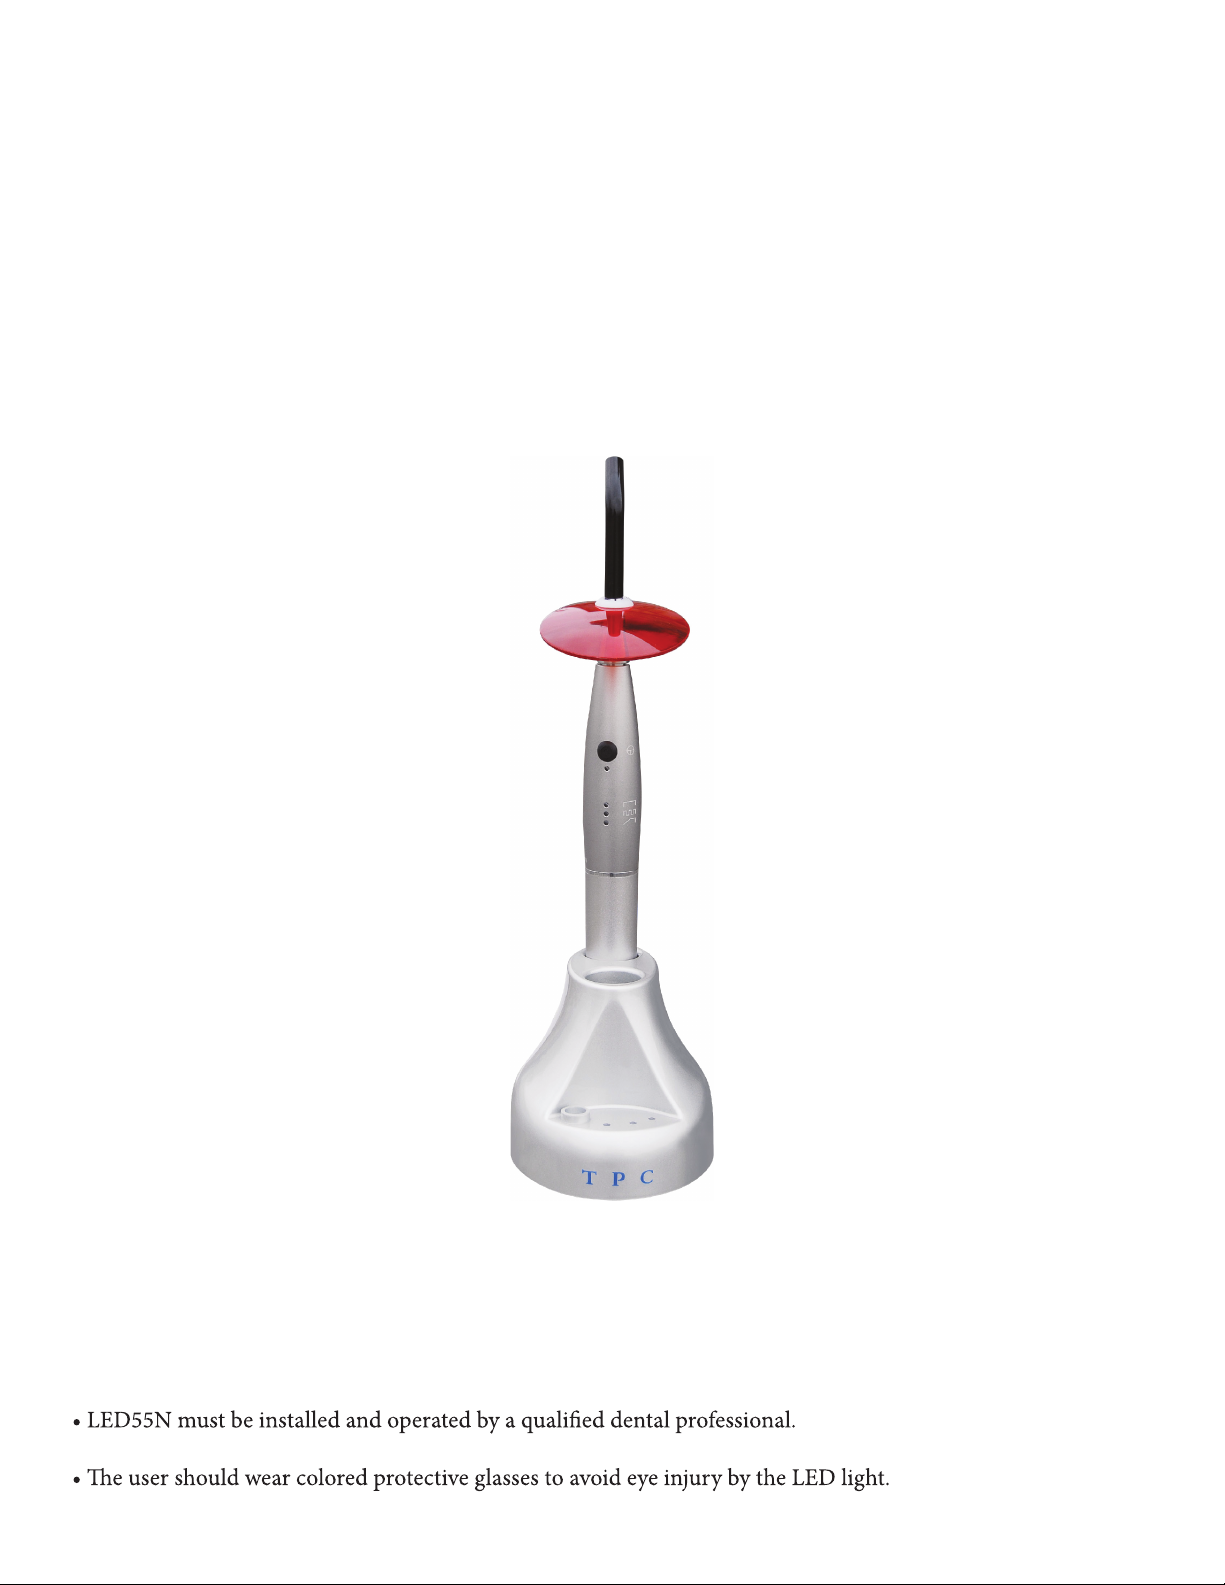
TPC
User Manual
LED 55N
• All instructions in this USER’S MANUAL must be completely read before installation or operation.
Cordless LED Curing Light
REV. 1-1-13
Page 2

Table Of Contents
1. INTRODUCTION 1
1.1 TECHNICAL INFORMATION 1
2. FEATURES 2
3. ACCESSORIES 3
4. INSTALLATION 3-4
5. OPERATION 5
6. MAINTENANCE 6
7. TROUBLESHOOTING 6
8. WARRANTY 7
Page 3

1. INTRODUCTION
ank you for purchasing the LED 55N LED curing light. e LED 55N is a dental curing light which uses
the latest LED technology to polymerize composite resin.
Caution
Attention: Important information is being presented. Refer to the Operator’s Manual for more informa
tion.
High intensity Light: Protect your eyes from the light generated by this product
Shock Hazard: Beware of electrical shock or injury. Type B Applied Part
Class II Medical Equipment
Electronics Waste: Properly dispose of when use is discontinued.
1.1 Technical Information
Range of Light (in nm) 430 - 490 nm
Light Intensity at the Tip (mW/cm2) 1200 mW
Battery Life 200 cycles at STANDARD mode, 10 seconds per cycle;
135 cycles at STANDARD mode, 20 seconds per cycle.
Charging Time to Complete 5 Hours
Battery Type Lithium Ion
Cradle Battery Rechargeable
Operating Temperature 15 - 30°C (60 - 86°F); Unit turns o automatically when
the temperature at the wand tip reaches 48° C
Power Input, Curing Light 5.2 VDC @ 1.0 A
Power Input, Power Supply 90 - 240 VAC @ 50 - 60 Hz
Pulse Rate 10 Hz
Pulse Duty Cycle 50%
Storage and Transport Conditions 0 - 40°C (32 - 104°F)
0 - 100% RH
-1000 to + 9000 meters elevation
1
Page 4
2. FEATURES
1. Latest LED technology.
2. Minimal heat output.
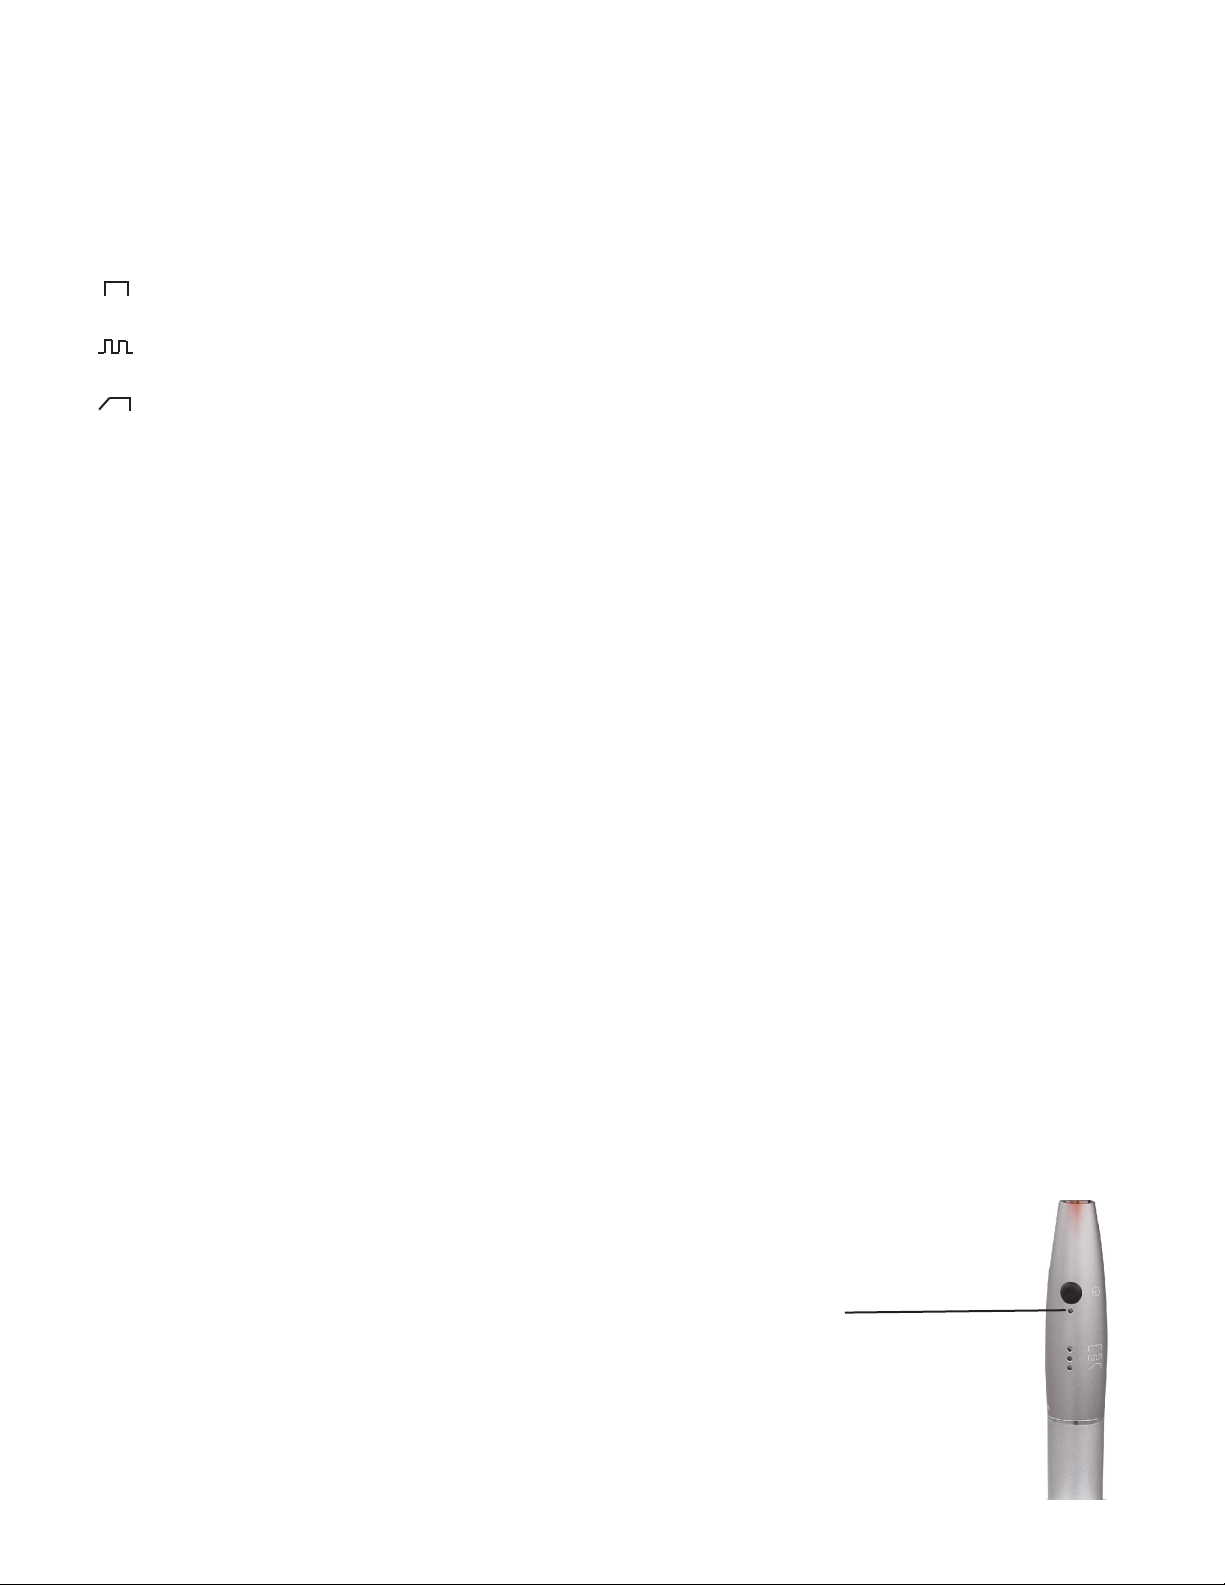
3. ree preset programs
FAST : Full power output.
PULSE : 0.5 second intermittent output.
RAMP : So Start.
4. Timer
e Led 55N has a xed timer. e unit will cure for a total of 20 seconds. At 10 seconds the light will
beep indicating that you have reached the 10 second time mark. At 20 seconds the light will beep
again and automatically stop the curing process.
5. Built-in light intensity sensor
e led 55N base has the a built in light intensity sensor on the charging base. is will allow the end
user to verify if there is sucient power to cure materials. To verify light intensity you must use a LED
light radiometer.
6. Sleeping Mode
e LED 55N will be in “trickle” charging mode aer 3 min of non - use. Trickle charging mode only
applies if the handpiece is placed on the charging base. If le o of charging base the light will be in sleep
mode.
7. Auto Memory
LED 55N will remain in previous setting, including the curing time and the curing program.
8. Cordless
e LED 55N comes with two re-chargable lithium ion Batteries. once one battery is drained you may
switch to the other battery that will be fullly charged if it has been placed on the charging base.
9. Low Battery / Over Heat indicator
e low battery indicator light will illuminate “red” when the battery
does not have suciant power to operate the light. e over heat light
will illuminate “yellow” if the handpiece has over heated. If the light over
heats allow the light to rest for 10 min. When the light is illuminated “green”
the light has sucient power to cure.
2
Page 5
3. Accessories
1
6
7
7
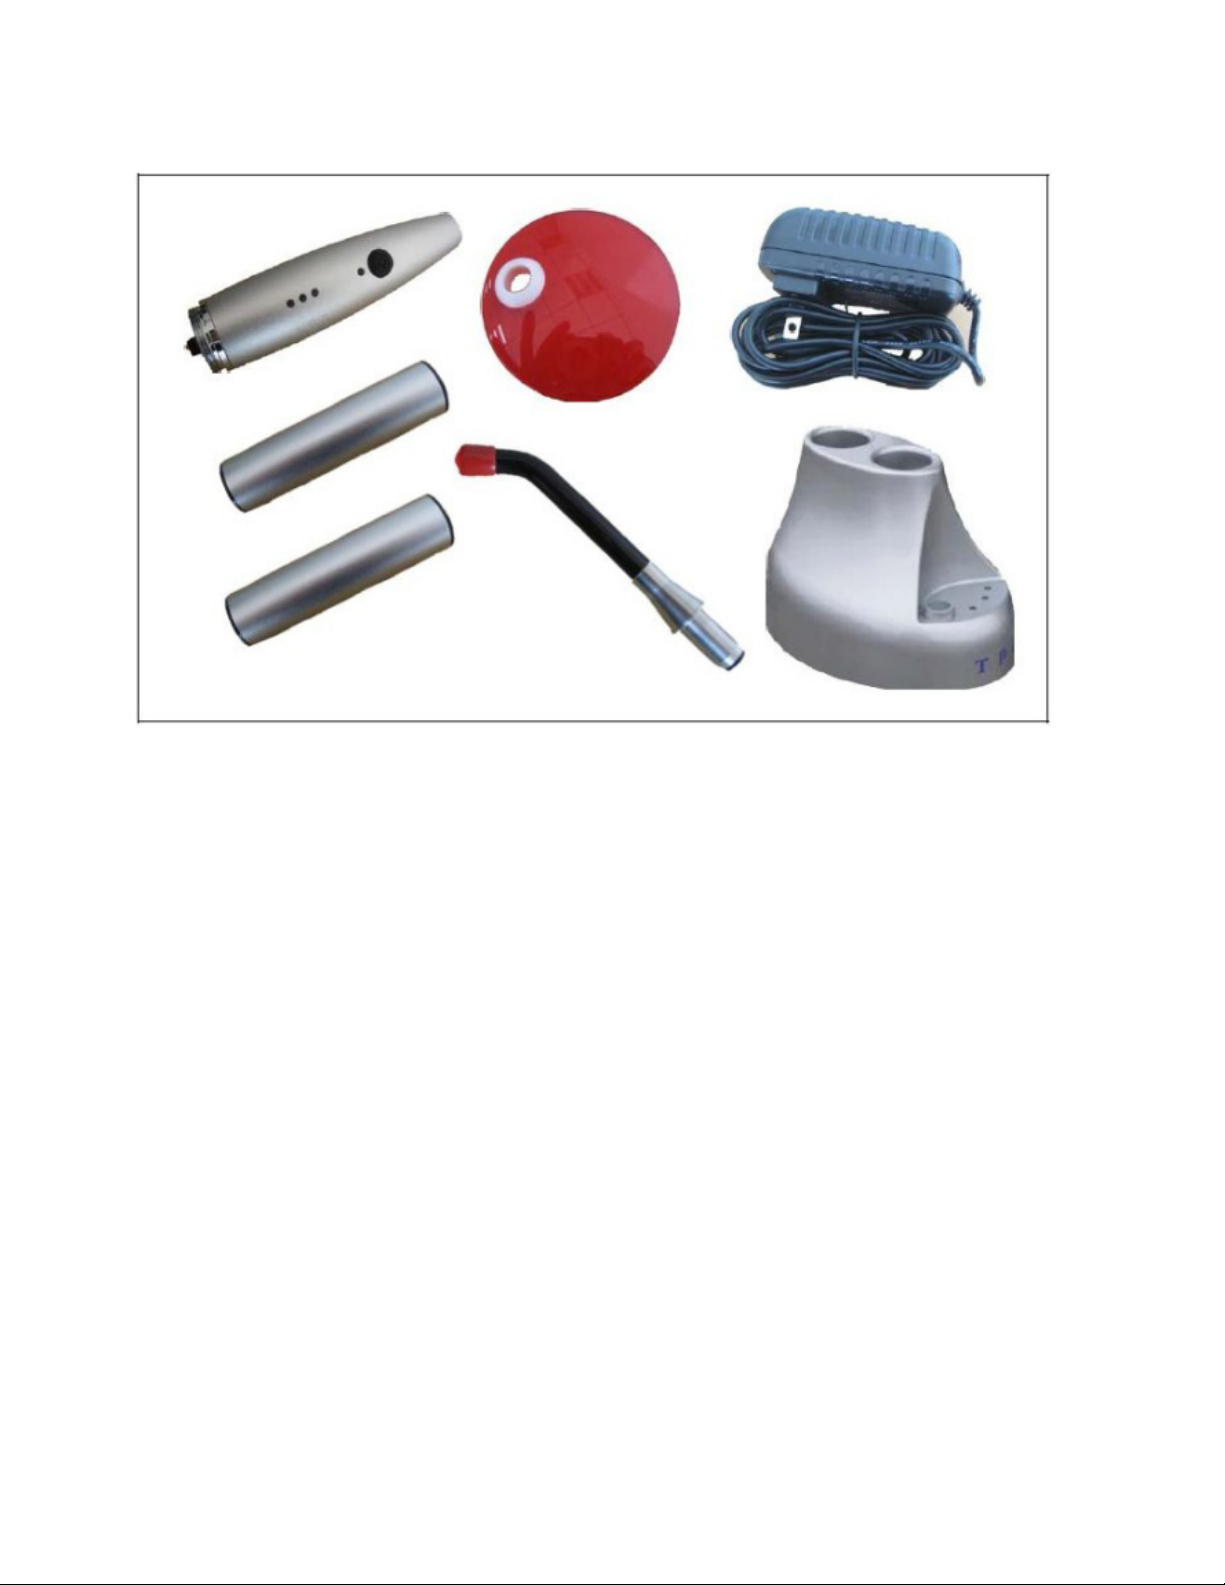
1. Curing Light Handpiece 2. Charging Base 3. Oval Protector 4. Light guide
PN: LED55HP LED55Base PN: P219 PN: P109
4
3
5
2
5. Switching Power Adapter 6. Function Switch 7. Battery
PN: LED55N-TF PN: LED55-BTN PN: LED55-BATT
4. Installation
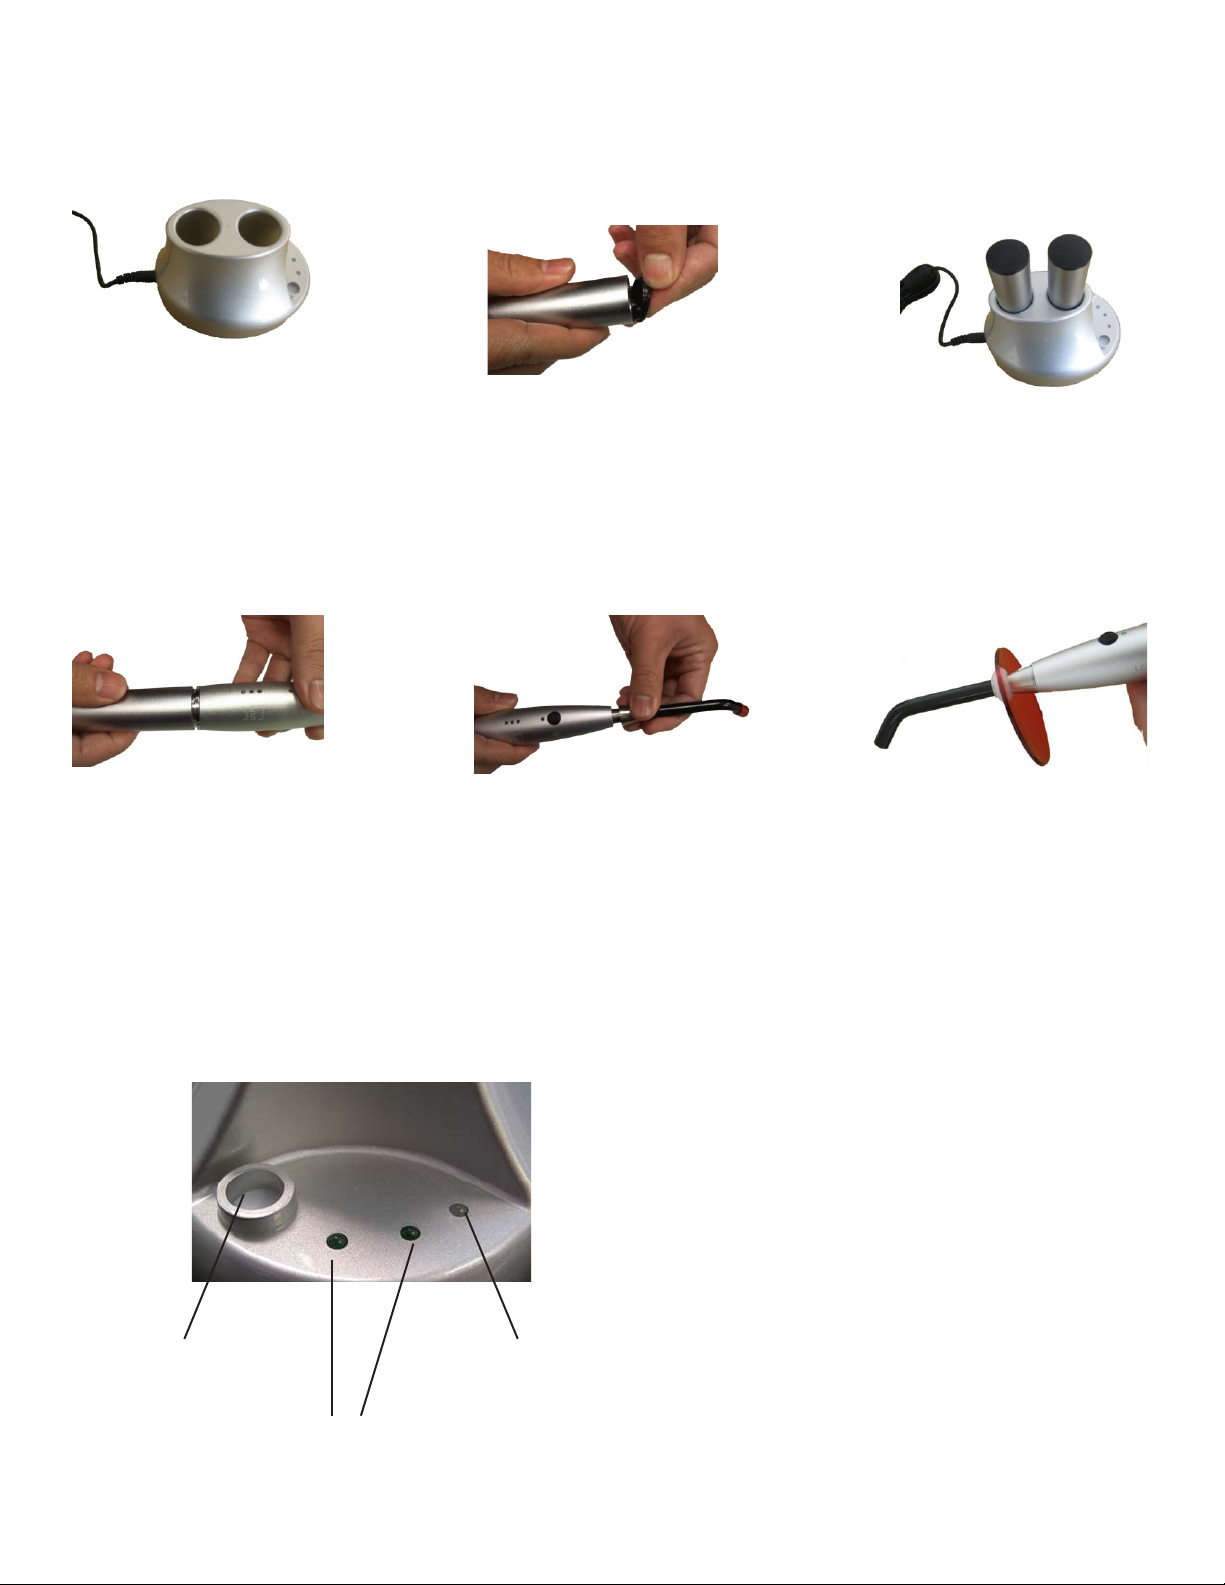
Step 1 : Connect Power Adapter to charging base.
Step 2 : Remove protective battery contact covers.
Step 3: Place the batteries in the charging base. Allow the batteries to fully charge.
For the best performance, charge curing light handpiece continually for 4 hours (charge battery at least 8
hours for rst time using). e battery indicator on the charging base will show the sign of full power when
battery is fully charged. LED 55N will detect the charging automatically. ere will be one short beep tone
generated when it has been properly put on to the Charging Base.
Step 4 : Aer charging is complete attach one battery to the handpiece. Align the threads of the battery to the
back of the handpiece and turn clockwise to fasten. Be sure not to over tighten the battery to the handpiece.
Step 5 : Install light guide into the handpiece. Directly insert it onto the front of the curing light handpiece. e
light guide can be rotated aer installation.
Step 6 : Place the light shield over the light guide. Verify it is secure on the silver chuck of light guide.
3
Page 6
4. Installation
Connect power adaptor to
the charging base.
Remove protective battery
covers.
Place batteries in the
charging base.
Attach battery to light
handpiece.
Insert light guide.
4.1 Charging Base
1. Light intensity
tester
2. Battery Charging
indicator
3. Light intensity
indicator
Attach light shield.
Charging base indicators
1. light intensity sensor. Place the light guide on
this sensor to verify there is sucient light to cure.
If there is sucient light and battery power the
light sensor will illuminate “purple”. If there is not
sucient light, power or the light guide is damaged
or dirty the light indicator will illuminate “red”.
2. Battery charging indicators. When ahing red
the batteries are charging. When the light is solid
“green” the batteries are fully charged.
3. light sensor indicator. is light is only activted
when the light intensity sensor is being used. A
“purple” light indicates that there is sucient
power to cure. A “red” ligh indicates that there is
not sucient power to cure. Possible reasons for a
“red” light are Low battery, Damaged / dirty light
guide or damaged LED.
4
Page 7
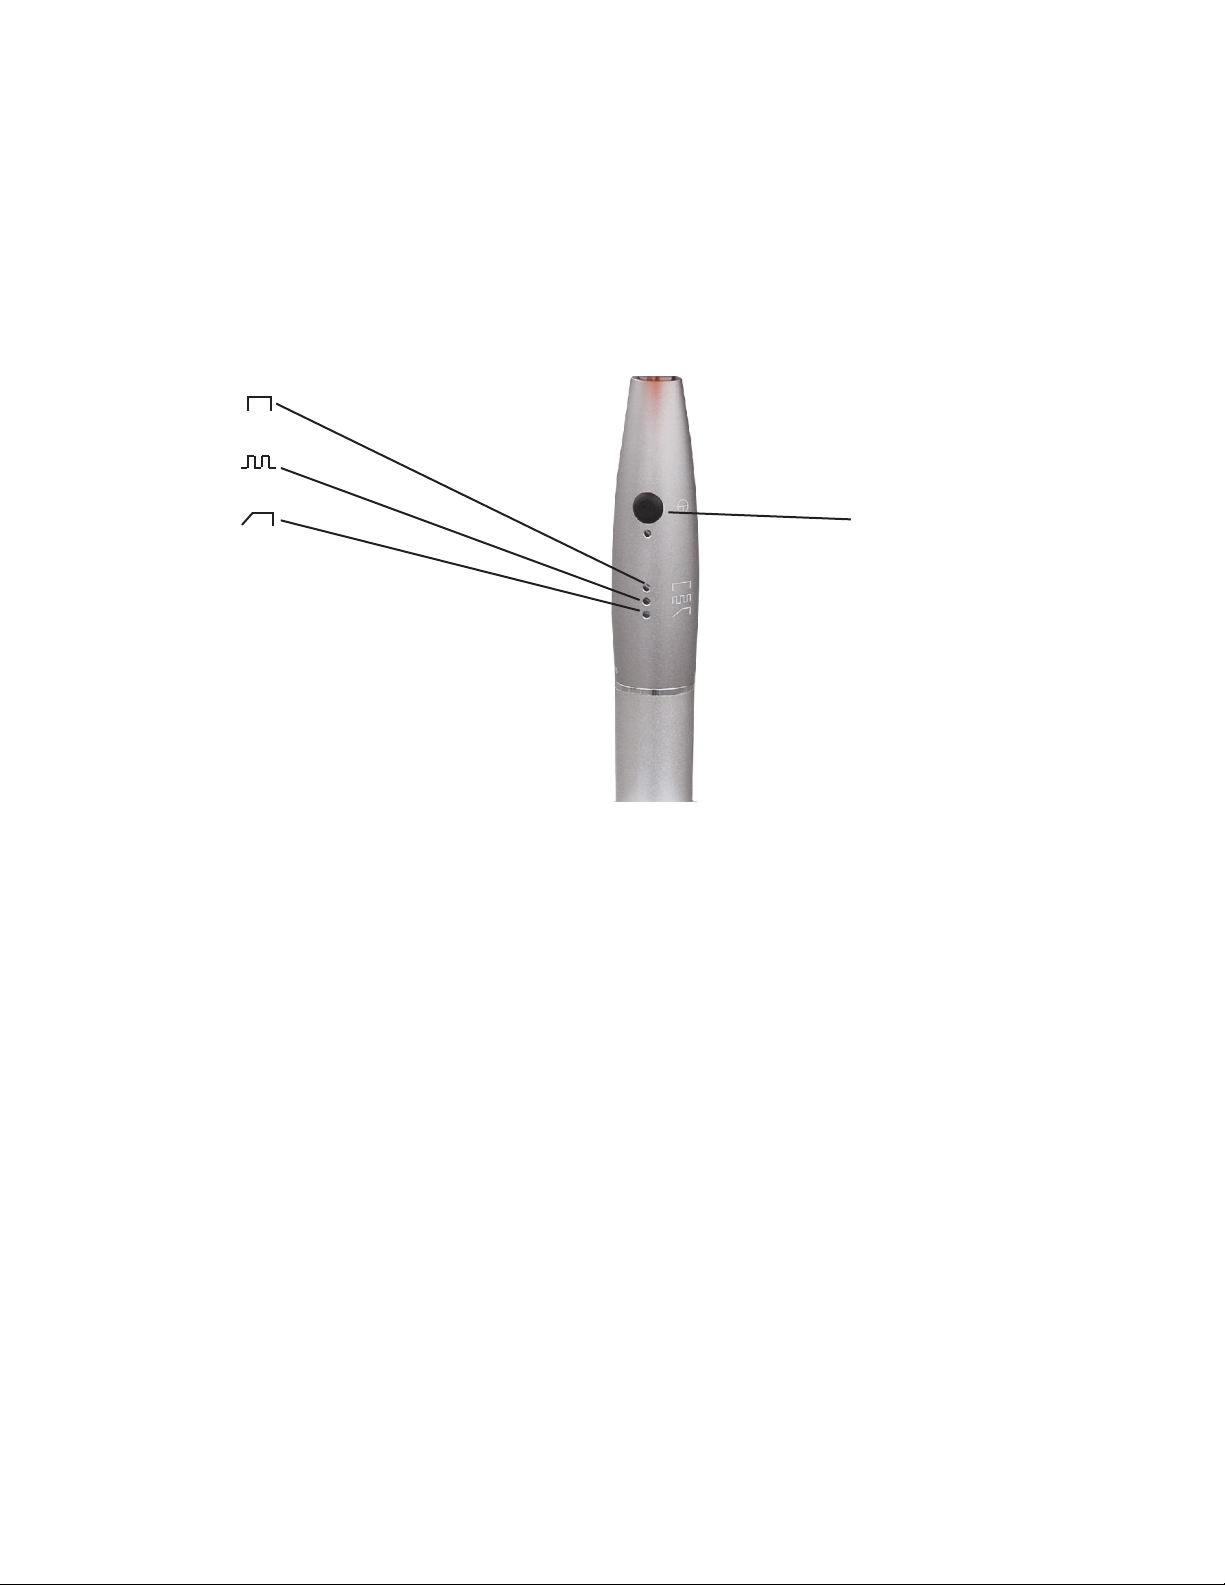
5. Operation
A. Set Curing Program
Press and hold the function switch for two seconds and you will see the modes change every second. To stop on
the desired mode simply let go of the depressed button for the desired mode.
(1) FAST
(2) PULSE
(3) RAMP
1.Curing Time
2.Battery Sign
Function
Button
3.Curing Program
B. Set Timer
e LED55N has a xed curing time of 20 seconds. e light will beep at 10 seconds and then automatically stop
the curing process at 20 seconds.
C. Start to Operate
Press button to start curing program. To interrupt a program, press curing button again. When the program
nishes, the curing light handpiece will beep again then turn o the light immediately.
D. Turn o the Power
Allow curing light handpiece to enter into sleeping mode automatically. is will shut down all the curing function to save the power. To completely shut down curing light disconnect battery.
5
Page 8

6. MAINTENANCE
1. Be sure there is no resin or material sticking to the surface of the light guide.
2. If materials are sticking on the light guide immediately clean it with so cloth. Keep light guide clean for better
light intensity and curing performance.
3. e light guide should be sterilized aer each use. It can be safely autoclaved at 121 °C. For no more then 15
minutes. Let cool before handling.
4. e other accessories such as curing light hadpiece and eye protector should be scrubbed with pure water and
sheathed in accordance with standard disinfection procedures.
5. Keep curing light handpiece in charging station while not in use.
6. Dispose Lithium battery according to the federal and state laws.
7. e User should wear colored protection glasses to avoid eye injury due to LED light.
7. TROUBLESHOOTING
Fault Possible Cause Solution
e low battery indicator on the
curing light is solid red
e overheat indicator light is
orange
When the light is placed on the
charging base the LED emmits a
low light while not in use
My light guide is very loose when
placed in the curing light
e light changes modes on its own Function button is depressed in Verify the function button is not
None of the mode or status lights
are illuminating
Charging base does not beep when
batteries are placed on the charger
e light intensity indocator on the
base illuminates red when checking
the light intensity
When i try to attach the battery its
very tight and will not fully attach
I see a halo pattern when the light
is being used
Battery Low Charge Battery
e curing light has overheated Allow to cool for 10 min
Battery is very low Disconnect battery and charge bat-
tery while disconnected from light
for 10 min or till fully charged
O-ring damaged or missing Check o-ring or repalce
stuck. Press and release the function button
Drained battery
Contacts are dirty on the battery
Depleted battery
No power to base. Connect power supply to base.
Light guide had debris on it.
Not enough battery power to cure
Battery may have been dropped
and the threads are dented in
Light guide has cracks in the ber Replace light guide
6
Charge battery
Clean contacts
Replace battery
Clean light guide
Charge battery
Repalce battery
Page 9

Warranty Information
All of our products sold are guaranteed to be free from defects in workmanship and materials for a 1 year from
date of purchase, unless otherwise stated. TPC will repair or replace any defective part at no charge. During the
warranty period. TPC will not be responsible for labor charges or shipping charges to / from the TPC facility.
is guarantee does not cover normal wear or stains on surface nish. e guarantee does not cover damage
resulting from improper installation or misuse. All claims against the freight carrier must be initiated at the time
the damaged items are received. e claim is the responsibility of the customer. We are improving our products
on a continuous basis. We reserve the right to make modications without the need for prior notication and
are not obligated to modify previously manufactured items. Light guides and batteries are not covered under any
type of warranty.
Warranty Card
Name:____________________________________________________
Address:__________________________________________________
City:_____________________State:______Zip___________________
Phone Number:(____)______-________FAX:(____)______-________
Email Address_____________________________________________
Model: LED 55N
Handpiece: SN________________
Base: SN_____________________
Please complete this card and return it to TPC. Include a copy of your invoice or packing slip.
Return to:
TPC Advanced Technology
851 S. Lawson St
City Of Industry, CA 91748
Or Email a scaned copy to [email protected]
7
 Loading...