

Toyotomi LC-40 Owner's Manual
MODEL
LC-40
a
LASER CLEAN
INSTRUCTION MANUAL
IMPORTANT
READ AND UNDERSTAND INSTRUCTIONS BEFORE USING HEATER.
RETAIN INSTRUCTIONS FOR FUTURE REFERENCE.
CONTENTS
SPECIFICATIONS 1
PART NAME 1
OPERATION 5
EMERGENCY MESSAGE 10
ROUTINE MAINTENANCE 11
TROUBLESHOOTING 12
LONG TERM STORAGE 13

SPECIFICATIONS
MODEL
HEAT RATING
FUEL TANK CAPACITY
BURNING TIME
DIMENSIONS(W x D x H
)
WEIGHT
VOLTA GE / FREQUENCY
ELECTRICAL CONSUMPTION
LC-40
14,300 BTU / 3,600 Kcal
3,800 BTU / 960 Kcal
7.6 lit.
19.0 ~69.0 hrs.
550 x 328 x 445 mm
12.0 kg
230V AC, 50 HZ
Igniter : 320 W
Continuous : 36 W
High
Low
Front panel
Louver
operation panel
Removable fuel tank
Circulation
fan
Room
thermistor
Power supply
cord
Air filter
Carrying
handle
Top plate
* Matching Room Size to HEAT RATING
•
Because the “Heat Load” of an area to be
heated is influenced by so many factors, it is
impossible to specify a heater output to an
exact room size.
•
If you use a heater too large for the area to
be heated, the temperature you desire will
be reached quickly. In such cases, to avoid
overheating the area, the heater must be
turned off frequently, or doors opened to
other areas of the house, or windows to the
outside opened to cool the area.
•
If you use a heater too small for the area to
be heated, it will take much longer to reach
the desired temperature, in fact it may not
be reached at all depending on the outside
weather conditions.
PART NAME
BEFORE USING HEATER, FAMILIARIZE YOURSELF WITH THE FOLLOWING OPERATING
CONTROLS AND PART NAMES.
MAIN BODY
1
20:15
set room
key-lock timer save hour min. extension
timer save vent. fuel
temp.
clock
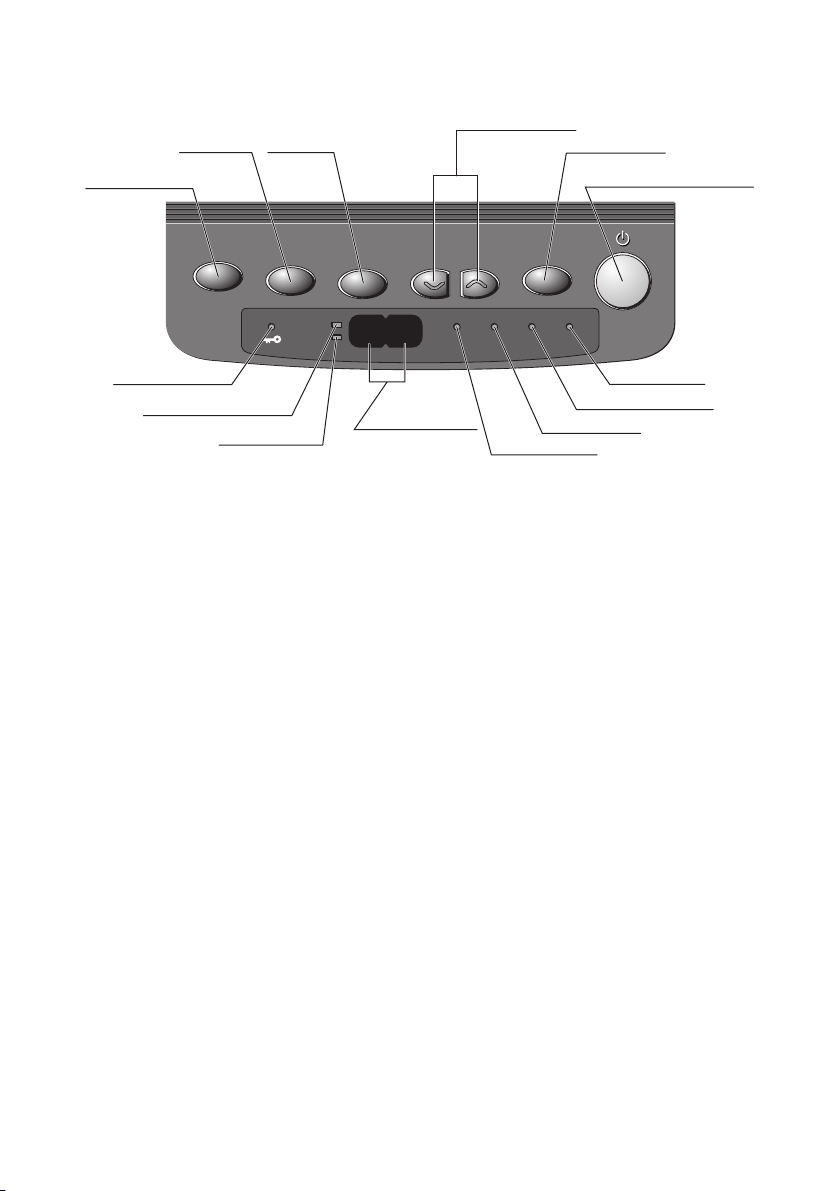
Adjustment Keys
Temperature Lamp
Key-lock Button
Save KeyTimer Key
Extension Key
ON/OFF Button / Lamp
Fuel Lamp
Ventilation Lamp
Save Lamp
Timer Lamp
Key-lock Lamp
Clock Lamp
Digital Indicator
OPERATION PANEL
ON/OFF Lamp —flashing : Preheating mode
constant : Heater in operation
key-lock Lamp — constant : Childproof Lock is on.
Temperature Lamp —constant : The Digital Indicator shows Set temperature
and Room temperature.
Clock Lamp —constant : The Digital Indicator shows current time.
Timer Lamp —constant : Heater in operation in timer mode.
Save Lamp —constant : The operation is in Save mode operation.
Ventilation Lamp —flashing : Oxygen level in room is insufficient. Heater
shuts off automatically.
Fuel Lamp —constant : Fuel tank empty. Only 10 minutes burning time
remaining. Digital indicator shows the
remaining burning time in minutes.
You can hear the alarm every 2 minutes.
flashing : Heater extinguished due to lack of fuel. (10
seconds alarm)
2

UNPACKING AND PLACEMENT
CAUTION :Risk of burns. Do not operate the heater without the grille completely attached.
1. Take out heater from box carefully to avoid damage.
2. Remove all packing materials from heater.
3. Make sure all screws are tight and all parts intact.
NOTE:Save shipping carton and all packing materials for future storage of your
heater.
4. When positioning your heater for use, keep it away from walls and all other
materials as illustrated below.
More than 1m
More than
20cm
More than
50cm
More than
More than 1.5m
50cm
5. The floor should be firm and completely level. Reposition the heater, when it is not
level.
NOTE:If your heater is not on a level surface, change its location. Do not attempt to
prop heater up with books or other objects.
3
FUELING
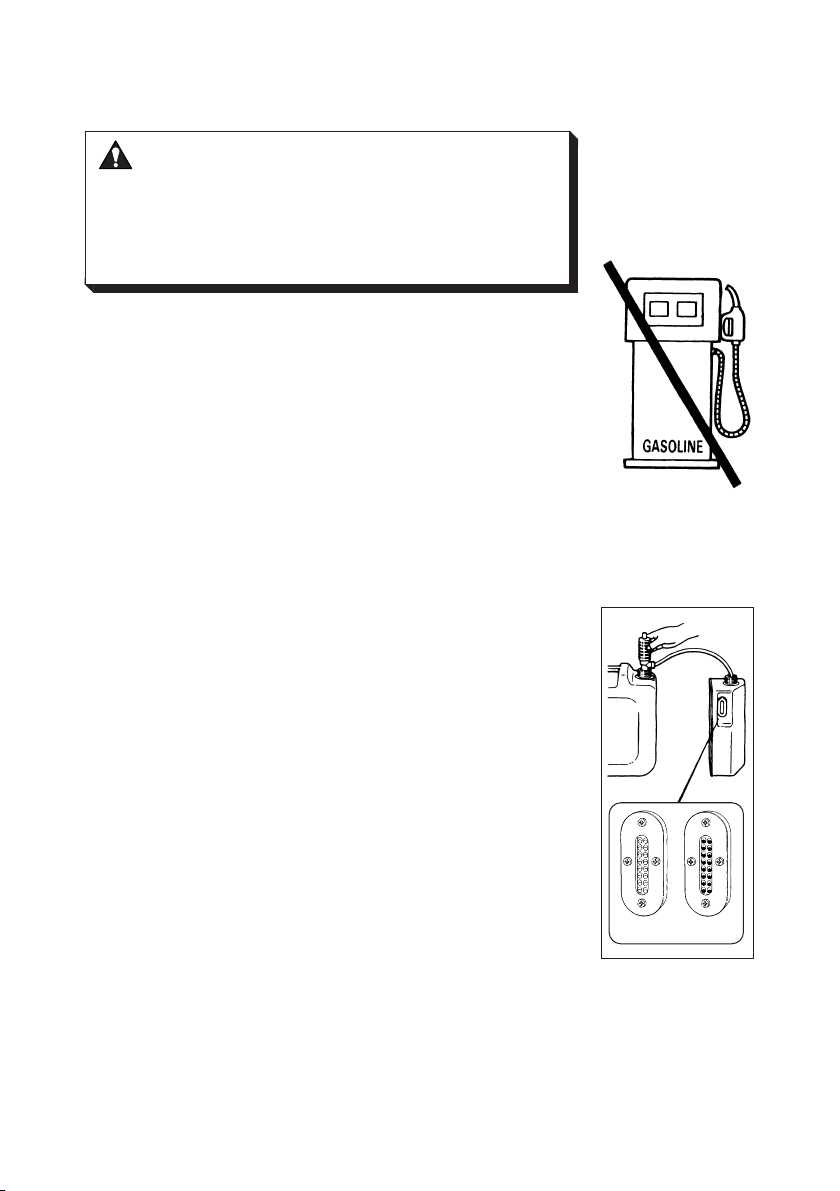
WARNING :
Use only water-clear kerosene (paraffin).
Never use gasoline or other flammable
liquids.
ALWAYS extinguish heater before refill
heater fuel tank.
Fuel heater outside the living area.
empty full
1. Open the fuel tank lid on the top of heater cabinet and lift out
the removable fuel tank. Turn the removable tank upside
down and remove the fuel tank cap.
2. Insert the straight tube of the manual siphon into the
jerrycans; insert the siphon’s flexible hose into the removable
fuel tank opening.
3. Turn the air vent knob on the top of the siphon clockwise to
close the vent. Start the flow of kerosene (paraffin) by
squeezing the bulb of the siphon vigorously six or seven
times. Once flow begins, it is no longer necessary to squeeze
the bulb.
4. Check the removable tank fuel gauge while filling the tank.
Stop filling by loosening the switch button on top of the
pump (turn anti-clockwise), once the gauge indicates that the
tank is full. Never overfill the tank, especially not when the
fuel is very cold (fuel expands when it heats up).
5. Remove the siphon carefully, allowing excess kerosene
6. After making sure fuel tank cap is tightly fastened, invert tank
NOTE:Be careful to avoid overfilling the tank, especially with
very cold kerosene (paraffin). Overflow might occur
due to expansion when the fuel warms up.
(paraffin) to drain from the tube back into the jerrycans.
Replace fuel tank cap and tighten it securely. Be sure to wipe
away any spilled kerosene (paraffin) from tank and other
heater parts.
and replace into heater body.
4
 Loading...