

Town & Country Fires Little Thurlow, Little Thurlow SC Installation And User Instructions Manual
LITTLE THURLOW MULTI-FUEL STOVE
INSTALLATION AND USER INSTRUCTIONS
Read these instructions carefully before installation and use.
These instructions should be retained by the user for future reference.
The Little Thurlow stove has a nominal heat output of 5KW and a weight of 61 kg. The flue
gas mass flow is 4.5g/s for mineral fuel and 3.7 g/s for wood logs. The mean flue gas
temperature directly downstream of the flue spigot at nominal heat output is 294 degrees C.
The stove is designed as a closed appliance and is capable of intermittent operation.
The stove must be installed to comply with Health and Safety at Work Act 1974, and to all
local Building Regulations, including those referring to National and European standards.
These need to be complied with when installing the appliance.
CO Alarms:-Building regulations require that whenever a new or replacement fixed solid
fuel or wood/biomass appliance is installed in a dwelling a carbon monoxide alarm must be
fitted in the same room as the appliance. Further guidance on the installation of the carbon
monoxide alarm is available in BS EN 50292:2002 and from the alarm manufacturer’s
instructions.
Provision of an alarm must not be considered a substitute for either installing the appliance
correctly or ensuring regular servicing and maintenance of the appliance and chimney
system.
1
UNPACK THE STOVE
Carefully cut the straps and lift the box up over the top of the stove. Remove the packing
from round the outside of the stove, leaving the plastic cover on if building work is still
in progress, it is important to protect the paint finish from any damage, water, dust or
fire cement. Using a 17mm spanner, remove the two bolts attaching the stove to the pallet,
and then replace the bolts into the stove legs, these are used as levelling bolts if required.
Open the stove door and remove the grey packaging from inside the stove, there is some
behind the baffle, and the heavy one inside the stove contains the spigot and blank for the
flue outlets. Remove the bag inside the ashpan, this contains the operating tool,
instructions, and a pair of stove gloves.
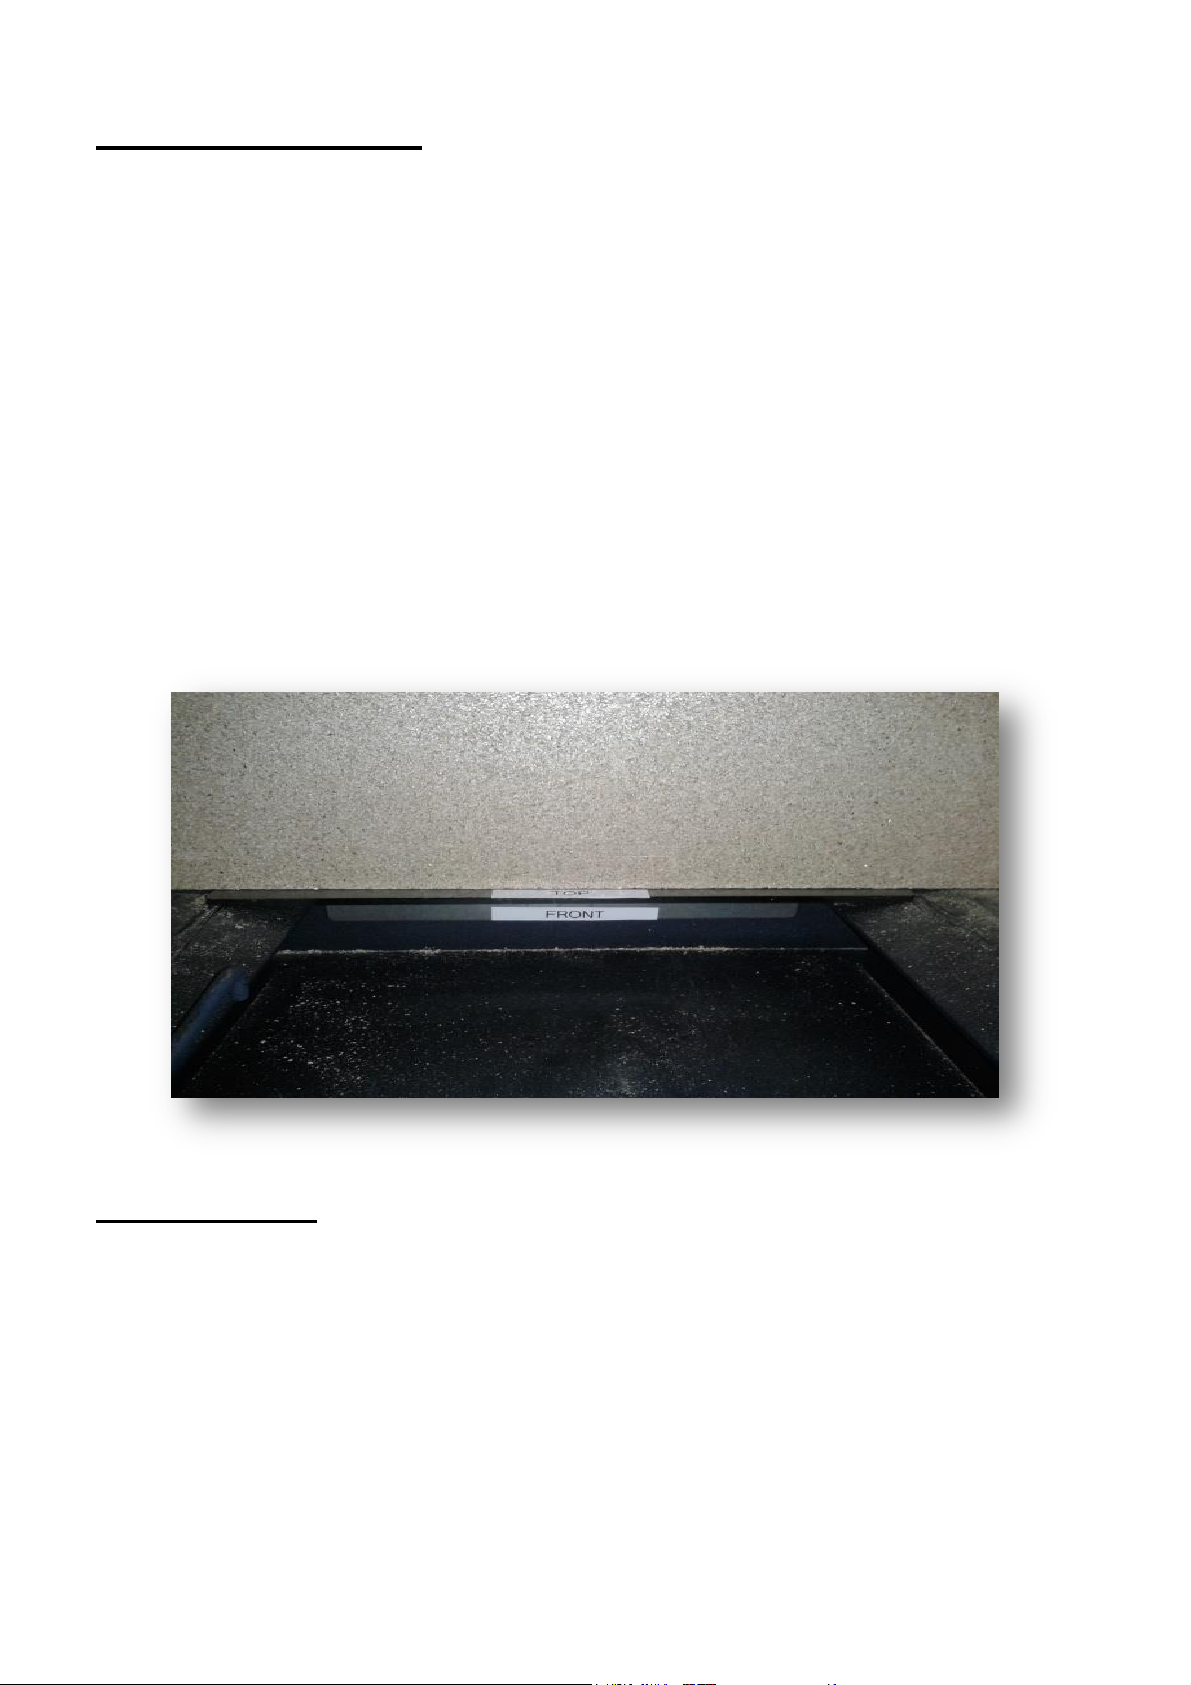
The Little Thurlow is supplied with a rear brick support – this is assembled in the stove
during production. Occasionally it can slip forward into the ashpan during delivery/
installation. The picture below shows the correct positioning of the rear brick support if it
needs re locating.
CLEARANCES
The Little Thurlow needs to be sited next to and on a non-combustible surface. A minimum
clearance of 150mm at the sides, 300mm above and 50mm from the back of the stove body
will allow air circulation and not impede the performance of the stove. If it is necessary to
site the stove near a combustible surface a minimum of 350mm at the back, and 450mm at
the sides must be maintained. It is recommended that this appliance is installed on a solid,
level, non-combustible hearth conforming to current Building Regulations
2

INSTALLATION
A minimum flue draught of 20 Pa is required for nominal heat output. As referred to in
document J of the Building Regulations, no purpose provided ventilation is required for the
Little Thurlow stove. It is important that any inlet grilles are so positioned that they are not
liable to blockage. It is essential that the stove has adequate air supply for combustion
and ventilation. Apertures provided for this purpose shall not be restricted.
The Appliance must be installed on a floor with an adequate load-bearing capacity. If an
existing construction doesn’t meet the prerequisite, suitable measures (e.g. load
distributing plate) shall be taken to achieve it. It is important that any inlet grilles are so
positioned that they are not liable to blockage.
If the stove is to be fitted with a top flue, fit the collar on the top of the stove and the
blanking plate on the rear. Or the other way round if the flue is to be fitted from the rear of
the stove (see figure 1). A flat-bladed screw driver and 8mm spanner will be required.
The Little Thurlow requires a Class 1 chimney of it’s own, a shared chimney will not be
suitable. The chimney must be sound, free from leaks and swept before installation. If the
chimney requires lining, a lining must be used which is suitable for wood and solid fuel,
with a minimum of 150mm internal diameter. A metre of flue pipe should be used from the
stove before the chimney lining, and the lining must be installed to manufacturers
instructions. Alternatively, if there is no chimney then an insulated stainless steel flue
may be used, to BS EN 15287-1:2007 + A1:2010 with a minimum of 150mm internal
diameter, and must be installed to manufacturers instructions and to relevant Building
Regulations. The length of the chimney or flue must be at least 4.5 metres from the top of
the stove, and must finish in a down draught free area. A stove must not be installed into a
room where there is an extractor fan, or fumes could be pulled down the chimney.
It is essential to provide a facility for sweeping the chimney, and this may be done by
installing a soot door in the brickwork, or providing an access plate in the register plate or
flue pipe. When the flue is fitted from the top of the stove, the baffle can be removed to
sweep up through the stove.
Connect the stove to the chimney using vitreous enamelled flue pipe, either from the top of
the stove, or from the rear. Horizontal flue must be kept to a minimum, no more that
150mm is allowed. Make sure that all joints and connections are well sealed.
When installation is complete, allow a suitable time for fire cement and mortar to dry, light
a fire and make sure all joints are sealed. The stove is painted with a high temperature paint
finish. The paint will be cured when most surfaces have reached about 246 degrees C.
During this burn off period you will notice an unpleasant smell; you should not touch or
wipe the paint during this period as it will be soft and may mark. The room should be well
ventilated, children and pets should be kept away. Do not use water to clean the stove,
either before or after it is cured.
3

LIGHTING THE STOVE
When ready to light the stove for the first time, make sure that everything is removed from
the ashpan, and open the spin wheels at the bottom and top of the stove to let air in under
the grate. First burn some newspaper in the stove, with the door closed, to warm the flue, as
there may be down draught initially. The temperature in the flue has to be increased to
change the down draught to up draught. If down draught persists, try burning a blow torch
in the stove, facing the flue for a minute or two. If there is a soot door fitted, try warming
the flue through the soot door. If this does not work, call in your installer. If the stove has
not been lit for a while, the chimney should be checked for blockages before lighting.
When ready to light the stove, put a small piece of fire lighter, about 25mm square is big
enough, and then add small sticks, taking care not to smother the flames. When the sticks
are well alight add small logs, gradually increasing the size. Once the fire is well
Established and hot the bottom spin wheels can be closed, and the fire can be controlled
from the top air controls, without having to bend down. The spin wheels do become hot, so
use a glove or the tool provided to open or close the air vents, they only need moving
slightly to open or close the air gap. When burning solid fuel, it may be necessary to leave
the bottom air vents slightly open. A stove handle cover is included with the stove – place
the black cover over the handle when opening and closing the door, then remove and leave
near the stove.
The appliance will give more heat output with increased air supply, so the controls can be
adjusted to increase or decrease the burning rate of the fuel, as desired.
This appliance is hot whilst in operation. Keep children and furniture a safe distance away.
In the presence of children, elderly or infirm people a fireguard should be used. The
fireguard should be manufactured in accordance with BS 8423:2002 – Fireguards for use
with solid fuel appliances.
User warning - parts become very hot while the stove is running so should not be touched
with bare hands. The special operating tool, stove handle cover and a pair of gloves are
provided for operation of the hot stove.
To close the stove down, close the bottom spin wheels and the top spin wheels. Depending
on the fuel and the amount of draught in the chimney, it may be necessary to leave the top
vents open slightly to allow the glass to burn clean, and it may be necessary to leave a small
amount of air through the bottom air vents when burning certain solid fuels. DO NOT
OPEN THE BOTTOM SPIN WHEELS WITH THE TOP ONES CLOSED, THIS WILL
DAMAGE THE GLASS. When all the spin wheels are closed, the glass may become black
because the clean burn will be shut off. To burn the glass clean, make a good fire to get the
stove hot, close the bottom vents and leave the top spin wheels open.
The appliance is designed to operate efficiently with the fire door closed. The door should
be kept closed at all times, except when refuelling or removing ashes.
4
 Loading...