

Town & Country Fireplaces TCVT.SSWTA Installation And Operating Instructions Manual

281105-4 TCVT.SSWTA 5056.4267
IMPORTANT:
THESE INSTRUCTIONS ARE TO REMAIN
WITH THE APPLIANCE INSTRUCTIONS
These instructions are supplementary to the Installation and
Operating Instructions supplied with the fireplace and should
be kept together. Refer to the Installation and Operating
Instructions for proper gas supply, safety requirements and
operating instructions.
TCVT.SSWTA
INSTALLATION AND
OPERATING
INSTRUCTIONS
STAINLESS STEEL
VENT TERMINAL
2
281105-4 TCVT.SSWTA 5056.4267
TC Stainless Steel Vent Terminal Installation Instructions
The TC Stainless Steel Vent Terminal is
intended for use in climates that warrant
stainless steel construction as well as in
hard to reach places. The 2 phase
installation allows the sleeve to be
installed during the construction phase,
while the terminal can be installed at the
same time as the fireplace.
This terminal kit can be used both in
residential and commercial installation.
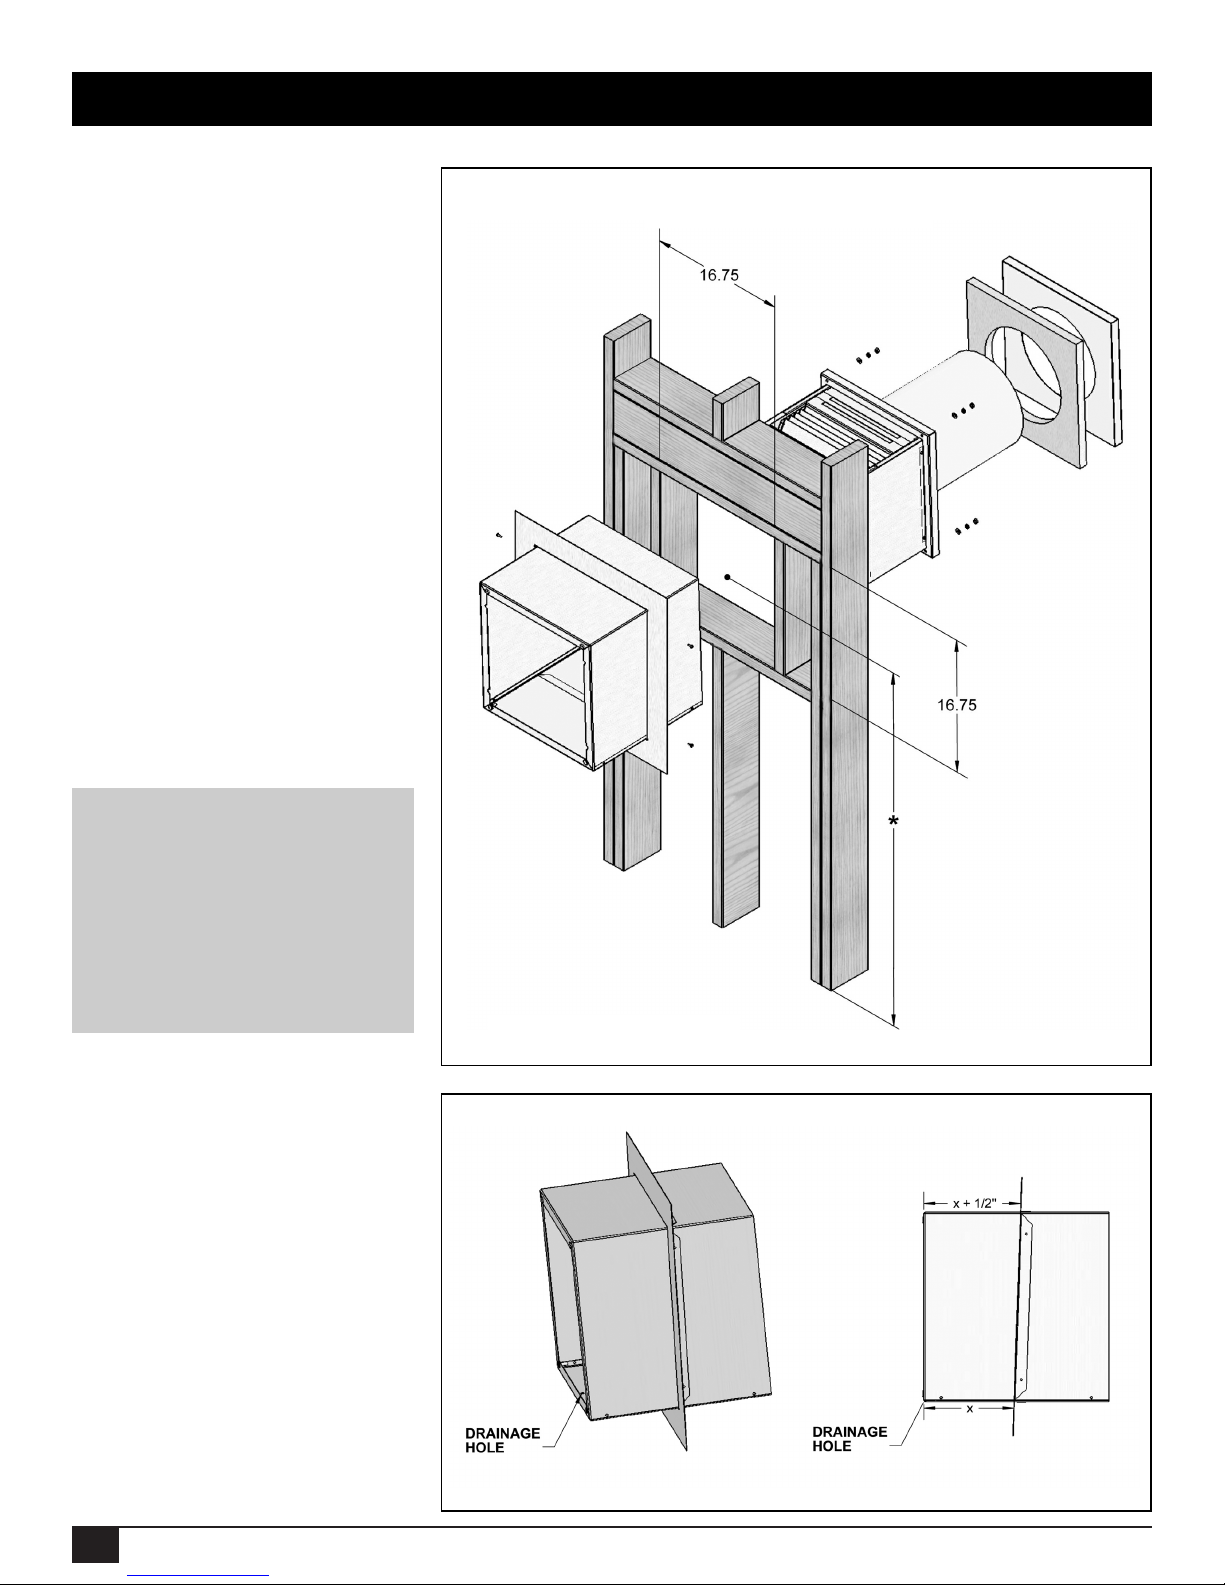
EXTERIOR WALL OPENING
Having determined the position of the
fireplace, cut and frame a 16 3/4 x 16 3/4
inch opening centered at a minimum
height above the floor as specified in the
fireplace manual. Height of the opening
will vary with each installation. As the
horizontal vent run increases, so does the
minimum vertical rise.
TYPICAL FRAMING FOR TERMINAL
IMPORTANT: When locating the
opening, it should be noted that
vent terminal exterior clear-
ances must be maintained. See
"Vent Terminal Clearances"
section in the fireplace manual
for proper clearances.
SLEEVE INSTALLATION
Slide the mounting flange over the sleeve
so that the fastening holes are oriented to
the side of the sleeve.
Set the flange back far enough so that the
sleeve will protrude a minimum of 1"
beyond the exterior wall surface.
Flange set back will depend on the type
of installation. If the sleeve is to be fas-
tened over top of siding, set the flange
back 1" from the end of the sleeve. If the
sleeve is to be fastened under the siding
or wall veneer assembly, set the flange
* As per installation manual
 Loading...