

Town MasterRange Smokehouses User Manual

SMOKEHOUSE OWNER’S MANUAL
SECTION I INSTALLATION INSTRUCTIONS
SM-24 SM-30 SM-36
FOR YOUR SAFETY
DO NOT STORE OR
USE GASOLINE OR
OTHER FLAMMABLE
VAPORS AND LIQUIDS
IN THE VICINITY OF
THIS OR ANY OTHER
APPLIANCE
IMPROPER INSTALLATION,
ADJUSTMENT, ALTERATION, SERVICE OR MAINTENANCE CAN CAUSE PROPERTY DAMAGE, INJURY OR
DEATH. READ THE INSTALLATION, OPERATING AND
MAINTENANCE INSTRUCTIONS THOROUGHLY BEFORE INSTALLING OR SER-
WARNING
NOTE
OBTAIN EMERGENCY
PROCEDURES FROM
YOUR LOCAL GAS
SUPPLIER IF YOU
SMELL GAS NEAR
THIS EQUIPMENT.
THIS EMERGENCY
INFORMATION MUST
BE PROMINENTLY
DISPLAYED
VICING THIS EQUIPMENT
KEEP THIS BOOKLET HANDY FOR FUTURE REFERENCE
WHEN SOLD IN THE COMMONWEALTH OF MASSACHUSETTS THIS UNIT MUST BE
EQUIPPED WITH AN INTERLOCK TO PREVENT OPERATION ONLY IF THE HOOD SYSTEM
IS OPERATIONAL. INSTALLATION OF THE INTERLOCK IS THE RESPONSIBILITY OF THE
INSTALLER; IT IS NOT SUPPLIED BY THE FACTORY.
Food Service Equipment Co., Inc.
72 Beadel Street BKLYN, NY 11222
(718)388-5650 fax (718)388-5860 townfood.com
(718) 388-5650 (800) 221-5032 except NY fax: (718) 388-5860 townfood.com
1
CONGRATULATIONS on your purchase of a MasteRRange Smokehouse. It will give you many years of
trouble free use if it is properly used and maintained. You can now produce delicious, juicy barbecue quickly
and easily. Feel free to call our Customer Service Department at (718)388-5650 if you have questions regarding
operation or care.
BE SURE YOUR NEW SMOKEHOUSE IS PROPERLY SET UP!
COMPONENTS MAY HAVE MOVED DURING SHIPMENT.
THE FOLLOWING ITEMS MUST BE VERIFIED BEFORE PROCEEDING WITH INSTALLATION:
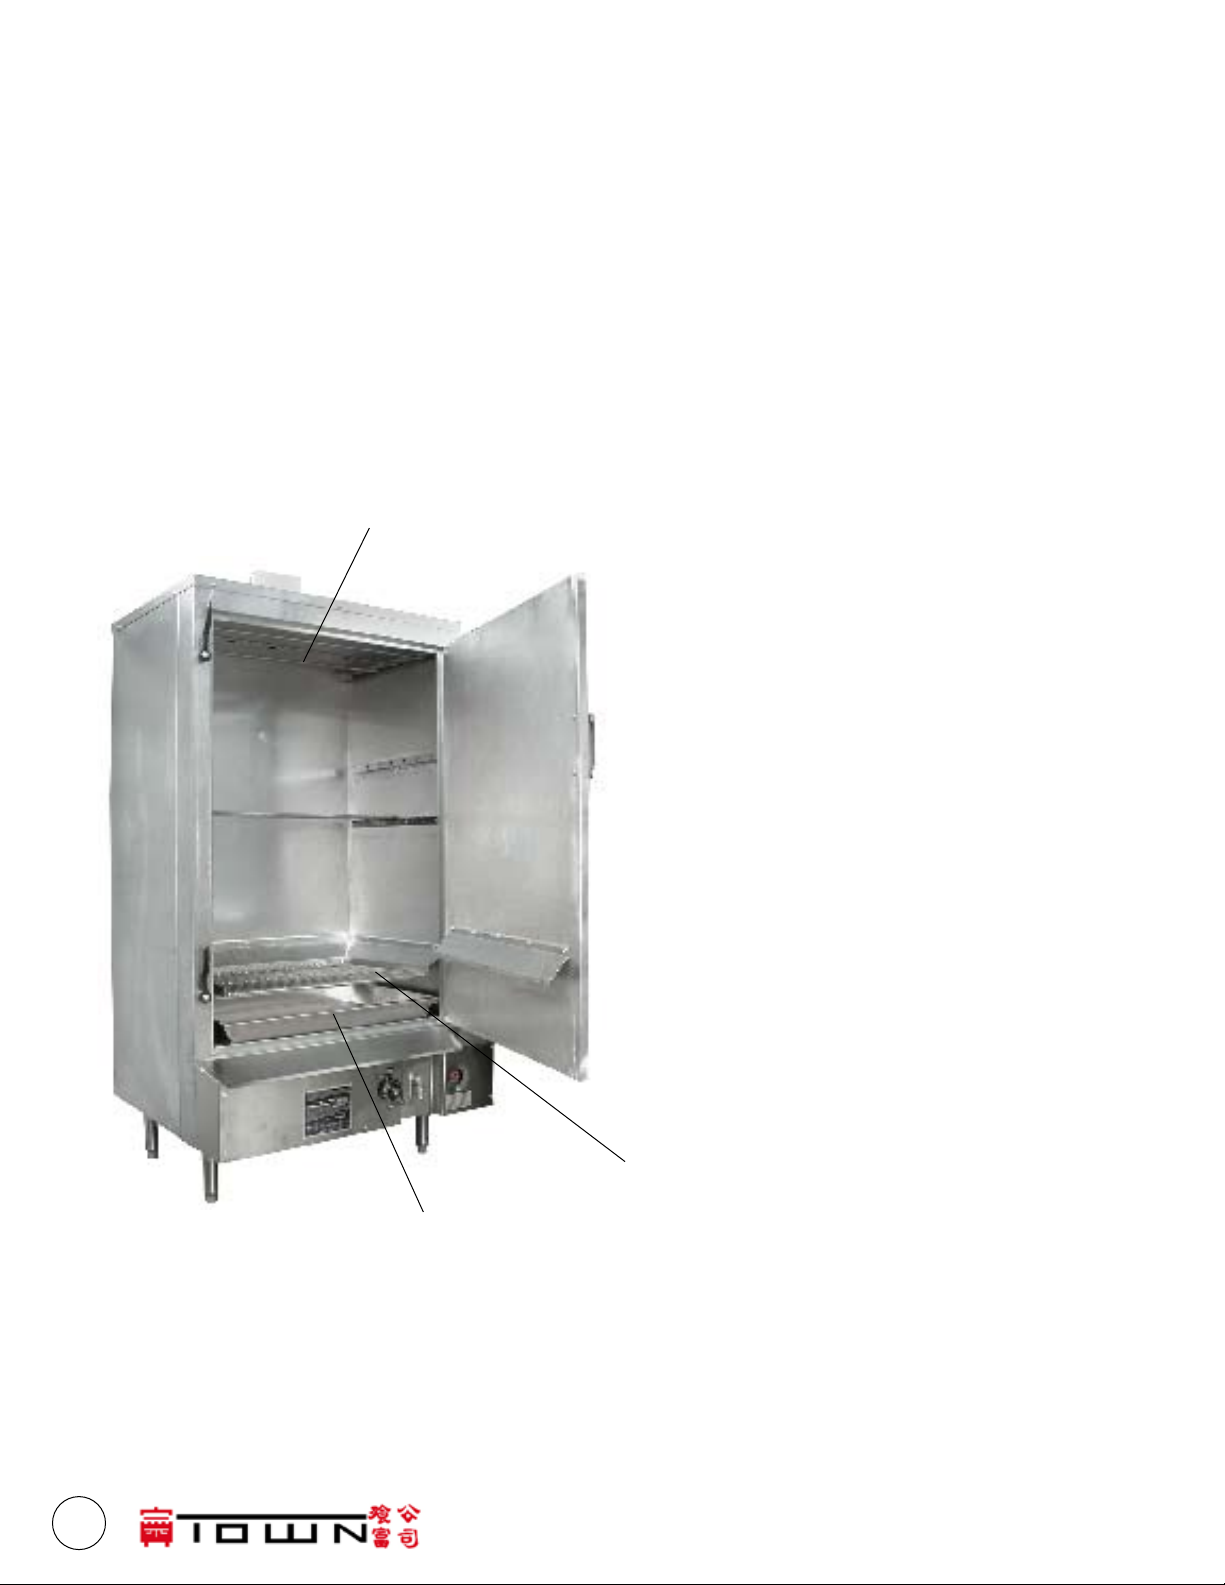
5
1. Ensure that left and right bafe tracks
are set into their support clips. Each
track has a front and rear support clip
(not pictured).
2. Remove shipping bolt from the steel
bafe on the bafe tracks. The bafe
plate must not be resting on the burners.
Position the bafe so the front and
rear are about the same distance from
the smokehouse walls.
(not pictured).
3. The water pan must be resting on the
steel bafe.
4. Ensure the safety grate is properly
positioned on the drip skirt clips.
5. The interior perforated top bafe must
be set as shown with the edges on the
pan resting on the track (at side up.)
4
3
2
FOOD SERVICE EQUIPMENT CO., INC. • 72 BEADEL ST • BKLYN • NY 11222

INSTALLATION INSTRUCTIONS
Proper installation is vital for proper performance. Consult your equipment dealer, utility company or local
“yellow pages” if assistance is needed in locating a qualied installer. When uncrating, locate all components.
Each unit is provided with a bafe, two bafe tracks, water pan, safety grate, lighter rod, and six skewers. Re-
fer to the sketch on the opposite page and verify proper component positioning.
INSTALLATION AREA MUST BE FREE & CLEAR FROM COMBUSTIBLES
1. Set the smokehouse in the position it is to occupy in the cooking area. Check that the unit is level.
The adjustable feet on the legs may be used to level the unit.
2. The gas supply line must be of adequate size to ensure maximum efciency of the unit and conform
with the National Fuel Gas Code, ANSI-Z223.1
3. The installation must conform with local codes, or in the absence of local codes with the National
Fuel Gas Code ANSI-Z223.1:
a) The appliance and its individual shutoff valve must be disconnected from the gas supply
piping system during any pressure testing of that system at test pressures in excess of 1/2
psig.
b) The appliance must be isolated from the gas supply piping system by closing its individual
manual valve during any pressure testing of the gas supply piping system at test pressures
equal or less than 1/2 psig.
4. This appliance is designed for use with Natural or Propane (bottled) gas only and may be connected
only to the type of gas for which it is equipped as specied on the rating plate secured to the front
of the unit.
5. Smokehouse should be used under a hood with adequate ventilation.
6. Smokehouse installation must have rear clearance of 4” and side clearance of 4” from any
combustible construction. Clearances for non-combustible construction are same as combustible
clearances. Suitable for installation or non-combustible oors.
7. Materials such as wood, compressed paper and plant bers that will ignite and burn, MUST NOT
BE LEFT NEAR THIS UNIT. Local safety codes should be complied with in respect to re hazard
avoidance.
8. The front of the unit must be kept clear to avoid restriction of air supply for combustion.
9. The unit must be installed in an area or room with sufcient fresh air supply to ensure proper
combustion.
10. There must be adequate clearance for air openings into the combustion chamber, servicing and
proper operation.
11. If your unit is supplied with casters, the installation shall be made with a connector that complies
with the Standard for Connectors for Movable Gas Appliances, ANZI-Z21.69, and a Quick Dis
connect device that complies with the Standard for Quick Disconnect Devices for Use with Gas
Fuel ANSIZ21.41, and adequate means must be provided to limit the movement of the appliance
without depending on connector and the quick disconnect device or its associated piping to limit
the appliance movement.
12. If your unit is provided with casters on legs, the legs with locking casters must be installed in the
front leg gussets. Restraining devices are required for caster mounted equipment. Such restraining
devices are to be well secured to sides or rear of the unit.
(718) 388-5650 (800) 221-5032 except NY fax: (718) 388-5860 townfood.com
3
13. Do not locate unit by door or window as air currents adversely affect operation
14. DO NOT THROW AWAY THESE INSTRUCTIONS. THIS MANUAL MUST REMAIN WITH THE
UNIT FOR FUTURE REFERENCE.
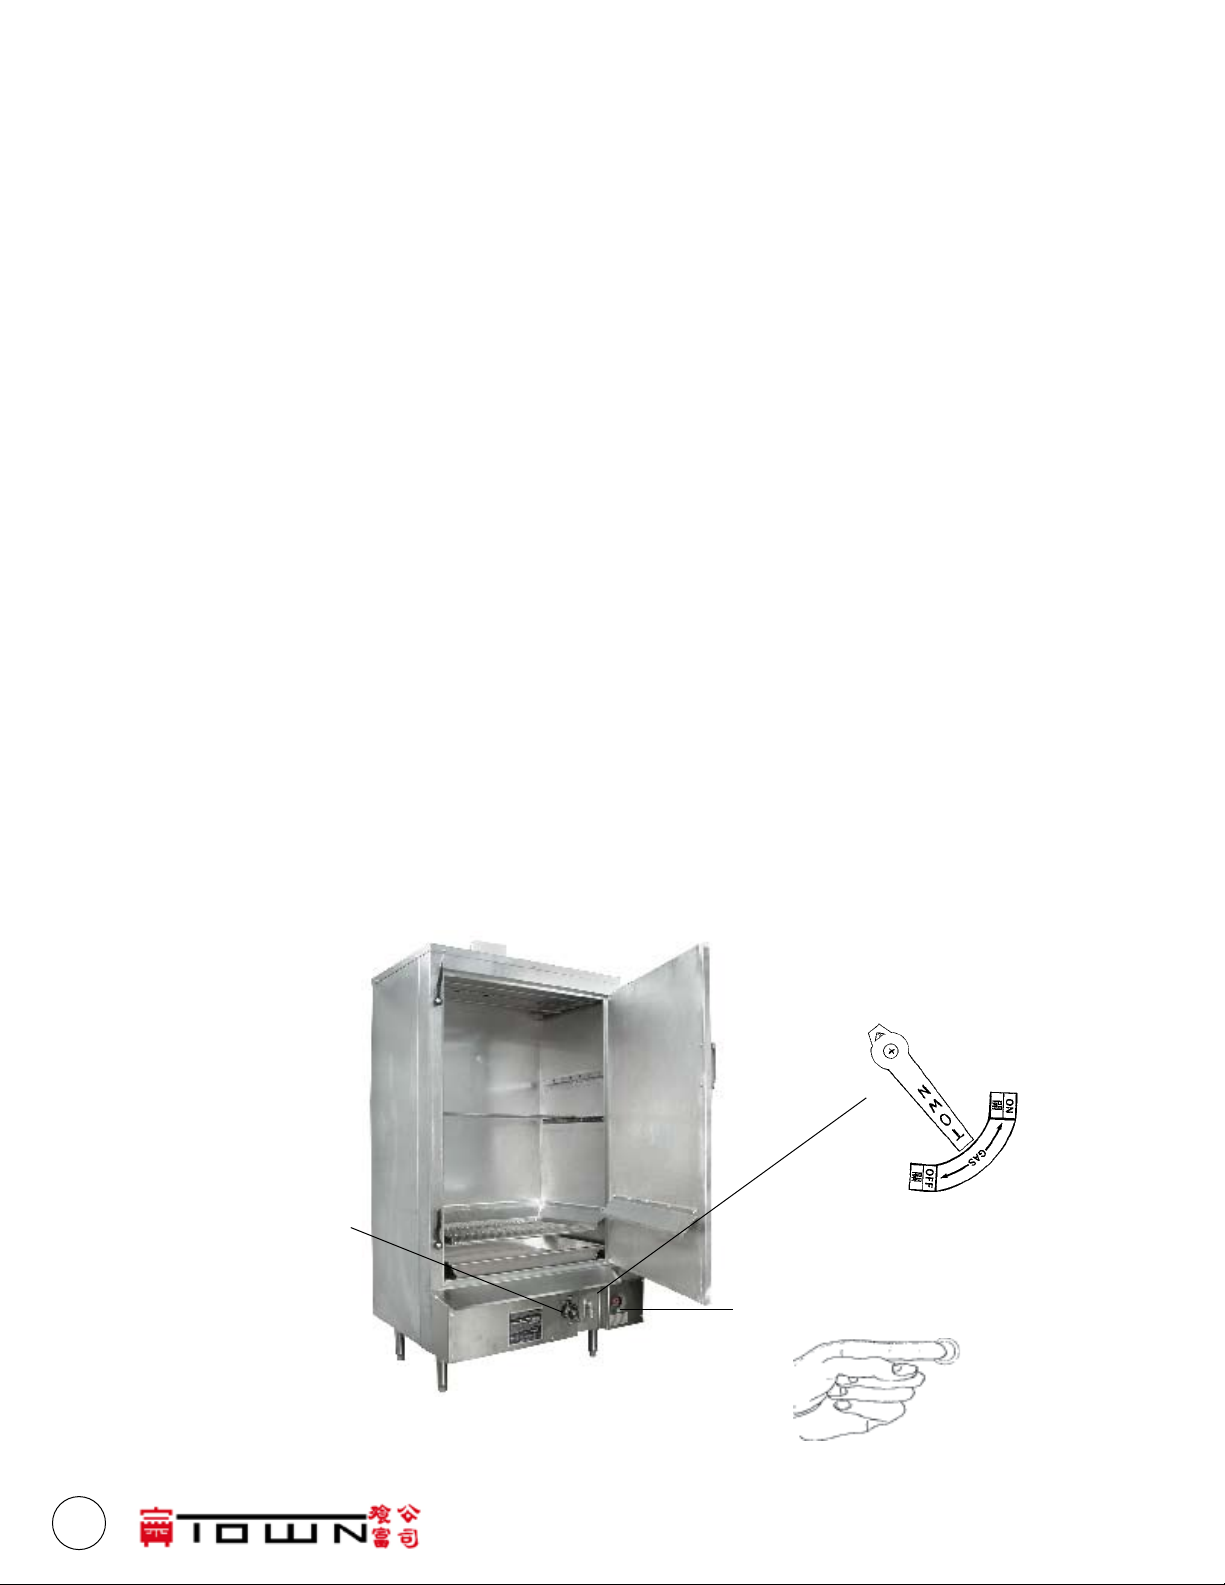
UNIT OPERATION: LIGHTING & SHUT DOWN INSTRUCTIONS
Always follow lighting and shut down instructions below when operating your unit. A ve minute complete
shutoff period is required before lighting or relighting it. See diagram below.
1. Check that all gas valves on the unit are turned “OFF” (lever handles in vertical position) before
turning “ON” main gas line. Check for leaks using soapy water or other suitable leak detector.
DO NOT USE OPEN FLAME FOR TESTING.
2. Main burner valve shall be in “OFF” position. Light a match and place it in the lighter rod.
Position the burning match by the pilot burner in the combustion chamber of the smokehouse.
Depress the red button on safely control (see g 1. below) and light pilot.
3. The pilot should light. Continue to hold the button for one minute or until the pilot stays lit.
4. Set thermostat to desired temperature.
5. Turn main burner valve counterclockwise to “ON” position (g. 2). Observe that each burner has
ignited with a clear, blue ame that is 3/4” - 1” long.
6. Turn main burner valve to “OFF” position when unit is not in use.
7. Set thermostat to minimum setting.
8. In the event of power failure, blackout or loss of gas, do not attempt to operate this unit.
Turn main burner valve
counter-clockwise to
“ON” after thermostat is
set.
Set thermostat to
desired temperature
Put lit match to pilot
burner, depress &
hold red button
Fig. 2
Fig. 1
4
FOOD SERVICE EQUIPMENT CO., INC. • 72 BEADEL ST • BKLYN • NY 11222
 Loading...