

TOWITOKO CHIPDRIVE mobile, CHIPDRIVE micro, CHIPDRIVE extern, CHIPDRIVE keyboard, CHIPDRIVE intern User Manual [en, de]
...Page 1
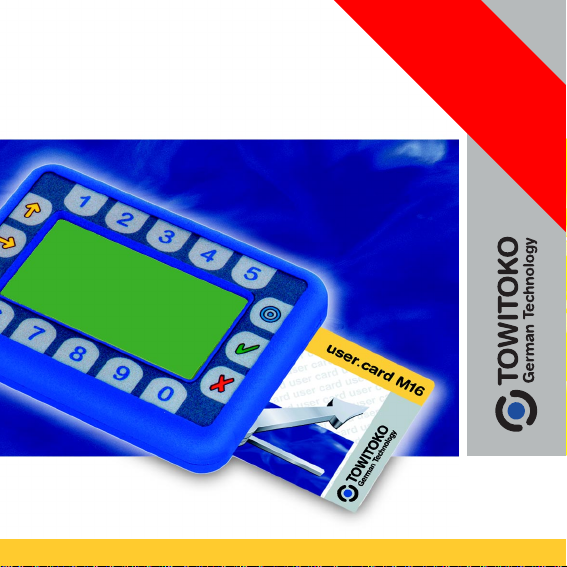
mit dem TripleCard
Zeiterfassung
Kurzanleitung
Terminal
Der Einsatz des TripleCard Ter minals
Windows® 3.11
Windows® 95/98
Windows NT
© 2000 Towitoko AG
TripleCard Terminal • TripleCard Ter minal • TripleCard Termina
TripleCard Terminal • TripleCard Ter minal • TripleCard Termina
Windows® 2000
®
Page 2

So arbeitet das TripleCard
Terminal...
Bei der Entwicklung des TripleCard Terminals wurde besonderer
Wert auf eine möglichst einfache Bedienung gelegt. So beschränkt
sich die einfache Kommen- bzw. Gehen-Buchung auf das
Einstecken und Wieder-Herausziehen der User Card.
Das Einschalten des Geräts erfolgt automatisch beim Einstecken
der Karte.
Über die normalen Buchungsvorgänge hinaus gibt es noch die
Vorgänge [ Uhr stellen] und [Daten auslesen], deren Durchführ ung
ebenfalls so einfach wie möglich gestaltet wurden.
So stellen sie Kalender und Uhr
des TripleCard Terminals ein...
Zum Einstellen von Datum und Uhr verwenden Sie das kleine
Programm Terminal Uhr, das bei der Installation der TripleCard
Software automatisch mitinstalliert wird.
Gehen Sie dazu folgendermaßen vor:
TripleCard Terminal • TripleCard Ter minal • TripleCard Termina
Page 3
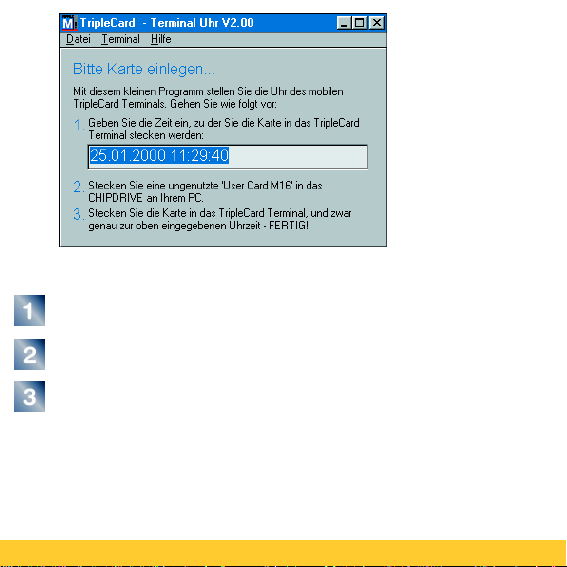
Starten Sie die Software TripleCard T erminal Uhr.
Bereiten Sie eine ungenutzte User Card vor.
Klicken Sie in den blau hinterlegten Text für Datum
und Uhrzeit (oder verwenden Sie die
Richtungstasten), um den Cursor auf die Uhrzeit zu
stellen.
TripleCard Ter minal • TripleCard Ter minal • Tr ipleCard Termin a
Page 4

Korrigieren Sie die Uhrzeit auf den Zeitpunkt, zu
dem Sie die Chipkarte in das Terminal einstecken
werden.
Stecken Sie die User Card in das CHIPDRIVE.
Schauen Sie auf eine genau gehende Uhr und
stecken Sie die User Card genau zum festgelegten
Zeitpunkt in das Ter minal.
So stempeln Sie und Ihre
Kollegen...
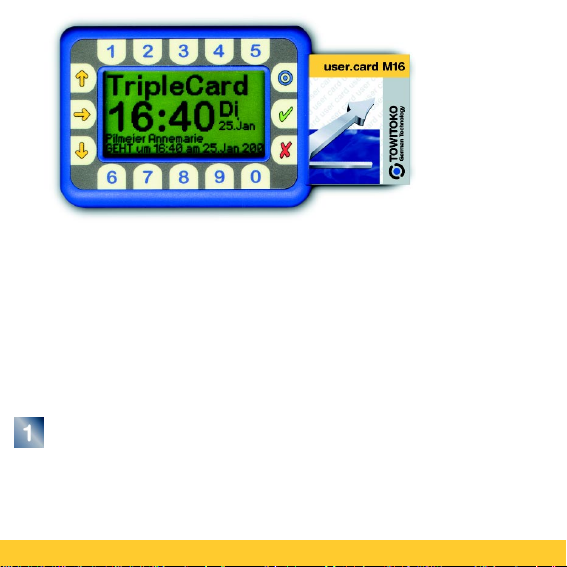
Gestempelt wird durch Einstecken von Tr ipleCard User Cards,
die mit Hilfe der TripleCard Software erstellt wurden. Um ein
"normales" Kommen oder Gehen zu stempeln, gehen Sie bitte
wie folgt vor:
TripleCard Ter minal • TripleCard Ter minal • Tr ipleCard Termin a
Page 5

Stecken Sie die User Card in das Terminal (falls das
Terminal nicht eingeschaltet ist, schaltet es sich
automatisch ein).
Überprüfen Sie, ob in der letzten Zeile auf dem
Display [KOMMT] oder [GEHT] korrekt angezeigt
wird.
Entnehmen Sie die Karte.
Falls die Art der Buchung ([KOMMT] oder [GEHT] )
nicht gestimmt hat, wiederholen Sie die Schritte 1
bis 2.
TripleCard Ter minal • TripleCard Ter minal • Tr ipleCard Termin a
Page 6
Wenn Sie mit der TripleCard Profi-Software arbeiten, können Sie
beim Kommen eine 4-stellige Projektnummer eingeben. Ferner
gibt es in der Profi-Version der Software den Buchungstyp
"Projektwechsel", der innerhalb der Zeitspanne zwischen
Kommen und Gehen gebucht werden kann.
Um ein Kommen mit einer Projektnummer zu buchen, gehen
Sie bitte folgendermaßen vor:
Stecken Sie die User Card ein und achten Sie
darauf, daß auf dem Display [KOMMT] angezeigt
wird (falls [GEHT] angezeigt wird, ziehen Sie die
Karte heraus und stecken Sie sie erneut ein).
TripleCard Ter minal • TripleCard Ter minal • Tr ipleCard Termin a
Page 7

Geben Sie mit Hilfe der Nummerntasten eine 4-stellige
Zahl ein (wenn Sie sich beim Eingeben der Zahl
vertippt haben, können Sie die falsche Eingabe mit der
Lösch-Taste
löschen und die Eingabe wiederholen. Wenn Sie die
Lösch-Taste 2 mal drücken, wird der gesamte Vorgang
abgebrochen und es bleibt bei einer einfachen
Buchung ohne Projektnummer.
Wenn Sie sicher sind, die korrekte Projektnummer
eingegeben zu haben, bestätigen Sie mit der OKTaste.
Entnehmen Sie die Karte.
TripleCard Ter minal • TripleCard Ter minal • Tr ipleCard Termin a
Page 8

Um eine Buchung vom Typ Projektwechsel zu stempeln, führen
Sie folgende Schritte aus:
Stecken Sie die User Card ein und achten Sie
darauf, daß auf dem Display [GEHT] angezeigt wird
(falls [KOMMT] angezeigt wird, ziehen Sie die Karte
heraus und stecken Sie sie erneut ein).
Führen Sie die Schritte 2 bis 4 wie beim
voranstehenden Beispiels aus.
So transportieren Sie die Daten
vom Terminal zum PC...
Für den Datentransport benötigen Sie eine formatier te Transport Card. Wie Sie die Transport Card for matieren, erfahren Sie
in der Kurzanleitung zur TripleCard Software. Um die Daten zu
transportieren, gehen Sie bitte wie folgt vor:
TripleCard Ter minal • TripleCard Ter minal • Tr ipleCard Termin a
Page 9

Stecken Sie die Transpor t Card in das Terminal.
Warten Sie, bis die Meldung [Transfer OK!] erscheint
und entnehmen Sie die Karte.
Starten Sie die TripleCard Software, stecken Sie die
Transport Card in das CHIPDRIVE und beantwor ten
Sie die Frage [Möchten Sie die Daten von der
Transport Card einlesen] mit [ Ja].
TripleCard Ter minal • TripleCard Ter minal • Tr ipleCard Termin a
Page 10
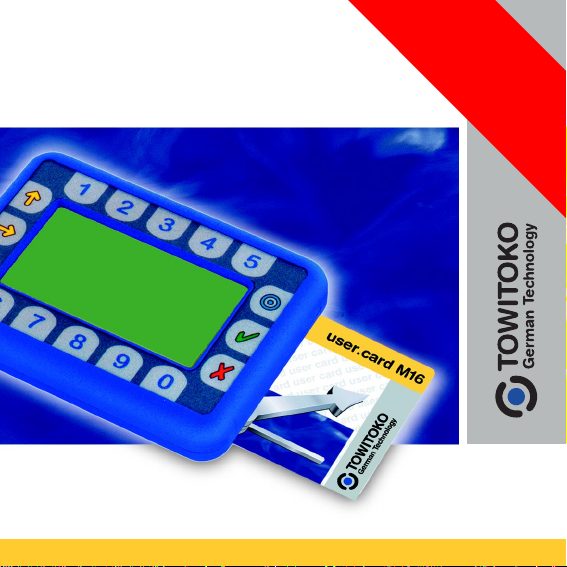
CHIPDRIVE mobile
Kurzanleitung
Das mobile Chipkartenter minal
© 2000 Towitoko AG
CHIPDRIVE mobile • CHIPDRIVE mobile • CHIPDRIVE mobil
Unabhängig
mit
Page 11
Herzlichen Glückwunsch zum
Erwerb des mobilen
Zeiterfassungsterminals TRM500.
Bitte beachten Sie die Bedienungshinweise in dieser
Kurzanleitung um einen effektiven Einsatz des Gerätes zu
gewährleisten.
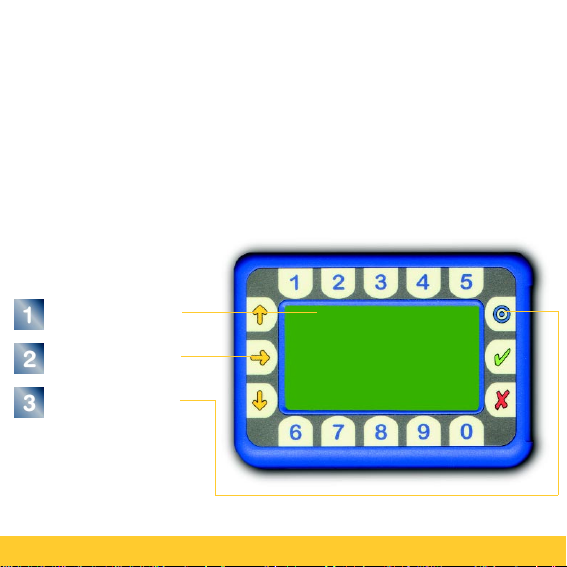
Die Bedienelemente:
Grafik Display
Tastatur
On/Off Taste
CHIPDRIVE mobile • CHIPDRIVE mobile • CHIPDRIVE mobil
Page 12
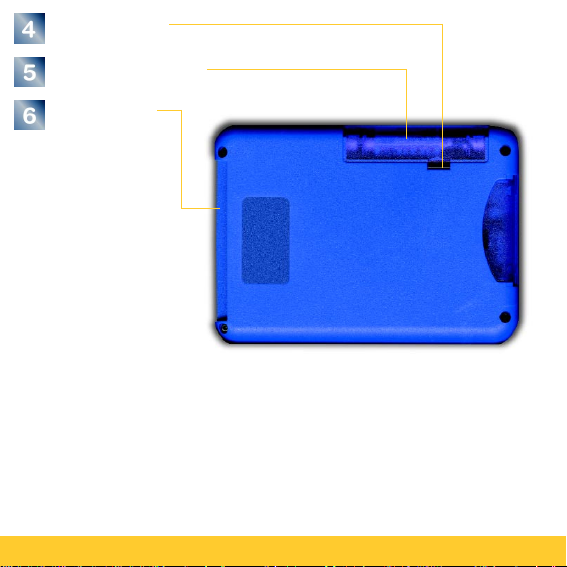
Verr iegelung
Batteriefachdecke
Kartenleser
Das Gerät wird mit der On/Off Taste (3) oder durch
Einstecken einer Chipkarte in den Kartenleser (6)
eingeschaltet. Die Abschaltung erfolgt entweder
manuell mit der On/Off Taste (3) oder automatisch
nach einer durch die Software vorgegebenen
Inaktivitätszeit.
CHIPDRIVE mobile • CHIPDRIVE mobile • CHIPDRIVE mobil
Page 13

So wechseln Sie die Batterien...
Ein Batteriewechsel ist nötig, sobald der Kontrast der Anzeige
sich merkbar verändert oder Fehler meldungen beim Bearbeiten
von Chipkarten auftreten.
Zum Batteriewechsel den Batteriefachdeckels (5) abnehmen,
wobei die Verriegelung (4) in Pfeilrichtung gelöst werden muß.
Die alten Batterien entnehmen und neue Batterien
entsprechend der Kennzeichnung auf dem Batteriefachboden
einlegen.
Bitte beachten Sie, daß stets beide Batterien
!
gleichzeitig ausgetauscht werden müssen und nur
Zellen der Größe 'AAA - MICRO' vom gleichen Typ
eingesetzt werden sollten. Zur Sicherheit sollten die
Zellen spätestens einmal im Jahr erneuert w erden,
da austretende Chemikalien von ausgelaufenen
Batterien das Gerät permanent beschädigen
könnten.
CHIPDRIVE mobile • CHIPDRIVE mobile • CHIPDRIVE mobil
Page 14

Nach dem Wechsel der Batterien ist die Uhrzeit der Echtzeituhr
zu prüfen und wenn notwendig gemäß der Softwareanleitung zu
korrigieren.
Achten Sie bei der Inbetriebnahme des Gerätes auf
!
eine angepasste Luftfeuchtigkeit, da Kondensationsfeuchte sich nachteilig auf den Betrieb des Gerätes
auswirken kann. Dies gilt insbesondere, wenn das
Gerät aus einer kalten Umgebung kommend auf
Zimmertemperatur erwär mt wird.
Das Display...
Der Kontrast des Flüssigkristalldisplays ist abhängig von der
Umgebungstemperatur. Es ist normal, daß das Display bei hohen
Temperaturen dunkler, und bei niedrigen Temperaturen blasser
und träger wird. Das Gerät ist für den Einsatz bei
Zimmertemperatur (15 - 25 °C) konzipier t und das Display ist für
diesen Temperaturbereich am besten ablesbar.
CHIPDRIVE mobile • CHIPDRIVE mobile • CHIPDRIVE mobil
Page 15

Hier finden Sie Hinweise zum
Kartenleser...
Der Kartenleser ist für Chipkar ten nach ISO-7816 ausgelegt.
Die häufige Verwendung von stark verschmutzten Karten kann
zu Funktionsstörungen führen - achten Sie daher darauf, die
Karten sauber und trocken zu halten.
Im Regelfall arbeitet der Kartenleser völlig
!
wartungsfrei - für sehr starke Beanspruchung ist
jedoch u.U. die Anschaffung eines
Reinigungskartensets (im EDV-Fachhandel
erhältlich) zweckmäßig.
CHIPDRIVE mobile • CHIPDRIVE mobile • CHIPDRIVE mobil
Page 16

So lade ich neue Software...
Es besteht technisch die Möglichkeit, die im Gerät
gespeicherte Software (Fir mware) durch ein SoftwareDownload zu aktualisieren bzw auszutauschen. Die neue
Firmware wird mittels einer Chipkarte über tragen, die Sie
von Ihrem Händler bekommen oder die Sie nach Anleitung
mit einem Kartenlesegerät am PC selbst bespielen können.
Prüfen Sie vor einem Software-Download, ob die
!
Batterien im Gerät noch frisch sind. Tauschen sie
die Batterien im Zweifelsfall gegen neue aus.
Schalten Sie das Gerät aus und stecken Sie die
Download-Karte ein.
Das Gerät schaltet sich bei Erkennen der Karte ein und
signalisiert durch einen Br ummton den Programmiervorgang.
Bei erfolgreichem Abschluß der Übertragung er tönt ein
Signalton und das Gerät startet automatisch neu mit der
neuen Software.
CHIPDRIVE mobile • CHIPDRIVE mobile • CHIPDRIVE mobil
Page 17

So reinige ich das Gerät...
Das Gerät ist nur mit einem weichen, leicht angefeuchtetem und
fusselfreiem Tuch zu reinigen. Bei starker Verschmutzung kann
das Tuch mit einigen Tropfen Ethylalkohol (Spiritus) befeuchtet
werden.
Die technischen Daten...
Bezeichnung batteriebetriebener Kar tenleser für
I²C Speicherkar ten mit Display,
Tastatur und integrier tem Speicher
Programmierung Firmware über I²C Speicherkar te
Betriebsspannung U3V
Stromversorgung 2 * 'AAA' Zelle
Betriebsstromaufnahme Ib <15mA
Ruhestromaufnahme Is <30µA
max. Batterienutzungsdauer 1 Jahr
CHIPDRIVE mobile • CHIPDRIVE mobile • CHIPDRIVE mobil
Page 18

Betriebstemperaturbereich t +15°C ... +25°C
Lagertemperaturbereich t +5°C ... +50°C
relative Luftfeuchte < 55%
Displayauflösung 128*64 Pixel
Speicher EEprom max. 4*64kBit
Kontaktiereinheit Landekontakte
goldbeschichtet
Abmessungen 78 * 108 * 21 mm
Gewicht ohne Batterien 145 gr
CHIPDRIVE mobile • CHIPDRIVE mobile • CHIPDRIVE mobil
Page 19
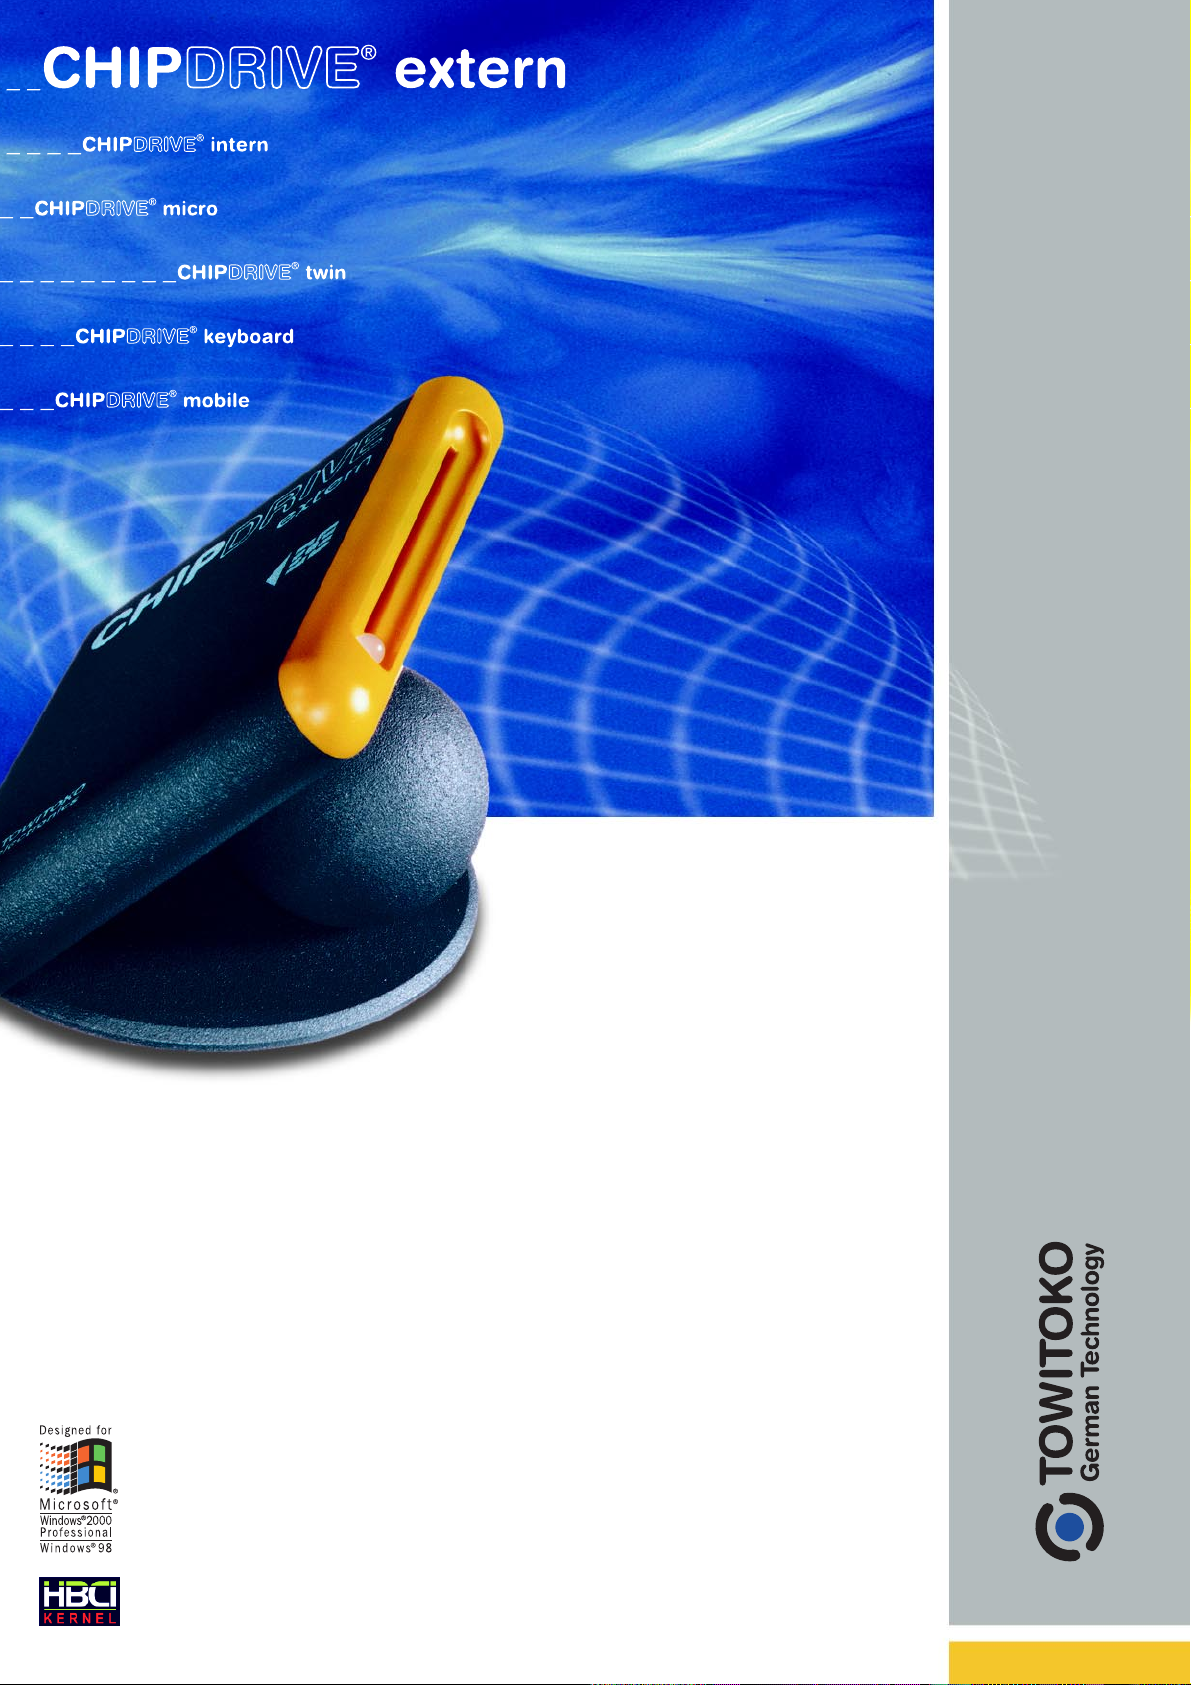
Short description
This rugged desktop terminal has
become famous for its
remarkable design. The
ergonomically cardinsertion
angle of 45° and the heavy and
stable steelbase (the total mass
is more than 600 grams)
significantly improve the handling
convenience. A three color light
displays status information.
• all important smartcard
protocols are supported: T=0,
T=1, 2-wire, 3-wire, I²C (up to
256 kBit), and special security
memorycards
• top quality: superior design and
best workmanship ensure a
long operating life
• future built in: new smartcard
protokols can be upgraded by
software update
Page 20
Interface PC, serial connection RS232, V.24
Power supply from serial port, buffered
by maintenance free
NiMH battery
Display three color status LED.
red / yellow / green
Dimensions 70 x 100 x 70 mm (LWH)
Body color RAL 7024 (dark grey)
RAL 1028 (orange - yellow)
Connection cable 120 cm, 9 pol. SUB-D, black
Mass 660 grams
EMI compatibility CE 89/336
Temperature range -10 to +50 °C
Card interface life 200.000 mating cycles
Contact material gold plated brass
Standards ISO 7816-3 ff., EMV3.0, GSM11.1,
PC/SC-Logo
Card frequency 3,57 MHz
Card current supply 0 to 55 mA
Protocols T=0, T=1, 2-Wire, 3-Wire, I2C,
over 40 memory card types
Interface speed T=0: 4800 .. 38400 Baud (PTS)
T=1: 4800 .. 115200 Baud (PTS)
Sync. protocols: 4800 .. 115200 Baud
CPU type 4 MHz Microchip controller
System compatibility Windows
Windows
Windows NT
®
3.11,
®
95,
®
Windows ® 2000
API standards PC/SC
NETS (Singapore),
OCF (OpenCard Framework),
CT-API V1.1
- MKT/BCS
- partial B1 command set
- EUTELIS compatible
SCARD interface
ORGA emulation (T=1)
Special features Plug & Play compatible;
integrated mouse passthru;
environment friendly NiMH
rechargeable battery for card
current supply
Application software SIM-Surf
®
(optional) ValueCard Station (GeldKarte),
SmartCard Explorer,
PC-Security with NT-Login
Timekeeping
InternetCard (Internet ID)
OEM-packaging cardboard box 110 x 102 x 75 mm
Shipping contents CHIPDRIVE extern,
serial mouse
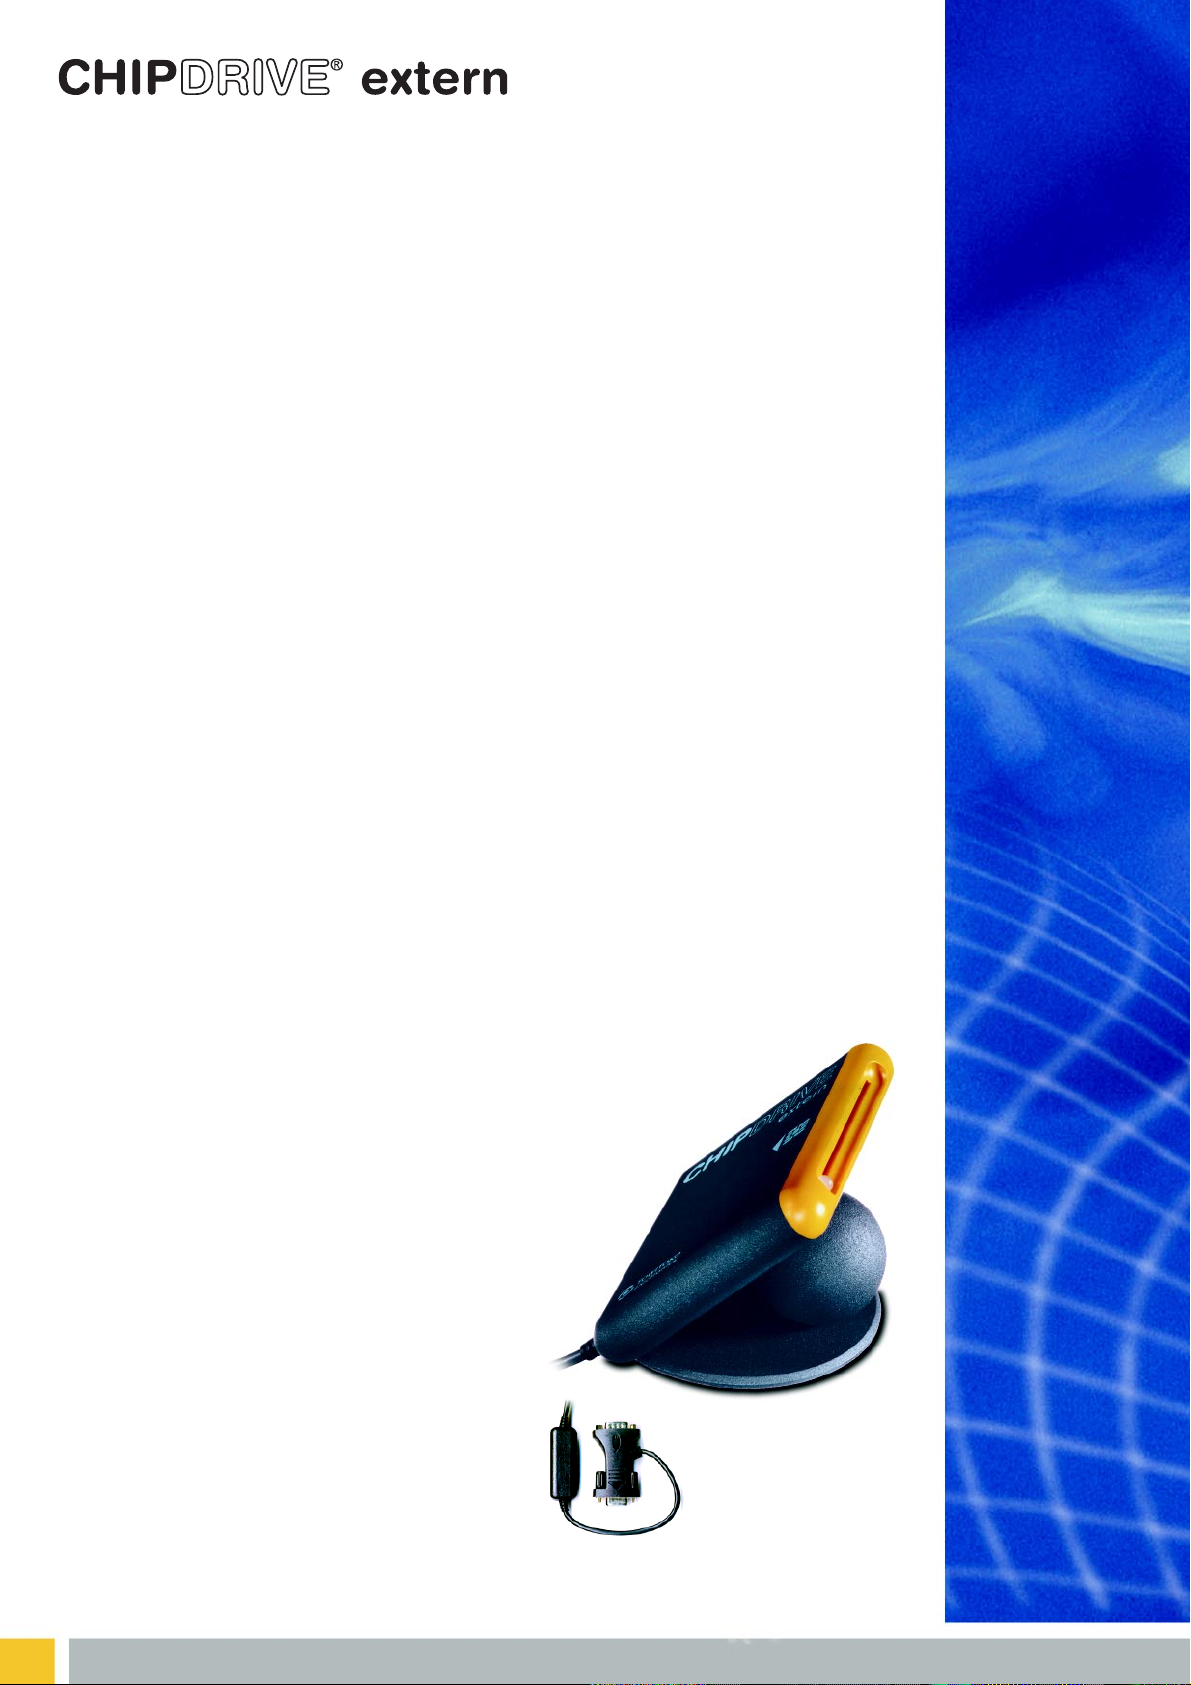
connection cable as shown,
installation guide sheet
Shipping units 20 pcs. per cardboard box,
50 boxes per palette (1000)
COM Port
© 2000 Towitoko AG Haidgraben 2 D-85521 Ottobrunn tel: +49-89-66683-0 fax: +49-89-66683-222 http://www.towitoko.de
Page 21
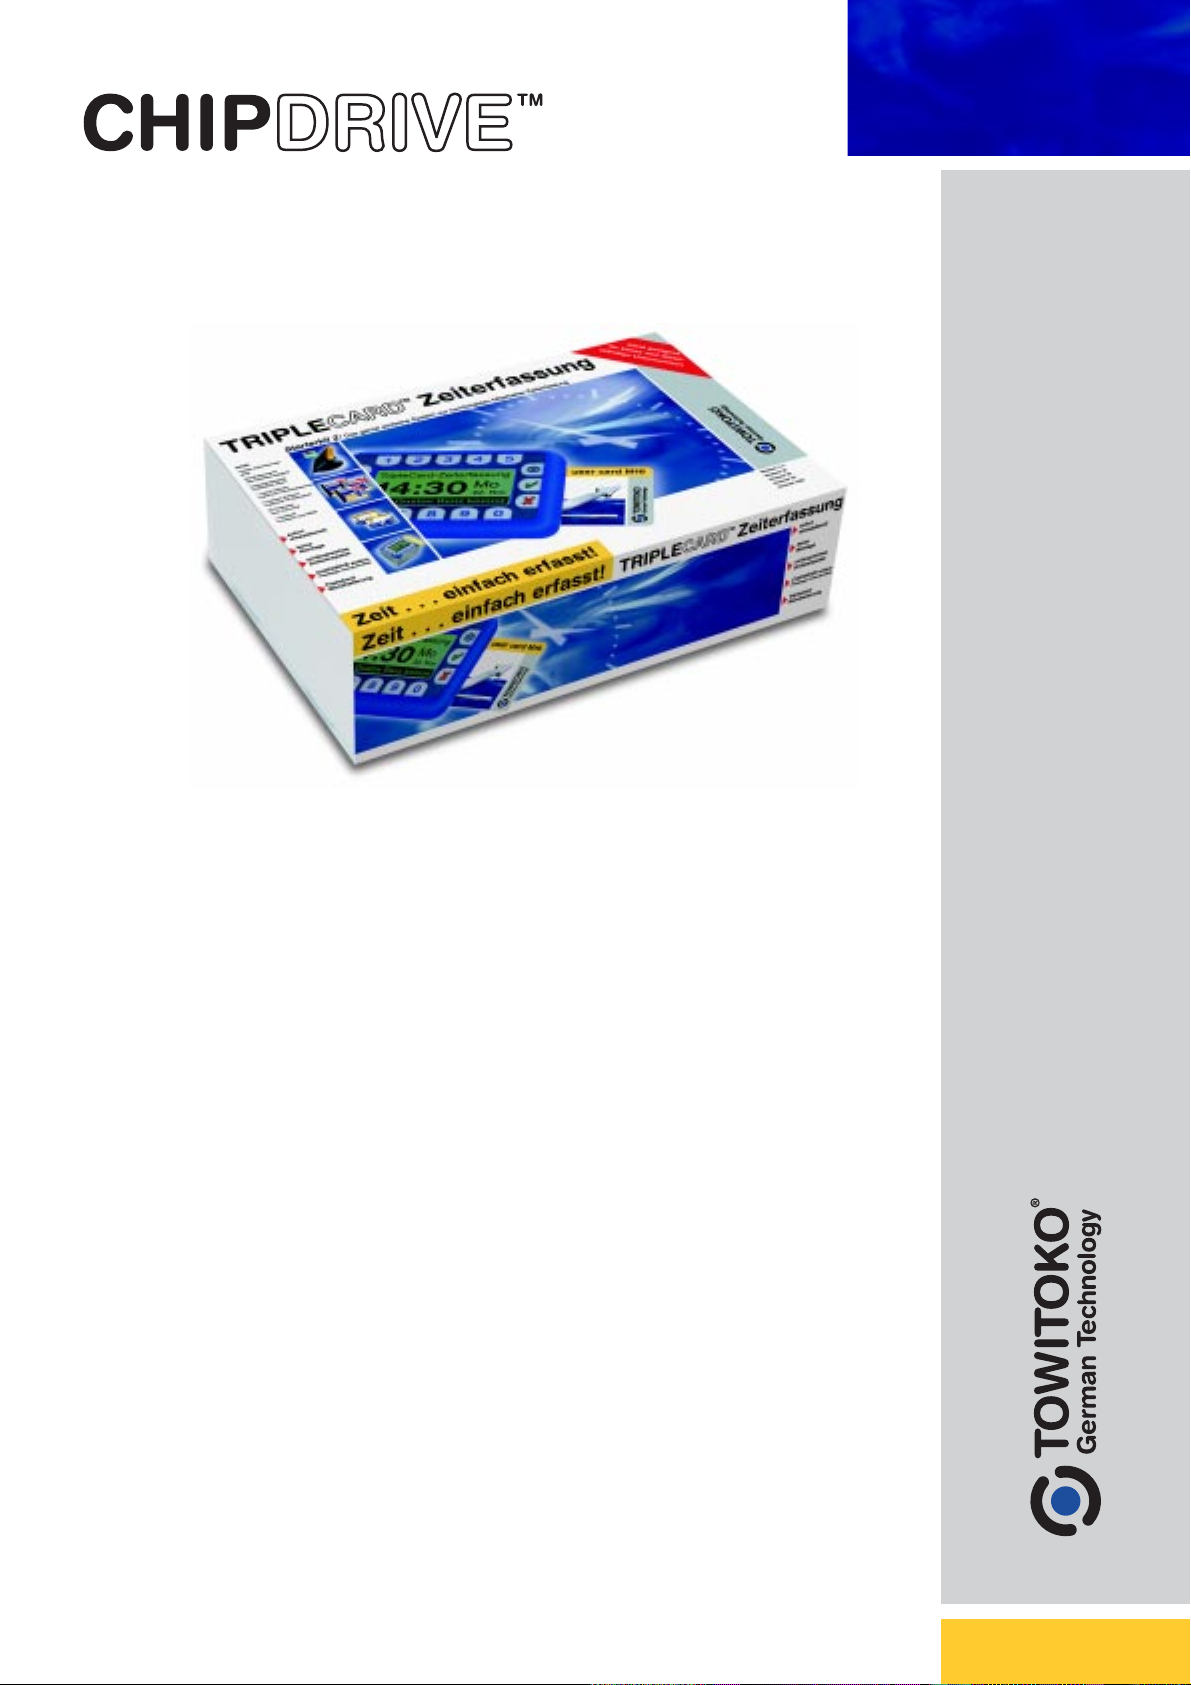
time recording
V2.10
The CHIPDRIVE
time recording set
Time recording device, software for evaluation of the data
and chip cards for data transfer – the three-part system
is the ideal solution for time recording in your company.
No physical installation
– ready to use
The system is ready to use with no cabling and a minimum
of fuss. Data is transferred from the time recording device to
the PC simply with a chip card. (see diagram on the
backside)
Easy-to-use software
The software is clearly structured and intuitive. It ensures
a short familiarization period and that all the functions of
the program can be used effectively.
P roduct
Info
Page 22
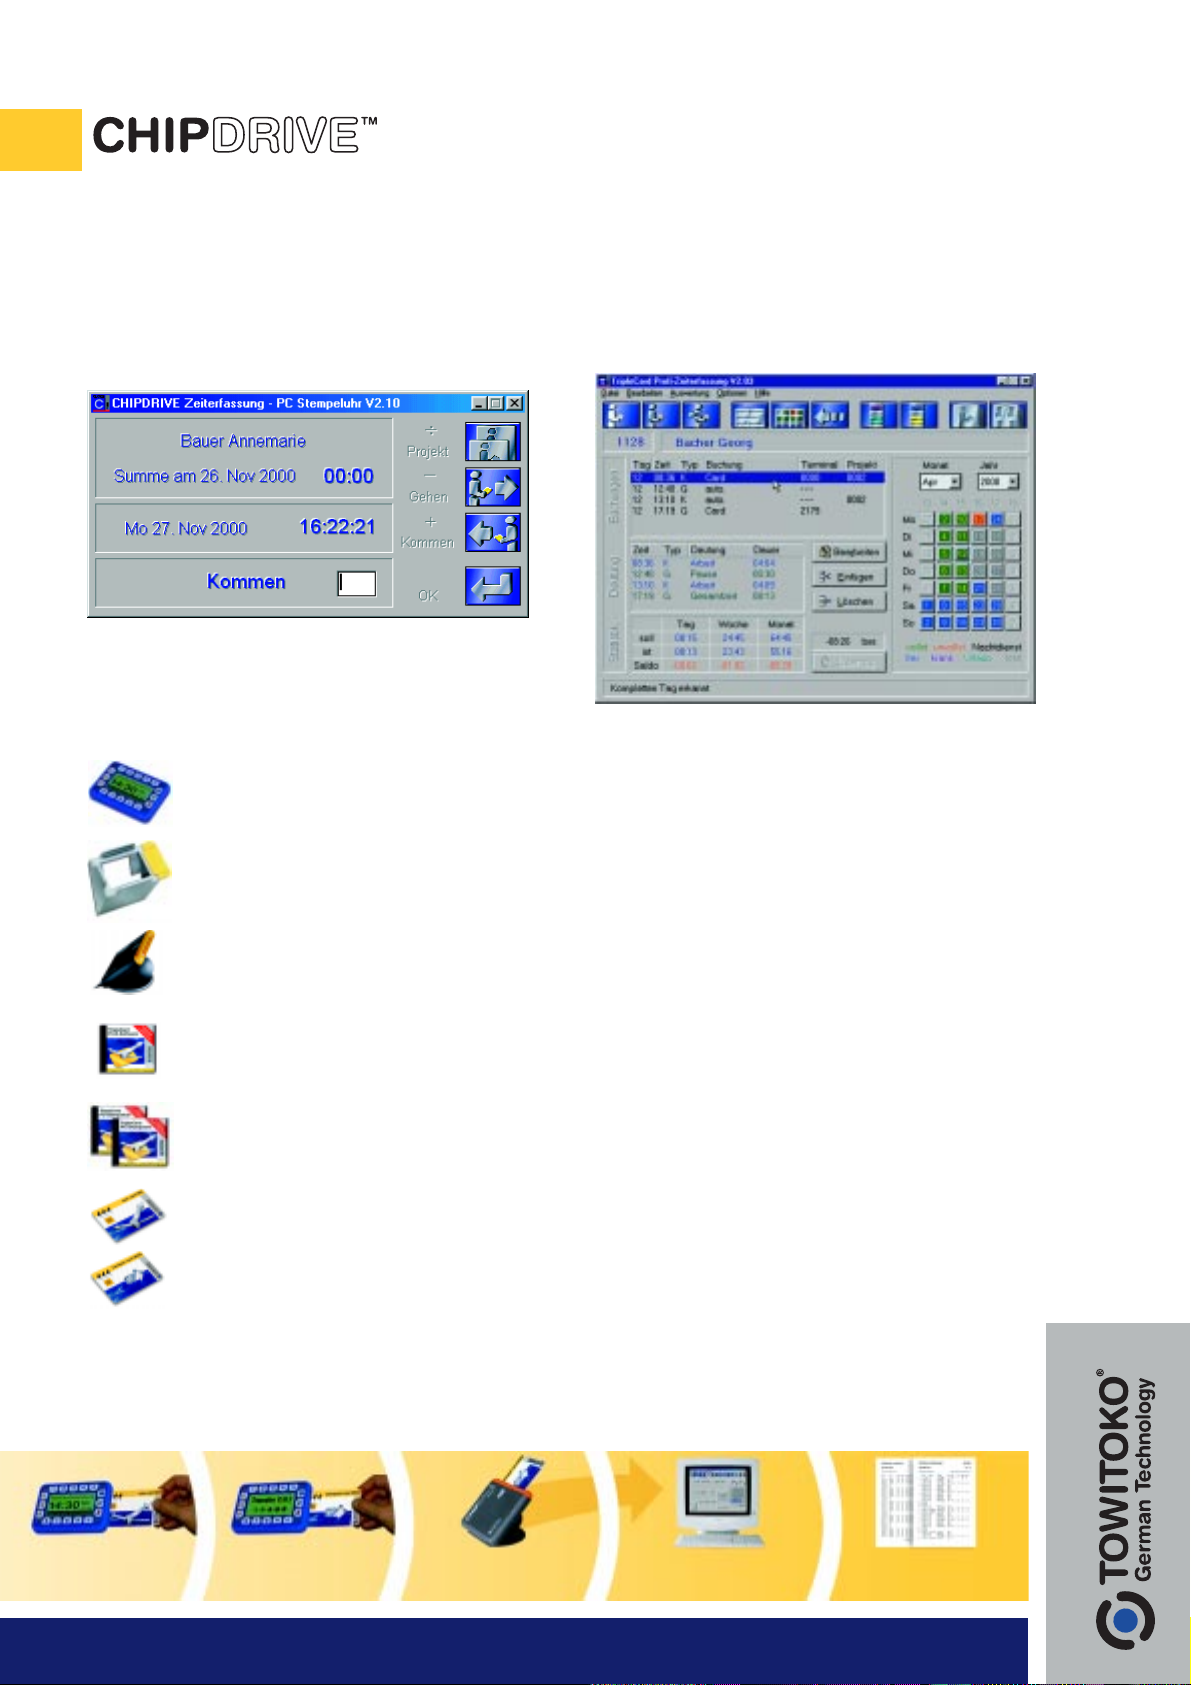
time recording V2.10
PC time clock software
The combination of a CHIPDRIVE with the PC time
clock is a practical alternative to the time recording
device. Each member of staff whose PC is equipped
with a CHIPDRIVE can this easily record their times
directly at their workplace.
Contents:
mobile time recording device
wall mount for time recording
device
CHIPDRIVE extern chip card
reader
1 license for CHIPDRIVE time
recording software
2 licenses for PC time clock
software
CHIPDRIVE time recording
software
In combination with the time recording device or the
PC time clock, the software offers a time recording
system based on chip cards.
• Creating user records
• Creation of pesonalized cards (User Cards) and
the data transfer card (Transport Card)
• Nominal times can be entered for each week of the
day or for the week as a whole
• Automatic clocking of up to three breaks per day,
which can be optionally extended by clocking
manually
• Annual calendar for the planning of vacations,
weekends and public holidays
• Monthly calendar for the processing of errored
clockings and missing clockings
• Data security with the “Create Backup Copy”
function
• Automatic or manual carryover for the month
• Evaluation of the data for individual members of
staff either as a brief overview or as a detailed list
• Project reports for efficient time and cost
monitoring
25 ‘User Card M16’ chip cards
1 ‘Transport Card M256’ chip card
Clocking at the time recording
device using the User Card
Saving the data to the
Transport Card
Reading the data into the
PC from the Transport Card
Checking, processing and
evaluating the data
© 2000 Towitoko AG
Haidgraben 2 D-85521 Ottobrunn phone: +49-89-66683-0 fax: +49-89-66683-222 http://www.towitoko.de
Printing reports
Page 23
PC time clock
time recording software
complete time recording system
+ CHIPDRIVE to form a
Supplements
the CHIPDRIVE
© 2001 Towitoko AG
• Brief description • Brief description •
• Brief description • Brief description •
Windows® 95/98
Windows NT
Windows® 2000
®
Page 24

How to install the CHIPDRIVE
PC time clock...
Before installing:
There are two ways of ensuring that the CHIPDRIVE time
recording software and the PC time clock function correctly
together:
You install both programs in the folder suggested by
the Setup program. This ensures that the programs
work together automatically.
You install the programs in folders of your choice.
Then start the CHIPDRIVE time recording software
and establish the connection between the two
programs using the menu command [File/ Adminis-
tration / Connect to PC time clock].
Installation:
Insert the CD and wait until the selection menu appears.
Then select [START SETUP] and follow the instructions in the
Setup program.
• Brief description • Brief description •
Page 25

How to install the CHIPDRIVE
PC time clock in a network...
The PC time clock software allows all employees with a PC
which has a CHIPDRIVE installed to clock in and out at their
own workstation. To do this, you must have a license for each
installation, each installation must be on the same network
drive. The exact procedure is described using two examples:
Example 1
You have installed the time recording software on Computer 1
in the folder suggested by the Setup program [C:\chipdrv]. To
operate the PC time clock on Computer 2, you must proceed as
follows:
Share the C drive of Computer 1 as a network dr ive.
Assign the C drive of Computer 1 a drive letter on
Computer 2 (Map network drive), for example, 'M'.
On Computer 2, install the PC time clock in the
folder [M:\chipdrv].
• Brief description • Brief description •
Page 26

Example 2
You have installed the CHIPDRIVE time recording software in
the [c:\chipdrv] folder on Computer 1 as described in the first
example, but you do not wish to share the entire C drive for
the network. It should also not be possible to access the time
recording software from the network.
Proceed as follows:
On Computer 1 install the PC time clock in a
different folder from the time recording software, for
example, [c:\pc_clock].
Connect the time recording software to the PC time
clock by selecting the menu item [File / Administra-
tion / Connect to PC time clock] and then, in the
appropriate window, double-click on [c:\pc_clock]
and then on the sub-folder [clock] and finally
confirm using [OK ].
On Computer 1, you can now share just the folder
[c:\pc_clock] on the network.
• Brief description • Brief description •
Page 27
Assign the share of Computer 1 a drive letter on
Computer 2 (Map network drive), for example, 'M'.
On Computer 2, install the PC time clock in the root
folder [M:\] and remember that during installation the
PC time clock must be closed on all computers.
To install the PC time clock on additional computers, carry out
steps 4 and 5 for all affected computers.
How to operate the CHIPDRIVE
PC time clock...
The PC time clock can be operated using just the numeric
keypad on the keyboard. It is therefore possible to operate a
special time recording PC with a separate numeric keypad. In
order to ensure that the program is not terminated by accident,
the PC time clock does not have a button to do this. To ter minate the program you must use Close button on the Windo ws
title bar or the system menu.
• Brief description • Brief description •
Page 28
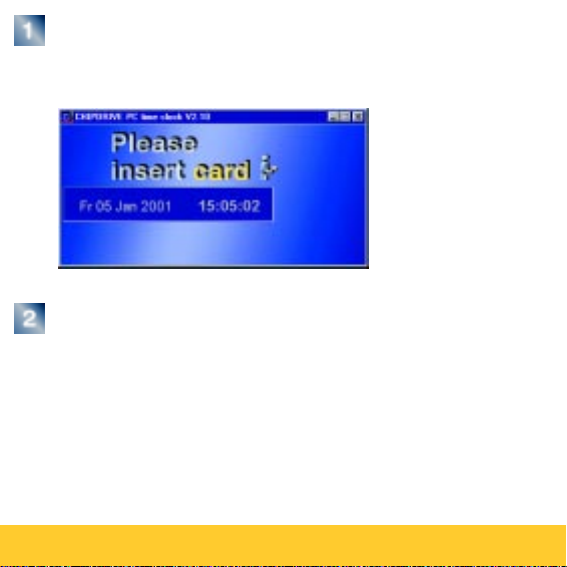
To carry out clockings using the PC time clock,
follow the instructions on screen [Please insert card]
and insert your User Card into the CHIPDRIVE.
Wait for a moment until your name appears and
then check the status of your hours and check to
see whether the PC time clock has suggested the
correct type of clocking in the lower part of the
display.
• Brief description • Brief description •
Page 29
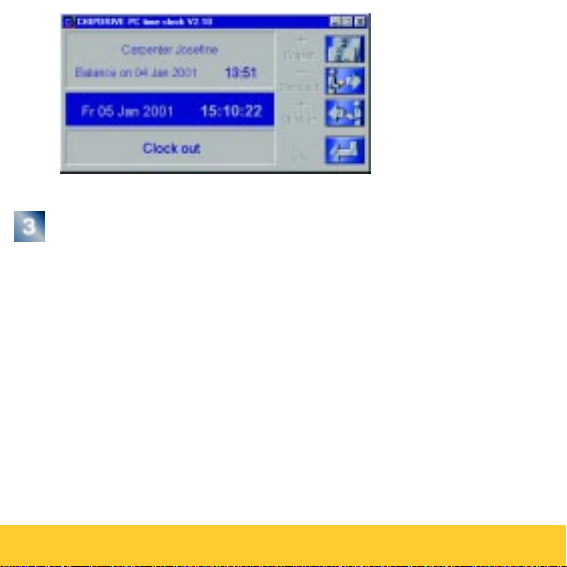
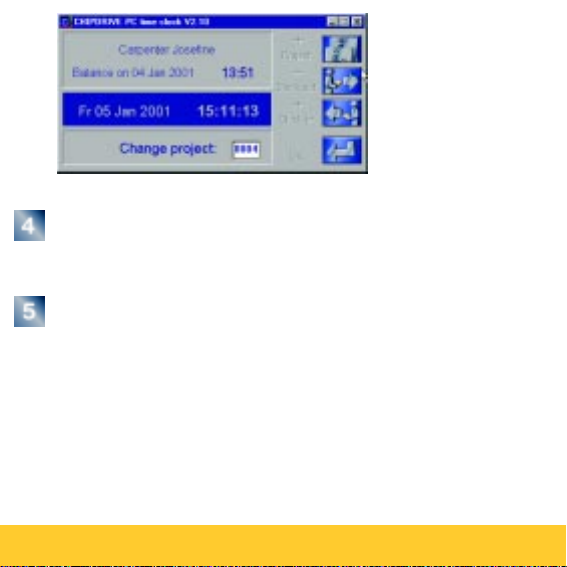
If necessary, change the clocking type either by
pressing the keys (divided by) for project change,
(minus) for out or (plus) for in, or alternatively by
pressing the appropriate keys [I, O or P] or by clicking
the appropriate buttons. You can also enter a project
number for the clocking types "In" and "Project
change". If you enter the project number incorrectly,
you can delete the incorrect entry by pressing the
Delete key or by entering more than 4 digits.
• Brief description • Brief description •
Page 30
Complete the clocking either by clicking [OK] or by
pressing one of the two Return keys on the keyboard.
Wait until the clocking has been confirmed and then
remove the card from the CHIPDRIVE.
• Brief description • Brief description •
Page 31
PC-Stempeluhr
Registrierung von
Kommen und Gehen
direkt am Arbeitsplatz
bequeme
© 2001 Towitoko AG
• Kurzanleitung • Kurzanleitung •
• Kurzanleitung • Kurzanleitung •
Windows® 95/98
Windows NT
Windows® 2000
®
Page 32

So installieren Sie die
PC-Stempeluhr...
Vor der Installation:
Um die Zusammenarbeit der CHIPDRIVE Profi-ZeiterfassungsSoftware und der PC-Stempeluhr zu gewährleisten, gibt es 2
Möglichkeiten:
Sie installieren beide Programme in das jeweils vom
Setup-Programm vorgeschlagene Verzeichnis. Damit
arbeiten die Programme automatisch zusammen.
Sie installieren die Programme in Verzeichnisse Ihrer
Wahl. Danach star ten Sie die CHIPDRIVE ProfiZeiterfassung und stellen die Verbindung der beiden
Programme über den Menüpunkt [Datei / Administra-
tion / Mit PC-Stempeluhr verbinden] her.
Installation:
Legen Sie die CD ein und warten Sie, bis die Tafel mit dem
Auswahlmenü erscheint. Wählen Sie dann [START SETUP] und
folgen Sie den Anweisungen des Setup-Programms.
• Kurzanleitung • Kurzanleitung •
Page 33

So installieren Sie die
PC-Stempeluhr im Netzwerk...
Mit der Software PC-Stempeluhr kann jeder Mitarbeiter, dessen
PC mit einem CHIPDRIVE ausgerüstet ist, an seinem eigenen
Arbeitsplatz "stempeln". Voraussetzung ist, dass Sie für jede
Installation eine eigene Lizenz erwerben und dass jede Installation auf dem gleichen Netzlaufwerk vorgenommen wird. Das
genaue Vorgehen wird in 2 Beispielen erläuter t:
Beispiel 1
Sie haben die CHIPDRIVE Profi-Zeiterfassung in das vom
Setup-Programm vorgeschlagene Verzeichnis [C:\chipdrv] auf
Computer 1 installiert. Um die PC-Stempeluhr auf Computer 2
zu betreiben, führen Sie folgende Schritte durch:
Geben Sie das Laufwerk C von Computer 1 als
Netzlaufwerk frei.
Erteilen Sie dem Laufwerk C von Computer 1 auf
Computer 2 einen Laufwerksbuchstaben
(Netzlaufwerk verbinden), z. B. 'M'.
• Kurzanleitung • Kurzanleitung •
Page 34

Installieren Sie auf Computer 2 die PC-Stempeluhr
in das Verzeichnis
[M:\chipdrv].
Beispiel 2
Sie haben die CHIPDRIVE Zeiterfassungs-Software wie im
ersten Beispiel in das Verzeichnis [C:\chipdrv] auf Computer 1
installiert, möchten aber nicht Ihr ganzes Laufwerk C für das
Netzwerk freigeben. Ferner sollte es nicht möglich sein, vom
Netzwerk aus auf die Zeiterfassungs-Software zuzugreifen.
Gehen Sie dann bitte folgendermaßen vor:
Installieren Sie auf Computer 1 die PC-Stempeluhr
in ein von der Zeiterfassungs-Software
unabhängiges Verzeichnis, z.B. [C:\pc_uhr].
Verbinden Sie die Zeiterfassungs-Software mit der
PC-Stempeluhr, indem Sie den Menüpunkt [Datei /
Administration / Mit PC-Stempeluhr verbinden]
wählen und im entsprechenden Fenster zunächst
auf [C:\pc_uhr] und dann auf das Unterverzeichnis
[Uhr] doppelklicken und schließlich mit [OK]
bestätigen.
• Kurzanleitung • Kurzanleitung •
Page 35
Geben Sie auf Computer 1 nur das Verzeichnis
[C:\pc_uhr] für das Netzwerk frei.
Erteilen Sie der Freigabe von Computer 1 auf Computer 2 einen Laufwerksbuchstaben (Netzlaufwerk
verbinden), z. B. 'M'.
Installieren Sie auf Computer 2 die PC-Stempeluhr auf
das Stammverzeichnis (Root) [M:\] und beachten Sie
dabei, dass zum Zeitpunkt der Installation auf keinem
beteiligten Computer die PC-Stempeluhr laufen darf.
Um die PC-Stempeluhr auf weiteren Computern zu installieren,
führen Sie bitte bei beiden Beispielen die Schritte 4 und 5
sinngemäß auf den betreffenden Computern aus.
So bedienen Sie die CHIPDRIVE
PC-Stempeluhr...
Die PC-Stempeluhr ist vollständig mit dem rechten Nummernblock auf der Tastatur bedienbar. Es ist daher möglich, einen
gesonderten Zeiterfassungs-PC mit einer separaten Nummern-
• Kurzanleitung • Kurzanleitung •
Page 36
Tastatur zu betreiben. Um einem versehentlichen Beenden des
Programms vorzubeugen, besitzt die PC-Stempeluhr keinen
entsprechenden Button. Zum Beenden des Programms
benutzen Sie bitte den Close-Button in der Windows-Leiste
oder das Systemmenü.
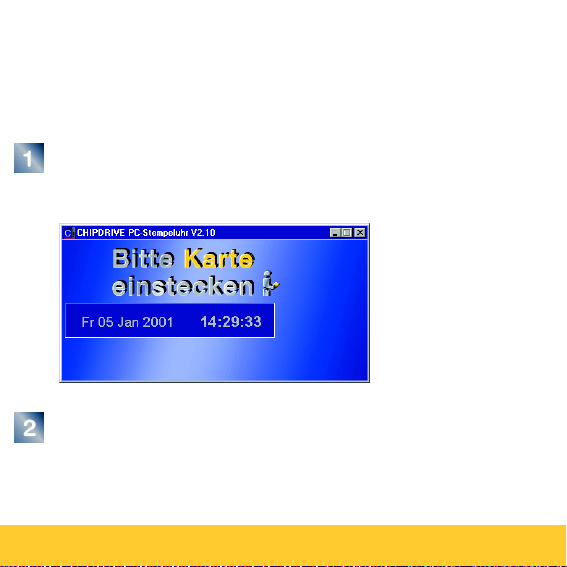
Um mit der PC-Stempeluhr Buchungen auszuführen,
folgen Sie der Aufforderung [Bitte Karte einstecken]
und stecken Sie Ihre User Card in das CHIPDRIVE.
Warten Sie kurz, bis Ihr Name erscheint,
informieren Sie sich über den Stand Ihres
Stundenkontos und überprüfen Sie, ob die PCStempeluhr im unteren Sichtfeld die richtige
Buchungsart vorschlägt.
• Kurzanleitung • Kurzanleitung •
Page 37
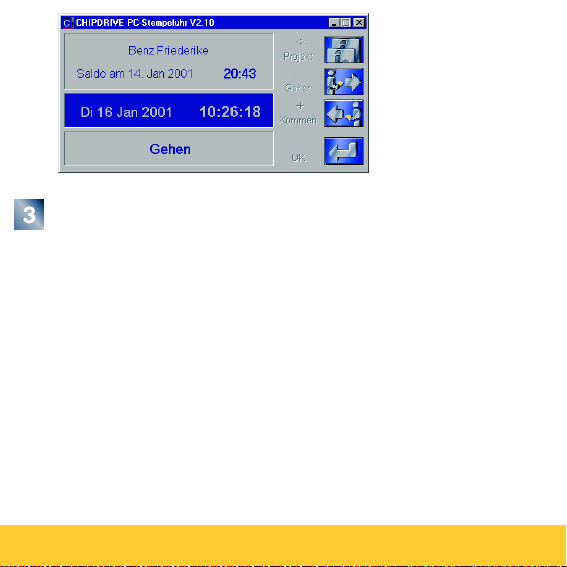
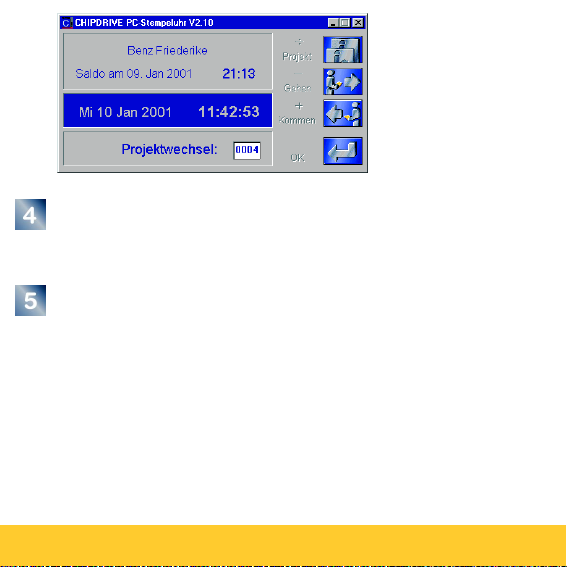
Ändern Sie falls nötig die Buchungsart, indem Sie
entweder auf der Tastatur die Tasten (geteilt) für
Projekt, (minus) für Gehen, (plus) für Kommen oder
alternativ die Anfangsbuchstaben [K, G bzw. P]
drücken oder auf die Buttons klicken. Bei den
Buchungsarten Kommen und Projektwechsel können
Sie zusätzlich eine Projektnummer eingeben. Bei
Falscheingabe einer Projektnummer, lässt sich diese
mit Hilfe der Entfernen-Taste oder durch Eingabe von
mehr als 4 Ziffern löschen.
• Kurzanleitung • Kurzanleitung •
Page 38
Lösen Sie die Buchung aus, indem Sie entweder
auf [OK] klicken, oder eine der beiden EINGABETasten auf der Tastatur drücken.
Warten Sie die Bestätigung der Buchung ab und
entnehmen Sie dann die Karte aus dem
CHIPDRIVE.
• Kurzanleitung • Kurzanleitung •
Page 39
time recording
for time recording
Software
using chip cards
Windows® 95/98
Windows NT
© 2001 Towitoko AG
• Brief description • Brief description •
• Brief description • Brief description •
Windows® 2000
®
Page 40

How to install the CHIPDRIVE PC
time recording software...
Put the CD into the machine and wait until the selection menu
appears. Then select [START SETUP ] and follow the instruc-
tions in the Setup program.
During the setup you will have the opportunity to either accept
the suggested target folder, [C:\chipdrv] or to specify a folder
of your choice. You can also deter mine the folder for the
program icons.
If you accept the suggested folders when installing both the
time recording software and the PC time clock, you will have
the advantage that the two programs will work together without
the need to make any further settings.
Once the software has been installed, you can start the
program and begin creating users.
• Brief description • Brief description •
Page 41
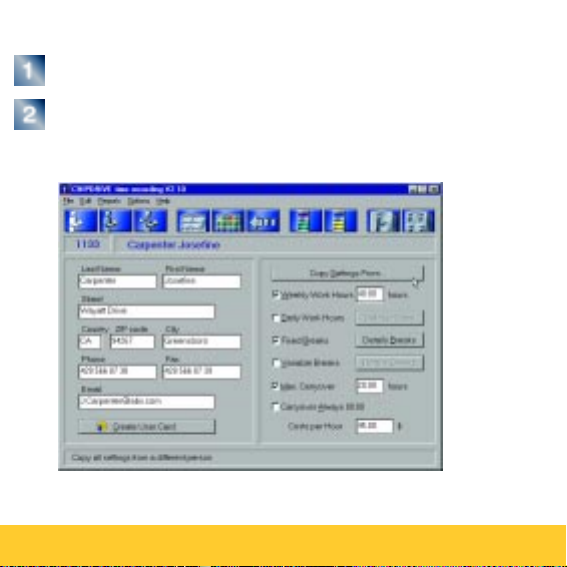
How to create users...
Choose [File / New Person].
Type in the last name and first name. You can fill in
the fields under the Last Name and First Name, but,
unlike the names, these fields are not mandatory.
• Brief description • Brief description •
Page 42

Write the name of the user on a User Card and
insert the card in the CHIPDRIVE.
Click [Create User Card] and remove the card
when prompted to do so by the CHIPDRIVE
time recording software.
How to transfer data from the
time recording device to the PC...
To ensure that the Time Recording software works correctly
with the CHIPDRIVE time recording device, you must make
sure that the data is transferred from the time recording device
to the PC. You do this with the Transport Card, which you must
format as follows before you use it:
Start the CHIPDRIVE Time Recording software and
insert a new Transport Card in the CHIPDRIVE. The
system will ask you whether you want to format the
card as a Transpor t Card.
• Brief description • Brief description •
Page 43

Choose [Format] and only remove the card when
the program prompts you to do so.
You use the for matted Transpor t Card to fetch the
data from the time recording device.
Refer to the relevant instructions for details on using
the time recording device.
Insert the Transport Card in the CHIPDRIVE and
respond to the question [Do you want to read the
data on the transport card] with [Yes].
All the data is then read in, assigned to the individual people
and their total hours are then recalculated. The data on the
Transport Card is deleted and is thus ready to transfer the
next set of data.
• Brief description • Brief description •
Page 44

How to transfer data from the PC
time clock to the CHIPDRIVE time
recording software...
If you have installed the time recording software and the PC
time clock program in the folders suggested in the Setup
program, the two programs will work together automatically.
If you chose different folders during installation, you must tell
the CHIPDRIVE time recording software where to find the PC
time clock. Do this by choosing [File / Administration / Connect
to PC time clock]. The online Help system provides details on
doing this. You have two options for reading in clocking data
from the PC time clock:
When you start the CHIPDRIVE time recording
software, the system identifies whether any new
clocking data is available and asks you whether you
want to read the data.
You can read in data at any time by choosing [File /
Read Data from PC time clock].
• Brief description • Brief description •
Page 45
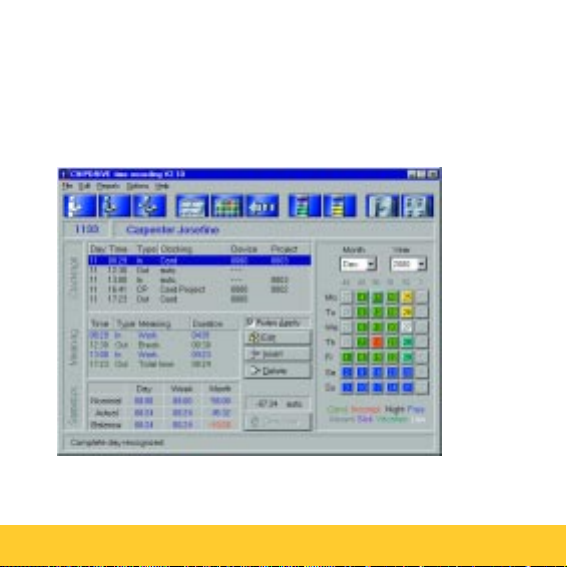
How to edit clockings...
If possible, clockings should be checked for completeness every
time new data is read in. The menu command [File / Incomplete
Records] provides you with a tool which takes you to precisely
those records where you need to complete the data manually.
• Brief description • Brief description •
Page 46

To complete or correct the data for an incomplete day (shown in
red in the monthly calendar), proceed as follows
First take a look in the [Meaning] list. Here you will
see notes such as [In last clocking], which will make
it easier for you to decide what manual correction is
necessary.
Click one of the buttons [Edit], [Insert] or [Delete ].
Note that you must first select the relevant clocking
from the [Clockings] list before you can choose
[Edit] or [Delete].
If you carry out one of the actions [Edit], [Inser t] or [Delete],
and are not satisfied with the results, you can return to the
previous status with [Edit / Undo].
• Brief description • Brief description •
Page 47

How to print reports and finalize
your data...
To ensure that the CHIPDRIVE time recording software
continues to run at high speed and to remove the "provisional"
status from the reports, you should finalize the data as soon as
possible once it is complete. You do this in conjunction with the
monthly evaluation at the end of the month:
Choose [Reports / Several People].
Select one, several or all entries in the [Complete]
list.
Click the [Reports ] button. In the window which is
then displayed, choose [Finalize and Print].
From the [finalize to] list, choose the month up to
which the data is to be finalized.
Note that no more changes can be made to data that has
been finalized.
• Brief description • Brief description •
Page 48

How to back up your data...
The Time Recording software provides a simple and efficient
way of backing up data under [File / Create Backup Copy].
Use this facility regularly and if possible, copy the entire data
set onto a different computer in the network. The online Help
system provides details on accessing a backup copy.
How to find further information...
The CHIPDRIVE time recording software has a detailed and
clearly structured online Help function. Use the online Help
system to obtain information on the following topics:
• Fixed weekly or daily working hours
• Fixed breaks
• Var iable breaks
• Vacations, days off due to illness, extra free days and
public holidays
• Creating projects and project reporting
• Data security, data maintenance
• Brief description • Brief description •
 Loading...