

TOWA SX-590 Instruction Manual
SX- 5 9 0
Instruction Manual

NOTICE
The information and specifications in this manual are subject to change without notice.
While every precaution has been taken to make this manual accurate, the Manufacturer shall not be liable for
any errors or omissions, not for any damages resulting from the use of the information herein.
This manual may not be copied or transmitted by any means, in whole or in part, without prior written consent
from the Manufacturer.
NOTICE

INTRODUCTION
We very much appreciate your purchase of this cash register. This cash register is equipped with function keys
which allow you to program and use various functions and with numeric keys for entering numbers.
This manual explains the methods for programming and entering transactions with this cash register and it
describes precaution and accessory items necessary to use it. This manual also shows examples of the receipts
that will be printed out for each case described.
Before using the cash register, please read this manual so that you understand its operation.
INTRODUCTION

CONTENTS
1. BEFORE STARTING OPERATIONS.................................................................................................................1
1.1 GENERAL SPECIFICATIONS............................................................................................................ 1
1.2 PRECAUTIONS .................................................................................................................................. 1
1.3 PART NAMES AND FUNCTIONS ...................................................................................................... 2
1) EXTERNAL VIEW ................................................................................................................................... 2
2) THE CONTROL LOCK............................................................................................................................ 3
3) CONTROL KEYS..................................................................................................................................... 3
4) CASH DRAWER WITH LOCK ................................................................................................................ 3
5) KEYBOARD............................................................................................................................................. 4
6) KEYBOARD FUNCTIONS....................................................................................................................... 4
7) DISPLAY.................................................................................................................................................. 7
8) CUSTOMER DISPLAY............................................................................................................................ 7
9) PRINTER................................................................................................................................................. 8
2. SETTING UP ......................................................................................................................................................9
2.1 INITIALIZING ...................................................................................................................................... 9
HALF CLEAR .............................................................................................................................................. 9
SYSTEM CLEAR ........................................................................................................................................ 9
2.2
INSTALLING THE PAPER ROLL ...................................................................................................... 10
3. PROGRAMMING.............................................................................................................................................12
3.1 DATE / TIME / MACHINE NUMBER................................................................................................... 12
TO PROGRAM THE DATE....................................................................................................................... 12
TO PROGRAM THE TIME........................................................................................................................ 12
TO PROGRAM THE MACHINE NUMBER............................................................................................... 12
3.2 TRANSACTION NUMBER PRESET.................................................................................................. 13
3.3 DEPARTMENT PROGRAMMING...................................................................................................... 13
TO PROGRAM DEPARTMENT BY USING DEPARTMENT KEY........................................................... 13
TO PROGRAM DEPARTMENT BY USING ENT KEY & DPT# KEY ................................................ 14
3.4 PRICE LOOK-UP (PLU)..................................................................................................................... 17
TO PROGRAM THE PLU’S ...................................................................................................................... 17
TO SEARCH A VACANT PLU NUMBER................................................................................................. 18
TO DELETE PLU DATA ........................................................................................................................... 19
STARTING NUMBER OF PLU ALLOCATION......................................................................................... 19
PLU NAME/PRICE CHANGE ................................................................................................................... 19
3.5 TAX PROGRAMMING....................................................................................................................... 20
TO PROGRAM TAX RATE....................................................................................................................... 20
TO PROGRAM THE ADD-ON TAX RATE............................................................................................... 21
TO PROGRAM TAX TABLE RATE........................................................................................................... 22
3.6 MINUS [ - ]......................................................................................................................................... 23
3.7 PLUS PERCENTAGE........................................................................................................................ 25
3.8 MINUS PERCENTAGE DISCOUNT................................................................................................... 26
3.9 CLERK NUMBERS
. ......................................................................................................................... 27
TO PROGRAM CLERK NUMBERS ......................................................................................................... 27
TO PROGRAM A CLERK NAME.............................................................................................................. 28
CONTENTS

TO USE CLERK NUMBERS..................................................................................................................... 28
3.10 ROUNDING METHOD FOR FINALIZING AMOUNT........................................................................ 29
3.11 MANAGER PASSWORDS............................................................................................................... 29
TO PROGRAM THE "X" MANAGER PASSWORD.................................................................................. 29
TO PROGRAM THE “P/Z” MANAGER PASSWORD .............................................................................. 30
TO USE THE MANAGER PASSWORD................................................................................................... 30
3.12 TRAINING MODE AND TRAINING PASSWORD............................................................................. 31
TO PROGRAM THE TRAINING PASSWORD......................................................................................... 31
TO TURN ON THE TRAINING MODE...................................................................................................... 31
TO SHUT OFF THE TRAINING MODE ................................................................................................... 31
3.13 PASSWORD FOR THE OPERATION OF THE
VOID, RET, – , ..................................................... 32
3.14 GRAND TOTAL PRESET ................................................................................................................ 33
TO SET THE GRAND TOTAL TO ZERO................................................................................................. 33
TO ASSIGN A VALUE TO THE GRAND TOTAL..................................................................................... 33
3.15 X1 AND X2 COUNTER PRESET..................................................................................................... 33
TO PROGRAM THE X1 COUNTER NUMBER ........................................................................................ 34
TO PROGRAM THE X2 COUNTER NUMBER ........................................................................................ 34
3.16 Z1 AND Z2 COUNTER PRESET...................................................................................................... 34
TO PROGRAM THE Z1 COUNTER NUMBER ........................................................................................ 34
TO PROGRAM THE Z2 COUNTER NUMBER ........................................................................................ 35
3.17 DRAWER OPEN ALARM TIMER DELAY....................................................................................... 35
3.18 MONEY LIFT ALARM AMOUNT..................................................................................................... 35
3.19 AGE VERIFICATION ...................................................................................................................... 36
3.20 CLERK HOLD TIMER..................................................................................................................... 36
3.21 PROGRAMMING ALPHANUMERIC DESCRIPTIONS..................................................................... 37
3.22 PROGRAM STORE LOGO/COMMERCIAL MESSAGE ................................................................... 41
3.23 SCROLL MESSAGES...................................................................................................................... 43
PROGRAM A SCROLL MESSAGE: ........................................................................................................ 43
PROGRAM SCROLL DISPLAY SETTINGS: ........................................................................................... 44
3.24 PROGRAMMABLE KEYBOARD .................................................................................................... 46
TO PROGRAM THE KEY LAYOUT ......................................................................................................... 46
3.25 TRANSACTION WORDS................................................................................................................. 49
3.26 FOREIGN CURRENCY ................................................................................................................... 52
3.27 FLAG OPTIONS .............................................................................................................................. 53
3.28 PROGRAM CONFIRMATION LIST.................................................................................................. 62
4. THE CASH REGISTER OPERATION.............................................................................................................67
1) SAMPLE RECEIPT.............................................................................................................................. 67
2) TRANSACTION SYMBOLS................................................................................................................. 67
3)
THE CASH REGISTER OPERATION................................................................................................. 68
1: CASH SALE WITHOUT TENDERING CHANGE .............................................................................. 68
2: CASH SALE WITH TENDERING CHANGE ...................................................................................... 68
3: USING THE DPT# KEY AND TENDERING CHANGE ..................................................................... 68
5: CHECK SALE ..................................................................................................................................... 69
6: SPLIT TENDERING SALE ................................................................................................................. 69
7: NO-SALE FUNCTION ........................................................................................................................ 69
8: REGISTERING A REFERENCE NUMBER ....................................................................................... 70
CONTENTS

9: MULTIPLYING BY A FRACTION................................................................................................... 70
10: MULTIPLICATION SALE ................................................................................................................ 70
11: REGISTERING A DEPARTMENT UNIT PRICE............................................................................ 71
12: MULTIPLICATION OF A DEPARTMENT UNIT PRICE................................................................. 71
13: DEPARTMENT ............................................................................................................................... 71
14: RECEIVED-ON-ACCOUNT SALE ................................................................................................. 71
15: PAID-OUT SALE............................................................................................................................. 71
16: RETURN SALE ............................................................................................................................... 72
17: MINUS [ - ] SALE: ........................................................................................................................... 72
18: MINUS PERCENTAGE DISCOUNT SALE: ................................................................................... 73
19: PLUS PERCENTAGE SALE:.......................................................................................................... 74
20: USE OF THE ERROR-CORRECT EC KEY: ........................................................................... 75
21: VOIDING A SALE............................................................................................................................ 75
22: VOIDING A MULTIPLICATION SALE ............................................................................................ 75
23: VOIDING A MINUS [ - ] SALE ........................................................................................................ 75
24: VOIDING A MINUS PERCENTAGE DISCOUNT SALE ................................................................ 76
25: VOIDING A PLUS PERCENTAGE SALE ...................................................................................... 76
26: VOIDING A DEPARTMENT PRESET PRICE................................................................................ 76
27: VOIDING MULTIPLICATION OF A DEPARTMENT PRESET PRICE.......................................... 76
28: VOIDING A DEPARTMENT PRESET PRICE WITH A MINUS PERCENTAGE DISCOUNT ...... 77
29: VOIDING A DEPARTMENT PRESET PRICE WITH A MINUS [ - ]............................................... 77
30: CANCEL KEY OPERATION........................................................................................................... 77
31: PLU SALE ....................................................................................................................................... 77
32: VOIDING A PLU SALE ................................................................................................................... 78
33: VOIDING A PLU MULTIPLICATION SALE .................................................................................... 78
34: VOIDING A PLU SALE WITH A MINUS [ - ] .................................................................................. 79
35: VOIDING A PLU SALE WITH A MINUS PERCENTAGE DISCOUNT .......................................... 79
36: VOIDING A PLU SALE WITH A PLUS PERCENTAGE RATE...................................................... 79
37: ISSUING A DUPLICATE RECEIPT................................................................................................ 79
38: AGE VERIFICATION...................................................................................................................... 80
39: CLERK HOLD OPERATION........................................................................................................... 80
40: AUTOMATIC PLU PROGRAMMING FUNCTION ......................................................................... 81
41: FOREIGN CURRENCY .................................................................................................................. 82
5. X / Z MANAGEMENT REPORTS ...................................................................................................................83
X POSITION READING .......................................................................................................................... 83
Z POSITION READING .......................................................................................................................... 83
MANAGEMENT REPORTS AVAILABLE ................................................................................................. 83
TO TAKE A CASH IN-DRAWER / CHECK-IN-DRAWER REPORT ........................................................ 85
TO TAKE AN HOURLY REPORT............................................................................................................. 85
TO TAKE A DEPARTMENT RANGE REPORT........................................................................................ 86
TO TAKE A CLERK REPORT .................................................................................................................. 86
TO TAKE AN INDIVIDUAL CLERK REPORT .......................................................................................... 87
TO TAKE A PLU REPORT ....................................................................................................................... 87
TO TAKE A CASH DECLARATION REPORT.......................................................................................... 87
TO TAKE A DEPARTMENT GROUP REPORT....................................................................................... 89
TO TAKE A GROUP REPORT ................................................................................................................. 89
CONTENTS

TO TAKE A FULL REPORT...................................................................................................................... 89
TO TAKE A WEEKLY OR MONTHLY FULL REPORT............................................................................ 89
TO TAKE A TRAINING FULL REPORT ................................................................................................... 90
TO TAKE A TRAINING WEEKLY OR MONTHLY FULL REPORT.......................................................... 90
6. MAINTENANCE................................................................................................................................................92
CLEANING YOUR CASH REGISTER .................................................................................................... 92
OPENING THE DRAWER MANUALLY .................................................................................................. 92
IN CASE OF A PAPER JAM................................................................................................................... 92
7. INTERFACE......................................................................................................................................................93
8. TROUBLESHOOTING .....................................................................................................................................94
IN CASE OF AN ERROR TONE OR IF "ERR" DISPLAYS: ..................................................................... 94
IF PRINTING PROBLEMS OCCUR:........................................................................................................ 94
IF THE CASH REGISTER IS MALFUNCTIONING:................................................................................. 94
OPENING THE DRAWER IN AN EMERGENCY:.................................................................................... 94
9. ERROR MESSAGE ..........................................................................................................................................95
CONTENTS

OVERVIEW OF STEPS REQUIRED TO USE THIS CASH REGISTER
1) UNDERSTAND YOUR CASH REGISTER.
Before using your cash register, check the specifications and part names, and confirm the precautions
for using it.
See 1 : BEFORE STARTING OPERATIONS
2) INITIALIZE THE CASH REGISTER.
Initialize the memory of your cash register before programming the cash register.
See 2.1: INITIALIZING
3) INSTALL THE PAPER ROLL.
Install paper rolls for the receipt and journal correctly.
See 2.2: INSTALLING THE PAPER ROLLS.
2.5: REMOVING THE PAPER ROLLS FOR THE RECEIPT.
4) PROGRAM YOUR CASH REGISTER.
Program certain items for your store into the memory of the cash register, for example, the price of an
item, the taxes levied on the item, the functions of the keys and so on.
See 3: PROGRAMMING
5) OPERATE THE CASH REGISTER.
Perform the sales transaction according to your programming.
See 4: THE CASH REGISTER OPERATION
6) CHECK AND RESET THE SALES INFORMATION.
Review and reset the daily sales information. You can also check the information from a certain period
of time, such as a week and a month. After resetting the information, you can enter the new information
from the next day.
See 5: X / Z MANAGEMENT REPORTS
OVERVIEW OF STEPS REQUIRED TO USE THIS CASH REGISTER

1
1. BEFORE STARTING OPERATIONS
1.1 GENERAL SPECIFICATIONS
Item Description
Power source
AC100~117VAC,220~240VAC±10%
Power consumption 35W(maximum)
Ambient operating temperature 0°C to 40°C ( 32°F to 104°F )
Memory C-MOS RAM
Memory back-up time Approx. 700 hours
Printer 2 station Thermal Printer
Printing speed Approx. 14 lines per sec.
Paper roll Width 57.5mm
Max. Diameter of paper roll 70mm
Dimensions(Body) 350mm (W) x 429mm (D) x 188mm (H)
Dimensions(Drawer No.26) 410mm (W) x 415mm (D) x 114mm (H)
Weight Body(except Drawer): 5.7 Kg
Drawer (No.26): 6.4 Kg
Power Frequency 50Hz/60Hz
Altitude Up to 2,000m
Over voltage category
Ⅱ
Pollution degree 2
Protection class
Ⅰ
Electrical safety standards EN60950-1
EMC standards EN55022 class B, EN55024, EN61000-3-2&3
1.2 PRECAUTIONS
Please note the following items before using the cash register.
▪ Avoid using the cash register in the following conditions:
Exposed to direct sunlight or water
Hot or humid environments
Near equipment that generates strong electromagnetic fields
Anywhere there may be sudden changes in temperature
▪ Do not touch the cash register if your hands are wet.
▪ If the register malfunctions, do not attempt to repair the cash register by yourself.
▪ Plug your cash register into any standard wall outlet. Other electrical devices on the same circuit may
damage the cash register.
▪ The main outlet for this cash register must be located near the unit and easily accessible.
GENERAL SPECIFICATIONS
2
1.3 PART NAMES AND FUNCTIONS
This section shows part names and describes the function of each part of the cash register.
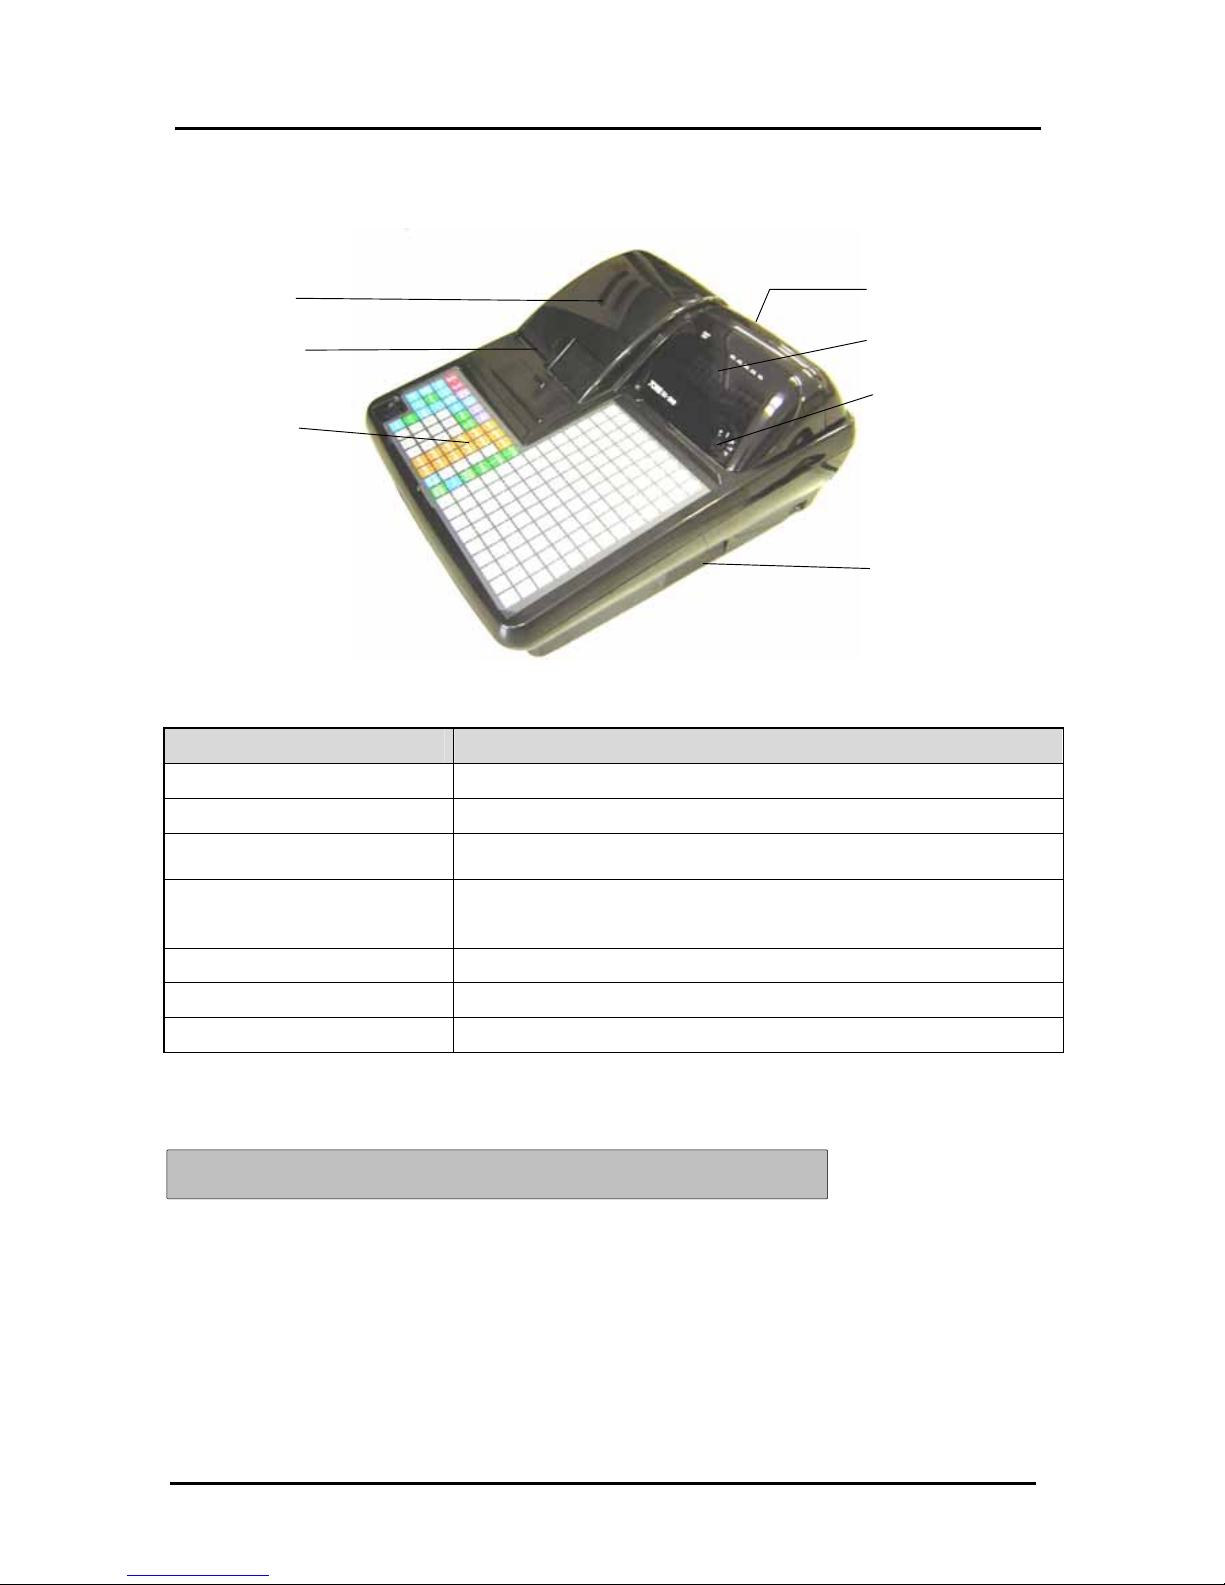
1) EXTERNAL VIEW
Part name Functions
1. Printer Cover This cover protects the printer.
2. Receipt Dispenser This is where the receipt comes out.
3. Interface Ports Two connectors (RJ45 type)for RS232C interface are equipped as
standard.
4. Customer Display The article name, the amount and the transaction name are displayed
in two-line fluorescent display unit. Upper line: 14 segments 10 digits.
Lower line: Numeric 10 digits
5. Operator Display The same display as Customer Display.
6. Control Lock The control lock allows you to change the Cash Register mode.
7. Keyboard The water-proof 173-position flat keyboard.
Drawer Unit: The drawer can be sited remotely from the ECR.
CAUTION: Do not connect Input/Output Connectors to Telephones line.
EXTERNAL VIEW
1
2
7
4
5
6
3

3
2) THE CONTROL LOCK
Located at the right of the operating area, the Control Lock is a switch that places the cash register into
its several operating modes. These modes are:
3) CONTROL KEYS
Two pairs of keys are provided for the Control Lock and the Cash Drawer Lock.
Operator's Register Key (OP): Provides movement to the L and R modes only.
Manager's Key (MA): Provides access to all of the operating modes. This system effectively limits
access to the P, X, and Z modes to individuals who are authorized to use the Manager's Program key
only.
NOTE: A Manager Password is available for accessing "P", "X" and "Z" positions.
4) CASH DRAWER WITH LOCK
The cash drawer will automatically open after completing a transaction by pressing the [#/NS/SUB] key, or
by the hidden emergency lever underneath the register.
The cash drawer is electronically locked when the Control Lock is in the “Off” position. In addition, the cash
drawer is designed with a security lock and when used with the Cash Drawer key, manually locks the cash
drawer and prevents electronically opening it by the [#/ST] key or by the hidden emergency lever
underneath the register. The Bill Tray and Coin Tray can be removed from the register by lifting up on the
open drawer and pulling toward you.
Program Mode (P): The position is used to set and change your
individualized programming for register operations.
Locked Mode (L): This position is used when the cash register is not in
use. The register is inoperable and the cash drawer stays closed.
Register Mode (R): You will perform normal register operations in the R
position.
Report Mode (X): Permits reading of all transaction totals at anytime
without clearing the register.
Reset Mode (Z): Permits reading of all transaction totals and clears all
transaction totals to zero, except the running grand total.
P
L
R
• X
• Z
CONTROL LOC
K

4
21
22
23
5) KEYBOARD
The figures below show the standard keyboards for this cash register.
FLAT KEYBOARD
6) KEYBOARD FUNCTIONS
The following key functions are primarily for cash register entries in R mode. Several keys also have other
functions in the P, X and Z modes which are explained further in the manual.
1. Receipt Feed Key [RF] is used to advance the receipt paper.
2. Journal Feed Key [JF] is used to advance the journal paper.
3. Multiplication and Time Key [X/TIME] - double function - is used to multiply a number of items
entered at one price, to display the current time.
4. Receipt On/Off Key [ON/OFF] allows you to turn off the receipt printing to save paper.
29 18 19 20 30 28 24
31 32 33 34 35
1 2 3 4 5 6 7 8 9
11 12 13 14 15 16 17 10
25 26 27
KEYBOARD

5
5. Paid-Out Key [PO] is used to register dollar amounts taken out of the cash drawer that are not part
of a sales transaction; i.e., petty cash.
6. Received-On-Account Key [RA] is used to register dollar amounts placed in the cash drawer that
are not part of a sales transaction or used to register payments made to a customer's charge
account or to declare the starting amount of cash in the drawer for the day.
7. Department Keys (1-12) are used to specify which department the transaction is for. Each
department can represent a category of merchandise sold and can be programmed as taxable or
non-taxable.
8. Department Key [DPT#] is used to make entries for departments 1-99. Press Department after each
department number entry for departments 1-99.
9. Card 1 Key [CARD1] is used to receive the payment by a card.
10. Card 2 Key [CARD2] is used to receive the payment by a card.
11. Plus Percentage [+%] is used to add a percentage rate such as a service charge or gratuity to an
individual item. The percentage rate can be pre-programmed or manually entered.
12. Discount Key [-%] is used to subtract a percentage rate such as an employee discount from an
individual item. The rate can be pre-programmed or manually entered.
13. Entry and Release Key [ENT RLS] –double function - is used to enter the price of Department
and PLU items and also used to temporarily release the Single Entry or the High Digit Lock Out
which was preset and selected to a PLU or department number.
14. Price Look Up Key [PLU] allows the numbers from 1 to 8000 to be used as codes for
pre-programming merchandise prices, to maintain a tally of cost and quantity of the merchandise sold.
15. PRICE key [PRICE] is used for the temporary change of a unit price.
16. Clerk Key [CLK ID] is used for entering clerk numbers and the Manager's Password Code.
17. 5.00 Tend key [$5.00 TEND] Used to enter amount when $5.00 is tendered.
18. 10.00 Tend key [$10.00 TEND] Used to enter amount when $10.00 is tendered.
19. 20.00 Tend key [$20.00 TEND]Used to enter amount when $20.00 is tendered.
20. 50.00 Tend key [$50.00 TEND] Used to enter amount when $50.00 is tendered.
[Note for 17-20. Amount Tender keys $5.00 to $50.00]
The maximum tender amount using any of these amount tender keys is $95.00.
Example) Pressing $50.00 Î $20.00 x twice Î$5.00: OK
Pressing $50.00 Î $20.00 x three times: an error occurs.
21. Cancel Key [CANCEL] is used for cancellation of the current transaction.
22. Hold Operation Key [HOLD] is used to interrupt the registration temporarily, and release the
interrupt by depressing CLERK Key CLK ID to continue the registration held.
KEYBOARD

6
23. Minus Key [–] is used to subtract a specific amount from an individual item. This is also known as
A Mark-Down key.
24. Charge Key [CHRG] is used to finalize a transaction paid by a credit card or can be used to denote
an in-house charge.
25. Return Key [RET] is used for issuing refunds for returned merchandise.
26. Error Correction [EC] is used for deleting the last sales entry.
27. Void [VOID] is used for correcting a particular entry after it is processed and printed.
28. Check Stub Key [CHECK STUB] - double function - Check is used to finalize a transaction paid by
a check. Stub is used to issue the stub receipt after the transaction has been finalized.
29.
Foreign Currency# key [FC#] are used to convert local currency TOTAL amount into a foreign
currency.
30. TOTAL Key [TTL] displays the TOTAL sales amount, including sales tax. It is not printed on the
register receipt until the sale is finalized by pressing the [CHECK STUB], [CHRG] or the [CASH
TEND] key. It can be used to issue the receipt when Receipt Off.
31. Clear Key [CLR] clears the display to correct an entry before it is processed. Also stops error alarm
when incorrect entries are made.
32. Numeric Input Keys (0-9/00/.) are used to input dollar amounts of merchandise sold, to indicate how
many times a particular item repeats, to add and subtract percentages in conjunction with the -% and
+% keys, to input PLU code numbers, to handle figures that require a decimal point and for other
numeric value-related entries. Double Zero (00) allows for quick entry of numbers with two or more
zeros. Decimal Point (.) is used to enter fractional quantity of items being sold. In all modes, the
Decimal Point is not to be used when entering a price.
33. Non-Add and SubTOTAL Key [#/NS SUB] - triple function - opens the drawer without registering
any amounts; for example, to give change. The Non-Add key function allows entering up to a 8-digit
reference number which prints on sales receipts. The SubTOTAL key function displays and prints the
subTOTAL of a sale without sales tax.
34. Cash Tendered/TOTAL Key [CASH TEND] is used to finalize a transaction paid by cash and
calculates the amount of change required from the cash received.
35. Direct PLU Keys (1-117) are used to register a PLU item directly.
KEYBOARD
7
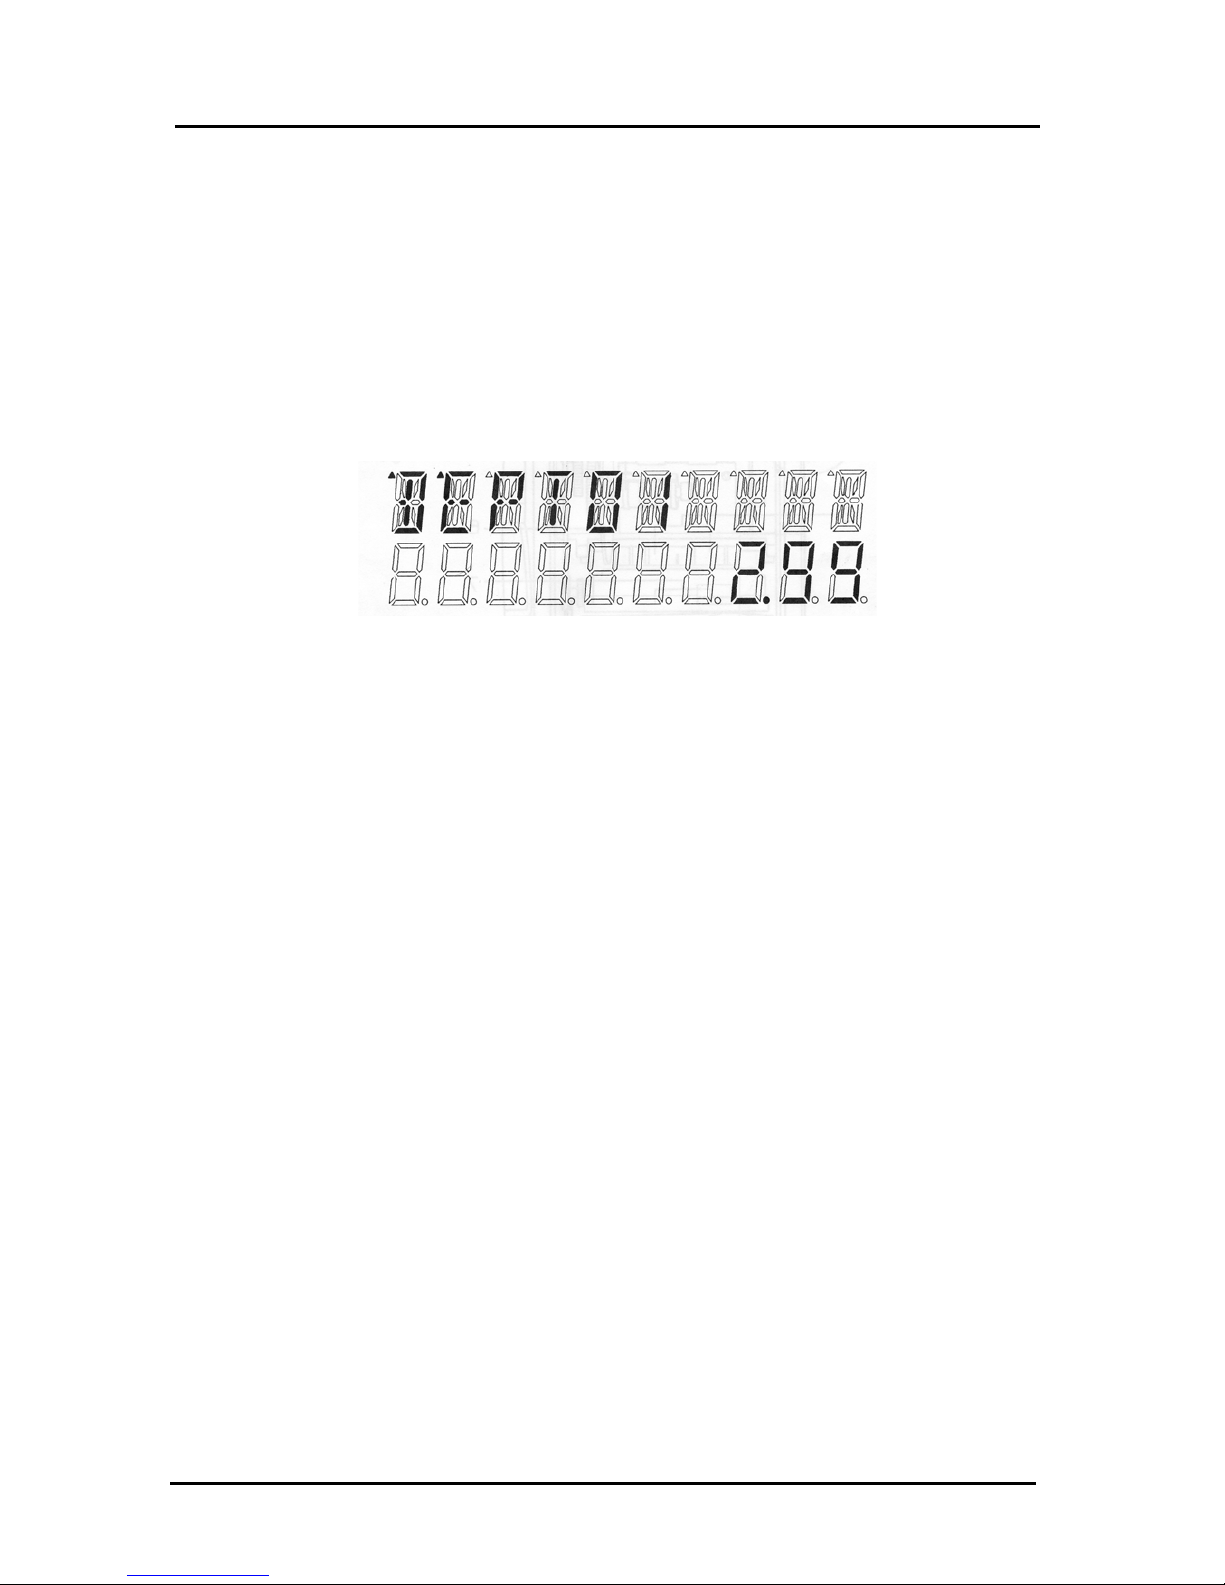
7) DISPLAY
Operator Displays
Your cash register provides two (10-digit capacity) displays, 1 line alpha and 1 line numeric which feature
large, easy to read fluorescent digits for easy operator viewing. The operator display is located at the top
front of the machine and is your visual guide to the inner workings of the cash register. The numeric display
shows entry amounts and related transaction information by the use of numbers and special symbols. The
alpha display shows alpha prompts in both the Register and Programming modes.
Following is a graphic representation of the items shown on the cash register Operator Displays:
The display indicators read from left to right as follows:
NAME or CLERK 1 to 40: Displays when the [CLERK] key is operated.
DEPT NUMBER or DESCRIPTION: Displays the department number or description entered.
PLU NUMBER or DESCRIPTION: Displays the number or description of the PLU entered.
CASH: Displays when the [CASH TEND] key is operated.
CHECK: Displays when the [CHECK STUB] key is operated.
CHARGE: Displays when the [CHRG] key is operated.
CARD 1: Displays when the [CARD 1] key is operated.
CARD 2: Displays when the [CARD 2] key is operated.
CHANGE: Displays the change due.
KEY OP ERR: Displays if an error is detected. PRESS the [CLEAR] key to
reset.
SUB-TOTAL: Displays when the [SUB TOTAL] key is pressed.
U: Return symbol, appears when a void or return operation is
performed.
R/A or P/O: RA or PO symbol appears when an amount is entered and the
RA or PO key is pressed.
VOID: Displays when the [VOID] key is operated.
RCPT ON/OFF: Displays when the ON/OFF key is pressed.
COUPON: Displays when the [ - ] key is operated.
RETURN: Displays when the [RET] key is operated.
8) CUSTOMER DISPLAY
To position the rear customer display, simply pull up and rotate for viewing from any direction. To close,
simply turn the display facing away from you (to the rear of the cash register), then press down on the
raised display until it lies flat against the top of the register.
RCPT
OFF
5CL 4CL 3CL 2CL 1CL
AMOUNT
DISPLAY
8
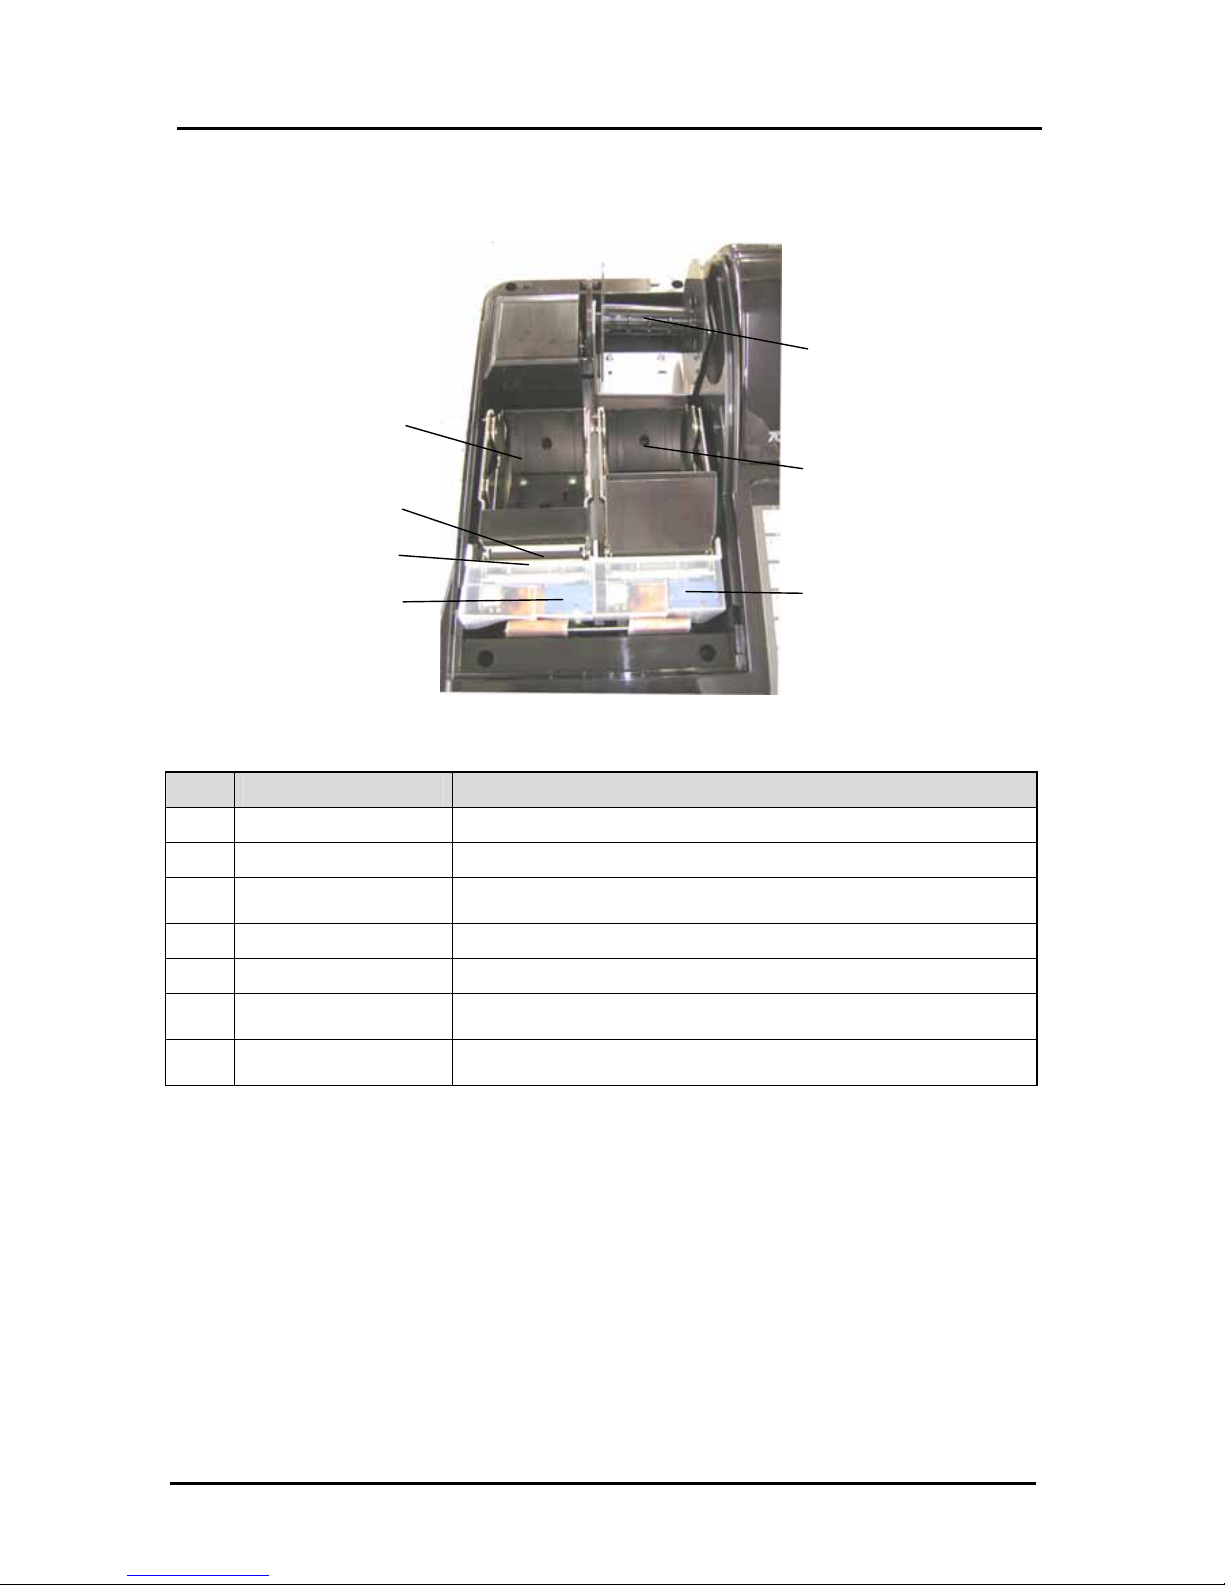
9) PRINTER
The figure below shows the printer with the printer cover removed.
Part Names Functions
1
Journal location The paper roll for record keeping (the journal) is located here.
2
Receipt location The paper roll for receipts is located here.
3
Print-head unit
Prints the characters and graphic logos on the receipt and
Journal.
4
Take-up reel Used to take up the paper used for record keeping (the journal).
5
Paper Exit The paper exits here.
6
Platen Release Button
(Receipt)
Release the platen for receipt.
7
Platen Release Button
(Journal)
Release the platen for Journal.
2
7
6
4
1
5
3
PRINTER

9
2. SETTING UP
2.1 INITIALIZING
1. Locate on level surface – Before operating the cash register, be sure it is placed on a level
surface to permit smooth operation of the register cash drawer.
2. This cash register operates on any standard electrical outlet . It is recommended that the
cash register be connected to an electrical circuit where no other electrical device or
appliance is connected which may overload the circuit or cause electrical interference with
the cash register. It is best that a single circuit be provided for register operations.
3. Confirm the power switch located on the right hand corner of the cabinet to the “OFF”
position. Plug in the cash register. Insert Manager’s Program Key (MA, 33I) and turn to the
“P” position. Install paper – Refer to the Paper Installation Instructions.
4. Initialize the cash register by holding down the CLEAR key and setting the power switch to
the “ON” position. (System Clear)
If Spanish, French, German, Dutch, Danish, Portuguese or Swedish is used instead of
English, hold down the numeral 2, 3, 4, 5, 6, 7 or 8 key respectively instead of the clear key.
HALF CLEAR – If an error tone still persists, perform a Half System Clear.
1. Turn the key to the "P" position.
2. Turn off the power switch located on the right hand wall of the cabinet (for more than 10
seconds), and then turn on the power switch.
3. Continue with normal operations
.
SYSTEM CLEAR – If the operator cannot correct an error lock condition, as a last resort a System
Clear should be done.
1. Turn the key to the "P" Position.
2. Turn off the power switch located on the right hand wall of the cabinet, and wait at least 15
seconds.
3. While holding down the CLEAR key, turn on the power switch. If Spanish, French, German,
Dutch, Danish, Portuguese or Swedish is used instead of English, hold down the numeral 2,
3, 4, 5, 6, 7 or 8 key respectively instead of the CLEAR key.
4. Re-program the cash register.
5. Continue with normal operations.
INTIALIZING

10
2.2 INSTALLING THE PAPER ROLL
Your cash register features a thermal printer which uses two rolls of 58mm standard thermal paper; one roll
(left side) is for the customer receipt and the other roll is for the journal record (right side). If a customer
receipt is not required, a paper saving option is available by pressing the [ON/OFF] key on the keyboard.
PAPER ROLL
Before installing the paper roll, be sure to do the following to avoid causing a paper jam:
2.3 INSTALLING THE PAPER ROLL FOR THE RECEIPT
From the front of the cash register, grab
the rear of the printer cover and lift it up.
1. Push the platen release button (left)
to raise the paper guide.
2. Load the paper roll into the receipt location,
and put the paper end to this side.
3. Depress the paper guide (See Fig. 2).
4. Keep the paper guide to this end and
close the printer cover.
Fig.2
2.4 INSTALLING THE PAPER ROLL FOR THE JOURNAL
1. Make sure the Control Lock is in the “R” (Register)
position.
2. From the front of the cash register, grab the rear
of the printer cover and lift it up.
3. Push the platen release button (right) to raise the
paper guide.
4. Load the paper roll into the journal location, and
put the paper end to this side.
Fig.3
5. Depress the paper guide.
6.Insert the end into the slot in the take-up reel and
wind two or three turns of paper around the reel
(See Fig. 3).
* Orient the paper roll so that it rotates in a
counterclockwise direction, as shown in Fig. 1.
NOTE:
1. As thermal paper is used, it has right and wrong
side for print. Install the paper roll correctly.
2. Be careful not to touch the paper cutter when
removing the printer cover.
INSTALLING THE PAPER ROLL
The platen release button
for the
j
ournal and the receipt
Fig.1

11
7.Load the take-up reel into the support.
8.Press the JF (Journal feed) key (See Fig. 4).
9.Close the printer cover.
Fig.4
2.5 REMOVING THE PAPER ROLL FOR THE RECEIPT
1. Open the printer cover.
2. Push the platen release button (left). (See Fig. 2)
3. Remove the roll.
Fig.5
2.6 REMOVING THE PAPER ROLL FOR THE JOURNAL
1. Open the printer cover.
2. Push the platen release button (right). (See Fig. 2)
3. Cut the paper after the end of the printing.
4. Remove the take-up spool from the support
(See Fig. 6).
5. Remove the paper record for the take-up reel
(See Fig. 7)
6. Install the remaining paper for the journal.
7. Close the printer cover.
CAUTION : If a paper roll is all up during print or platen is not se correctly, install a
New paper roll or set platen again, and press the RLS key to release
such condition and the massage, ” PRINTER ER” in the display.
Fig.6
Fig.7
INSTALLING THE PAPER ROLL

12
3. PROGRAMMING
3.1 DATE / TIME / MACHINE NUMBER
TO PROGRAM THE DATE
The Date is designed to roll over automatically every day and prints in a specific format.
Extra Option: If desired, a procedure is offered to eliminate the date from printing on the transaction
receipts, for details see Flag 24. The date format can also be changed to print in any one of the three
different formats selectable by the flag 1.
Control Lock: P position
( DAY MONTH YEAR ) # / NS .
2 2 4 digits
Remark: Flag 1 = 2 (Date, Month, Year in that order)
Example: To program September 14, 2015:
1 4 0 9 2 0 1 5 # / NS.
TO PROGRAM THE TIME
The Time is designed to use military time. REMINDER: To convert to military time, add the number 12
to every hour. Example: 1:15 P.M. will program as (1315). Extra Option: If desired, a procedure is
offered to eliminate the time from printing on transaction receipts, for details see Flag 23.
The Time can print in either the 12 or 24 hour format. The default setting is to print in the 12 hour mode.
To change to the 24 hour format, see Flag 2.
Control Lock: P position
(HOUR MINUTES) X / TIME.
4 digits
Example: To program 10:15 A.M.:
1 0 1 5 X / TIME .
TO PROGRAM THE MACHINE NUMBER
The Machine Number is designed to assign each cash register its own identifying number.
The Machine Number prints on all receipts/journal records, and management reports.
Control Lock: P position
2 ( Machine # ) PO.
4 digits
Example: Program the cash register number to be 1234:
2 1 2 3 4 PO .
IPROGRAMMING
13
3.2 TRANSACTION NUMBER PRESET
Transaction Number Preset allows you to choose a beginning transaction number of your own.
The Transaction Number normally begins with the number 000001 and counts up consecutively until a "Z"
Report is taken; thereafter it resets back to 000001. Transaction Number Preset can also be used to reenter the last transaction number in the event information is lost.
Extra Option: The register is programmed not to have the Transaction Number reset to zero after a "Z"
Report is taken. If desired, a procedure is offered to have the Transaction Number reset to zero after a
Report is taken.
TO PROGRAM THE TRANSACTION NUMBER
Control Lock: P position
1 ( TRANSACTION # ) PO .
6 digits # (in range 000000 -999999)
Example: To program the Transaction Number to be 1000:
1 0 0 1 0 0 0 PO
3.3 DEPARTMENT PROGRAMMING
A maximum of 99 Departments are available on your cash register. Each department can represent a
category of merchandise. For example, Department One can represent sales of beverages, Department
Two sandwiches, Department Three candy, etc. Each Department can be programmed as taxable or nontaxable.
The programming of departments consists of ten steps: Selecting the standard or Food Stamp Function,
Selecting the Standard or Hash Function, Selecting the Standard or Gallonage Function, Selecting Negative
Department Function, Selecting Multiple / Single Entry, Selection Group Number, Selecting the High Digit
Lock Out (HDLO) Number, Tax Status Number, Assigning a Department Preset price, plus programming a
Department Description, if desired.
TO PROGRAM DEPARTMENT BY USING DEPARTMENT KEY
Control Lock: P position
Flag
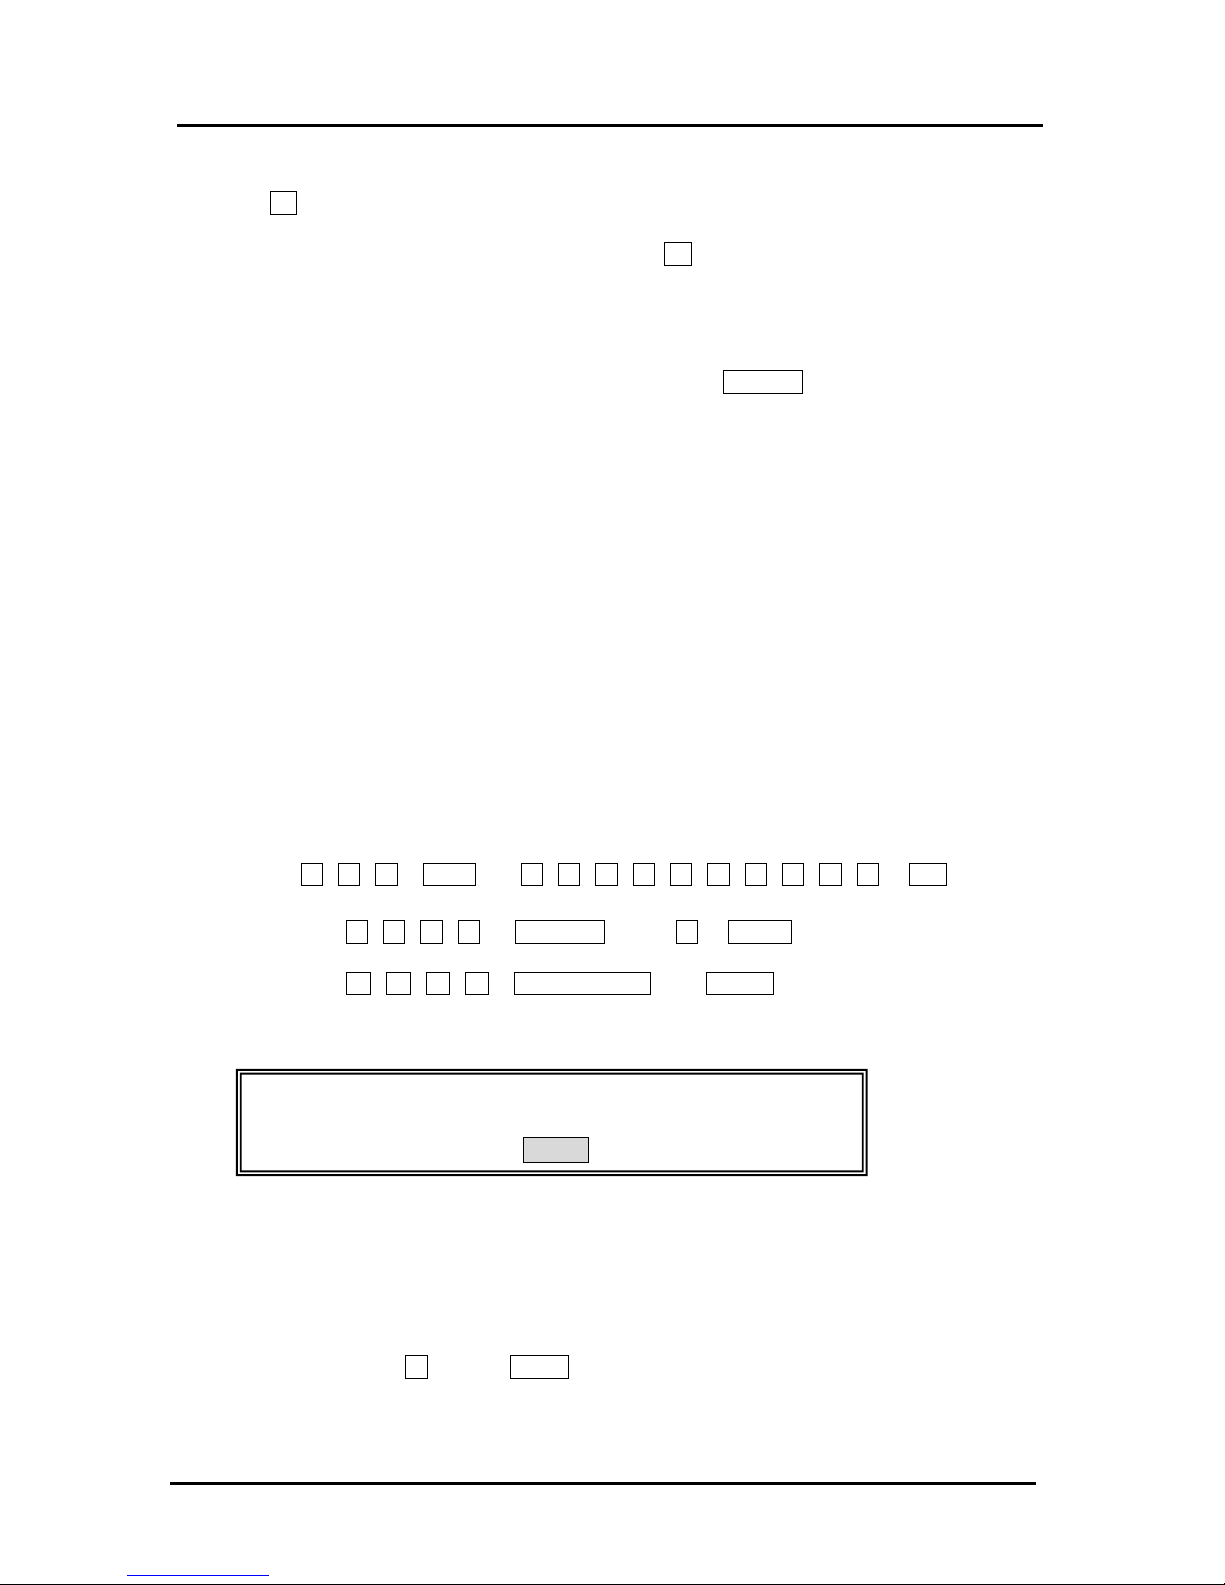
(N1) (N2) (N3) (N4) (N5) (N6) (N7) (N8) (N9) TTL.
1 1 1 1 1 1 1 1 2 digits
Î (Preset Price) DPT1 .
8 digits
Î (Department Name) CHECK STUB .
16 characters (Max.)
TRANSACTION NUMBER PRESET

14
TO PROGRAM DEPARTMENT BY USING ENT KEY & DPT# KEY
Flag
(N1) (N2) (N3) (N4) (N5) (N6) (N7) (N8) (N9) TTL.
1 1 1 1 1 1 1 1 2 digits
Î (Preset Price) ENT RLS
8 digits
Î ( n n ) DPT#
2 digits
Î (Department Name) CHECK STUB .
16 characters (Max.)
NOTE: * TTL , DPT1 , CHECK STUB .
When these keys are operated without number or description entry,
the flags, prices and names that have already been programmed are not
changed.
* *You can skip the price presetting by direct registration of DPT# keys.
Flag
N1: Age Table 1 digit
This function is to verify the full age or non-age of the customer to buy the item.
0 = Non Age Verification
1 = Age Table #1
2 = Age Table #2
3 = Age Table #3
N2: Food Stamp/Hash 1 digit
Each department can be set for Standard Mode, Food Stamp Mode or Hash Mode.
Food Stamp Mode can represent sales of food stamp (or coupon) items for livelihood
assistance by the government. Hash departments represent sales of items on consignment.
0 = Standard Department
1 = Food Stamp Department
2 = Hash Department
N3: Preset Price 1 digit
This function is to prohibit change of preset price during registration.
0 = The input price in registration overrides the preset price.
1 = Effective the preset price only.
DEPERTMENT PROGRAMMING

15
N4: Gallonage Mode 1 digit
Each department can be set for either Standard Mode or Gallonage Mode. Gallonage Mode allows
the entry of a price with 3 decimal places, representing the cost per gallon, i.e., 1.419 per gallon.
Standard Mode enters the price using the normal 2 decimal place setting.
0 = Standard Department 1 = Gallonage Department
N5: Negative Department 1 digit
Each department can be programmed with a negative (minus) value.
0 = Standard Department 1 = Negative Department
N6: Multiple Item / Single Item 1 digit
Multiple Item Entry allows you to ring up two or more items into a department.
Single Item Entry allows you to ring up only one item in a department.
0 = Multiple Item Sale 1 = Single Item Sale
N7: Group Number 1 digit
Each department can be classified in up to nine groups. For example, group departments 1, 2 and 3
designate as Group 1, which represents the TOTAL beverage sales.
Number Grouping
0 0
1 1
2 2
3 3
4 4
5 5
6 6
7 7
8 8
9 9
N8: High Digit Lock Out ( HDLO ) 1 digit
Number is used to limit the number of digits that can be rung up in an entry. This function is helpful
in safeguarding against large over rings. If an excess number of digits is entered, the error tone
sounds and the keypad locks up. For example, to limit ring ups of more than $99.99, set the HDLO
to 4.
Number
Dollar Range
0 = Max. $99,999.99(Standard Setting)
1 = Max. 0.09
2 = Max. 0.99
3 = Max. 9.99
4 = Max. 99.99
5 = Max. 999.99
6 = Max. 9,999.99
N9: Tax Status 2 digits
Used to link no tax, a single tax rate (Tax 1) or multiple tax rates (Tax 2, 3 or 4) to a department key.
DEPERTMENT PROGRAMMING

16
Tax Status Number Condition
00 = Non-Taxable (used when you do not wish to charge tax)
01 = Taxable by Tax 1
02 = Taxable by Tax 2
03 = Taxable by Tax 1 and Tax 2
04 = Taxable by Tax 3
05 = Taxable by Tax 1 and Tax 3
06 = Taxable by Tax 2 and Tax 3
07 = Taxable by TAX 1, TAX 2 and TAX 3
08 = Taxable by Tax 4
09 = Taxable by Tax 1 and Tax 4
10 = Taxable by Tax 2 and Tax 4
11 = Taxable by TAX 1, TAX 2 and TAX 4
12 = Taxable by Tax 3 and Tax 4
13 = Taxable by TAX 1, TAX 3 and TAX 4
14 = Taxable by TAX 2, TAX 3 and TAX 4
15 = Taxable by TAX 1, TAX 2, TAX 3 and TAX 4
Department Preset Price: 8 digits
Maximum 8 digits can be preset for Price.
NOTE: Department Preset Price is used to program a price in a department to save time when ringing up
an entry. The price will automatically ring up each time the appropriate [DEPARTMENT] key is
pressed.
Department Name: 16 characters (Max.)
A name or description can be assigned to each department key.
This name will display and print when ringing up sales.
For example, "Clothing" will print on the receipt in place of "Dept 1"; "Shoes" in place of "Dept 2";
"Sportswear" in place of "Department 3", etc.
Example: Program the Department 4:
Flag N1(Age Table) : (0) , N2( Food Stamp/HASH) : 0 , N3(Preset price) : 0 ,
N4(Gallonage): 0, N5(Negative) : 0, N6(Single Item) : 0 , N7(Group Number) : 2 ,
N8(HDLO): 0 , N9(Tax Status) : 01 (TAX1)
Preset Price : $ 5.00 Department : 4
Department Name : F R U I T
* Control Lock: P position:
Flag
2 0 0 1 TTL.
Î 5 0 0 DPT4
Î F R U I T CHECK STUB.
DEPERTMENT PROGRAMMING
17
3.4 PRICE LOOK-UP (PLU)
A TOTAL of 8000 Price Look Up codes (PLUs) are available on this cash register. Each PLU can be
programmed with a 16 character description that will print on the tape. The Price-Look Up system allows for
fast, accurate entry of an item and automatically records the number of items sold.
The first step in programming PLUs is to assign a PLU number between 1 and 8000 to each sales item.
Second, the PLU Numbers must then be linked to a Department key which has the appropriate Tax Status
needed for that PLU. For example, if PLU #1 is required to charge tax, then link it to a Department key
which is set up for tax. Whereas, if PLU #2 is not required to charge tax, then link it to a Department key
which is programmed for no tax. Lastly, each PLU (1-8000) can be programmed with a name or description.
The PLU name will print on the receipt or journal tape as well as on the PLU report.
TO PROGRAM THE PLU’S
Control Lock: P position
* Method of Using Department key
PLU # PLU Î ( Bar Code RA ) .
1 – 8000 14 digits (Max.)
Î ( Preset Price ) DPT1 .
8 digits
Î ( Name ) CHECK STUB Î # / NS (End Programming)
16 characters
* Method of Using ENT key & DPT# key
PLU # PLU Î ( Bar Code RA ) .
1 –8000 14 digits (Max.)
Î ( Preset Price ) ENT RLS Î ( Link Dept # ) DPT# .
8 digits 1 - 99
Î ( Name ) CHECK STUB Î # / NS (End Programming)
16 characters
* Repeat the steps of [ ( PLU# ) Æ CHECK STUB ] to program other PLUs.
* Press # / NS to end programming of PLUs.
PLU Number #
The PLU Nos. from 1 through 8000 can be designated and entered, and PLU key can be
operated.
PRICE LOOK-UP (PLU
)
18
Bar Code
The maximum of 14-digit Bar Code can be registered by inputting through K/B and depressing
RA key, or, by reading it using the Bar Code Reader and then you can proceed to the next
step. If you do not use a barcode reader for registration, in other words, if you use PLU number
(from 1 to 8000) only, the steps of (barcode) and RA key can be skipped.
You can skip the price presetting by direct registration of DEPT keys.
Preset Price
The maximum of 8 digit can be preset for Price.
You can skip the price preset by direct registration using ENT RLS key.
Link Dept #
Two digits number from 1 to 99 can be selected and entered for Link DEP #.
Name
Name can be preset in maximum 16 characters (Normal Size).
Both methods are available for character, by direct input using Alpha Keyboard
(Department Keys: Raised Keyboard / Direct PLU Block: Flat Keyboard ), or
by code input according to Alphanumeric Code Chart
Example:
PLU # : 125
Bar Code: 1234567890
Preset Price: $ 28.00
Link DEPT #: 5
Name : DESK
Control Lock: P position
1 2 5 PLU Î 1 2 3 4 5 6 7 8 9 0 RA.
Î 2 8 0 0 ENT RLS Î 5 DPT#.
Î D E S K CHECK STUB Î # / NS .
TO SEARCH A VACANT PLU NUMBER
Control Lock: P position
( 0 ) PLU .
To program a new PLU, it is possible to make a PLU number displayed that the description is not yet
programmed for.
Example: PLU 1 through PLU 100 are programmed already.
To search a vacant PLU number:
0 Î PLU .
PRICE LOOK-UP (PLU)
19
“PLU 101” is displayed.
Continuously, PLU 101 can be programmed.
TO DELETE PLU DATA
To delete the data of designated PLU number (in 1 – 8000) that has been programmed.
Control Lock: P position
( PLU # ) PLU Î ENT RLS Î ( 0 ) DPT# .
1 – 8000
Î # / NS.
Example: PLU 50 is already programmed. To delete the data of it:
5 0 PLU Î ENT RLS Î 0 DPT#
Î # / NS key to finalize.
STARTING NUMBER OF PLU ALLOCATION
Basically, the PLU number is automatically allocated to the smallest in the unoccupied numbers. Now it is
programmable to limit its smallest number for the allocation with the barcode reader.
TO PROGRAM THE STARTING NUMBER
Control Lock: P position
8 ( Starting Number ) PO.
1 – 8000 ( 4 digits )
NOTE: The PLU number allocated with the barcode reader is not less than “Starting Number”.
Example: If you program 1000 (a number in 1 through 8000) for the function, the smallest
number to allocate the PLU by scanning with the barcode reader is 1000.
8 1 0 0 0 PO.
PLU NAME/PRICE CHANGE
Current method of price /name change
nn :absolute or bar code number
aaaaaaa: unit price
ccccccc: name
PRICE LOOK-UP (PLU
)

20
Price change
xx PLU aaaaaaaa DPT# CLR (xx: absolute number, bar code # or scan the product)
Name change
xx PLU DPT# nnnnnnnnnnnnnnnn CHECK CLR
If the department key to which you want to link is not located on keyboard, press PLU/ENTÎ
In put the Department number. (by ten-key) Î DPT# key.
PLU SHIFT Function (Flag No. 112)
3.5 TAX PROGRAMMING
You can program up to four (4) types of tax to be added to each item.
We call these four taxes TAX1, TAX2, TAX3 and TAX4. To program a tax, you must select a taxation
system and enter the tax rate for that tax. For the instructions how to add these programmed taxes to
an item.
SELECTING A TAXATION SYSTEM
Your cash register has three taxation systems. They are described as follows:
Add-on Tax
This system calculates tax by using a tax rate you enter and it automatically adds the tax to the unit
price or the price enter.
VAT
The Value Added Tax is a European tax system. It calculates tax by using the tax rate you enter and
includes the calculated tax in the unit price or the price entered from the keyboard.
Tax Table
This system calculates the tax by using a tax table that you enter. The tax table depends on the
location of the store. Use the tax tables provided by the local tax office to enter the numbers.
For instructions on entering a tax, see “Tax Table” in this section.
NOTE: Tax 1 through Tax 3 can be set as either an add-on fixed tax rate, a VAT tax or tax table
rate. Tax 4 can be set as a fixed add-on rate or a VAT tax only.
TO PROGRAM TAX RATE
Control Lock: P position
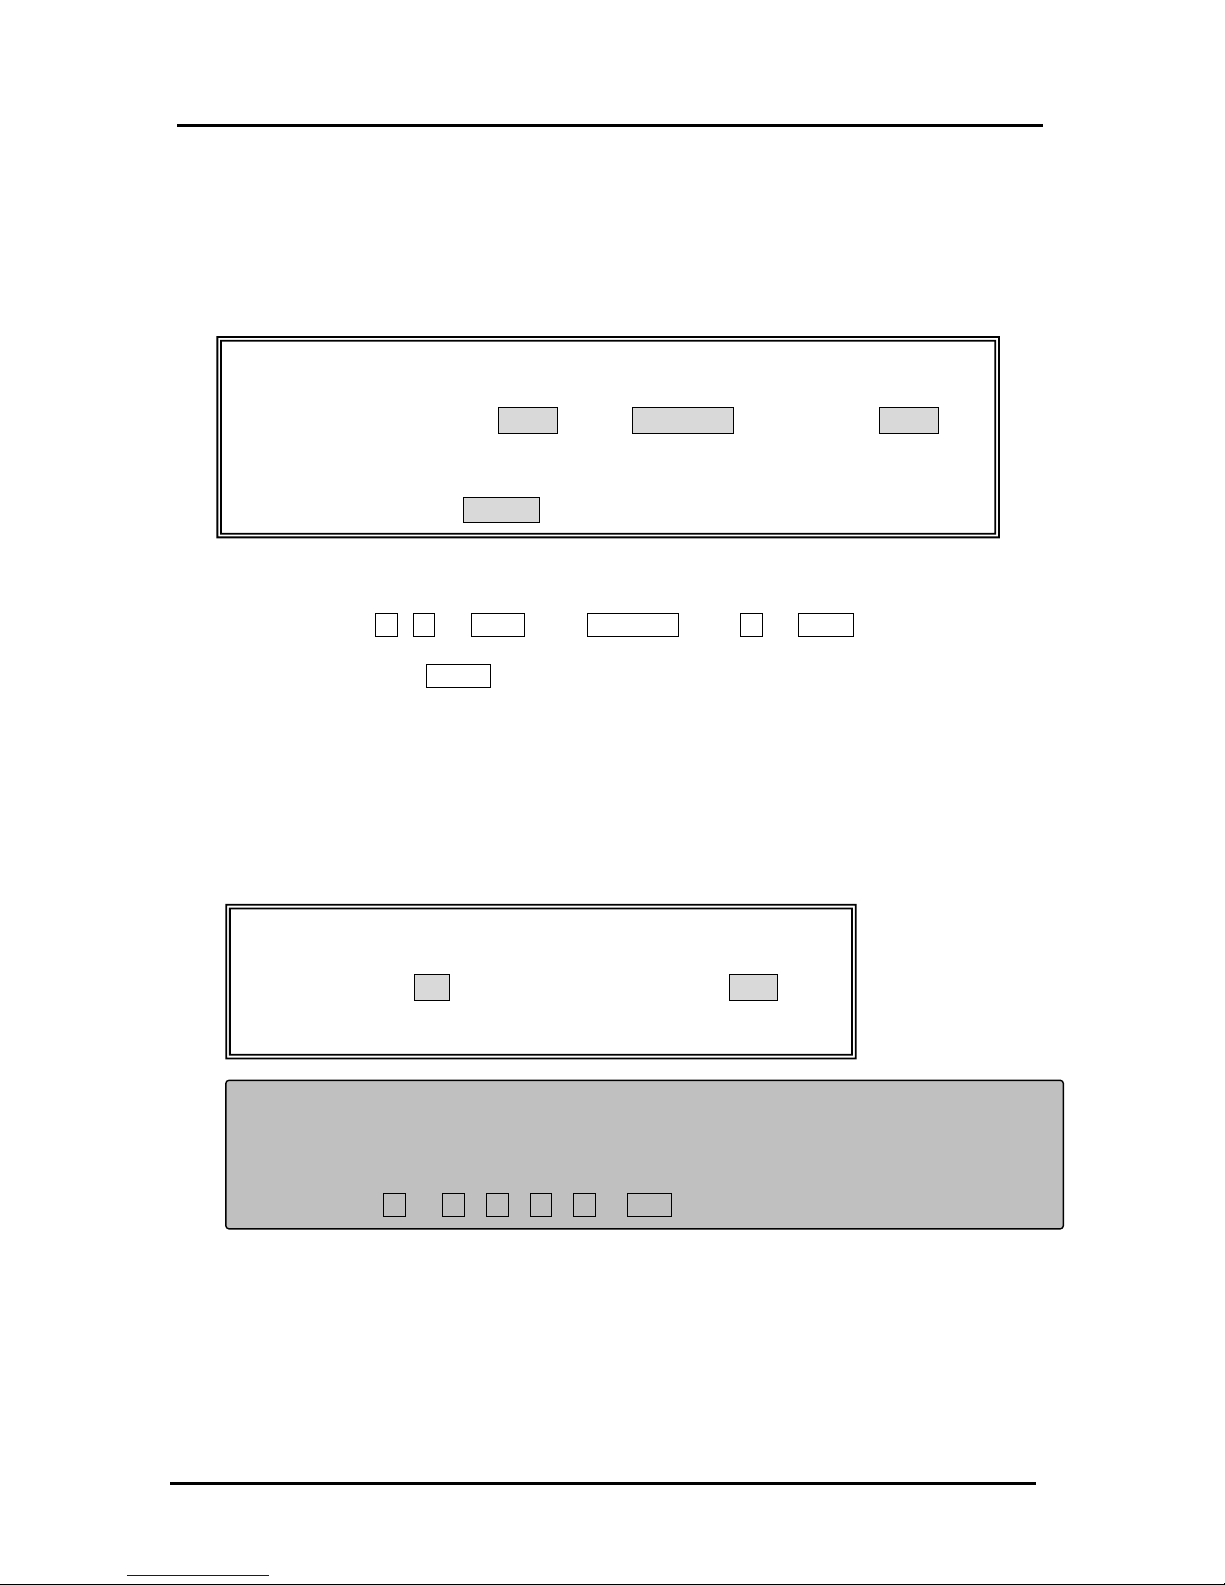
( TAX # ) ( TAX MODE ) CHRG .
1 digit 1 digit
1 - 4 0: ADD ON
1: VAT
2: TABLE TAX
TAX PROGRAMMING
21
Î ( Tax Rate ) TTL .
6 digits (Max.)
Î ( Tax Limit Amount ) TTL .
6 digits (Max.)
TO PROGRAM THE ADD-ON TAX RATE
Control Lock: P position
( TAX # ) ( TAX MODE ) CHRG .
1 digit 1 digit
Add on TAX 1 :
1 0
Add on TAX 2 : 2 0
Add on TAX 3 : 3 0
Add on
TAX 4 : 4 0
Î ( Tax Rate ) TTL .
6 digits (Max.)
Î ( Tax Limit Amount ) TTL .
6 digits (Max.)
Example: To program the TAX1 Add-On of tax rate of 6 %.
1 0 CHRG .
Î 6 0 0 0 0 TTL
Î ( Tax Limit Amount ) TTL
6 digits (Max.)
* Tax Limit Amount: If Tax Limit Amount is not necessary, press 2nd TOTAL key directly.
TO PROGRAM THE VAT TAX RATE
Control Lock: P position
( TAX # ) ( TAX MODE ) CHRG .
1 digit 1 digit
VAT TAX 1 :
1 1
VAT TAX 2 : 2 1
VAT TAX 3 : 3 1
VAT TAX 4 : 4 1
Î ( Tax Rate ) TTL
6 digits (Max.)
TAX PROGRAMMING

22
Î ( Tax Limit Amount ) TTL.
6 digits (Max.)
Example: To program the TAX2 VAT of tax rate 10% .
2 1 CHRG.
Î 1 0 0 0 0 0 TTL.
Î ( Tax Limit Amount ) TTL .
6 digits (Max.)
* Tax Limit Amount : If Tax Limit Amount is not necessary , press 2 nd TOTAL key directly.
TO PROGRAM TAX TABLE RATE
Control Lock: P position
( TAX # ) ( TAX MODE ) CHRG .
1 digit 1 digit
TABLE TAX 1: 1
2
TABLE TAX 2: 2 2
TABLE TAX 3: 3 2
Î ( State Tax Table Code ) TTL .
▲ ▼
Í Í Í Í
Repeat for each code
Î # / NS.
( To finalize )
Example: The tax code for Arizona's tax rate of 4% is: 138-100-4-13-19-23-27-27-29-25-25-25-
25. To program this under Tax 1, which you must have previously defined as a Tax
Table Rate per the instructions in Step 1:
1 2 CHRG .
Î 1 3 8 TTL. Î 1 0 0 TTL. Î 4 TTL.
Î 1 3 TTL. Î 1 9 TTL. Î 2 3 TTL.
Î 2 7 TTL. Î 2 7 TTL. Î 2 9 TTL.
Î 2 5 TTL. Î 2 5 TTL. Î 2 5 TTL.
Î 2 5 TTL.
Î # / NS. ( To finalize )
TAX PROGRAMMING
 Loading...