

Bedienungsanleitung
Instruction Manual
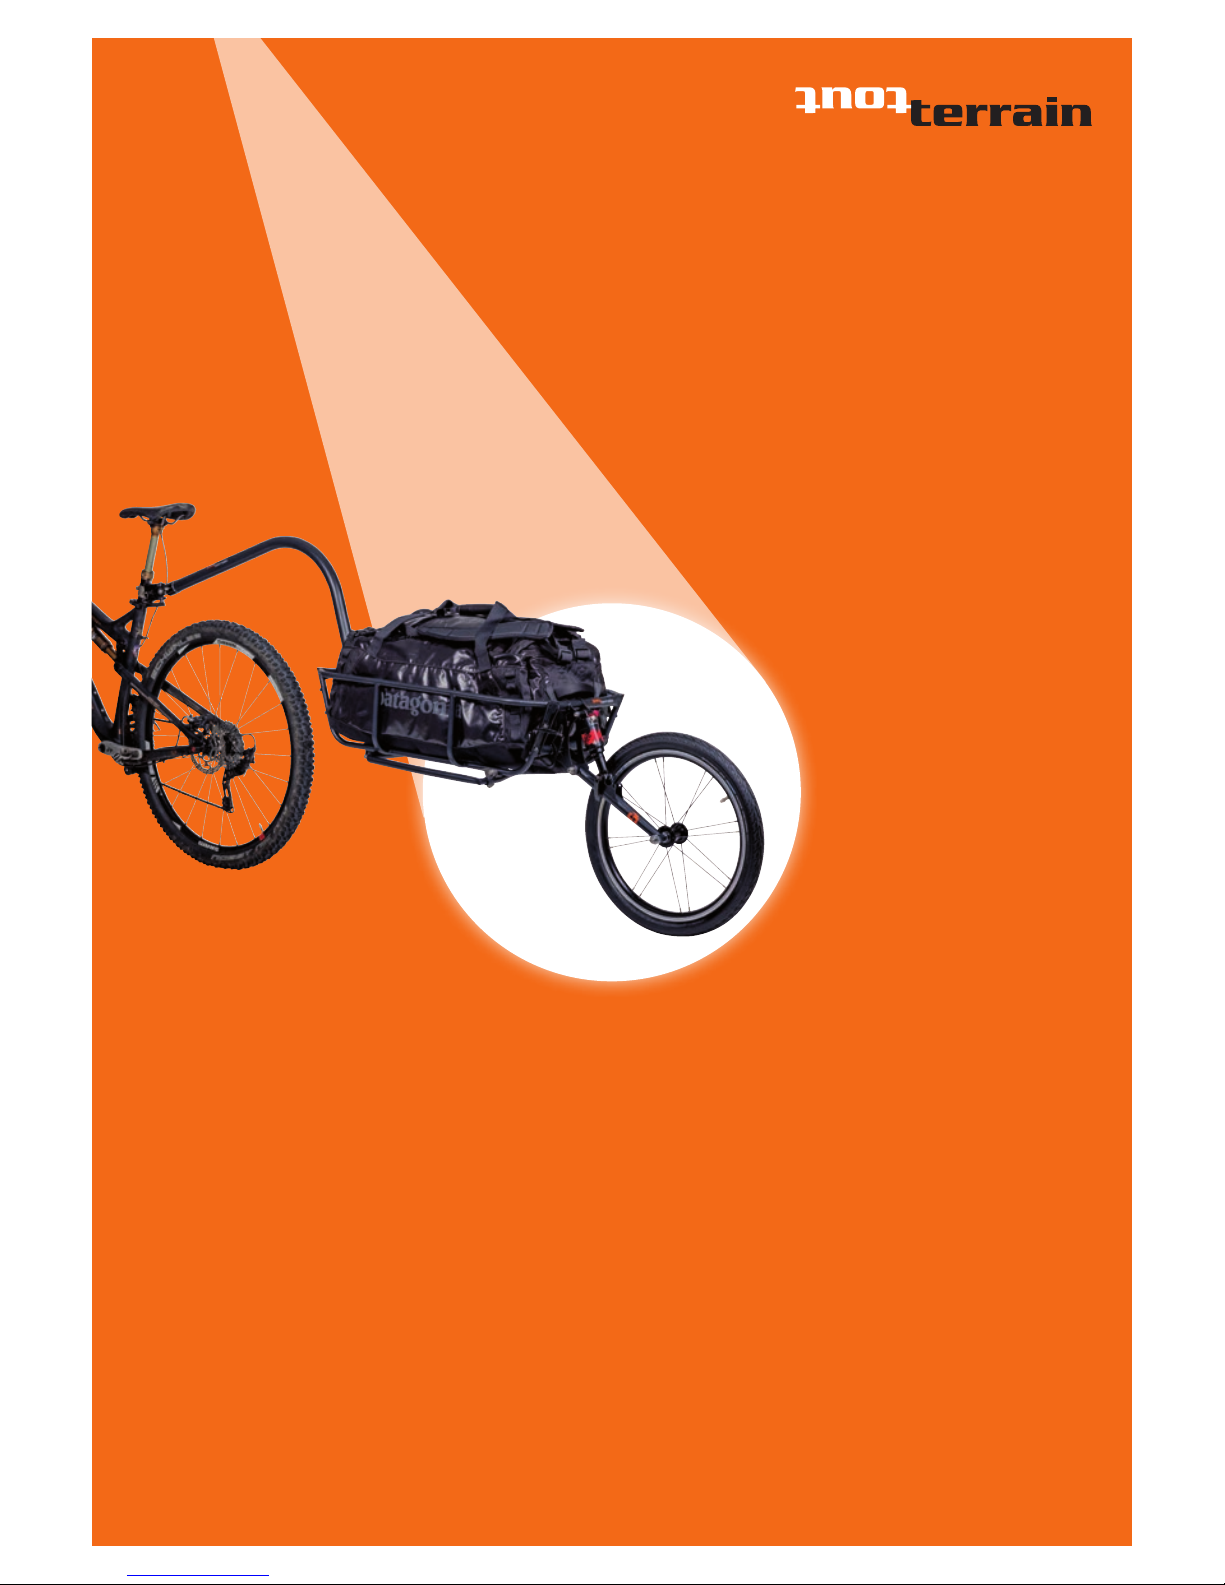
Mule
bevorzugen. Der Schnellspanner muss immer
sorgfältig verschlossen werden!
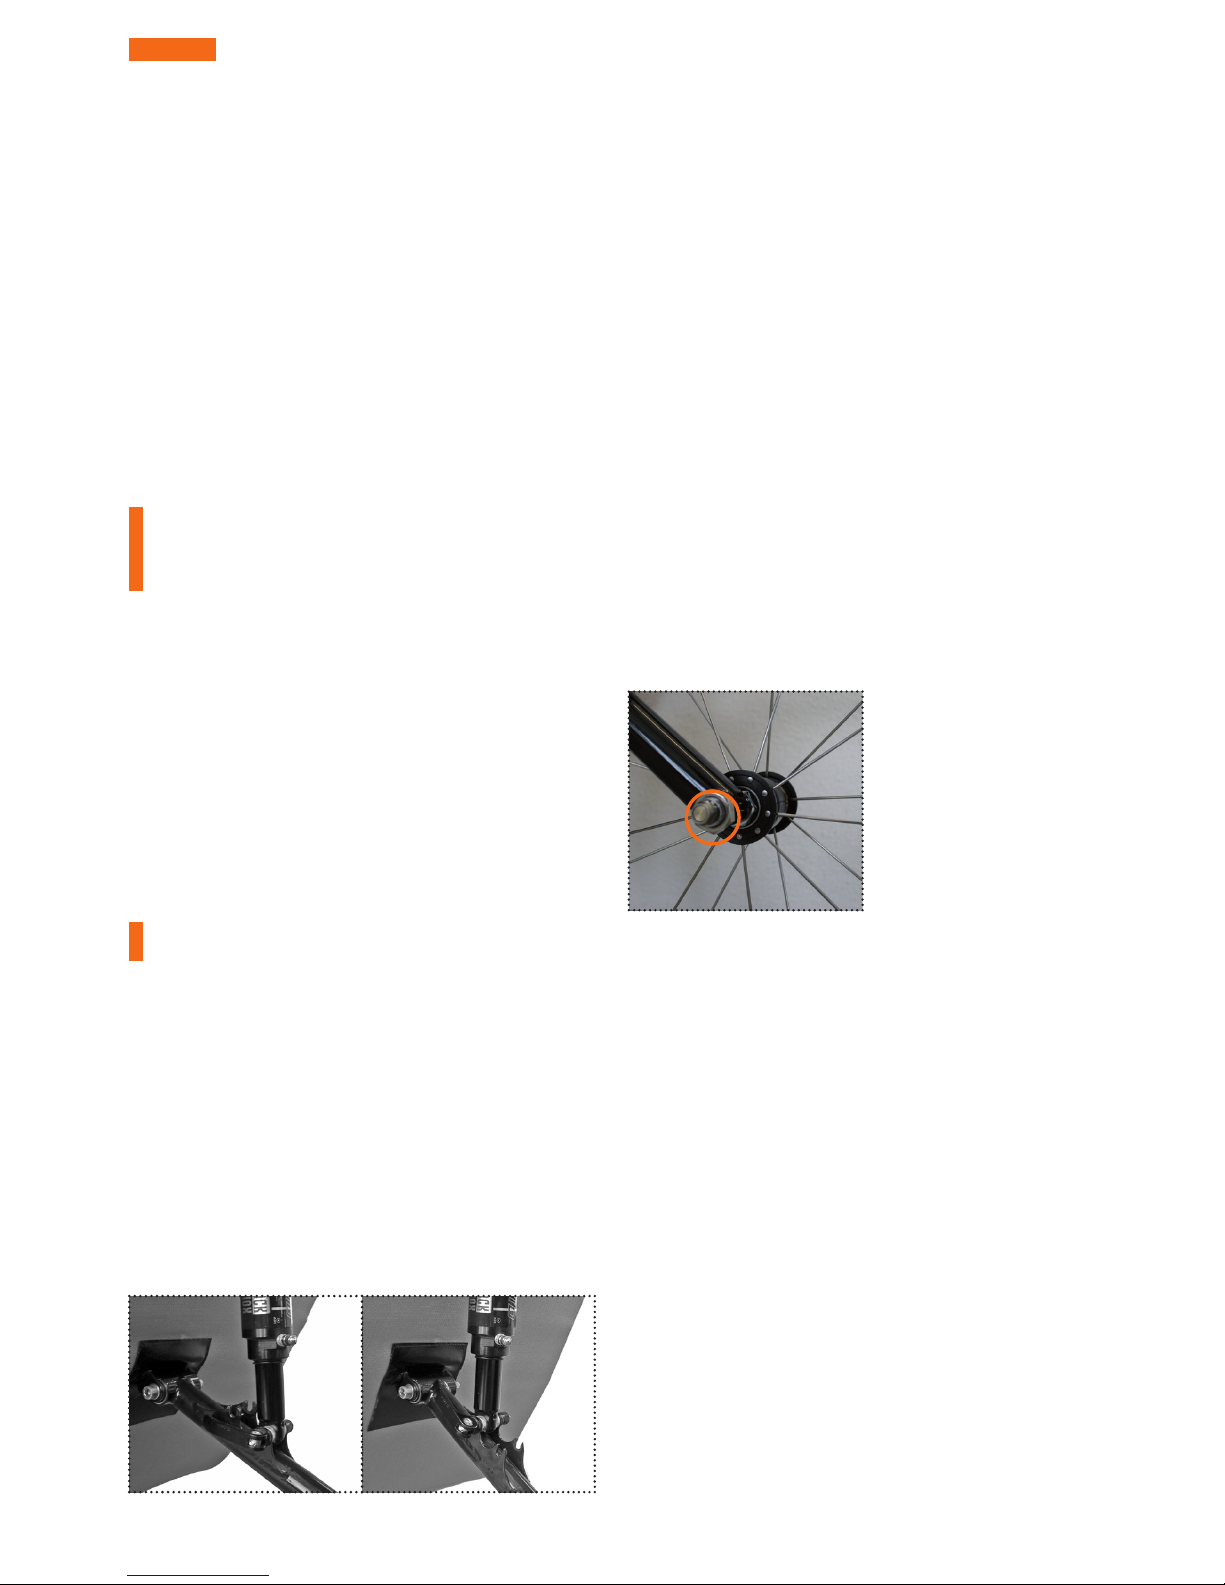
2. Das Hinterrad wird mit der Schnellverschluss Steckachse (durch Druck auf die Achsmitte –
unter Gummiabdeckung) in die Buchse an der
Schwinge gesteckt. Es ist wichtig, dass das Rad
einrastet! Dies erkennen Sie daran, dass der
Stift in Achsmitte vollständig verschwindet!
3. Bei der Montage der Deichsel beachten Sie, dass
bei jeder Montage die Deichsel voll überlappend
im Rahmen steckt und der Sicherungssplint eingeführt ist. Nach dem Ausrichten der Deichsel
im Rahmen, ziehen Sie die Schrauben mit einem
Drehmoment von 9Nm an!
4. Ziehen Sie die Sattelstütze aus dem Zugfahrrad
heraus. Das Kupplungsstück an der Sattelstütze
über die Sattelstütze stecken. Der Durchmesser
der Kupplungsschelle muss genau mit dem der
Sattelstütze übereinstimmen. Die Schelle darf
auf der Stütze kein Spiel haben. Sie darf allerdings auch nicht weiter als 1mm auf ge bogen
werden, um die Montage zu erleichtern. Dann
schieben Sie die Stütze wieder in das Fahrrad
und positionieren das Kupplungsteil so knapp
wie möglich über dem Rahmen, allerdings so,
dass Sie bei Bedarf im Gelände die Sattelstütze
noch um einige Zentimeter absenken können.
Das Kupplungsrohr muss gerade nach hinten
zeigen, dann ziehen Sie die Schraube mit
einem 5 mm Inbus fest. Das Anzugsmoment
der Schraube darf 9Nm nicht überschreiten.
Lieber Kunde, vielen Dank, dass Sie sich für den Mule entschieden haben. Wir fertigen
diesen nach höchstem Qualitätsstandard, und hoffen, Ihnen damit ein Produkt zu liefern, das Ihnen lange viel Freude bereitet. Sollten Sie aufgrund der Nutzung Verbesserungsvorschläge haben, lassen Sie es uns wissen – wir werden versuchen, diese in zukünftige Serien einfließen zu lassen. Wir wünschen viel Spass mit dem Mule.
VOR INBETRIEBNAHME
Wichtig: Der Mule ist für den Einsatz im
Gelände konzipiert. Der Betrieb mit diesem
erfordert vom Radfahrer eine gewisse
Erfahrung und Sicherheit beim Radfahren.
Folgende Punkte sollten Sie vor der ersten
Be nutzung beachten:
➔ Anfänger sollten den Betrieb des
Anhängers im Gelände meiden.
➔ Die Reaktionsmöglichkeiten mit Anhänger
sind eingeschränkt und das Bremsverhalten
ist deutlich reduziert gegenüber der Fahrt
ohne Anhänger.
INBETRIEBNAHME
Wichtig: Fahren Sie niemals, ohne die Prüfungen
in 1 – 5 durchgeführt zu haben.
Überprüfen Sie folgende Punkte vor jeder Fahrt:
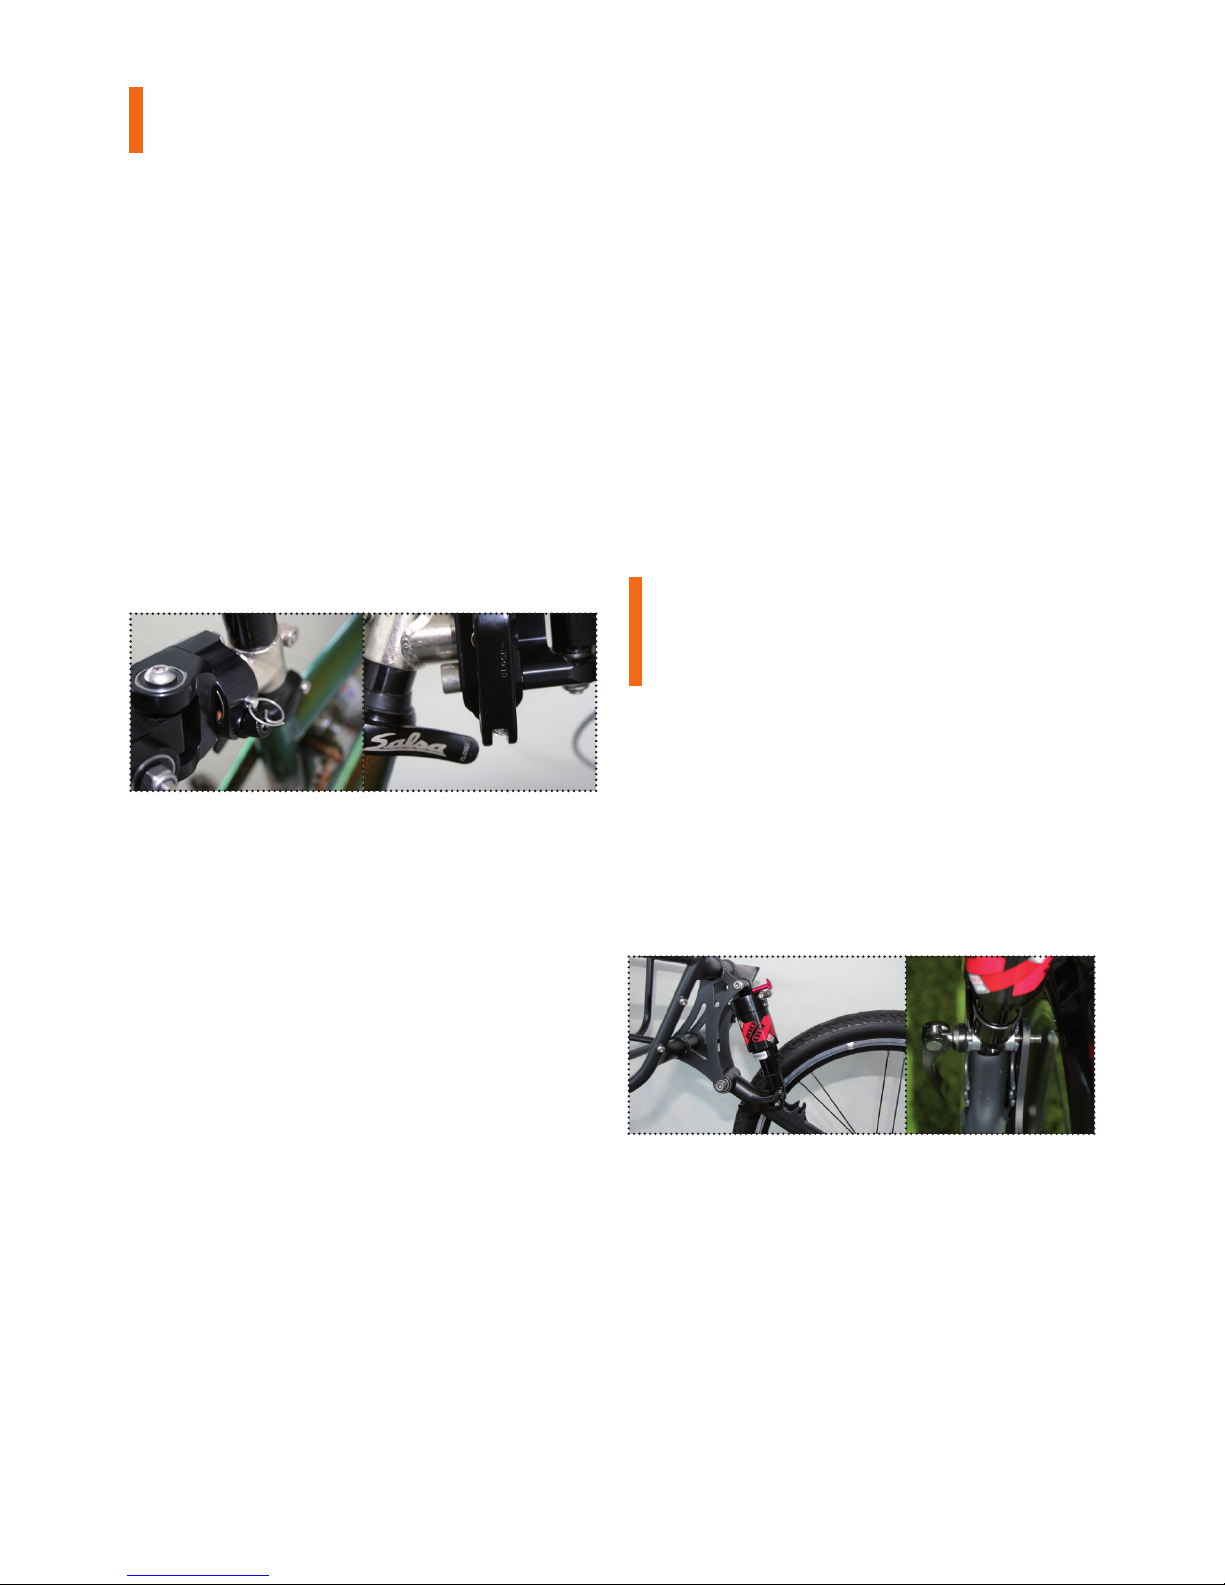
1. Der Dämpfer wird in die entsprechenden Aufnahmen an der Schwinge eingehängt. Hierfür
gibt es zwei Positionen. Für den Betrieb auf
Strassen kann man die Position 1 wählen, in
dieser Position hat der Anhänger 12cm Federweg, und der Schwerpunkt liegt etwas tiefer.
In der Position 2 hat der Anhänger 16cm Federweg, und der Schwerpunkt liegt etwas höher.
Für Fahrten im Gelände ist diese Position zu
1.: Position 1 1.: Position 2
DEUTSCH
2.
Achtung: Montieren Sie den Anhänger nicht
an Carbon- oder anderen extremen Leichtbausattelstützen.
5. Ankuppeln: Dazu muss der Schnellspanner der
Kupplung offen stehen und die Kupplungsteile
müssen schmutz frei sein. Das Kupplungsgelenk
wird über das Kupplungsrohr geschoben, bis es
ganz auf diesem steckt (die Schnellspannschelle
berührt nun fast die Sattelstützenschelle). Am
einfachsten geht das, wenn der Anhänger auf
seinem Ständer steht und das Fahrrad mit der
einen Hand an die Kupplung geführt wird, während man mit der anderen Hand die Kupplung
auf das Fahrrad ausrichtet. Achten Sie darauf,
dass der Anhänger genau in der Flucht hinter
dem Fahrrad hängt. Gehen Sie nun wie folgt vor:
a) Stecken Sie immer den Sicherungsbolzen
durch die Kupplung.
b) Der Schnellspanner muss fest sitzen und
sorgfältig geschlossen werden.
BETRIEB
➔ Die maximale Zuladung beträgt 30kg.
➔ Sichern Sie Ihre Ladung sorgfältig.
➔ Beachten Sie, dass immer die Schnellspanner
geschlossen und das Laufrad eingerastet ist.
WARTUNG
Überprüfen Sie die Verschleissteile in regelmäßigen Abständen bzw. lassen Sie gegebenenfalls Wartungsarbeiten von Ihrem Händler durchführen. Regelmäßige Wartungsintervalle können
nur schwer angegeben werden, da der Verschleiß
stark von Einsatzhäufigkeit und -gelände abhängt.
Teile, die vor jeder Fahrt auf Verschleiß und
Funktion überprüft werden sollten:
➔ Reifenprofiltiefe
➔ Luftdruck des Reifens
➔ Speichenspannung und Rundlauf des Rades
➔ Funktionsfähigkeit des Dämpfers
➔ Fester Sitz des Rades
ABSTIMMEN DER FEDERUNG
In der Luftkammer muss je nach Zuladung ein
unterschiedlicher Luftdruck eingestellt werden.
Die Dämpfung (rote Einstellschraube) sollte immer
möglichst schwach eingestellt sein, so dass der
Dämpfer schnell ausfedert, aber ohne beim Ausfedern durchzuschlagen. Wenn Sie den Federweg
verstellen (Strassen oder Gelände-Position)
be achten Sie, dass evtl. auch der Luftdruck und
die Dämpfung angepasst werden müssen.
Lesen Sie hierzu auch die separate Anleitung
für den Dämpfer.
Bitte beachten Sie auch, dass der Dämpfer je nach
Bodenbeschaffenheit angepaßt werden kann.
MONTAGEHINWEISE ZUM ANBAU DES
ANHÄNGER SCHUTZBLECHHALTERS
Wichtig: Die Halterung kann ohne Werkzeug
montiert werden. Bitte prüfen Sie vor jeder
Fahrt den Sitz der Schnellspanner, insbesondere
am Verbindungsstück zwischen Dämpfer und
Schwinge.
Zur Vereinfachung der Montage kann das Laufrad
entfernt werden.
Folgende Montageschritte sind durchzuführen:
1. Lösen sie die Mutter des Dämpferschnellspanners und montieren Sie den Halter
auf die Achse des Schnellspanners zwischen
Schwinge und Mutter.
5. a) 5. b)
1. a) 1. b)

2. Montage des zusätzlichen Schnellspanners
mit Hülse: Montieren Sie den mitgelieferten
Schnellspanner in dem noch freien Schlitz der
Schwinge und dem freien Loch des Halters.
Die Hülse dient als Abstandshalter im freien
Schlitz der Schwinge.
3. Wenn Sie die Dämpferposition ändern, tauschen
Sie die Hülse mit dem Dämpfer. Die Position des
Schutzblechs bleibt unverändert.
4. Der Anhänger ist nun fahrbereit.
Bei Service-Fragen
wenden Sie sich bitte an:
service@tout-terrain.de
tout terrain
Industriestraße 11
79194 Gundelfingen
Deutschland
Tel. +49 761 205510-00
info@tout-terrain.de
www.tout-terrain.de
4.
STÄNDERMONTAGE
(wenn nicht vormontiert)
1. Entfernen Sie die vormontierten Hülsen mit
einem Inbus- sowie einem Gabelschlüssel
2. Positionieren Sie den Ständer und die mitgelieferten Hülsen wie abgebildet. Ziehen Sie die
Schrauben so fest, dass sich der Ständer noch
drehen lässt.
3. Montieren Sie den Ständerhaken mit der
Öffnung nach hinten in die beiden Gewindebuchsen auf der Unterseite des Anhängers.
Verwenden Sie nach Möglichkeit etwas
Schraubensicherung (z.B. Loctite). Stellen
Sie sicher, dass der Ständerhaken beim
Hochklappen des Ständers einrastet.
Achtung: Prüfen Sie vor jeder Fahrt,
dass der Ständer vollständig eingehakt ist.
Registrieren Sie Ihr Produkt unter
www.tout-terrain.de. Dies dient der Garantie erfassung und damit Ihrer Sicherheit.
3. a) 3. b)
2.
2.

ENGLISH
Dear customer, thank you for purchasing our Mule trailer. We aim to manufacture
these products according to the highest quality standard. We hope to deliver a product
to you which guarantees long-lasting enjoyment. If you have suggestions for improvements based on your use please let us know and we will look into incorporating these
into a future series. We wish you lots of fun with Mule.
2. The rear wheel is put with the quick-release
rod (with pressure into the axle center) into the
socket at the linkage. It is important that the
wheel engages completely and you cannot pull
it out! You recognize this by the fact that the
pin completely disappears in the axle center!
3. Please note that with each assembly the
drawbar is fully overlapping in the frame and
the safety pin is installed. After aligning the
drawbar in the frame tighten the screws with
a torque of 9Nm!
4. Pull the seat post out of the bicycle. Take out
the coupling, which is fastened to the seat post,
out of the cardan joint and stick it onto the seat
post. The coupling must fit exactly onto the
seat post. Therefore absolutely make sure to
purchase the correct coupling. The coupling
should not have a play on the seat post. It should
also not be bend open more than 1mm, to make
the mounting easier. Put back the seat post into
the bike again and position the coupling scarcely
as possible over the framework, however so that
you can lower the seat post if necessary still
some centimeters going downhill. The tube of
the coupling must show straight to the rear,
and now tighten the screw with a 5 mm allen key.
The clamping torque of the screw may not
exceed 9Nm.
Warning: Don’t mount the trailer to carbon or
other lightweight construction seat posts.
BEFORE STARTUP
Important: the Mule is designed for sports
cycling and rough terrain. Thus, using it
requires a certain experience and confidence
of the cyclist over these conditions.
You should take the following points into
consideration before using the trailer.
➔ Beginners should avoid using the trailer
off-road.
➔ The reaction possibilities with a trailer are
restricted and the braking behavior is reduced
considerably compared to riding without
a trailer. In addition breaking distance is
increased, compared to use without trailer
attached.
STARTUP
Important: Check the following before each ride.
1. The shock is hung up into the appropriate
position at the linkage. There are two possible
positions. For road riding one can select the
position 1, in this position the trailer has 12cm
suspension travel, and the center of gravity
is lower. In the second position the trailer has
16 cm of travel, and the center of gravity is
slightly higher. For off-road trips this position
is to be preferred. The quick-release must
always be locked!
1.: Position 1 1.: Position 2
2.

5. Attaching the trailer to the bike: The quickrelease of the cardan joint must be open and
the coupling parts need to be clean. The cardan
joint is pushed over the coupling until it is
completely plugged in (the cardan joint nearly
contacts the seat post coupling now). The easiest this can be done is if the trailer stands on
its stand and the bicycle is led to the coupling
with one hand, while the other hand aligns
the coupling to the bicycle. Make sure that the
Singletrailer hangs straight behind the bike.
Proceed as follow:
a) Always stick the fastening bolt through
the coupling.
b) The quick-release fastener needs to be
attached securely and closed accurately.
OPERATION
➔ The maximum cargo load is 30kg.
➔ Always secure your load.
➔ Always make sure that the quick releases are
tightened & the wheel is properly engaged.
MAINTENANCE
Examine the wearing parts in regular intervals
and/or let your dealer accomplish maintenance
work if necessary. Regular maintenance rates
can difficulty be indicated, as the wear strongly
depends upon frequency of use and terrain.
Parts, which should be examined before
each trip for wear and function:
➔ tread
➔ air pressure of the wheel
➔ spoke tension and rotation of the wheel
➔ function of the shock
➔ correct & secure fit of the wheel
Warning: It is important that the wheel
engages completely and you cannot pull it out!
You recognize this by the fact that the pin
completely disappears in the axle center!
TUNING SUSPENSION
In the air chamber a different air pressure must
be adjusted depending upon the cargo weight.
The damping (red adjusting screw) should always
be adjusted as weakly as possible, so that the
shock releases quickly but without striking
through when releasing. If you adjust the suspension travel (road or off-road position) note that
shock air pressure and damping also possibly must
be adapted. Please also read the separate manual
for the shock.
The road position requires slightly lower air
pressure.
ASSEMBLY INSTRUCTIONS TO
ATTACH THE MUDGUARD
Important: There are no tools required to assemble the mudguard to the trailer. It is easier
to assemble the mudguard if you remove the
wheel. Please check before every ride the secure fit of the quick releases.
1. Release the Nut of the quick release of the
shock. Slide the mudguard over the axle of
the quick release
2. Assemble the additional quick release with
the spacer in the open slot of the shock mount.
The spacer is avoids deformation of the shock
mount.
5. a 5. b
1. a) 1. b)
2.

For service related
questions please contact:
service@tout-terrain.de
tout terrain
Industriestraße 11
79194 Gundelfingen
Germany
Tel. +49 761 205510-00
info@tout-terrain.de
www.tout-terrain.de
3. If you change the shock position, swap the shock
with the shim. The position if the mudguard
remains the same.
4. The trailer is now ready to go.
KICKSTAND ASSEMBLY
(if not preinstalled)
1. Remove the preassembled spacers with hex key
and a nut spanner
2. Position the kickstand and the spacers as shown
in the pictures. Tighten the bolts so that the
kickstand still moves smoothly.
3. Attach the kickstand hook with the opening to
the rear to the two braze-ons in the bottom of
the trailer. We recommend to secure the bolts
with some thread locker (e.g. Loctite). Make sure
that the kickstand engages fully with the hook.
3. a) 3. b)
2.
Warning: please check before every ride, that
the kickstand is engaged completely.
Please register your product under
www.tout-terrain.de. This will validate your
warranty, and with that, your safety.
4.

Mule und tout terrain sind eingetragene Warenzeichen. Technische Änderungen vorbehalten. © tout terrain 2016
Mule und tout terrain are registered trademarks – details subject to change. © tout terrain 2016
Seriennummer Serial number
Händlerstempel Retailer
zubehör accessories
Kupplung (26,8/27/27,2/30/30,9/31,4/31,6/35) Hitch (26,8/27/27,2/30/30,9/31,4/31,6/35)
Schutzblech Mudguard
Innentasche Inside bag
Regenüberzug für Innentasche raincover for inside bag
Patagonia Duffle Bag 90L Patagonia Duffle Bag 90L
Schnellverschluss-Splint für Kupplung Quick release spline for hitch
Strassenlaufrad Road wheel
erhältliche ersatzteile (auszug) available spare parts (selection)
Standard Splint für Kupplung Standard spline for hitch
Ständerhaken Kickstand hook
Ständer Kickstand
Achsabdeckung Axle cover
 Loading...