

Page 1
About this guide
Remote Control User’s Guide
January 2010
900138-001 Rev. 01
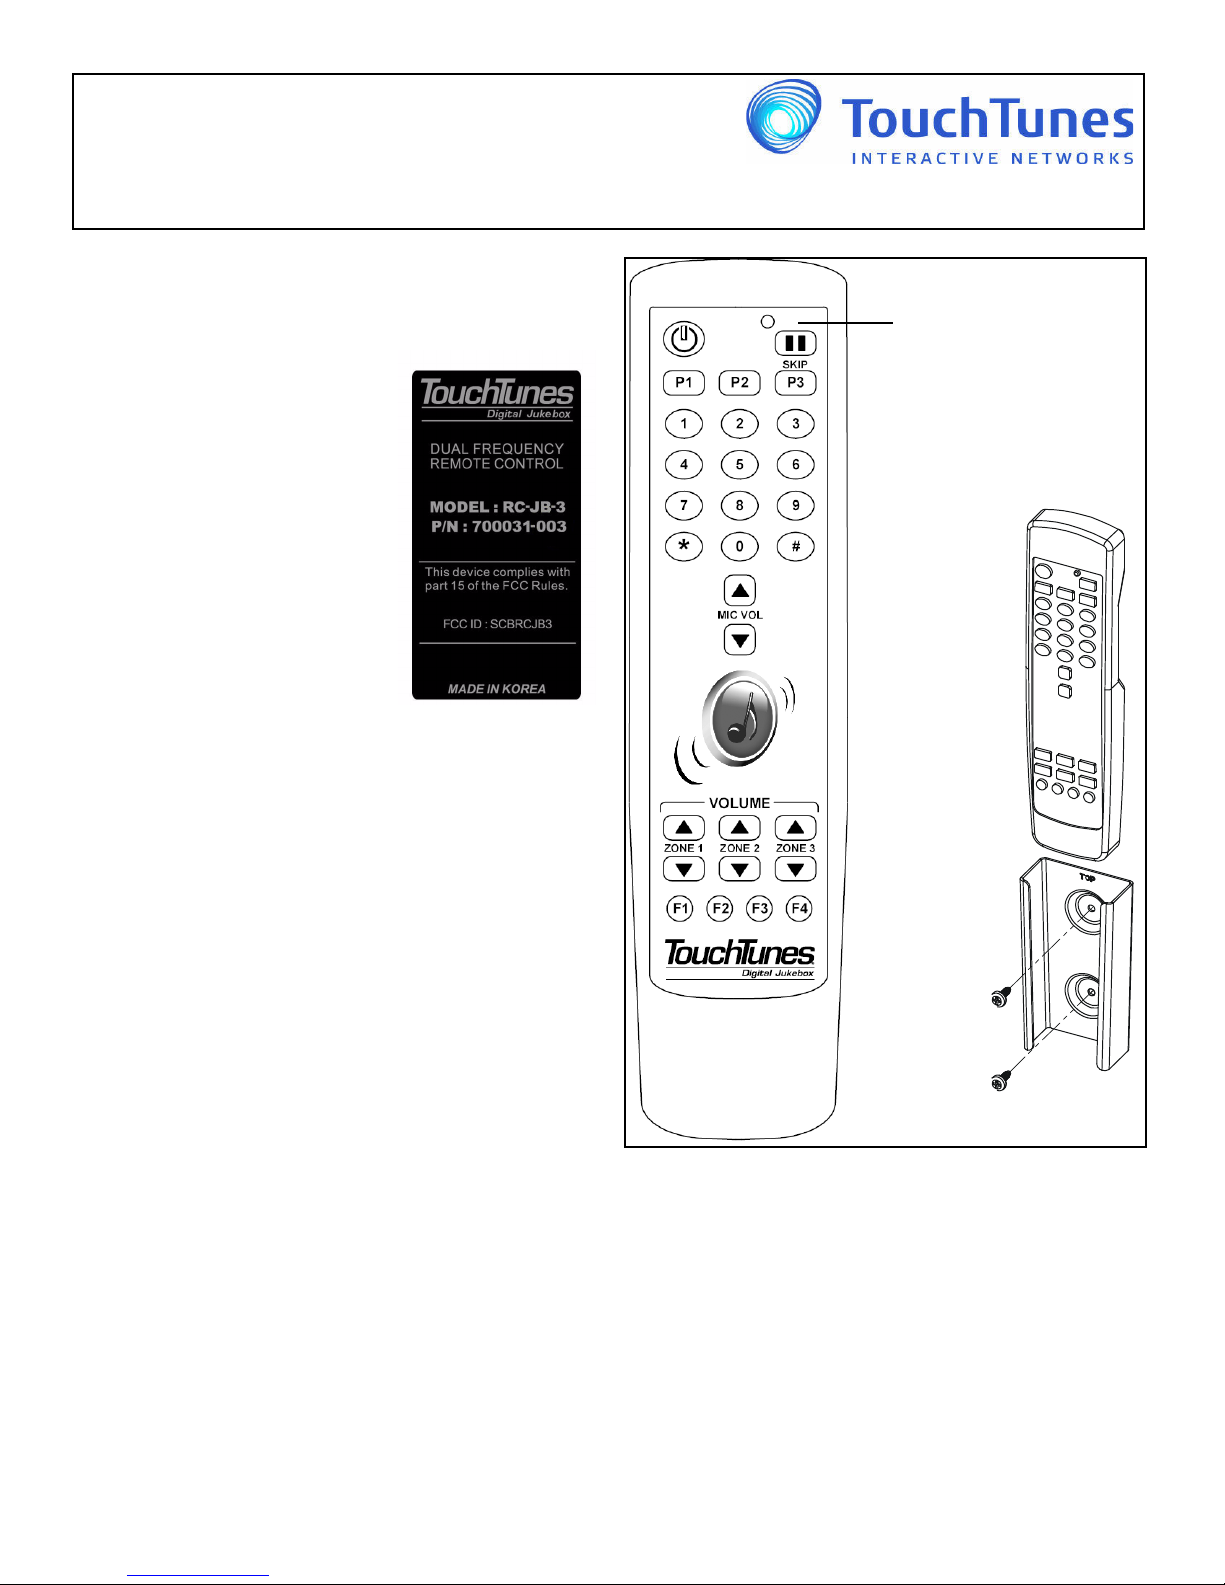
The red indicator light
flashes when the remote
transmits or when it is
being programmed.
Use the
mounting
bracket to
installed the
remote
control on a
wall for easy
access.
Fasten the
bracket to the
wall with two
screws as
illustrated.
Also signals low battery.
This guide explains the setup and operation of TouchTunes
wireless remote control, P/N 700031-003.
Note: This component replaces
TouchTunes P/N 700031-001, and
is identifiable by the label on the
battery compartment cover on the
rear of the unit.
Package contents
• Remote control (part number
700031-003)
• Mounting bracket (part number
400188-001)
• 2 AAA alkaline batteries
• This guide
Service and support
You can contact the TouchTunes Technical Support
department for assistance using either of the following
methods:
• Call the Technical Support department at 847-353-1954
and pressing 1 when prompted. Before calling, write
down the jukebox ID number. TouchTunes requires this
ID number to provide you with the proper assistance.
• Email the Technical Support department from the
Contacts page on the TouchTunes Dashboard; see the
TouchTunes Dashboard User Guide.
This product complies with the Canadian ICES-003 Class B
specification.
Overview
The dual-frequency remote control can transmit on one of
two carrier frequencies:
• 27.145 MHz (AM) to communicate with jukeboxes
(Genesis I, II, Maestro, Rhapsody) that use the existing
receiver/demodulator.
• 433.92 MHz. (FSK) for jukeboxes with the new receiver/
demodulator.
By default, the frequency is set to 433.92 MHz.
The remote control is RF-based. This eliminates the need to
point it directly at the jukebox when using it. It has a range of
up to 200 feet depending on the type of the obstructions
between it and the jukebox. Concrete and metal provide
more of a barrier than wood or plaster. The remote control
can also be affected by interference from other RF-based
devices.
The remote control is powered by two 1.5V AAA batteries.
Insert the batteries in the compartment on the rear of the
remote. Use only high-quality alkaline batteries.
Low Battery Warning
When the remote control’s battery level decreases to a level
too low for reliable operation (2.2V or less), the red LED will
flash 10 times to indicate that the batteries need to be
replaced, and the remote will not transmit.
1 of 5
Page 2
Setting the carrier frequency
By default, the carrier frequency is set to 433.92 MHz. To change it, do the following:
1. Press the
PAUSE and F1 keys at the same time and hold them down until the red indicator light blinks two times.
2. Enter the three-digit numeric code for the frequency you want to use.
• 027 for 27.145 MHz
• 433 for 433.92 MHz
3. The red indicator light will light up for three seconds to confirm your selection. If you enter an invalid code the light will
blink five times.
4. The default manufacturer carrier frequency selection code is 433.
5. The carrier frequency selection code is memorized in a non-volatile memory.
Setting the remote control ID
By default, the remote control ID is set to 000. To change it, do the following:
1. Press the
POWER and F4 keys at the same time and hold them down until the red indicator light blinks two times.
2. Enter the new three-digit code to use. The new code must be in the range
000 to 255.
3. The red indicator light will light up for three seconds to confirm your selection. If you enter an invalid code the light will
blink five times.
4. You must now have the jukebox re-learn the remote ID.
Learning the remote ID
For Gen 1
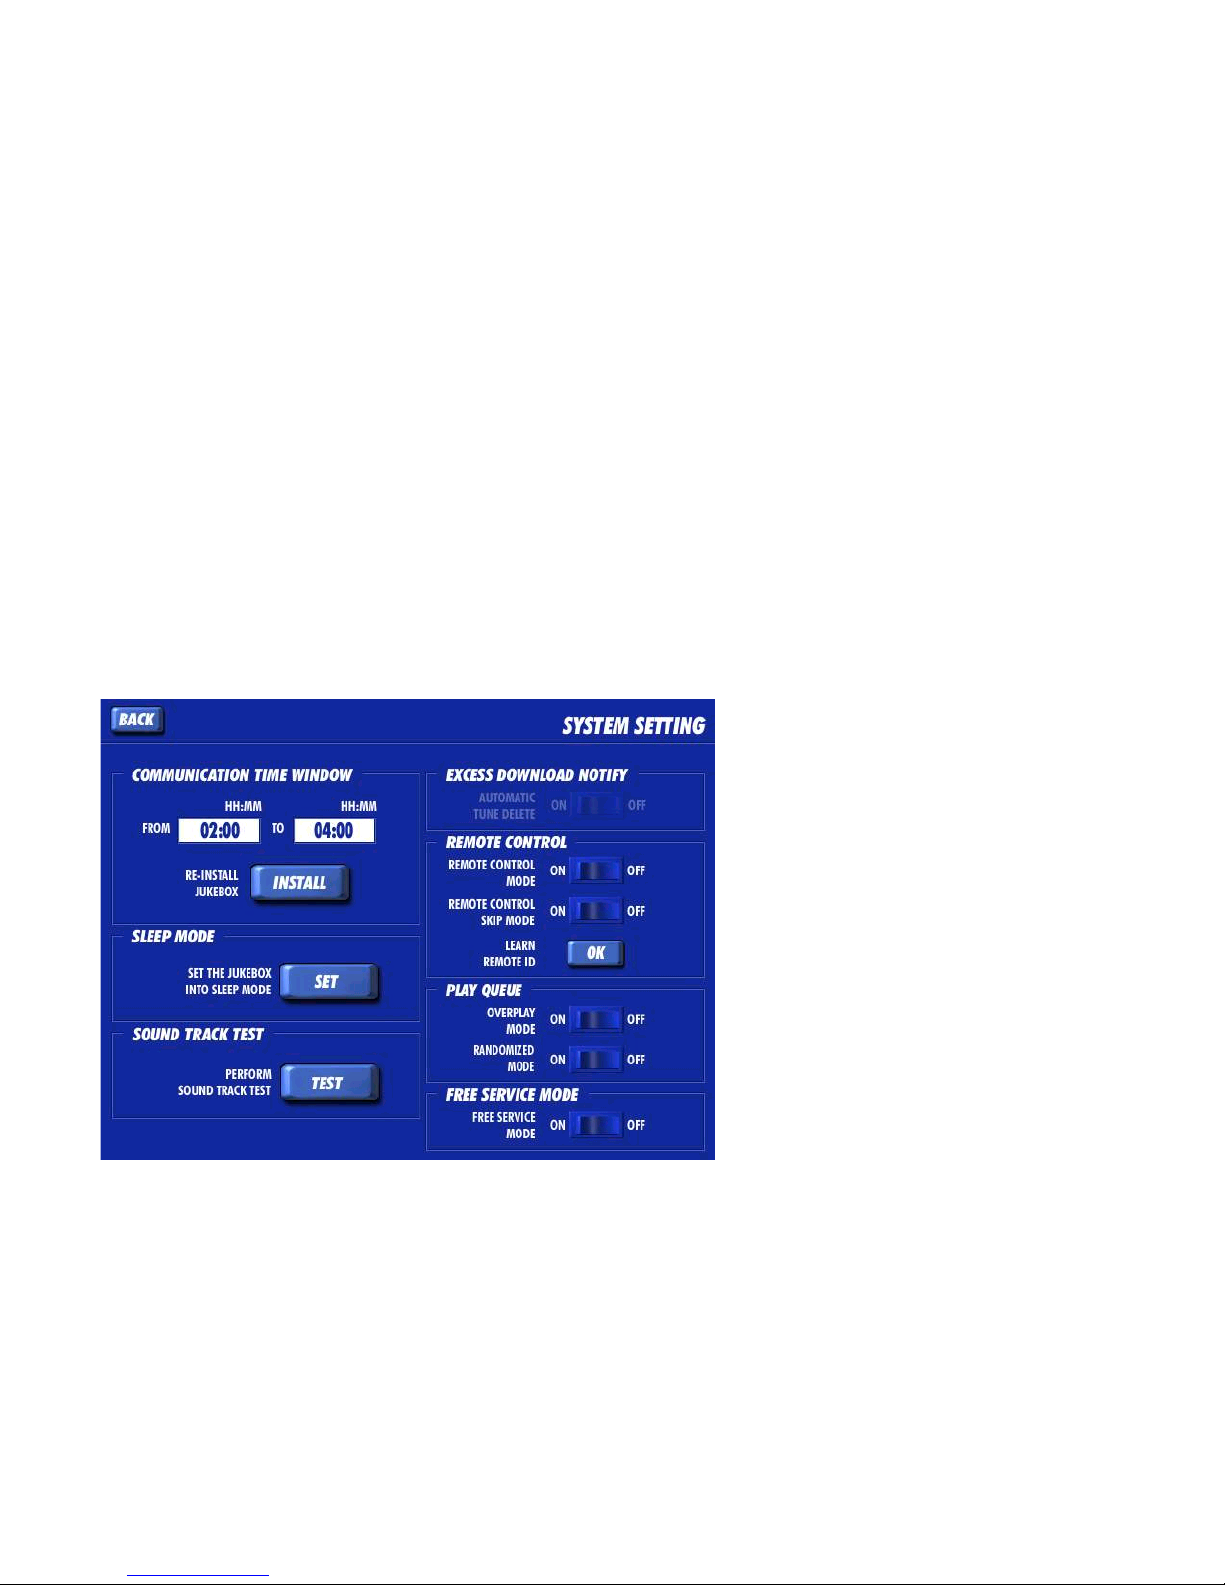
1. On the Operator Interface, open the System Setting screen.
2. In the
3. Next to
REMOTE CONTROL box, set REMOTE CONTROL MODE on.
LEARN REMOTE ID, touch OK.
4. Watch the display. When prompted, press any key on the remote control. The display will return to the System Settings
screen.
5. To allow the remote control to skip a song that is playing (Z button), turn on
6. Touch
BACK to return to the Operator menu.
7. Test the remote by raising and lowering the jukebox volume as it is playing.
REMOTE CONTROL SKIP MODE.
2 of 5
Page 3
For NextGen (Gen 2)
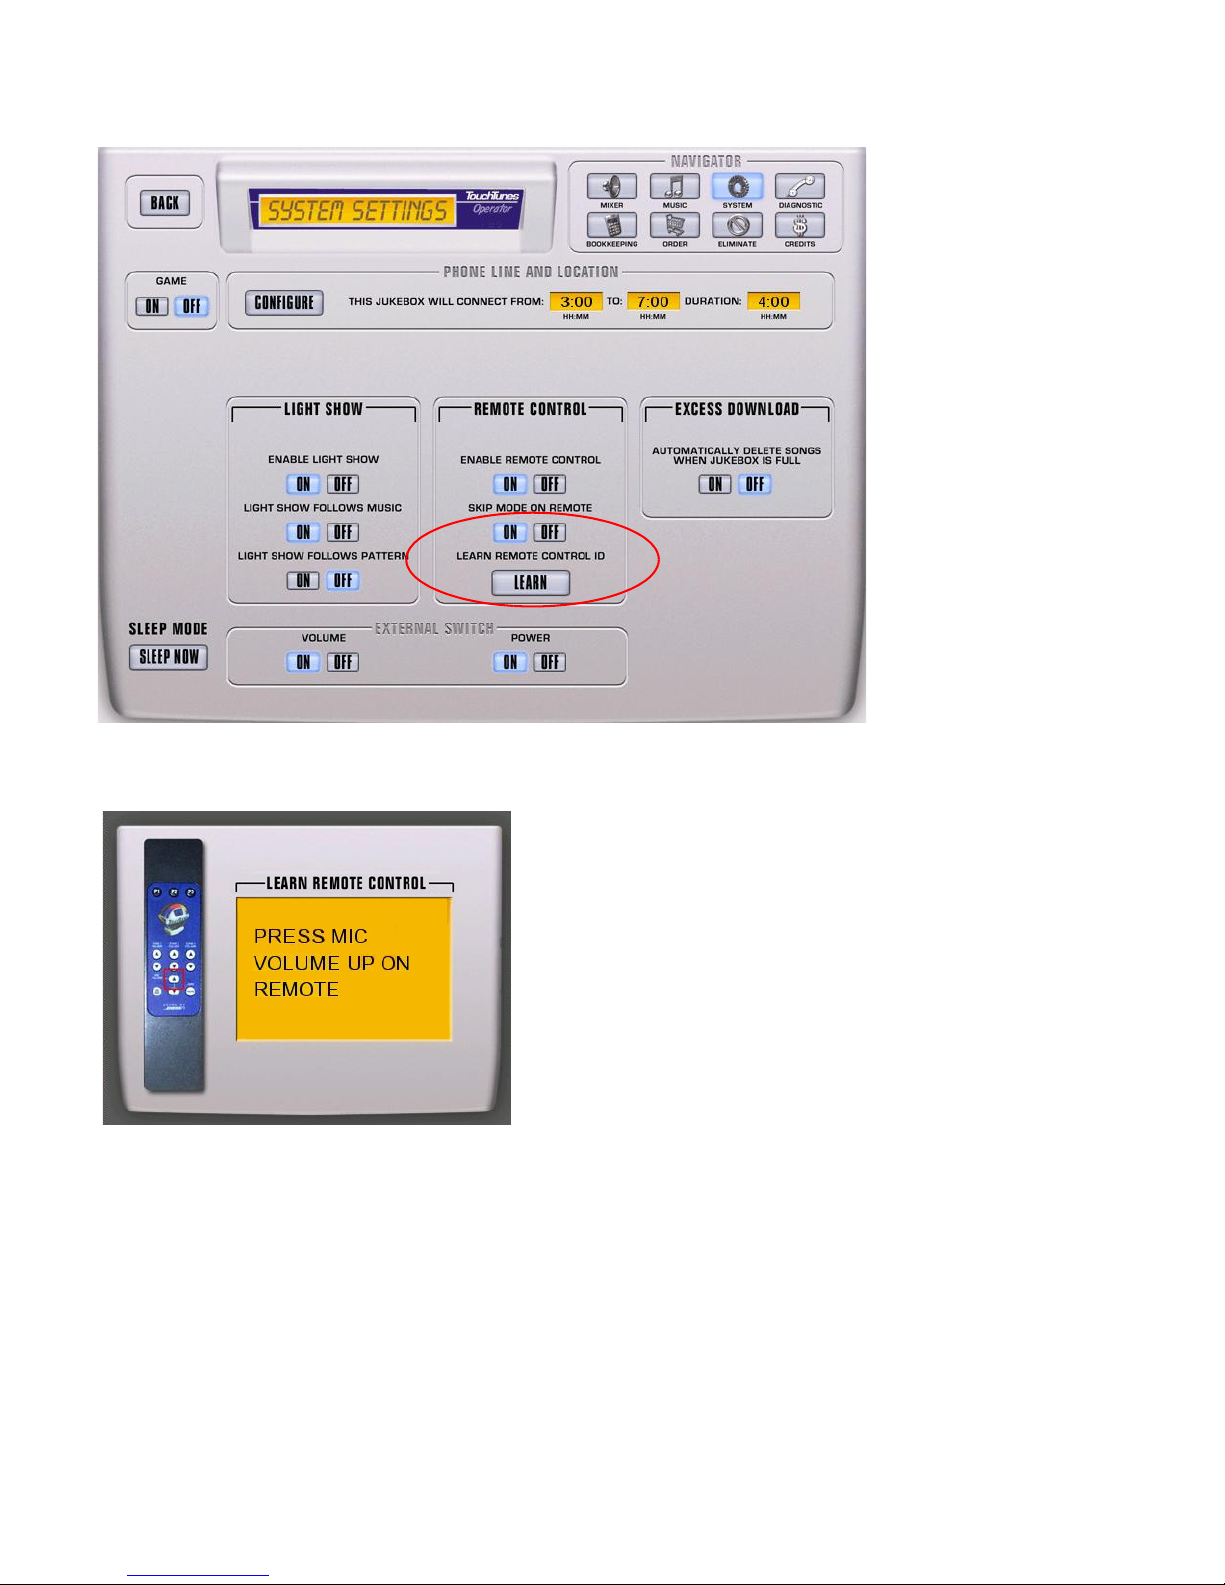
1. On the Operator Interface, open the System Settings screen.
The System Settings screen displays.
2. In the REMOTE CONTROL area, press the LEARN button.
3. Watch the display. When prompted, press the MIC VOL UP key on the remote control.
The display will show a success message and return to the Options screen.
4. Test the remote by raising and lowering the jukebox volume as it is playing.
3 of 5
Page 4
For Gen 3
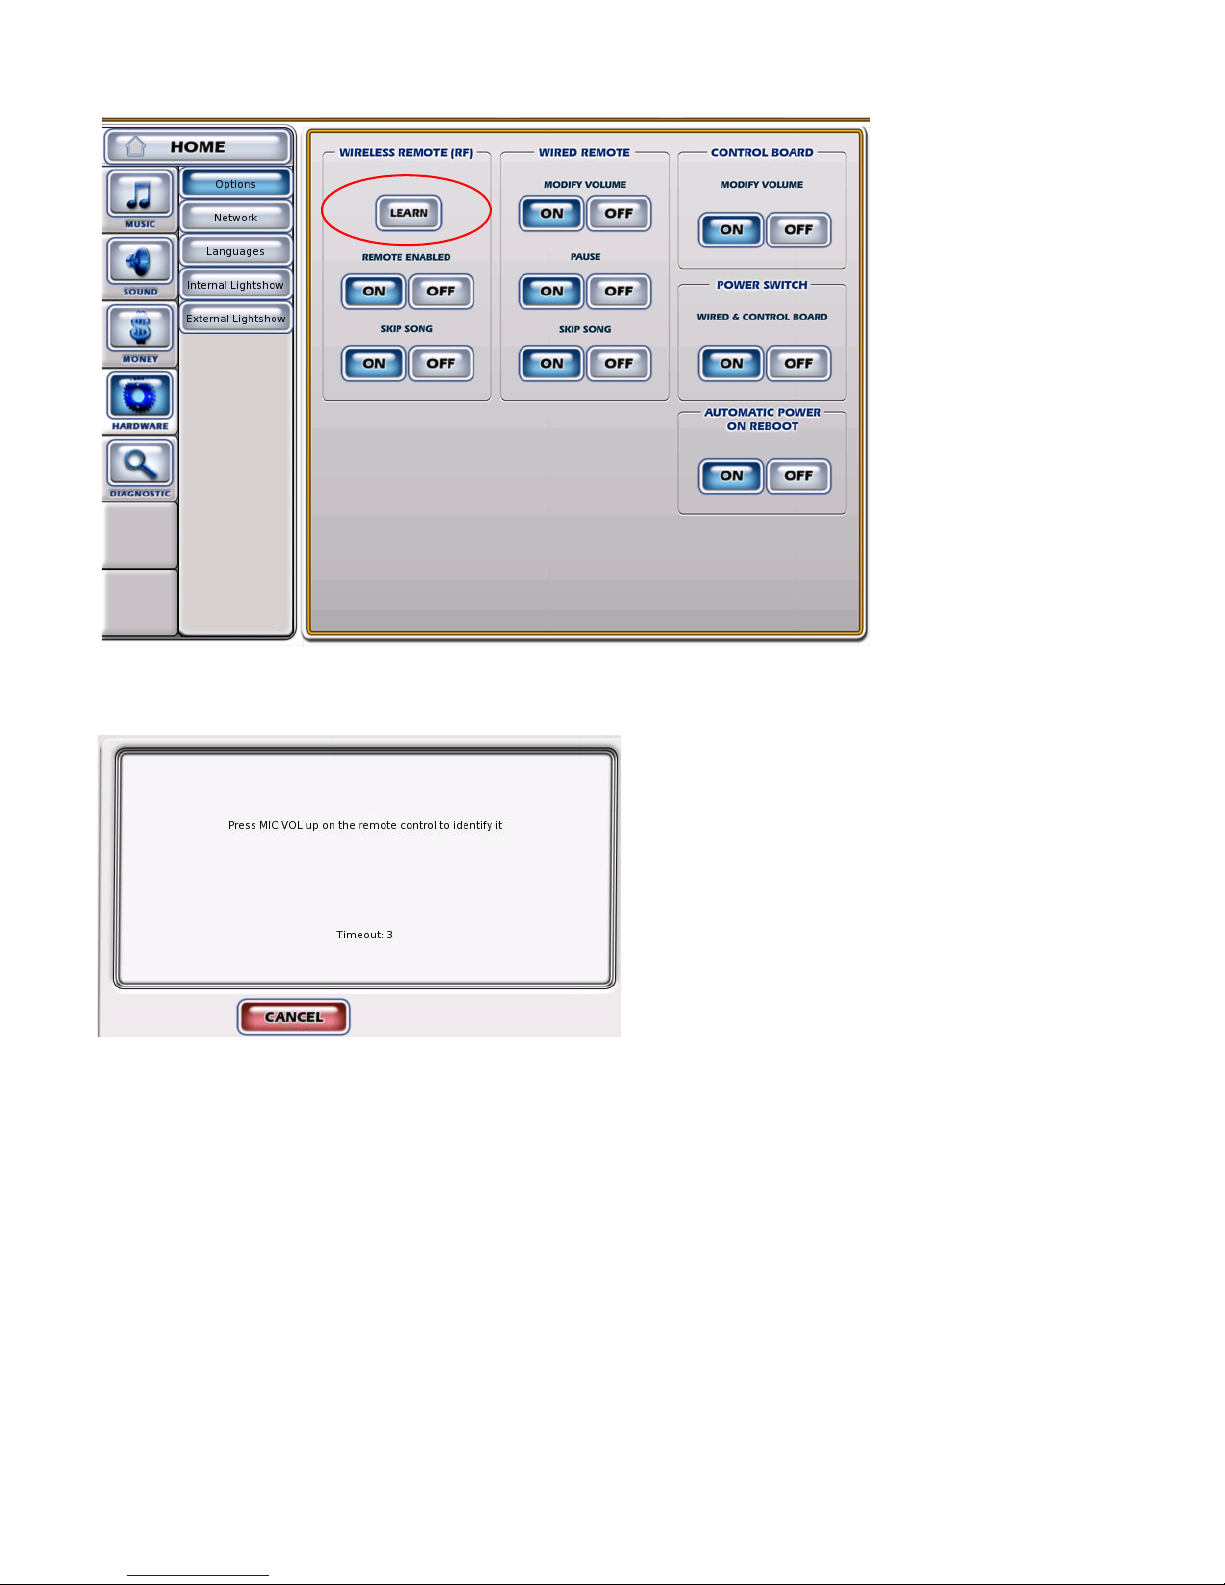
1. On the Operator Interface, open the Hardware Options screen.
2. Press the LEARN button.
3. Watch the display. When prompted, press the MIC VOL UP key on the remote control.
The display will show a success message and return to the Options screen.
4. Test the remote by raising and lowering the jukebox volume as it is playing.
4 of 5
Page 5
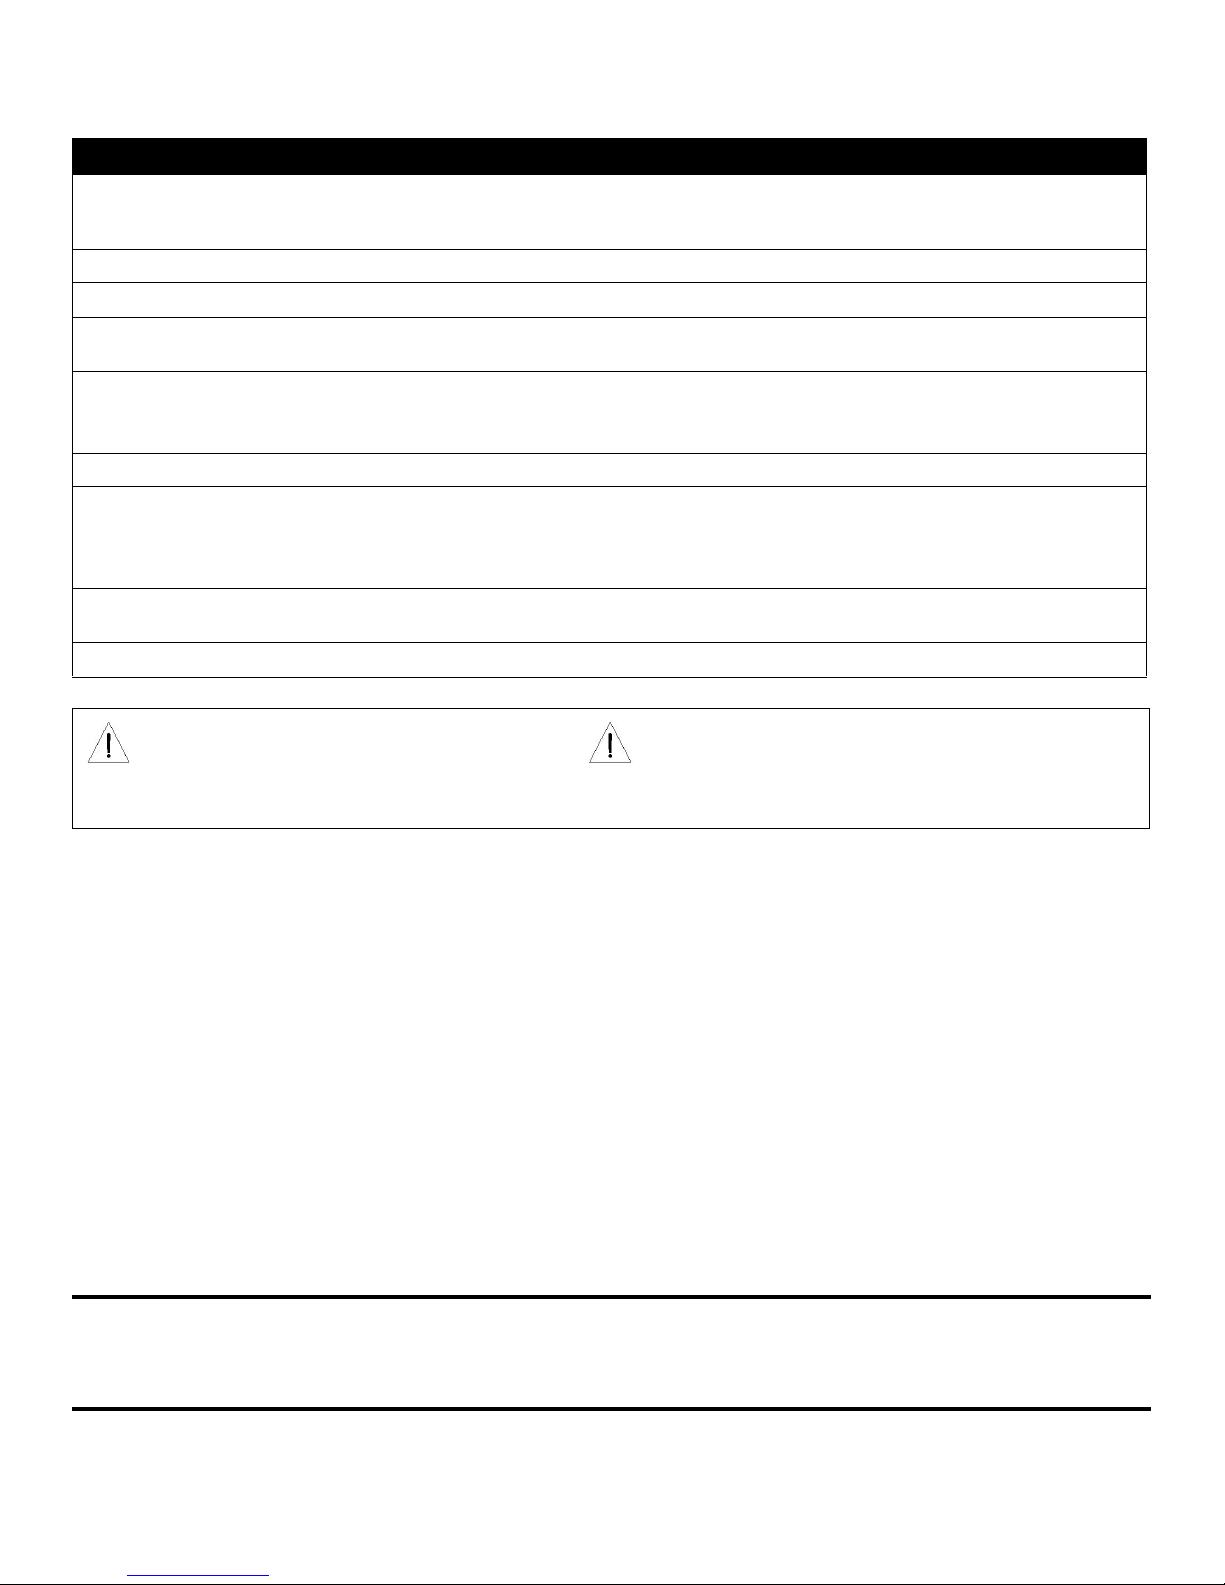
Key assignments and functionality
The keys on the remote are pre-programmed for the following functions.
Key Function
Power Press to turn the jukebox monitor and audio subsystem on or off. The jukebox computer
remains on. Equivalent to pressing the Night Mode button on the jukebox (not available on all
models).
Pause Pauses the jukebox.
Numeric keys Used to program the remote and for future use.
MIC VOL Raises and lowers the volume of the microphone within the limits set on the Mixer Settings
screen.
P1 Give promotional credit: Press and release this button to add a credit to the jukebox. Credits are
deducted from the promotional credit count.
The promotional credit feature is enabled/disabled on the Credit Settings screen.
P2 For future use.
P3/Skip Skip song: Quickly press and release this button to stop playing the current song and
immediately skip forward to the next song in the queue. The skip song feature is enabled/
disabled on the System Settings screen.
Flush play queue: Press and hold this button for four seconds to flush the entire play queue.
VOLUME ZONE 1, 2, 3 Raises and lowers the volume of the selected zone within the limits set on the Sound Mixer
screen.
F1, F2, F3, F4 For future use.
CAUTION: Do not use or store the remote near
any heat sources, such as radiators, heat
CAUTION: Dispose of used batteries in accordance with
the regulations in your area. Do not incinerate.
registers, stoves, or other apparatus (including
amplifiers) that produce heat.
FCC Notice
This equipment has been tested and found to comply with limits for a Class B digital device, pursuant to Part 15 of the FCC
rules. These limits are designed to provide reasonable protection against harmful interference in a commercial environment.
This equipment generates, uses, and can radiate radio frequency energy and, if not installed and used in accordance with the
instruction manual, may cause harmful interference to radio communications. Operation of this equipment in a residential
area is likely to cause harmful interference in which case the user will be required to correct the interference at his own
expense.
Note: Unauthorized modification of the receiver or radio remote control could void the user's authority to operate this
equipment.
This product complies with the Canadian ICES-003 Class B specification.
TouchTunes Interactive Networks, Inc.
400 Sainte Croix Avenue, Suite 200 E
Montreal, Quebec,
Canada, H4N 3L4
TouchTunes Interactive Networks, Inc.
3455 Salt Creek Lane, Suite 100
Arlington Heights, IL 60005
USA
Technical Support
847-353-1954
www.touchtunes.com
Copyright © 2010 TouchTunes Interactive Networks
5 of 5
 Loading...