

TouchMagix MotionMagix MAGIXBOX Quick Start Manual
MAGIXBOX
TM
Quick Start Guide
MotionMagix
TM
by TouchMagix
MotionMagix
TM
by TouchMagix
TM
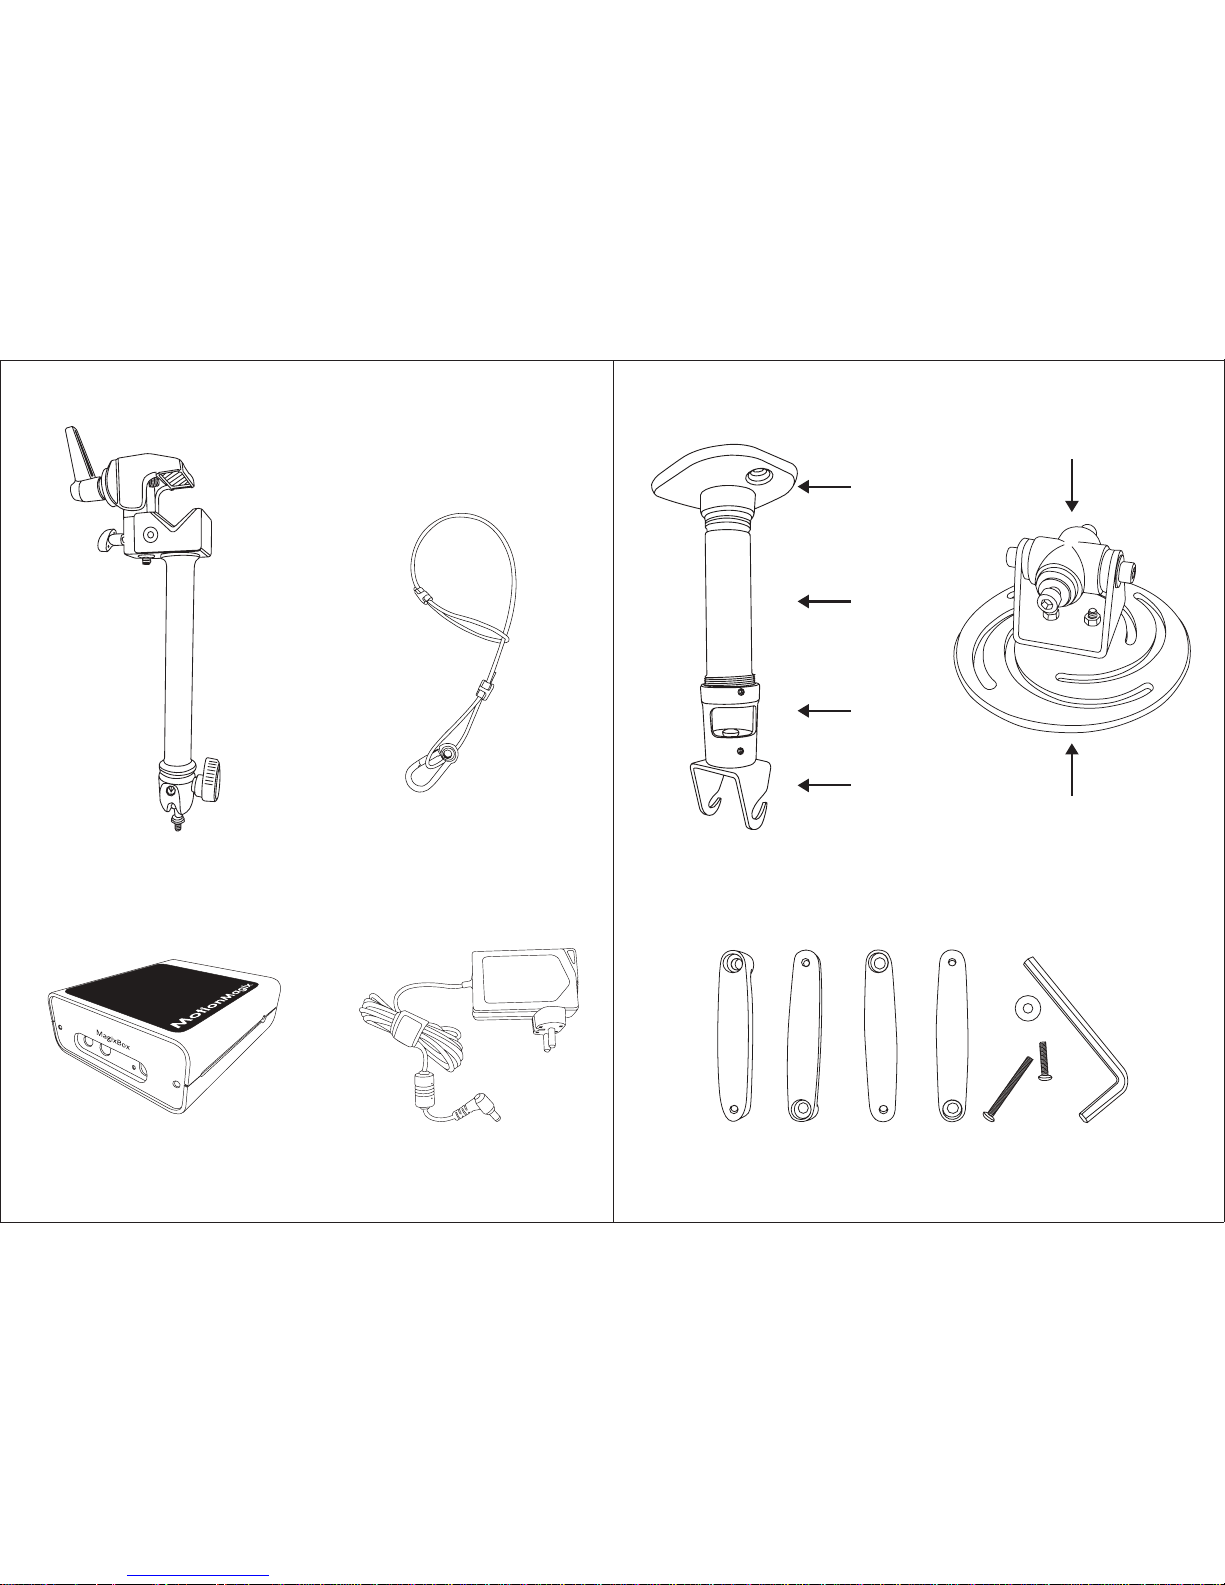
Four Arms, Screws and Allen Keys
Projector Mount Top
Ceiling
Plate
Extendable
Rod
Connector
Piece
Middle
Piece
Projector Mount Bottom
Ankle
Universal Spider
MagixBox
Super clamp with ball socket
Adapter
Safety Cable
What’s in the box:
MagixBox
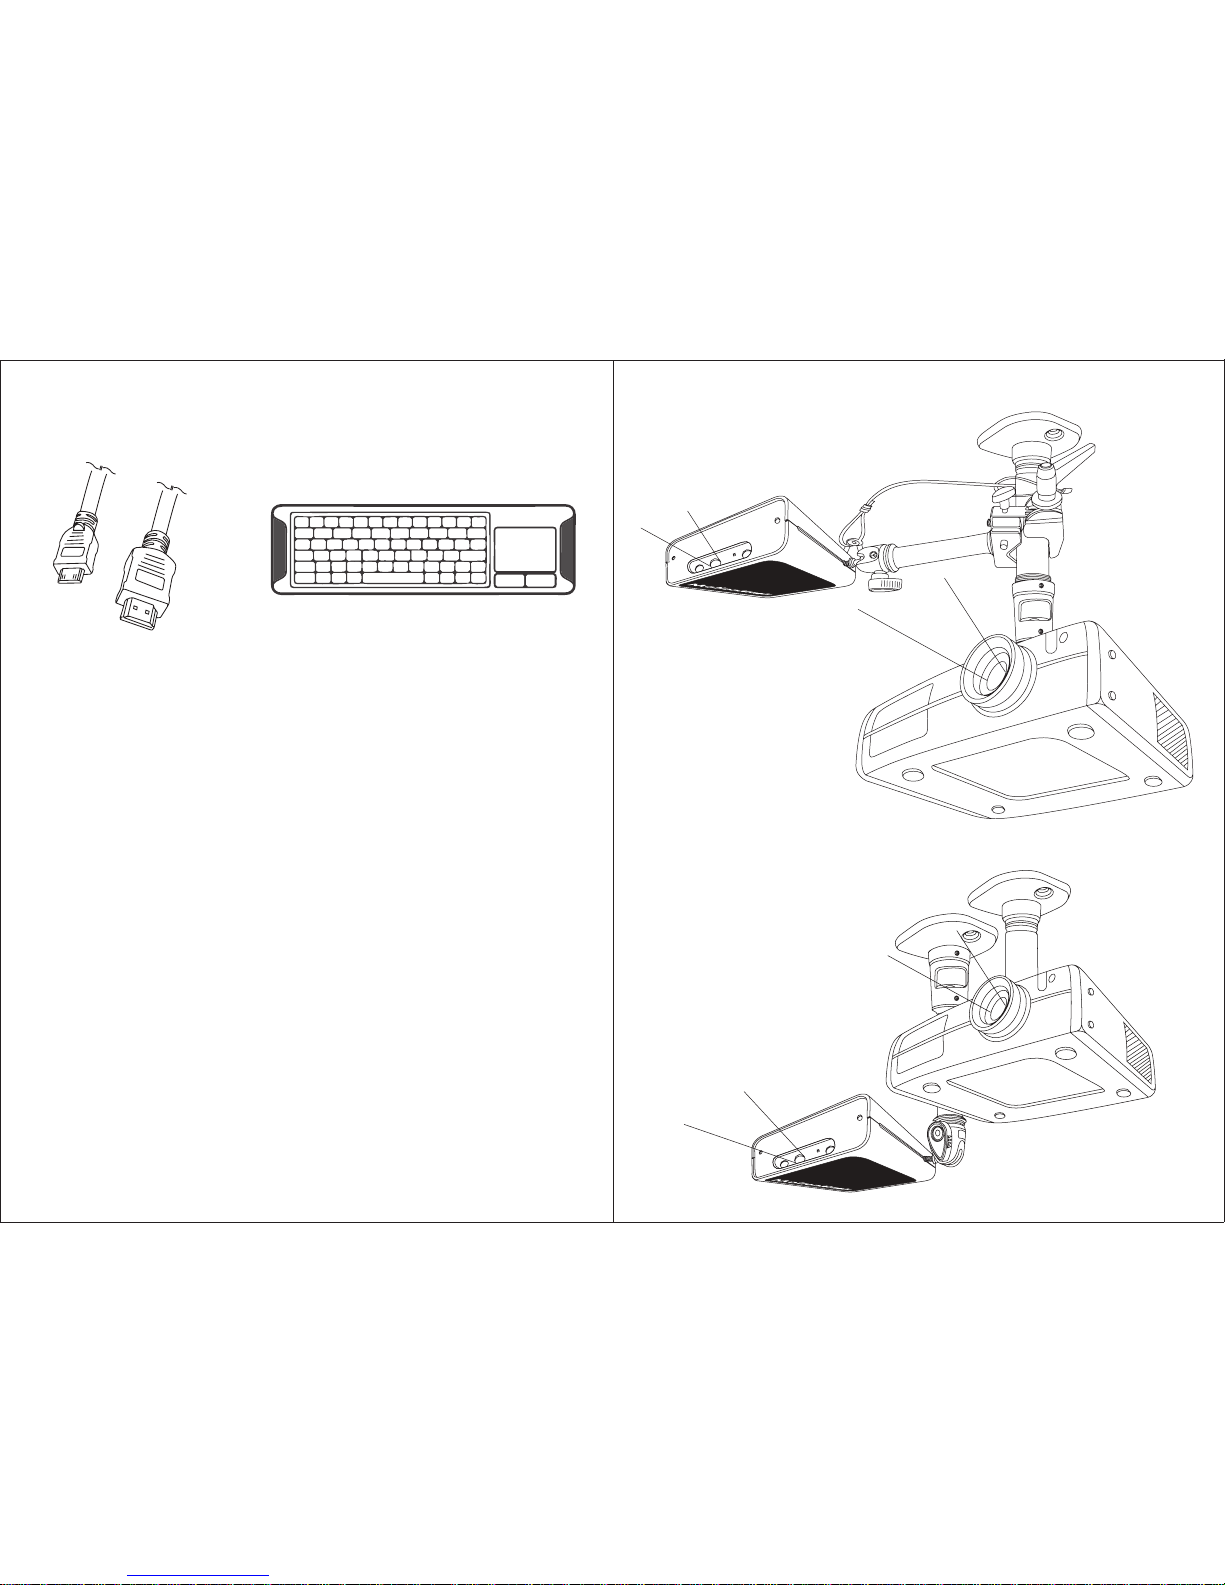
Interactive Wall Setup with Clamp
HDMI Cable
Assembly Instructions:
Wireless Keyboard
1. Select desired location on the ceiling and assemble
the projector mount on it.
2. Mount your projector.
3. Attach MagixBox on the projector mount using Super Clamp.
4. Connect HDMI cable from MagixBox to the projector.
5. Connect power adapter for MagixBox and Projector to
standard AC outlet.
6. Power on the projector and adjust the display area.
7. Start the MotionMagix software and follow given steps.
8. All set to go. Enjoy the MotionMagix experience.
MagixBox
Interactive Wall Setup with separate Projector mount
 Loading...