

touch bionics i-limb digits User Manual

i-limbTM digits
User Manual
Part number: MA01063: Issue No. 1, December 2012
This document provides information for i-limb digits users and should be used in conjunction with
advice from a qualied clinical team with experience of i-limb digits.
This symbol signies important information and is used throughout the manual.
Refer to www.touchbionics.com to ensure the latest copy of this document.
Part number: MA01063: Issue No. 1, December 2012
2

Table of Contents
1 i-limb digits 1.1 Product Description
1.2 Know Your Prosthesis
1.3 Wristband
2 Socket Interface 2.1 Socket Interface and Electrodes
2.2 Battery
2.3 Battery Charging
3 biosim 3.1 biosim Overview
3.2 biosim Connecting
3.3 Navigating biosim
3.3.1 Features
3.3.2 Training
3.3.3 Hand Health Check
3.3.4 Exit
4 i-limb digits Coverings 4.1 Cover Options
5 Support Information 5.1 Troubleshooting
5.2 Warnings and Precautions
6 User Information 6.1 User Details
7 Appendix 7.1 Technical Information
7.2 Component Compatibility
7.3 Warranty
Part number: MA01063: Issue No. 1, December 2012
3 of 27

1.0 i-limb digits
1.1 Product Description
i-limb digits is a customized prosthetic device designed to
t and function with your residual hand. i-limb digits is a tool
to enhance function for individuals with partial hand loss or
deciency.
Each digit in the system has its own motor, which allows the
i-limb digits to take the shape of whatever object is being
held. This also allows you to stop a digit or multiple digits from
moving by putting pressure against the digit to stop its motion.
Additionally, different grasp patterns can then be programmed
into the hand using a software system called biosim.
These various grasping patterns will be discussed in more
detail later in this manual as well as how the i-limb digits can
assist you in completing your daily activities, work tasks, and
even some hobbies.
Part number: MA01063: Issue No. 1, December 2012
4 of 27

1.2 Know Your Prosthesis
Your i-limb digits device is a mechanical device to assist
with everyday tasks. Although the device may look similar to a
natural hand, there are some things that a normal hand can do
that are not possible with the i-limb digits device.
To get the most out of the device do not use the i-limb digits
device where you would not use a natural hand. The i-limb
digits device will limit sensation and so you may not be aware
if the hand is being stressed by excessive weight, temperature
or moisture, or has been struck by an object that would cause
pain in a natural hand. A natural hand and forearm absorb
shock, the i-limb digits device is less able to do this. The
i-limb digits device will not dampen vibration as much as the
soft tissues of a natural hand.
1.3 Wristband
The i-limb digits Wristband has a circumference range of
155mm (6”) to 270mm (10.5”).
The i-limb digits Wristband contains the PCB and two
removable 3.7V batteries. It is connected to the main socket by
a exible sheath which protects the cabling.
The i-limb digits device will be damaged if the joints are
moved in a way in which they were not designed. Do not apply
forces to the side of the digits, or move the joints in directions
which they are not intended to move.
When carrying a bag or other object protect the hand by resting
the handle or strap toward the center of the hand and away
from the tips of the digits.
For further information contact your prosthetist.
Your device should be treated like any electrical device, it is
important to avoid contact with water or moisture. Wipe your
prosthesis dry quickly if there is any contact (review Warnings
and Precautions for a comprehensive overview).
76mm
(3”)
95mm (3.75”)
45mm
(1.75”)
58mm (2.3”)
Maximum
Minimum
Part number: MA01063: Issue No. 1, December 2012
2.0 Socket Interface
2.1 Socket Interface and Electrodes
Your i-limb digits device has been designed with a socket
interface which has been specially created by your prosthetist
team. The socket interface should t comfortably and directly to
your residual hand. Some minor redness on your residual hand
may be normal when you rst remove the device. However if
this redness does not go away within 20 minutes or if you have
any skin breakdown from your device, contact your prosthetist
directly.
As part of the tting process, your prosthetist selected the best
2.2 Battery
i-limb digits is powered by 800mAh, 3.7 Volt batteries which
have been specically designed to meet the power requirements
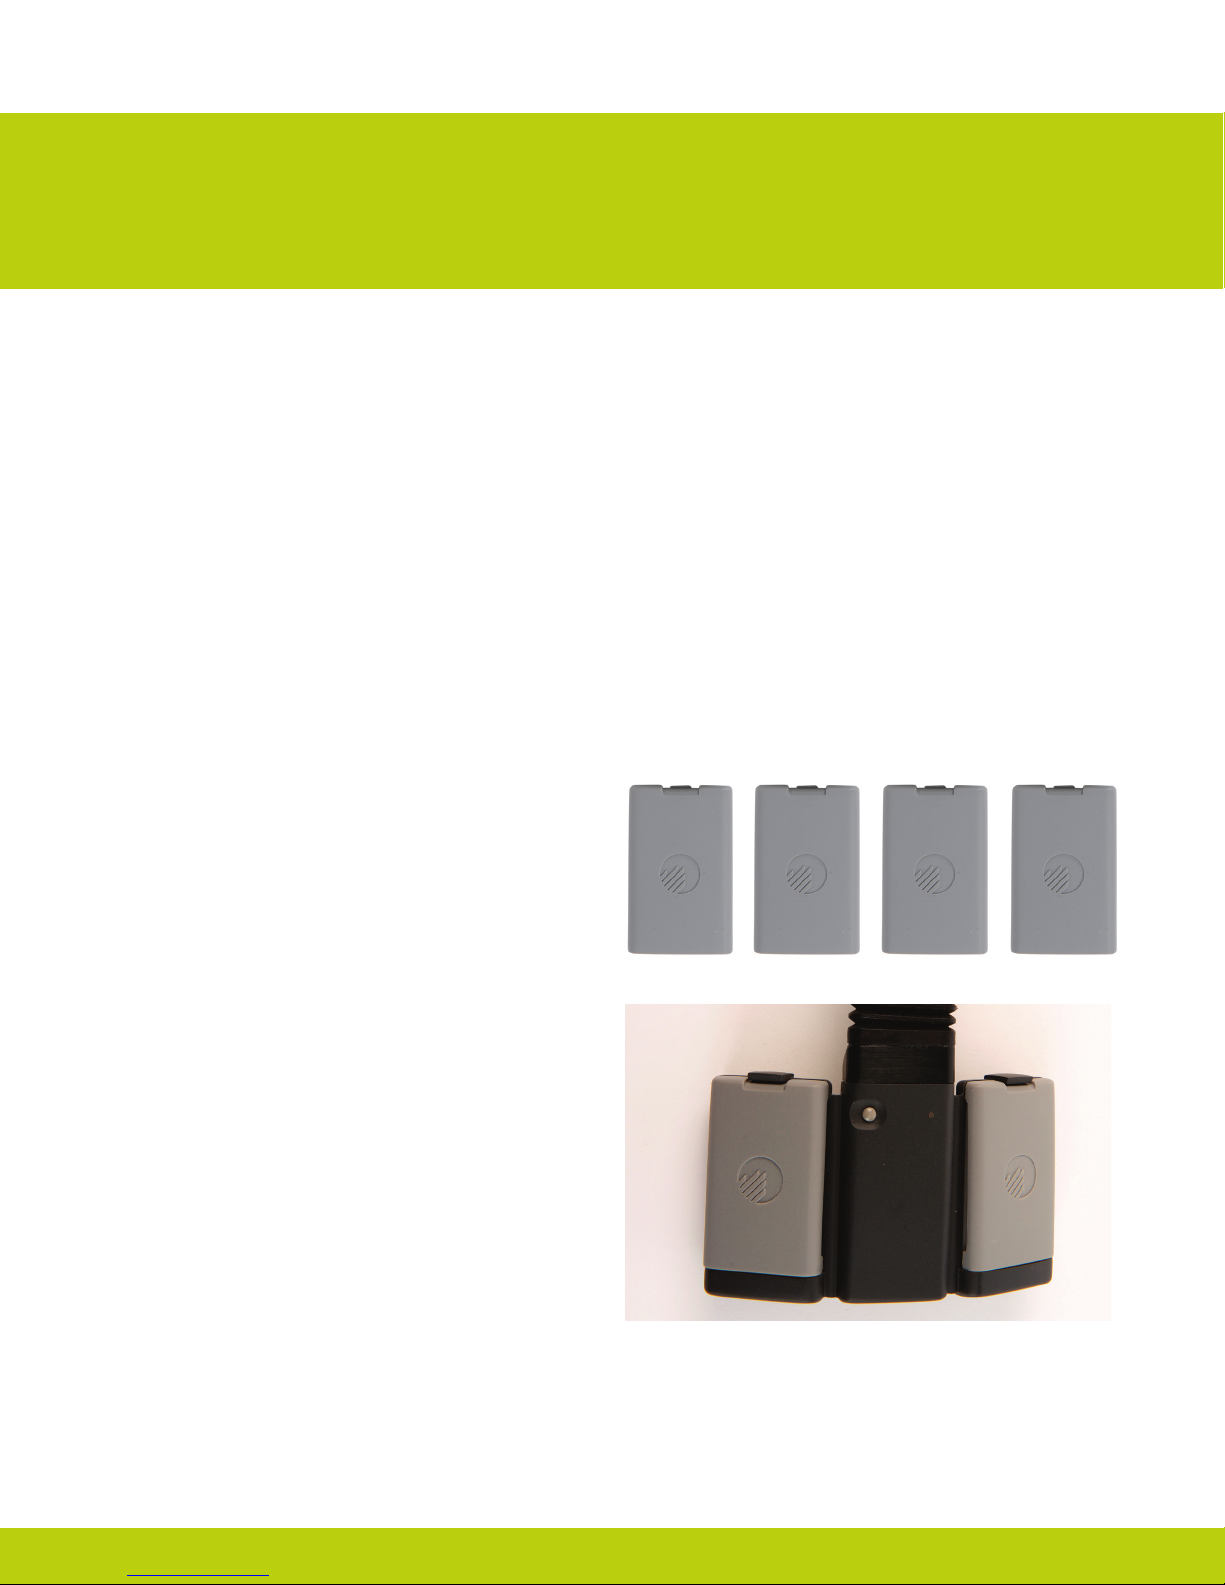
of i-limb digits devices. Four batteries are provided, two for
the Wristband and two spares.
Two 3.7v batteries will be needed with the Wristband (the
Wristand will not work with only one battery).
method for you to provide control of your device. This tells the
processor (the brains of the hand) whether you want the hand
to open or close. One option is an electrode. Electrodes pick
up on the electrical activity that your body gives off when you
contract a muscle. Another option is called a Force Sensing
Resistor (FSR). These allow you to put pressure against a
pad inside your device using movement from your residual
hand. While gaining good control may take time and practice,
your method of input should not cause pain. Talk with your
prosthetist if you do not understand how your input control is
working or if it is causing discomfort.
Part number: MA01063: Issue No. 1, December 2012
6 of 27
The Wristband is switched on and off via the grey button on the
central panel. The light sequence is as follows:
On : Red light appears for 8 seconds
Off : Red light brief ashes
Low power: Green light ashes continually when the charge
level falls below 5%
Batteries are tted into the Wristband battery housing and
secured by the holding catch at the wrist side of the Wristband.
Release the holding catch to remove the battery.
The batteries provided are designed to work specically
with the Touch Bionics i-limb digits Wristband and are
not to be used with any other device.
Only Touch Bionics batteries are approved for use
with i-limb digits, use of alternative batteries will
invalidate the warranty.
Part number: MA01063: Issue No. 1, December 2012
2.3 Battery Charging
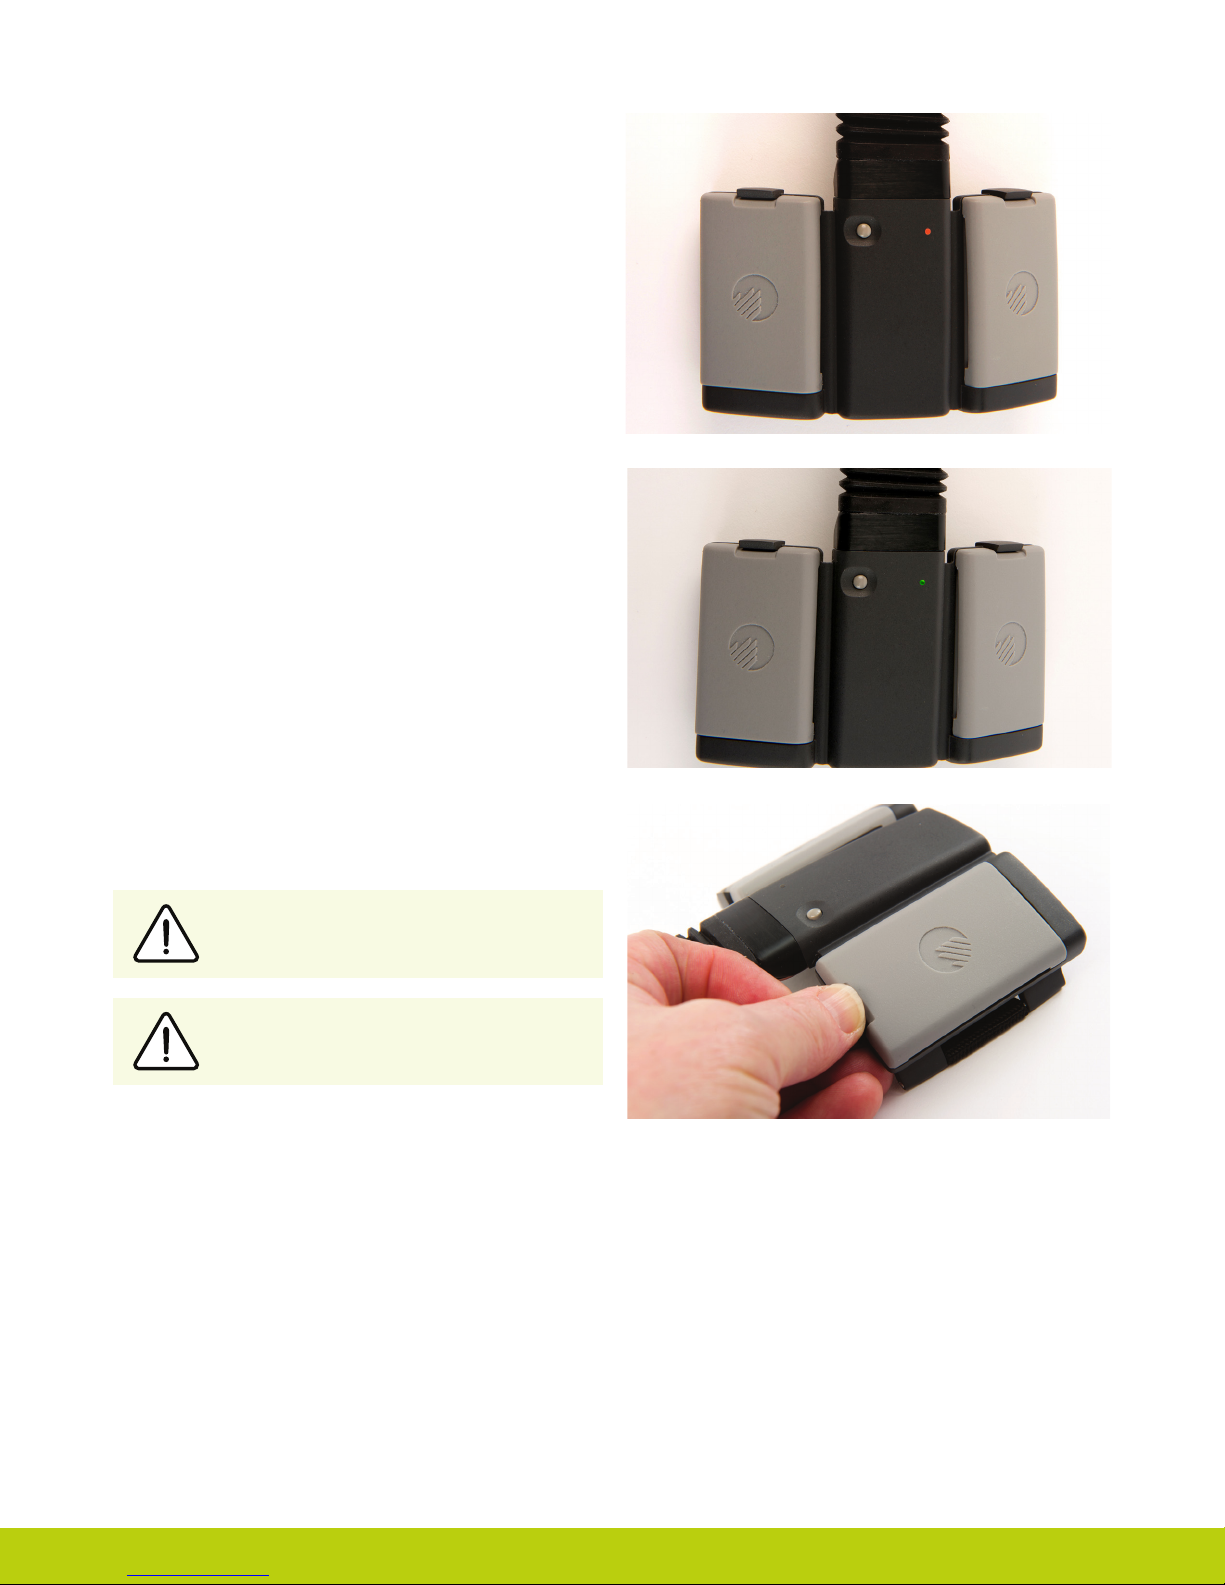
Batteries for i-limb digits should only be charged using the
Touch Bionics powerpack and battery charger supplied (UK,
European and US style plugs are available). Place the batteries
in the charger as illustrated. Insert the charger lead from the
battery powerpack into the charge port. Insert the charger into
the power outlet.
Charging time from full discharge is approximately 2 hours.
A continual blue light indicates that the battery is charging.
When the battery is fully charged the light will go out.
If a continual red light appears for more than 10 minutes then
the battery should be replaced.
Only use the plug to disconnect the charger, never
pull the cable to remove the lead.
Part number: MA01063: Issue No. 1, December 2012
8 of 27
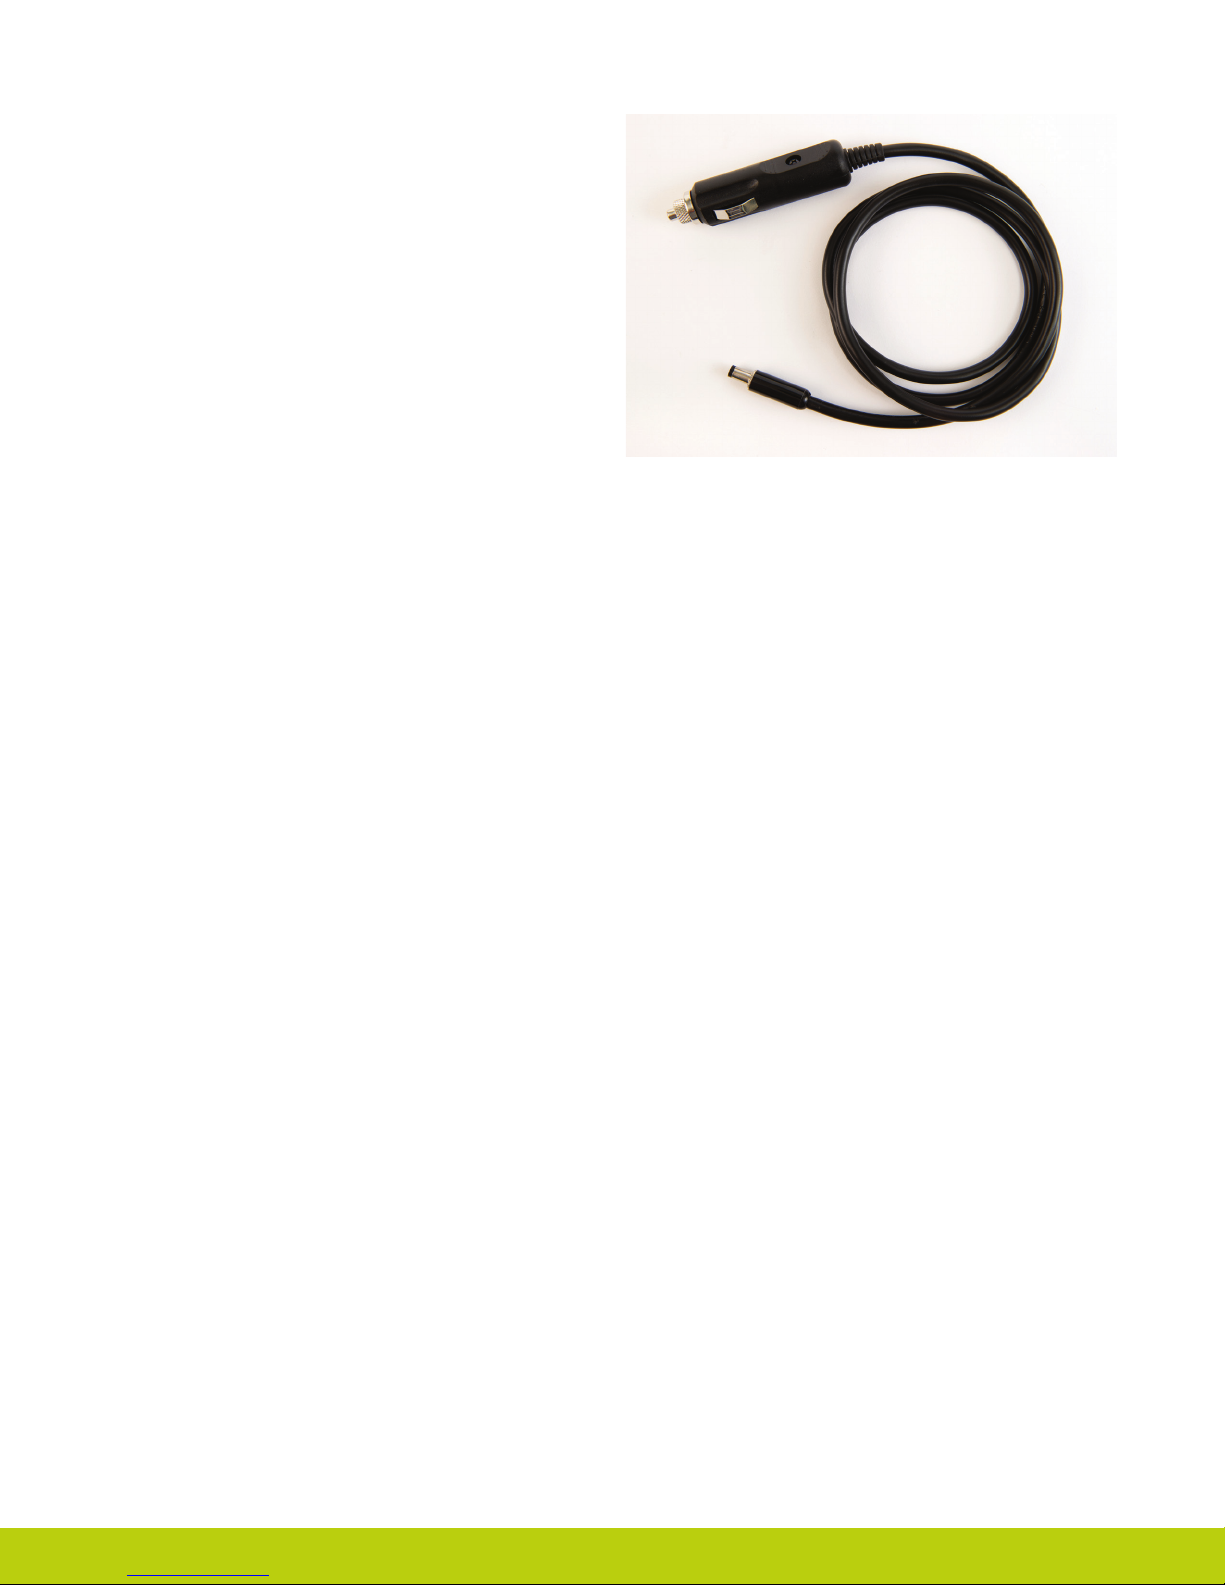
As an alternative to charging directly from domestic power, a
car charger (PL069380A) is also available.
2.4 Storage and Maintenance
Always turn off the hand when not in use.
Aim to charge the battery each day after use.
Replace the battery every 12 months.
Part number: MA01063: Issue No. 1, December 2012
 Loading...