

Page 1
UNIFIT ROUGH-IN
AX
INSTALLATION INSTRUCTION
MATERIALS REQUIRED:
1. Mounting bolts
2. Wax ring/seal
TOOLS NEEDED:
1. Tape measure
2. Screwdriver
3. Putty knife
Power drill, ⁄”drill bit (for
4.
woo
d floor
masonry drill bit
installation) &
(for
⁄
”
masonry/tile floor installation)
- for mounting block
5. Pencil
PACKAGE CONTENTS:
1. Rough-In - 1
2. Mounting screw w/washer - 2
3. Anchor - 2
4. Installation template - 1
5. Installation instruction - 1
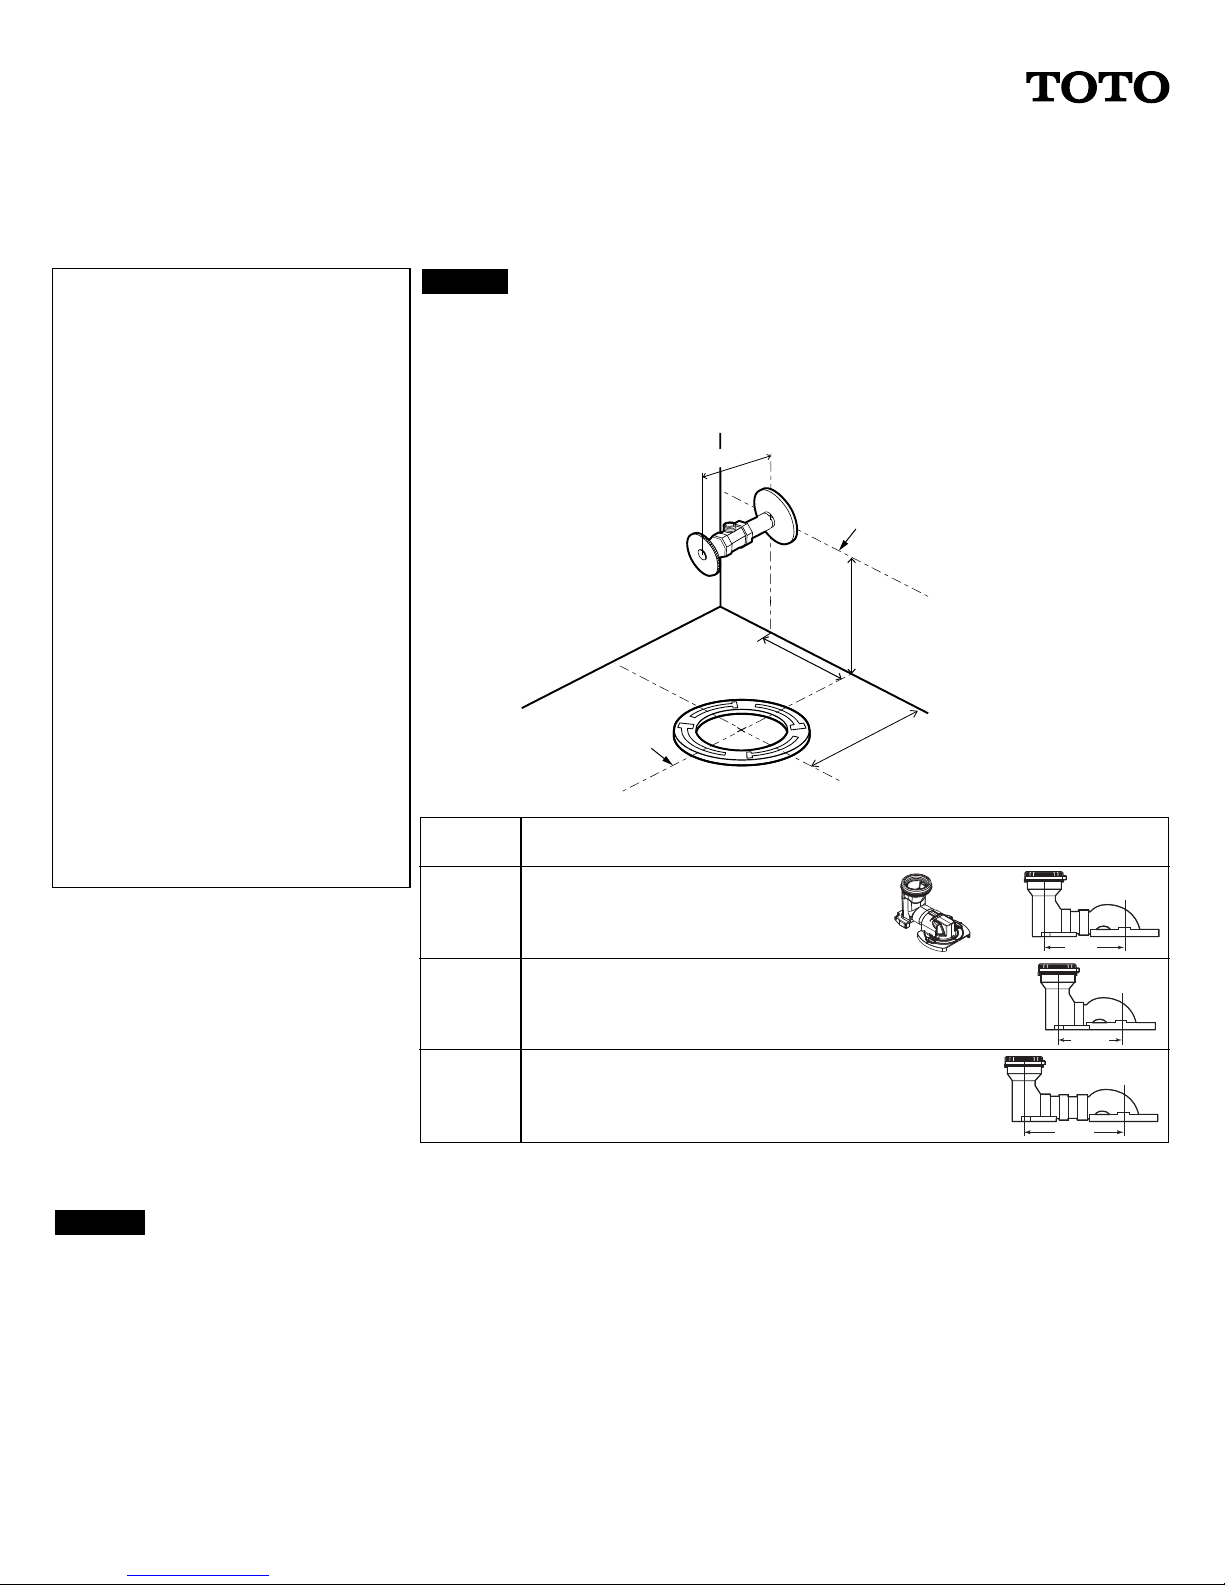
STEP 1 PIPING CHECK AND ROUGH-IN
1. In order for your new TOTO toilet to fit correctly, check the
dimensions in the Table below. Rough-In (“RI”): Distance between
finished wall to the center of the toilet outlet.
2. Remove existing toilet (if necessary)
Finished wall
4¾”
(120mm)
Centerline of stop valve
4¾”
(120mm)
“RI”
Centerline of ange
“RI”
3½” (90mm) M
Rough-In Part Number
12 inch
TSU08W.12
(supplied)
6"
TSU08W.10
10 inch
(optional - must be purchased separately)
4"
TSU08W.14
14 inch
(optional - must be purchased separately)
8"
Please make sure that you have the correct outlet connection part.
STEP 2 INSTALLING MOUNTING BOLTS
1. Cover/block the drain opening to prevent items from falling into the drain and prevent smell from
coming up.
2. Clean any debris out of the closet flange.
3. Install the mounting bolts (either provided by the original closet flange or new wax ring) into the slots
of the flange. Insert the bolts into the slot with its head down and threaded shank pointed upward.
™
PEOPLE- FIRST INNOVATION
totousa.com |
1155 Southern Road
Morrow, GA 30260
P: 888-295-8134
F: 770-282-8701
PAGE 1 of 2
Rev. 10/17
0GU185
Page 2
STEP 3 INSTALLATION TEMPLATE INSTRUCTION
Follow the Installation Template instruction that comes
with the Installation Template.
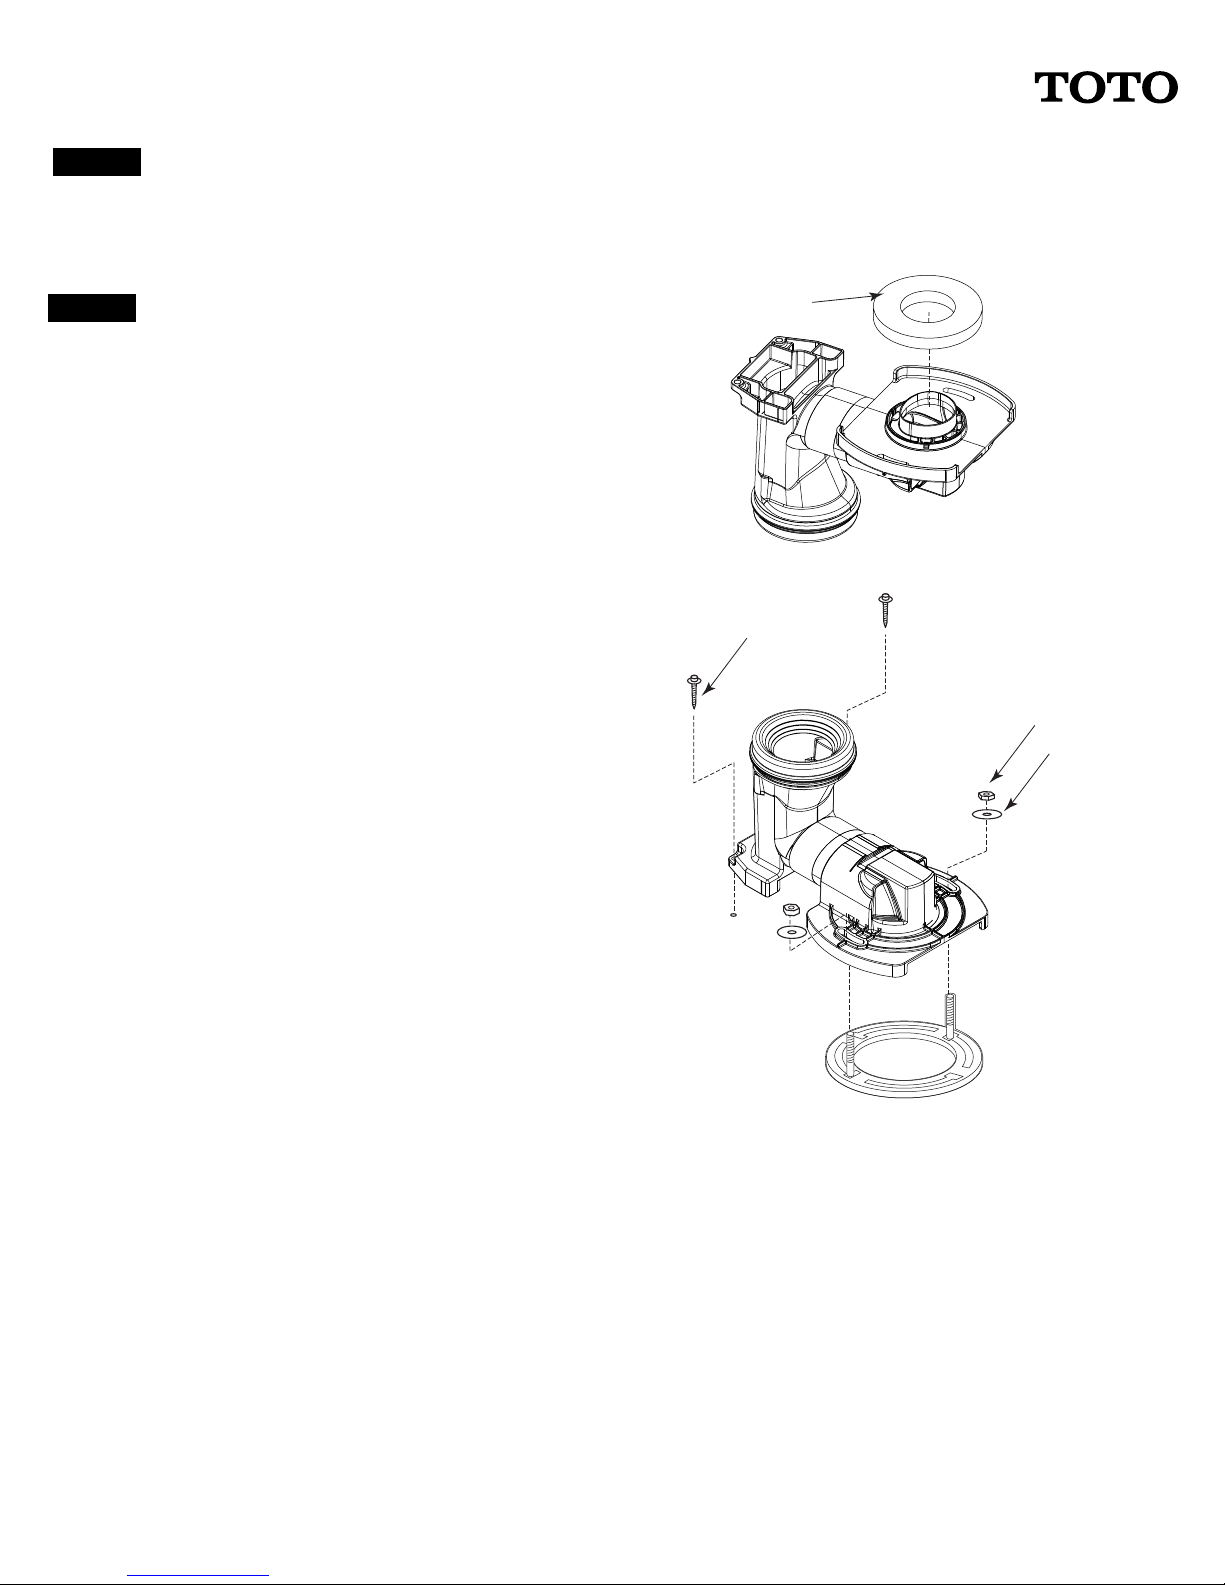
STEP 4 INSTALLING THE ROUGH-IN
1. Flip the rough-in upside down and firmly press a new
wax seal onto the circular recess around the
outlet opening.
2. Turn the rough-in upright and lower it into position
over closet flange. With the unit properly aligned, press
down firmly to set wax seal.
NOTICE: DO NOT move the outlet connection after
the wax seal is set. If this notice is disregarded, you
will have to discard the wax seal and replace with a
new one.
3. Insert washers and thread nuts onto mounting bolts on
the closet flange and hand tighten. Then tighten bolts
an additional ½ turn.
4. Secure back side of the rough-in to the floor using the
2 screws provided by the rough-in.
5. Make sure to secure the two mounting blocks to
the floor.
Wax seal
Screw
Nut
Washer
™
PEOPLE- FIRST INNOVATION
totousa.com |
1155 Southern Road
Morrow, GA 30260
P: 888-295-8134
F: 770-282-8701
PAGE 2 of 2
Rev. 10/17
0GU185
 Loading...