

Page 1

INSTALLATION GUIDE
FLOTATION TUB
WITH RECLINE COMFORT
<INSTALLATION INSTRUCTIONS>
●Cautions and warnings 2
●Included parts
●Required tools
●
6
4
5
●Dimension drawings
●Installation procedures 8,9
●
Installing the bathtub
●Finishing 15,20
10,16
To service installers
Please explain the FLOTATION TUB functions and
operation to the customers.
Please install according to all local and applicable
codes.
7
Page 2

Cautions and warnings
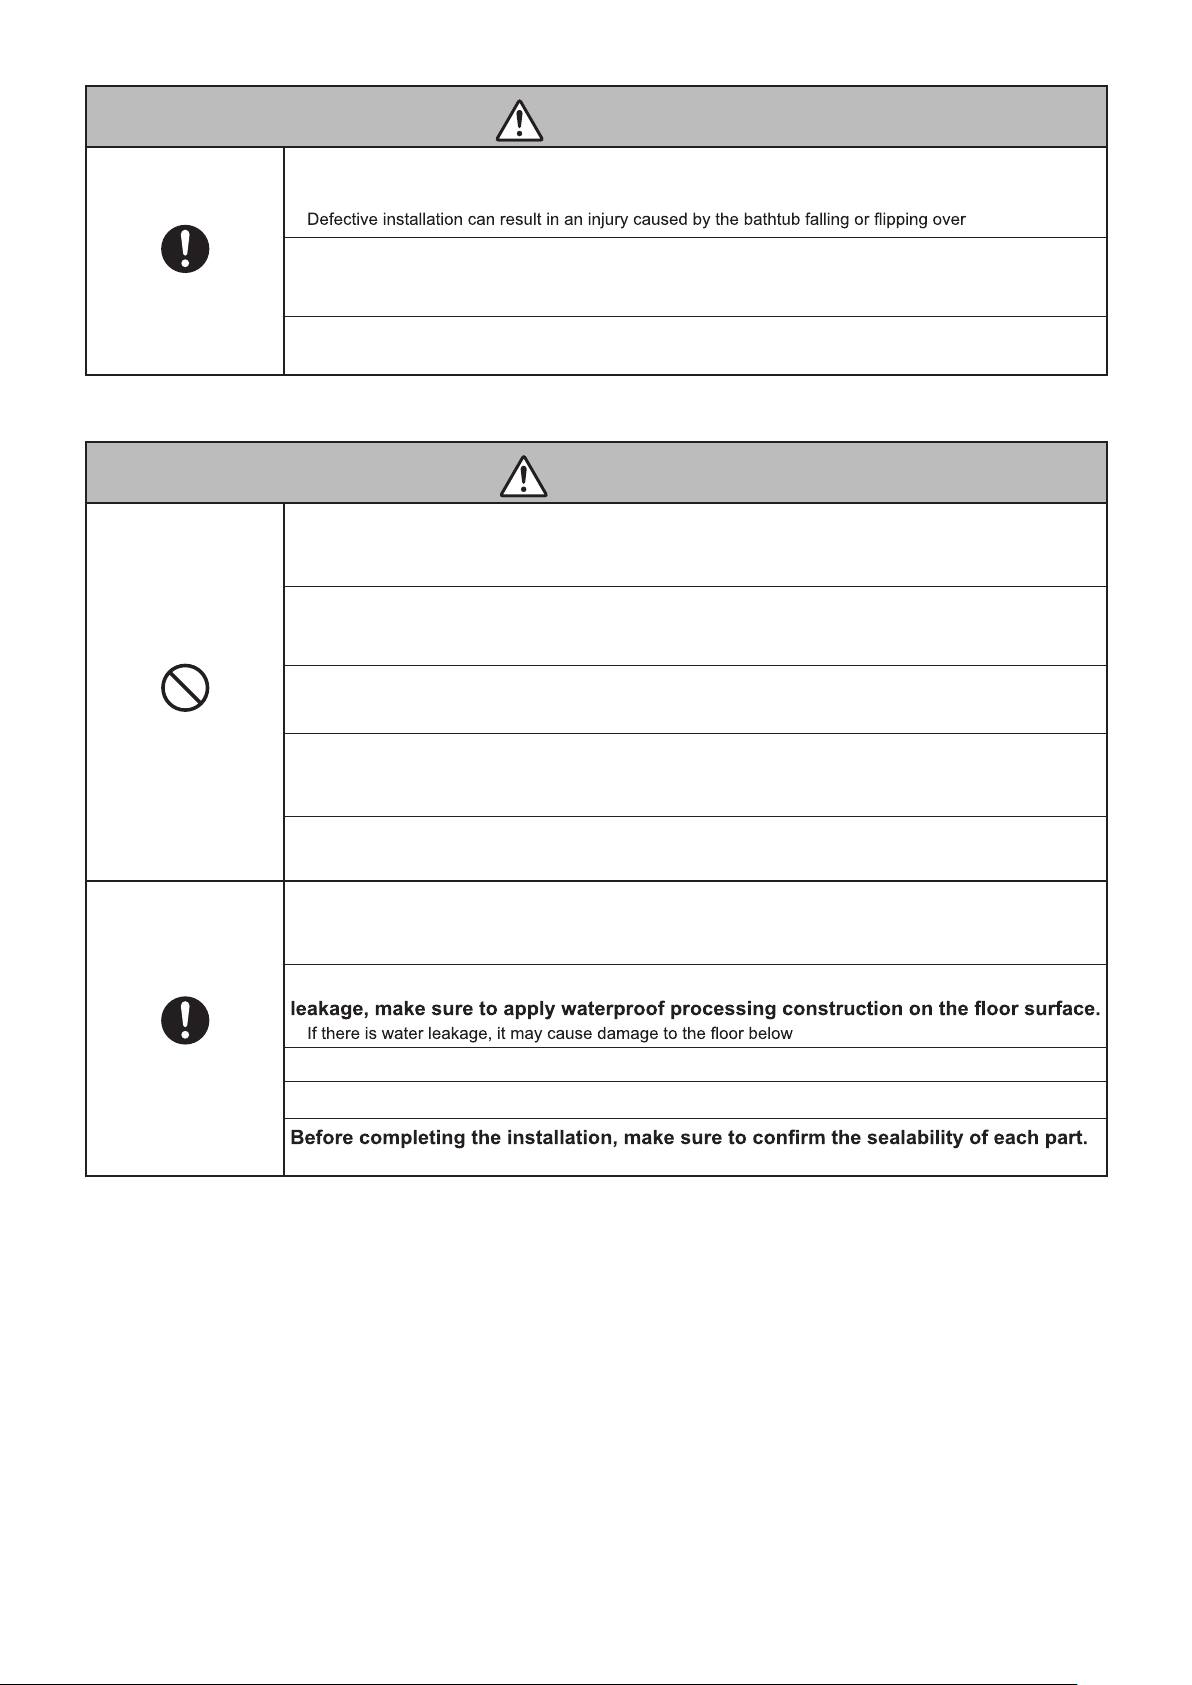
When this appears next to a topic, this indicates that misoperation could result in death
WARNING
CAUTION
● The following symbols are used to classify and explain instructions that must be followed.
Symbol example Meaning of symbol
or serious injury.
When this appears next to a topic, this indicates that misoperation may result in injury
or physical damage.
This symbol indicates something that is "Prohibited".
This symbol indicates something that is "Required".
WARNING
Do not stand on bathtub while working.
● Doing so could cause a fall or injury or damage the components.
Prohibited
Always observe
Only install the supplied parts or directed parts, and do not apply any changes to
them.
● Especially make sure not to change the dimensions of the product.
Make sure to follow the installation guide for installation.
Incomplete installation can result in a leakage that could wet and cause damage to household property.
●
Make sure to follow the procedures for the drainage piping attachment.
● Defective construction can result in water leakage that could wet and cause damage to household
property.
After unpacking, swiftly dispose of any unnecessary packing materials.
● The wood frame, nails, cardboard boxes, vinyl bags, or sealing straps may cause an injury.
If children play with the packaging materials there is a risk of suffocation or other accidents.
Attach the faucet water supply equipment to the bathtub.
2
Page 3
Always observe
Prohibited
WARNING
Make sure to install the bathtub according to the installation guide and in a stable
location.
●
Ensure that you have an ergonomic working position during transport and assembly.
● Take care at every stage that your move is safe. Ensure that you have assistance to avoid risk of accident
or injury.
Observe the current local prevention of accidents and building regulations as well as
sanitary and environmental protection rules during installation.
CAUTION
Do not place a stepladder inside the bathtub or place heavy objects on the edge the
bathtub.
● This may cause damage.
Do not drop or bump anything hard or heavy onto the bathtub.
● This may cause the bathtub to crack and result in an injury, or leakage that could wet and cause damage
to household property.
Keep sources of heat at a distance. Do not smoke.
● Doing so could cause damage.
Do not install the bathtub outdoors or in a location that is regularly exposed to
sunlight (such as a sun room).
● This may cause the bathtub to freeze and cause damage or discoloration.
.
Always observe
When delivering the bathtub, do not hold the hose or piping or bump anything hard
against it.
When opening the packaging, make sure that all of the supplied parts and the
bathtub itself are not damaged. If they are, do not use the damaged parts.
● Replace any damaged parts.
When installing the bathtub in a location that could result in damage due to water
● .
Remove the bathtub's protective sheet after the construction is completed.
Secure an area that enables proper space for the usage and maintenance of the bathtub.
● If water leakage is detected, remove the cause of the leakage.
SAVE THESE INSTRUCTIONS
3
Page 4
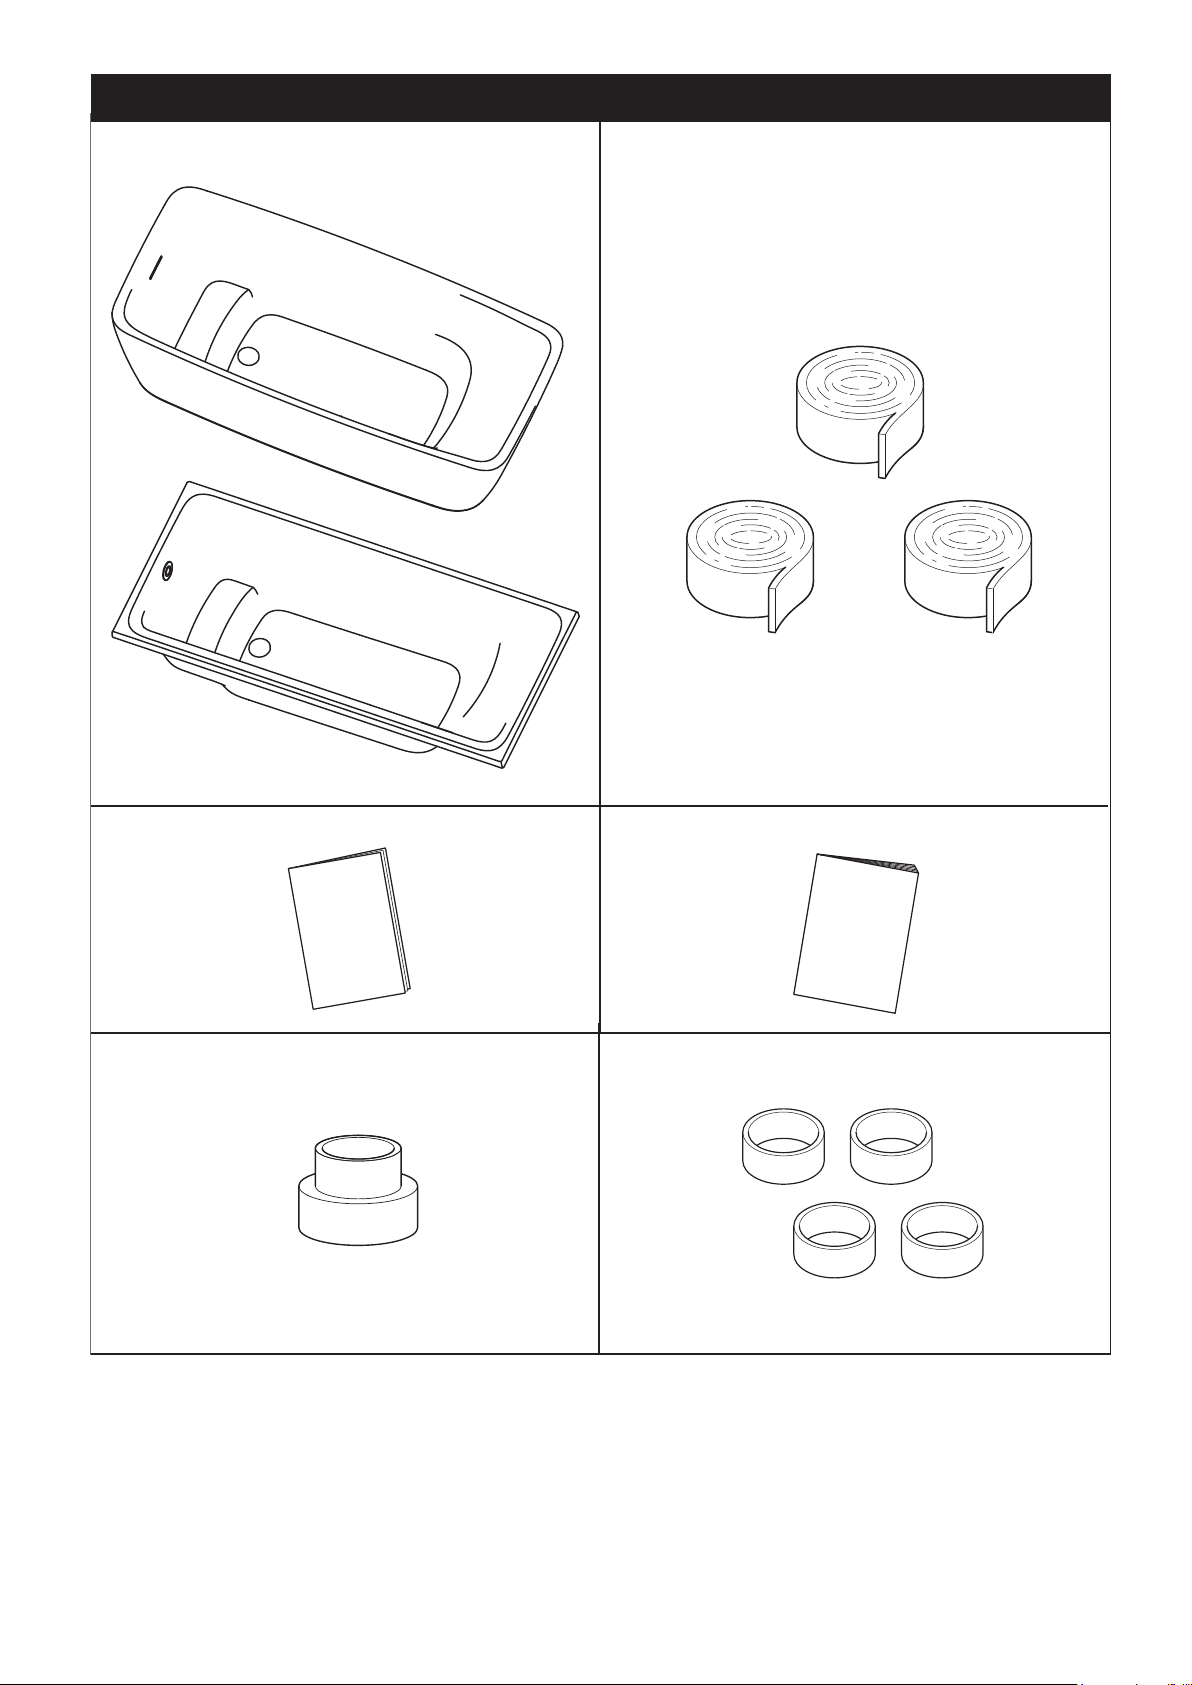
Included parts
: Bathtub : Polyethylene foamed sheet
A-1 A-2
: Instruction manual
A-3 A-4
Instruction
Manual
: Socket : Sleeve
A-5 A-6
(Only PJY1724PW)
: Installation guide
Installation
Guide
4
Page 5

Required tools
B-1 B-2
B-3
M12
B-5 B-6 B-7
PVC adhesive
Silicone
B-8
PVC primer
B-9
B-4
Water detection sheet
B-10
Made by OS&B Ltd:
ITD35/ITD5135 Island Tub Drain(shown)
Made by CG Air:
CG-DID Drop-in Drain
(Only PJY1724PW)
Soft cloth that will not
damage the bathtub
5
Page 6
Item
Specifications
PJY1724PW PPY1780PT
External dimensions
Bathtub depth
Capacity 67.5 gallons (255 L) 53.7 gallons (203 L)
Weight 212.5 pounds (96.4 kg) 169.7 pounds (77 kg)
Materials
Drainage method
Drain plug Push-operated drain plug Push-operated overf low button
66-15/16″(L) × 31-1/2″(W) × 22-1/4″(H) 66-15/16″(L) × 29-1/2″(W) × 22-1/16″(H)
(1700 mm (L) × 800 mm (W) × 565 mm (H)) (1700 mm (L) × 750 mm (W) × 560 mm (H))
17-11/16″ (450mm)
Composed of a transparent acrylic layer on
Artificial marble made of GFRP sandwich
structure
Normal drainage + Overflow dr
the surface,a colored layer mixed with
alumina,and the back side is composed of
GFRP and artlficial marble
ainage
Drainage rate
Overflow rate
19 gpm (72 L/min)
11 gpm (41 L/min)
21 gpm (81 L/min)
12 gpm (44 L/min)
6
Page 7
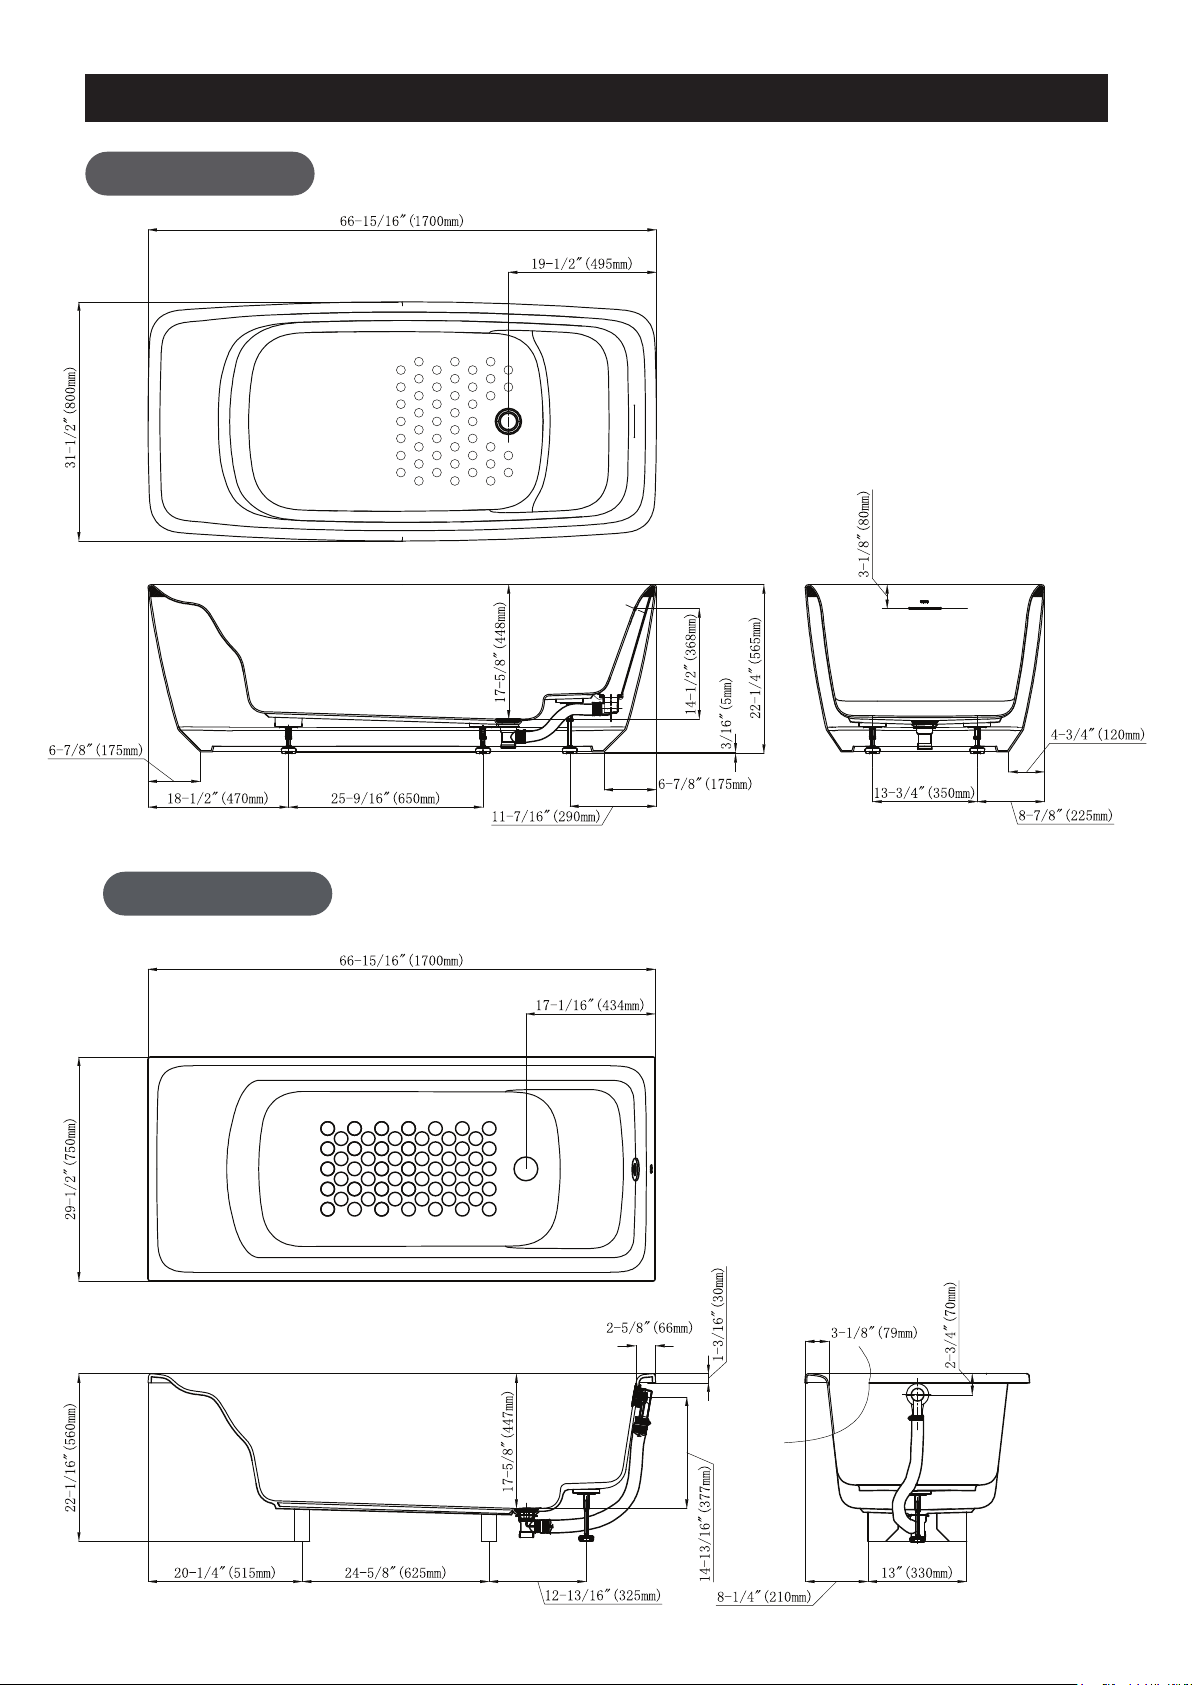
Dimension drawings
PJY1724PW
PPY1780PT
7
Page 8
Installation procedures for PJY1724PW
>>P.7 >>P.10
>>P.10 >>P.11
>>P.12
>>P.11
8
Page 9

Installation procedures for PPY1780PT
>>P.7 >>P.16
>>P.18 >>P.18
3/16”
(5mm)
13/16”
(20mm)
>>P.19
9
Page 10

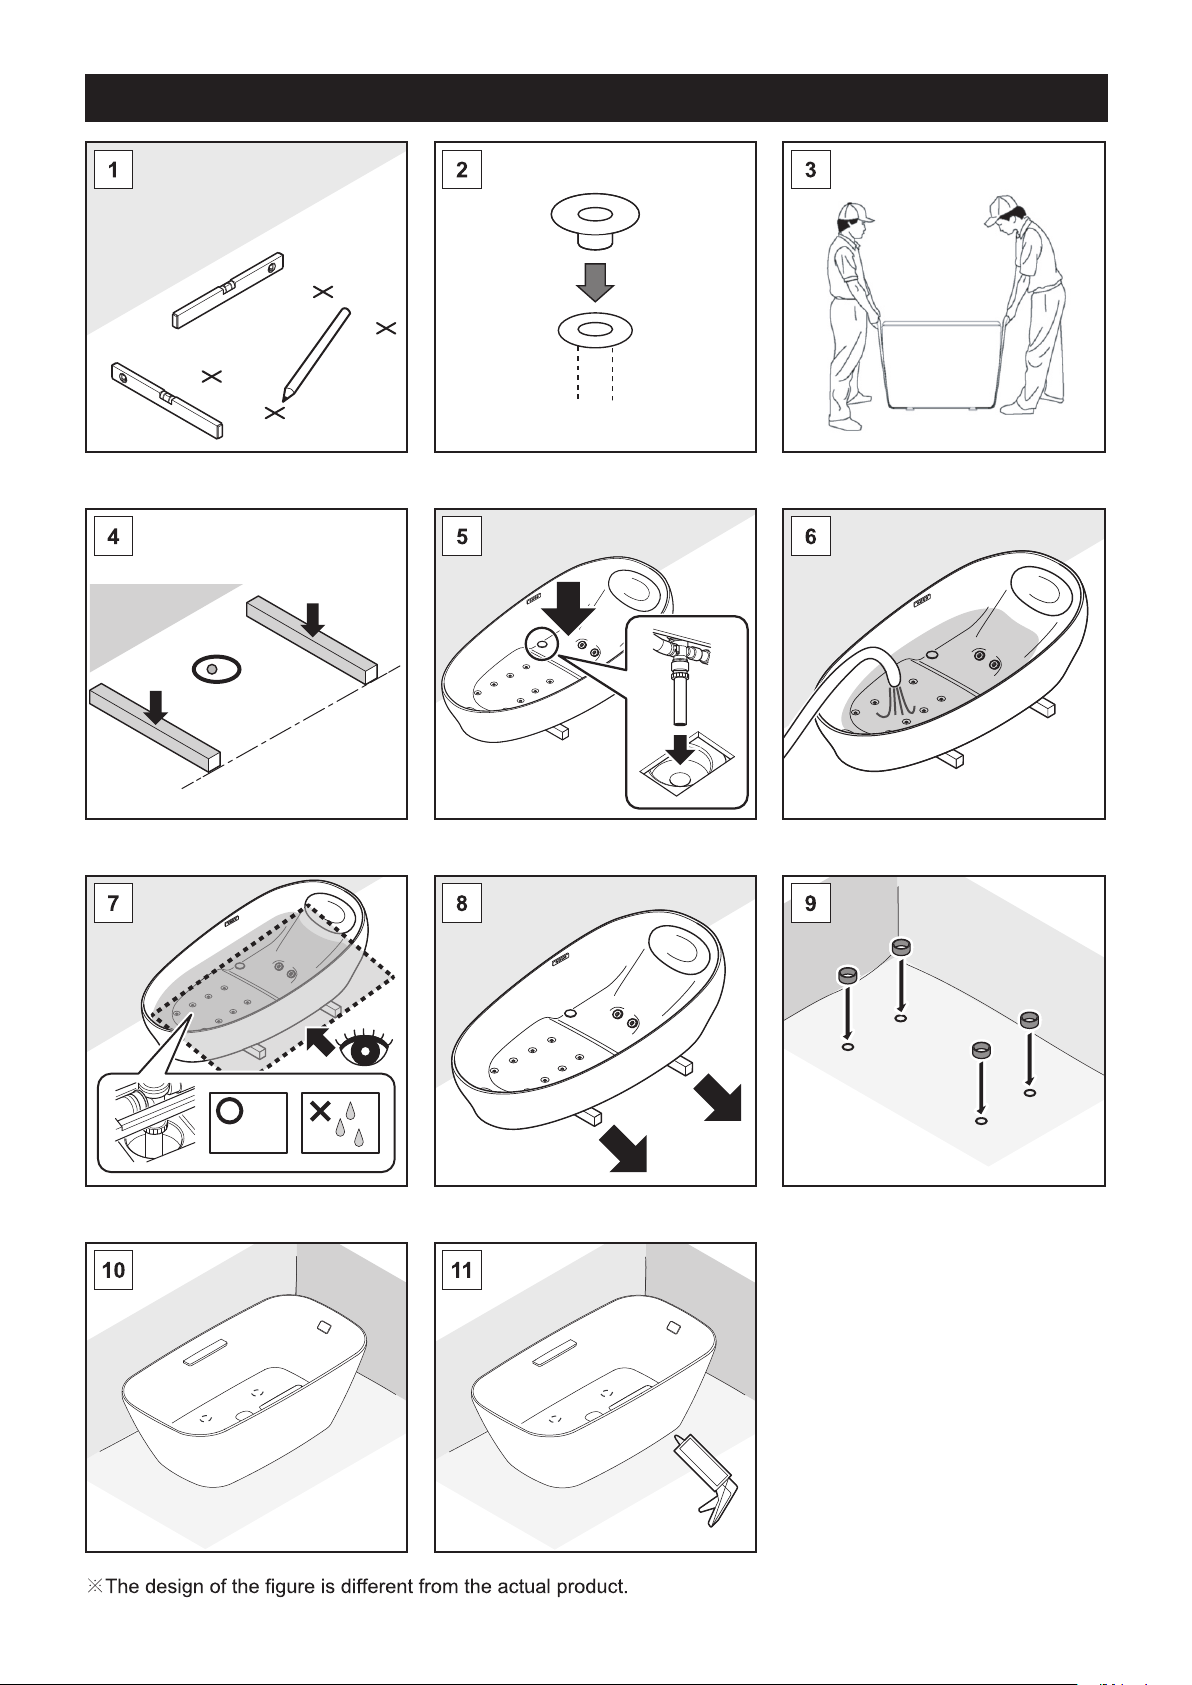
Installing the bathtub for PJY1724PW
2
3
1
B-20
2
B-10
10
4
Page 11

5
1
A-5
B-10B-6
2
6
11
Page 12

Conduct a fill water
8
1
12
Page 13

8
3
2
B-2 M12
3/16”(5 mm)
3/16”(5 mm)
Fix the bathtub
9
1
A-2
B - 4
2
A-6
13
Page 14

9
10
3
14
Required
CAUTION
Fix the bathtub in place with mortar using the provided sleeves (A-6).
Page 15

Finishing
11
B-5
WARNING
that does not contain alcohol.
15
Page 16

Installing the bathtub for PPY1780PT
Preparation prior to the installation of bathtub
1.To confirm the drainage hole position.
①、Ensure the floor is level for placing bathtub.
If the floor is not level, pedestals can be built for placing bathtub. Location depends on the position of bathtub
feet and height depends on the drainage fittings used.
②、Detailed dimensions of drain hole depend on the dimensions of drain parts in drainage fittings.
Note: 1. After bathtub is placed, level the bathtub to ensure stable placement.
2. For detailed position of feet, refer to the dimension drawing on page 7.
2
1
Drain hole
Bathtub
dimension
Pedestal for vertical foot
Leave a 1/8”(3mm) gap between the flange and the framing.
1/8”(3mm)
16
Page 17

Installing of drain tube
3
● For direct draining occasions.
1 .Connecting PVC pipe
2 .Connecting thread pipe
rubber gasket
B-6
A-5
● For side draining occasions.
1. Connecting PVC pipe 2. Connecting thread pipe
G1 1/2
teflon tape
Always do this
G1 1/2
teflon tape
A-5
pipe tilt 1/50 or more
rubber gasket
B-6
PVC adhesive and PVC primer must be used for sticking, fixing and sealing the connected
part (A-5) between drain pipe and drain fitting to avoid water leakage.
17
Page 18

18
Page 19

6
Secure the bathtub
1. Install the adjustable height foot.
① Loosen nut A.
② Install the foot to the bathtub at C (shown below).
Loosening nut
C
Adjustable height bottom foot
Note: 1. After nut A is loosened, the distance between nut B and nut A is about 2-3/4” (70mm).
2. When the foot is installed, it is not required to secure with mortar.
2. Level the bathtub and connect the drain pipe.
Place the installed bathtub on the pedestal and adjust the bathtub until level.
Keep the gap between the edge and the wall about 1/8” (3mm).
Nut A
Fastening nut
B
Nut
A
Level
3. Secure the four fixed feet.
Method 1
Fix the feet of the bathtub with cement mortar.
The scope of the mortar
Attention: please do not touch the mortar or strong adhesive to the body of bathtub.
Method 2
Use universal glue to pour the all-purpose adhesive on the ground previously marked,
with an area of about 1-3/16”(30mm) in diameter.
1/8” (3mm)
Figure A
Bottom position of bathtub
19
Page 20

7
Building of ceramic tile
● Drop-in Installation
a. Bathtub without skirt: Build a low wall with brick.
side of the low wall with mortar (a clearance of at least 3/16”(5mm) is kept between
the upper edge surface and bathtub side). Buffer material is used to fill this clearance (such as soft polythene or
equiva lent material). At last sealing material is used to seal the clearance between ceramic tile and bathtub.
(Refer to the following Figure B).
Build ceramic tile on the outer
A Wall edge
B
Warning
Material for
stopping mortar
(sponge etc.)
Sealed material
Mortar
Brick
13/16”
3/16”(5mm)
Tile
(20mm)
Drop-in Installation
1. During the whole installation soft material is recommend to cover bathtub surface to
prevent surface scratching.
2. The bathtub cannot be hung by the rim. The bathtub weight must be transferred solely
through its feet.
3. During installation, do not allow the bathtub to collide with hard objects and do not
allow hard objects to fall into the bathtub.
4. The back of bathtub can not be filled or buried by mortar otherwise damage may be
caused.
5. During construction, never stand on the bathtub or place heavy material on the
rim of the bathtub. This may damage the bathtub.
Note: After installation of the bathtub clean the floor. Then use a sponge or cloth
with neutral detergent to clean the bathtub. After 5 minutes, rinse with water
and then wipe dry.
20
Page 21

MEMO
Page 22

MEMO
Page 23

MEMO
Page 24

©TOTO Ltd. All rights reserved.
2018. 12
Printed in China
NTE225
 Loading...