

Page 1

LCD COLOR TV
LCD-2300VT
LCD-2700VT
LCD-3018VT
LCD-3200VT
LCD-4000VT
LCD-4200VT
P/N:7042301301 V1.0
TOTEVISION SERVICE CENTER 1319 Dexter
Avenue N.#020,Seattle,Wa98109
TELL: (206) 623-6000 FAX: (206) 623-6609
Page 2

CONTENT
CONTENTS
OPERATION SAFETY............................................................
TO CUSTOMERS..................................................................
SAFETY & PRECAUTIONS.................................................
ACCESSORIES......................................................................
FUNCTIONS..........................................................................
DIMENSIONS...................................................................
PRODUCT SPECIFICATIONS...............................................
FEATURES..........................................................................
MULTI-MEDIA BOX...............................................................
PRODUCT INSTALLATION....................................................
1.Antenna Installation.......................................................
2.VGA Source Connection.................................................
DVI Source Connection...................................................
3.
4.High Definition TV (HDTV)..............................................
5.Speaker Jack(Audio Out)................................................
6.Power Connection..........................................................
SOURCE INPUT CONNECTORS...........................................
POWER ON/OFF...................................................................
TV/AUDIO/PC SELECTION...................................................
REMOTE CONTROL.............................................................
REMOTE CONTROL PRECAUTION & USAGE.......................
PC (RGB) MODE..................................................................
BASIC OPERATION..............................................................
1.Channel Selection.....................................................
2.Direct Channel Selection...........................................
3.Antenna /Cable TV Setup...........................................
4.Auto Scan.................................................................
AUDIO SETTINGS................................................................
PICTURE PARAMETERS.................................................
PC PARAMETERS..........................................................
AUDIO SETTINGS................................................................
PICTURE-IN-PICTURE...................................................
CHANNEL SETTINGS...........................................................
PARENTAL CONTROLS.......................................................
GENERAL SETTINGS.....................................................
815
19
20
25
26~28
29~31
32
2335
38~41
1
2
2~5
6
7
16
17
17
17
17
18
18
18
18
18
20
21
22
23
24
24
24
24
24
36
37
Page 3

OPERATION SAFETY
Caution:To avoid fire and electric
shocks, do not expose this
product under damp or humid
condition and make sure the
plug is fully plugged in at all time.
Warning:Never open the housing of the LCD
display. When the housing is opened,
there is a danger of injury from
electric shock.There is no
component that can be replaced by
users. Please contact the service
personnels and replace with
manufacturer appointed components.
Disposal: Due to the environmental concerns,
please refer to your local
authorized organization or
electronics industry society before
you dispose this product. Please
visit http:// www.eia.org for more
Informations.
1
Page 4

TO CUSTOMERS
Thank you for purchasing this product. Please
read through the instructions and follow the steps
in order to achieve the maximum reliability.
Please keep this manual handy and close to your
LCD display after reading.
SAFETY & PRECAUTIONS
◎Manual Guide--Please read through user's
manual before operating this
product.
◎Instructions--Please follow and be aware
of cautions and warnings.
◎Follow Steps--Please follow the operation
procedures.
◎Socket Outlet--Please use standard socket
outlet to avoid damages to
the LCD display.
◎Power Source--This product has to operate with
correct power source shown on
label.
◎Power Cord Protection--Avoid tangling or
placing objects on the power cord.
◎Over-loading--Avoid AC power over-loading,
which may lead to fire or electric
shock.
2
Page 5

◎Do not insert any objects through the slots and
openings of the LCD display.This may lead to
an electrical short-circuit or even cause fire
and results in damages to your LCD display
◎Repair--Please unplug the power cord and contact
distributors or qualified repair personnels if
any of the following situations have happened.
1.Power cord is damaged
2.Objects have been inserted through the slots and
openings of the display.
3.Product is under humid condition or liquid
leakages on to the display.
4.Product cannot function normally, or cannot
operate.
5.Product was dropped or damaged
Note:When using AV signals (e.g DVD, VCR..), Please
check the input source if the screen appears glittering
or having bad signals.
For example, cables are correctly connected and DVD
player output setting is the same as TV resolution
setting. (Resolution is under 480i or 576i etc.)
◎Parts Replacement--If any parts need to be replaced,
please contact the service personnel.
3
Page 6

◎Wall Mounting--Please use correct wall mount and follow
instructions when installing the display
onto the wall.
◎Cleaning--Unplug power cord beforehand.Please use
dry and soft sponge to clean the screen
surface.Do not use diluted acid.
◎Humidity--Keep this product away from moisture or high
humidity area.
◎Placement--Place this product on a stable and vibration
free surface in order to avoid the LCD
display from falling.
◎Ventilation--Please never cover or block openings and
slots of the display.This may cause the
display to over-heat and reduced it's life
time.Please allow some space for
ventilation.
4
Page 7

◎Away from heat sources--Keep this product away from heat
sources such as direct exposure to sunlight, heater and stove,
etc.This would avoid structure distortion or machine break down.
◎When switched off, the LCD display can be stored comfortably
between -4℉ to 140℉(-20℃ to 60℃)
◎Unplug from the socket outlet if the LCD Display is not intended
to be used for a long period of time.
5
Page 8
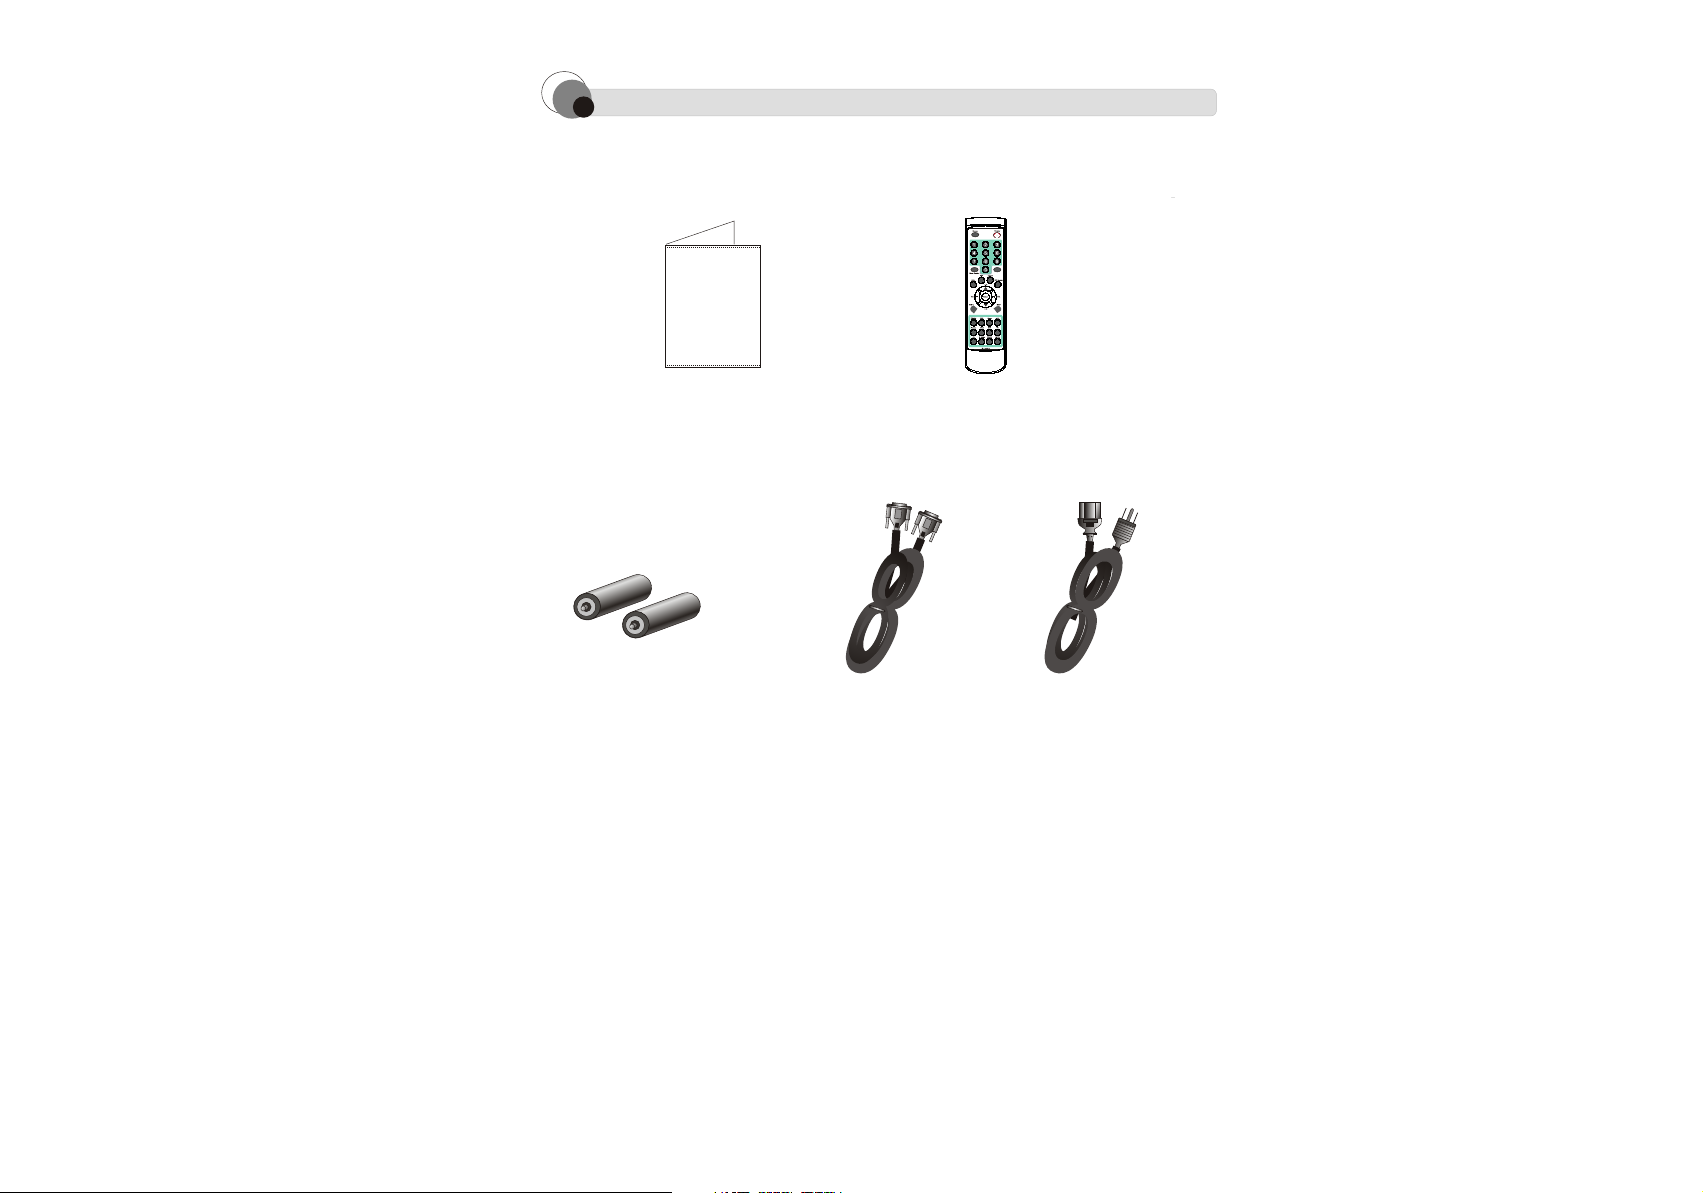
ACCESSORIES
User Menu(*1) Remote Control(*1)
88
88
88
AAA Batteries(*2) VGA Cable(*1) Power Cable(*1)
6
88
88
88
Page 9

FUNCTIONS
1.
Auto-Adjustment:It helps users to
adjust the display into appropriate
setup.
2.
Contrast/Brightness:Users are able to
adjust their custom setup.
3.
Color Adjustment:Users are able to
adjust their custom color setup.
4.
Display Frequencies:Users can use this
function to check current horizontal
frequency,vertical frequency, phase
and resolution.
5.
Position Adjustment:Users can adjust
display's vertical and horizontal
positions.
6.
Source:Allows selection from PC,DVI,
S-Video1,S-Video2,AV1,AV2,YCbCr,TV/CATV,HDTV
7.
Menu Setting: Allows setup of OSD
language, picture position, time and
picture freeze time etc.
8.
PIP setup:
(1)PIP source:Select PIP input source
(2)PIP Ver/Horz position: Allows
adjustment of PIP positions.
7
Page 10
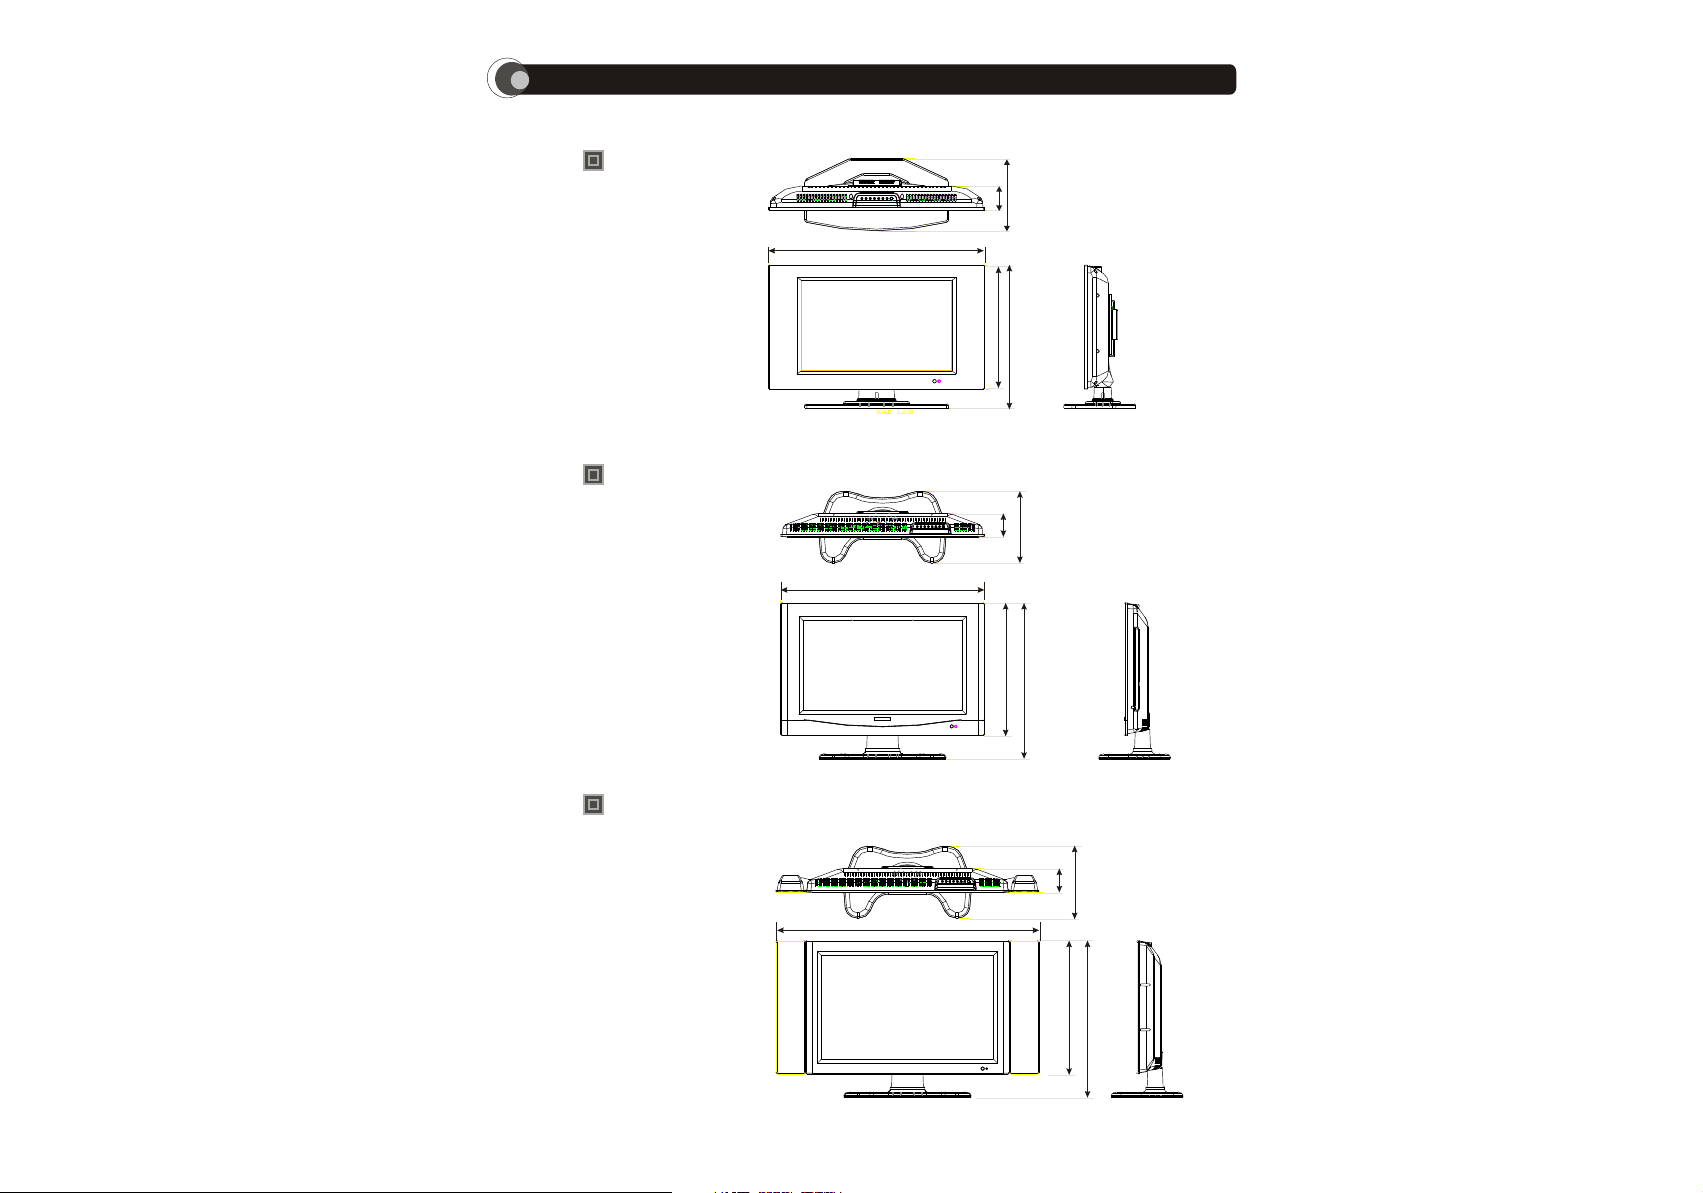
Dimensions
23"LCD-2300VT
27"LCD-2700VT
720
766.2
240
80.5
412.8
474.95
87.9
269.48
30"LCD-3018VT
587.1
412.8
90
269.48
987.2
499
587.16
8
Page 11

Dimensions
Control Buttons(23".27".30") LCD-2300VT,LCD-2700VT,LCD-3018VT
89.9
(mm)
訊號源
頻道
Ch
Vol
音量
Source
目錄
Menu
Power
電源
RGB Jack, Audio In (PC Audio Souce In)
RGB訊號接頭、Audio in(電腦聲音輸入源)
13
Page 12
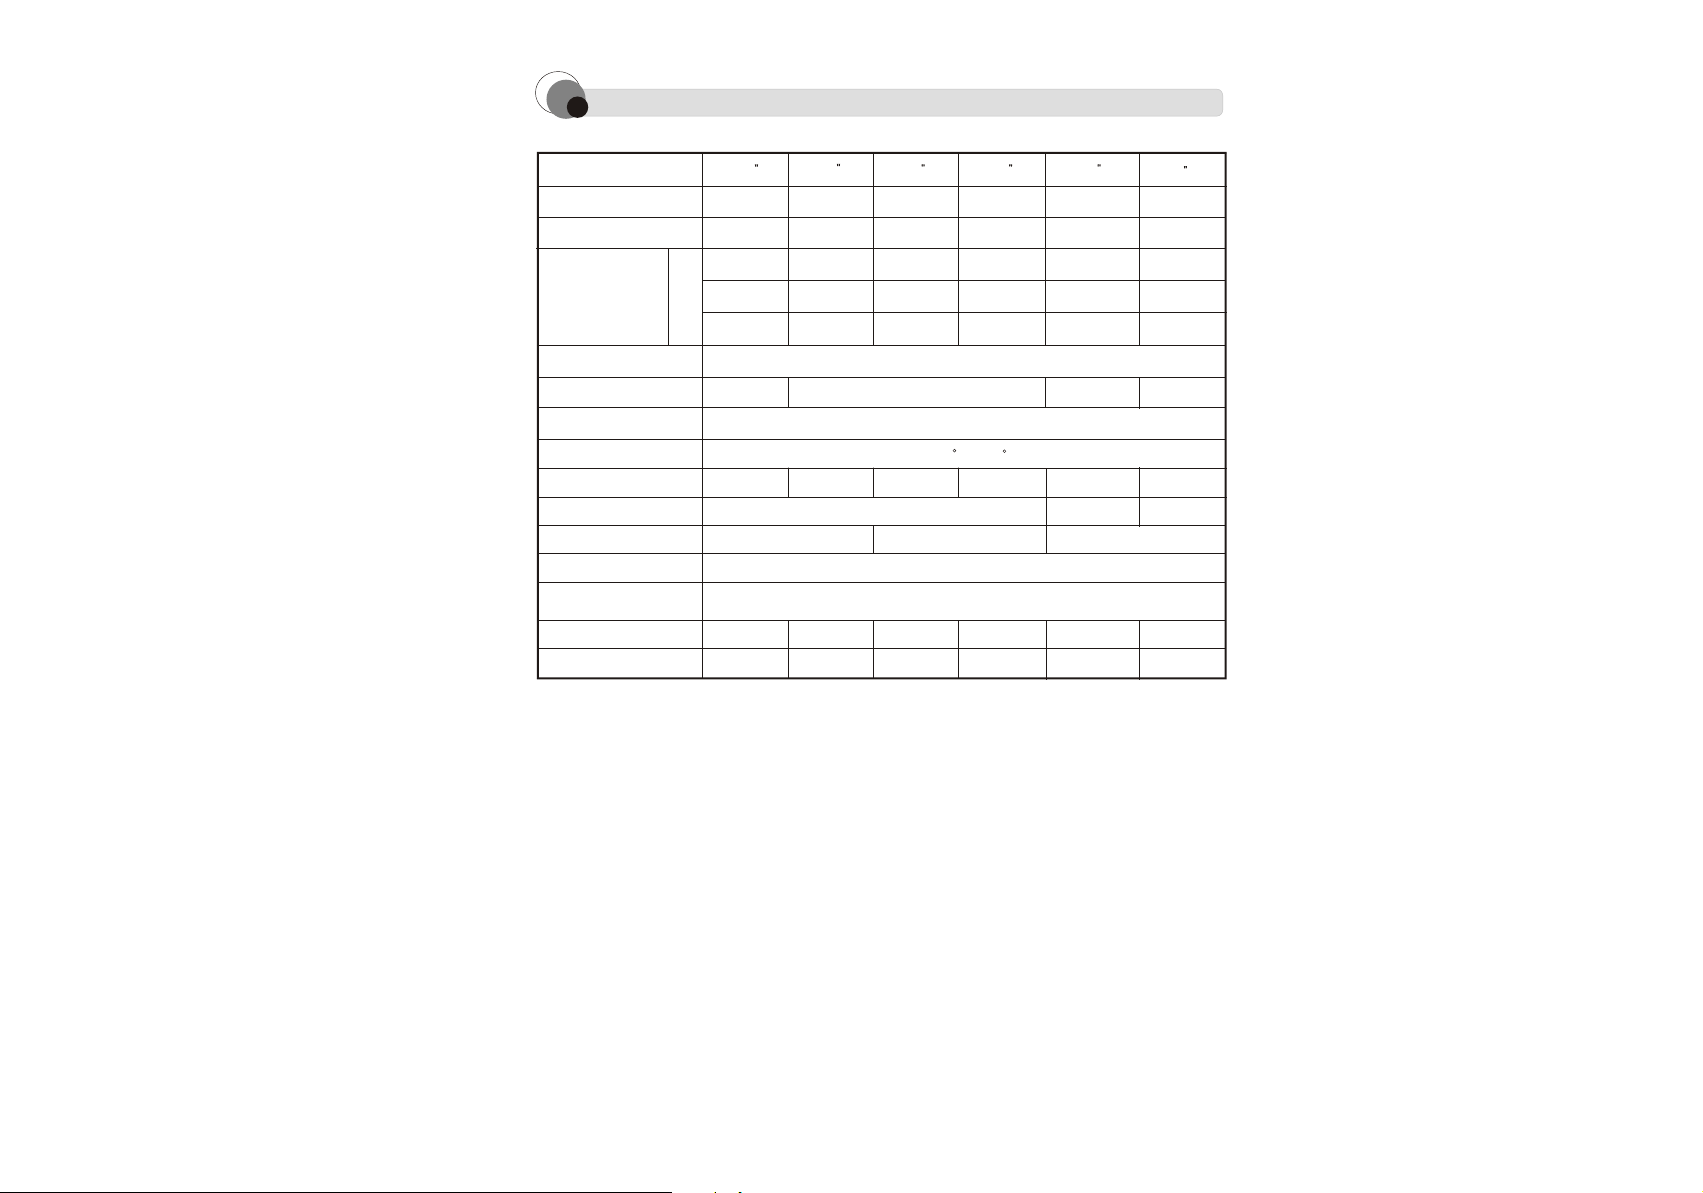
PRODUCT SPECIFICATIONS
產品尺寸規格產品尺寸規格
Model
Picture panel
Resolution
W
Dimensions
(mm)
H
D
HDTV compatible
Speaker
AC Power Supply
View angle
Contrast ration(type)
Response time(Tr/Tf)
Lamp life
Video Compatible
Remote control
Weight(Net/Gross)
POWER COMSUMPTION
23-inch.16:9
1280x768
720mm
475mm
240mm
2
8W+8W
600:1
50,000 hours
11.58/14.86Kg 13.42/16.7Kg 16.45/22.52Kg 17.0/24.3Kg 32.8/39.69Kg 36.0/45.0Kg
120W 125W 145W 170W 270W 360W
27
27-inch.16:9
766mm
545mm
240mm
500:1
30
30-inch.15:9
1280x7681280x720
987mm
545mm
240mm
480p/480i/720p/1080i
10W + 10W
AC 100-240V ,50/60 Hz
H:170, V:170
600:1
15/10 ms
NTSC/PAL/Secam
32
32-inch.16:9
1366x768
1026mm
551mm
240mm
800:1
60,000 hours
R4001
Note: No announcement for any change of design and specification.
40
40-inch.16:9
1280x768
974mm
688mm
254mm
6W + 6W
600:1
14/8 ms
50,000 hours
42
42-inch.16:9
1366x768
1024mm
700mm
250mm
8W+8W
400:1
10/10 ms
16
Page 13

FEATURES
Power Saving:Save more than 40% power compared
with CRT TV
No Radiation:No radiation wave from screen.
No Flaring Picture:No flaring picture which
may hurt users' eyes
Thinner and lighter:space saving, better for
decoration
No Static Electricity:LCD panel does not create
static electricity
Excellent Sound Effects:High performance speakers
17
Page 14

MULTI-MEDIA BOX
Audio
Connectors
Supporting
Connectors
MTS
Surround
S-Video
AV Input
TV Input
YCbCr
HDTV
VGA
Audio Input
Audio Output
DVI
YES
YES
2 SET
2 SET
1 SET
1 SET
1 SET
1 SET
1 SET
1 SET
AV I/O Connector Video1vp-p(75)ohms
Audio0.4rms(47Kohms)
S-Video:Brightness:1vpp(75ohms),
Color:0.3VPP(75ohms)
PRODUCT INSTALLATION
〈WITH MULTI-MEDIA BOX〉
1.Antenna Installation
Make sure multi-media box has been
installed correctly.
Please connect antenna cable to
Multi-media box's tuner head〈ANT〉
(Refer to figure 1 on page 12)
Please do not install antenna in raining or thundering condition
Caution:Please use legal cable TV, otherwise it may
damage the product.It may also void warranty.
18
Page 15

2.VGA Source Connection:
Please switch off PC and TV. Connect VGA
cable to display's D-Sub connector, and
connect the other head of cable to PC VGA
Output
3.DVI Source Connection:
Use DVI cable to connect with PC and TV
You can use this display to play with a Video player, Video
Camera, DVD Player, and TV Game consoles etc.
Please connect to Y.Cb.Cr (Digital signals)
if the external devices has Y.Cb.Cr outputs
Please connect to correct video and audio
jacks with external devices.
This TV provides audio output jack(Audio OUT) which allows
connection with external speakers or stereo.
Please purchase standard signal cables
Please switch off the TV before setting up additional equipments.
4.High Definition TV (HDTV)source connection:
This TV provides one Y.Cb.Cr-VGA cable and one
audio cable.for HDTV, please connect
Y.Cb.Cr-VGA cable to Y.Cb.Cr jacks, and connect
the other head of cable to D-SUB connector.
For HDTV audio, please connect the audio cable
to PC Audio In jack at the back of the TV.
5.Speaker Jack(Audio Out):
Use for external speakers or stereo.
6.Power Connection:
Please use correct socket outlet.
Please unplug the power cord if theTV will not be used for a
long period of time.
19
Page 16

SOURCE INPUT CONNECTORS
Multi-media box
INPUT1
INPUT2
Connectors
1
AV.S-Video In
2
Input 1、Input 2
3
Audio Out
4
ANT
SDTV Input
5
HDTV Input
6
Description
Video Input is using Video Jack(Yellow RCA Jack)or S-Video
Jack. Audio Input is using White RCA Jack (Left) and Red RCA
Jack (Right)
The level of audio output cannot be changed using the volume,
treble and bass controls on your display.This connector should
be used with an external audio amplifier that can be used to
control the volume
Receive TV Source
Support 480i. 576i. Signal
Support 480P. 576P.720P and 1080i Signal
20
Page 17

POWER ON/OFF
1.Press POWER button from key pad (or remote control),the
red light will turn green.This means the TV has been
switched on. The picture will takes about 3 seconds to show
on the screen.
2.Press POWER button again to switch off
the TV. Green light will turn back to red
Warning:Electrical currents may still remain
in TV after power is switched off,please
unplug the power cord if it is not intended to be
used for a long period of time.
TV/AUDIO/PC SELECTION
Key Pad
Ch
Vol
E
1.Press SOURCE button to change input source
Source Menu
D
2
C
POWER
C
B
A
2.Sources display orders are PC DVI S-Video1 S-Video2
Av1
Av2 YCbCr TV/CATV HDTV
3.After source input has been selected, press
B
MENU button to set up language and other
3
functions
Refer to Pg.14 for Remote Control Description
21
Page 18

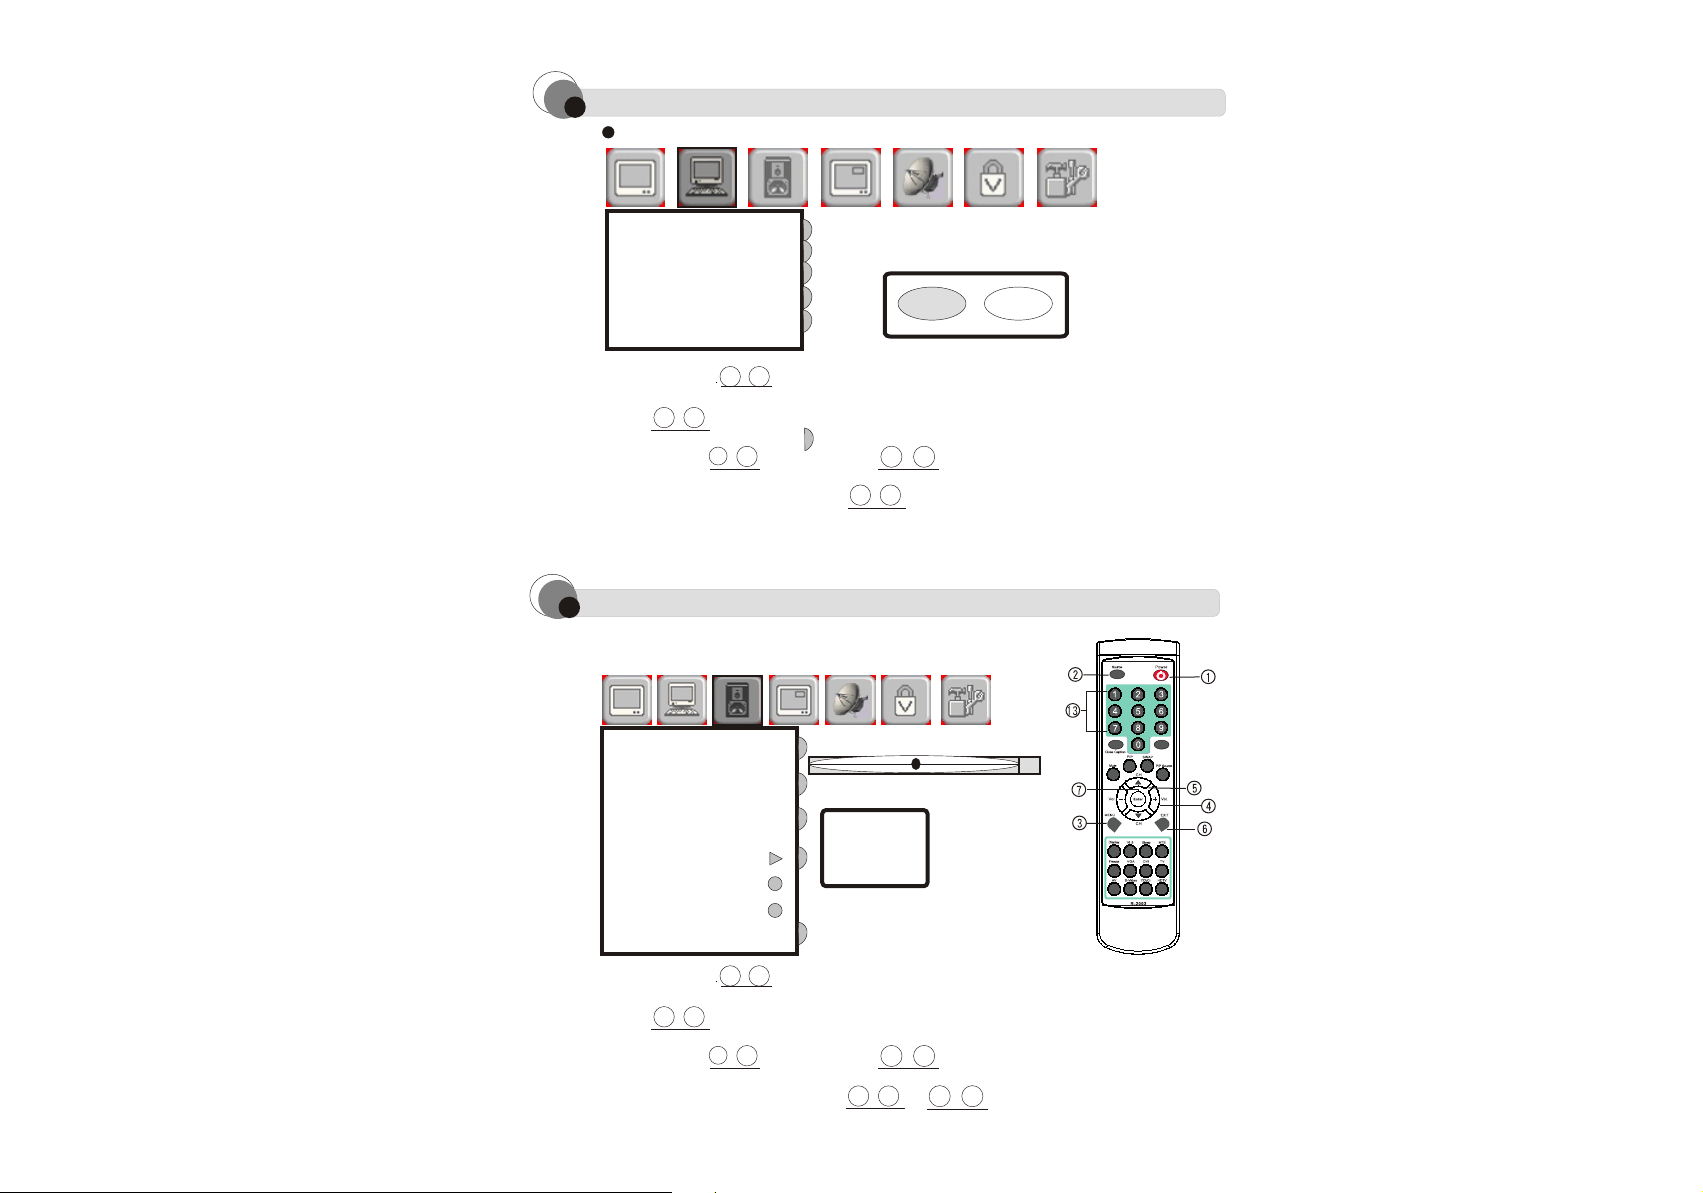
REMOTE CONTROL
Power(1)
Source:
(2)
Select source input
(3)
Menu:
Select from PICTURE
PARAMETERS/AUDIO
SETTING/PICTURE IN
PICTURE/PARENTAL
CONTROLS/GENERAL
SETTINGS.Use(+)(-)to
select desired
program and press ENTER
to proceed. Use and
to select function that need
to be adjusted.
VOL:
(4)
(+)for volume up and
(-)for volume down
7
5
E
D
4
CH:
(5)
Use CH( ) to change
channels
Exit:
(6)
Back to previous
channel or program
(7)Enter:
Under menu mode,press this key to confirm and proceed the
program or function.In TV Mode,it can be used to switch back to
the previous channel
(8)MTS/NICAM:
Switch to Mono,SAP
(9)PIP:
Switch to PIP or POP
22
Page 19

(10)Mute:
Switch On/Off sound off function
(11)Sleep:
Set timer to 30/60/120 min.
(12)Display:
To display the imformations at top right corner
(13)Digit Buttons:
Switch to favorite channel directly by
entering the channel numbers
(14)16:9:
Switch to 4:3 or 16:9 display format
(15)Freeze:
Freeze the display image
(16)Close Caption:
Switch On/Off sub-title function
(17)Swap:
Swap input sources between main display and
sub-display
(18)PIP Source:
To show PIP function on the screen
(19)Direct Keys:
Access to PC/DVI/TV/(AV1andAV2)/(S-Video1andS-Video2)
/Y.Pb.Pr/HDTV directly
REMOTE CONTROL PRECAUTION & USAGE
Remote distance will be shorter as the
signal receiver is facing a strong light.
All impacts should be avoided
Humidity and high temperature
conditions should be avoided
Remove batteries from remote control if it
not in use for a long time
Remote control should point directly to
the TV signal receiver
23
Page 20

PC (RGB) MODE
IMPORTANT:
1.If PC picture interferences appeared
while RGB and antenna are connecting to the
display at the same time. This is possibly caused by
PC and display both are using different number of
plugging heads,such as 2 heads and 3 heads.
Users are adviced to use the same number of plugging heads
for both PC and display.
( ) ( ) ( )
DisplayDisplay PC PC PCDisplay
PC Mode Adjustment
Key Pad
Ch
E
1.Press or button to get Menu list
2.Use buttons to select options
3.Use Enter button from remote control
(or Source button from key pad) to
confirm selected adjustment option
4.Use to proceed adjustment
D
D
VolCSource Menu
D
B
3
4
7
C
4
Or
5
E
24
B
POWER
A
Page 21

BASIC OPERATION
Key Pad
Ch
E
VolCSource Menu
D
B
POWER
A
A:By using Key Pad
B:Or Remote Control
1.Channel Selection
Press Ch or button to search channels
5
E
2.Direct Channel Selection
Select favorite channels directly by pressing
channel numbers. For example, Ch45. Press 4
and followed by 5
Remote Control
3.Antenna/Cable TV Setup
Menu CHANNEL SETTINGS System ANTENNA/
CABLE
4.Auto Scan
Menu CHANNEL SETTINGS CH EDIT AUTO
5.Press POWER button to stop auto-scan process
25
Page 22

AUDIO SETTINGS
Key Pad
Ch
E
1.Press Vol button,
"-"for volume
2.Press MENU to display the main menu. Use
4
Vol to select audio settings.
3.Press to enter Audio Settings menu.Use
4.Press buttons to perform adjustment. Press MENU
button to exit.
Balance:Sound Balance adjustment
Bass:Bass sound frequency adjustment
Treble:Treble sound frequency adjustment
E
C
7
Buttons to select (Bass/Treble/Balance/MTS/Mute)
D
4
VolCSource Menu
D
4
D
down and "+"for volume up.
B
3
B
POWER
A
10
5
E
8
B
3
5.MUTE:Press Mute button from remote control
to switch On/Off the sound
(Refer to pg.14 for Remote Control Description)
6.MTS:Press MTS button from remote control,
You are able to select fuctions of Mono,and Nicam
(Refer to pg.14 for Remote Control Description)
Note:MTS/NICAM only works in TV mode
10
8
26
Page 23
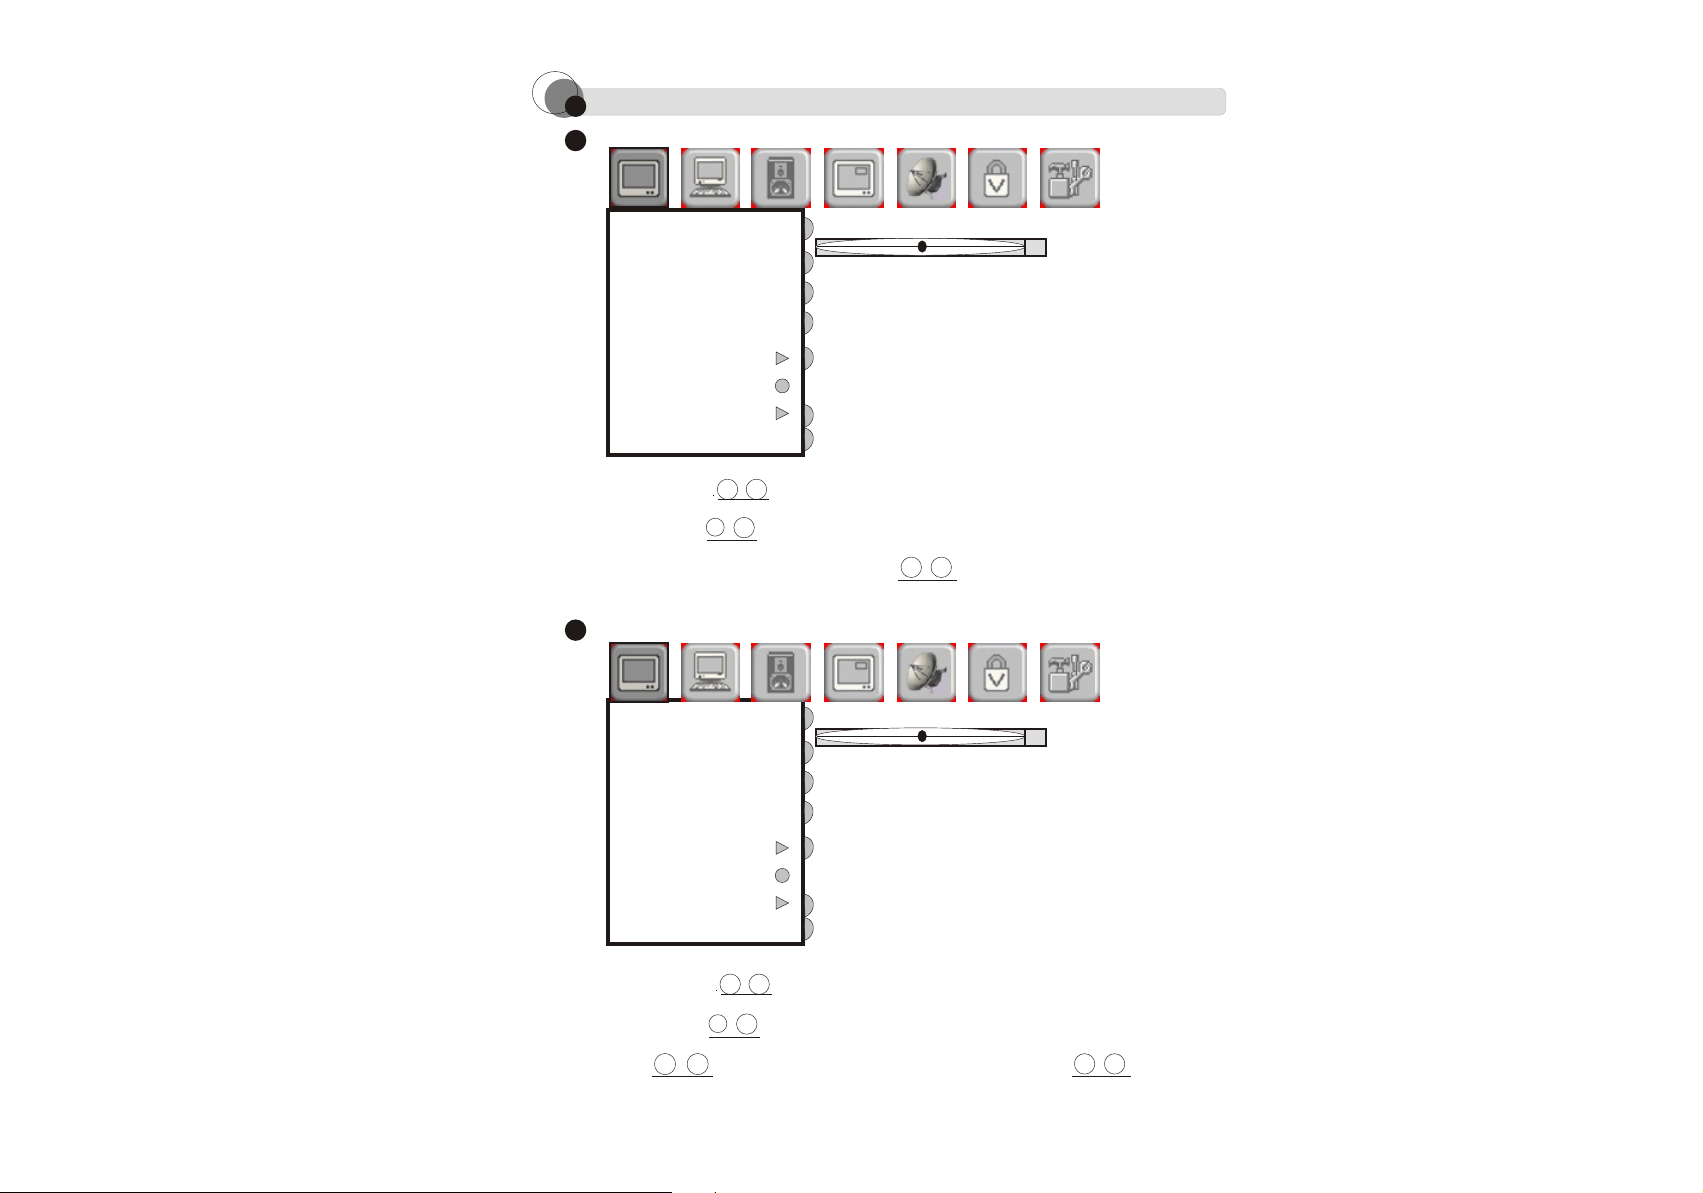
PICTURE PARAMETERS
BRIGHTNESS
CONTRAST
SATURATION
HUE
COLOR TEMP
50
FLESHTONE
SHARPNESS
3
B
7
C
BRIGHTNESS
BRIGHTNESS
CONTRAST
SATURATION
HUE
COLOR TEMP
FLESHTONE
SHARPNESS
BL BRIGHTNESS
B
1.Press MENU button to display the main menu
2.Press Enter button to select(PICTURE PARAMETERS) option
3.Select BRIGHTNESS and press to perform adjustment.
3
C
7
D
4
50
CONTRAST
BIRGHTNESS
CONTRAST
SATURATION
HUE
50
COLOR TEMP
FLESHTONE
SHARPNESS
BL BRIGHTNESS
1.Press MENU button to display the main menu
2.Press Enter button to select(PICTURE PARAMETERS) option
3.Press button to select CONTRAST and use to adjust.
E
B
3
C
7
D
5
27
4
Page 24

PICTURE PARAMETERS
BRIGHTNESS
CONTRAST
SATURATION
HUE
COLOR TEMP
50
FLESHTONE
3
B
7
C
5
E
4
D
SATURATION
BRIGHTNESS
CONTRAST
SATURATION
HUE
COLOR TEMP
FLESHTONE
SHARPNESS
BL BRIGHTNESS
B
1.Press MENU button to display the main menu
2.Press Enter button to select(PICTURE PARAMETERS) option
5
3.Press button to select SATURATION and use to adjust.
HUE
1.Press MENU button to display the main menu
2.Press Enter button to select(PICTURE PARAMETERS) option
3.Press button to select HUE and use to adjust.
E
BRIGHTNESS
CONTRAST
SATURATION
HUE
COLOR TEMP
FLESHTONE
SHARPNESS
BL BRIGHTNESS
5
E
3
C
7
B
3
C
7
50
D
4
50
D
4
28
Page 25

PICTURE PARAMETERS
BRIGHTNESS
CONTRAST
SATURATION
HUE
COLOR TEMP
FLESHTONE
SHARPNESS
3
B
7
C
5
E
7
C
FLESHTONE
BRIGHTNESS
CONTRAST
SATURATION
HUE
COLOR TEMP
FLESHTONE
SHARPNESS
BL BRIGHTNESS
B
1.Press MENU button to display the main menu
2.Press Enter button to select(PICTURE PARAMETERS) option
3
C
7
5
3.Press button to select FLESHTONE press Enter to adjust
E
C
7
SHARPNESS
BRIGHTNESS
CONTRAST
SATURATION
HUE
COLOR TEMP
FLESHTONE
SHARPNESS
BL BRIGHTNESS
B
1.Press MENU button to display the main menu
3
50
C
2.Press Enter button to select(PICTURE PARAMETERS) option
3.Press button to select SHARPNESS and use to adjust.
E
7
D
5
29
4
Page 26
PC PARAMETERS
YES NO
3
B
7
C
4
4
D
AUTO
AUTO
CLOCK
PHASE
POSITION
AUTO COLOR
B
1.Press MENU button to display the main menu
4
2.Press button to select(PC PARAMETERS) option
E
3.Press Enter button to select AUTO
4.Press Enter again and use to select (YES / NO)
3
C
7
D
CLOCK
YES NO
4
AUTO
CLOCK
PHASE
POSITION
AUTO COLOR
50
B
1.Press MENU button to display the main menu
4
2.Press button to select(PC PARAMETERS) option
E
3.Press Enter button to select CLOCK
D
4.Press to adjust
4
3
C
7
30
Page 27

PC PARAMETERS
50
3
B
7
C
4
PHASE
AUTO
CLOCK
PHASE
POSITION
AUTO COLOR
B
1.Press MENU button to display the main menu
4
2.Press button to select(PC PARAMETERS) option
3.Press Enter button to select PHASE
4.Press to adjust
E
D
4
POSITION
3
C
7
50
AUTO
CLOCK
1.Press MENU button to display the main menu
2.Press button to select(PC PARAMETERS) option
3.Press Enter button then press to select POSITION
4.Press Enter again and use and to adjust
PHASE
POSITION
AUTO COLOR
B
4
E
C
7
3
5
E
D
4
31
5
E
Page 28
YES NO
PC PARAMETERS
AUTO COLOR
AUTO
CLOCK
PHASE
POSITION
AUTO COLOR
B
1.Press MENU button to display the main menu
4
2.Press button to select(PC PARAMETERS) option
E
BL BRIGHTNESS
3.Press Enter button then to select AUTO COLOR
4.Press Enter again and use to select (YES / NO)
3
C
7
D
YES NO
5
E
4
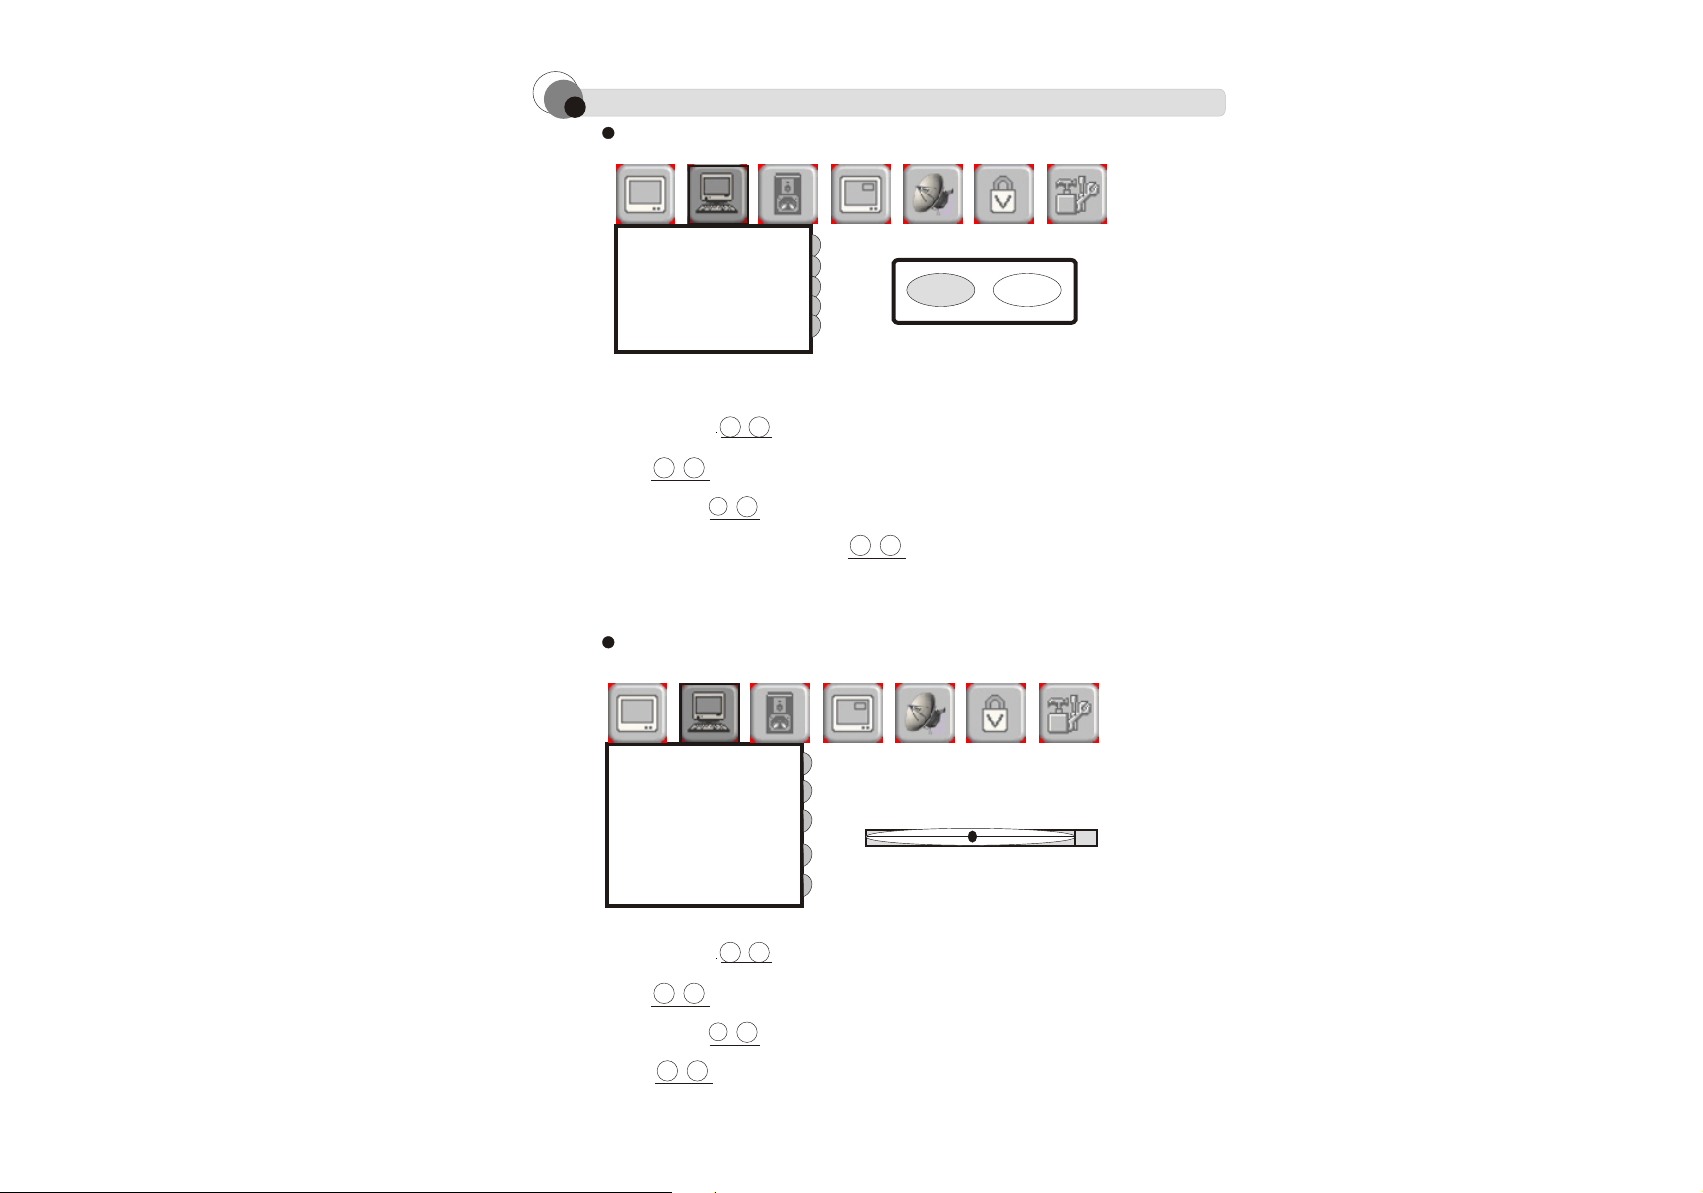
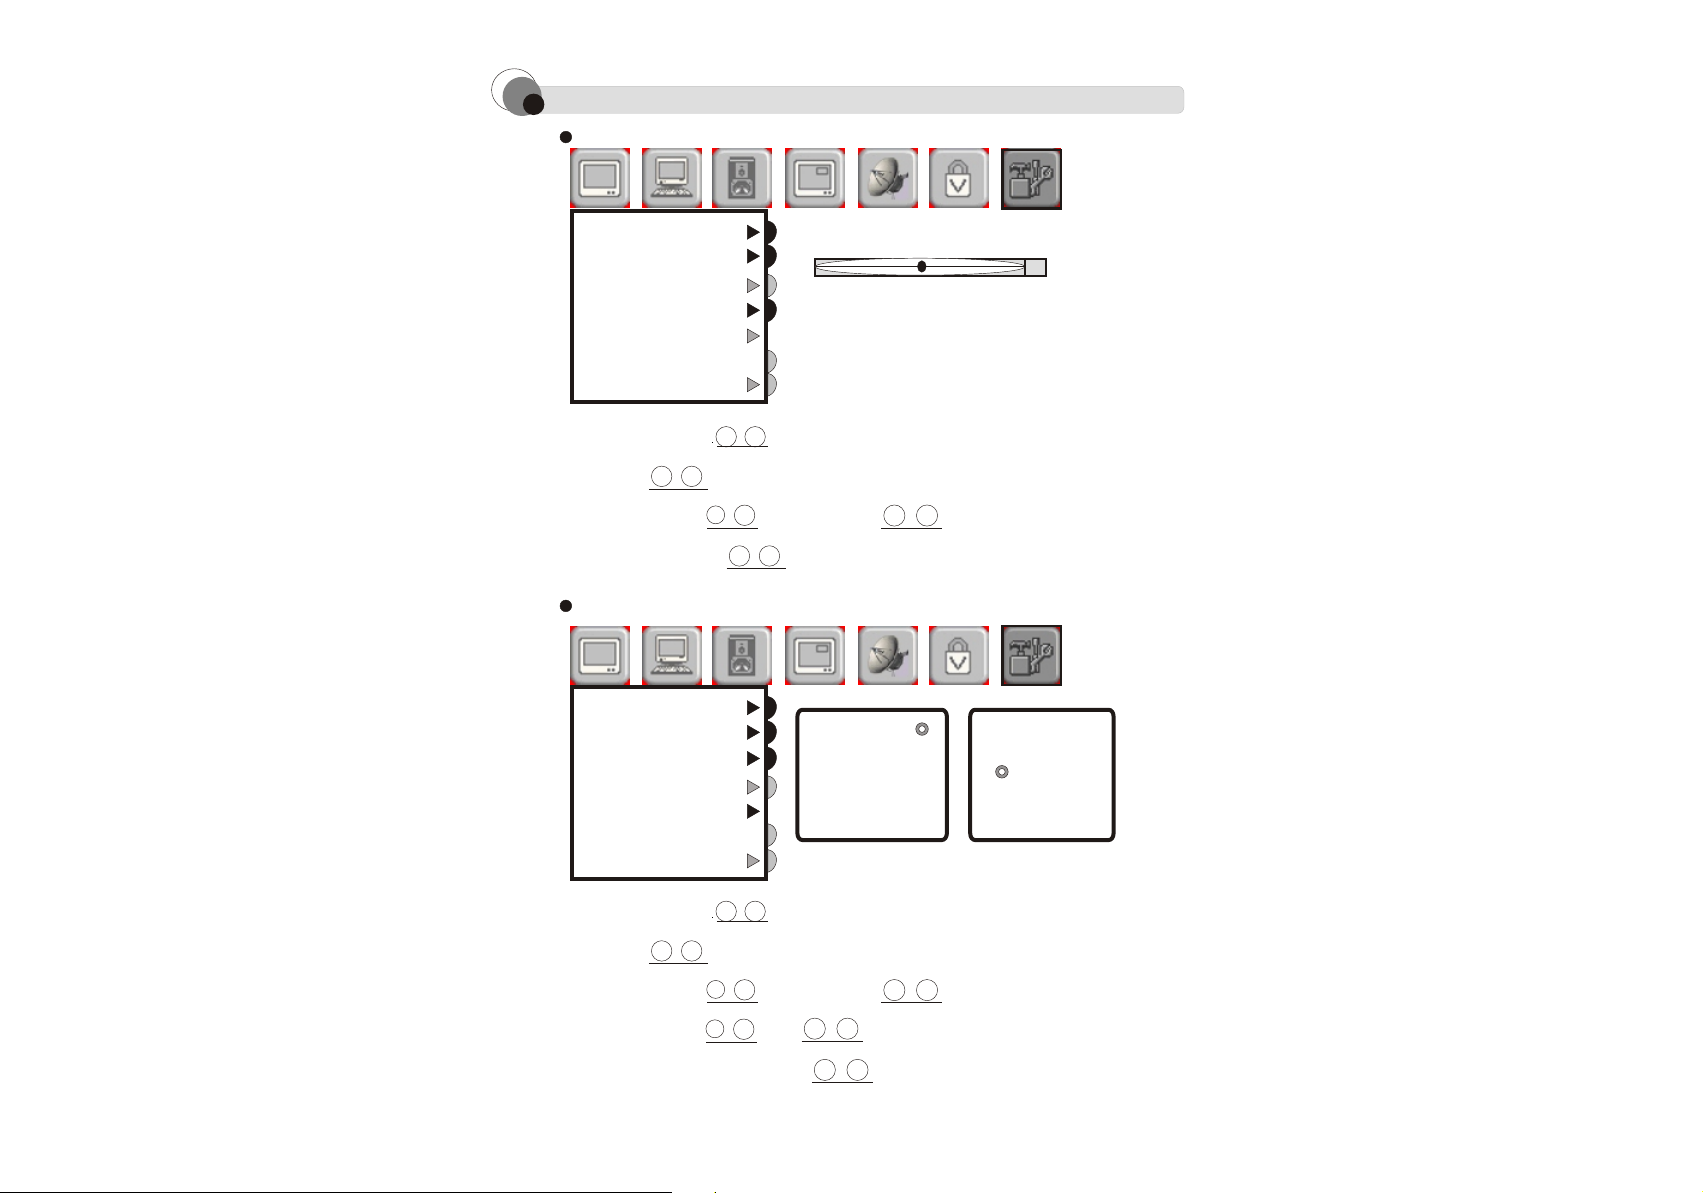
AUDIO SETTINGS
BASS
TREBLE
BALANCE
MTS
MUTE
STEREO
EXT SPEAKER
B
1.Press MENU button to display the main menu
4
2.Press button to select(AUDIO SETTINGS) option
E
3.Press Enter button then to select required option
3
C
7
4.Press Enter again and use or to adjust
MONO
SAP
D
32
5
E
4
E
50
5
Page 29
PICTURE-IN-PICTURE
PIP POSITION
PIP SIZE
PIP SOURCE
B
1.Press MENU button to display the main menu
4
2.Press button to select(PICTURE-IN- PICTURE) option
E
3
OFF
SMALL
LARGE
PBP
C
3.Press Enter or button to select
(PIP POSITION / PIP SIZE / PIP SOURCE)
4.Press Enter button and use and to select
(OFF / SMALL / LARGE / PBP)
7
C
7
5
E
D
4
5
E
33
Page 30

PICTURE-IN-PICTURE
PIP POSITION
PIP SIZE
PIP SOURCE
1.When the main screen is display under the
VGA or HDTV mode either
(DVI-S-video1/S-video2/AV1/AV2/YCbCr/TV)is selectable for
sub-screen display.
PIP SOURCE
VGA
DVI
S-VIDEO1
S-VIDEO2
Av1
Av2
YCbCr
TV
HDTV
2.(VGA and HDTV source are not viewable at the
same time)
3.When the main screen is display under the
DVI mode either
(VGA/S-video1/S-video2/AV1/AV2/YCbCr/TV/HDTV)
is selectable for sub-screen display.
4.When the main screen is display under the
S-video1/S-video2/AV1/AV2/YCbCr/TV mode either
(VGA/DVI/HDTV)is selectable for
sub-screen display.
34
Page 31
PICTURE SOURCE SETUP
Picture source setup
Main
source
VGA DVI Av1
PIP
source
VGA
DVI
Sv1
Sv2
Av1
Av2
YCbCr
TV
Sv2
Av2
YCbCr
TV HDTVSv1
HDTV
Remark:
" "
Represent a playable source
" "
Represent a non-playable source
35
Page 32

CHANNEL SETTINGS
ANTENNA
CABLE
ANTENNA AND CABLE TV SELECTION
SYSTEM
CH EDIT
ANTENNA
CABLE
B
1.Press MENU button to display the main menu
4
2.Press button to select(CHANNEL SETTINGS)
3.Press Enter button to select SYSTEM
4.Press Enter again and use to select(ANTENNA / CABLE)
E
3
C
7
5
E
CHANNELS AUTO-SCAN
SYSTEM
CH EDIT
B
1.Press MENU button to display the main menu
4
2.Press button to select(CHANNEL SETTINGS)
3.Press Enter button then to select CH EDIT
4.Press Enter again and use to select(AUTO/ADD/DELETE)
E
3
C
7
AUTO
ADD
DELETE
E
36
5
E
5
Page 33

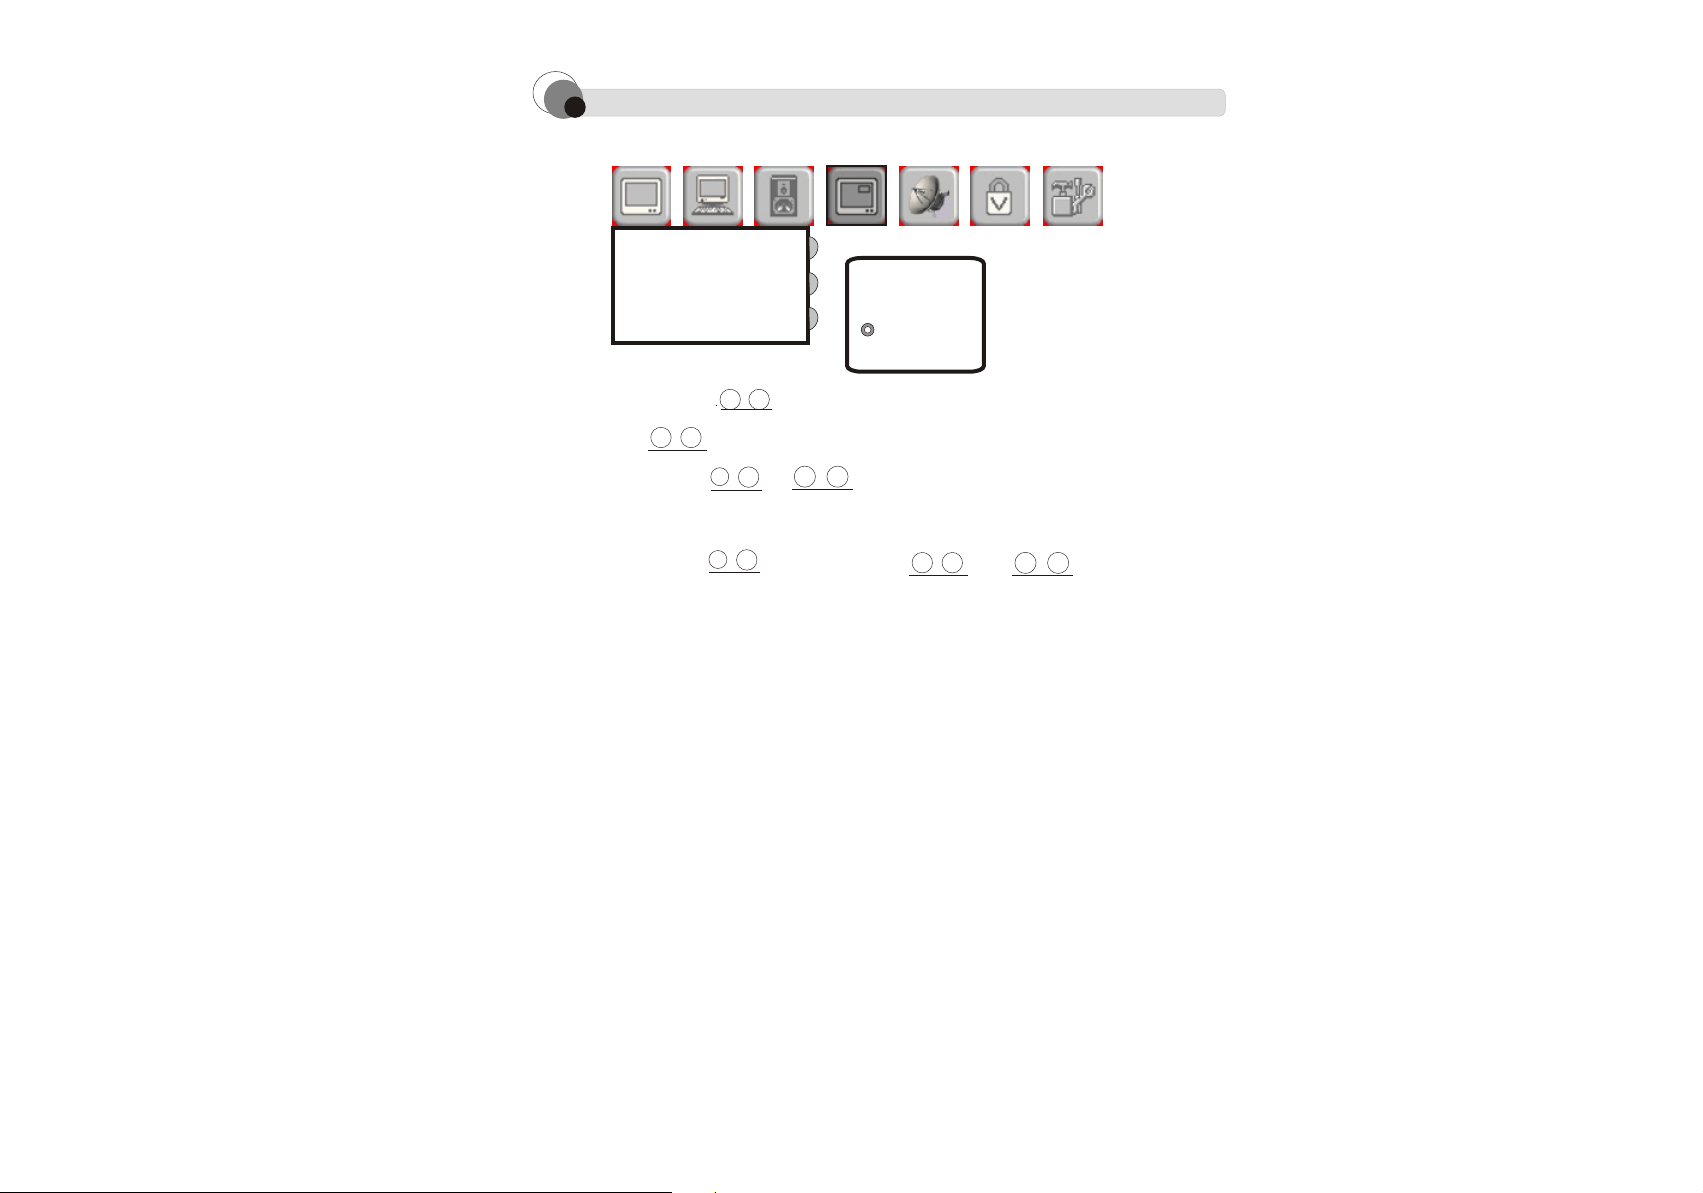
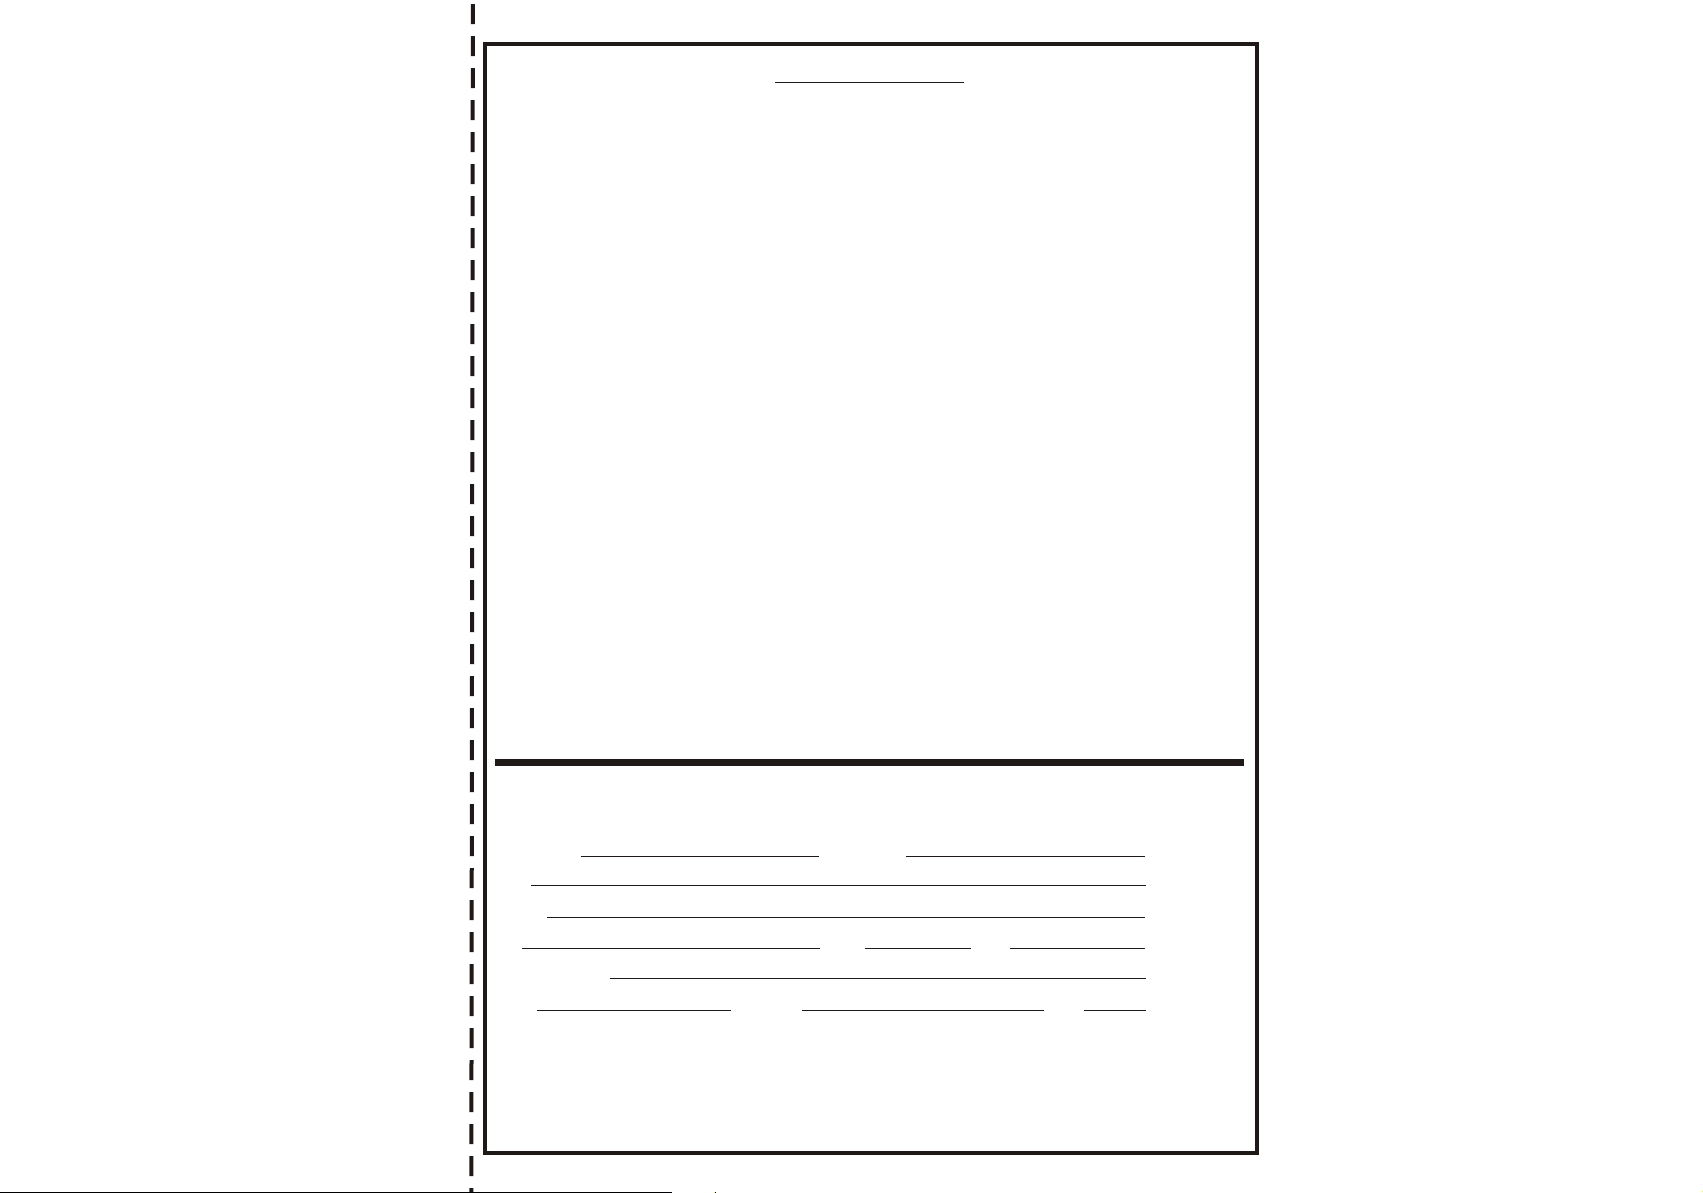
PARENTAL CONTROLS
LOCK MENU
MPAA RATING
TV PG RATING
CODE CHANGE
B
1.Press MENU button to display the main menu
4
2.Press button to select(PARENTAL CONTROLS)
E
3.Press Enter button then to select required option
3
C
7
4.Press Enter again and use and number button to adjust.
Please Enter the Password:
5
E
4
D
5
E
5.Press default password was"1111",you can change your password
with the icom "code change".
GENERAL SETTINGS
OSD TIMEOUT
OSD TIMEOUT
LANGUAGE
10 SEC
E
37
30 SEC
1 MIN
5
SLEEP TIMER
I/P INFO
RESET
TRANSPARENCY
DEINTERLACE
B
1.Press MENU button to display the main menu
4
2.Press button to select(GENERAL SETTINGS)
E
3.Press Enter button to select OSD TIMEOUT
3
C
7
4.Press Enter again and use to select(10SEC/30SEC/1MIN)
Page 34

GENERAL SETTINGS
LANGUAGE
OSD TIMEOUT
LANGUAGE
ENGLISH
SLEEP TIMER
I/P INFO
RESET
TRANSPARENCY
DEINTERLACE
B
1.Press MENU button to display the main menu
4
2.Press button to select(GENERAL SETTINGS)
E
3.Press Enter button then to select required option
3
C
7
4.Press Enter again and use to select
E
中文
E
5
5
(ENGLISH/CHINESE 中文.)
SLEEP TIMER
OSD TIMEOUT
LANGUAGE
SLEEP TIMER
I/P INFO
RESET
TRANSPARENCY
DEINTERLACE
OFF
30 MIN
60 MIN
120 MIN
B
1.Press MENU button to display the main menu
4
2.Press button to select(GENERAL SETTINGS)
E
3.Press Enter button then to select SLEEP TIMER
4.Press Enter again and use to select (OFF / 30MIN / 60MIN
3
C
7
E
38
5
E
5
/ 120MIN)
Page 35

GENERAL SETTINGS
I/P INFO
OSD TIMEOUT
LANGUAGE
SLEEP TIMER
I/P INFO
RESET
TRANSPARENCY
DEINTERLACE
SOURCE
RESOLUTION
H SYNC
V SYNC
AV
720x240
15KHZ
59KHZ
1.Press MENU button to display the main menu
2.Press button to select(GENERAL SETTINGS)
E
3.Press Enter then and the information will display
B
3
4
C
7
5
E
on screen
RESET
OSD TIMEOUT
LANGUAGE
SLEEP TIMER
I/P INFO
RESET
TRANSPARENCY
DEINTERLACE
B
1.Press MENU button to display the main menu
4
2.Press button to select(GENERAL SETTINGS)
E
3.Press Enter button then to select RESET
3
C
7
YES
NO
5
E
D
4.Press Enter again and use to select (YES / NO)
4
39
Page 36
GENERAL SETTINGS
50
TRANSPARENCY
OSD TIMEOUT
LANGUAGE
SLEEP TIMER
I/P INFO
RESET
TRANSPARENCY
DEINTERLACE
B
1.Press MENU button to display the main menu
4
2.Press button to select(GENERAL SETTINGS)
E
3.Press Enter button then to select TRANSPARENCY
4.Press and use to adjust
3
C
7
D
4
5
E
DEINTERLACE
50
OSD TIMEOUT
3
MADI
MOTION
5
E
5
E
40
5
E
LANGUAGE
SLEEP TIMER
I/P INFO
RESET
TRANSPARENCY
DEINTERLACE
1.Press MENU button to display the main menu
2.Press button to select(GENERAL SETTINGS)
E
3.Press Enter button then to select DEINTERLACE
4.Press Enter then to select MOTION
B
4
C
7
C
7
5.Press Enter again then to select (LOW / MEDUUM / HIGH)
LOW
MEDUUM
HIGH
Page 37

GENERAL SETTINGS
DEINTERLACE
1.MADI(Motion Adaptire De-interlacing)
Video processing with this
de-interlacing,recommend in TV,AV
and S-video mode.
2.Motion:
Video processing in motion picture.
Low: Exhibits very little fickering.
Medium: Between low and high.
High: Minimize or eliminate the feathering
artifact.
41
Page 38
ONE YEAR LIMITED WARRANTY
ToteVision warrants to the original purchaser that this product is free from defects in workmanship and material under normal use and
conditions for a period of 1 year from the date of original purchase,subject to the limitations below. Should service be required by
reason of any defect or malfunction during the warranty period,ToteVision will repair or at its discretion replace this product,, without
charge(except for a $15.00 charge for handling,packing,return shipping,and subject to verification of the defect or malfunction),
upon delivery of this product to the Factory Service Center listed below with proof of date of purchase.During the warranty period
ToteVision will repair or replace,free of charge,defective units WHICH ARE NOT DEFECTIVE DUE TO ORDINARY WEAR
AND TEAR, USER ABUSE, OR OTHER CAUSES NOT ARISING OUT OF MANUFACTURER'S DEFECTS IN
MATERIALS OR WORKMANSHIP.
Before returning this product for service:
1. If it is necessary to pack the unit in other than original carton and protectors,please insure proper packaging for good protection.
2. Enclose a photocopy of your dated sales receipt, credit card statement, or other proof of the date of purchase, a description of your
complaint, your name, address and day time telephone number. (Do not use P.O Box numbers since UPS cannot deliver to P.O.
Boxes.) Your warranty registration information must be on file in our office as a method of identification. If Proof of original
ownership is not in our records, the repairs will be treated as"out-of-warranty" and your unit will be returned to you C.O.D. For repair
and handling charges.
3. For"In Warranty repairs" enclose a check or money order payable to the order of Tote Vision for the sum of $15.00 for return
postage and handling.
4. Ship the unit prepaid to the Factory Service Center listed below.
5. If your unit needs service after the warranty period has expired,ship it prepaid and insured to the Factory Service Center below.
Enclose a description of your complaint:your name,company name,address,and day time telephone number,You will be advisd of
estimated repair charges.
NOTE:This warranty is valid only if the product is used for the purpose for which it was designed. It does not cover:
(i ) products which have been damaged by negligence,misuse, accidents,abuse,acts of God, or units which have been modified or
repaired by unauthorized persons,
(ii ) cracked or broken units damaged by excessive heat or cold, or units exposed to excessive UV light.
(iii ) products which havetheir serial numbers removed,altered or rendered illegible,
(iv ) products that have been in constant use (24 hours per day, 7 days per week)that have cold cathode florescent tubes(CCFT) that
do not provide sufficient illumination,
(v ) the cost of shipping this product to the Factory Service Center and its return to you.
No warranty,expressed or implied,as to merchantability or fitness for a particular use is made beyond this Limited Warranty.
Tote Vision will not be liable for incidental or consequential damages or lost profits arising form product defects or malfunctions. This
warranty is valid only in the United States of America and does not extend to owners of the product subsequent to the original
purchaser.Any applicable implied warranties are also limited to 1 year and Tote Vision will not be liable for consequential damages.
(Some states do no allow limitations on implied warranties or exclusions of consequential damages,so that thes restrictions may not
apply to you.) This warranty gives you specific legal rights,and you may also have other rights which vary from state to state.
As a precondition to receiving any of the benefits of this limited warranty,your completed warranty registration information
must be on file in our office. IF YOUR INFORMATION IS NOT ON FILE WITH US, ALL WARRANTY CLAIMS WILL BE
DENIED. TO PROTECT YOUR WARRANTY, MAIL YOUR REGISTRATION INFORMATION TODAY! Submission of a unit
determined not defective will result in a charge to you for testing and handling the unit. Thoroughly test your unit before submitting it
for warranty claim repair.
Send unit to : TOTEVISION SERVICE CENTER 1319 Dexter Avenue N.#020,Seattle, Wa98109
For further information: call (206) 623-6000 fax (206) 623-6609
WARRANTY REGISTRATION
Protect your Warranty by completing and mailing this form to : ToteVision,1319 Dexter Avenue N.# 020, Seattle, Wa98109
Model Number: Serial Number:
Name:
Address:
City: State: Zip:
Telephone number: ( )
Dealer: Dealer City: State:
 Loading...