

TOTALINE TOC009DS, TOC018DS, TOC012DS, TOC024DS, TOU009DS Owner's Manual
...
Beijer Ref AB
Stortor get 8
Malmö
Sweden
OWNER’S
L
G B
ENG ISH
S K
SLO VENČI NA
C Z
ČEŠ TINA
R O
ROM ÂNĂ
MAG YAR
H U
OWNER’S MANUAL
NÁVOD NA POUŽITIE
MANUAL DE UTILIZARE
HASZNÁLATI ÚTMUTATÓ
NÁVOD K OBSLUZE
Carrier is committed for continuous improvement of Carrier products according to national and international
standards to ensure the highest quality and reliability standards, and to meet market regulations and requirements.
All specifications subject to change without prior notice according to Carrier policy of continuous development.
02
01
This pr oduct has bee n dete rmined t o be in com pliance wit h the Low Voltage Direct ive ( 2006 /95/EC),
and t he Ele ctrom agnetic Compat ibility Direc tive (200 4/108/ EC) of the Europe an Union.
Correct Disposal of This Product
(Waste Electrical & Electronic Equipment)
(When usin g th is air con dition er in Euro pean countries, t he follow ing guidance mu st be followed)
- This marking shown on the product or its literature, indicates that waste electrical and eletrical equipment (WEEE as in
directive 2002/96/EC) should not be mixed with general household waste.
It is prohibited to dispose of this appliance in domestic household waste.
For disposal, there are several possibilities:
1. The municipality has established collection systems, where electronic waste can be disposed of at least free of charge to
the user.
2. When buying a new product, the retailer will take back the old product at least free of charge.
3. The manufacture will take back the old appliance for disposal at least free of charge to the user.
4. As old products contain valuable resources, they can be sold to scrap metal dealers.
Wild disposal of waste in forests and landscapes endangers your health when hazardous substances leak into the
ground-water and find their way into the food chain.
Read this manual before using the product!
This appliance can be used by children aged from 8 years and above and persons with reduced physical,
sensory or mental capabilities or lack of experience and knowledge, if they have been given supervision or
instruction concerning use of the appliance in a safe way and understand the hazards involved.
Children shall not play with the appliance. Cleaning and user maintenance shall not be made by children without
supervision.
Moving parts of appliance must be installed/located at the level not less than 2.3m from the floor.
ELECTRICAL work may only be performed by authorized personnel and inaccordance with national wiring
standard. If the supply cord is damaged, it must be replaced by the manufacturer, its service agent or similarly
qualified persons in order to avoid a hazard.
CAUTION
Guides, Tips and Cautions
CONTENT
1.1 Safety Precautions
1.2 Part Names
2.1 Operating Conditions
2.2 Manual Operation
2.3 How it Works
2.4 Directional Control
2.5 Special Functions
Care and Maintenance
03
06
07
07
08
09
10
11
13
3. CARE
4. TROUBLE SHOOTING
1. READ BEFORE OPERATING
2. OPERATION
READ BEFORE OPERATING
WARNING!
-This appliance is not intended for use by persons (including children) with reduced
physical, sensory or mental capabilities, or lack of experience and knowledge, unless
they have been given supervision or instruction concerning use of the appliance by a
person responsible for their safety.
- Children should be supervised to ensure that they do not play with the appliance.
Indoor Unit Outdoor Unit Rated Voltage & Hz
220-240V~, 50/60Hz
T
OC009DS
OC012DS
T
OC018DS
T
OC024DS
T
TOU009DS
T
TOU012DS
T
TOU018DS
T
TOU024DS
T
G B
READ BEFORE OPERATING
04
03
1.1 Safety Precautions
● Follow these instructions carefully to;
- avoid incorrect operation,
- prevent personal injury or consequential damage
- optimise product life
● The level of seriousness is classified as follows:
WARNING
This symbol indicates the possibility of
personnel injury or loss of life.
CAUTION
● Symbols used in this manual:
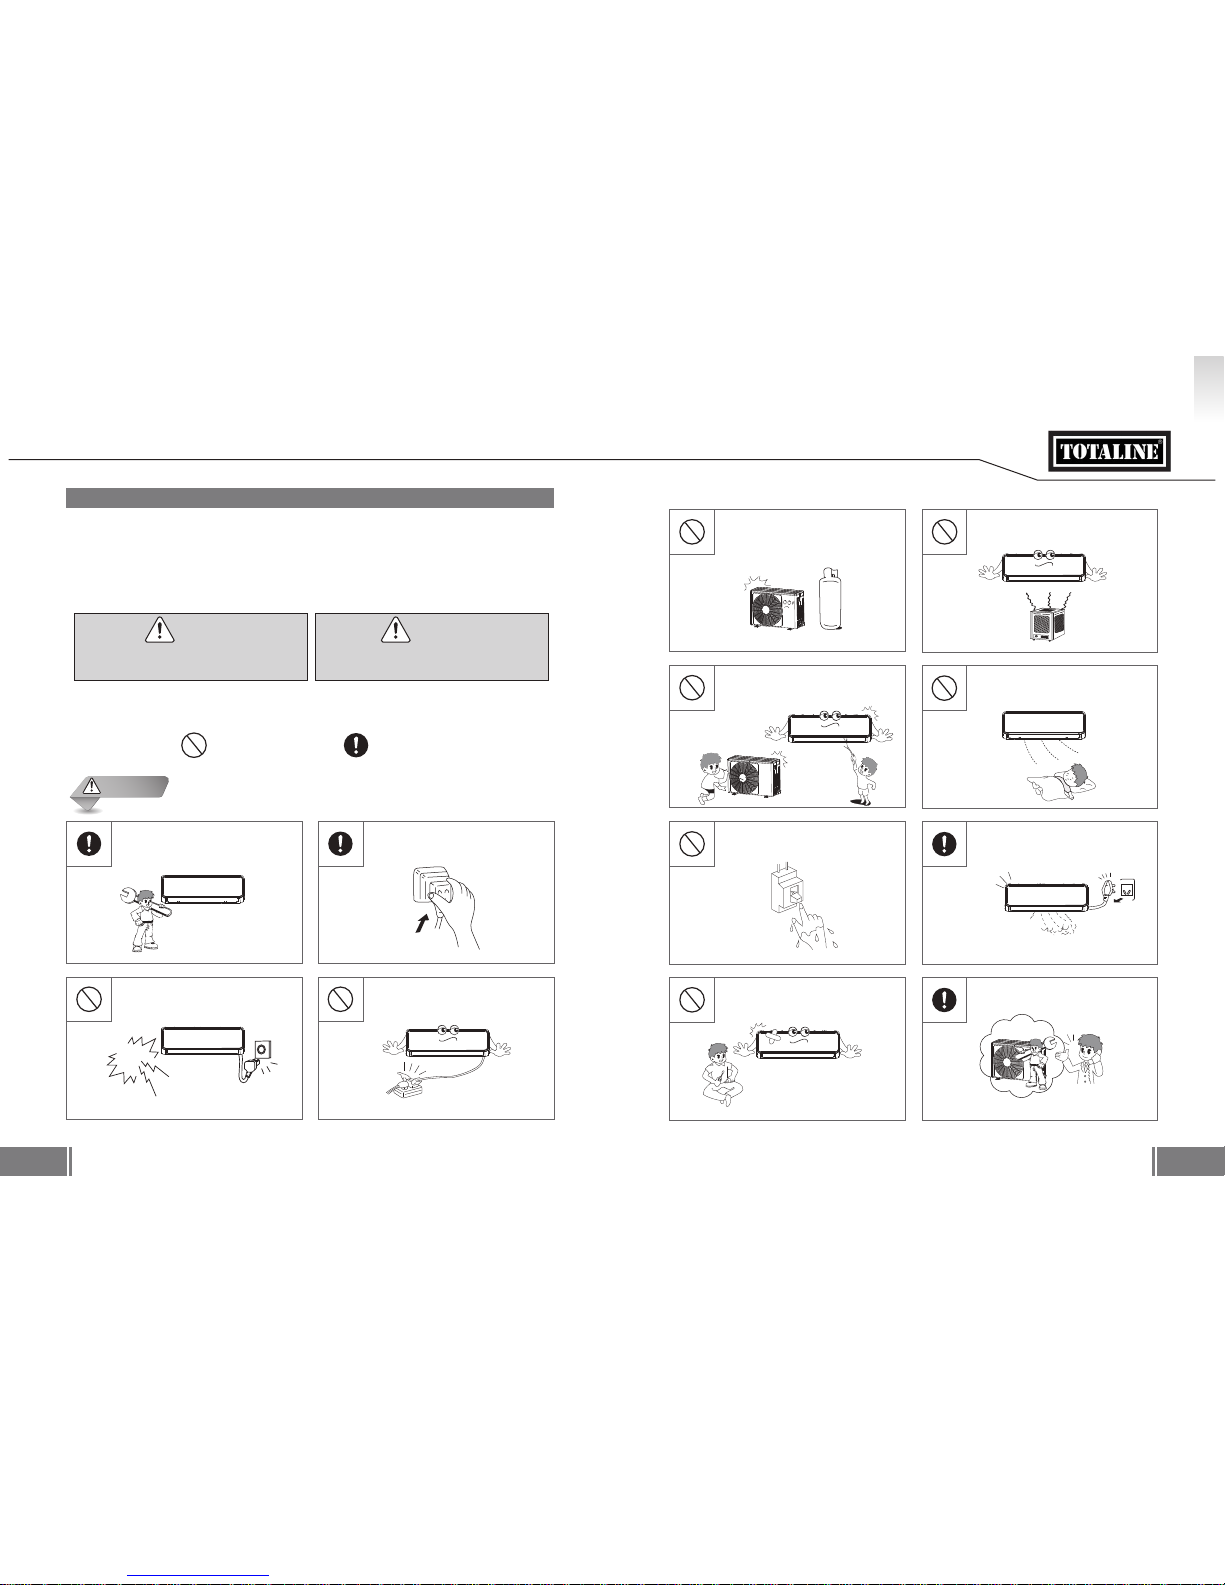
The task of installing this product must
only be performed by suitably qualified
and appropriately experienced persons.
Power plug must be securely inserted
into the socket outlet if applicable
Do not operate or stop the unit by
connecting or disconnecting power plug
Do not use extension cord or share the
same power outlet with other appliances
COMPLYAVOID
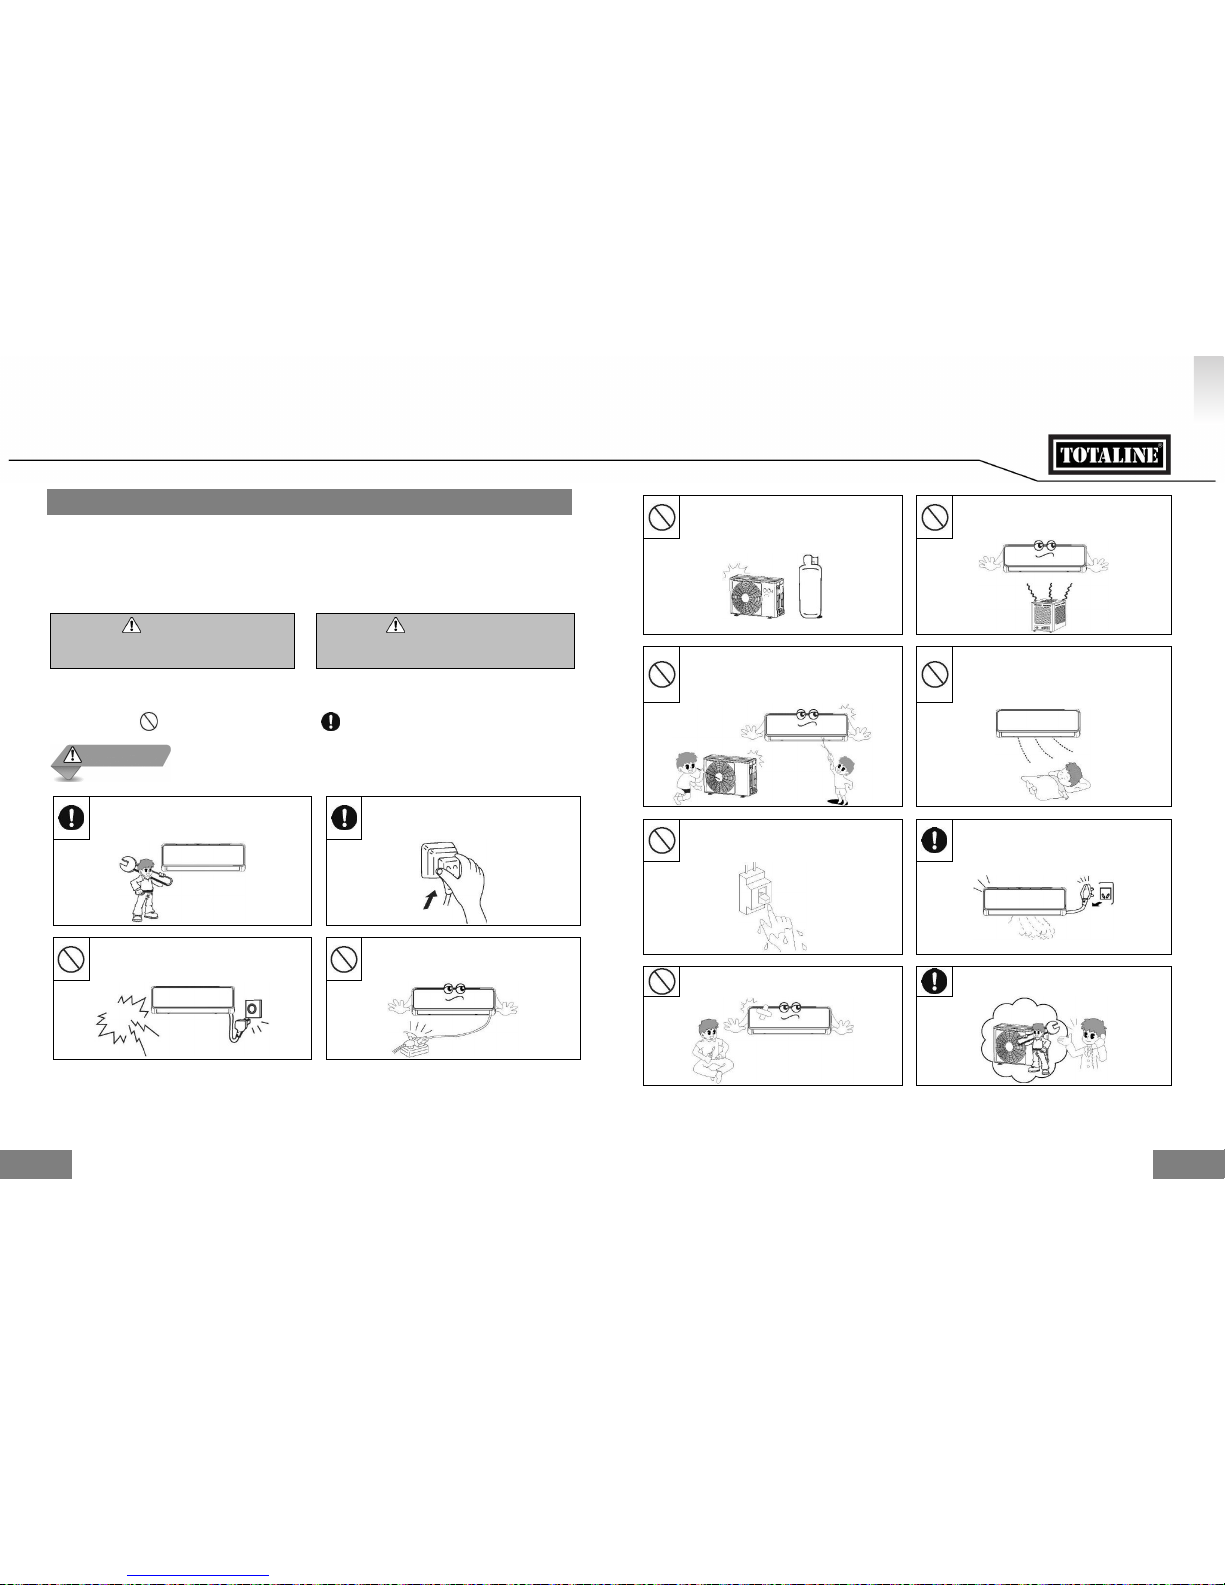
WARNING
Children must be advised not to play with
the air conditioner controls, moving parts
and/or refrigeration and electrical
connections.
Prolonged exposure to drafts may lead to
muscular discomfort and dry eyes.
Operating with wet hands may result in
electrical shock
Turn off the unit if unusual smells,
sounds or vibrations are noticed. Contact
authorized dealer.
Do not attempt to repair, move or modify
your air conditioner.
Seek professional help – contact an
authorized dealer.
Do not use flammable gas or
ombustibles such as gasoline, benzene,
thinner, etc. in the conditioned space.
Do not use a heating appliance in the
conditioned space.
This symbol indicates the possibility of
property damage or serious consequences.
G B
READ BEFORE OPERATING
06
05
Do not climb or place objects on the unit. Do not block air inlets or outlets. Poor
performance, increased running costs
and reduced product life will result.
Disconnect BEFORE cleaning or
servicing.
Regularly inspect air filters and clean
them if required.
Unplug the unit when unused for long
periods
The product is intended for human
comfort ONLY
When cleaning, use water sparingly to
prevent electrical shock.
Never use strong detergents, solvents or
abrasive polish on the product.
CAUTION
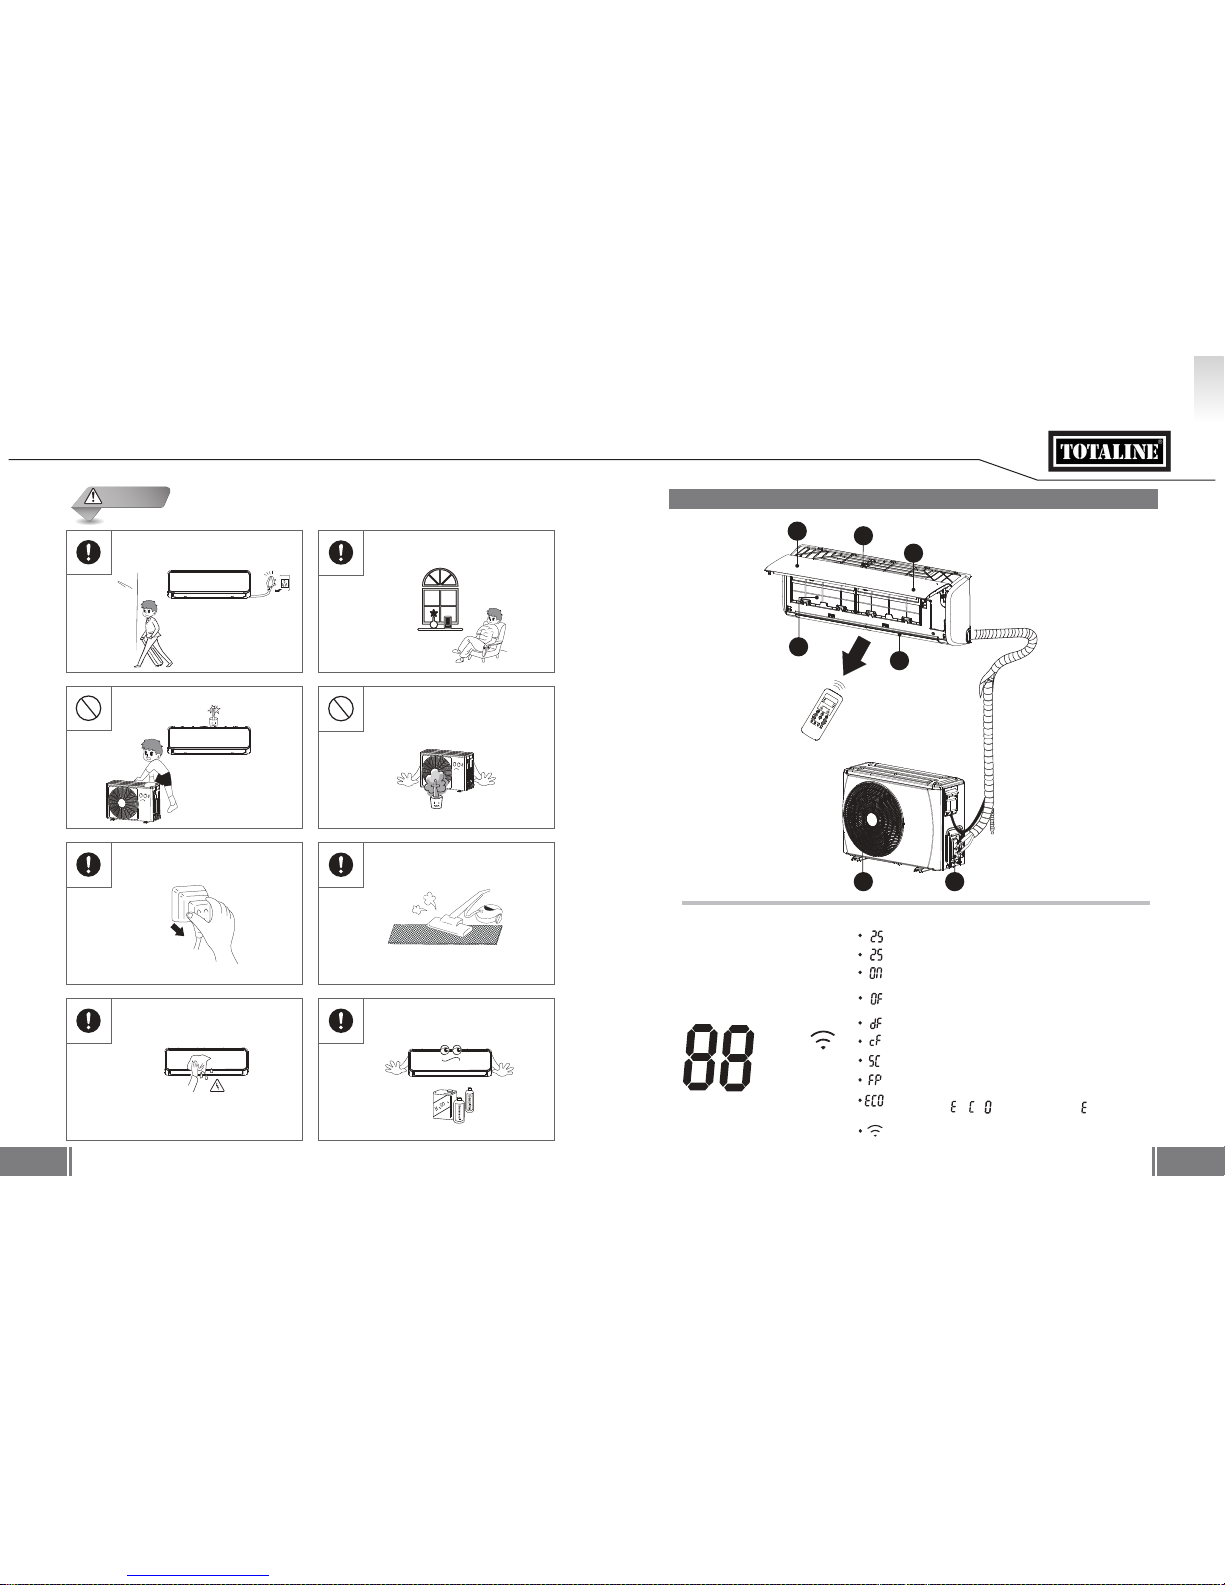
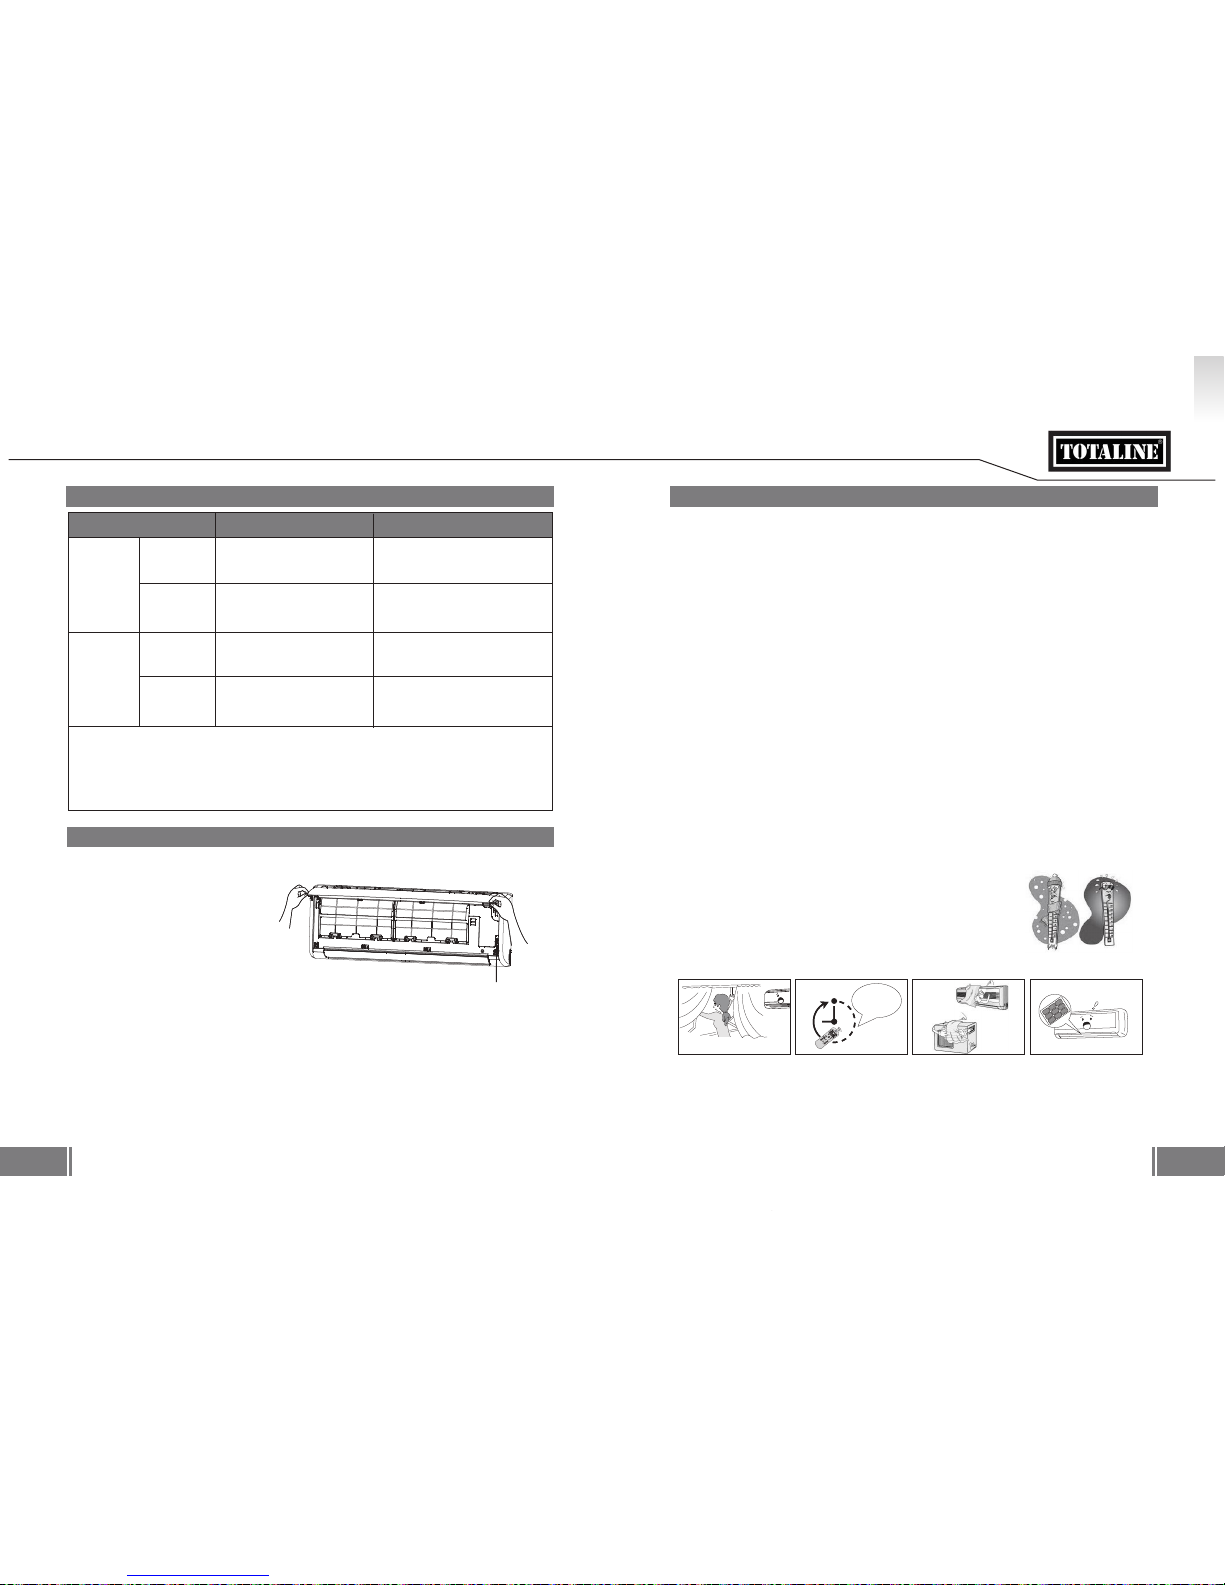
1.2 Part Names
■ Display symbols
Note: A guide on using the infrared remote controller refer to the remote controller manual.
■ Indoor
1. Front Panel
2. Air Inlet
3. Display
4. Air Filter
5. Louver
6.Grille
7. Service valve
■ Outdoor
4
5
1
2
3
Air Outlet
Shows setting temperature in normal operation.
Display symbol represent:
[*] Model dependent
6
7
Shows room temperature in FAN mode.
Display it for three seconds when timer on is set, or activate
Air purification*, Swing, Turbo and Silence* fuction.
Display it for three seconds when timer off is set, or cancel
Air purification*, Swing, Turbo and Silence* fuction.
Defrosting operation*
Cold draft prevention*
Self clean*
Freeze Protection*
When ECO funciton* is activated, the display illuminates in
sequence as “ -- -- -- setting temperature -- ...” in
one second interval.
WIFI function (only for the model with WIFI module)*
ECO
G B
OPERATION
08
07
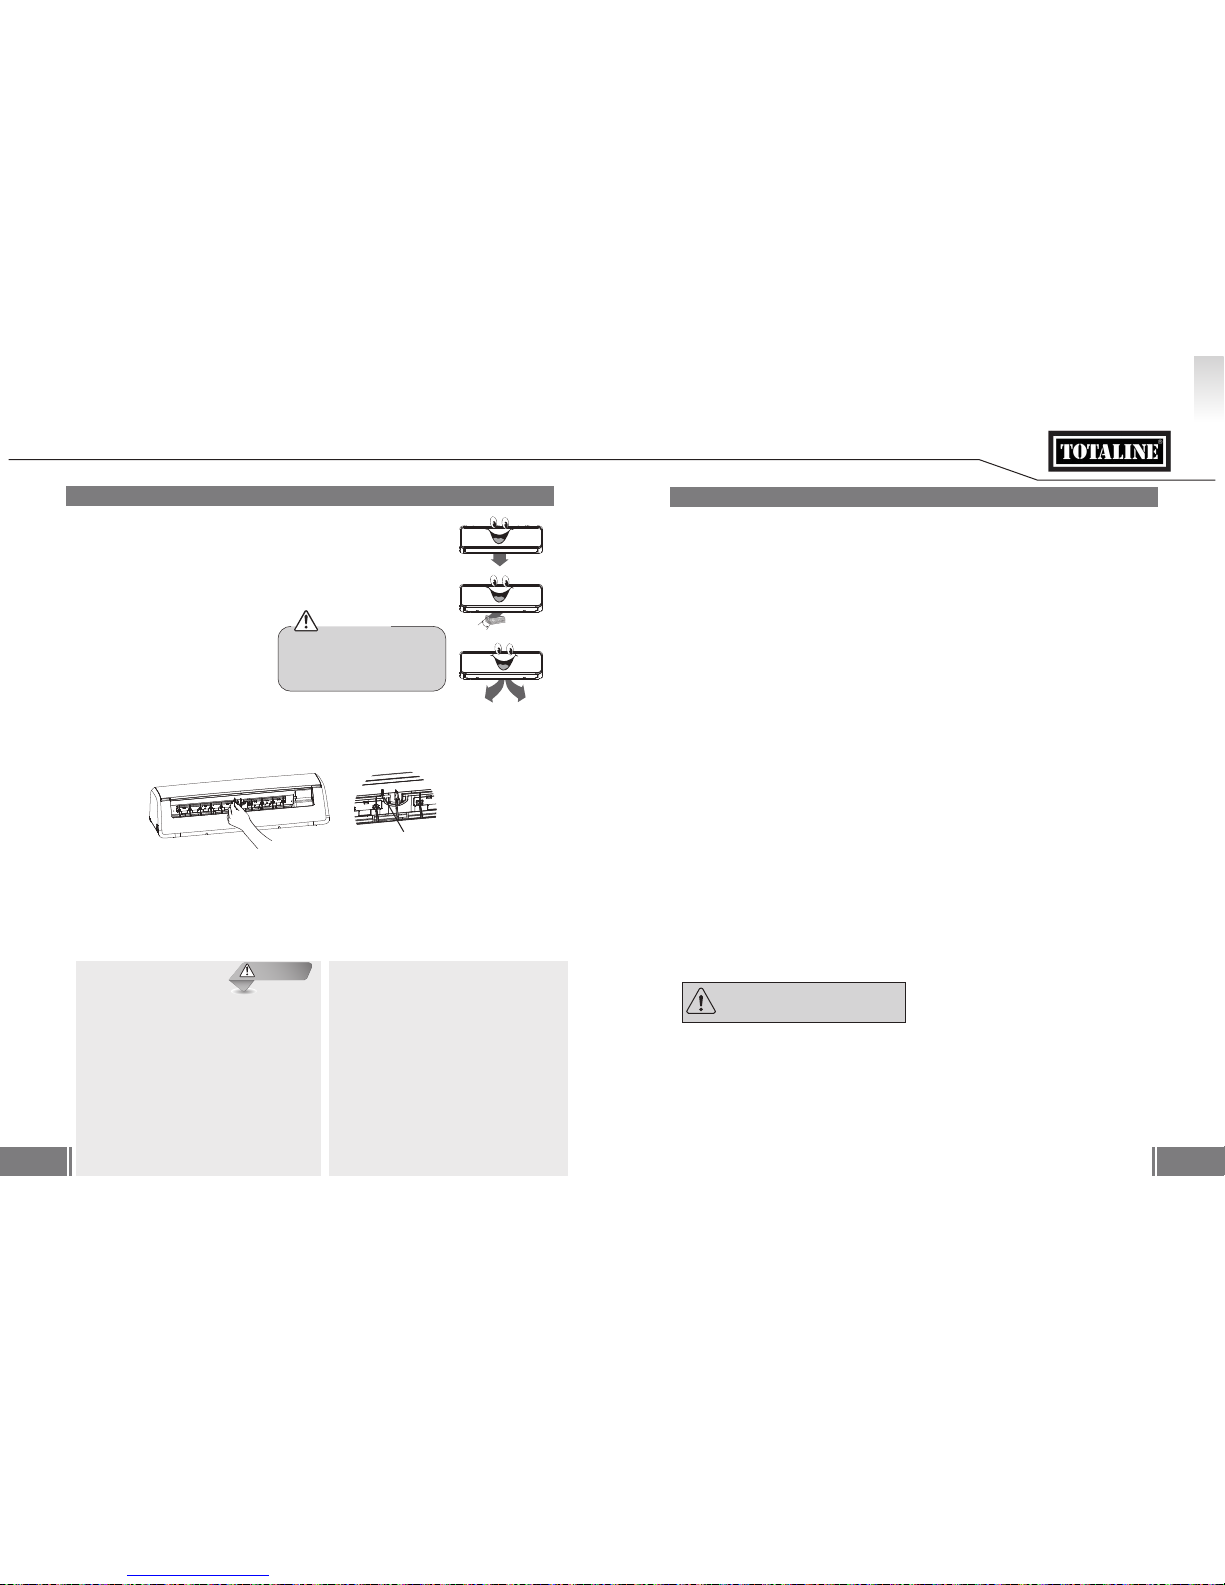
2.2 Manual Operation
Manual operation is available to control the unit when your remote is unavailable.
ACCESS
Open the front panel by carefully
lifting both ends at the same time.
Once lifted sufficiently, a click is heard
and it becomes self-supporting.
OPERATE
Press the manual button repeatedly to change modes as follows;
a Once = AUTO mode [heat, cool or fan and auto fan speed].
b Twice=COOLING mode [ switches to AUTO mode after 30 minutes (mainly used for
testing purpose)].
c Three times = OFF.
COMPLETE
Close the panel by firmly tugging downwards on both ends until it returns to its original
position.
RESTORE
Using the remote controller will return the unit to normal operation.
2.1 Operating Temperature
2.3 How It Works!
● In this setting the system will automatically change modes and fan speed to the set
temperature.
● In spring and autumn, closer temperature control may require COOL/HEAT mode
changes.
In this mode, priority is given to dehumidifying the air. Low fan speed and compressor
cycling is used to achieve this and regulate room temperature.
When selected, the set temperature will increase (cooling) or decrease (heating) by 1°C
per hour for the first 2 hours. Thereafter it keeps this new temperature for 5 hours
before switching off.
This operation saves energy and improves night time comfort by synchronising with the
body’s metabolism.
AUTO Mode
DRY Mode
SLEEP Mode
Hints For Economical Operation
● Adjust the temperature to achieve moderate comfort levels.
● Excessively low or high temperatures waste energy.
● Improve performance by keeping windows and doors closed.
● Limit energy usage [run time] by using the TIMER function.
● Do not block air inlets or outlets. It will cause poor performance, increased running costs
and reduced product life.
● Inspect the air filters periodically, and clean them when needed.
Please clean
cold hot
Please close
Basic Operation Modes:AUTO / COOL / DRY / HEAT* / FAN
[*]Model dependent
Note: DB - Dry Bulb
1. Optimum performance will be achieved within these operating temperatures.
2. When the unit operates above or below these conditions for a long time, system diagnostics may detect a malfunction
and the unit will not operate properly.
3. Room relative humidity - less than 80%. If the air conditioner operates outside this range, the surface of the air conditioner
may attract condensation. Please set the air flow louver to its maximum angle and set HIGH fan mode.
Use the timer
effectively
Manual Button
ECO mode can be activated at cooling mode for energy saving. When selected, the unit
will automatically regular the fan speed and compressor rotation. It provides you the
same comfort with minimum power consumption in 8 hours running time.
The set temperature can be selected from 24 ~ 30 °C when ECO is activated.
ECO Mode*
Indoor
Outdoor
Upper limit
27°C DB
Lower limit
0°C DB
Cooling
operation
Upper limit
32°C DB
Lower limit
18°C DB
Heating
operation
-15°C DB
24°C DB
-15°C DB
46°C DB
G B
OPERATION
10
09
Louver position
Maximum down
In COOLING or DRY mode, condensate may
form and drip from unit in high humidity condition.
Narrow opening
Restricted air flow reduces performance and
may cause condensate.
Closed
Do not operate if it will not open – damage
may occur.
Louver action
After a quick restart, louver may remain
static for about 10s.
Adjusting horizontal air flow
Step 1
ISOLATE the unit at the MAIN switch
(or unplug)
Step 2
Pull horizontal louver downwards using both hands.
Step 3
Identify the lever/s as indicated.
[On uppermost part of air outlet and linked to recessed vertical blades]
Step 4
Move the lever/s left or right to guide the air in the desired direction.
Step 5
ENERGISE the unit at the MAIN switch! (or plug back in)
Attention: Isolating the main power supply synchronises the horizontal
louver.
WARNING!
Do not attempt this adjustment
while the machine is in operation.
Accidental contact with the fan
may cause serious injury.
2.4 Directional Control
Adjusting vertical air flow
● Press “AIR DIRECTION” on remote controller to adjust vertical
air flow direction. The louver position moves slightly
each time the button is pressed.
● Press “SWING” to engage continuous louver motion.
Note: Please refer to the REMOTE CONTROLLER MANUAL for details
CAUTION
2.5 Special Functions
■ Compressor Delay
At start-up, a time delay of 3 ~ 4 minutes
protects the compressor.
■ Air Purification*
Ionizer*
Negative ions are added to the air to
simulate the effects of forests and
waterfalls on humans.
Plasma*
Dust particles in the passing air stream are
charged electrically. This enhances dust
collection, odour reduction and reduces
airborne bacteria mortality.
■ Mildew Prevention*
This function keeps the indoor fan running
in low speed for 7 ~ 10 minutes after being
turned off by the user in cooling mode.
Drying the water droplets on the indoor
heat exchanger prevents mildew growth.
■ Louver Memory
Horizontal louver angle is memorised and
will return to the position last selected by
the user.
This will not happen in TURBO mode,
running by manual control buttons, or after
a power interruption.
Interrupting this process may scramble the control logic.
To reverse this, briefly disconnect the electrical supply.
[*] Model dependent.
■ WIFI Control*
With WIFI function, the unit can be
controlled either by remote controller or by
your mobile phone. Connect the WIFI
module and communication module with
display board to activate this function.
■ Auto swing of horizontal air flow
Press “SWING” for two secends to
engage vertical blades swing motion.
Note: Please refer to the REMOTE
CONTROLLER MANUAL for details.
Features (Model dependent)
Lever
■ Turbo
The Turbo function makes the unit work
extra hard to reach your present
temperature in the shortest time possible.
■ Self Cleaning*
Airborne bacteria always grows provided that
there is moisture on the indoor heat excharger.
Regular drying of the exchanger prevents this
growth. By simply pressing the “self clean”
button, the controller will automatically manage
the process.
■ Cold Draft Prevention
To avoid uncomfortable when the air
conditioner get into heating mode, the indoor
unit will preheat before the fan starts. This
delay should only last a few minutes.
■ Auto Restart
The unit will automatically restart after a
power interruption.
Previous user’s settings are all recovered.
■ Auto Defrost
Ice develops on the outdoor unit in heating
mode. To defrost this ice, the indoor fan
stops for a few minutes before heating
continues.
■ Auto Leak Detection
When refrigerant leakage is detected,
the unit will display “EC” code or flash
LEDs [model dependent].
G B
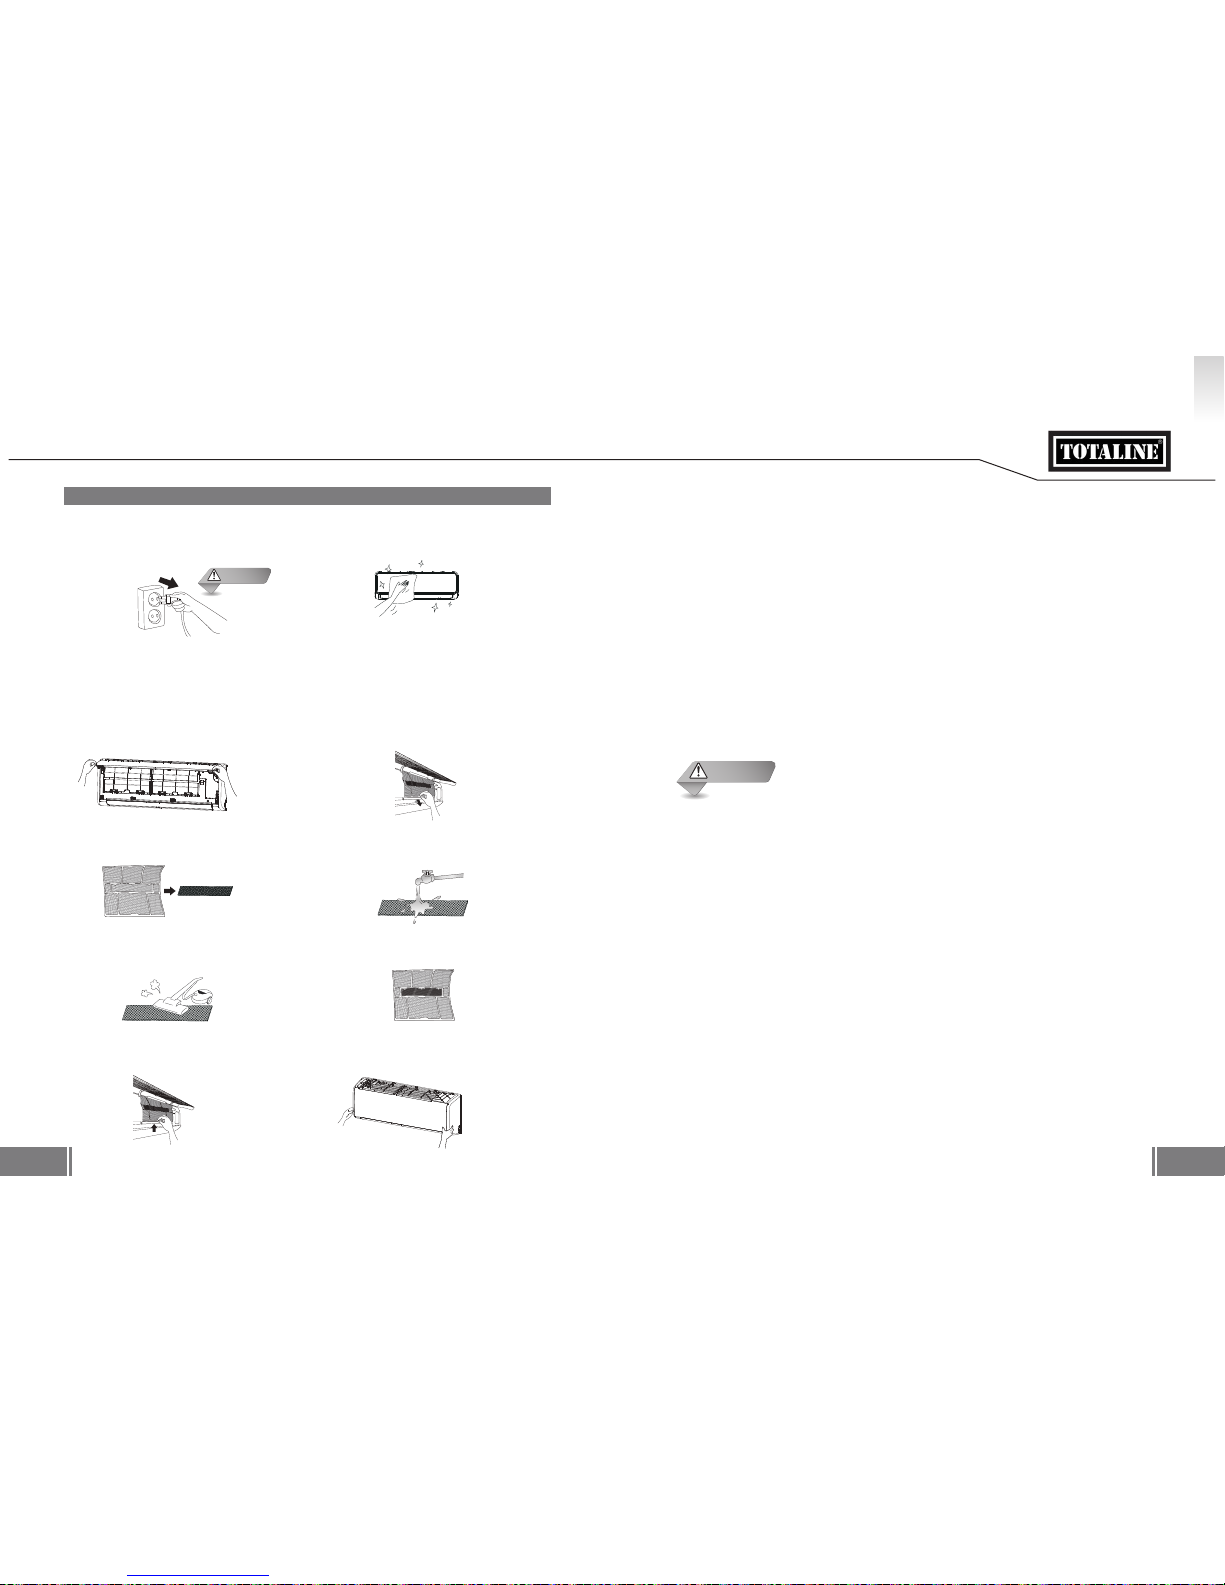
CARE
12
11
3 Unclip the small specialized filter.
5 Vacuum clean the small filter/s.
[Replace occasionally]
6 Refit the small filter onto the large filter.
8 Close the front panel.7 Re-insert into unit in the reverse order
described in point 2 above.
4 Clean the large air filter/s with soapy
water. Rinse with fresh water. Shake off
excess water.
DISCONNECT from power source
BEFORE attempting to clean or service!
General Cleaning
Use a soft damp cloth when cleaning the
grille, casing and remote controller.
● No chemicals e.g. detergents, solvents,
abrasive polish, etc,
● No heat (over 40
°C)
1 Open the front panel by carefully lifting
both ends at the same time.
At a certain angle, a clicking sound is
heard and it becomes self-supporting.
2
Hold the tab on the filter to move it up a
little, then pull slightly towards you .
Now extract the filter by gently pulling it
downwards.
Filter Cleaning
Care and Maintenance
CAUTION
Regular high level maintenance of the indoor and outdoor units is essential.
- Specialist MAINTENANCE is required to do deep-clean, lubricate and function check of
all critical components.
- Do not attempt such work by yourself.
- Contact a suitable service provider.
Storage Preparation [long idle periods]
1) Clean the air filters
2) In humid or damp climates, operate in Fan mode until the unit has dried out.
3) Turn the air conditioner off with the remote controller and remove the batteries.
4) Disconnect from the power source.
Re-use After Storage
1) Reconnect to the power source
2) Wait 24 hours when the ambient temperature is low (For inverter model).
3) Reinstall the batteries into the remote controller and turn the unit on.
Preventative Maintenance
Regularly check your unit for:
1. Obstructed airflow through the indoor and outdoor units.
2. Water or oil leaks.
3. Damaged or disconnected wires
Metal parts may have sharp edges that cause injury. Take care!
CAUTION
G B
TROUBLE SHOOTING
14
13
The following may occur during normal operation,
and may not indicate malfunction.
Automatically happens in heating mode - prevents
cold air blowing onto occupants.
Frost removal on outdoor unit is in
progress (5 ~ 10mins).
May occur when unit temperature is low and room
air is hot and humid.
“Hissing”: normal – gas pressure equalizing when
compressor stops or starts.
"Squeaking": normal expansion and contraction of
plastic and metal parts.
Rushing air – normal when louver resets
its positi
on.
May occur when air conditioner is used for the
first time or has not been used for a long time.
Usually caused by chemicals, cigarette smoke, cooking
etc. If not the case call your suitable contractor.
Room temperature is the same as that selected with
the remote. If not the case call a suitable contractor.
May occur when outdoor temperatures are close
to or below zero degrees Celsius.
If not the ca
se call a suitable contractor.
Normal when power is restored after a
power failure.
Interference from cell phone towers and remote
boosters may cause the unit to malfunction.
Disconnect the power and then re-connect.
Press the ON/OFF button on the remote controller
to restart operation.
If the problem is not resolved call a suitable
contractor.
Case Explanation
A 3 minutes delay protects the compressor.Co
oling or heating is delayed.
Fan speed changes – off , very slow and
then normal
The heating operation stops suddenly and
defrost-light blinks.
Mist coming out of the indoor unit
Dust discharges from the unit.
Emits a peculiar odour.
Changes to fan only while cooling or heating.
Turns on automatically
Low volume sounds are emitted by
the air conditioner
Poor heating performance
Operation is erratic, unpredi
ctable or
unresponsive.
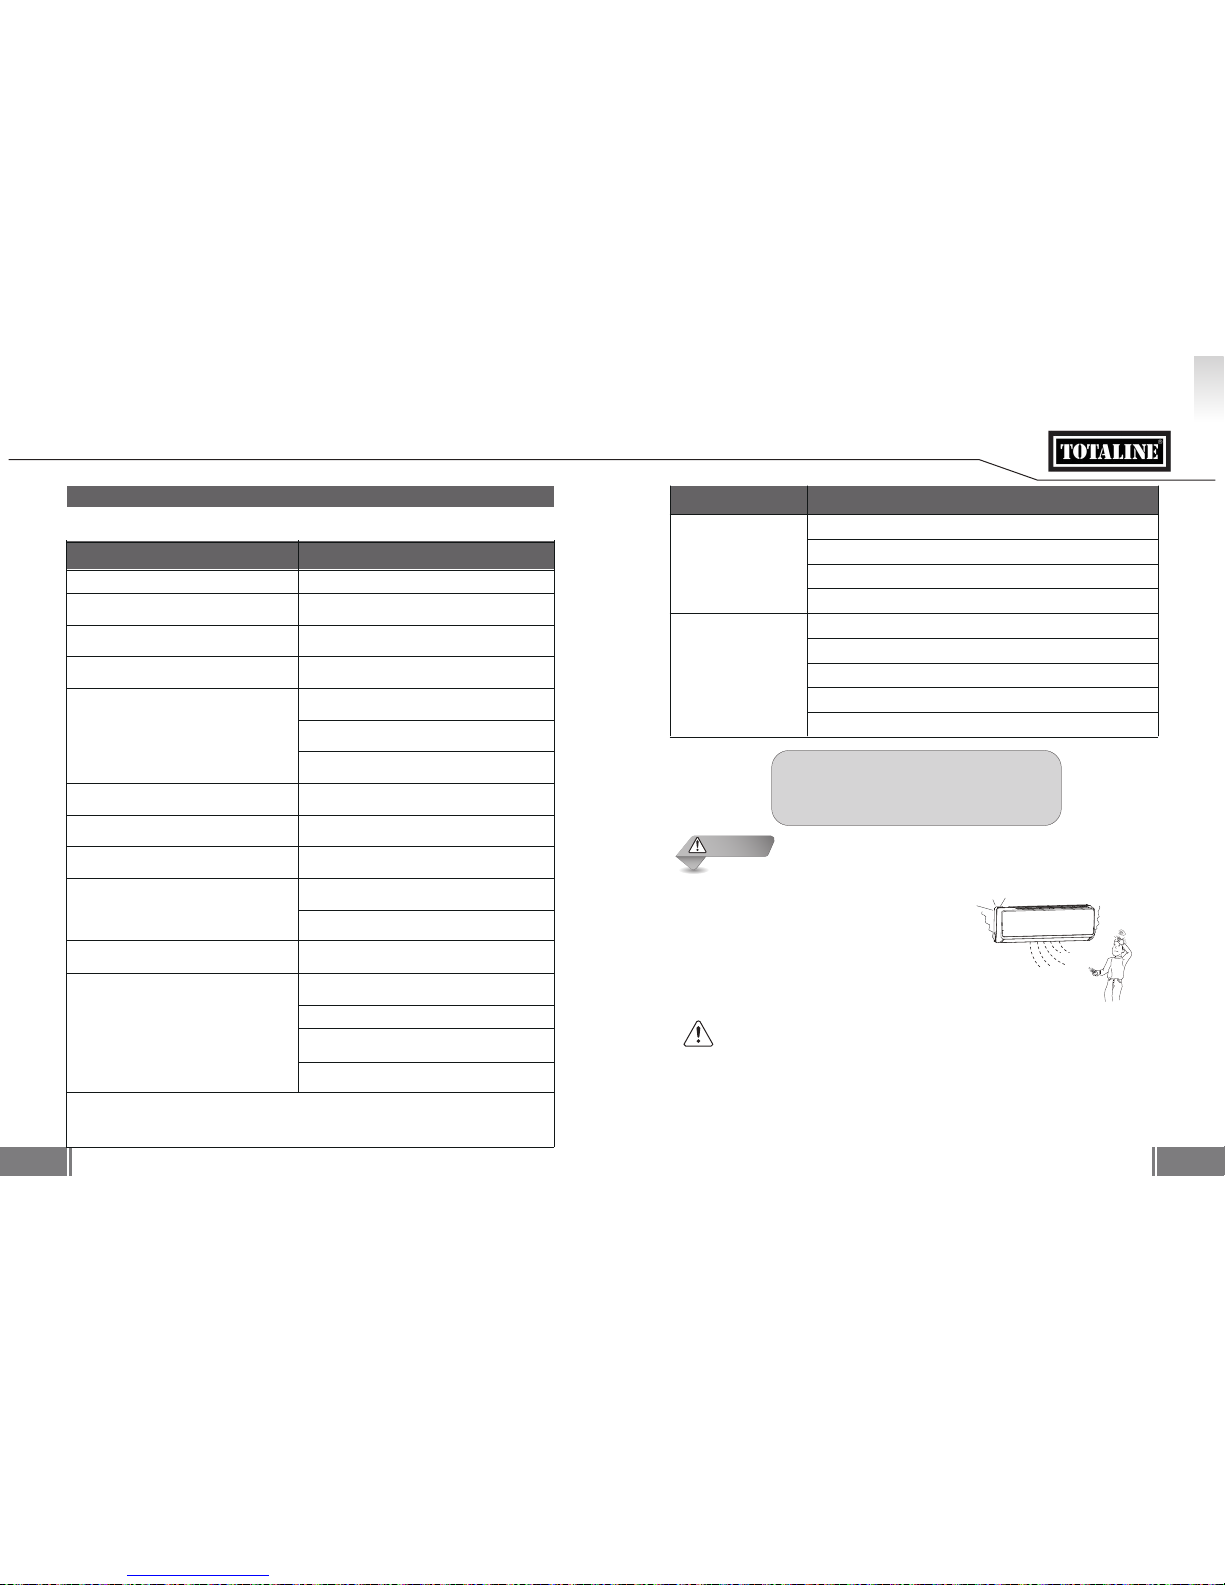
Guides, Tips and Cautions
CONCERN PLEASE FIRST CHECK!
• Is there a power failure?
• Has a switch been turned off, a circuit breaker tripped or a fuse blown?
• Are the batteries in the remoter control fresh?
• Are the clock and timer on the remote set correctly?
• Are the temperature and mode settings correct?
• Are the air filters clean?
• Are the windows and doors closed?
• Is air flow unrestricted in & out of indoor & outdoor units?
• Is fan speed on high and louvers allowing maximum flow?
Unit will not operate.
Not cool/warm enough.
UNIT NOT RESPONDING AS REQUIRED?
• Record the product’s model number,
• Contact a suitable contractor,
• Share all observed details!
In the case of ANY of the following, turn off the unit immediately!
• Power cord is damaged or abnormally warm.
• Burning odours are smelled.
• Loud or abnormal sounds are heard.
• A power fuse blows or a circuit breaker trips frequently.
• Water or other objects fall into or out of the unit.
• Indicators blink continuously.
• A self-diagnostic code is displayed e.g. E0, E1, E2 … or P0, P1, P2… etc.
DO NOT ATTEMPT TO CORRECT THESE ITEMS YOURSELF!
CONTACT A SPECIALIST SERVICE PROVIDER!
(
C
)
ˇ
TE
M
P
A
U
T
O
C
O
O
L
D
R
Y
H
E
A
T
F
A
N
H
I
G
H
M
E
D
L
O
W
M
O
D
E
F
A
N
S
P
E
E
D
T
I
M
E
R
O
N
S
L
E
E
P
O
N
/
O
F
F
T
I
M
E
R
O
F
F
A
I
R
D
I
R
E
C
T
I
O
N
R
E
S
E
T
L
O
C
K
S
E
T
T
E
M
P
E
R
A
T
U
R
E
S
W
I
N
G
L
E
D
D
I
S
P
L
A
Y
T
U
R
B
O
?
?
?
CAUTION
The multi-system air conditioner can not be in different operating modes at the same time, such as one
unit being in the “COOL” mode and one unit being in the “HEAT” mode.
When conducting different operations, the “HEAT” mode will be given priority. The indoor unit which
operates in “COOL” or “FAN” mode will stop and display “P5”.
G B
PREŠTUDUJTE SI PRED UVEDENÍM DO PREVÁDZKY
2
1
Tento produkt je v súlade so smernicami Európskej únie, a to smernicou o nízkom napätí (2006/95/ES)
a smernicou o elektromagnetickej kompatibilite (2004/108/ES).
Správna likvidácia tohto produktu
(odpad z elektrických a elektronických zariadení)
(Ak toto zariadenie používate v krajinách Európy, je potrebné riadiť sa nasledujúcimi pokynmi)
– Tento symbol nachádzajúci sa na samotnom produkte alebo v jeho dokumentácii označuje, že ide o elektrické a elektronické zariadenie
v zmysle smernice OEEZ (2002/96/ES), ktoré sa nesmie likvidovať spolu s bežným komunálnym od padom.
Likvidácia tohto zariadenia s komunálnym odpadom sa zakazuje. Máte niekoľko možností na likvidáciu:
1. Miestna samospráva zriadila zberné strediská, v ktorých možno bezplatne odovzdať staré spotr ebiče.
2. Pri kúpe nového produktu predajca odvezie váš starý spotrebič.
3. Výrobca bezplatne vyzdvihne starý spotrebič na likvidáciu.
4. Keďže staré spotrebiče obsahujú cenné suroviny, možno ich predať v zberniach kovového odp adu.
Neriadená likvidácia odpadu v lesoch a na poliach ohrozuje vaše zdravie, pretože môže dôjsť k úniku škodlivých látok do podzemnej
vody a ich vstupu do potravinového reťazca.
Interiérová jednotka
Exteriérová jednotka
Menovité napätie a frekvencia
42QHC009DS*/42QHC009ES*
38QHC009DS*/38QHC009ES*
220-240 V, 50/60 Hz
42QHC012DS*/42QHC012ES*
38QHC012DS*/38QHC012ES*
42QHC018DS*/42QHC018ES*
38QHC018DS*/38QHC018ES*
42QHC024DS*/42QHC024ES*
38QHC024DS*/38QHC024ES*
■ Pred použitím výrobku si prečítajte tento návod!
■ Toto zariadenie môžu používať deti od 8 rokov veku a osoby so zníženými fyzickými, zmyslovými alebo mentálnymi
schopnosťami, resp. nedostatkom skúseností a znalostí, v prípade, že boli poučené o bezpečnom používaní
spotrebiča a chápu súvisiace riziká.
■ Deti sa nesmú hrať so zariadením. Čistenie a údržbu zariadenia nesmú vykonávať deti bez dozoru.
■ Pohyblivé časti spotrebiča sa musia namontovať/nachádzať najmenej 2,3 m nad podlahou.
■ Zapojenie ELEKTROINŠTALÁCIE smie vykonať len autorizovaný personál v súlade s príslušnými normami.
Aby sa predišlo ohrozeniu v prípade poškodenia napájacieho kábla, musí ho vymeniť výrobca, jeho servisný
zástupca alebo iná podobne kvalifikovaná osoba.
OBSAH
1. PREŠTUDUJTE SI PRED UVEDENÍM DO PREVÁDZKY
1.1 Bezpečnostné opatrenia...................................................................................................................... 3
1.2 Názvy častí ........................................................................................................................................... 6
2. PREVÁDZKA
2.1 Prevádzkové podmienky .................................................................................................................... 7
2.2 Ručná obsluha .................................................................................................................................... 7
2.3 Ako zariadenie funguje ........................................................................................................................ 8
2.4 Ovládanie smeru prúdenia vzduchu .................................................................................................. 9
2.5 Špeciálne funkcie ................................................................................................................................ 10
3. STAROSTLIVOSŤ
Starostlivosť a údržba ................................................................................................................................... 11
4. RIEŠENIE PROBLÉMOV
Rady, tipy a upozornenia ........................................................................................................................... 13
- Toto zariadenie nie je určené na používanie osobami (vrátane detí) so zníženými fyzickými, zmyslovými
alebo mentálnymi schopnosťami, resp. nedostatkom skúseností a znalostí v prípade, že neboli poučené
o bezpečnom používaní spotrebiča osobou zodpovednou za ich bezpečnosť.
- Deti by mali byť pod dozorom, aby sa zabezpečilo, že sa so zariadením nebudú hrať.
VAROVANIE!
UPOZORNENIE
S K
PREŠTUDUJTE SI PRED UVEDENÍM DO PREVÁDZKY
4
3
1.1 Bezpečnostné opatrenia
• Tieto pokyny dôsledne dodržiavajte, vďaka čomu:
– zabránite nesprávnej prevádzke,
– predídete poraneniu osôb alebo následnému poškodeniu majetku,
– zabezpečíte optimálnu životnosť produktu.
• Úroveň závažnosti sa klasifikuje takto:
VAROVANIE
UPOZORNENIE
Tento symbol označuje riziko poranenia alebo úmrtia.
Tento symbol označuje riziko poškodenia majetku alebo
závažných následkov.
• Symboly použité v tomto návode:
ZABRÁNIŤ
DODRŽIAVAŤ PRAVIDLÁ
Montáž tohto produktu smú vykonať len osoby
s dostatočnou kvalifikáciou a náležitými
skúsenosťami.
Ak zariadenie využíva zásuvku, koncovku
napájacieho kábla je do nej potrebné pevne
zasunúť.
Zariadenie nezapínajte ani nevypínajte
zapojením alebo odpojením napájacieho kábla.
Nepoužívajte predlžovacie káble. Do zásuvky,
v ktorej je zapojené zariadenie, nezapájajte
ďalšie spotrebiče.
Prístroj neumiestňujte do blízkosti
horľavých plynov ani iných horľavých látok,
ako je napríklad benzín, benzén, riedidlo atď.
V klimatizovanej miestnosti nepoužívajte
vykurovací spotrebič.
Deti je nutné poučiť, aby sa nehrali s ovládacími
prvkami, pohyblivými časťami a elektrickými
prípojkami, resp. prípojkami chladiaceho okruhu,
klimatizačného zariadenia.
Dlhodobé vystavenie prievanu môže viesť
k bolestiam svalov a vysušovaniu očí.
Obsluha zariadenia mokrými rukami môže
mať za následok úraz elektrickým prúdom.
Ak zaznamenáte neobvyklý zápach,
zvuk alebo vibrácie, zariadenie ihneď vypnite.
Obráťte sa na autorizovaného predajcu.
Klimatizačné zariadenie sa nepokúšajte
opravovať, presúvať ani pozmeňovať.
Obráťte sa na odborníkov – napr.
na autorizovaného predajcu.
VAROVANIE
S K

PREŠTUDUJTE SI PRED UVEDENÍM DO PREVÁDZKY
6
5
Ak zariadenie nebudete dlhší čas používať,
odpojte ho.
Tento produkt je určený IBA na spríjemňovanie
prostredia.
Na prístroj nevyliezajte ani naň neumiestňujte
žiadne predmety.
Neblokujte otvory na prívod a odvod vzduchu.
Môže to mať za následok nižší výkon, vyššie
prevádzkové náklady a kratšiu životnosť produktu.
Pred čistením a vykonávaním servisu zariadenie
odpojte.
Pravidelne kontrolujte vzduchové filtre a podľa
potreby ich čistite.
Pri čistení používajte len malé množstvo vody,
aby ste sa vyhli zásahu elektrickým prúdom.
Nepoužívajte agresívne čistiace prostriedky,
rozpúšťadlá ani abrazívne leštidlá.
1.2 Názvy častí
■ Interiérová jednotka
■ Exteriérová jednotka
■ Symboly displeja
Poznámka: Návod na používanie infračerveného diaľkového ovládača nájdete v návode na použitie diaľkového ovládača.
Zobrazuje teplotu nastavenia pri normálnej prevádzke.
Zobrazuje teplotu v miestnosti pri prevádzke v režime FAN (ventilátor).
Keď je nastavený časovač zapnutia, je možné ju zobraziť na tri sekundy, alebo aktivovať
funkciu Air purification* (čistenie vzduchu), Swing (pohyb lamely), Turbo a Silence* (tichý chod).
Keď je nastavený časovač vypnutia, je možné ju zobraziť na tri sekundy, alebo zrušiť
funkciu Air purification* (čistenie vzduchu), Swing (pohyb lamely), Turbo a Silence* (tichý chod).
Odmrazovanie*
Zabránenie vzniku studeného prievanu*
Samočistenie*
Ochrana proti zamŕzaniu*
Keď je aktivovaná funkcia ECO*, na displeji sa postupne rozsvieti údaj ako „
teplota nastavenia “. Každú sekundu.
Funkcia Wi-Fi (iba v prípade modelov s modulom Wi-Fi)* [*] Závisí od modelu
1. Predný panel
2. Vstup vzduchu
3. Displej
4. Vzduchový filter
5. Lamela
6. Mriežka
7. Servisný ventil
Význam symbolov na displeji:
UPOZORNENIE
S K
 Loading...