

TOTALINE P103-RRUVL-012, P103-RRUVL-018 Installation Instructions Manual
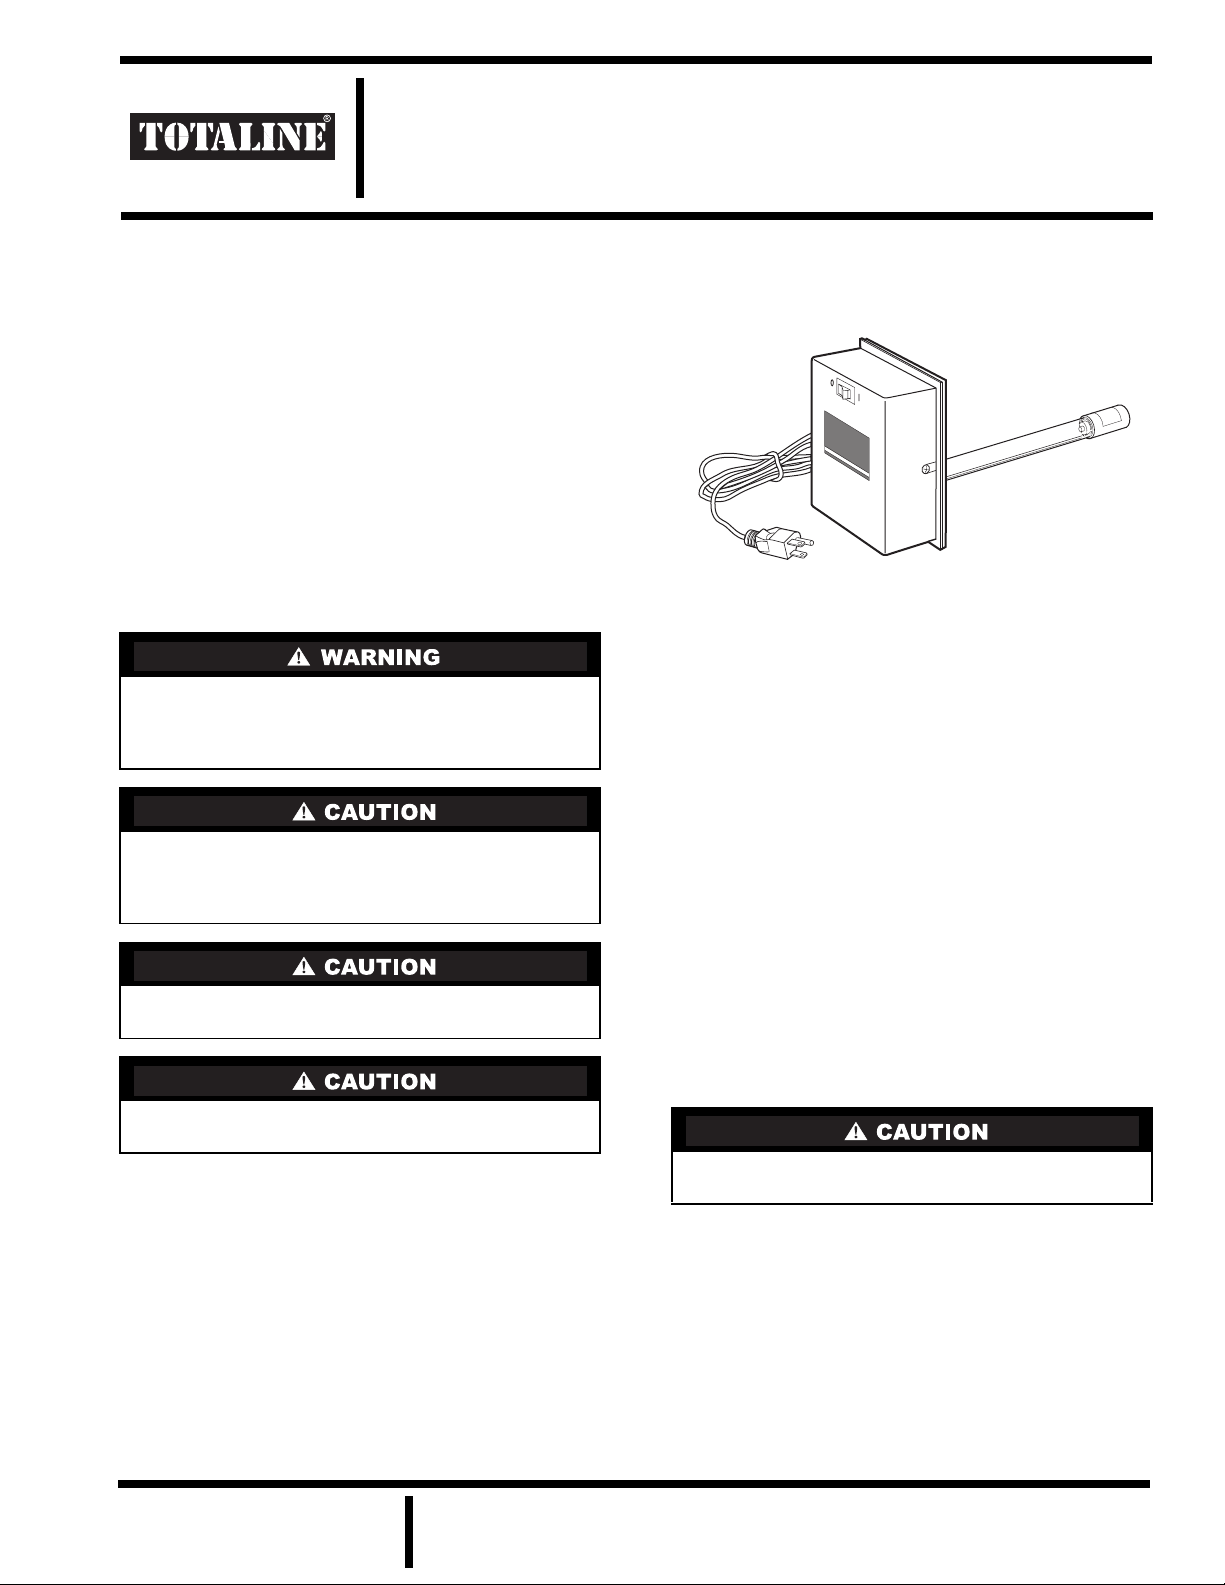
Fig. 1 — Fusion Ultraviolet Air Purifier
INSTALLATION
Fusion Residential Plenum
Ultraviolet Air Purifier
INSTRUCTIONS
Part Numbers: P103-RRUVL-012, P103-RRUVL-018
SAFETY CONSIDERATIONS
Installation and servicing of air-conditioning equipment can
be hazardous due to system pressure and electrical components. Only trained and qualified service personnel should
install, repair, or service air-conditioning equipment.
Untrained personnel can perform basic maintenance functions such as changing lamps. All other operations should be
performed by trained service personnel. When working on airconditioning equipment, observe precautions in the literature,
tags and labels attached to the unit or accessory, and other
safety precautions that may apply.
Follow all safety codes. Wear safety glasses and work
gloves.
Before installing accessory or performing ma intenance or
service on accessory, turn off main power switch to unit.
Electrical shock can cause injury or death. There may be
more than one disconnect switch.
Never expose eyes or skin to ultraviolet light from any
source. Lamp must be off before entering HVAC (heating,
ventilation, and air conditioning) unit to perform maintenance or service. Personal injury may result.
Do not touch lamp glass without gloves. Wipe lamp clean
after handling.
The lamp contains a small quantity of mercury. If a lamp
breaks, clean area and dispose of lamp with care.
GENERAL
Totaline’s Fusion Residential Ultraviolet Air Purifier is
designed to kill odor causing bacteria, viruses, mold and
fungus that may develop in a HVAC unit. The high output, low
temperature air purifier is preferably installed in the return
plenum section of the HVAC unit. It can also be inst alled in the
supply section. The Fusion Air Purifier is a simple and easy
installation to an existing HVAC unit and incorporates a quick
release mechanism to clean or replace the lamp. See Fig. 1.
60 Hz
INSTALLATION
Location —
Fusion Air Purifier is in the return plenum section where it will
have contact with the airstream. If there is an obstruction, such
as the filters, that cannot be relocated, the Fusion Air Pur ifier
can be installed in the supply, over the evaporator coil. It
should be placed 6 to 10 in. above the coil, so the UV (ultraviolet) rays will cover the coil.
Make sure site can be supplied with the necessary power
receptacle. Ensure that there is adequate clearance for service.
The Fusion units can be mounted in a horizontal or vertical
position. More than one unit can be used if needed.
Mount Air Purifier on Unit —
procedure to install the air purifier:
1. Turn off all power to unit.
2. Evaluate the ideal area for locating and installing the
Fusion Air Purifier. Ensure that the air purifier will fit
into the plenum. Space required internally is approximately 12-in. for the size 012 unit and 18-in. for the
size 018 unit. See Fig. 2.
If the drainpan is plastic, it must be protected with a reflective material, such as metal tape.
3. Ultraviolet light may damage certain plastics and
exposed non-UV-C (Ultraviolet Radiation, C-Band)
protected wires or drainpan. Wrap exposed plastic and
wiring with aluminum tape or use metal conduit.
4. Remove the control box from its package. Open the
cover of the box by loosening the screw 1 or 2 turns to
the left. Swing cover open to allow mounting plate
access.
The preferred location for installation of the
Perform the following
Manufacturer reserves the right to
discontinue, or change at any time,
specifications or designs without notice
and without incurring obligations.
REPLACEMENT COMPONENTS DIVISION
© CARRIER CORPORATION 6-01 LITERATURE NUMBER P103-1SI
PRINTED IN U.S.A. CATALOG NUMBER 570-455

5. Using the back plate as a template, mark off the four
corner holes and the center of the 1-in. diameter lamp
access hole to be cut in the plenum.
6. Drill the four corner holes
1
/8-in. diameter and the 1-in.
hole.
7. Remove the protective paper from the foam on the
back so the unit will be properly sealed when installed.
8. Secure the control box to the pl enum using four no. 8 x
1
/2-in. sheet metal screws.
9. Open the carton containing the lamp and remove the
Styrofoam packaging.
Do not touch the glass of the lamp with fingers. Use soft
tissue paper to manipulate the lamp.
10. Insert front of the lamp through the center hole and
slowly insert lamp completely until the face of the
metal plate of the lamp touches the metal backplate
and through the two standoff screws. Turn the metal
disc to the right so the two elongated holes of the outer
metal ring are touching the screws. When in place,
tighten the two screws using a Phillips screwdriver.
11. Connect the ceramic white plug with the four colored
wires onto th e lamp pins . The p lug is de signe d so th at
it can only be installed one way. You may have to
rotate the socket 90 degrees to line up the pins with the
holes.
12. Close cover and secure by tightening the Phillips
screw on the right side.
3
13. To install the UV indicator plug, drill a
/8-in. diameter
hole in the plenum return in the area around the
installed unit.
14. Insert the indicator plug into this hole and push to lock
into place.
15. The Fusion Air Purifier can now be plugged into a
standard 110-volt receptacle.
OPERATION
T o start the Fusion Air Purifier, simply press the switch to 1
(on) position. The switch is illuminated to show when power is
on. Within a few seconds, the UV lamp will energize. To
ensure that the air purifier is on look at the indicator plug.
It should be reflecting the bluish color of the UV lamp. While
lit, lamp color should be light blue. If lamp color changes to red
or flickers, replace the lamp. Lamps that are not light blue will
not emit ultraviolet radiation and will not kill harmful bacteria
or fungi.
MAINTENANCE
Disconnect all power before performing any maintenance
or service.
The ultraviolet lamp should be cleaned every two to three
months. Simply open the control box by loosening the Phillips
screw on the side. Disconnect the white socke t from the la mp.
Slightly loosen the two screws that hold the lamp mounting
plate. Rotate the lamp to the left to disengage the head of the
screws and simply pull the lamp out. Be ca reful not to touch
the glass of the lamp with fingers. Clean the la mp with a soft
tissue and alcohol based solution. Reverse the above procedure
to reinstall the lamp.
Lamps need periodic replacement to maintain design specifications. Replace lamps after 6000 hours of operation or
1 year, whichever comes first. Contact your dealer for replacement lamps.
AIR PURIFIER
(PREFERRED
LOCATION)
RETURN AIRFLOW SUPPLY AIRFLOW
HEATING AND A/C COILS
FAN
FILTER
Fig. 2 — Air Purifier Installation Locations
RETURN AIRFLOW SUPPLY AIRFLOW
HEATING AND A/C COILS
FAN
FILTER
AIR PURIFIER
(6-10” ABOVE
COIL)
2
 Loading...