

Page 1
Page 2
1
6
6
3
4
Display
1
2
5
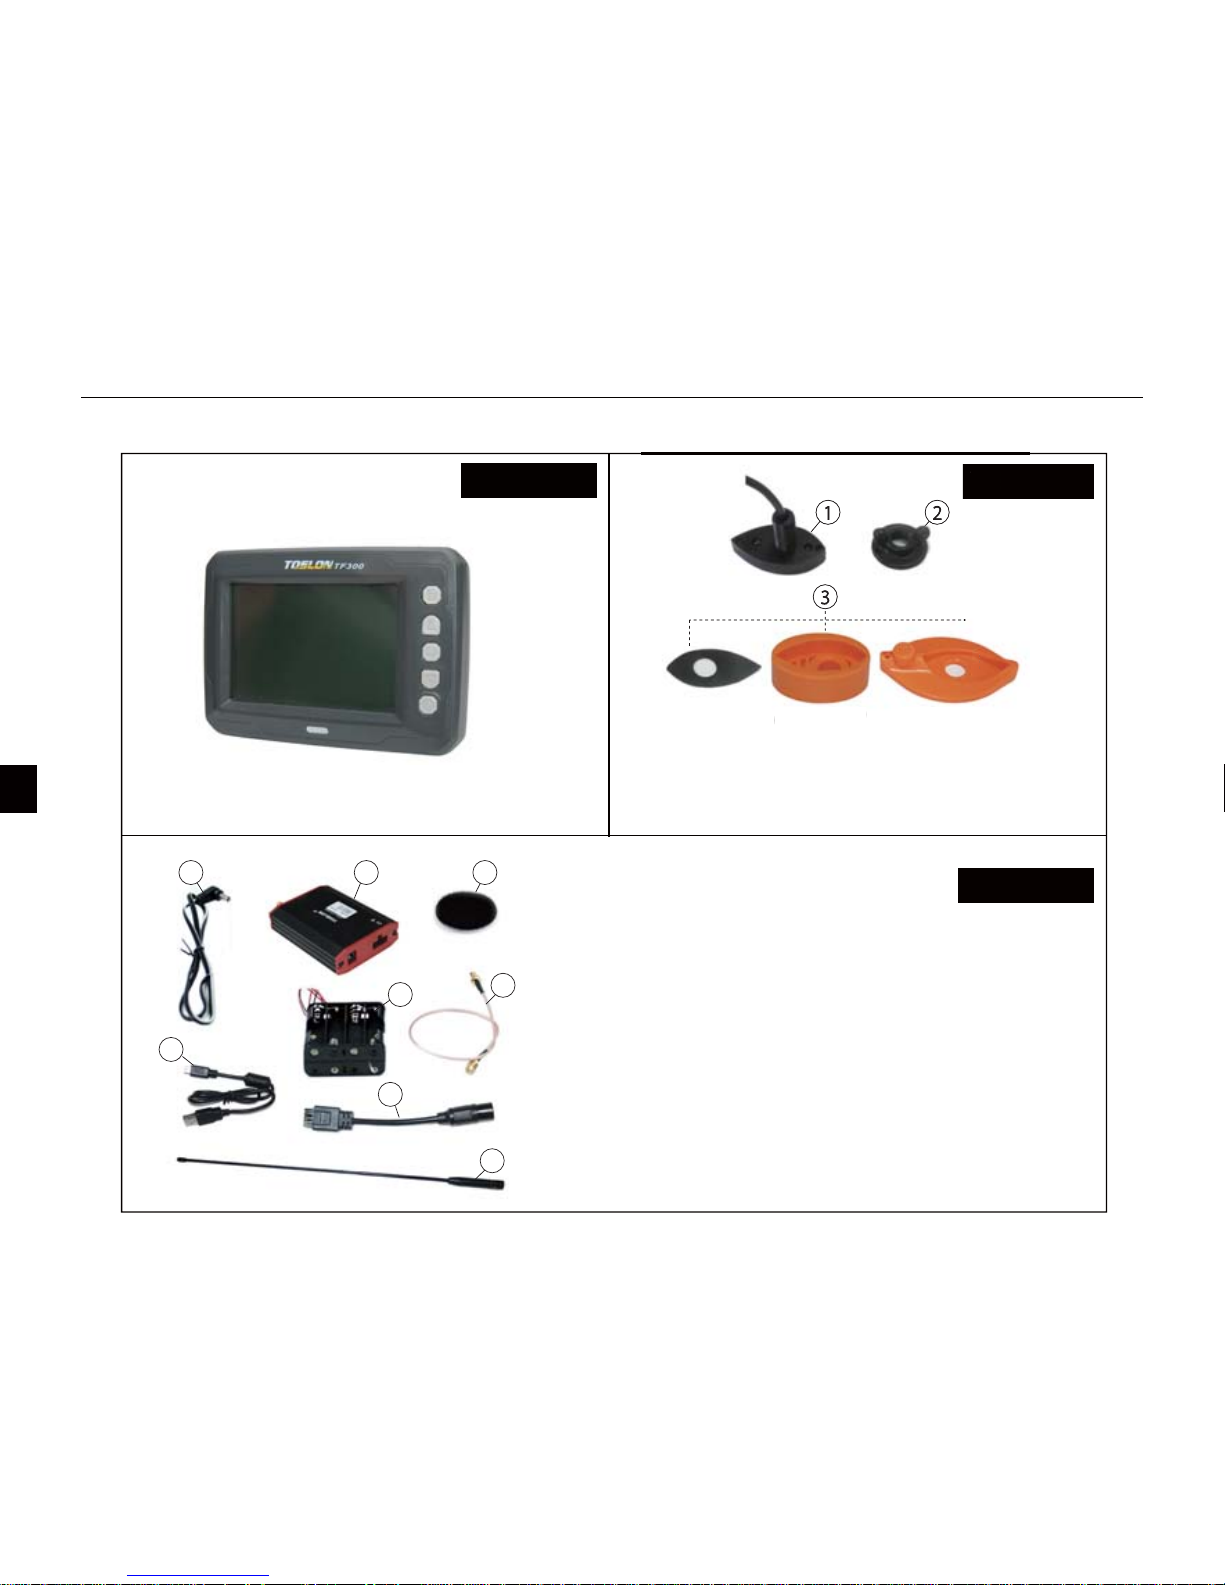
1) CCU
2) Power cable
3) Charger cable
4) Data conversion cable
5) Antenn (2pcs; one display; another for CCU)
6) Battery holder
7) Fedder cable
8) Valcro
CCU
1) Transducer 2) Knobs 3) Rubber
Note: the rubber is dierent according to
dierent bait boats
Transducer
Check the content
1 2
3
(Optional) (Optional)
T
ran
sd
3
tio
nal)tio
nal
)
8
7
Page 3
Installation (transducer)
2
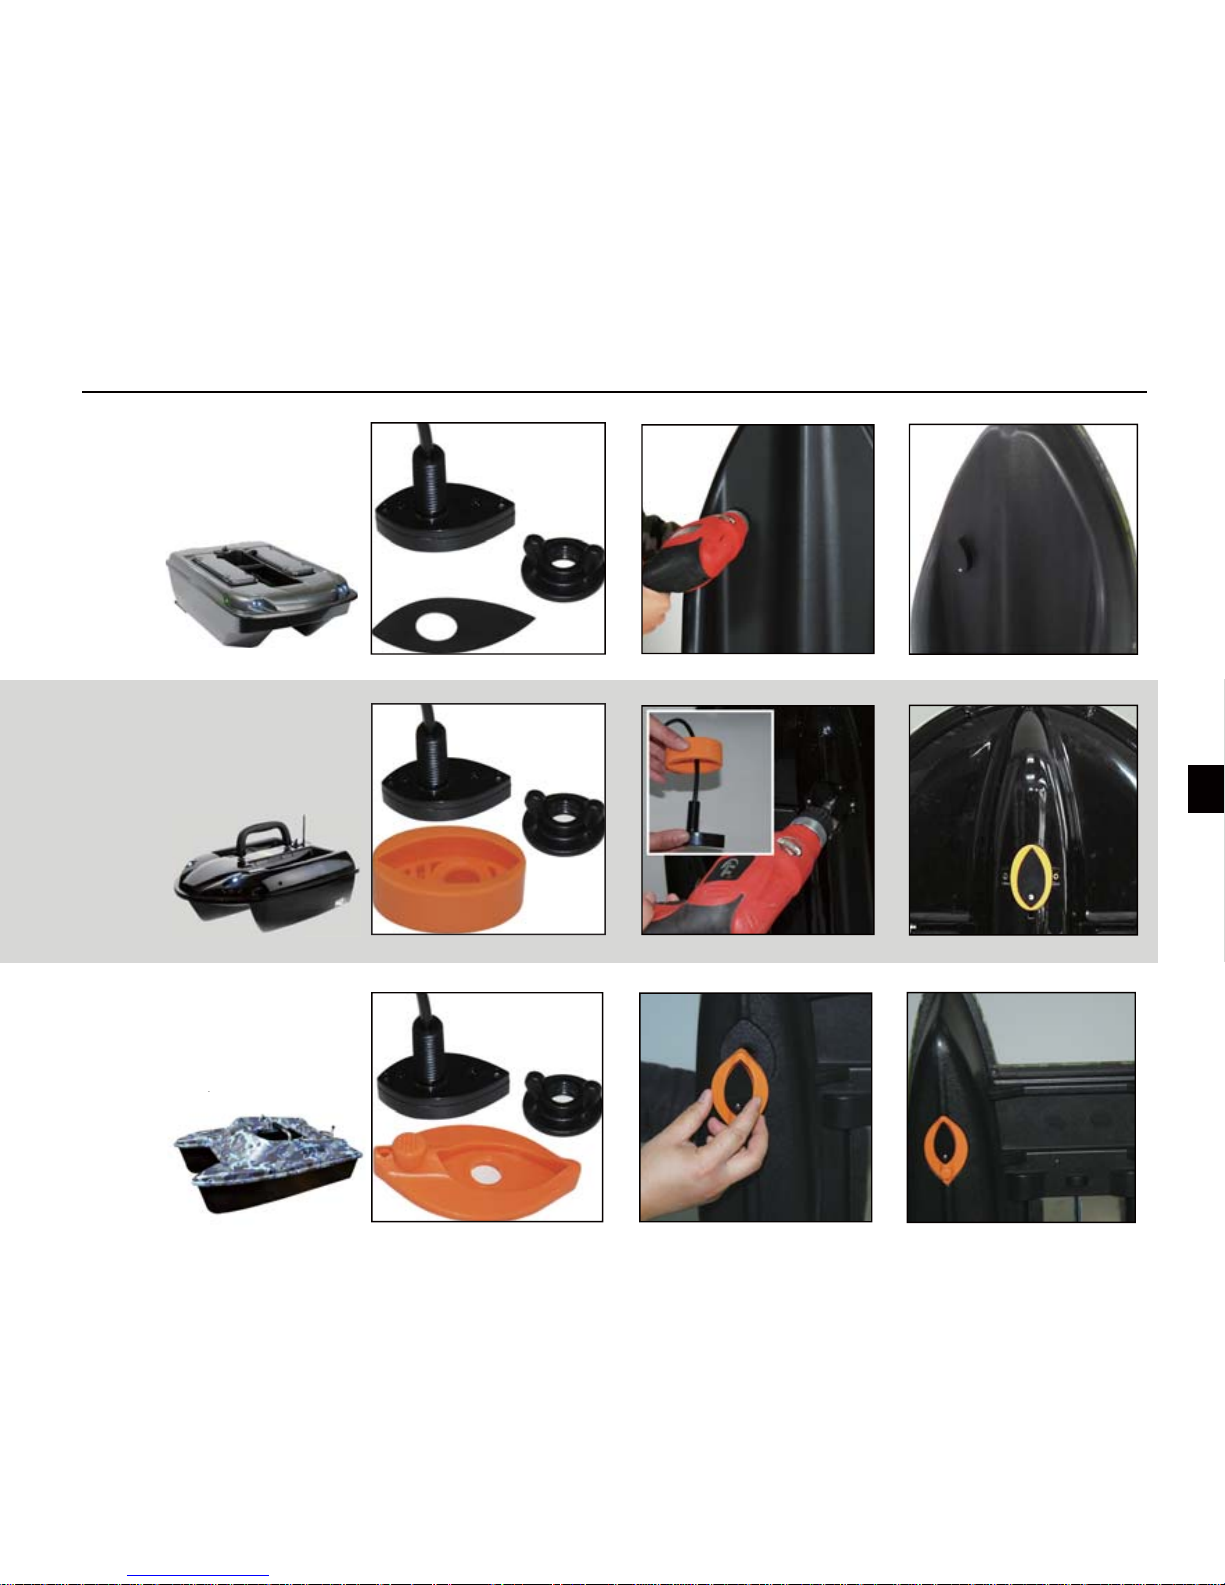
1) For general boats, like Carp
Madness, Anatec Monocoque,
you need to drill a hole on the
boat bottom to x the
transducer.
2) For boats of Carplounge/Waveruner/ Vegaboat/Carpboat
etc, there is a transducer groove
on the bottom. So, you only need
to simply match the
transducer to
the boat
with a
rubber.
3) For Anatec catamaran bait
boat, there is a transducer
groove on the bottom. So, you
only need simply match the
transducer to the
boat with
a rubber.
r to t
he
Page 4
3
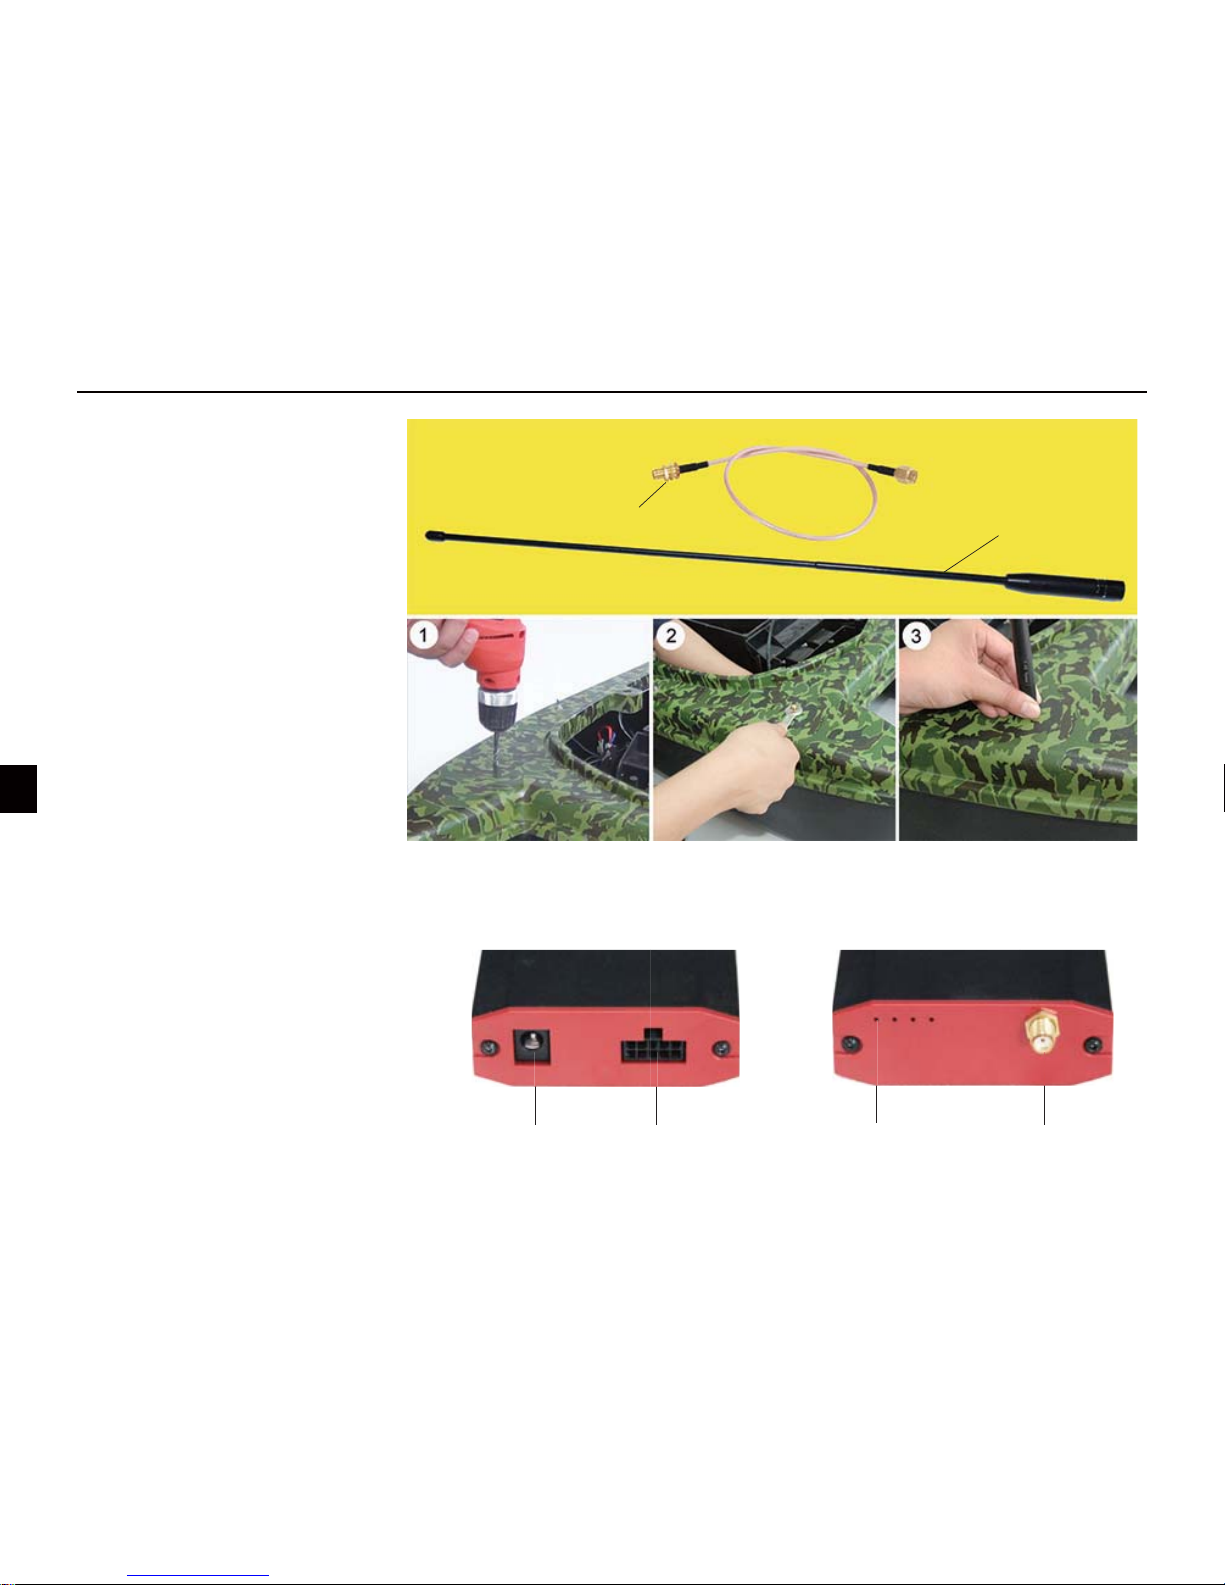
1) Drill an hole (5mm diameter)
on the selected position.
2) Screw down the wisher and
nut from the feeder cable , then
hold the cable through the hole
from inner housing, and Screw
tighted the nut by an wrench.
3) Screw the antenna on boat
feeder cable
signal
indicator
connected to
antenna with
feeder cable
antenna for CCU
Antenna Installation
After all the installatiion are
nished, please connect the
parts (transducer, antenna,
battery) to the CCU.
Then x the CCU inner the
boat.
Wiring
Installation (antenna & wiring)
connected
to battery
connected to
transducer with
converision cable
Page 5
4
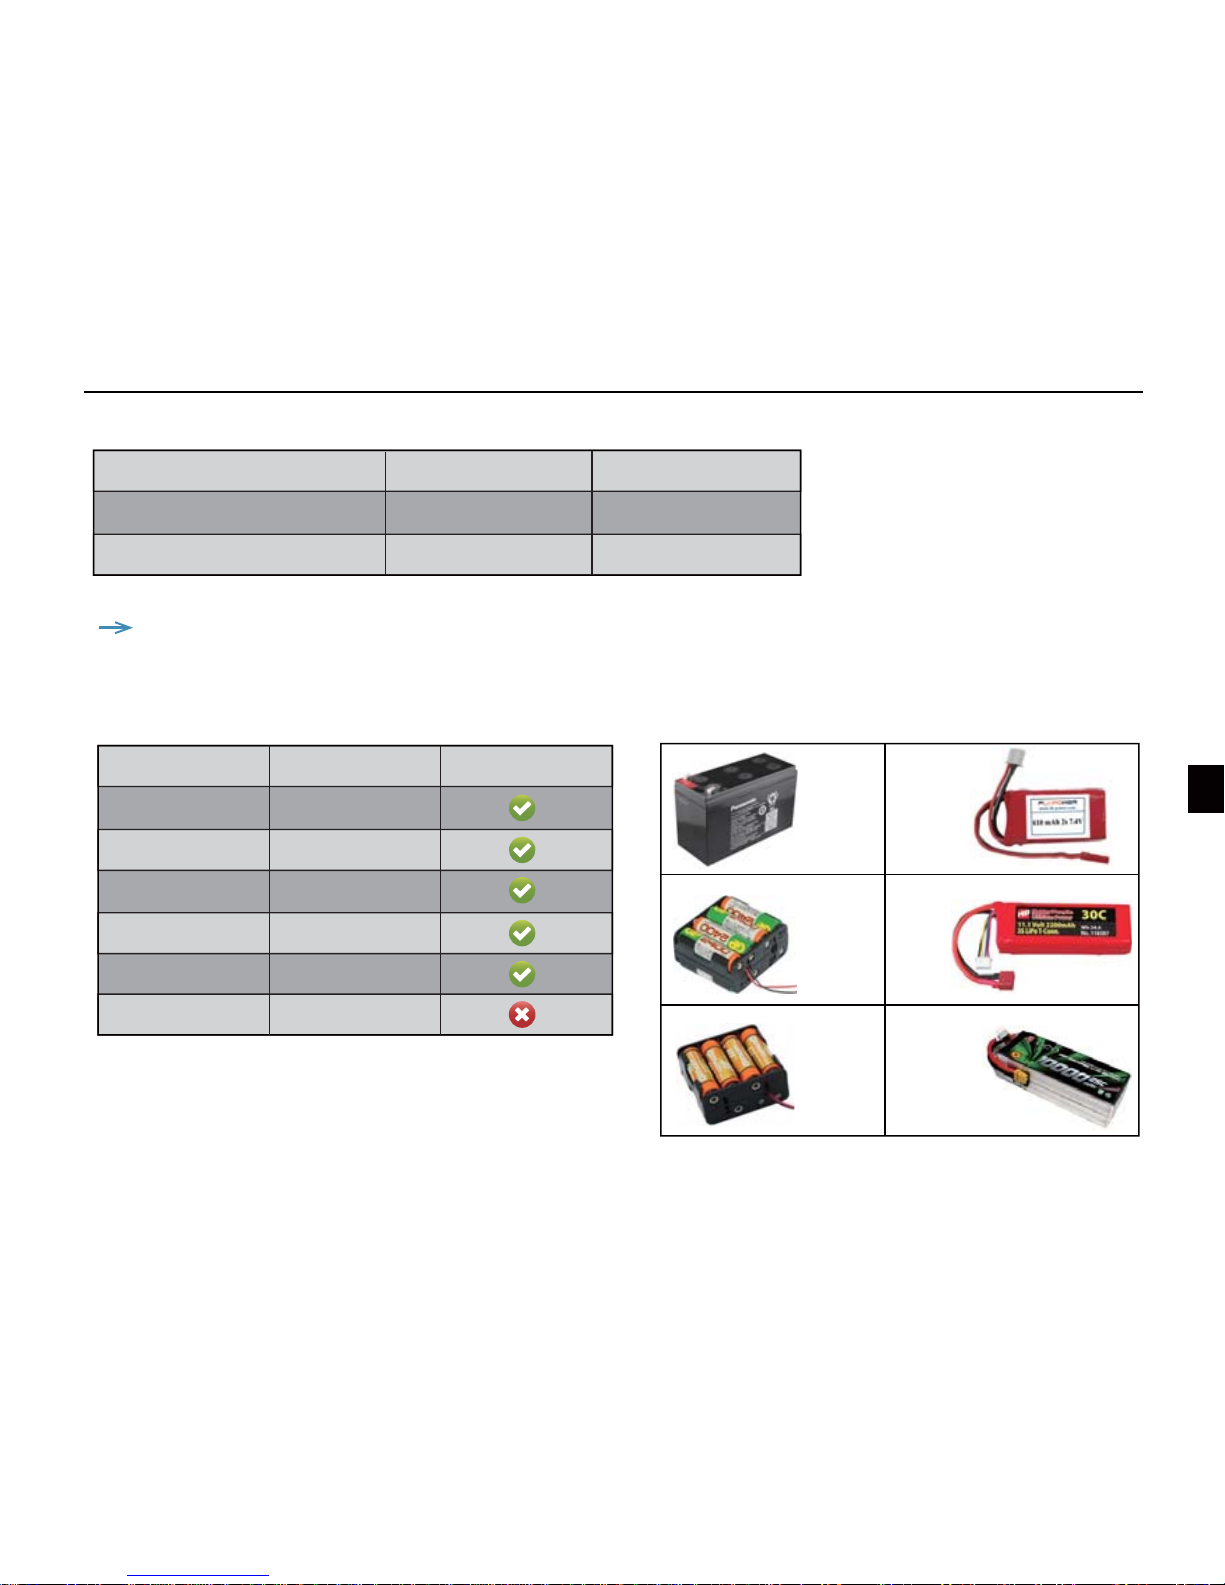
Powering
Battery Type
12V Lead-acid
8*AA NiMH
8*AA Alkaline
2S Lithium
3S Lithium
4S Lithium
Voltage
10.8v~14.8V
7.8V~10.6V
7.5V~12.8V
5.6~8.4V
8.4~12.6V
11.2V~16.8V
Permission
12V
lead-acid
8AA
NiMH
8AA
Alkaline
2S
Lithium
3S
Lithium
4S
Lithium
Recomended voltage
Absolute Maximum voltage
For display
6-12V
14.8V
For transmitter
6-12V
14.8V
Note: overvoltage may burn the elements in the device!
From bellow shows the voltage range of the most popular batteries in the market:
Page 6
Using Instruction
5
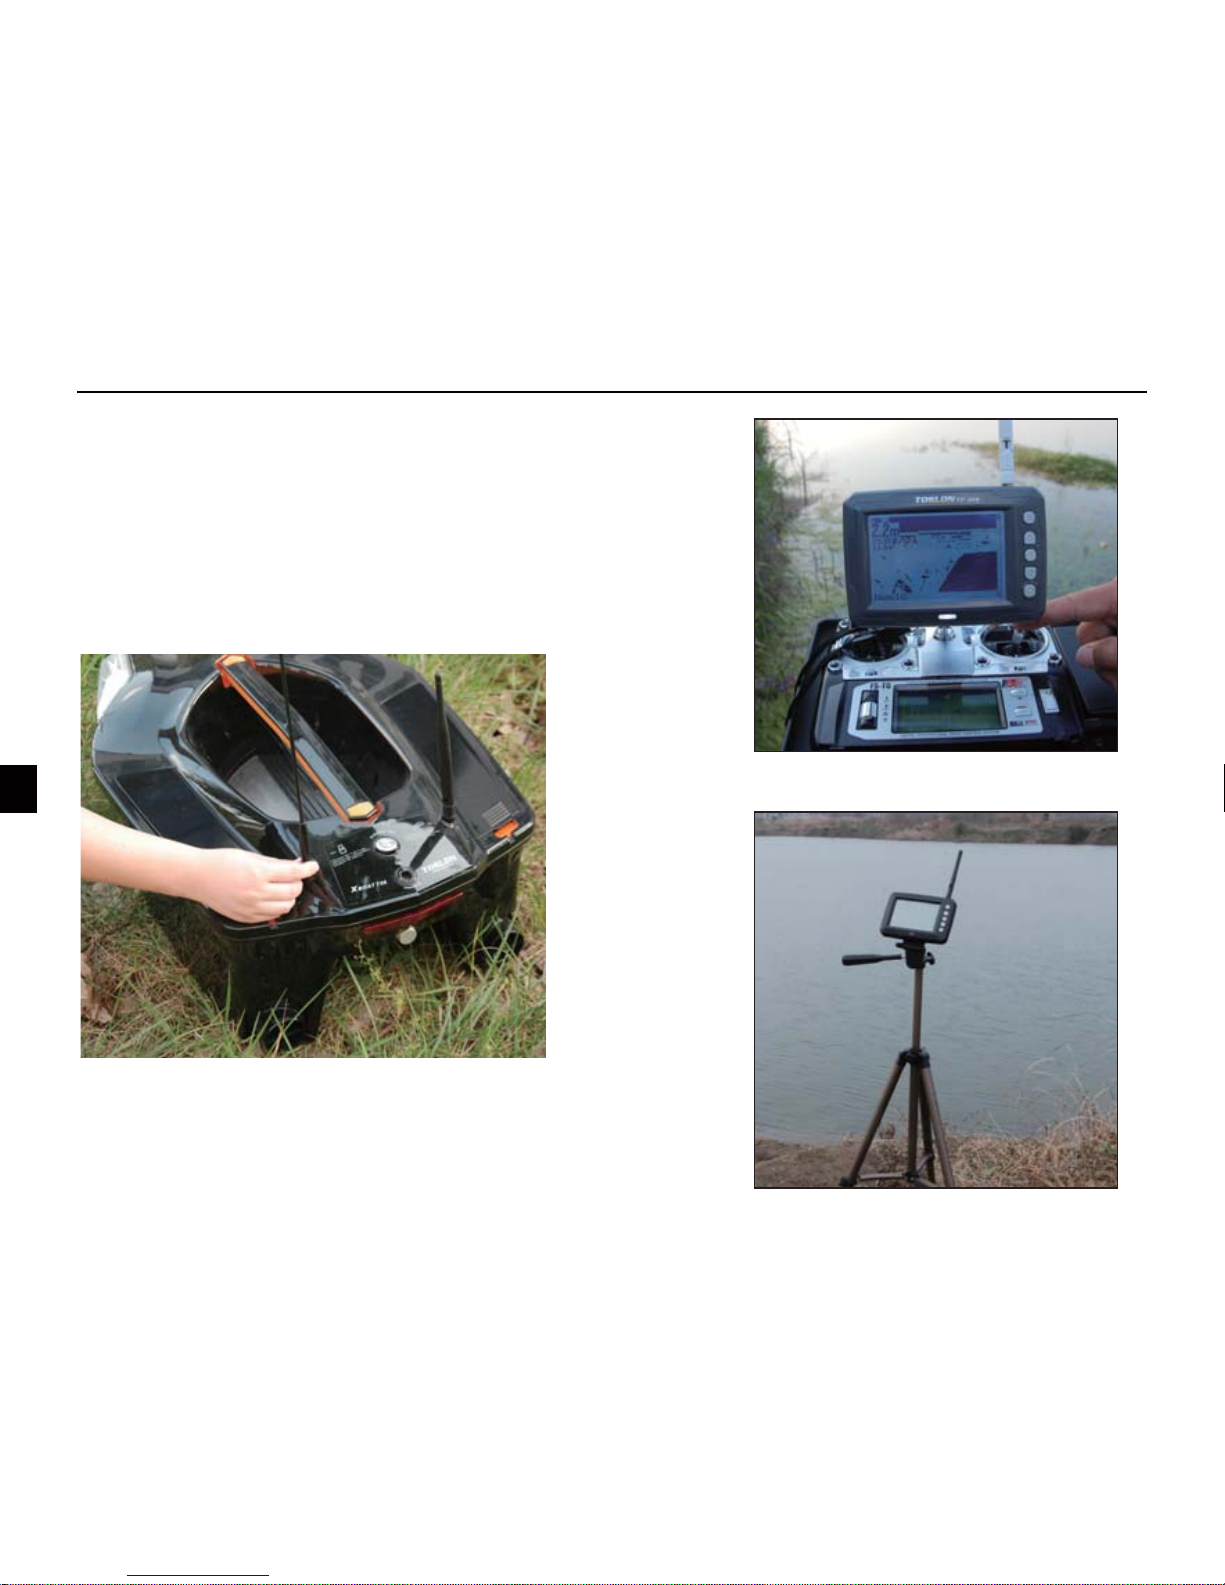
1) TF300 can be used by xing to a remote.
2) TF300 also can be used by xing to a tripod.
Note: make sure the antenna is tighten on the boat, otherwise
the R/C distance will be greatly shorten.
xed to a remote.
xed to a tripod
Page 7
Key function
6
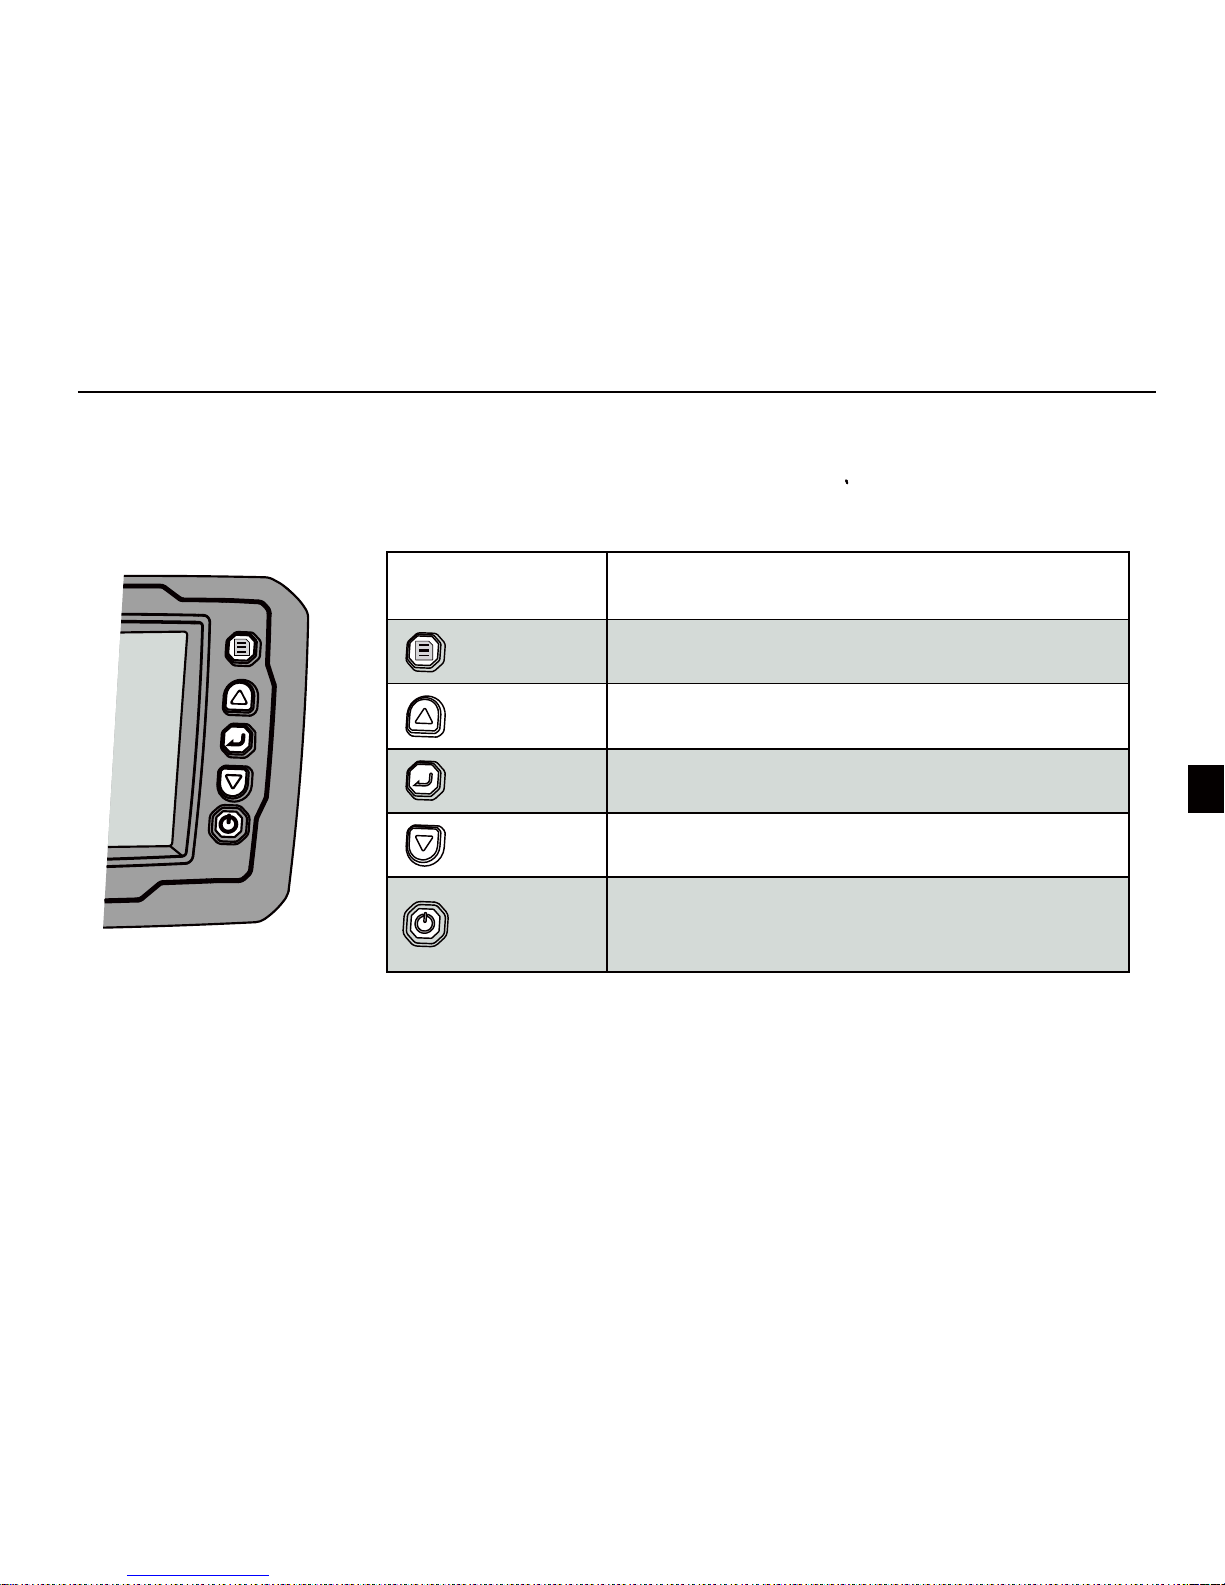
Key Function
[Menu]
1) Open menu settings
2) Switch between menus
[Power / Exit]
1) Power on / off the unit
2) Exit the selection or menu
3) Turn on / off the backlight
[Enter]
1) Confirm a setting / selection
2) Enter the menu settings
[Up]
1) Move up to select menu
2) Increase a value of option
1) Move down to select menu
2) Decrease a value of option
[Down]
Page 8
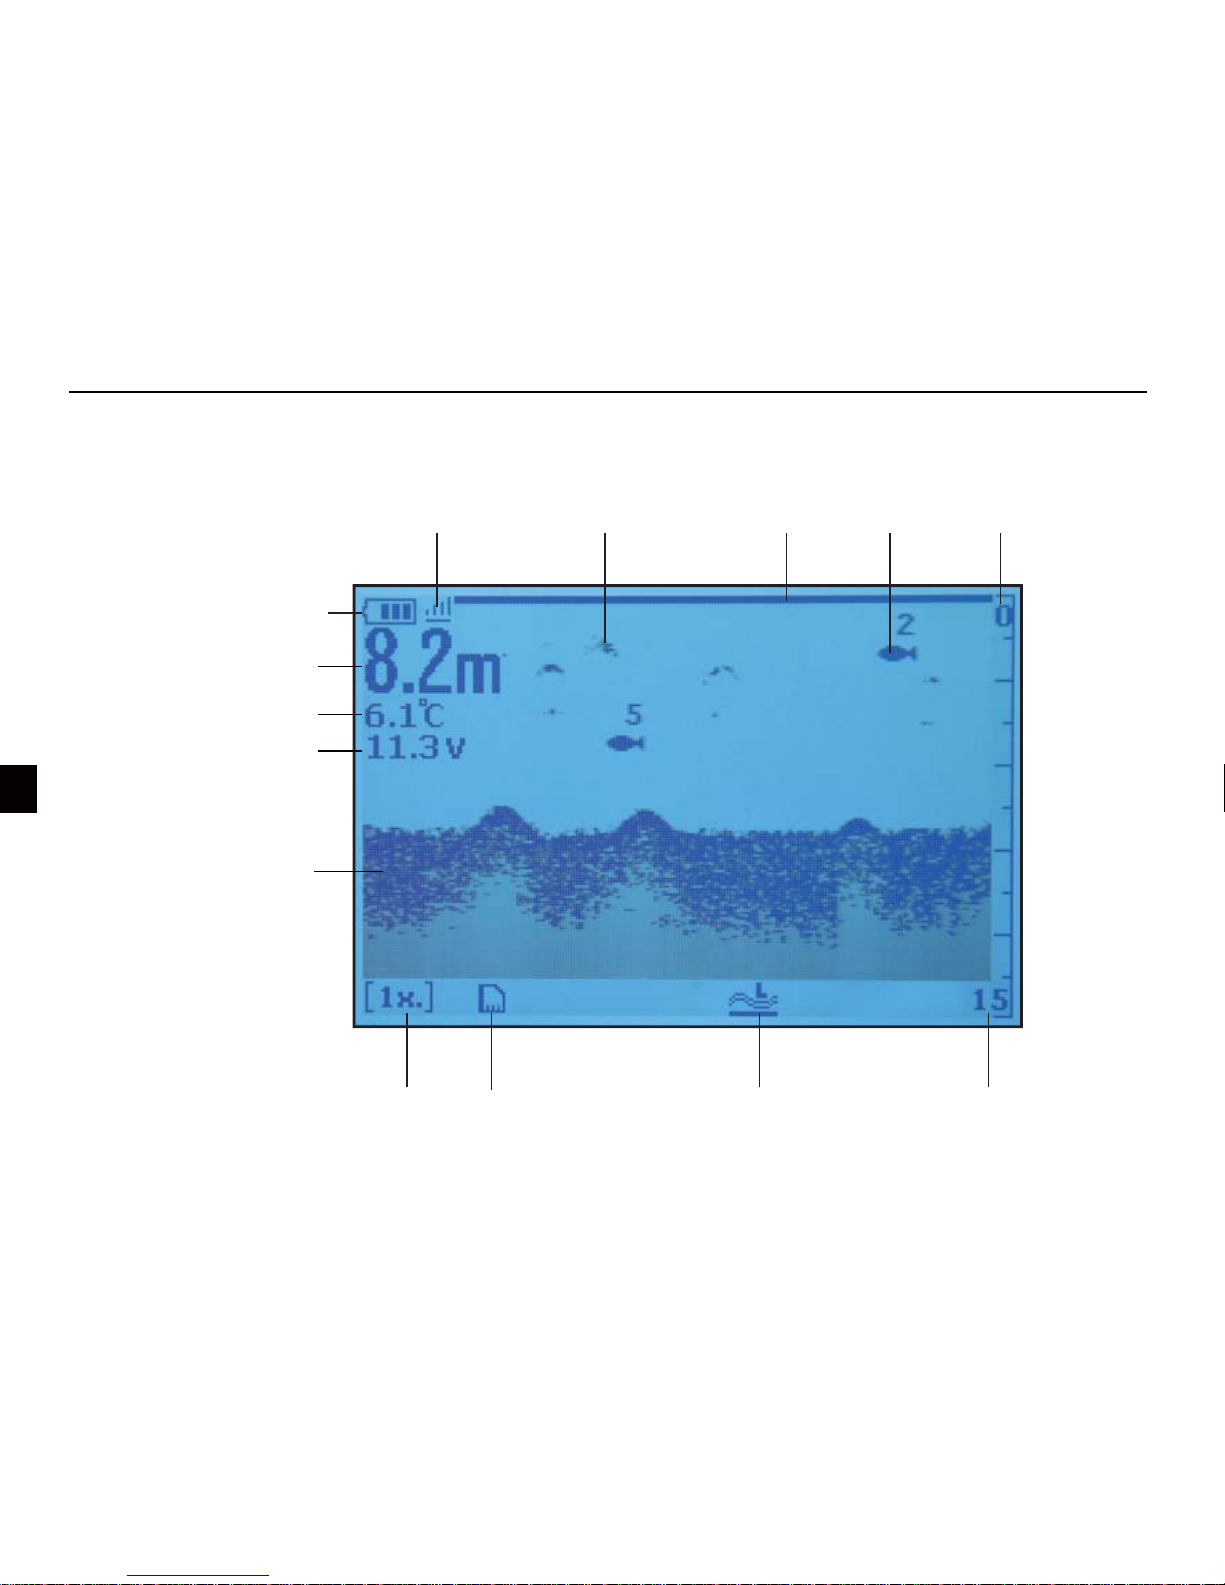
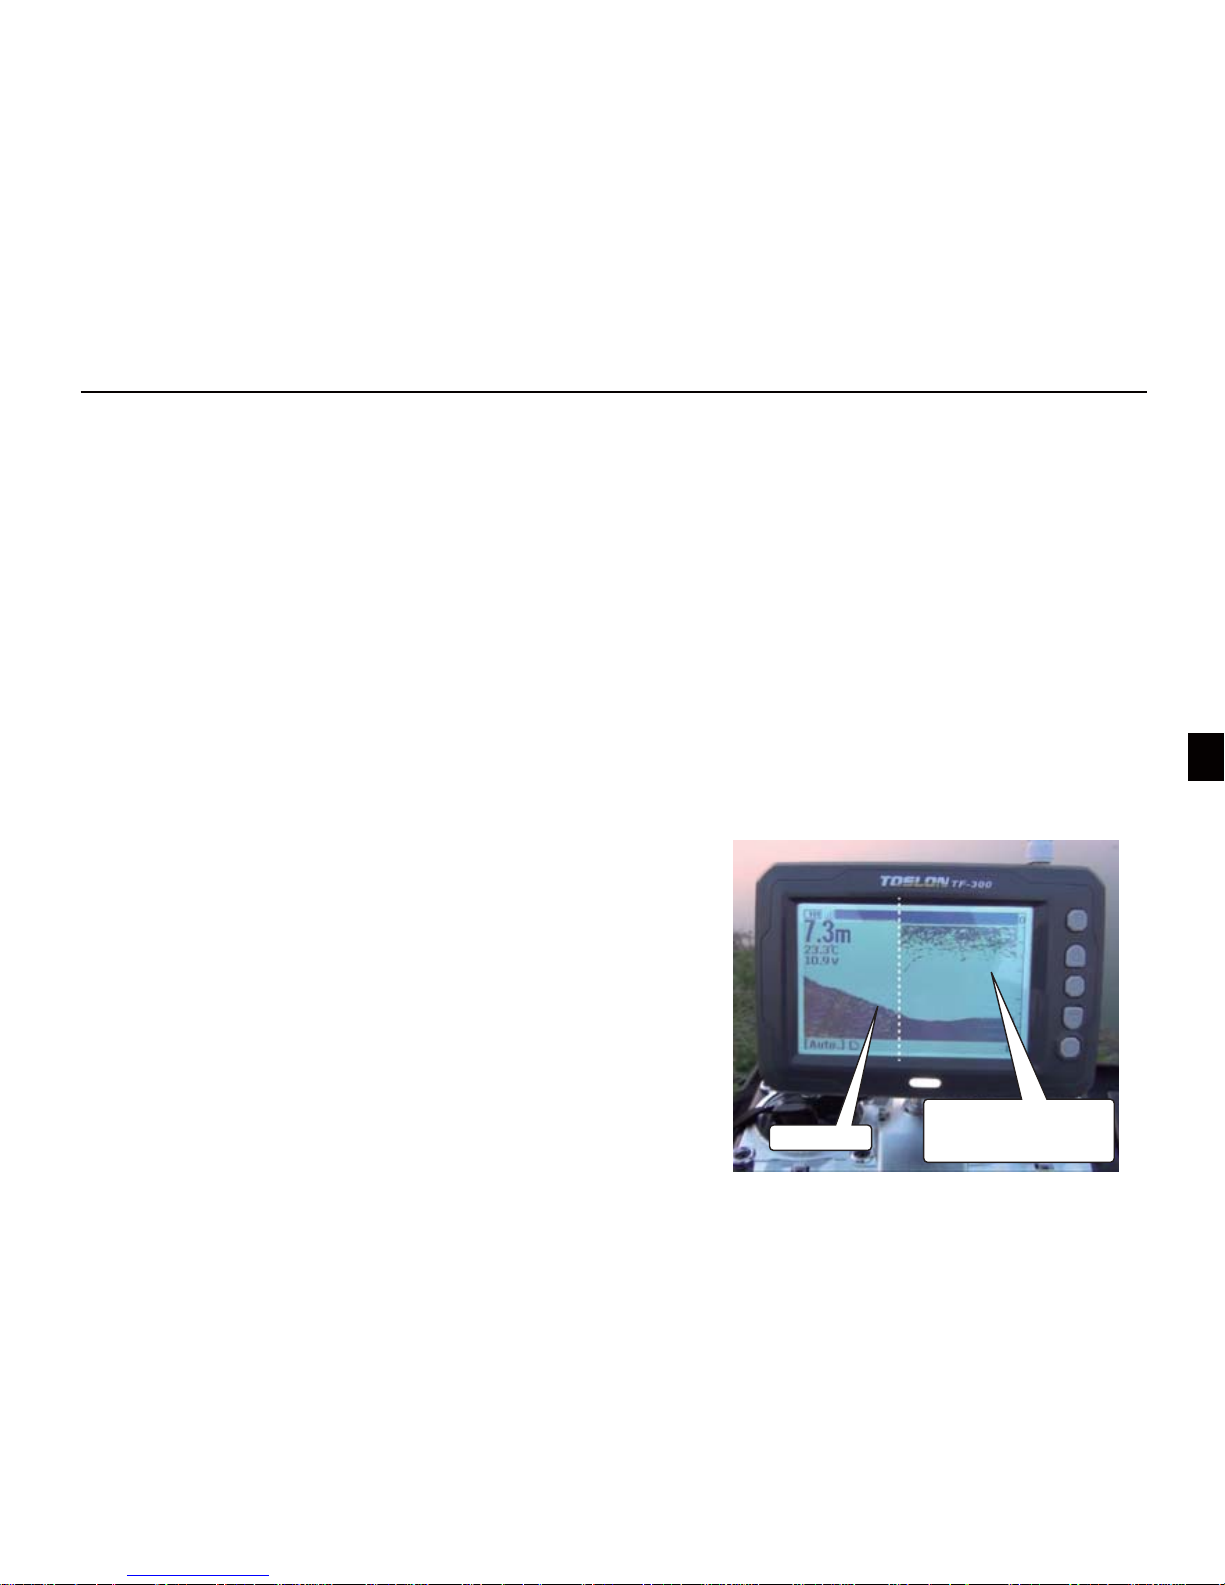
What’s on the display
7
Depth readout
Water temperature
Voltage of CCU
Bottom
SD card ready
Gain setting Shallow water mode Depth range
at bottom
Fish
symbol
Water
surface
Unrecognized
sh
Strength of
radio signal
Battery strength
Up range
Page 9
SONAR SETTING
8
In most time the default setting is enough. However in some situation, to get a better using, you need adjusting
the menu setting.
Determines how echoes will be displayed on the screen. Increasing the sensitivity will make you see more
details on the screen. In deep water, increasing the sensitivity. whereas in shallow decreasing the sensitivity.
1) Sensivity
Fish ID. Sens. adjust the threshold of sh size display
Selecting a higher setting allows weak returns being displayed as sh, which is helpful especially when you
are intending to nd smaller sh species or bait sh.
Selecting a low setting will prevent weak sonar returns being displayed as sh, which will be very helpful
when you are seeking large species of sh.
2) Fish ID. Sens.
The gain controls the sensitivity of the hardware receiver. A
higher gain makes the sonar more sensitive to echo returns,
allowing it to display weaker targets. If the gain is set too
high, the image might be cluttered with background noise.
Note: when set in [shallow water mode], the [Gain] option
will be disable.
3) Gain
Used to get a better sonar performance in shallow water.
4) Shallow Mode
[gain] automatilly
changed to high
sensivity (Gain=4x)
[Gain]=2x
Page 10
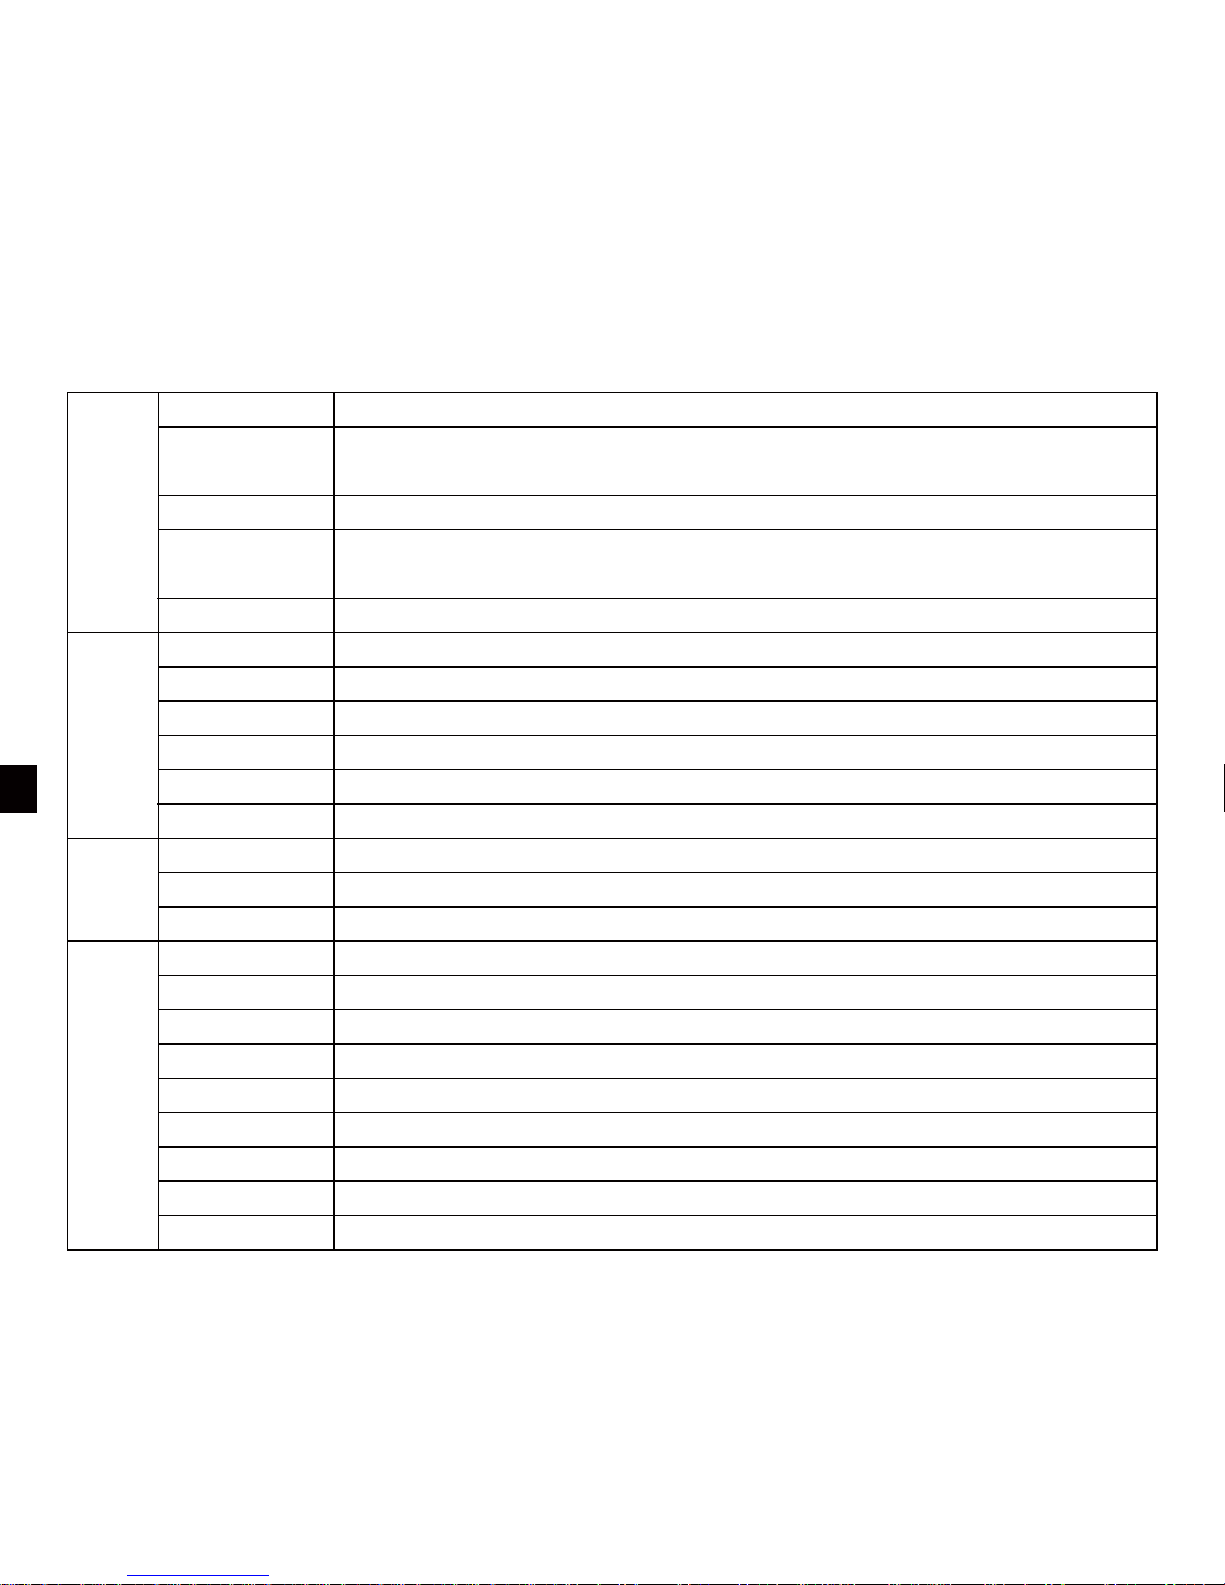
Menu List
9
Sensivity
Fish ID. Sens.
Surface Clarify
Gain
Shallow Mode
Units
Depth Range
Depth Offset
Color Invert
Chart Speed
Contrast
Shallow Alarm
Fish Alarm
CCU Alarm Vtg.
Beeper
Language
Backlight
Load Default
Simulator
System Info
Dev. Mode
CCU Update
Mode Select
Controls the level of details shown on the display
Adjust the threshold of sh size display. Higher setting allows weak returns being
displayed as sh, while a low setting will prevent it being displayed as sh
Reduces surface clutter by decreasing the sensivity of the receiver near the surface
The gain controls the sensitivity of the hardware receiver. A higher gain makes
the sonar more sensitive to echo returns
Used to get better sonar performance in shallow water
Set the units of measure for all depth or temperature related readouts
Determine in which portion the bottom will be displayed on the screen
Adjust the digital depth readout to indicate depth from the waterline
Invert the color of sonar image
Control how fast the sonar information moves across the screen
Let you to get a suitable display when you operate the unit
Sounds when the depth becomes equal to or less than the menu setting.
Sounds when the fishfinder detects what it determines to be a fish
Alarm when the input battery voltage of transmitter is equal to or less than the setting
Set if the sonar unit sound a tone or not when a key is pressed.
Select the display language for menus
Adjust the brightness of backlight
Used to restore original factory setting
Used to let you practicing using the Fishfinder as if you were on the water
Show system information of device
For engineering using
Used to update CCU
Select a mode for sonar display
SonarDisplayAlarmSystem
Page 11
10
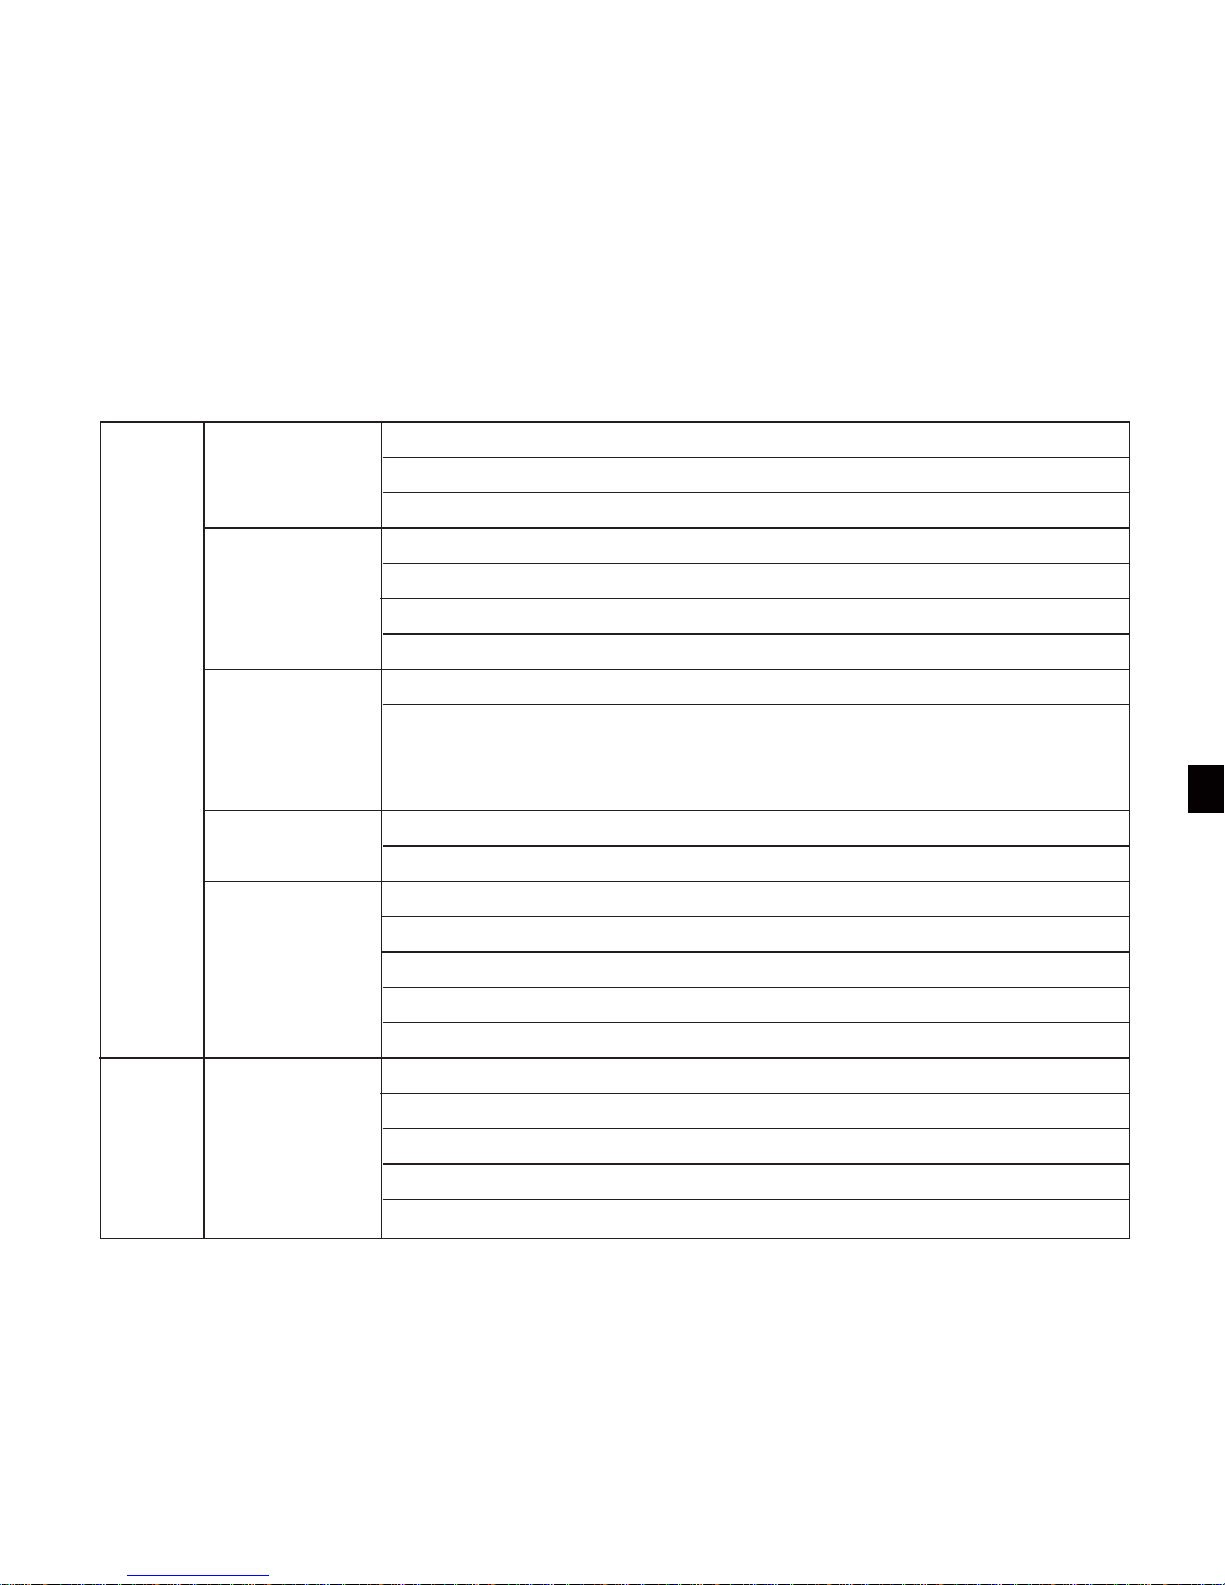
Specifications and Features
Display size: 4.5"FSTN, Sunlight Viewable
Resolution: 240*128Pixels; 4Gray Scal screen
Language: Multi-language
Depth Capability: Max 30m (100ft)
Sonar Frequency: 115Khz
Sonar Beam Angle: 60deg @-10db
Sonar Alarms: Fish / Shallow / Low Battery
Radio Frequency: 433Mhz
RC Power: 20dBm(note: normally 180m(600ft) range can be expected, the
height of atenna and weather can result huge difference of the radio range)
Radio Frequency: 433MHz
Power of Display: Li battery (BL-5C)
Power of Transmitter: Powered by bait boat battery or DC6~12V/2.0W
Sensor Cable Length: 0.5m
Sonar unit size: 134 x92 x 24mm
Operational Temperature: -10°C ~ 50°C
Water Temp. Included in Transducer
Display target depth reading above each fish symbol
Update the software of display & CCU (transmitter) via the built in SD card
3 level hardware gain setting to meet shallow/middle/deep water enviroment
Optimized shallow water mode for carp fishing
Extreme stable wireless performance envn in bad condition
Full two-year warranty; extended warrangies available
Display
Sonar
R/F
Power
Features
Technical and
casing
SpecicationsFeatures
Page 12
 Loading...