

Page 1
OPERATIONS
3LCD DATA PROJECTOR
QUICK REFERENCE CARD
“Camera” function is equipped only with the model which has a document imaging camera model.
Projecting a Picture
1
• Connect external equipment
such as a computer or
video tape player.
• Connect the power cord to
the projector.
4
INPUT
Press INPUT to select the
input source.
Video: VIDEO input picture
RGB: RGB input picture
CAMERA: Camera input picture
Adjust the picture size and
2
3
ON/STANDBY
Press ON/STANDBY.
Both the ON and LAMP indications light up
in green.
Turn on the connected equipment
5
focus.
Zoom ring: Adjust the picture size.
Focus ring: Focus the picture.
and put it in playback mode.
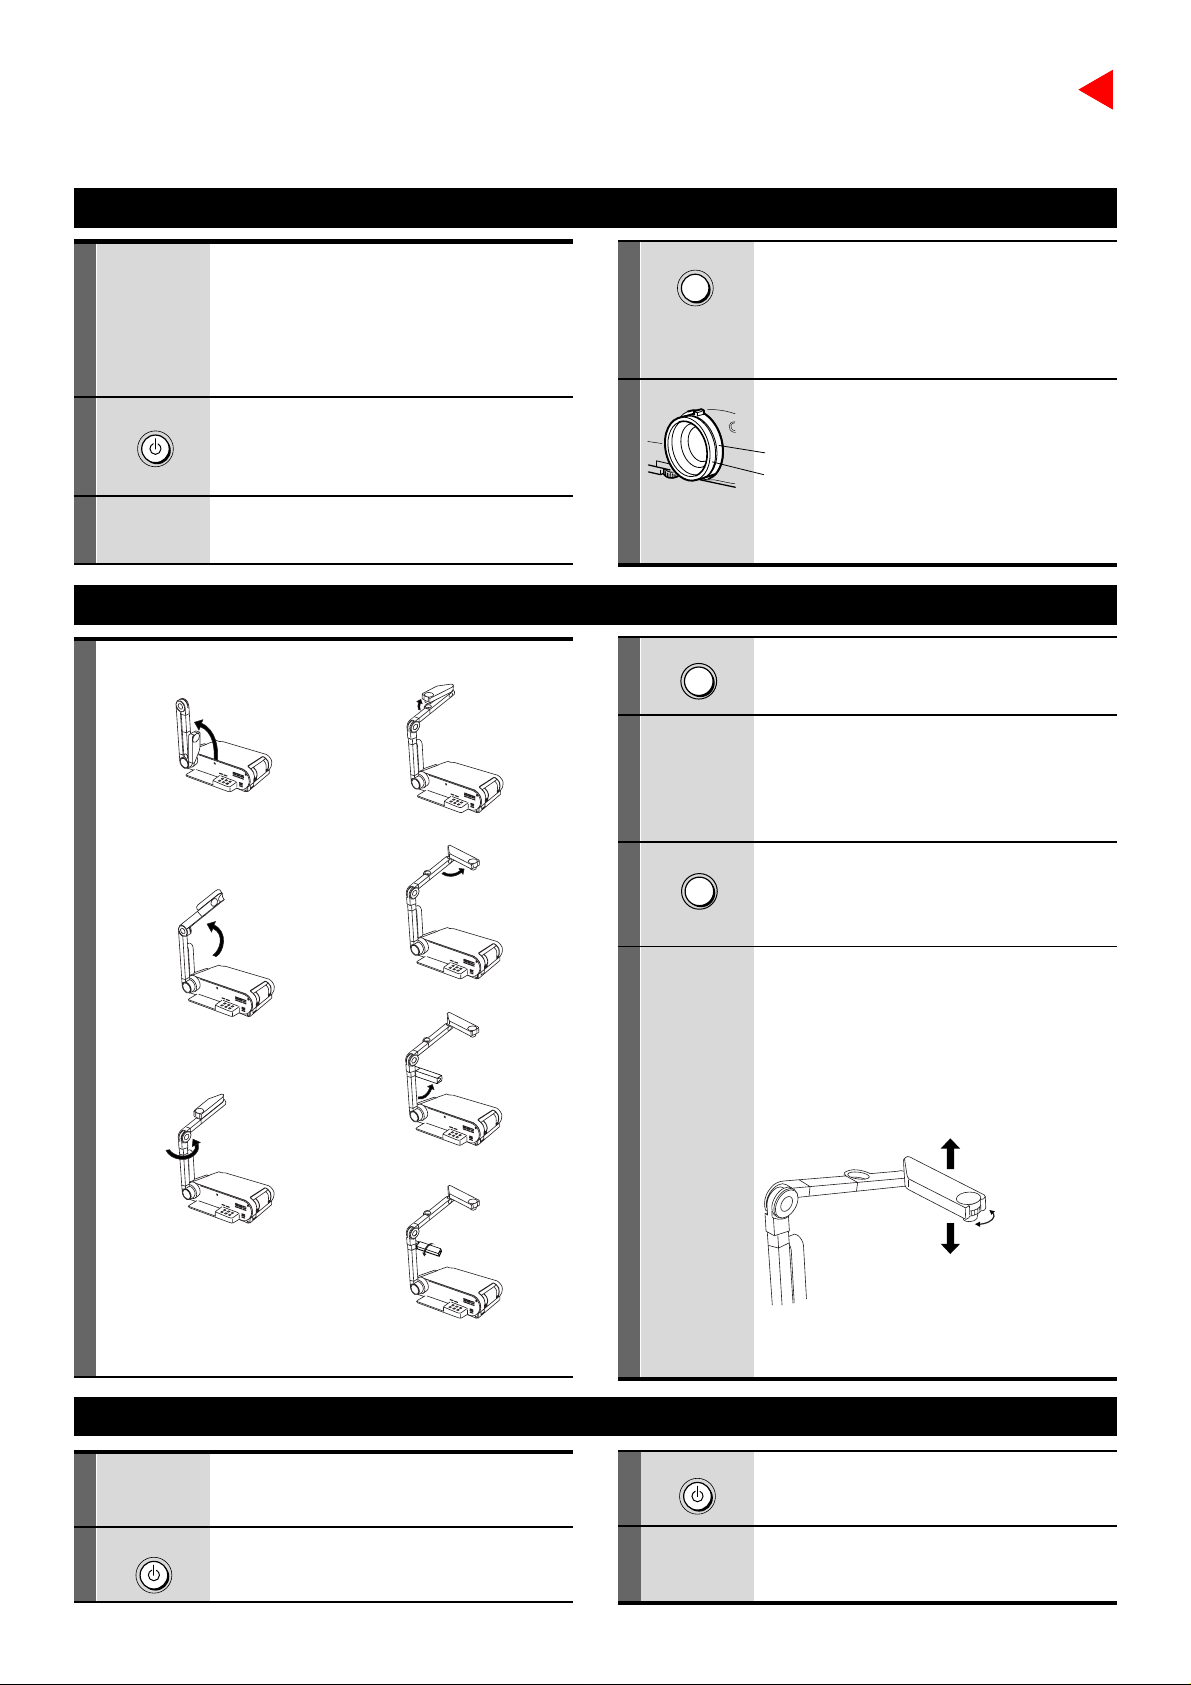
Projecting Images with the Document Imaging Camera
1) Raise up the arm.
1
2) Stretch the arm.
4) Open the camera head.
5) Turn the camera head.
2
3
4
ARM LIGHT
CAMERA
Press ARM LIGHT .
The light turns on.
Place a document onto or
around the projector, and turn
the camera head to direction
of the document.
Press CAMERA.
The appeared image is a projected one
through the camera.
6) Pull up the light.
3) Turn the arm.
7) Turn the light.
After using, return the arm to the original position in the
reverse order.
Turning Off the Power After Use
1
2
ON/STANDBY
Put the connected equipment
in the stop mode.
Press ON/STANDBY.
An instruction message appears.
5
3
4
ON/STANDBY
Move the camera head to
adjust the size of the picture,
and focus on the picture by
turning the focusing ring on
the camera head.
Up : to reduce.
Focusing ring
N: Near
F : Far
Down : To enlarge.
Press ON/STANDBY again.
(Power turns off and then the lamp goes off.)
After confirming the exhaust fan
stops, unplug the power cord.
For more informations about usage and operations, see the owner’s manual.
Page 2
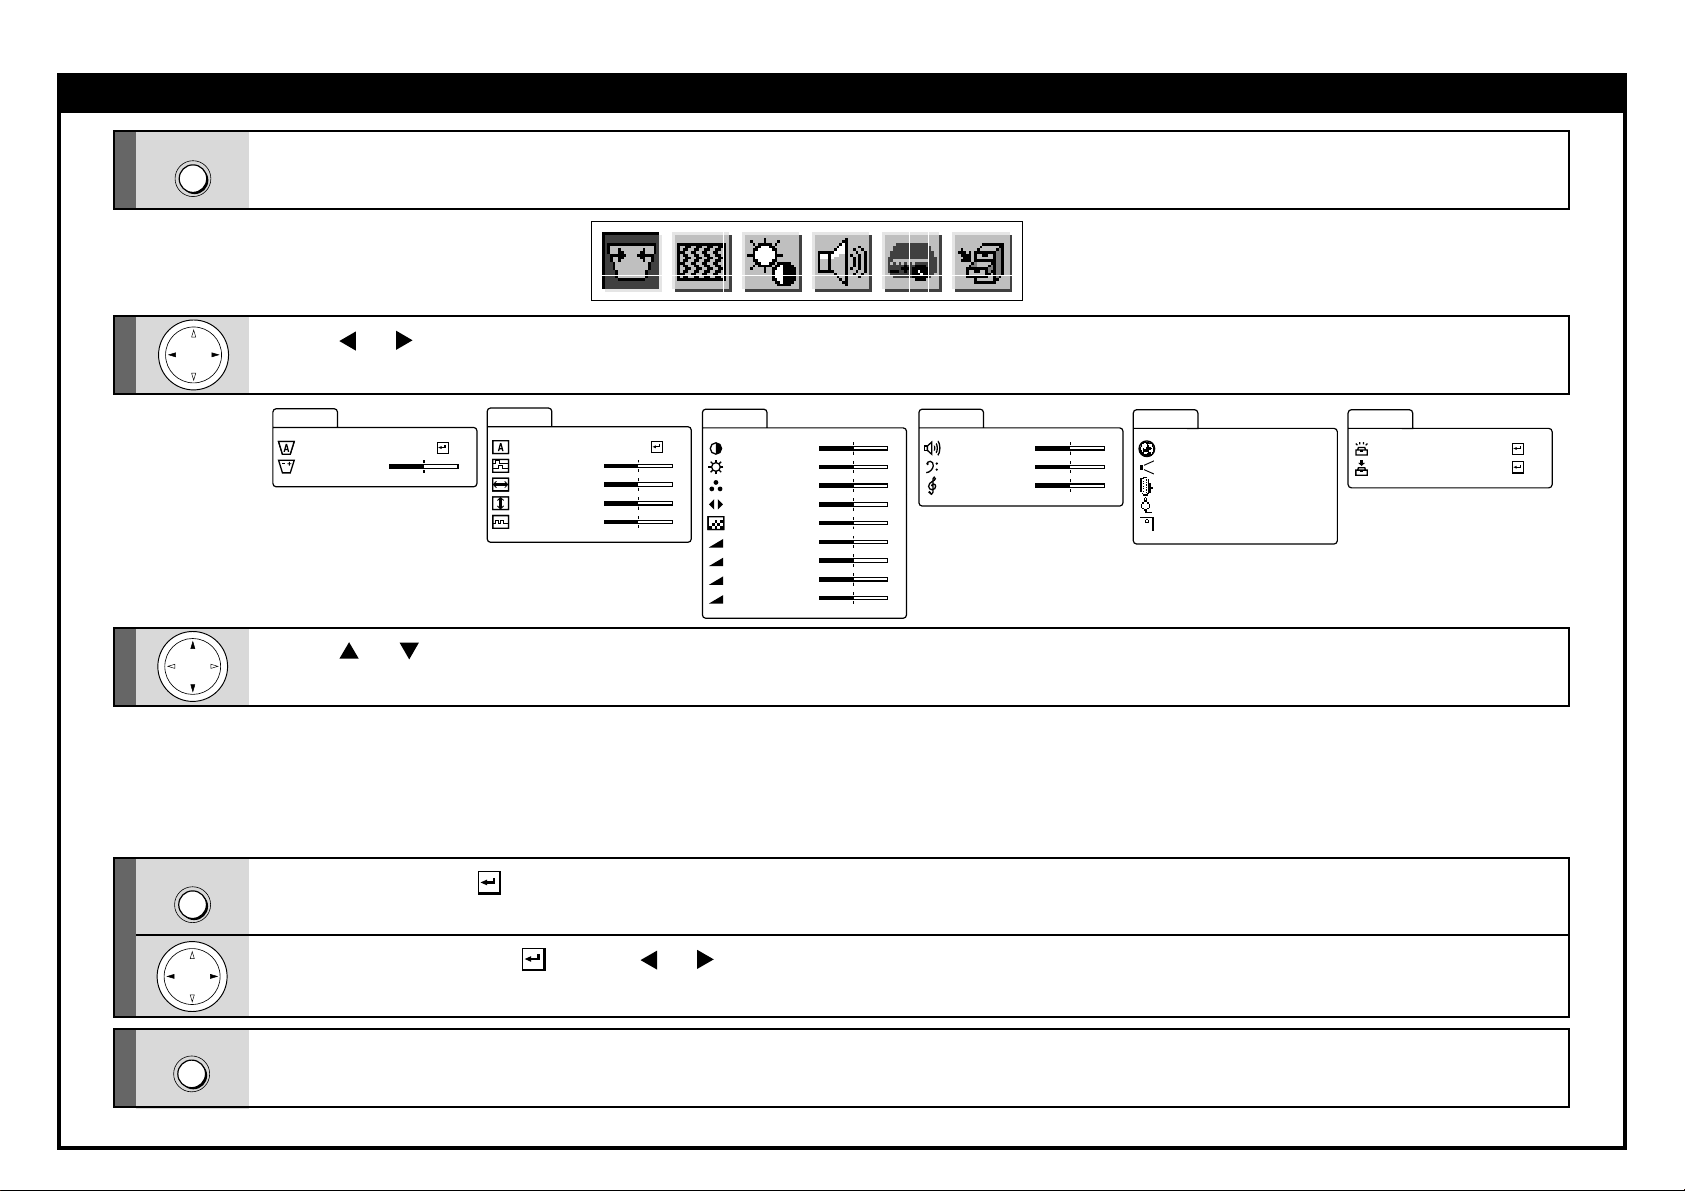
Adjustment and Function Setting
1
2
3
4
MENU
ENTER
Press MENU.
The menu is displayed.
Press or to select the item.
+
Image
Auto syn
Phase
H–posi t i on
V–pos i t i on
Clock
c.
Picture
Con t r a s t
–
–
–
–
+
+
+
+
Brightness
Color
Tint
Shar pness
R- leve l
G- leve l
B- level
Camera gain
–
–
–
–
–
–
–
–
–
+
+
+
+
+
+
+
+
+
Keys t one
Auto set
Adjust
–
Press or to select the item.
Auto set... To correct the keystone
Adjust...... To make the correction of
distortion automatically
keystone distortion
Auto sync. .... To adjust the image au-
Phase .......... To reduce flickers
H-Position .... To shift the image hori-
V-P osition..... T o shift the image ver-
Clock ........... To remove vertical
tomatically
zontally
tically
stripes
Contrast ..................... Contrast
Brightness .................. Brightness
Color .......................... Color density
Tint ............................Tint
Sharpness .................. Sharpness
R-level .......................Red level
G-level ....................... Green level
B-level ........................ Blue level
Camera gain ..............Sensitivity
(Item marked with ). Press ENTER to execute the item.
Audio
Vo l ume
Bas s
Treble
Volume.. T o adjust the sound volume
Bass ..... T o adjust the bass
Treble ... T o adjust the treble
–
–
–
Default
+
Language
+
Pr oj .mode
+
RGB i nput
Vi deo s igna l
Language ........ To select the lan-
Proj. mode....... To set the projecting
RGB input ....... To set the signal type
Video signal ..... To set the signal type
Scrn display ... To use of disable on-
Eng l i s h
St andar d
RGB
Auto
On
yScrn displa
guage
orientation
screen displays
Save
Save dat
a
Al l preset
Save data ... T o save the adjustments
All preset .... To restore the adjust-
and settings on the
menu.
ments and settings on
the menu to the factory
set.
(Item not marked with ). Press or to adjust the value or select the setting.
5
MENU
Note: Pressing RESET of the remote control will return all the adjustments or settings currently displayed to their default.
Press MENU.
The menu disappears.
 Loading...