

Page 1

SoundStrip®
Sound Bar Speaker System
User’s Guide:
SBX5065KU
If you need assistance:
Toshiba’s Support Web site : support.toshiba.com
For more information see “Troubleshooting” on page 18 in this guide.
1
Owner’s Record
The model number and serial number are on the back and underside of your
SoundStrip
whenever you communicate with your Toshiba dealer about this SoundStrip®.
Model name____________________________
Serial number___________________________
SBX5065KU_IB_R6.indd 1 2013/7/3 10:01:04
®
. Record these numbers in the spaces below. Refer to these numbers
Page 2

2
Contents
Introduction .......................................................................................... 6
Safety icons used in this manual............................................................ 6
®
SoundStrip
Remote control ................................................................................... 10
SoundStrip
SoundStrip
Troubleshooting .................................................................................. 18
Specifications ..................................................................................... 19
Maintenance ....................................................................................... 19
speaker system controls ................................................... 7
®
speaker system placement ............................................. 12
®
speaker system connections ........................................... 13
SBX5065KU_IB_R6.indd 2 2013/7/3 10:01:04
Page 3
3
Safety Precautions
The lightning ash with an arrowhead symbol, within the
equilateral triangle, is intended to alert the user to the presence
of uninsulated “dangerous voltage” within the product’s
enclosure that may be of sufcient magnitude to constitute a
risk of electric shock to persons.
The exclamation point within the equilateral triangle is intended
to alert the user to the presence of important operating and
maintenance (servicing) instructions in this User’s Guide.
WARNING: TO REDUCE THE RISK OF FIRE OR ELECTRIC SHOCK, DO NOT EXPOSE THIS APPLIANCE TO RAIN OR
MOISTURE. DANGEROUS HIGH VOLTAGES ARE PRESENT INSIDE THE ENCLOSURE. DO NOT OPEN THE CABINET.
REFER SERVICING TO QUALIFIED PERSONNEL ONLY.
TO PREVENT ELECTRIC SHOCK, MATCH WIDE BLADE OF PLUG TO WIDE SLOT OF AC POWER UTLET, THEN FULLY
INSERT.
CHANGES OR MODIFICATIONS MADE TO THIS EQUIPMENT, NOT EXPRESSLY APPROVED BY TOSHIBA, OR PARTIES
AUTHORIZED BY TOSHIBA, COULD VOID THE USER’S AUTHORITY TO OPERATE THE EQUIPMENT.
To ensure proper use of this product, please read this User’s
Guide carefully and retain for future reference. Should the unit
require maintenance, contact an authorized service location. Use
of controls or adjustments or performance of procedures other
than those specied herein may result in hazardous radiation
exposure.
The symbol for Class II
(Double lnsulation)
Warnings:
• The mains plug is used as disconnect device and it should
remain readily operable during intended used. In order to
disconnect the apparatus from the mains completely, the main
plug should be disconnected from the mains socket outlet
completely.
Important Safety Instructions
1. Read these instructions.
2. Keep these instructions.
3. Heed all warnings.
4. Follow all instructions.
5. Do not use this apparatus near water.
6. Clean only with a dry cloth.
7. Do not block any of the ventilation openings. Install in
accordance with the manufacturer’s instructions.
8. Do not install near any heat sources such as radiators, heat
registers, stoves, or other apparatus (including ampliers)
that produce heat.
9. Protect the power cord from being walked on or pinched
particularly at plugs, convenience receptacles, and the point
where they exit from the apparatus.
10. Only use attachments/accessories specified by the
manufacturer.
11. Unplug this apparatus during lightning storms or when
unused for long periods of time.
12. Refer all servicing to qualied service personnel. Servicing
is required when the apparatus has been damaged in any
way, such as the power-supply cord or plug is damaged,
liquid has been spilled or objects have fallen into the
apparatus, the apparatus has been exposed to rain or
moisture, does not operate normally, or has been dropped.
13. Do not overload wall outlets; extension cords, or integral
convenience receptacles as this can result in a risk of re
or electric shock.
14. Never expose the apparatus to dripping or splashing or
place items such as vases, aquariums, any other item lled
with liquid, or candles on top of the unit.
15. Do not place anything on top of this unit.
16. Do not place the apparatus on ampliers or equipment that
may produce heat.
17. Never block or cover the slots or openings in the unit. Never
place the unit:
• on a bed, sofa, rug or similar surface;
• too close to drapes, curtains, or walls; or
• in a conned space such as a bookcase, built-in cabinet,
or any other place with poor ventilation.
The slots and openings are provided to protect the unit from
overheating and to help maintain reliable operation.
SBX5065KU_IB_R6.indd 3 2013/7/3 10:01:05
Page 4

4
Additional Safety Instructions
18. If the apparatus should emit smoke or an unusual odor,
immediately disconnect the power cord from the wall outlet.
Wait until the smoke or smell stops, then ask your dealer
for a check and repair. Neglecting to do so may cause re.
19. During thunderstorms, do not touch the connecting cables
or the apparatus.
20. Warning: To prevent spread of re, keep candles or other
open ames away from this product at all times.
USA
Federal Communications Commission Statement
FCC Compliance Statement
This device complies with Part 15 of the FCC Rules. Operation
is subject to the following two conditions: (1) This device may
not cause harmful interference, and (2) This device must accept
any interference received, including interference that may cause
undesired operation.
Interference
This equipment has been tested and found to comply with the
limits for a Class B digital device, pursuant to Part 15 of the
FCC Rules. These limits are designed to provide reasonable
protection against harmful interference in a residential
installation. This equipment generates, uses, and can radiate
radio frequency energy and, if not installed and used in
accordance with the instructions, may cause harmful interference
to radio communications. However, there is no guarantee that
interference will not occur in a particular installation. If this
equipment does cause harmful interference to radio or television
reception, which can be determined by turning the equipment off
and on, the user is encouraged to try to correct the interference
by one of the following measures:
• Reorient or relocate the receiving antenna.
• Increase the separation between the equipment and receiver.
• Connect the equipment into an outlet on a circuit different from
that to which the receiver is connected.
• Consult the dealer or an experienced radio/TV technician for
help.
21. CAUTION: Always use the TOSHIBA AC adapter that was
provided with the product, or use AC adapters specied by
TOSHIBA to avoid any risk of re or other damage to the
product. Use of an incompatible AC adapter could cause re
or damage to the product possibly resulting in serious injury.
TOSHIBA assumes no liability for any damage caused by
use of an incompatible adapter.
®
Wireless Technology and Your Health
Bluetooth
The products with Bluetooth
radio devices, emit radio frequency electromagnetic energy.
The level of energy emitted by devices with Bluetooth
technology however is much less than the
electromagnetic energy emitted by wireless devices such as
mobile phones.
Because products with Bluetooth
within the guidelines found in radio frequency safety standards
and recommendations, TOSHIBA believes Bluetooth
technology is safe for use by consumers.
These standards and recommendations reect the consensus
of the scientic community and result from deliberations of
panels and committees of scientists
who continually review and interpret the extensive research
literature.
In some situations or environments, the use of Bluetooth
wireless technology may be restricted by the proprietor of the
building or responsible representatives of the organization.
These situations may, for example, include in any other
environment where the risk of interference to other devices or
services is perceived or identied as harmful.
If you are uncertain of the policy that applies on the use of
wireless devices in a specic organization or environment (e.g.
airports), you are encouraged to ask for authorization to use
the device with Bluetooth
on the equipment.
®
wireless technology, like other
®
wireless
®
wireless technology operate
®
wireless
®
wireless technology prior to turning
®
SBX5065KU_IB_R6.indd 4 2013/7/3 10:01:05
Page 5

Precautions
5
On Safety
Do not handle the AC power cord with wet hands.
When connecting or disconnecting the AC power cord, grip the
plug and not the cord itself. Pulling the cord may damage it and
create a hazard.
When you are not going to use the unit for a long period of time,
disconnect the AC power cord.
On Recycling
This unit’s packaging materials are recyclable and can be
reused. Please dispose of any materials in accordance with your
local recycling regulations.
Batteries should never be thrown away or incinerated but
disposed of in accordance with your local regulations concerning
chemical wastes.
Copyright
This guide is copyrighted by Toshiba America Information
Systems, Inc. with all rights reserved. Under the copyright laws,
this guide cannot be reproduced in any form without the prior
written permission of Toshiba. No patent liability is assumed,
Notice
The information contained in this manual, including but not limited to any product specications, is subject to change without notice.
TOSHIBA CORPORATION AND TOSHIBA AMERICA INFORMATION SYSTEMS, INC. (TOSHIBA) PROVIDES NO WARRANTY
WITH REGARD TO THIS MANUAL OR ANY OTHER INFORMATION CONTAINED HEREIN AND HEREBY EXPRESSLY
DISCLAIMS ANY IMPLIED WARRANTIES OF MERCHANTABILITY OR FITNESS FOR ANY PARTICULAR PURPOSE WITH
REGARD TO ANY OF THE FOREGOING. TOSHIBA ASSUMES NO LIABILITY FOR ANY DAMAGES INCURRED DIRECTLY
OR INDIRECTLY FROM ANY TECHNICAL OR TYPOGRAPHICAL ERRORS OR OMISSIONS CONTAINED HEREIN OR FOR
DISCREPANCIES BETWEEN THE PRODUCT AND THE MANUAL. IN NO EVENT SHALL TOSHIBA BE LIABLE FOR ANY
INCIDENTAL, CONSEQUENTIAL, SPECIAL, OR EXEMPLARY DAMAGES, WHETHER BASED ON TORT, CONTRACT OR
OTHERWISE, ARISING OUT OF OR IN CONNECTION WITH THIS MANUAL OR ANY OTHER INFORMATION CONTAINED
HEREIN OR THE USE THEREOF.
however, with respect to the use of the information contained
herein.
©2013 by Toshiba Corporation. All rights reserved.
Trademarks
SoundStrip® is a registered trademark of Toshiba America Information Systems, Inc.
®
The Bluetooth
are registered trademarks owned by
Bluetooth SIG, Inc. and any use of such
marks by Toshiba Corporation is under
license.
Blu-ray
the Blu-ray Disc Association.
Manufactured under license from Dolby
Laboratories. Dolby, and the double-D
symbol are registered trademarks of
Dolby Laboratories.
Google, Android, and Google Play Store
are trademarks of Google, Inc.
word mark and logos
TM
and the logo are trademarks of
All other brand and product names are trademarks or registered
trademarks of their respective companies.
The terms HDMI and HDMI HighDenition Multimedia Interface, and the
HDMI Logo are trademarks or registered
trademarks of HDMI Licensing LLC in
the United States and other countries.
TruSurround HD, SRS and the
symbol are used under license from DTS
Licensing Limited.
The N Mark is a trademark or registered
trademark of NFC Forum, Inc. in the
United States and in other countries.
SBX5065KU_IB_R6.indd 5 2013/7/3 10:01:05
Page 6
6
Introduction
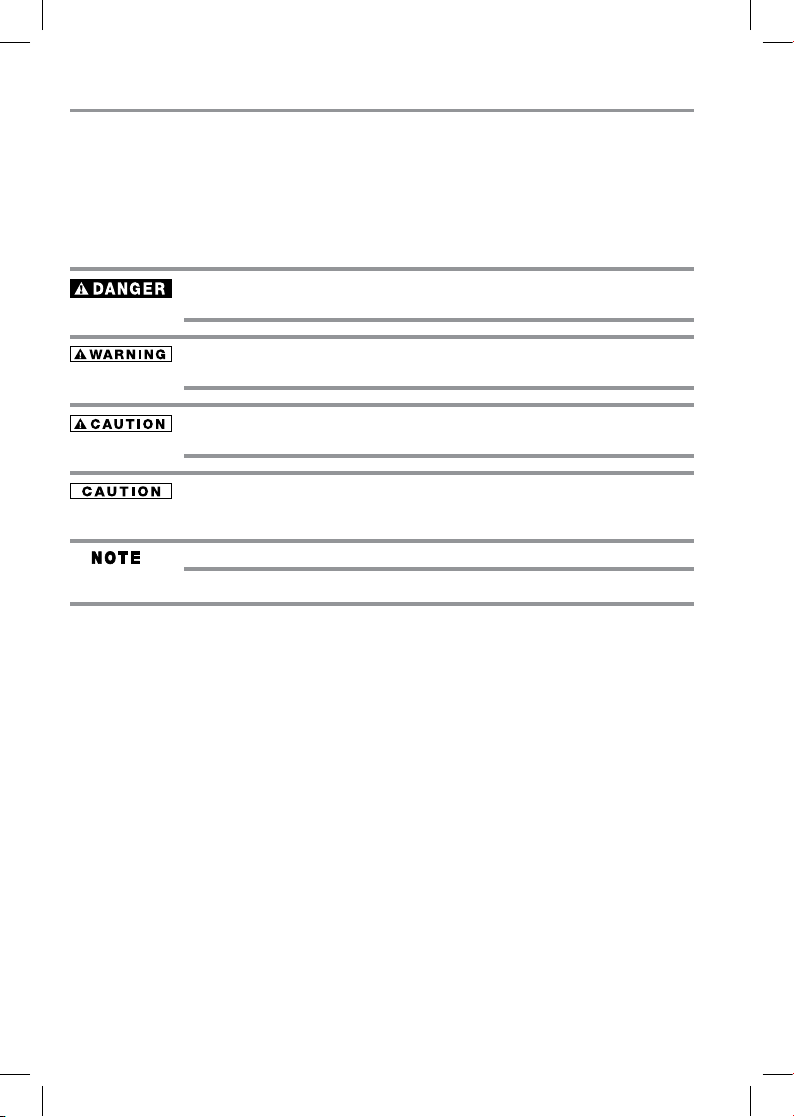
Safety icons
This guide contains safety instructions that must be observed to avoid potential hazards that could
result in personal injuries, damage to your equipment, or loss of data. These safety cautions have
been classied according to the seriousness of the risk, and icons highlight these instructions as
follows:
Indicates an imminently hazardous situation which, if not avoided, will result in
death or serious injury.
Indicates a potentially hazardous situation which, if not avoided, could result in
death or serious injury.
Indicates a potentially hazardous situation which, if not avoided, may result in minor
or moderate injury.
Indicates a potentially hazardous situation which, if not avoided, may result in
property damage.
Provides important information.
Supplied Accessories
Remote Control (SE-R0429) with Batteries (AAA x 2)
User’s Guide (this manual)
Quick Start
Wall Mounting template
Switching power supply (AC Adapter)
Warranty
Stop Return Sheet
SBX5065KU_IB_R6.indd 6 2013/7/3 10:01:05
Page 7

SoundStrip® front panel
SoundStrip® speaker system controls
(Sample Illustration) Front & Top panel controls
Item: Description: Function:
1 VOLUME button Press to adjust the volume level.
2 BASS VOLUME button Press to adjust the bass volume level.
3 MODE button Press to select the surround mode from Stereo/SRS
4 INPUT button Press to switch bet ween HDMI 1/2 (HDMI
5 STANDBY button Press to turn on the unit or place it into standby mode.
To completely turn the unit off, you must unplug the switching
6 NFC (N-Mark) NFC tag indicator/touchpoint.
In NFC tag applications, the N-Mark is used to identify the
7 Remote Sensor Receives the signal from the remote control.
8 Standby Indicator Indicates whether the unit is ON or in STANDBY (OFF) mode.
Light On: The unit is in STANDBY.
Light Of f: The unit is turned ON.
Tru Sur rou nd H D/SR S Tru B ass.
(HDMI® ARC) , BT (Bluetooth®), OPT 1/2 (OPTICAL IN),
AUX (AUX IN) or LINE-IN.
power supply (AC Adapter).
position over an NFC tag where the consumer can align an
NFC-enabled device to initiate an NFC interaction.
®
IN), ARC
7
SBX5065KU_IB_R6.indd 7 2013/7/3 10:01:05
Page 8

8
SoundStrip® back panel
9
10
13
11
(Sample Illustration) Back panel connections
Item: Description: Functions:
9 OPTICAL IN jack (1) & (2) Connects the optical audio input to another device, see
10 AUX IN jack (L / R) Connects other AV devices through the AUX IN jack, see
11 LINE IN jack Connects other AV devices through the LINE IN jack, see
12 DC IN jack Conne cts to the pow er supply, see “C onnecting t o a switchin g
®
13 HDMI
14 HDMI
IN jack (1) & (2) HDMI® (High-Definition Multimedia Interface) cable
®
OUT jack Audio Return Channel (ARC) enables the audio signal
“Connecting to an Audio System” on page 14.
“Connect audio through an analog audio cable” section on
page 14.
“Connect audio through an analog audio cable” section on
page 15.
power supply (AC Adapter)” on page 15.
connects to devices that have an HDMI® output. See
Connecting to a compatible device section on page 13.
of the TV to be sent to the SoundStrip® via the HDMI®
cable. See “Connecting to a TV using an HDMI® (ARC)
cable” on page 13.
14
15
SBX5065KU_IB_R6.indd 8 2013/7/3 10:01:05
Page 9

Subwoofer
TM
(Sample Illustration) Subwoofer connections
Item: Description: Functions:
15 Bass port
16 Subwoofer Speaker
®
17 WIRELESS LINK button Press to pair the subwoofer with the SoundStrip
WIRELESS LINK indicator The indicator is red when the wireless link is activated.
18 POWER switch Switch to turn ON/OFF the subwoofer.
19 Power cord Connects to a standard AC outlet to supply power to the
subwoofer.
.
9
SRS TruSurround HD™
SRS TruSurround HD™ delivers
immersive and natural surround sound
without the need to add cumbersome
rear speakers. TruSurround HD also
improves vocal clarity to ensure dialog
is always clearly understood even
when challenged by loud sound effects
common in today’s soundtracks.
Additionally, TruSurround HD uses
specialized technologies to provide
rich enveloping bass up to an octave
beyond what the speakers are
normally capable of producing while
adding crisp, clear high-frequency
detail all together providing a truly
compelling listening experience.
SBX5065KU_IB_R6.indd 9 2013/7/3 10:01:07
(Sample Illustration) SRS TruSound HD
TM
Page 10

10
Remote control
1
2
3
4
5
6
(Sample Illustration)
Remote control
Item: Description: Operation:
7
1 MUTE Press to turn the sound off.
8
Press again to cancel.
2 CEC Press to turn the HDMI
3
VOLUME Press to adjust the volume level.
9
10
4 EQ Press to select the sound setting.
(Flat/Rock/Pop/Jazz/Classic/Movie)
When in stereo mode, use EQ to select
5
6
7 POWER Press to turn the SoundStrip
8 INPUT Press to select the source.
(HDMI
9 SRS Press to select the Stereo / SRS
10
PRE/NEXT Press to go to the last track or advance
to the next track in Bluetooth® mode.
PL AY/ PAUSE Press to play/pause the track in
Bluetooth® mode.
your settings.
BASS Press to adjust the bass volume level.
SUB Press to adjust the subwoofer volume
level.
®
1/2 (HDMI® IN), ARC (HDMI®
ARC), BT (Bluetooth®), OPT 1/2
(OPTICAL IN), AUX (AUX IN), LINE-IN)
TruSurround HD / SRS TruBass.
TREBLE Press to adjust the treble volume level.
®
CEC on/off.
®
ON/OFF.
SBX5065KU_IB_R6.indd 10 2013/7/3 10:01:07
Page 11

11
Installing the batteries
Install the batteries (AAAx2), matching the polarity indicated inside the battery compartment of
the remote control.
1 Open the battery cover.
(Sample Illustration) Remote control
- Opening the battery cover
2 Insert batteries.
Make sure to match the polarity marks (+ / –) on the batteries to the marks indicated in the
battery compartment.
(Sample Illustration) Remote control
- inserting the batteries
3 Replace the battery cover.
Never throw batteries in a fire. Doing so may cause the batteries to explode.
Do not expose batteries to excessive heat such as sunshine, fire, etc.
Dispose of batteries in a designated disposal area.
Always consider the environment when disposing of batteries.
Always follow applicable laws and regulations.
If the remote does not operate correctly, or if the operating range is reduced,
replace the batteries.
Always replace both batteries with new ones. Never mix battery t ypes or use new
and used batteries together.
Always remove batteries from the remote if they are dead or if the remote control
is not to be used for an extended period of time.
This prevents battery acid from leaking into the batter y compartment.
SBX5065KU_IB_R6.indd 11 2013/7/3 10:01:08
Page 12

12
Subwoofer
Sound Bar
300mm
TV
SoundStrip® speaker system placement
The SoundStrip® can be placed freestanding on a table or mounted on a wall. For the best surround
sound experience, place your subwoofer as shown below.
Place the subwoofer at least 11.8” (300mm) away from the TV.
SoundStrip
®
(Sample Illustration)
Subwoofer placement
Placing the unit on a wall
The SoundStrip® requires additional mounting hardware that must be purchased separately.
1. Place the wall mounting template on the wall and then mark the locations of the screw holes.
2. Drill the screws (not supplied) into the wall carefully.
3. Gently hang the SoundStrip® onto the screws in the wall.
We recommend that wall-mounting be carried out by a professional. The stand’s
“key-holes” are intended for use with #8 (Imperial) or M4 (Metric) pan head
screws.
Make sure that the wall-mounting screws are fixed securely enough so that it
meets safety standards.
Allow at least 2” (5 cm) separation in all directions between the SoundStrip® and
other AV equipment (such as your TV or Set-Top Box).
It is recommended that all cables (AC adapter and Audio cables) be connected to
the SoundStrip® before placing it on the wall.
(Sample Illustration)
Wall-mount screwed to the wall
SBX5065KU_IB_R6.indd 12 2013/7/3 10:01:08
Page 13

13
High
Definition
TV
HDMI® OUT
HDMI® IN
HDMI® IN (ARC)
High
Definition
TV
SoundStrip® speaker system connections
Connecting to a TV using an HDMI® (ARC) cable.
This feature enables the audio signal of the TV to be sent to the SoundStrip® via the HDMI® cable.
The HDMI® cable is not included and must be purchased separately. Be sure that the connected TV
has an HDMI® (ARC) compatible terminal. To connect the HDMI® ARC cable:
1. Connect an HDMI® cable from the HDMI® output jack on the SoundStrip® to the HDMI®
input jack on the TV.
2. Press the INPUT button to select the HDMI®-ARC mode and the display will be shown
“ARC”.
Do not tilt the connector when inserting it into the HDMI® jack, and make sure the
shapes of the jack and the connector are aligned properly.
If your TV is not HDMI® (ARC) compliant , connect your SoundStrip® to the TV
through a standard HDMI® connection.
The optical digital audio cable connections is needed when the HDMI® cable is
connected to a terminal that is not HDMI® (ARC). (For more information, please
refer to “Connecting to an audio system” on page 14.)
not supplied
(Sample Illustration)
HDMI® OUT ARC
connection
Connecting to a compatible device.
You can output the audio signal from the compatible device (e.g. Blu-ray™ player , DVD player
etc.) with this SoundStrip® and pass the signal through to your TV.
1. Connect an HDMI® cable from the HDMI® input jack on the SoundStrip® to the HDMI®
output jack on the other device.
2. Connect an HDMI® cable from the HDMI® output jack on the SoundStrip® to the HDMI®
input jack on the TV.
3. Press the INPUT button to select the HDMI® mode and the display will be shown “HDMI-1”
or “HDMI-2”.
Blu-ray™/
DVD Player
not supplied
(Sample Illustration)
HDMI
SBX5065KU_IB_R6.indd 13 2013/7/3 10:01:08
®
compatible device connection
Page 14

14
Connecting to an Audio System.
You can connect your SoundStrip® to an audio system to play audio from other devices.
Connect audio through a digital optical cable
1. You can connect a optical cable from the OPTICAL input jack on the SoundStrip
OPTICAL output jack on the other device.
2. Press the INPUT button to select the OPTICAL mode and the display will show “OPT-1” or
“OPT-2”.
®
to the
When your SoundStrip
®
and TV are connected through HDMI® (ARC), an audio
connection is not required.
not supplied
Blu-ray™/
DVD Player
Set-Top Box
OPTICAL OUT
(Sample Illustration)
Digital optical cable connections
Connect audio through an analog audio cable.
You can connect an audio cable (not included) from the L/R AUX input jack on the SoundStrip®
to the Audio output jack on the other device.
1. Press the INPUT button to select the AUX IN mode and the display will show “AUX”.
not supplied
Blu-ray™/
DVD Player
Set-Top Box
(Sample Illustration) Analog audio connections
SBX5065KU_IB_R6.indd 14 2013/7/3 10:01:09
Page 15

Portable music player or
other Audio Devices
2. Connect a 3.5mm cable (not included) from the LINE input jack on the SoundStrip® to the
other device.
3. Press the INPUT button to select the LINE IN mode and the display will show “LINE-IN”.
not supplied
(Sample Illustration) 3.5mm connection to audio device
Connecting to a switching power supply (AC Adapter).
Using a switching power supply (AC Adapter) other than the one supplied with the
unit may damage the unit.
Before use, ensure the rated voltage of the switching power supply (AC Adapter)
matches your local voltage.
The included switching power supply (AC Adapter) is for use with this unit only.
Do not use it with other equipment.
If you are not going to use the unit for an extended period of time, disconnect the
switching power supply (AC Adapter) from the wall outlet.
Whenever the switching power supply (AC Adapter) is plugged in to a wall outlet,
the switching power supply (AC Adapter) will draw some power, even when the
unit is turned off.
15
SoundStrip
®
(Sample Illustration)
Connecting the switching power supply (AC Adapter)
Subwoofer
SBX5065KU_IB_R6.indd 15 2013/7/3 10:01:09
Page 16

16
Subwoofer wireless connection
In order to use the subwoofer, you must pair it with the SoundStrip®.
1. Connect the power cord to a wall outlet.
2. Turn on the SoundStrip
3. Turn the ON/OFF switch on the back of subwoofer to the “on” position.
4. The SoundStrip® and the subwoofer will automatically pair up. The pairing indicator located in
upper right corner of the rear panel will appear red when the wireless link is activated.
Playing back via Bluetooth® enabled devices
1. Press the INPUT button on the remote or using the speaker system controls to select Bluetooth®
mode as indicated when the display “shows “BT”.
Your pairing device must have the Bluetooth® feature turned on.
2. Once the SoundStrip® is detected by your Bluetooth® enabled device, select the “Toshiba
SoundBar” on your device.
3. Enter the PIN code.
PIN code : 0000
4. When this unit successfully paired with your Bluetooth® device, it will appear “CONNECTED”.
5. Select the desired music and press the PLAY button on your device.
®
.
When the wireless link is deactivated, the SoundStrip® will show “NO
SUBWOOFER” on the front panel display. You can press and hold the
but ton on the remot e control for 8 s econds in HDMI®-2 mode. A nd then, pres s
and hold the WIRELESS LINK button of the subwoofer for approximately 5
seconds until the red indicator is flashes.
The SoundStrip® will show “PAIRED” when the SoundStrip® and the
subwoofer link are active.
Disconnect Bluetooth® enabled device
1. Press the INPUT button to select Bluetooth® mode until the display on the SoundStrip® is
shown “BT”.
2. Select disconnect or unpaired menu on paired Bluetooth® enabled device.
The SoundStrip
SBX5065KU_IB_R6.indd 16 2013/7/3 10:01:09
®
become able to pair with another Bluetooth® enabled device.
The SoundStrip® must disconnect or unpaired from a previous paired device in
order to properly pair with another Bluetooth® enabled device.
For details, please refer to the user manual of your Bluetooth® device.
Page 17

17
Bluetooth® connection by NFC
NFC (Near Field Communication) is a technology enabling short-range wireless communication
between various devices, such as mobile phones and IC tags.
By just touching the SoundStrip® where the “N-mark” is located with an NFC compatible device,
the SoundStrip® is turned on automatically and then paired and connected with the various devices,
such as mobile phones. To locate the “N-mark” on the unit, please see page 7.
1. Start and turn on the NFC function on the device. Your Bluetooth must be in active or “ON”
mode from your pairing device. Keep touching the device on the “N-Mark” of the SoundStrip®
until the device vibrates or a message pops up, the Bluetooth® will be paired automatically.
2. Touch the SoundStrip® with the device again to disconnect. In order to avoid unintentional
disconnection, it is advised that you place your device away from the “N-mark” once connected.
The NFC function is built into AndroidTM devices powered by Android 4.1
Jellybean or later.
If your device is powered by a previous version than Android 4.1 Jellybean,
you must download the relevant application from Google PlayTM Store to use
the NFC function.
The position of the NFC antenna differs on devices. Check where the NFC
antenna is located before connecting. If your device is covered with a thick
case, the connection may not succeed.
For details, please refer to the user manual of your NFC device.
SBX5065KU_IB_R6.indd 17 2013/7/3 10:01:09
Page 18

18
Troubleshooting
Problem:
The unit does not switch on.
No sound from the SoundStrip
No sound from the subwoofer
Remote control does not work
properly
Connection (NFC) is not
available
Solution:
Make sure it is plugged into a AC power outlet and the outlet
is turned ON.
Press the STANDBY/ON button located on the top of the
SoundStrip
®
, and check to see if the STANDBY/ON indicator
turns off.
Turn the subwoofer power switch to ON.
®
Press the VOL
button of the SoundStrip®.
Ensure the source you have selected is outputting audio. If
you are using “audio out” from your TV, please ensure your
TV is configured to output audio (see T V’s menu settings).
Ensure your audio connections are properly made (check
that you don’t have any loose connections).
Ensure you have selected the correct source (input) - the
display of the SoundStrip
®
will shown the currently-selected
source (input).
Press the MUTE button on the remote control to ensure the
SoundStrip
Move the subwoofer closer to the SoundStrip
®
is not muted.
®
.
Ensure the subwoofer is turned on. Turn the subwoofer
power switch to ON.
Press the WIRELESS LINK button on the back of the
subwoofer to re-link the subwoofer with the SoundStrip
®
.
Check the following:
The batteries are inserted correctly.
The batteries are new.
The remote control is pointed directly at the remote sensor
of the unit.
The remote control is not being used from too far a distance
from the unit.
Nothing is obstructing remote sensor (located on front of
the unit).
Keep the device close to the system until the device vibrates.
Check the NFC function of the device is set to on.
SBX5065KU_IB_R6.indd 18 2013/7/3 10:01:09
Page 19

Specifications
These models comply with the specifications listed below.
Designs and specifications are subject to change without notice.
These models may not be compatible with features and/or specifications that
may be added in the future.
Main unit:
Power requirements DC 27.5V
Power output 75 watts (per channel at 4 ohms, 1 kHz /THD10%)
Power consumption 27W
Impedance 4
Dimensions 44.6” x 3” x 2.3” (1133 x 76 x 57mm)
(width x height x depth)
Weight 5.1 lbs (2.3kg)
Subwoofer:
Power requirements AC 120
Power output 150 watts (at 3 ohms, 100Hz /THD10%)
Power consumption 34W
Impedance 3
Dimensions 7.5” x 13.9” x 13.2” (193 x 355 x 336mm)
(width x height x depth)
Weight 14.5 lbs (6.6 kg)
3.2A
60Hz
19
Maintenance
Servicing
Please refer to relevant topics in “Troubleshooting” on page 18 before returning the product.
If this unit becomes inoperative, do not try to correct the problem by yourself. There are no userservicable parts inside. Turn off, unplug the power plug, and please call our helpline to locate an
Authorized Service Center.
Cleaning the cabinet
Never use a solvent, thinner, benzene or alcohol to clean the unit. Do not spray
insecticide liquid near the unit. Such chemicals may discolor the sur face or
damage the unit.
SBX5065KU_IB_R6.indd 19 2013/7/3 10:01:10
Page 20

20
SBX5065KU_IB_R6.indd 20 2013/7/3 10:01:10
 Loading...