

Toshiba Satellite P500, Qosmio G60, Qosmio X505, Satellite P500D, Satellite P505D User Manual
...
TOSHIBA
Satellite P500 / Satellite P505
Qosmio X500 / Qosmio G60 /
Qosmio X505
Satellite
P500D / Satellite P505D
Satellite P507
/
Satellite P507D
Portable Personal Computer
User's Manual
Downloaded from LpManual.com Manuals

User’s Manual ii
Copyright
© 2009 by TOSHIBA Corporation. All rights reserved. Under the copyright
laws, this manual cannot be reproduced in any form without the prior
written permission of TOSHIBA. No patent liability is assumed, with respect
to the use of the information contained herein.
TOSHIBA Satellite P500 / Satellite P505 / Satellite P507, Qosmio X505,
Qosmio X500, Qosmio G60, Satellite P500D / Satellite P505D / Satellite
P507D Series
Portable Personal Computer User's Manual
First edition August 2009
Copyright authority for music, movies, computer programs, databases, and
other intellectual property covered by copyright laws belongs to the author
or the copyright owner. Copyrighted material can be reproduced only for
personal use or use within the home. Any other use beyond that stipulated
above (including conversion to digital format, alteration, transfer of copied
material and distribution on a network) without the permission of the
copyright owner is a violation of copyright or author’s rights and is subject
to civil damages or criminal action. Please comply with copyright laws in
making any reproduction from this manual.
Please note that you may infringe the owner's rights protected by the
copyright laws if you use the screen mode switching functions (e.g. Wide
mode, Wide Zoom mode, etc.) of this product to display enlarged images/
video at coffee shops or hotels for the purposes of profits or providing these
to the public.
Disclaimer
This manual has been validated and reviewed for accuracy. The
instructions and descriptions it contains are accurate for the TOSHIBA
Satellite P500 / Satellite P505 / Satellite P507, Qosmio X505, Qosmio
X500, Qosmio G60, Satellite P500D / Satellite P505D / Satellite P507D
Series Portable Personal Computer at the time of this manual’s production.
However, succeeding computers and manuals are subject to change
without notice. TOSHIBA assumes no liability for damages incurred directly
or indirectly from errors, omissions or discrepancies between the computer
and the manual.
This product incorporates copyright protection technology that is protected
by U.S. patents and other intellectual property rights. Use of this copyright
protection technology must be authorized by Macrovision, and is intended
for home and other limited viewing uses only unless otherwise authorized
by Macrovision. Reverse engineering or disassembly is prohibited.
Downloaded from LpManual.com Manuals

User’s Manual iii
Trademarks
IBM is a registered trademark and IBM PC is a trademark of International
Business Machines Corporation.
Windows and Microsoft are registered trademarks of Microsoft Corporation.
DirectX, AcriveDesktop, DirectShow, and Windows Media are registered
trademarks of Microsoft Corporation.
Intel, Intel Core, Celeron, Centrino and Pentium are trademarks or
registered trademarks of Intel Corporation or its subsidiaries in the United
States and other countries.
AMD, the AMD Arrow logo, AMD Athlon, AMD Turion, AMD Sempron, ATI
Radeon, ATI Mobility Radeon and combinations thereof are trademarks of
Advanced Micro Devices, Inc.
Adobe and Photoshop are either registered trademarks or trademarks of
Adobe Systems Incorporated in the United States and/or other countries.
Bluetooth™ is a registered trademark owned by its proprietor and used by
TOSHIBA under license.
ConfigFree is a trademark of TOSHIBA Corporation.
WinDVD is a trademark of Corel Corporations.
DVD MovieFactory is a trademark of Corel Corporations.
Dolby is a registered trademark of Dolby Laboratories.
ExpressCard is a trademark of PCMCIA.
HDMI, the HDMI logo and High-Definition Multimedia Interface are
trademarks or registered trademarks of HDMI Licensing LLC.
Blu-ray Disc is a trademark.
Labelflash(TM) is a trademark of YAMAHA CORPORATION.
Memory Stick, Memory Stick PRO, and i.LINK are registered trademarks
and i.LINK is a trademark of SonyCorporation.
MultiMediaCard and MMC are trademarks of MultiMediaCard Association.
Photo CD is a trademark of Eastman Kodak.
Secure Digital and SD are trademarks of SD Card Association.
xD-Picture Card is a trademark of Fuji Photo Film, Co., Ltd.
WiMAX, WiMAX Forum, WiMAX Certified, WiMAX Forum Certified, the
WiMAX Forum logo and the WiMAX Forum Certified Logo are trademarks
or registered trademarks of the WiMAX Forum.
Wi-Fi is a registered trademark of the Wi-Fi Alliance.
Other trademarks and registered trademarks not listed above may be used
in this manual.
Downloaded from LpManual.com Manuals

User’s Manual iv
FCC information
FCC notice “Declaration of Conformity Information”
This equipment has been tested and found to comply with the limits for a
Class B digital device, pursuant to part 15 of the FCC rules. These limits
are designed to provide reasonable protection against harmful interference
in a residential installation. This equipment generates, uses and can radiate
radio frequency energy and, if not installed and used in accordance with the
instructions, may cause harmful interference to radio communications.
However, there is no guarantee that interference will not occur in a
particular installation. If this equipment does cause harmful interference to
radio or television reception, which can be determined by turning the
equipment off and on, the user is encouraged to try to correct the
interference by one or more of the following measures:
■ Reorient or relocate the receiving antenna.
■ Increase the separation between the equipment and receiver.
■ Connect the equipment into an outlet on a circuit different from that to
which the receiver is connected.
■ Consult the dealer or an experienced radio/TV technician for help.
FCC conditions
This device complies with part 15 of the FCC Rules. Operation is subject to
the following two conditions:
1. This device may not cause harmful interference.
2. This device must accept any interference received, including
interference that may cause undesired operation.
Contact
Only peripherals complying with the FCC class B limits may be attached to
this equipment. Operation with non-compliant peripherals or peripherals
not recommended by TOSHIBA is likely to result in interference to radio
and TV reception. Shielded cables must be used between the external
devices and the computer’s external monitor port, USB port, serial port,
parallel port, PS/2 mouse/keyboard port and microphone jack. Changes or
modifications made to this equipment, not expressly approved by
TOSHIBA or parties authorized by TOSHIBA could void the user’s
authority to operate the equipment.
Address: TOSHIBA America Information Systems, Inc.
9740 Irvine Boulevard
Irvine, California 92618-1697
Telephone: (949) 583-3000
Downloaded from LpManual.com Manuals
User’s Manual v
EU Conformity Statement
This product and - if applicable - the supplied accessories too are marked
with "CE" and comply therefore with the applicable harmonized European
standards listed under the Low Voltage Directive 2006/95/EC, the EMC
Directive 2004/108/EC and/or R&TTE Directive 1999/5/EC.
The complete official EU CE Declaration can be obtained on following
internet page:
http://epps.toshiba-teg.com/
VCCI Class B Information
Important Safety Information for Computers with TV
tuner
IEC60950-1/EN60950-1 Information technology equipment - Safety Coaxial cable connection to this computer must only be used if the cable
outer conductive shielding has been grounded by the cable installer at the
building premises as close to the point of cable entrance, or attachment, as
practicable and the connection complies with all local cable installation
requirements that are applicable in your area.
Responsible for CEmarking:
“TOSHIBA EUROPE GMBH, Hammfelddamm 8,
41460 Neuss, Germany.
Manufacturer: Toshiba Corporation, 1-1 Shibaura 1-chome,
Minato-ku, Tokyo, 105-8001, Japan.
ߎߩⵝ⟎ߪޔࠢࠬ㧮ᖱႎᛛⴚⵝ⟎ߢߔޕߎߩⵝ⟎ߪޔኅᐸⅣႺߢ↪ߔࠆ
ߎߣࠍ⋡⊛ߣߒߡ߹ߔ߇ޔߎߩⵝ⟎߇ࠫࠝ߿࠹ࡆ࡚ࠫࡦฃାᯏߦㄭធߒ
ߡ↪ߐࠇࠆߣޔฃା㓚ኂࠍᒁ߈ߎߔߎߣ߇ࠅ߹ߔޕ
ขᛒ⺑ᦠߦᓥߞߡᱜߒขࠅᛒࠍߒߡߊߛߐޕ
VCCI-B
Downloaded from LpManual.com Manuals

User’s Manual vi
Modem warning notice
Conformity Statement
The equipment has been approved to [Council Decision 98/482/EC - "TBR
21"] for pan-European single terminal connection to the Public Switched
Telephone Network (PSTN).
However, due to differences between the individual PSTNs provided in
different countries/regions the approval does not, of itself, give an
unconditional assurance of successful operation on every PSTN network
termination point.
In the event of problems, you should contact your equipment supplier in the
first instance.
Network Compatibility Statement
This product is designed to work with, and is compatible with the following
networks. It has been tested to and found to conform with the additional
requirements conditional in EG 201 121.
Specific switch settings or software setup are required for each network,
please refer to the relevant sections of the user guide for more details.
The hookflash (timed break register recall) function is subject to separate
national type approvals. It has not been tested for conformity to national
type regulations, and no guarantee of successful operation of that specific
function on specific national networks can be given.
This information is applicable to the models equipped with a built-in
modem.
Germany ATAAB AN005, AN006, AN007, AN009, AN010 and
DE03, 04, 05, 08, 09,12,14,17
Greece ATAAB AN005, AN006 and GR01, 02, 03, 04
Portugal ATAAB AN001, 005, 006, 007, 011 and P03, 04, 08,
10
Spain ATAAB AN005, 007, 012, and ES01
Switzerland ATAAB AN002
All other countries/
regions
ATAAB AN003, 004
Downloaded from LpManual.com Manuals
User’s Manual vii
Japan regulations
Region selection
If you are using the computer in Japan, technical regulations described in
the Telecommunications Business Law require that you select the Japan
region mode. It is illegal to use the modem in Japan with any other
selection.
Redial
Up to two redial attempts can be made. If more than two redial attempts are
made, the modem will return Black Listed. If you are experiencing problems
with the Black Listed code, set the interval between redials at one minute or
longer.
Japan's Telecommunications Business Law permits up to two redials on
analogue telephones, but the redials must be made within a total of three
minutes.
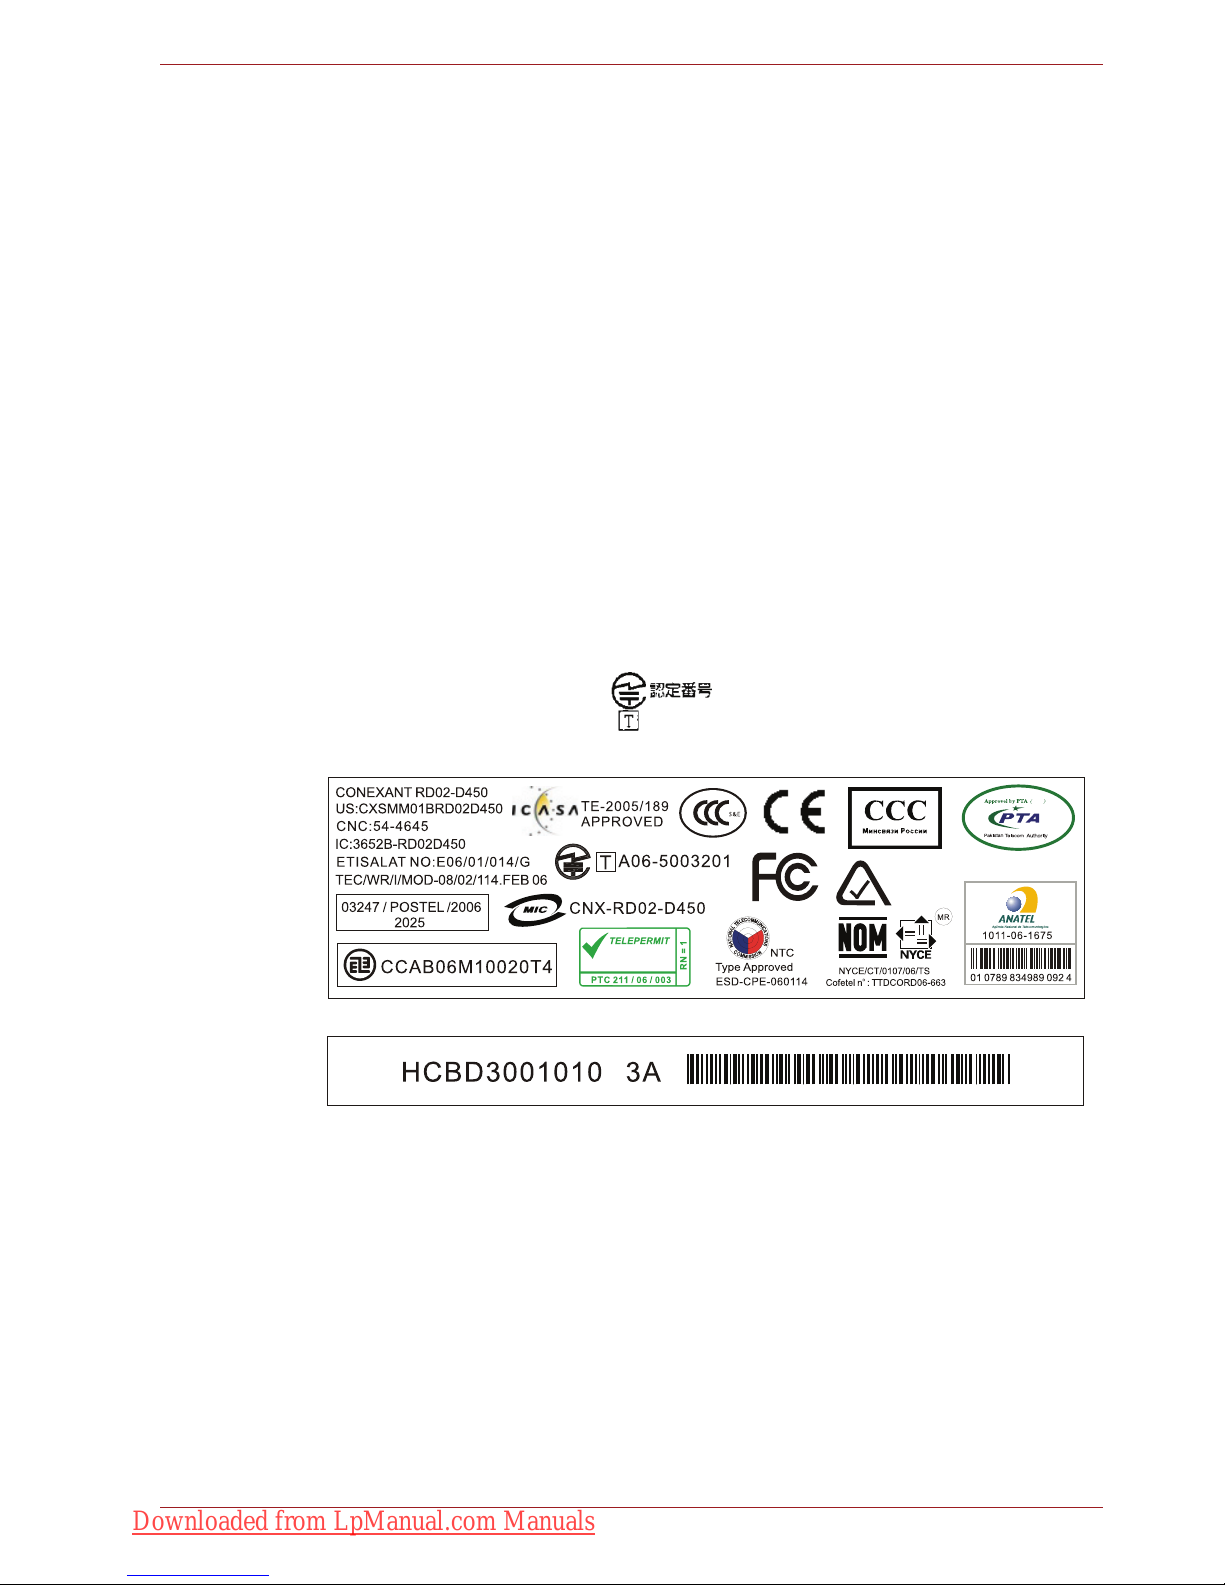
The internal modem is approved by Japan Approvals Institute for
Telecommunications Equipment.
A06-5003201
This Conexant RD02-D450
PSTN Modem may be
connected to the Telecom
Network
2006
N51
Downloaded from LpManual.com Manuals

User’s Manual viii
Pursuant to FCC CFR 47, Part 68:
When you are ready to install or use the modem, call your local telephone
company and give them the following information:
■ The telephone number of the line to which you will connect the modem.
■ The registration number that is located on the device
US : CXSMM01BRD02D450
The FCC registration number of the modem will be found on either the
device which is to be installed, or, if already installed, on the bottom of
the computer outside of the main system label.
■ The Ringer Equivalence Number (REN) of the modem, which can vary.
For the REN of your modem, refer to your modem’s label.
The modem connects to the telephone line by means of a standard jack
called the USOC RJ11C.
Type of service
Your modem is designed to be used on standard-device telephone lines.
Connection to telephone company-provided coin service (central office
implemented systems) is prohibited. Connection to party lines service is
subject to state tariffs.
If you have any questions about your telephone line, such as how many
pieces of equipment you can connect to it, the telephone company will
provide this information upon request.
Telephone company procedures
The goal of the telephone company is to provide you with the best service it
can. In order to do this, it may occasionally be necessary for them to make
changes in their equipment, operations, or procedures. If these changes
might affect your service or the operation of your equipment, the telephone
company will give you notice in writing to allow you to make any changes
necessary to maintain uninterrupted service.
If problems arise
If any of your telephone equipment is not operating properly, you should
immediately remove it from your telephone line, as it may cause harm to
the telephone network. If the telephone company notes a problem, they
may temporarily discontinue service. When practical, they will notify you in
advance of this disconnection. If advance notice is not feasible, you will be
notified as soon as possible. When you are notified, you will be given the
opportunity to correct the problem and informed of your right to file a
complaint with the FCC. In the event repairs are ever needed on your
modem, they should be performed by TOSHIBA Corporation or an
authorized representative of TOSHIBA Corporation.
Disconnection
If you should ever decide to permanently disconnect your modem from its
present line, please call the telephone company and let them know of this
change.
Downloaded from LpManual.com Manuals
User’s Manual ix
Fax branding
The Telephone Consumer Protection Act of 1991 makes it unlawful for any
person to use a computer or other electronic device to send any message
via a telephone fax machine unless such message clearly contains in a
margin at the top or bottom of each transmitted page or on the first page of
the transmission, the date and time it is sent and an identification of the
business, other entity or individual sending the message and the telephone
number of the sending machine or such business, other entity or individual.
In order to program this information into your fax modem, you should
complete the setup of your fax software before sending messages.
Instructions for IC CS-03 certified equipment
1. The Industry Canada label identifies certified equipment. This
certification means that the equipment meets certain
telecommunications network protective, operational and safety
requirements as prescribed in the appropriate Terminal Equipment
Technical Requirements document(s). The Department does not
guarantee the equipment will operate to the user’s satisfaction.
Before installing this equipment, users should ensure that it is
permissible to be connected to the facilities of the local
telecommunications company. The equipment must also be installed
using an acceptable method of connection.
The customer should be aware that compliance with the above
conditions may not prevent degradation of service in some situations.
Repairs to certified equipment should be coordinated by a
representative designated by the supplier. Any repairs or alterations
made by the user to this equipment, or equipment malfunctions, may
give the telecommunications company cause to request the user to
disconnect the equipment.
Users should ensure for their own protection that the electrical ground
connections of the power utility, telephone lines and internal metallic
water pipe system, if present, are connected together. This precaution
may be particularly important in rural areas.
2. The user manual of analog equipment must contain the equipment’s
Ringer Equivalence Number (REN) and an explanation notice similar to
the following:
The Ringer Equivalence Number (REN) of the modem, which can vary.
For the REN of your modem, refer to your modem’s label.
Use only No.26AWG or larger telecommunication line cord.
Users should not attempt to make such connections themselves, but
should contact the appropriate electric inspection authority, or electrician,
as appropriate.
Downloaded from LpManual.com Manuals

User’s Manual x
3. The standard connecting arrangement (telephone jack type) for this
equipment is jack type(s): USOC RJ11C.
The IC registration number of the modem is shown below.
Canada: 3652B-RD02D450
Notes for Users in Australia and New Zealand
Modem warning notice for Australia
Modems connected to the Australian telecoms network must have a valid
Austel permit. This modem has been designed to specifically configure to
ensure compliance with Austel standards when the country/region selection
is set to Australia. The use of other country/region setting while the modem
is attached to the Australian PSTN would result in you modem being
operated in a non-compliant manner. To verify that the country/region is
correctly set, enter the command ATI9 which displays the currently active
setting.
To set the country/region permanently to Australia, enter the following
command sequence:
AT+GCI=09
Failure to set the modem to the Australia country/region setting as shown
above will result in the modem being operated in a non-compliant manner.
Consequently, there would be no permit in force for this equipment and the
Telecoms Act 1991 prescribes a penalty of $12,000 for the connection of
non-permitted equipment.
The Ringer Equivalence Number (REN) assigned to each terminal device
provides an indication of the maximum number of terminals allowed to be
connected to a telephone interface. The termination on an interface may
consist of any combination of devices subject only to the requirement that
the sum of the Ringer Equivalence Numbers of all the devices does not
exceed 5.
Downloaded from LpManual.com Manuals

User’s Manual xi
Notes for use of this device in New Zealand
■ The grant of a Telepermit for a device in no way indicates Telecom
acceptance of responsibility for the correct operation of that device
under all operating conditions. In particular the higher speeds at which
this modem is capable of operating depend on a specific network
implementation which is only one of many ways of delivering high
quality voice telephony to customers. Failure to operate should not be
reported as a fault to Telecom.
■ In addition to satisfactory line conditions a modem can only work
properly if:
a/ it is compatible with the modem at the other end of the call and
b/ the application using the modem is compatible with the application
at the other end of the call - e.g., accessing the Internet requires
suitable software in addition to a modem.
■ This equipment shall not be used in any manner which could constitute
a nuisance to other Telecom customers.
■ Some parameters required for compliance with Telecom’s PTC
Specifications are dependent on the equipment (PC) associated with
this modem. The associated equipment shall be set to operate within
the following limits for compliance with Telecom Specifications:
a/ There shall be no more than 10 call attempts to the same number
within any 30 minute period for any single manual call initiation, and
b/ The equipment shall go on-hook for a period of not less than 30
seconds between the end of one attempt and the beginning of the
next.
c/ Automatic calls to different numbers shall be not less than 5
seconds apart.
■ Immediately disconnect this equipment should it become physically
damaged, and arrange for its disposal or repair.
■ The correct settings for use with this modem in New Zealand are as
follows:
ATB0 (CCITT operation)
AT&G2 (1800 Hz guard tone)
AT&P1 (Decadic dialling make-break ratio = 33%/67%)
ATS0=0 (not auto answer)
ATS10=less than 150 (loss of carrier to hang up delay, factory default of
15 recommended)
ATS11=90 (DTMF dialling on/off duration=90 ms)
ATX2 (Dial tone detect, but not (U.S.A.) call progress detect)
■ When used in the Auto Answer mode, the S0 register must be set with a
value of 3 or 4. This ensures:
■ a person calling your modem will hear a short burst of ringing before
the modem answers. This confirms that the call has been
successfully switched through the network.
■ caller identification information (which occurs between the first and
Downloaded from LpManual.com Manuals

User’s Manual xii
second ring cadences) is not destroyed.
■ The preferred method of dialling is to use DTMF tones (ATDT...) as this
is faster and more reliable than pulse (decadic) dialling. If for some
reason you must use decadic dialling, your communications program
must be set up to record numbers using the following translation table
as this modem does not implement the New Zealand “Reverse dialling”
standard.
Number to be dialled: 0 1 2 3 4 5 6 7 8 9
Number to program into computer: 0 9 8 7 6 5 4 3 2 1
Note that where DTMF dialling is used, the numbers should be entered
normally.
■ The transmit level from this device is set at a fixed level and because of
this there may be circumstances where the performance is less than
optimal. Before reporting such occurrences as faults, please check the
line with a standard Telepermitted telephone, and only report a fault if
the phone performance is impaired.
■ It is recommended that this equipment be disconnected from the
Telecom line during electrical storms.
■ When relocating the equipment, always disconnect the Telecom line
connection before the power connection, and reconnect the power first.
■ This equipment may not be compatible with Telecom Distinctive Alert
cadences and services such as FaxAbility.
NOTE THAT FAULT CALLOUTS CAUSED BY ANY OF THE ABOVE
CAUSES MAY INCUR A CHARGE FROM TELECOM
General conditions
As required by PTC 100, please ensure that this office is advised of any
changes to the specifications of these products which might affect
compliance with the relevant PTC Specifications.
The grant of this Telepermit is specific to the above products with the
marketing description as stated on the Telepermit label artwork. The
Telepermit may not be assigned to other parties or other products without
Telecom approval.
A Telepermit artwork for each device is included from which you may
prepare any number of Telepermit labels subject to the general instructions
on format, size and color on the attached sheet.
The Telepermit label must be displayed on the product at all times as proof
to purchasers and service personnel that the product is able to be
legitimately connected to the Telecom network.
The Telepermit label may also be shown on the packaging of the product
and in the sales literature, as required in PTC 100.
The charge for a Telepermit assessment is $337.50. An additional charge
of $337.50 is payable where an assessment is based on reports against
non-Telecom New Zealand Specifications. $112.50 is charged for each
variation when submitted at the same time as the original.
An invoice for $NZ1237.50 will be sent under separate cover.
Downloaded from LpManual.com Manuals
User’s Manual xiii
Following information is only for EU-member states:
Disposal of products
WEEE Dustbin Symbol
The crossed out wheeled dust bin symbol indicates that products must be
collected and disposed of separately from household waste. Integrated
batteries and accumulators can be disposed of with the product. They will
be separated at the recycling centres.
The black bar indicates that the product was placed on the market after
August 13, 2005.
By participating in separate collection of products and batteries, you will
help to assure the proper disposal of products and batteries and thus help
to prevent potential negative consequences for the environment and
human health.
For more detailed information about the collection and recycling
programmes available in your country, please visit our website (http://
eu.computers.toshiba-europe.com) or contact your local city office or the
shop where you purchased the product.
Disposal of batteries and/or accumulators
The crossed out wheeled dust bin symbol indicates that batteries and/or
accumulators must be collected and disposed of separately from
household waste.
If the battery or accumulator contains more than the specified values of
lead (Pb), mercury (Hg), and/or cadmium (Cd) defined in the Battery
Directive (2006/66/EC), then the chemical symbols for lead (Pb), mercury
(Hg) and/or cadmium (Cd) will appear below the crossed out wheeled dust
bin symbol.
By participating in separate collection of batteries, you will help to assure
the proper disposal of products and batteries and thus help to prevent
potential negative consequences for the environment and human health.
For more detailed information about the collection and recycling
programmes available in your country, please visit our website (http://
eu.computers.toshiba-europe.com) or contact your local city office or the
shop where you purchased the product.
This symbol may not be displayed depending on the country and region
where you purchased.
Downloaded from LpManual.com Manuals

User’s Manual xiv
ENERGY STAR® Program
Your Computer model may be ENERGY STAR®
compliant. If the model you purchased is compliant, it is
labeled with the ENERGY STAR logo on the computer and
the following information applies.
TOSHIBA is a partner in the ENERGY STAR Program and
has designed this computer to meet the latest ENERGY
STAR guidelines for energy efficiency. Your computer
ships with the power management options preset to a configuration that will
provide the most stable operating environment and optimum system
performance for both AC power and battery modes.
To conserve energy, your computer is set to enter the low-power Sleep
mode which shuts down the system and display within 15 minutes of
inactivity in AC power mode. TOSHIBA recommends that you leave this
and other energy saving features active, so that your computer will operate
at its maximum energy efficiency. You can wake the computer from Sleep
mode by pressing the power button.
Products that earn the ENERGY STAR prevent greenhouse gas emissions
by meeting strict energy efficiency guidelines set by the US EPA and the
EU Commission. According to the EPA, a computer meeting the new
ENERGY STAR specifications will use between 20% and 50% less energy
depending on how it is used.
Visit http://www.eu-energystar.org or http://www.energystar.gov for more
information regarding the ENERGY STAR Program.
Disposing of the computer and the computer’s batteries
■ Discard this computer in accordance with applicable laws and
regulations. For further information, contact your local government.
■ This computer contains rechargeable batteries. After repeated use, the
batteries will finally lose their ability to hold a charge and you will need
to replace them. Under certain applicable laws and regulation, it may be
illegal to dispose of old batteries by placing them in the trash.
■ Please be kind to our shared environment. Check with your local
government authority for details regarding where to recycle old batteries
or how to dispose of them properly. This product contains mercury.
Disposal of this material may be regulated due to environmental
considerations. For disposal, reuse or recycling information, please
contact your local government.
Downloaded from LpManual.com Manuals
User’s Manual xv
Optical disc drive safety instructions
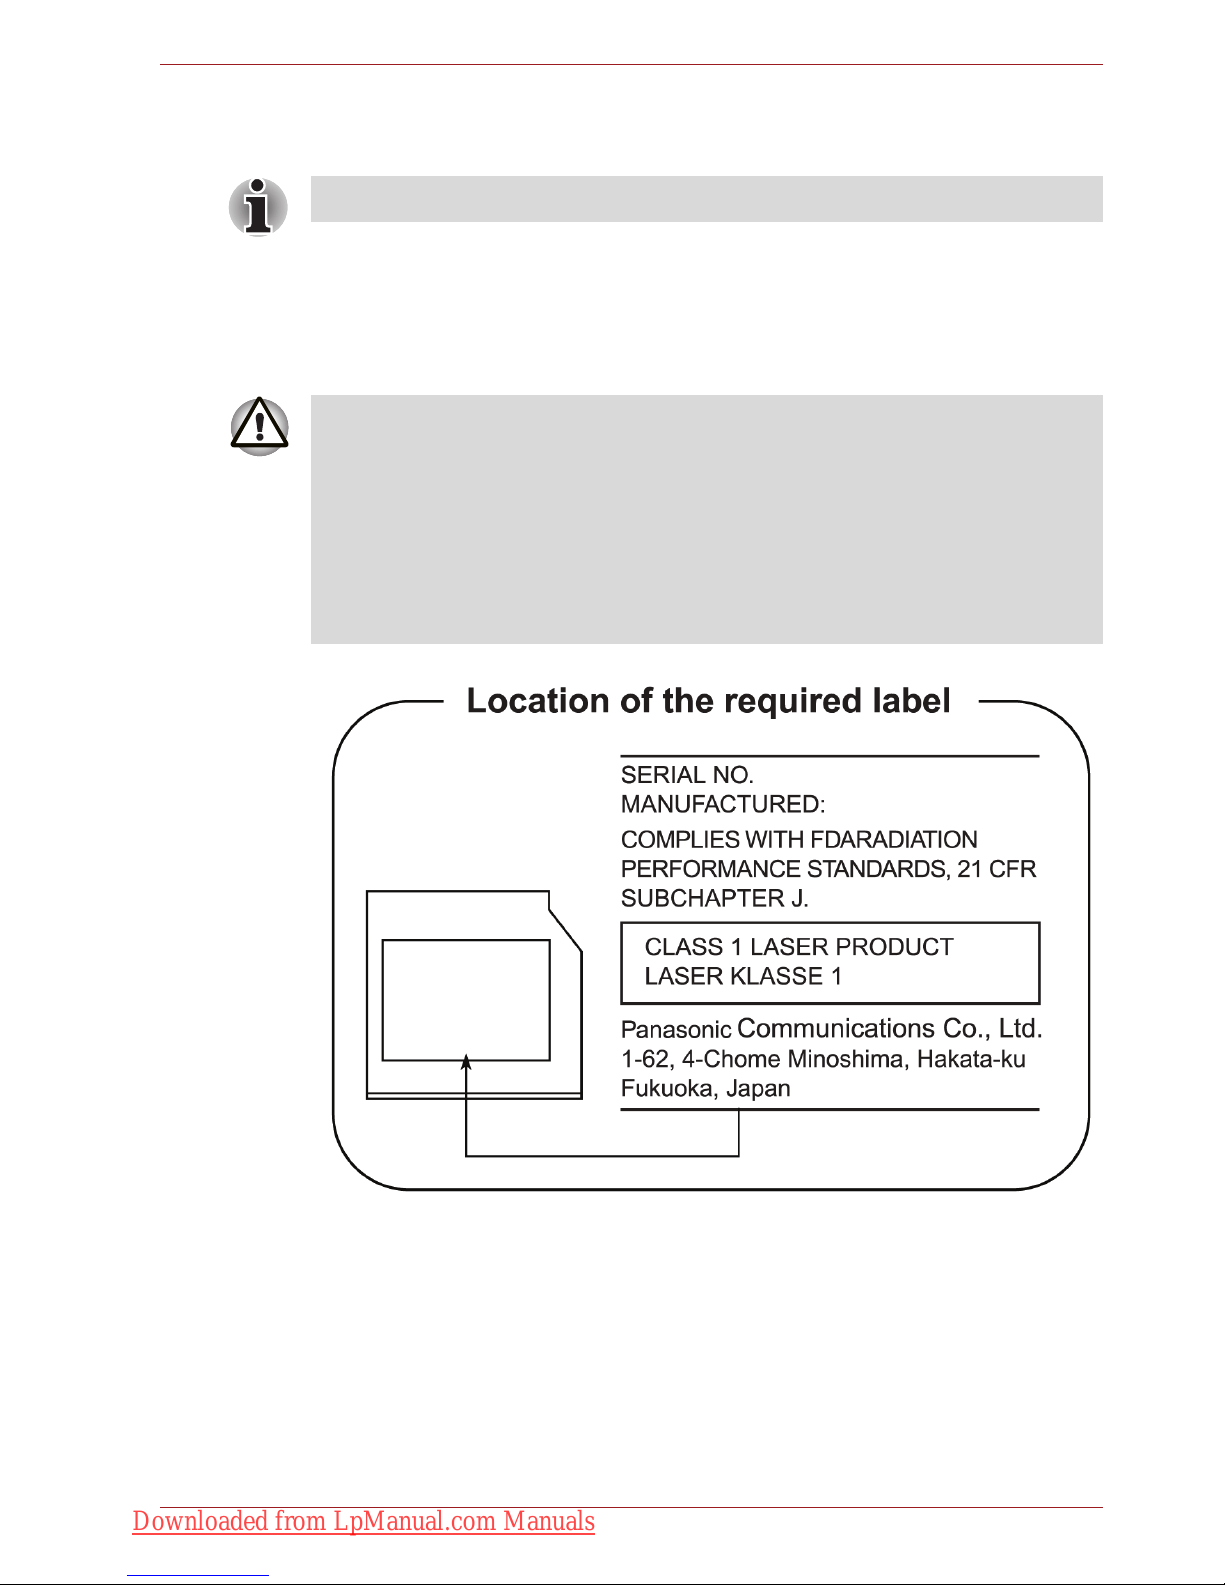
Panasonic
BD Combo UJ141/BD-R/RE UJ240 with Labelflash™
Be sure to check the international precautions at the end of this section.
■ The BD Combo/BD-R/RE drive employs a laser system. To ensure
proper use of this product, please read this instruction manual carefully
and retain for future reference. Should the unit ever require
maintenance, contact an authorized service location.
■ Use of controls, adjustments or the performance of procedures other
than those specified may result in hazardous radiation exposure.
■ To prevent direct exposure to the laser beam, do not try to open the
enclosure.
Downloaded from LpManual.com Manuals

User’s Manual xvi
Hitach-LG Data Storage
DVD Super Multi GT20N/GT20F with Labelflash™
■ The DVD Super Multi drive employs a laser system. To ensure proper
use of this product, please read this instruction manual carefully and
retain for future reference. Should the unit ever require maintenance,
contact an authorized service location.
■ Use of controls, adjustments or the performance of procedures other
than those specified may result in hazardous radiation exposure.
■ To prevent direct exposure to the laser beam, do not try to open the
enclosure.
Downloaded from LpManual.com Manuals
User’s Manual xvii
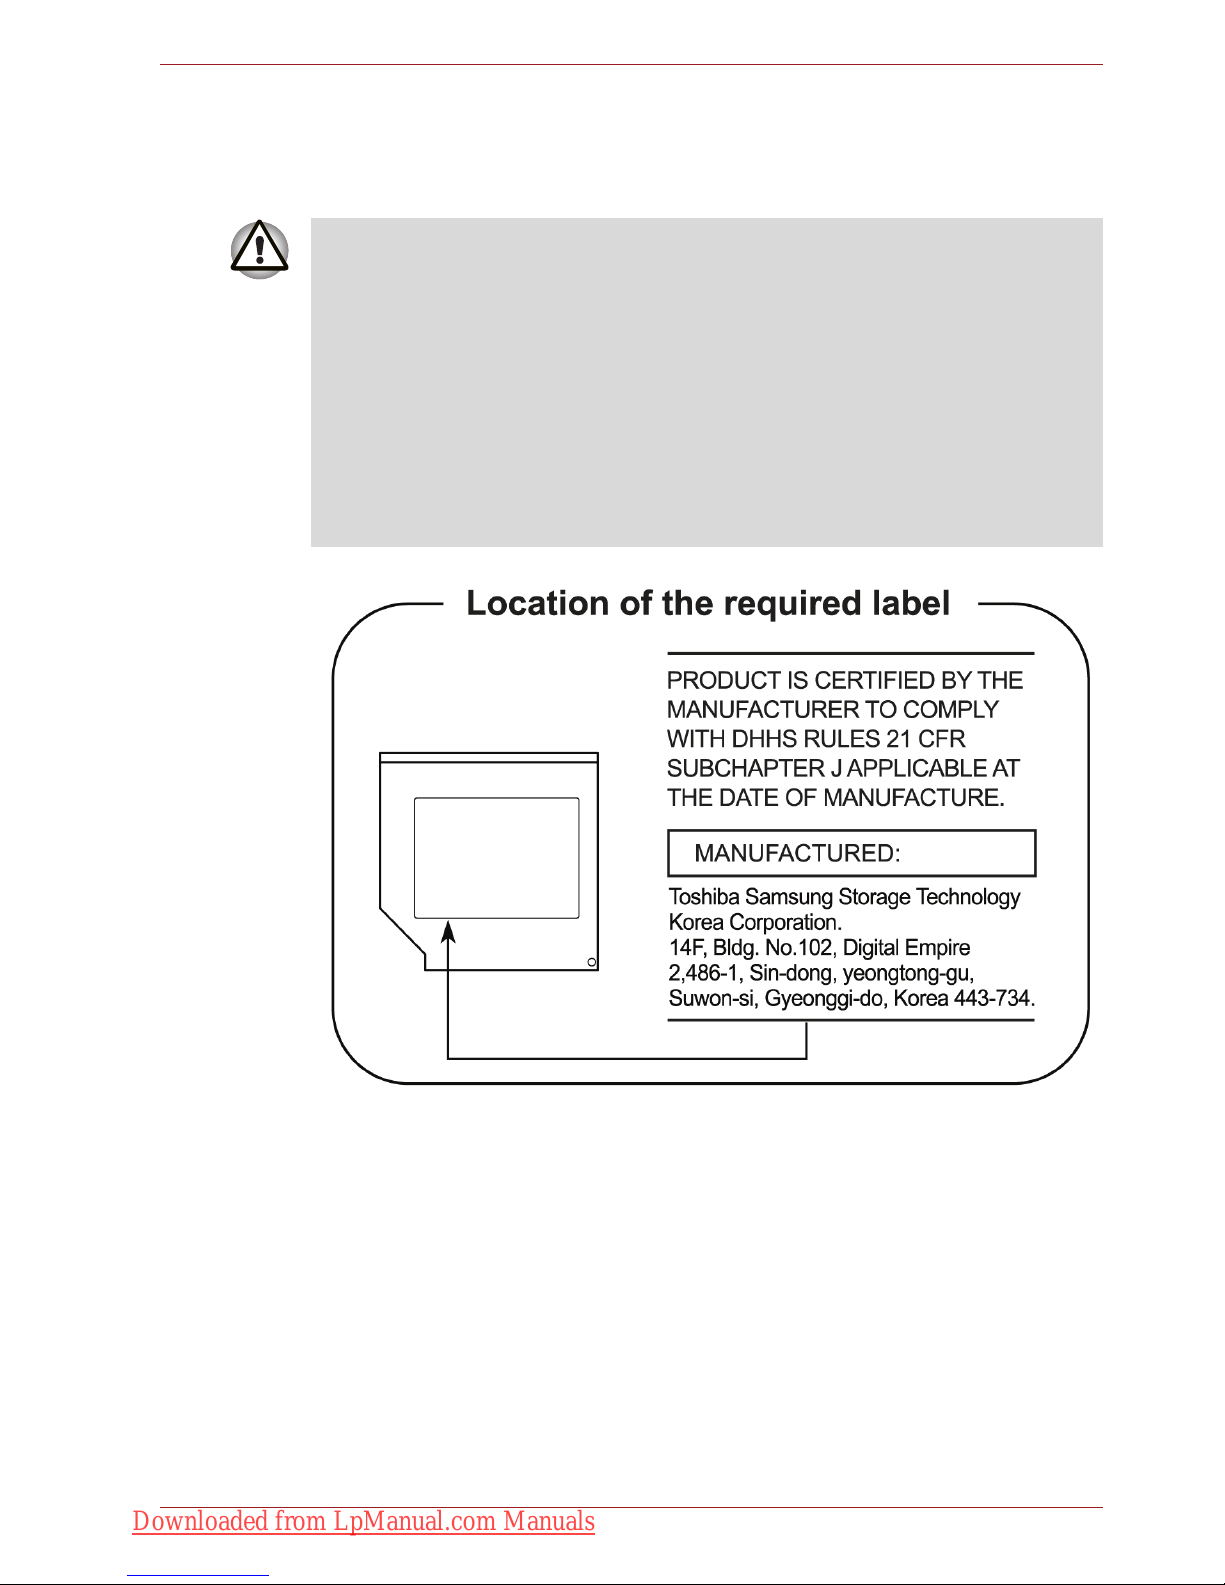
TOSHIBA SAMSUNG STORAGE TECHNOLOGY
DVD Super Multi TS-L633C/TS-L633Y
■ THIS DVD WRITABLE DRIVE EMPLOYS A LASER SYSTEM TO
ENSURE PROPER USE OF THIS PRODUCT, PLEASE READ THIS
INSTRUCTION MANUAL CAREFULLY AND RETAIN FOR FUTURE
REFERENCE. SHOULD THE UNIT EVER REQUIRE MAINTENANCE,
CONTACT AN AUTHORIZED SERVICE LOCATION-SEE SERVICE
PROCEDURE.
■ USE OF CONTROLS OR ADJUSTMENTS OR THE PERFORMANCE
OF PROCEDURES OTHER THAN THOSE SPECIFIED HEREIN MAY
RESULT IN HAZARDOUS RADIATION EXPOSURE.
■ TO PREVENT DIRECT EXPOSURE TO LASER BEAM, DO NOT TRY
TO OPEN THE ENCLOSURE.
Downloaded from LpManual.com Manuals
User’s Manual xviii
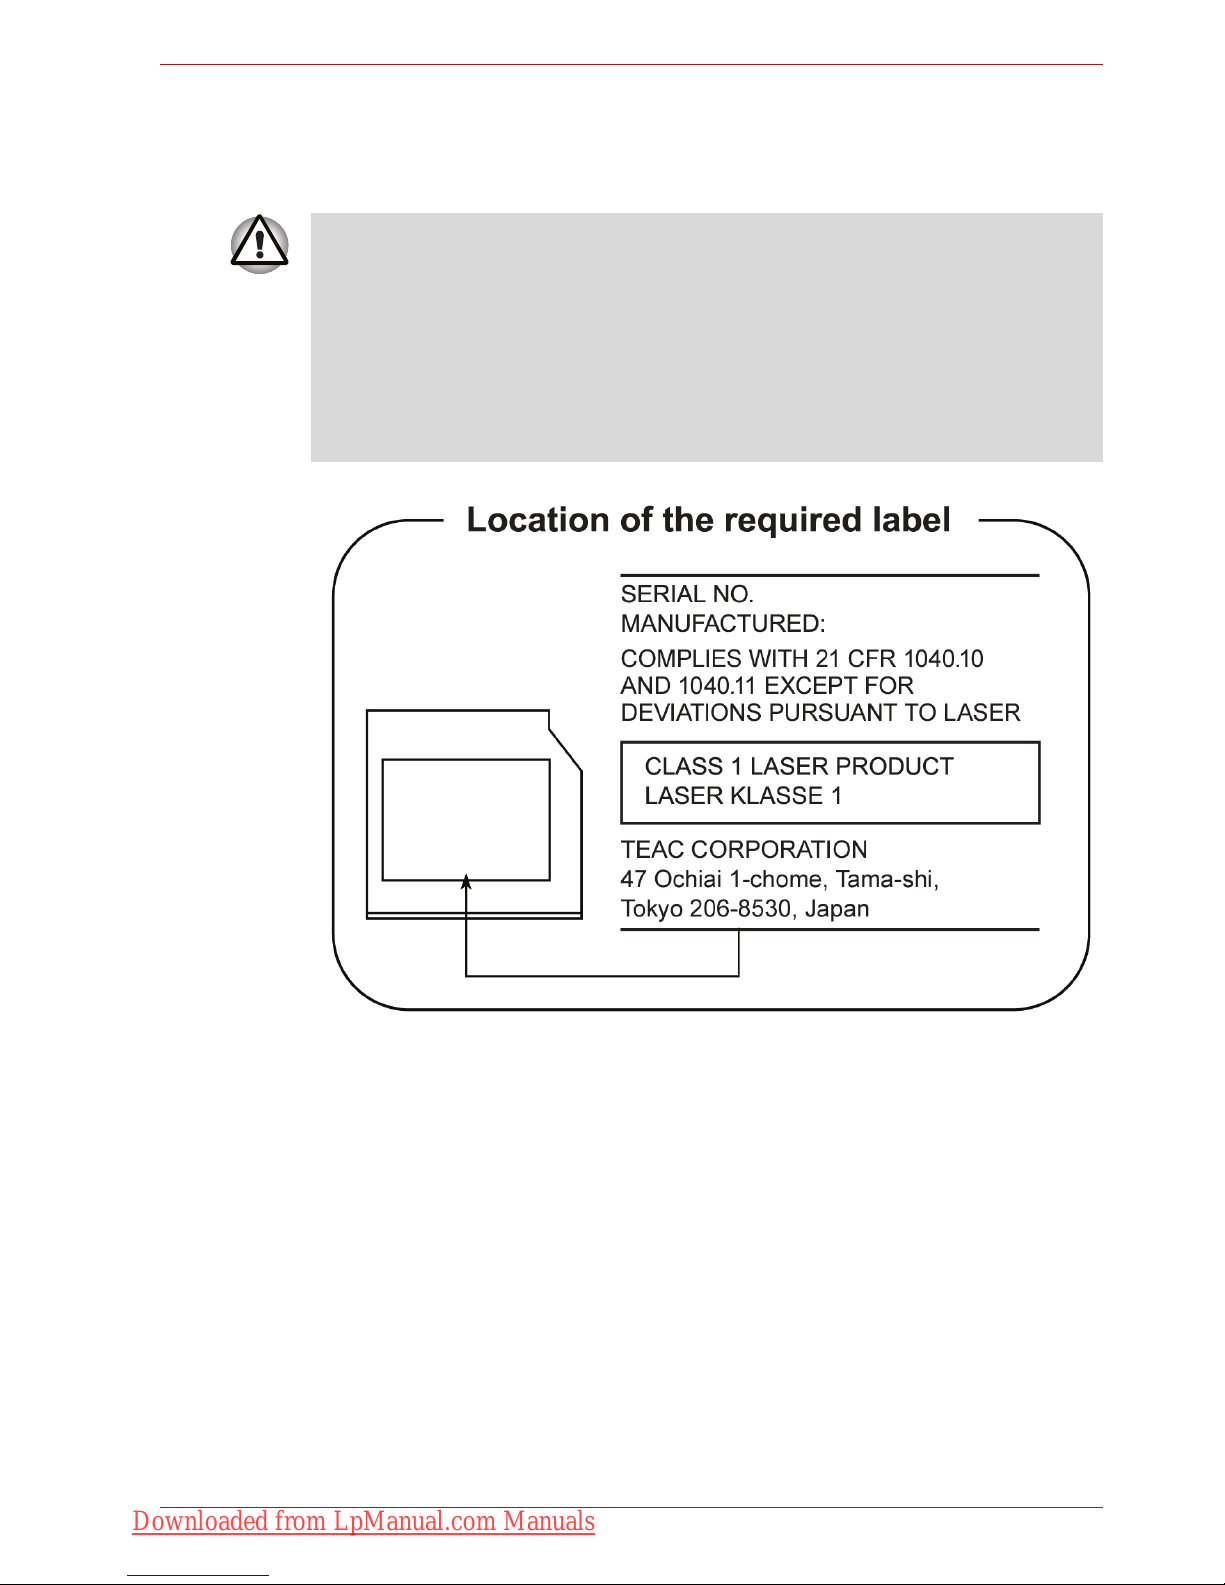
TEAC
DVD Super Multi DV-W28S-VTG/DV-W28S-VTH
Using WinDVD BD for TOSHIBA
Do not sleep or hibernate PC while WinDVD BD for TOSHIBA is running.
When you need it, exit WinDVD BD for TOSHIBA in advance.
■ The DVD Super Multi drive employs a laser system. To ensure proper
use of this product, please read this instruction manual carefully and
retain for future reference. Should the unit ever require maintenance,
contact an authorized service location.
■ Use of controls, adjustments or the performance of procedures other
than those specified may result in hazardous radiation exposure.
■ To prevent direct exposure to the laser beam, do not try to open the
enclosure.
Downloaded from LpManual.com Manuals
User’s Manual xix
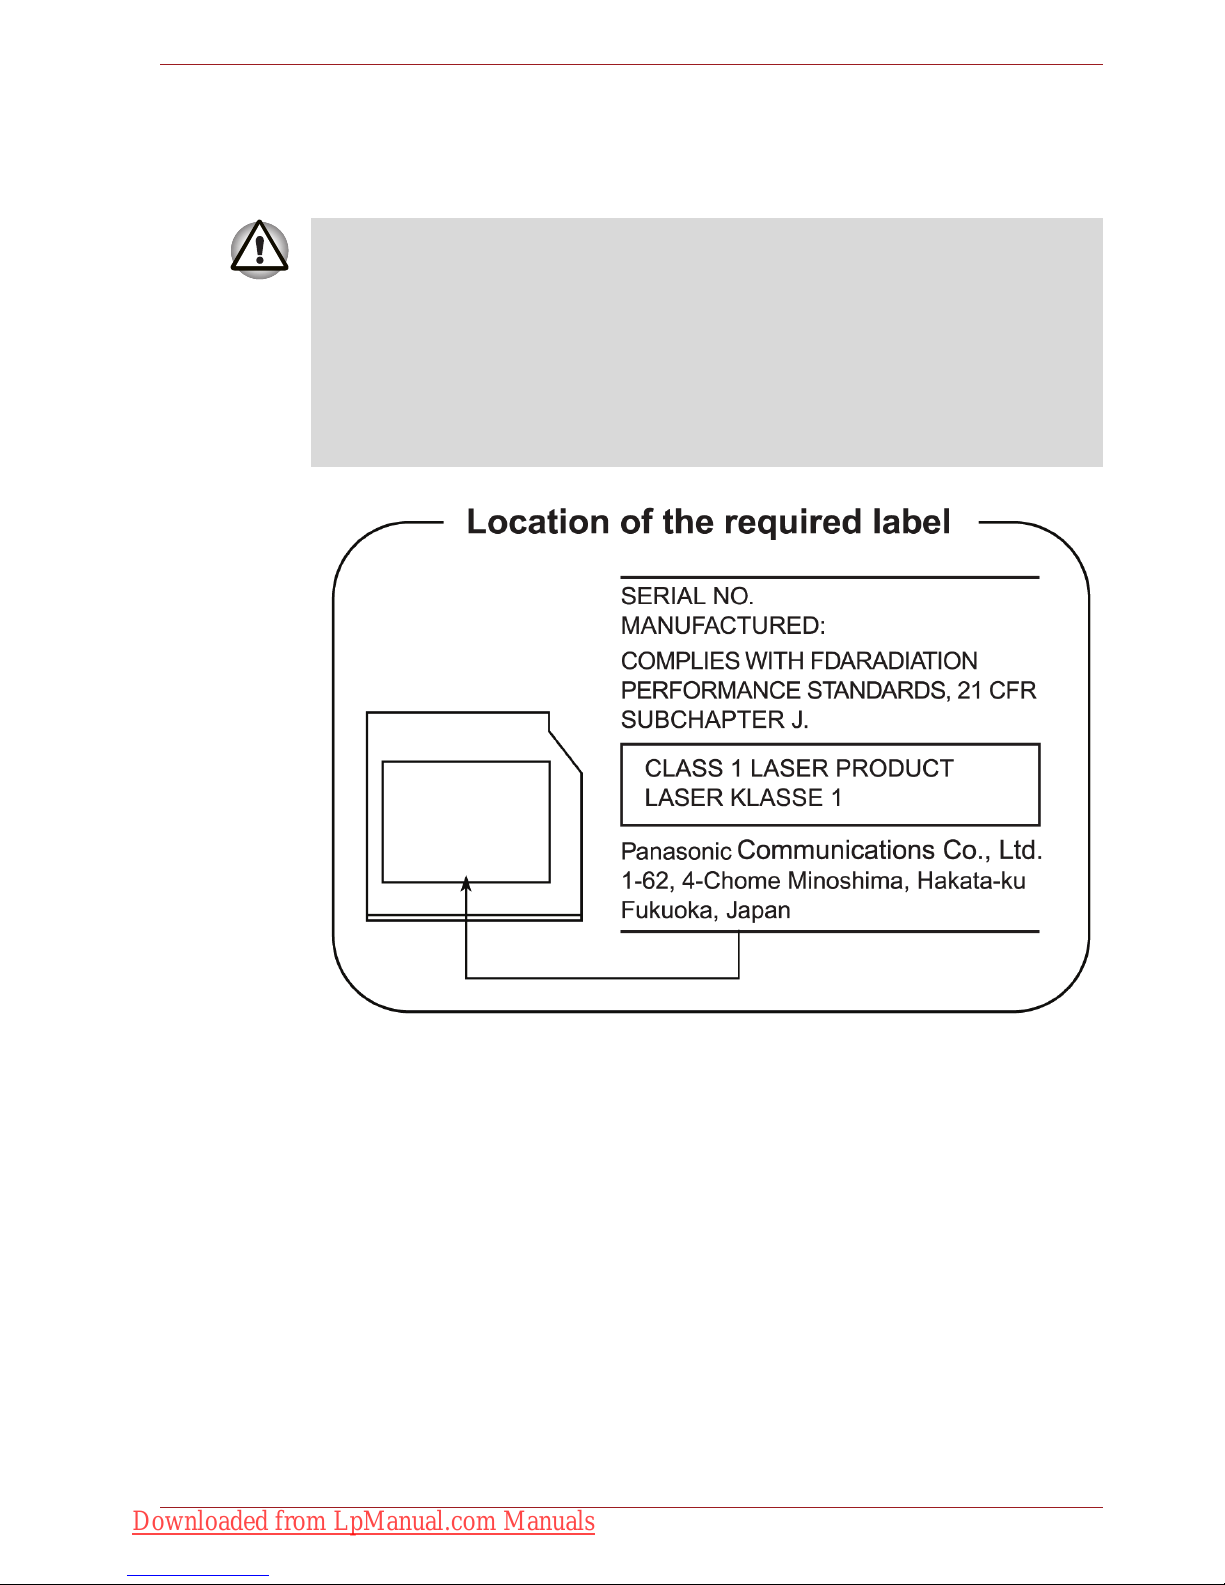
Panasonic
DVD Super Multi UJ890AD/UJ890ED with Labelflash™
■ The DVD Super Multi drive employs a laser system. To ensure proper
use of this product, please read this instruction manual carefully and
retain for future reference. Should the unit ever require maintenance,
contact an authorized service location.
■ Use of controls, adjustments or the performance of procedures other
than those specified may result in hazardous radiation exposure.
■ To prevent direct exposure to the laser beam, do not try to open the
enclosure.
Downloaded from LpManual.com Manuals
User’s Manual xx
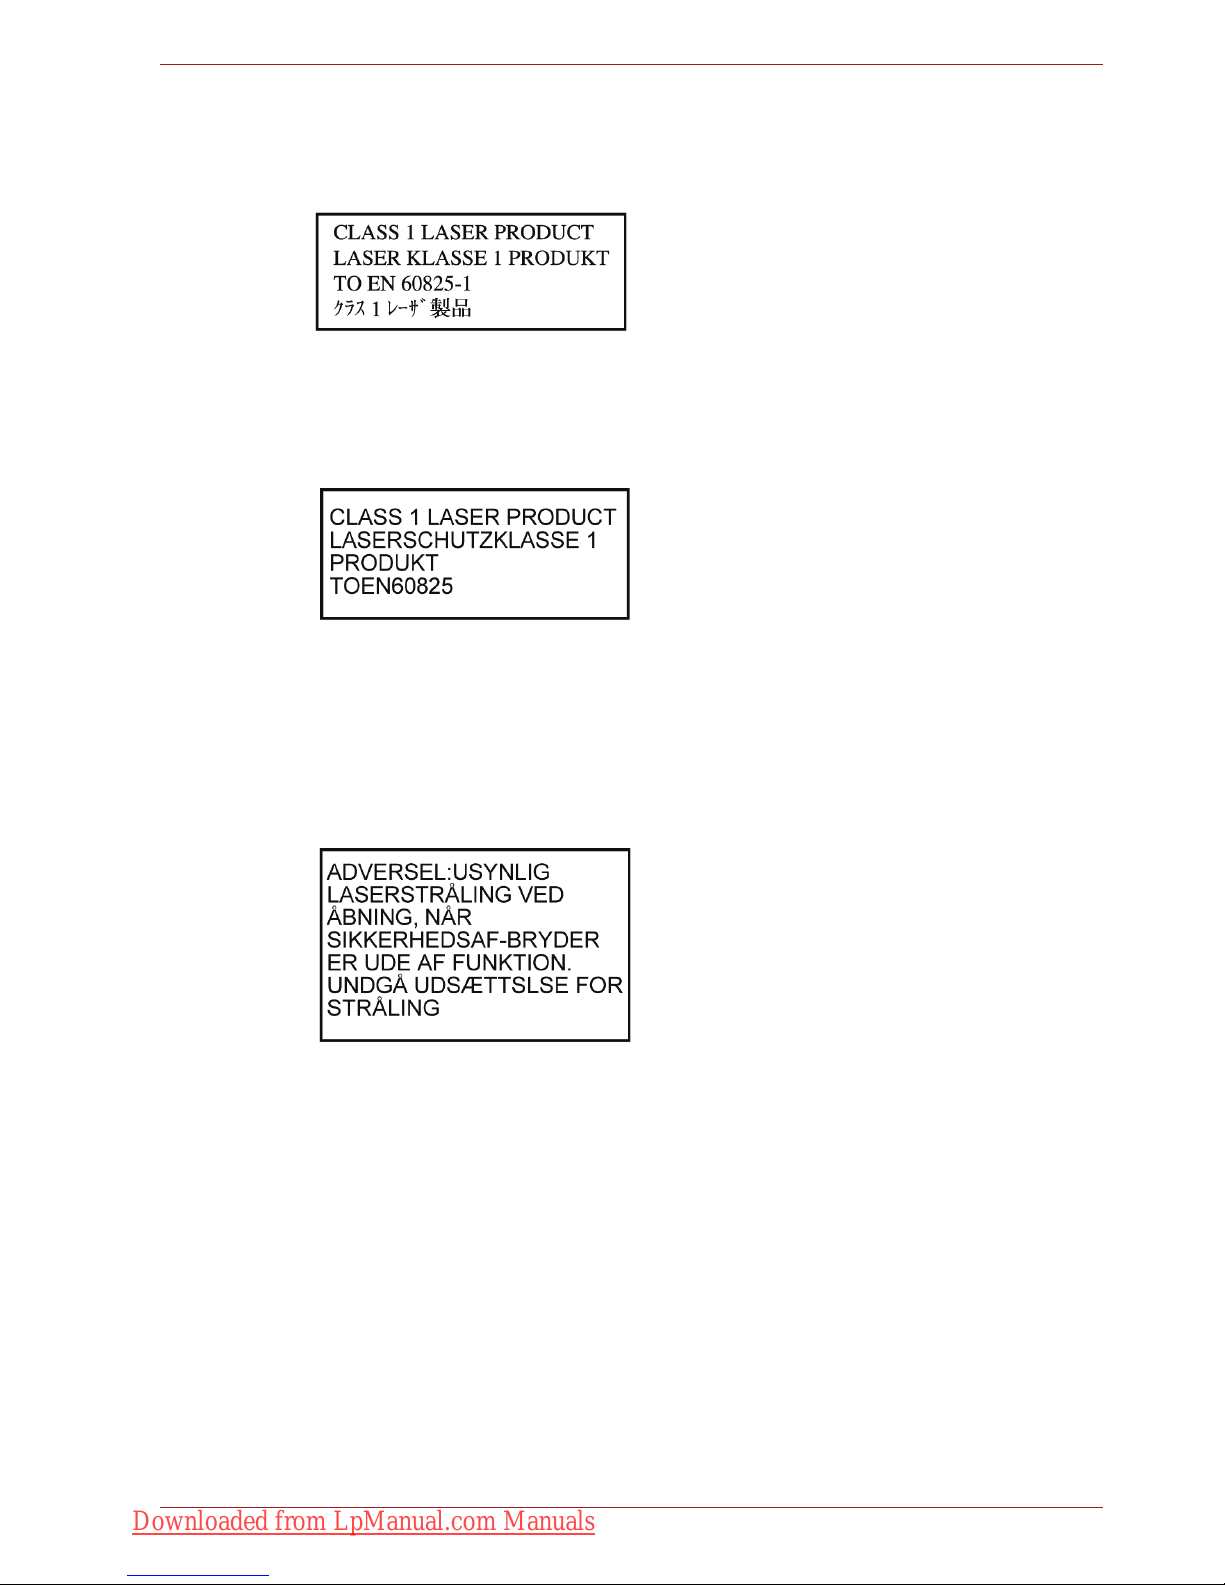
International Precautions
CAUTION: This appliance contains a laser
system and is classified as a "CLASS 1
LASER PRODUCT." To use this model
properly, read the instruction manual
carefully and keep this manual for your
future reference. In case of any trouble
with this model, please contact your
nearest "AUTHORIZED service station."
To prevent direct exposure to the laser
beam, do not try to open the enclosure.
VORSICHT: Dieses Gerät enthält ein
Laser-System und ist als
"LASERSCHUTZKLASSE 1 PRODUKT"
klassifiziert. Für den richtigen Gebrauch
dieses Modells lesen Sie bitte die
Bedienungsanleitung sorgfältig durch und
bewahren diese bitte als Referenz auf.
Falls Probleme mit diesem Modell
auftreten, benachrichtigen Sie bitte die
nächste "autorisierte Service-Vertretung".
Um einen direkten Kontakt mit dem
Laserstrahl zu vermeiden darf das Gerät
nicht geöffnet werden.
ADVARSEL: Denne mærking er anbragt
udvendigt på apparatet og indikerer, at
apparatet arbejder med laserstråler af
klasse 1, hviket betyder, at der anvendes
laserstrlier af svageste klasse, og at man
ikke på apparatets yderside kan bilve
udsat for utilladellg kraftig stråling.
APPARATET BOR KUN ÅBNES AF
FAGFOLK MED SÆRLIGT KENDSKAB
TIL APPARATER MED LASERSTRÅLER!
Indvendigt i apparatet er anbragt den her
gengivne advarselsmækning, som advarer
imod at foretage sådanne indgreb i
apparatet, at man kan komme til at udsatte
sig for laserstråling.
Downloaded from LpManual.com Manuals

User’s Manual xxi
OBS! Apparaten innehåller
laserkomponent som avger laserstråining
överstigande gränsen för laserklass 1.
VAROITUS. Suojakoteloa si saa avata.
Laite sisältää laserdiodin, joka lähetää
näkymätöntä silmilie vaarallista
lasersäteilyä.
CAUTION: USE OF CONTROLS OR
ADJUSTMENTS OR PERFORMANCE
OF PROCEDURES OTHER THAN
THOSE SPECIFIED IN THE OWNER’S
MANUAL MAY RESULT IN HAZARDOUS
RADIATION EXPOSURE.
VORSICHT: DIE VERWENDUNG VON
ANDEREN STEUERUNGEN ODER
EINSTELLUNGEN ODER DAS
DURCHFÜHREN VON ANDEREN
VORGÄNGEN ALS IN DER
BEDIENUNGSANLEITUNG
BESCHRIEBEN KÖNNEN
GEFÄHRLICHE
STRAHLENEXPOSITIONEN ZUR
FOLGE HABEN.
Downloaded from LpManual.com Manuals

User’s Manual xxii
General Precautions
General Precautions
TOSHIBA computers are designed to optimize safety, minimize strain and
withstand the rigors of portability. However, certain precautions should be
observed to further reduce the risk of personal injury or damage to the
computer.
Be certain to read the general precautions below and to note the cautions
included in the text of the manual.
Provide adequate ventilation
■ Always make sure your computer and AC adaptor have adequate
ventilation and are protected from overheating when the power is
turned on or when an AC adaptor is connected to a power outlet (even if
your computer is in Sleep Mode). In this condition, observe the
following:
■ Never cover your computer or AC adaptor with any object.
■ Never place your computer or AC adaptor near a heat source, such
as anelectric blanket or heater.
■ Never cover or block the air vents including those located at the
base of the computer.
■ Always operate your computer on a hard flat surface. Using your
computer on a carpet or other soft material can block the vents.
■ Always provide sufficient space around the computer.
■ Overheating your computer or AC adaptor could cause system failure,
computer or AC adaptor damage or a fire, possibly resulting in serious
injury.
Creating a computer-friendly environment
Place the computer on a flat surface that is large enough for the computer
and any other items you are using, such as a printer.
Leave enough space around the computer and other equipment to provide
adequate ventilation. Otherwise, they may overheat.
Downloaded from LpManual.com Manuals

User’s Manual xxiii
General Precautions
To keep your computer in prime operating condition, protect your work area
from:
■ Dust, moisture, and direct sunlight.
■ Equipment that generates a strong electromagnetic field, such as
stereo speakers (other than speakers that are connected to the
computer) or speakerphones.
■ Rapid changes in temperature or humidity and sources of temperature
change such as air conditioner vents or heaters.
■ Extreme heat, cold, or humidity.
■ Liquids and corrosive chemicals.
Stress injury
Carefully read the Instruction Manual for Safety and Comfort. It contains
information on the prevention of stress injuries to your hands and wrists
that can be caused by extensive keyboard use. Chapter 3, Getting Started,
also includes information on work space design, posture and lighting that
can help reduce physical stress.
Heat injury
■ Avoid prolonged physical contact with the computer. If the computer is
used for long periods, its surface can become very warm. While the
temperature will not feel hot to the touch, if you maintain physical
contact with the computer for a long time, for example if you rest the
computer on your lap or if you keep your hands on the palm rest, your
skin might suffer a low-heat injury.
■ If the computer has been used for a long time, avoid direct contact with
the metal plate supporting the various interface ports as this can
become hot.
■ The surface of the AC adaptor can become hot when in use but this
condition does not indicate a malfunction. If you need to transport the
AC adaptor, you should disconnect it and let it cool before moving it.
■ Do not lay the AC adaptor on a material that is sensitive to heat as the
material could become damaged.
Pressure or impact damage
Do not apply heavy pressure to the computer or subject it to any form of
strong impact as this can damage the computer's components or otherwise
cause it to malfunction.
Downloaded from LpManual.com Manuals

User’s Manual xxiv
General Precautions
ExpressCard overheating
Some PC and ExpressCards can become hot during prolonged use which
may result in errors or instability in the operation of the device in question.
In addition, you should also be careful when you remove a PC or
ExpressCard that has been used for a long time.
Mobile phones
Please be aware that the use of mobile phones can interfere with the audio
system. The operation of the computer will not be impaired in any way, but
it is recommended that a minimum distance of 30cm is maintained between
the computer and a mobile phone that is in use.
Instruction Manual for Safety and Comfort
All important information on the safe and proper use of this computer is
described in the enclosed Instruction Manual for Safety and Comfort. Be
sure to read it before using the computer.
Downloaded from LpManual.com Manuals

User’s Manual xxv
Table of Contents
Table of Contents
Preface
Manual contents . . . . . . . . . . . . . . . . . . . . . . . . . . . . . . . . . . . . . . . . . xxxi
Conventions . . . . . . . . . . . . . . . . . . . . . . . . . . . . . . . . . . . . . . . . . . . . xxxii
Abbreviations . . . . . . . . . . . . . . . . . . . . . . . . . . . . . . . . . . . . . . . . . xxxii
Icons . . . . . . . . . . . . . . . . . . . . . . . . . . . . . . . . . . . . . . . . . . . . . . . . xxxii
Keys . . . . . . . . . . . . . . . . . . . . . . . . . . . . . . . . . . . . . . . . . . . . . . . . xxxii
Key operation . . . . . . . . . . . . . . . . . . . . . . . . . . . . . . . . . . . . . . . . . xxxiii
Display . . . . . . . . . . . . . . . . . . . . . . . . . . . . . . . . . . . . . . . . . . . . . . xxxiii
Messages . . . . . . . . . . . . . . . . . . . . . . . . . . . . . . . . . . . . . . . . . . . . xxxiii
Chapter 1 Introduction
Equipment checklist. . . . . . . . . . . . . . . . . . . . . . . . . . . . . . . . . . . . . . . 1-1
Hardware . . . . . . . . . . . . . . . . . . . . . . . . . . . . . . . . . . . . . . . . . . . . . 1-1
Software . . . . . . . . . . . . . . . . . . . . . . . . . . . . . . . . . . . . . . . . . . . . . . 1-2
Features. . . . . . . . . . . . . . . . . . . . . . . . . . . . . . . . . . . . . . . . . . . . . . . . . 1-3
Special features . . . . . . . . . . . . . . . . . . . . . . . . . . . . . . . . . . . . . . . . . 1-12
TOSHIBA Value Added Package . . . . . . . . . . . . . . . . . . . . . . . . . . . . 1-14
Utilities and Applications. . . . . . . . . . . . . . . . . . . . . . . . . . . . . . . . . . 1-16
Options . . . . . . . . . . . . . . . . . . . . . . . . . . . . . . . . . . . . . . . . . . . . . . . . 1-19
Chapter 2 The Grand Tour
Front with the display closed . . . . . . . . . . . . . . . . . . . . . . . . . . . . . . . 2-1
Left side. . . . . . . . . . . . . . . . . . . . . . . . . . . . . . . . . . . . . . . . . . . . . . . . . 2-3
Right side . . . . . . . . . . . . . . . . . . . . . . . . . . . . . . . . . . . . . . . . . . . . . . . 2-5
Backside . . . . . . . . . . . . . . . . . . . . . . . . . . . . . . . . . . . . . . . . . . . . . . . . 2-7
Underside . . . . . . . . . . . . . . . . . . . . . . . . . . . . . . . . . . . . . . . . . . . . . . . 2-8
Front with the display open. . . . . . . . . . . . . . . . . . . . . . . . . . . . . . . . 2-10
Optical Disc Drive. . . . . . . . . . . . . . . . . . . . . . . . . . . . . . . . . . . . . . . . 2-13
Region codes for BD drive and media . . . . . . . . . . . . . . . . . . . . . . 2-13
Writable discs . . . . . . . . . . . . . . . . . . . . . . . . . . . . . . . . . . . . . . . . . 2-13
CDs. . . . . . . . . . . . . . . . . . . . . . . . . . . . . . . . . . . . . . . . . . . . . . . . . 2-13
Downloaded from LpManual.com Manuals

User’s Manual xxvi
Table of Contents
DVDs. . . . . . . . . . . . . . . . . . . . . . . . . . . . . . . . . . . . . . . . . . . . . . . . 2-13
BDs . . . . . . . . . . . . . . . . . . . . . . . . . . . . . . . . . . . . . . . . . . . . . . . . . 2-13
BD-R/RE drive . . . . . . . . . . . . . . . . . . . . . . . . . . . . . . . . . . . . . . . . 2-14
BD Combo drive . . . . . . . . . . . . . . . . . . . . . . . . . . . . . . . . . . . . . . . 2-15
DVD Super Multi drive . . . . . . . . . . . . . . . . . . . . . . . . . . . . . . . . . . 2-16
AC adaptor . . . . . . . . . . . . . . . . . . . . . . . . . . . . . . . . . . . . . . . . . . . . . 2-17
Remote controller. . . . . . . . . . . . . . . . . . . . . . . . . . . . . . . . . . . . . . . . 2-18
Using the remote controller. . . . . . . . . . . . . . . . . . . . . . . . . . . . . . . 2-21
Installing/Removing batteries . . . . . . . . . . . . . . . . . . . . . . . . . . . . . 2-23
Placing the slim size remote controller . . . . . . . . . . . . . . . . . . . . . . 2-25
Chapter 3 Getting Started
Connecting the AC adaptor . . . . . . . . . . . . . . . . . . . . . . . . . . . . . . . . . 3-2
Opening the display . . . . . . . . . . . . . . . . . . . . . . . . . . . . . . . . . . . . . . . 3-4
Turning on the power . . . . . . . . . . . . . . . . . . . . . . . . . . . . . . . . . . . . . . 3-5
Windows setup . . . . . . . . . . . . . . . . . . . . . . . . . . . . . . . . . . . . . . . . . . . 3-5
Turning off the power . . . . . . . . . . . . . . . . . . . . . . . . . . . . . . . . . . . . . . 3-6
Shut Down mode (Boot mode) . . . . . . . . . . . . . . . . . . . . . . . . . . . . . 3-6
Sleep Mode. . . . . . . . . . . . . . . . . . . . . . . . . . . . . . . . . . . . . . . . . . . . 3-6
Hibernation Mode . . . . . . . . . . . . . . . . . . . . . . . . . . . . . . . . . . . . . . . 3-8
Restarting the computer . . . . . . . . . . . . . . . . . . . . . . . . . . . . . . . . . . . 3-9
System Recovery Options . . . . . . . . . . . . . . . . . . . . . . . . . . . . . . . . . . 3-9
System Recovery Options . . . . . . . . . . . . . . . . . . . . . . . . . . . . . . . 3-10
Create Optical Recovery Discs . . . . . . . . . . . . . . . . . . . . . . . . . . . . . 3-10
Restoring the preinstalled software from the Recovery HDD . . . . 3-11
Restoring the preinstalled software from Recovery Media . . . . . . 3-12
Chapter 4 Operating Basics
Using the TouchPad . . . . . . . . . . . . . . . . . . . . . . . . . . . . . . . . . . . . . . . 4-1
Touch Pad Gesture . . . . . . . . . . . . . . . . . . . . . . . . . . . . . . . . . . . . . . 4-2
Using the fingerprint sensor . . . . . . . . . . . . . . . . . . . . . . . . . . . . . . . . 4-3
How to swipe the finger. . . . . . . . . . . . . . . . . . . . . . . . . . . . . . . . . . . 4-4
Points to note about the fingerprint sensor . . . . . . . . . . . . . . . . . . . . 4-5
How to delete the fingerprint data. . . . . . . . . . . . . . . . . . . . . . . . . . . 4-6
Fingerprint sensor limitations . . . . . . . . . . . . . . . . . . . . . . . . . . . . . . 4-6
Points to note about the fingerprint utility . . . . . . . . . . . . . . . . . . . . . 4-7
Set up procedure . . . . . . . . . . . . . . . . . . . . . . . . . . . . . . . . . . . . . . . 4-7
Windows logon via fingerprint authentication . . . . . . . . . . . . . . . . . . 4-8
Fingerprint system boot authentication. . . . . . . . . . . . . . . . . . . . . . . 4-8
Fingerprint Single Sign-On feature . . . . . . . . . . . . . . . . . . . . . . . . . . 4-9
USB Sleep and Charge function . . . . . . . . . . . . . . . . . . . . . . . . . . . . 4-10
Starting the USB Sleep and Charge Utility . . . . . . . . . . . . . . . . . . . .4-11
Using the Web Camera. . . . . . . . . . . . . . . . . . . . . . . . . . . . . . . . . . . . 4-12
Using the software . . . . . . . . . . . . . . . . . . . . . . . . . . . . . . . . . . . . . 4-13
Downloaded from LpManual.com Manuals

User’s Manual xxvii
Table of Contents
Using the microphone . . . . . . . . . . . . . . . . . . . . . . . . . . . . . . . . . . . . 4-14
Using the TOSHIBA Face Recognition . . . . . . . . . . . . . . . . . . . . . . . 4-14
Disclaimer . . . . . . . . . . . . . . . . . . . . . . . . . . . . . . . . . . . . . . . . . . . . 4-15
How to register the Face Recognition Data . . . . . . . . . . . . . . . . . . 4-15
How to Delete the Face Recognition Data . . . . . . . . . . . . . . . . . . . 4-16
How to launch the help file . . . . . . . . . . . . . . . . . . . . . . . . . . . . . . . 4-17
Windows Logon via TOSHIBA Face Recognition . . . . . . . . . . . . . . 4-17
Using the optical disc drive. . . . . . . . . . . . . . . . . . . . . . . . . . . . . . . . 4-17
Loading discs . . . . . . . . . . . . . . . . . . . . . . . . . . . . . . . . . . . . . . . . . 4-18
Removing discs. . . . . . . . . . . . . . . . . . . . . . . . . . . . . . . . . . . . . . . . 4-22
Writing CD/DVD/BDs . . . . . . . . . . . . . . . . . . . . . . . . . . . . . . . . . . . . . 4-23
Important message . . . . . . . . . . . . . . . . . . . . . . . . . . . . . . . . . . . . . 4-23
Before writing or rewriting with the BD-R/RE drive . . . . . . . . . . . . . 4-23
Before writing or rewriting with the BD Combo drive . . . . . . . . . . . 4-25
Before writing or rewriting with the DVD Super Multi drive . . . . . . . 4-26
When writing or rewriting . . . . . . . . . . . . . . . . . . . . . . . . . . . . . . . . 4-29
Disclaimer (DVD Super Multi drive or BD-R/RE drive) . . . . . . . . . . 4-29
Data Verification . . . . . . . . . . . . . . . . . . . . . . . . . . . . . . . . . . . . . . . . . 4-30
How to learn more about TOSHIBA Disc Creator. . . . . . . . . . . . . . 4-30
Video . . . . . . . . . . . . . . . . . . . . . . . . . . . . . . . . . . . . . . . . . . . . . . . . . . 4-30
When using Corel DVD MovieFactory® for TOSHIBA: . . . . . . . . . . 4-30
How to make a Labelflash DVD . . . . . . . . . . . . . . . . . . . . . . . . . . . 4-30
How to make a Blu-ray disc Movie . . . . . . . . . . . . . . . . . . . . . . . . . 4-30
How to make a DVD-Video. . . . . . . . . . . . . . . . . . . . . . . . . . . . . . . 4-31
How to learn more about Corel MovieFactory . . . . . . . . . . . . . . . . 4-31
Important information for use . . . . . . . . . . . . . . . . . . . . . . . . . . . . . 4-31
TOSHIBA DVD Player . . . . . . . . . . . . . . . . . . . . . . . . . . . . . . . . . . . . . 4-33
Using WinDVD BD for TOSHIBA . . . . . . . . . . . . . . . . . . . . . . . . . . . . 4-35
Media care . . . . . . . . . . . . . . . . . . . . . . . . . . . . . . . . . . . . . . . . . . . . . . 4-37
CD/DVD/BD . . . . . . . . . . . . . . . . . . . . . . . . . . . . . . . . . . . . . . . . . . 4-37
Modem . . . . . . . . . . . . . . . . . . . . . . . . . . . . . . . . . . . . . . . . . . . . . . . . . 4-38
Region selection . . . . . . . . . . . . . . . . . . . . . . . . . . . . . . . . . . . . . . . 4-38
Properties menu . . . . . . . . . . . . . . . . . . . . . . . . . . . . . . . . . . . . . . . 4-38
Settings. . . . . . . . . . . . . . . . . . . . . . . . . . . . . . . . . . . . . . . . . . . . . . 4-39
Modem Selection . . . . . . . . . . . . . . . . . . . . . . . . . . . . . . . . . . . . . . 4-39
Dialing Properties . . . . . . . . . . . . . . . . . . . . . . . . . . . . . . . . . . . . . . 4-39
Connecting . . . . . . . . . . . . . . . . . . . . . . . . . . . . . . . . . . . . . . . . . . . 4-39
Disconnecting . . . . . . . . . . . . . . . . . . . . . . . . . . . . . . . . . . . . . . . . . 4-40
Using the FM tuner . . . . . . . . . . . . . . . . . . . . . . . . . . . . . . . . . . . . . . . 4-41
Wireless communications . . . . . . . . . . . . . . . . . . . . . . . . . . . . . . . . . 4-42
Wireless LAN . . . . . . . . . . . . . . . . . . . . . . . . . . . . . . . . . . . . . . . . . 4-42
Security. . . . . . . . . . . . . . . . . . . . . . . . . . . . . . . . . . . . . . . . . . . . . . 4-43
Downloaded from LpManual.com Manuals

User’s Manual xxviii
Table of Contents
Bluetooth Stack for Windows by TOSHIBA (depends on the model you
purchased) . . . . . . . . . . . . . . . . . . . . . . . . . . . . . . . . . . . . . . . . . . . 4-43
Wireless communication switch . . . . . . . . . . . . . . . . . . . . . . . . . . . 4-44
Wireless activity LED . . . . . . . . . . . . . . . . . . . . . . . . . . . . . . . . . . . 4-44
LAN . . . . . . . . . . . . . . . . . . . . . . . . . . . . . . . . . . . . . . . . . . . . . . . . . . . 4-44
LAN cable types . . . . . . . . . . . . . . . . . . . . . . . . . . . . . . . . . . . . . . . 4-44
Connecting LAN cable . . . . . . . . . . . . . . . . . . . . . . . . . . . . . . . . . . 4-45
Disconnecting LAN cable . . . . . . . . . . . . . . . . . . . . . . . . . . . . . . . . 4-45
Cleaning the computer. . . . . . . . . . . . . . . . . . . . . . . . . . . . . . . . . . . . 4-45
Moving the computer . . . . . . . . . . . . . . . . . . . . . . . . . . . . . . . . . . . . . 4-46
Using the Hard Disk Drive (HDD) Protection . . . . . . . . . . . . . . . . . 4-46
TOSHIBA HDD Protection Properties. . . . . . . . . . . . . . . . . . . . . . . 4-47
Details. . . . . . . . . . . . . . . . . . . . . . . . . . . . . . . . . . . . . . . . . . . . . . . 4-48
Chapter 5 The Keyboard
Typewriter keys. . . . . . . . . . . . . . . . . . . . . . . . . . . . . . . . . . . . . . . . . . . 5-1
F1 ... F12 function keys . . . . . . . . . . . . . . . . . . . . . . . . . . . . . . . . . . . . 5-2
Soft keys: Fn key combinations . . . . . . . . . . . . . . . . . . . . . . . . . . . . . 5-2
Emulating keys on enhanced keyboard . . . . . . . . . . . . . . . . . . . . . . 5-2
Hot keys. . . . . . . . . . . . . . . . . . . . . . . . . . . . . . . . . . . . . . . . . . . . . . . . . 5-3
Fn Sticky key (Depends on the model you purchased). . . . . . . . . . . 5-4
Windows special keys . . . . . . . . . . . . . . . . . . . . . . . . . . . . . . . . . . . . . 5-5
Generating ASCII characters. . . . . . . . . . . . . . . . . . . . . . . . . . . . . . . . 5-5
Chapter 6 Power and Power-Up Modes
Power conditions . . . . . . . . . . . . . . . . . . . . . . . . . . . . . . . . . . . . . . . . . 6-1
Power indicators. . . . . . . . . . . . . . . . . . . . . . . . . . . . . . . . . . . . . . . . . . 6-2
Battery indicator . . . . . . . . . . . . . . . . . . . . . . . . . . . . . . . . . . . . . . . . 6-2
Power indicator . . . . . . . . . . . . . . . . . . . . . . . . . . . . . . . . . . . . . . . . . 6-2
Battery types. . . . . . . . . . . . . . . . . . . . . . . . . . . . . . . . . . . . . . . . . . . . . 6-3
Battery pack . . . . . . . . . . . . . . . . . . . . . . . . . . . . . . . . . . . . . . . . . . . 6-3
Real Time Clock battery . . . . . . . . . . . . . . . . . . . . . . . . . . . . . . . . . . 6-4
Care and use of the battery pack . . . . . . . . . . . . . . . . . . . . . . . . . . . . 6-6
Charging the batteries. . . . . . . . . . . . . . . . . . . . . . . . . . . . . . . . . . . . 6-6
Monitoring battery capacity. . . . . . . . . . . . . . . . . . . . . . . . . . . . . . . . 6-8
Maximizing battery operating time . . . . . . . . . . . . . . . . . . . . . . . . . . 6-8
Retaining data with power off . . . . . . . . . . . . . . . . . . . . . . . . . . . . . . 6-9
Extending battery life . . . . . . . . . . . . . . . . . . . . . . . . . . . . . . . . . . . . 6-9
Replacing the battery pack . . . . . . . . . . . . . . . . . . . . . . . . . . . . . . . . 6-10
Removing the battery pack . . . . . . . . . . . . . . . . . . . . . . . . . . . . . . . 6-10
Installing the battery pack . . . . . . . . . . . . . . . . . . . . . . . . . . . . . . . . .6-11
Starting the computer by password . . . . . . . . . . . . . . . . . . . . . . . . . 6-12
Power-up modes. . . . . . . . . . . . . . . . . . . . . . . . . . . . . . . . . . . . . . . . . 6-13
Hot keys . . . . . . . . . . . . . . . . . . . . . . . . . . . . . . . . . . . . . . . . . . . . . 6-13
Downloaded from LpManual.com Manuals

User’s Manual xxix
Table of Contents
Panel power off/on . . . . . . . . . . . . . . . . . . . . . . . . . . . . . . . . . . . . . . . 6-13
System Auto Off . . . . . . . . . . . . . . . . . . . . . . . . . . . . . . . . . . . . . . . . . 6-13
Chapter 7 HW Setup
Accessing HW Setup . . . . . . . . . . . . . . . . . . . . . . . . . . . . . . . . . . . . . . 7-1
HW Setup Window . . . . . . . . . . . . . . . . . . . . . . . . . . . . . . . . . . . . . . . . 7-1
Chapter 8 Optional Devices
ExpressCard . . . . . . . . . . . . . . . . . . . . . . . . . . . . . . . . . . . . . . . . . . . . . 8-2
Inserting an ExpressCard . . . . . . . . . . . . . . . . . . . . . . . . . . . . . . . . . 8-2
Removing an ExpressCard. . . . . . . . . . . . . . . . . . . . . . . . . . . . . . . . 8-3
SD/SDHC/MMC/MEMORY STICK / MEMORY STICK PRO/xD Memory
cards . . . . . . . . . . . . . . . . . . . . . . . . . . . . . . . . . . . . . . . . . . . . . . . . . . . 8-4
Installing a memory card. . . . . . . . . . . . . . . . . . . . . . . . . . . . . . . . . . 8-5
Removing a memory card. . . . . . . . . . . . . . . . . . . . . . . . . . . . . . . . . 8-5
Memory card care . . . . . . . . . . . . . . . . . . . . . . . . . . . . . . . . . . . . . . . 8-6
Memory expansion . . . . . . . . . . . . . . . . . . . . . . . . . . . . . . . . . . . . . . . . 8-7
Installing a memory module . . . . . . . . . . . . . . . . . . . . . . . . . . . . . . . 8-7
Removing a memory module . . . . . . . . . . . . . . . . . . . . . . . . . . . . . 8-10
Additional battery pack . . . . . . . . . . . . . . . . . . . . . . . . . . . . . . . . . . . 8-11
Additional AC adaptor . . . . . . . . . . . . . . . . . . . . . . . . . . . . . . . . . . . . 8-11
External monitor . . . . . . . . . . . . . . . . . . . . . . . . . . . . . . . . . . . . . . . . . 8-12
HDMI . . . . . . . . . . . . . . . . . . . . . . . . . . . . . . . . . . . . . . . . . . . . . . . . . . 8-12
Setting for display video on HDMI. . . . . . . . . . . . . . . . . . . . . . . . . . 8-13
Settings for audio on HDMI. . . . . . . . . . . . . . . . . . . . . . . . . . . . . . . 8-13
i.LINK (IEEE1394) . . . . . . . . . . . . . . . . . . . . . . . . . . . . . . . . . . . . . . . . 8-13
Precautions. . . . . . . . . . . . . . . . . . . . . . . . . . . . . . . . . . . . . . . . . . . 8-14
Connecting . . . . . . . . . . . . . . . . . . . . . . . . . . . . . . . . . . . . . . . . . . . 8-14
Disconnecting . . . . . . . . . . . . . . . . . . . . . . . . . . . . . . . . . . . . . . . . . 8-14
eSATA (External Serial ATA) . . . . . . . . . . . . . . . . . . . . . . . . . . . . . . . 8-16
Connecting an eSATA device . . . . . . . . . . . . . . . . . . . . . . . . . . . . . 8-16
Disconnecting an eSATA device. . . . . . . . . . . . . . . . . . . . . . . . . . . 8-17
Security lock . . . . . . . . . . . . . . . . . . . . . . . . . . . . . . . . . . . . . . . . . . . . 8-17
Chapter 9 Troubleshooting
Problem solving process. . . . . . . . . . . . . . . . . . . . . . . . . . . . . . . . . . . 9-1
Preliminary checklist . . . . . . . . . . . . . . . . . . . . . . . . . . . . . . . . . . . . . 9-2
Analyzing the problem . . . . . . . . . . . . . . . . . . . . . . . . . . . . . . . . . . . 9-2
Hardware and system checklist . . . . . . . . . . . . . . . . . . . . . . . . . . . . . 9-3
System start-up. . . . . . . . . . . . . . . . . . . . . . . . . . . . . . . . . . . . . . . . . 9-3
Self test. . . . . . . . . . . . . . . . . . . . . . . . . . . . . . . . . . . . . . . . . . . . . . . 9-4
Power . . . . . . . . . . . . . . . . . . . . . . . . . . . . . . . . . . . . . . . . . . . . . . . . 9-4
Disposing of PC and PC batteries . . . . . . . . . . . . . . . . . . . . . . . . . . 9-6
Real Time Clock . . . . . . . . . . . . . . . . . . . . . . . . . . . . . . . . . . . . . . . . 9-7
Keyboard. . . . . . . . . . . . . . . . . . . . . . . . . . . . . . . . . . . . . . . . . . . . . . 9-7
Downloaded from LpManual.com Manuals

User’s Manual xxx
Table of Contents
LCD panel . . . . . . . . . . . . . . . . . . . . . . . . . . . . . . . . . . . . . . . . . . . . . 9-8
Solid State drive . . . . . . . . . . . . . . . . . . . . . . . . . . . . . . . . . . . . . . . . 9-9
Recovery Media Creator. . . . . . . . . . . . . . . . . . . . . . . . . . . . . . . . . . 9-9
Hard disk drive . . . . . . . . . . . . . . . . . . . . . . . . . . . . . . . . . . . . . . . . . 9-9
BD drive . . . . . . . . . . . . . . . . . . . . . . . . . . . . . . . . . . . . . . . . . . . . . 9-10
Pointing device . . . . . . . . . . . . . . . . . . . . . . . . . . . . . . . . . . . . . . . . 9-12
USB. . . . . . . . . . . . . . . . . . . . . . . . . . . . . . . . . . . . . . . . . . . . . . . . . 9-14
USB Sleep and Charge function. . . . . . . . . . . . . . . . . . . . . . . . . . . 9-15
Memory expansion . . . . . . . . . . . . . . . . . . . . . . . . . . . . . . . . . . . . . 9-16
Sound system . . . . . . . . . . . . . . . . . . . . . . . . . . . . . . . . . . . . . . . . . 9-17
Monitor . . . . . . . . . . . . . . . . . . . . . . . . . . . . . . . . . . . . . . . . . . . . . . 9-17
Modem . . . . . . . . . . . . . . . . . . . . . . . . . . . . . . . . . . . . . . . . . . . . . . 9-17
LAN. . . . . . . . . . . . . . . . . . . . . . . . . . . . . . . . . . . . . . . . . . . . . . . . . 9-18
Wireless LAN . . . . . . . . . . . . . . . . . . . . . . . . . . . . . . . . . . . . . . . . . 9-18
Fingerprint sensor . . . . . . . . . . . . . . . . . . . . . . . . . . . . . . . . . . . . . . 9-19
ExpressCard . . . . . . . . . . . . . . . . . . . . . . . . . . . . . . . . . . . . . . . . . . 9-19
TOSHIBA support . . . . . . . . . . . . . . . . . . . . . . . . . . . . . . . . . . . . . . . . 9-20
Before you call . . . . . . . . . . . . . . . . . . . . . . . . . . . . . . . . . . . . . . . . 9-20
Where to write. . . . . . . . . . . . . . . . . . . . . . . . . . . . . . . . . . . . . . . . . 9-21
Appendix A Specifications
Appendix B Display Controller
Appendix C Wireless LAN
Appendix D AC Power Cord and Connectors
Appendix E Disclaimers
Appendix F TOSHIBA PC Health Monitor
Starting the TOSHIBA PC Health Monitor. . . . . . . . . . . . . . . . . . . . . . E-2
Glossary
Index
Downloaded from LpManual.com Manuals
 Loading...