

Page 1
English
Owner’s Manual
Home Theater Projector
TDP-MT700
Page 2

SAFETY PRECAUTION
The lightning flash with arrowhead symbol, within an equilateral triangle, is intended to alert
the user to the presence of uninsulated "dangerous voltage" within the product's enclosure
that may be of sufficient magnitude to constitute a risk of electric shock to persons.
The exclamation point within an equilateral triangle is intend ed to alert the user to the
presence of important operating and maintenance (servicing) instructions in the literature
accompanying the appliance.
WARNING: TO REDUCE THE RISK OF FIRE OR ELECTRIC SHOCK, DO NOT EXPOSE THIS
APPLIANCE TO RAIN OR MOISTURE. DANGEROUS HIGH VOLTAGES ARE PRESENT
INSIDE THE ENCLOSURE. DO NOT OPEN THE CABINET. REFER SERVICING TO
QUALIFIED PERSONNEL ONLY.
WARNING: Handling the cord on this projector, or the cords associated with accessories sold with this
USA only
WARNING: The lamp used in this projector contains mercury. Disposal of mercury may be regulated due
USA only
MODEL NAME: TDP-MT700
projector, will expose you to lead, a chemical known to the State of California to cause birth
defects or other reproductive harm. Wash hands after handling.
to environmental considerations. For disposal or recycling information, please contact your
local authorities or the Electronic Industries Alliance: www.eiae.org.
TRADE NAME: HOME THEATER PROJECTOR MODEL NAME: TDP-MT700
Tested To Comply
With FCC Standards
FOR HOME OR OFFICE USE
FCC NOTICE: This device complies with part 15 of the FCC Rules. Operation is subject to the following
two conditions:
(1) This device may not cause harmful interference, and (2) this device must accept any interference
received, including interference that may cause undesired operation. This equipment has been tested and
found to comply with the limits for a Class B digital device, pursuant to part 15 of the FCC Rules. These
limits are designed to provide reasonable protection against harmful interference in a residential
installation. This equipment generates, uses and can radiate radio frequency energy and, if not installed
and used in accordance with the instructions, may cause harmful interference to radio communications.
However, there is no guarantee that interference will not occur in a particular installation. If this equipment
does cause harmful interference to radio or television reception, which can be determined by turning the
equipment off and on, the user is encouraged to try to correct the interference by one or more of the
following measures:
- Reorient or relocate the receiving antenna.
- Increase the separation between the equipment and receiver.
- Connect the equipment into an outlet on a circuit different from that to which the receiver is connected.
- Consult the dealer or an experienced radio/TV technician for help.
RESPONSIBLE PARTY: TOSHIBA AMERICA CONSUMER PRODUCTS, L.L.C.
82 Totowa Road, Wayne, NJ, 07470
Phone: (973) 628-8000
WARNING: Changes or modifications made to this equipment, not expressly approved by Toshiba, or
USA only
Notice: This Class B digital apparatus complies with Canadian ICES-003. Cet appareil numérique de
Canada only
parties authorized by Toshiba, could void the user’s authority to operate the equipment.
la classe B est conforme à la norme NMB-003 du Canada.
SAFETY PRECAUTION 2
Page 3
English
IMPORTANT SAFETY INSTRUCTIONS
CAUTION: PLEASE READ AND OBSERVE ALL WARNINGS AND INSTRUCTIONS GIVEN IN THIS
OWNER'S MANUAL AND THOSE MARKED ON THE UNIT. RETAIN THIS BOOKLET FOR
FUTURE REFERENCE.
This set has been designed and manufactured to ensure personal safety. Improper use can result in
electric shock or fire hazard. The safeguards incorporated in this unit will protect you if you observe the
following procedures for installation, use and servicing. This unit is fully transistorized and does not contain
any parts that can be repaired by the user.
DO NOT REMOVE THE CABINET COVER OR YOU MAY BE EXPOSED TO DANGEROU S VOLTAGE.
REFER SERVICING TO QUALIFIED SERVICE PERSONNEL ONLY.
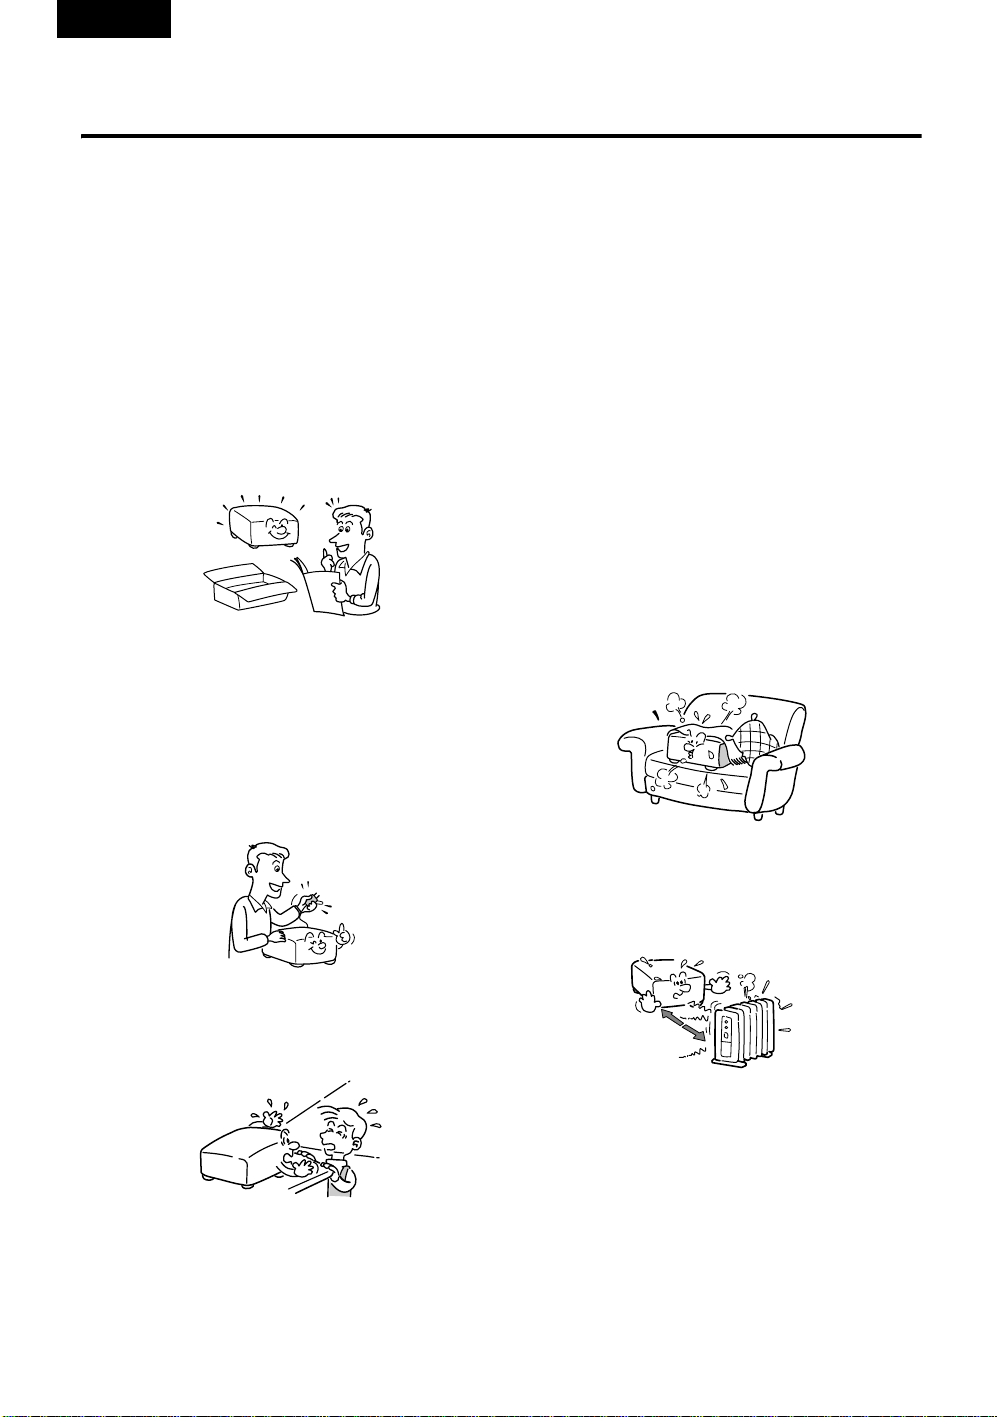
1. Read owner's manual
After unpacking this product, read the owner's
manual carefully, and follow all the operating
and other instructions.
2. Power sources
This product should be operated only from
the type of power source indicated on the
marking label. If you are not sure of the type
of power supply to your home, consult your
product dealer or local power company. For
products intended to operate from battery
power or other sources, refer to the operating
instructions.
4. Ventilation
Openings in the cabinet are provided for
ventilation to ensure reliable operation of the
product and protect it from overheating.
These openings must not be blocked or
covered. The openings should never be
blocked by placing the product on a bed,
sofa, rug or other similar surface. This
product should not be placed in a built-in
installation such as a bookcase or rack unless
proper ventilation is provided or the
manufacturer's instructions have been
adhered to.
5. Heat
The product should be situated away from
heat sources such as radiators, heat
registers, stoves, or other products (including
amplifiers) that produce heat.
3. Source of light
Do not look into the lens while the lamp is on.
The strong light from the lamp may cause
damage to your eyes or sight.
6. Replacement parts
When replacement parts are required, be
sure the service technician has used
replacement parts specified by the
manufacturer or that have the same
characteristics as the original part.
Unauthorized substitutions may result in fire,
electric shock, or other hazards.
(The lamp is the only user-replaceable part.)
IMPORTANT SAFETY INSTRUCTIONS
3
Page 4
7. Water and m ois tu re
Do not use this product near water (for
example, near a bath tub, wash bowl, kitchen
sink, or laundry tub; in a wet basement; or
near a swimming pool).
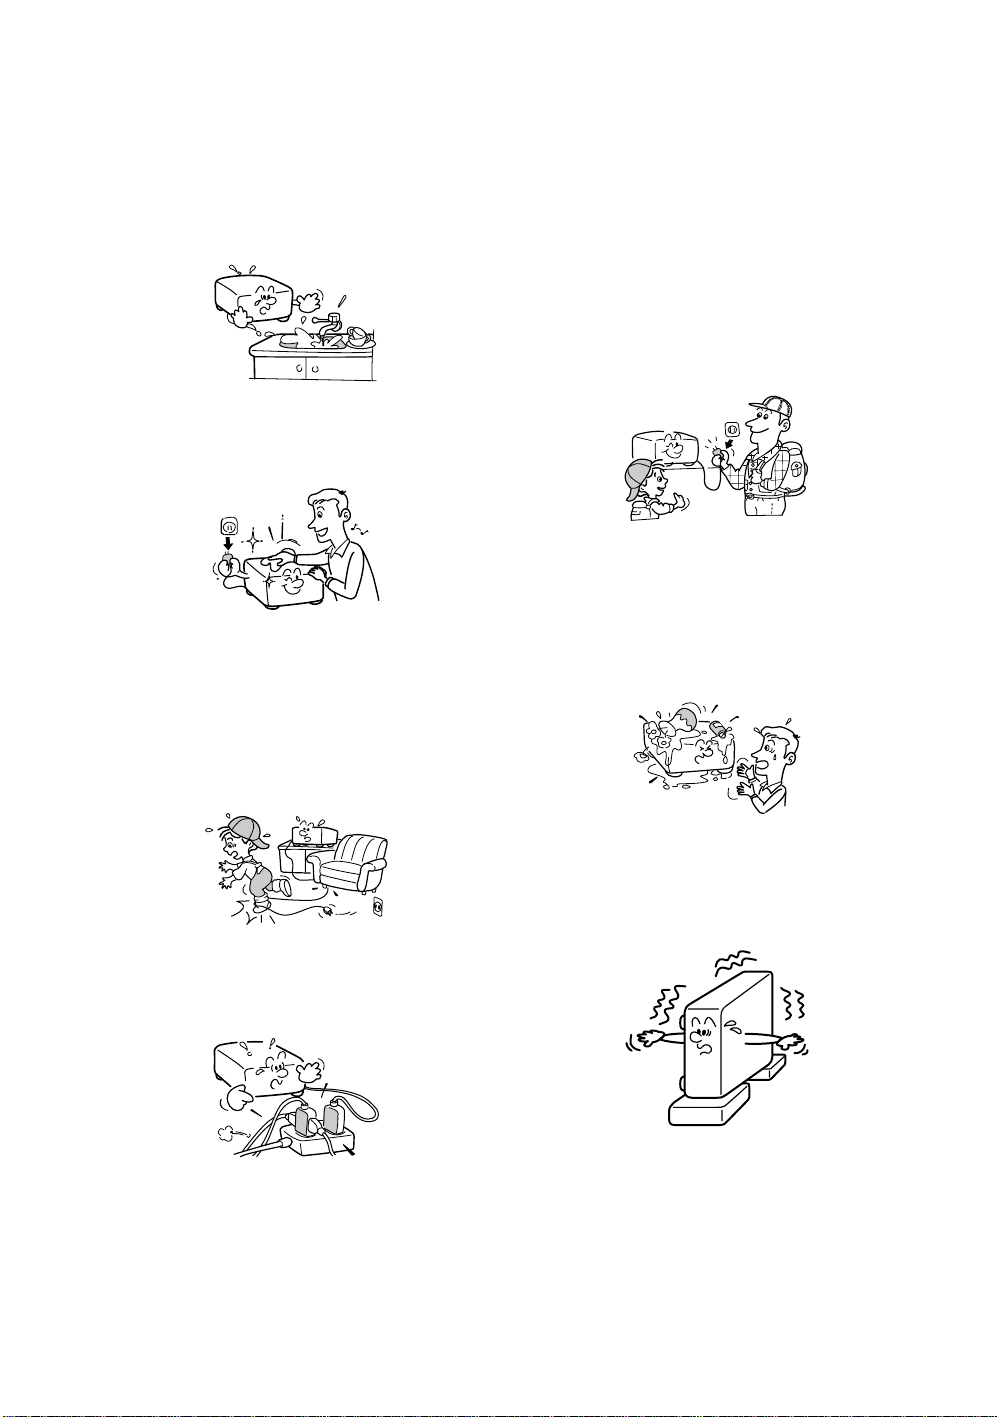
8. Cleaning
Unplug this product from the wall outlet before
cleaning. Do not use liquid cleaners or aerosol
cleaners. Use a soft cloth for cleaning.
9. Power cord protection
Power-supply cords should be routed so that
they are not likely to be walked on or pinched
by items placed upon or against them, paying
particular attention to cords at plugs,
convenience receptacles, and the point where
they exit from
the product.
12. Lightning storms
For added protection for this product during a
storm, or when it is left unattended and
unused for long periods of time, unplug it from
the wall outlet. This will prevent damage to the
product due to lightning and power line
surges. However, while it is thundering or
lightning, do not touch the apparatus and any
connected cable and/or equipment. This will
prevent you from receiving the electric shock
by an electric surge.
13. Object and liquid entry
Never push objects of any kind into this
product through the openings, as they may
touch dangerous voltage points or short-out
parts that could result in a fire or electric
shock. Never spill liquid of any kind on the
product.
10. Overloading
Do not overload wall outlets; extension cords,
or integral convenience receptacles as this
can result in a risk of fire or electric shock.
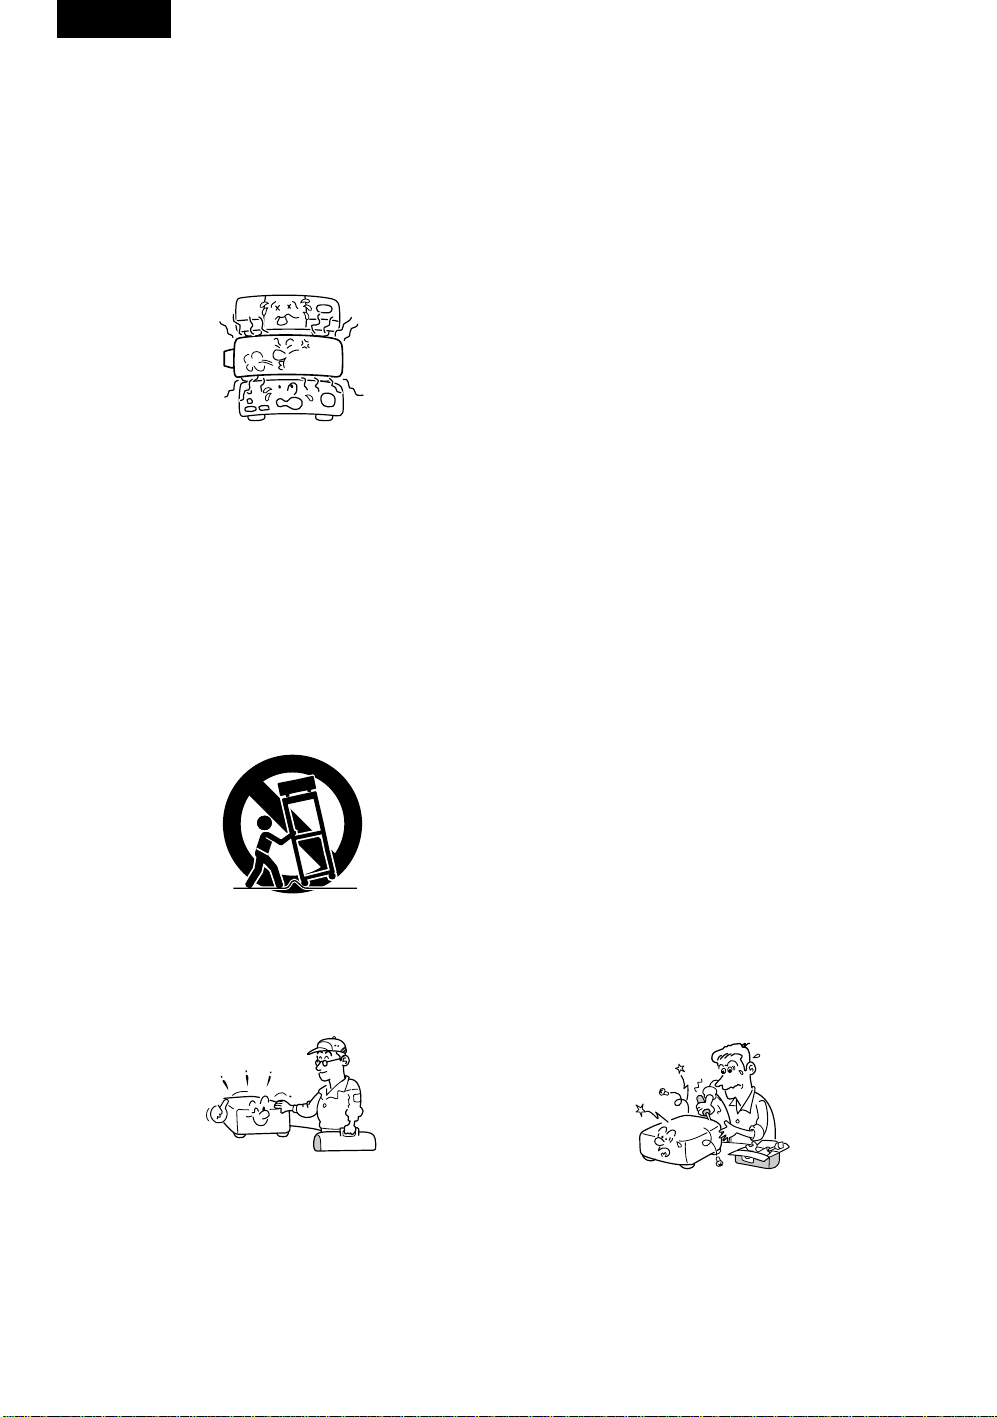
11. Do not use the product in a closed
installation state.
Do not place the product in a box or in any
other closed installation state. Otherwise it
may overheat. This could result in a risk of fire.
IMPORTANT SAFETY INSTRUCTIONS 4
14. Do not place the product vertically.
Do not use the product in the upright position
to project pictures at the ceiling, or any other
vertical positions. The product may fall over,
causing personal injury or product damage.
15. Do not leave thermal-paper documents or
easily deformed items on top of the unit or
near the air exhaust for long periods of
time.
The heat from the unit could erase the
information on the thermal paper, or cause
deformation or warping.
Page 5
English
16. Do not stack components.
Do not stack other equipment on this product
or stack this product on other equipment.
The top and bottom surfaces of this product
develop heat and may damage the other
unit.
17. Attachments
Do not use attachments not recommended
by the product manufacturer, as they may
cause hazards.
18. Accessories
Do not place this product on an unstable
cart, stand, tripod, bracket, or table. The
product may fall, causing serious injury to a
child or adult, and serious damage to the
product. A product and cart combination
should be moved with care. Quick stops,
excessive force, and uneven surfaces may
cause the product and cart combination to
overturn.
S3125A
19. Safety check
Upon completion of any service or repairs to
this product, ask the service technician to
perform safety checks to determine that the
product is in proper operating condition.
20. Damage requiring service
Unplug this product from the wall outlet and
refer servicing to qualified service personnel
under the following conditions:
a) when the power-supply cord or plug is
damaged;
b) if liquid has been spilled or objects have
fallen into the product;
c) if the product has been exposed to rain or
water;
d) if the product does not operate normally by
following the operating instructions (adjust
only those controls that are covered by the
operating instructions as an improper
adjustment of other controls may result in
damage and will often require extensive work
by a qualified technician to restore the
product to its normal operation);
e) if the product has been dropped or damaged
in any way; or
f) when the product exhibits a distinct change in
performance.
21. If glass components, including the lens
and lamp, should break, contact your
dealer for repair service.
This product incorporates glass components,
including the lens and lamp. If such parts
should break, please handle with care to
avoid injury. Contact your dealer for repair
service. The broken pieces of glass may
cause injury. In the unlikely event of the lamp
rupturing, thoroughly clean the area around
the projector and discard any edible items
placed in that area.
22. Servicing
Do not attempt to service this product
yourself, as opening or removing covers may
expose you to dangerous voltage or other
hazards. Refer all servicing to qualified
service personnel.
IMPORTANT SAFETY INSTRUCTIONS
5
Page 6

POWER SUPPLY CORD SELECTION
If your line voltage is 220 to 240V, use one of the following types of cable .
Plug
configuration
Use a 5A fuse approved by ASTA or BSI to
BSI362.
Always replace the fuse cover after
changing the fuse.
Plug type Line
voltage
EURO 220 - 240V Australian
UK 220 - 240V Switzerland
Plug
configuration
Plug type Line
240V
10A
240V
6A
North
American
240V
10A
voltage
200 - 240V
200 - 240V
200 - 240V
IMPORTANT PRECAUTIONS
Save Original Packing Materials
The original shipping carton and packing materials will come in handy if you ever have to ship your
projector. For maximum protection, repack the set as it was originally packed at the factory.
Moisture Condensation
Never operate this unit immediately after moving it from a cold location to a warm location. When the
unit is exposed to such a change in temperature, moisture may condense on the crucial internal
parts. To prevent the unit from possible damage, do not use the unit for at least 2 hours after there is
an extreme or sudden change in temperature.
Location and Installation
• Do not place in hot locations, such as near a heater. Doing so could cause malfunction and shorten
the life of the projector.
• Avoid locations with oil or cigarette smoke, which can affect the quality and useful life of the
product’s optical parts and darken the screen.
• Do not use the product vertically in any upright position or slantwise at an angle of 20 degrees or
more.
• Using this product near a TV or radio may cause interference in the image or sound. If this
happens, move it away from the TV or radio.
• In a high-altitude location where the air is thin, cooling efficiency is reduced; therefore, use the
projector in a cool area.
POWER SUPPLY CORD SELECTION 6
Page 7

English
IMPORTANT PRECAUTIONS (Continued)
Avoid Volatile Liquids
Do not use volatile liquids, such as an insect spray, near the unit. Do not leave rubber or plastic
products touching the unit for a long time. They will leave marks on the finish. If cleaning with a
chemically saturated cloth, be sure to follow the product's precautions.
In the spaces provided below, record the model and serial numbers located at the bottom of your
projector.
Model No. Serial No.
Retain this information for future reference.
EXEMPTION CLAUSES
• Toshiba Corporation bears no responsibility in the case of damages arising from natural disaster
such as earthquakes, lightning, etc., fire not liable to Toshiba Corporation, operation, theft or
mischief by third parties, other accidents, or use under abnormalconditions including erroneous or
improper operation and other problems.
• Toshiba Corporation bears no responsibility for incidental damages (lost profit, work interruption,
corruption or loss of the memory contents, etc.) arising from the use of or the inability to use this
unit.
• Toshiba Corporation accepts no liability whatsoever for any damages arising from not having
followed the descriptions in this Instruction Manual.
• Toshiba Corporation accepts no liability whatsoever for any damages arising from malfunctions
arising from combination with equipment or software that is not related to Toshib a Corporation.
OTHER NOTES AND INFORMATION
Copyrights
Showing or transmitting commercial imaging software or broadcast or cable-broad casting programs
with the purpose of other than the personal and private viewing, including modifying images using the
freeze, screen size, PIP or POP functions, or displaying with the varying aspect ratio of the images,
could violate the direct or indirect copyrights of the imaging software or broadcast program, etc., if
done without first consulting with the copyright holder. For this reason, please take appropriate
measures before performing one of the actions listed above, including obtaining a license from the
copyright holder.
Disposal
This product contains substances which are harmful to humans and the environment.
• Solder used in the internal parts contains the lead.
• The lamp contains inorganic mercury.
Please dispose of this product or used lamps in accordance with local regulations.
EXEMPTION CLAUSES
7
Page 8

Trademarks
• VGA, SVGA, XGA, SXGA, UXGA are trademarks or registered trademarks of International
Business Machines Corporation.
• DLP and Digital Light Processing, Digital Micromirror Device, DMD, and DLP are trademakes of
Texas Instruments.
• Macintosh is a registered trademark of Apple Computer, Inc.
• Theater Wide is a registered trademark of Toshiba America Consumer Products, L.L.C.
• HDMI, the HDMI logo and High-Definition Multimedia Interface are trademarks or registered
trademarks of HDMI licensing LLC.
• DCDi, TrueLife and Fraudja are trademarks of Fraudja, a division of Genesis Microchip Corp.
Notational Conventions Used in This Manual
• References to pages with related information are annotated as follows. For example, if making a
reference to page 36:
• The illustrations in this document are for reference purposes only and may not reflect your package
exactly .
p.36
REMOTE CONTROL BATTERIES
Caution
• Never throw batteries into a fire.
Note
• Be sure to use AAA batteries.
• Dispose of batteries in a designated dispoal area.
• Attention should be drawn to the environmental aspects of battery disposal.
• Do not mix different battery types or combine used batteries with new ones.
• If the remote control does not operate correctly, or if the operating range becomes reduced, replace
both batteries with new ones.
• If the batteries are dead or if you will not be using the remote control for a long time, remove the
batteries to prevent battery acid from leaking into the battery compatment.
Using the batteries improperly may cause them to explode or leak and lead to burn or injury. If
battery-leaking fluid contacts skin, wash the fluid off immediately with clean water and consult a
doctor. If the fluid is spilt on an instrument, avoid contact and wipe it off using tissue paper.
(Dispose of the used tissue paper as flammable garbage after moistening with water.)
REMOTE CONTROL BATTERIES 8
Page 9

English
CONTENTS
SAFETY PRECAUTION ..............................................................................2
IMPORTANT SAFETY INSTRUCTIONS .....................................................3
POWER SUPPLY CORD SELECTION .......................................................6
IMPORTANT PRECAUTIONS .....................................................................6
EXEMPTION CLAUSES ..............................................................................7
OTHER NOTES AND INFORMATION ........................................................7
REMOTE CONTROL BATTERIES ..............................................................8
CONTENTS ..................................................................................................9
Overview .....................................................................................................11
Shipping contents ................................................................................11
Projector exterior view .........................................................................12
Controls and functions .........................................................................13
Positioning your projector ........................................................................15
Choosing a location .............................................................................15
Obtaining a preferred projected image size .........................................16
Connecting various equipment .................................................................18
Connecting video inputs ......................................................................18
Connecting a computer ........................................................................19
Using the projector and remote control ...................................................20
Preparations ........................................................................................20
Turning the power on ...........................................................................20
Switching input signals ........................................................................20
Adjust the image ..................................................................................21
Optimizing the image ...........................................................................21
Personalizing the projector menu display ............................................23
Saving and loading the video memory .................................................23
Using PIP (Picture-In-Picture) and POP (Picture-On-Picture) functions 23
Pausing the picture ..............................................................................24
Turning the power off ...........................................................................24
Menus ..........................................................................................................25
Menu structure .....................................................................................25
Using the menus ..................................................................................26
CONTENTS
9
Page 10

Picture menu ....................................................................................... 26
Display menu ......................................................................................27
Options menu ...................................................................................... 28
Setup menu ......................................................................................... 28
Advanced menu .................................................................................. 29
Additional information .............................................................................. 30
Care of the projector ........................................................................... 30
About lamp .......................................................................................... 31
Replacing the lamp ............................................................................. 31
Indicator lights ..................................................................................... 33
Troubleshooting .................................................................................. 34
Specifications ...................................................................................... 35
Dimensions ......................................................................................... 35
Control terminal ................................................................................... 36
CONTENTS 10
Page 11
English
Overview
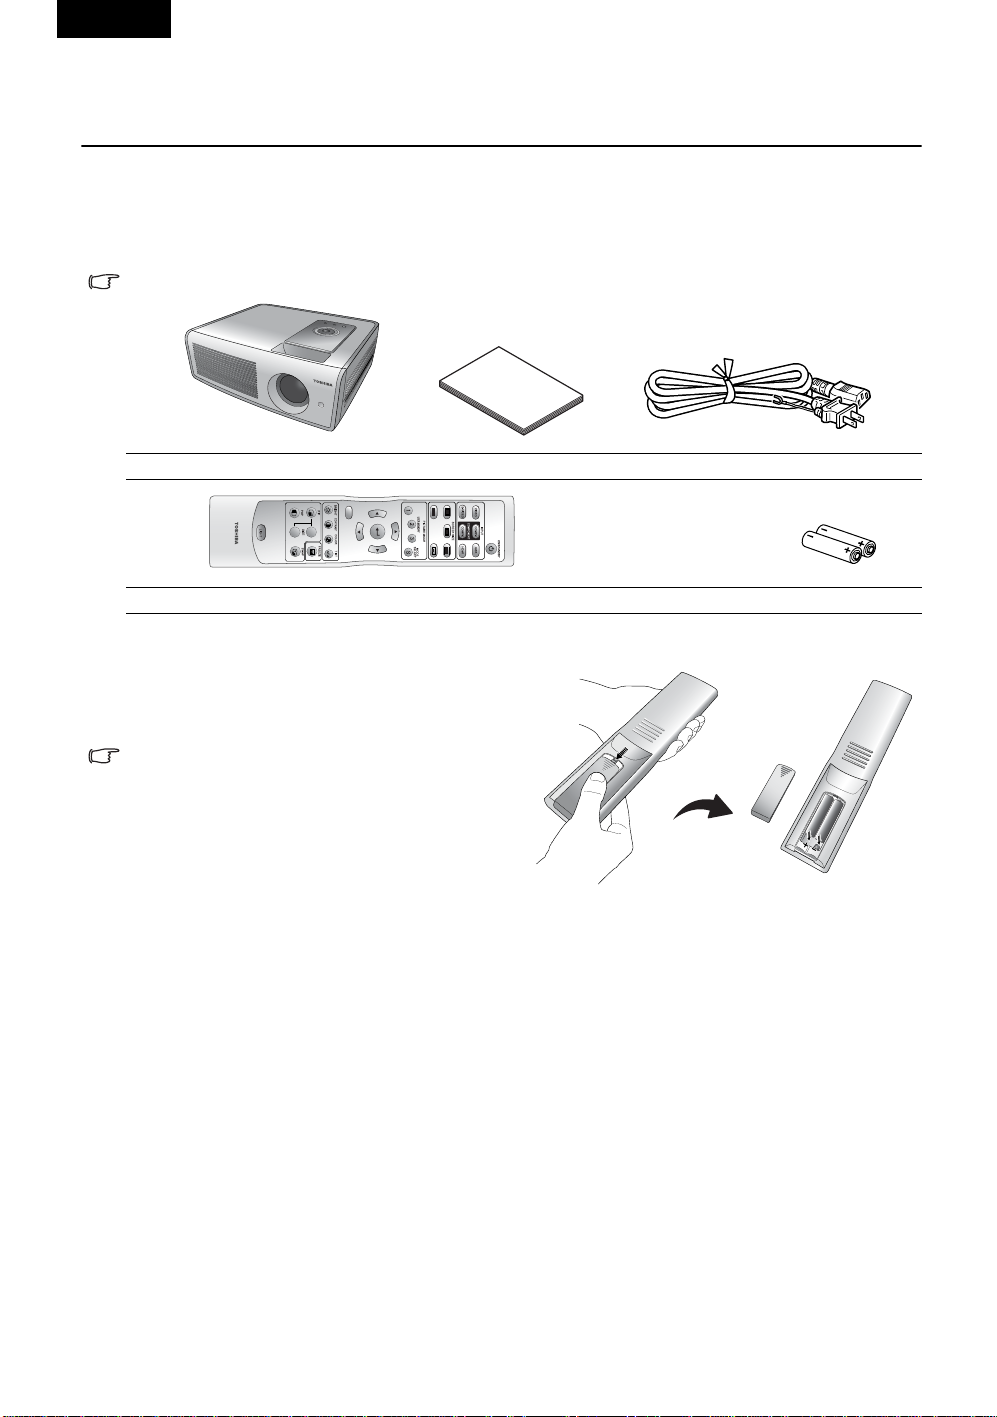
Shipping contents
Please make sure that the following items are included in the box, along with the main unit. If any
item is missing, please contact your dealer immediately.
Some of the accessories may vary from country to country.
Projector Owner’s manual Power cord
MENU
-
+
Remote control Batteries
Installing or replacing batteries
Push on the cover and slide it to open. Install two
AAA batteries with the correct polarities, then
close the cover.
Notes on batteries
Q Before using the batteries, be sure to
observe “REMOTE CONTROL
BATTERIES” described in previous
pages.
Q Avoid leaving the remote control and
batteries in an excessive heat or humid
environment like the kitchen, bathroom, sauna, sunroom, or in a closed car.
Q Dispose of used batteries according to the battery manufacturer ’s instructions and local
environment regulations for your region.
Q If the remote control will not be used for an extended period of ti me, remove the batteries to
avoid damage to the control from possible battery leakage.
Overview
11
Page 12

Projector exterior view
Front / Upper side
1
Rear side
HDMI
S-VIDEO
COMPONENT 1
6
Bottom and left sides
VIDEO
P
R / CR
B / CB
P
CONTROL
Y
COMPONENT 2 / GBR
VD
Y/G
HD
PR/R
P
B/B
1. Ventilation holes (exhaust)
2. Control panel
2
3
3. Focus ring and zoom ring
4. Projection lens
5. Front IR sensor
p.13
4
5
6. Connector panel (see below)
7. Main AC power switch
8. Power cord socket
7
8
9
10
Connector panel
12
13
S-VIDEO
VIDEO
14
CONTROL
15
17. Component video input (RCA jacks)
Supports Y/PB/PR or Y/CB/CR video signal input.
18. RGB/ HDTV input (BNC)
Supports Y/PB/PR, Y/CB/CR, or RGB video signal input or PC signal input.
VD
HD
COMPONENT 1
P
R / CR
COMPONENT 2 / GBR
PR/R
HDMI
P
B / CB
P
9
11
10
9. Front adjuster feet
10. Ceiling mounting holes
11. Antitheft lock hole
12. Rear IR sensor
13. Composite Video input (RCA jack)
16
14. S-Video input (mini DIN 4-pin)
15. Control terminal
Y
Y/G
B/B
17
18
TM
16. HDMI
(High-Definition Multimedia
Interface) input
Supports an all-digital video source,
such as a set-top box, DVD player.
Overview 12
Page 13

English
Controls and functions
Control panel
6
7
8
1
2
3
4
5
1. POWER indicator light
Lights up or flashes when the projector is
under operation.
2. MEMORY c
Sequentially recalls settings saved in memory
locations 1, 2, and 3.
When the on-screen menu is activated, this
button is used as directional arrow.
3. ARROWS <e/f/c/d>
When the on-screen menu is activated, arrows
#2, #3, and #10 (see illustration above) are
used as directional arrows to select the desired
menu items and to make adjustments.
4. ON/STANDBY , ,
Press and hold this button to turn the projector
on when it is in the standby mode. Or press
this button twice to turn the projector off.
p. 23
p. 20 p. 24 p. 33
9
3
10
11
p. 33
5. MENU
Turns the on-screen display control menu on.
Exits and saves the menu settings.
6. Focus Ring
Adjusts the focus of the projected image.
7. Zoom Ring
Adjusts the size of the projected image.
8. Temperature warning light
Lights up or flashes red if the projector’s
temperature becomes too high.
9. LAMP indicator light
Indicates the status of the lamp.
Lights up or flashes red when the lamp has
developed a problem. Please contact your
dealer for assistance.
p.21
p.21
p.33
p.33
10. AUTO d
Automatically determines the best picture
timings for the displayed image.
When the on-screen menu is activated, this
button is used as directional arrow.
11. INPUT
Switches input sources sequentially.
p.26
Remote control
Notes on remote control operation
Q Make sure there is nothing between the remote control and the projector’s IR sensor that
might obstruct the infrared beam.
Q The effective range of the remote control is up to 26.25 feet (8 meters) from the front of the
projector or 26.25 feet (8 meters) from the rear of the projector. The remote control must be
held at an angle within 45 degrees of the projector ’s IR remote control sensor.
26.25 ft (8 m)
Overview
13
Page 14

If the remote control stops working, or if its effective range decreases, replace the batteries
Q
with new ones.
Q The remote control may fail to operate if the infrared remote sensor is exposed to bright
sunlight or fluorescent lighting.
Q In rare cases, ambient conditions could impede the operation of the remote control. If this
happens, point the remote control at the main unit again, and repeat the operation.
Q If you press a button for a function that is not available, the icon will appear on the screen
when the button press is not effective.
1. ON/ST A NDBY , ,
1
2
3
4
5
6
MENU
7
8
+
-
9
10
Press and hold this button to turn the projector on when it is in the
standby mode. Or press this button twice to turn the projector off.
2. INPUT buttons
Selects an input source to display on the projector.
3. SCREEN SIZE buttons
Selects the image aspect ratio according to the input signal.
4. PICTURE MODE selection buttons
Restores settings saved in memory locations 1, 2, and 3, or
restores the default modes for the current input source (Dynamic,
Standard, Theater 1, or Theater 2).
5. Arrows (c/e/d/f)
Used to select the desired menu or to make adjustments.
Enter button
Opens the selected items of the menu.
6. MENU
Turns the on-screen display control menu on or return to upper
level.
p.26
7. Picture quality adjustment buttons
8. PIP and POP buttons
To turn the PIP or POP function on or off, press the PIP or POP button. Adjust the size of the PIP
image by pressing the + or - button. To switch between the two windows, repeat edly press SWAP to
adjust the image settings in the selected window.
9. FREEZE
Pauses the image.
p.26
p.23
p. 20 p. 24 p. 33
p. 20
p.27
p.23
p.26
p.26
p.26
10. LIGHT
Turns on the remote control’s backlight.
Overview 14
Page 15

English
Positioning your projector
Choosing a location
Your projector can be installed in one of four possible installation locations:
1. Floor in front of screen (Standard);
2. Ceiling in front of screen (Ceiling);
3. Floor at rear of screen (Rear);
4. Ceiling at rear of screen (Rear Ceiling).
Your room layout or personal preference will dictate which installation location you select. Take into
consideration the size and position of your screen, the location of a suitable power outlet, as well as
the location and distance between the projector and the rest of your equipment.
I. Floor in front of screen
Select this location with the projector placed
near the floor in front of the screen. This is the
most common way to position the projector for
quick setup and portability.
III. Floor at rear of screen
Select this location with the projector placed
near the floor behind the screen.
Note that a special rear projection screen is
required.
Select Rear in the Setup > Projection Mode
menu after you turn the projector on.
II. Ceiling in front of screen
Select this location with the projector suspended
from the ceiling in front of the screen.
Select Ceiling in the Setup > Projection Mode
menu after you turn the projector on.
IV. Ceiling at rear of screen
Select this location with the projector suspended
from the ceiling behind the screen.
Note that a special rear projection screen and
the Projector Ceiling Mounting Kit are required
for this installation location.
Select Rear Ceiling in the Setup > Projection
Mode menu after you turn the projector on.
WARNING
• Always obey the instructions listed in IMPORTANT SAFETY INSTRUCTIONS when placing the
unit. Attempting to clean/replace the lamp at a high site by yourself may cause you to drop
down, thus resulting in injury.
• If you wish to mount the projector on the ceiling, be sure to ask your dealer to do so. Mounting
the projector on a ceiling requires special ceiling brackets (sold separately) and specialized
knowledge. Improper mounting could cause the projector to fall, resulting in an ac cident.
• If the projector is ceiling-mounted, install the breaker for turning off the power in case of anomaly. Let everyone involved with the use of the projector know that fact.
Positioning your projector
15
Page 16

Obtaining a preferred projected image size
Factors that affect the projected image size including the distance from the projector lens to the
screen, the zoom setting, and the video format. Tables of dimensions for both 16:9 and 4:3 screen
ratios are provided below to help you determining the ideal location for your projector.
1. Determine the aspect ratio of your screen (16:9 or 4:3).
2. Select your desired Screen Size from the applicable screen dimension table below (16:9 or 4:3
ratio, depending on your screen ratio). Install the projector at a distance from the screen
between the Min. and Max. Projection Distance values in the table.
3. Determine the preferred height of your projector.
For example, if you have a 16:9 screen that is 69.7 in. W x 39.4 in. H (177 cm W x 100 cm H), you
should place your projector within a range of 92.1 in. to 125.2 in. (234 cm to 318 cm) from the screen.
The ideal height of your projector lens center will be level with the bottom or top side of the
screen.
Installation for a 16:9 ratio screen
Ceiling Installation
Type
Height
Projection Distance
Ceiling
Center of the lens
Screen
Floor Installation
Type
Height
Screen
Center of the lens
Projection Distance
Floor
16:9 (widescreen) ratio screen dimension table
Screen Size Projection Distance
Type
(inch) / (cm)
37 / 94 18.1 / 46 32.3 / 82 42.5 / 108 57.9 / 147
50 / 127 24.4 / 62 43.7 / 111 57.5 / 146 78.4 / 199
60 / 152 29.5 / 75 52.4 / 133 68.9 / 175 93.7 / 238
70 / 178 34.8 / 87 61.0 / 155 80.3 / 204 109.5 / 278
80 / 203 39.4 / 100 69.7 / 177 92.1 / 234 125.2 / 318
90 / 229 44.1 / 112 78.4 / 199 103.5 / 263 140.6 / 357
100 / 254 49.2 / 125 87.0 / 221 115.0 / 292 156.3 / 397
110 / 279 54.8 / 137 96.1 / 244 126.4 / 321 172.1 / 437
120 / 305 58.7 / 149 104.7 / 266 137.8 / 350 187.4 / 476
130 / 325 63.8 / 162 113.4 / 288 149.6 / 380 203.2 / 516
140 / 356 68.5 / 174 122.1 / 310 161.0 / 409 218.9 / 556
150 / 381 73.6 / 187 130.7 / 332 172.4 / 438 234.7 / 596
160 / 406 78.4 / 199 139.4 / 354 183.9 / 467 250.0 / 635
170 / 432 83.5 / 212 148.0 / 376 195.3 / 496 265.8 / 675
180 / 457 88.2 / 224 156.7 / 398 207.1 / 526 281.5 / 715
190 / 483 93.3 / 237 165.8 / 421 218.5 / 555 296.9 / 754
200 / 508 98.0 / 249 174.4 / 443 229.9 / 584 312.6 / 794
250 / 635 122.4 / 311 217.7 / 553 287.4 / 730 390.9 / 993
300 / 762 147.2 / 374 261.4 / 664 344.9 / 876 468.9 / 1191
The above numbers are approximate and may be slightly different from the actual measurements. Only
the recommended screen sizes are listed. If the your screen size is not in the table above, please con tact
your dealer for assistance.
An examination of the table reveals that you can place the projector lens in the rang e from 42.5 in.
(108 cm) to 468.9 in. (1191 cm) distance from the screen, which will give you a projected image from
32.3 in. W x 18.1 in. H (82 cm W x 46 cm H) to 261.4 in. W x 147.2 in. H (664 cm W x 374 cm H) full
screen.
Height
(inch) / (cm)
Width
(inch) / (cm)
Min.
(inch) / (cm)
Max.
(inch) / (cm)
Positioning your projector 16
Page 17

English
Installation for a 4:3 ratio screen
Ceiling Installation
Type
Image Height
Projection Distance
Ceiling
Center of the lens
Screen
Floor Installation
Type
Image Height
Screen
Center of the lens
Projection Distance
4:3 (standard) ratio screen dimension table:
Screen Size Projection
Distance
Ty pe (inch) /
(cm)
37 / 94 22.1 / 56 29.5 / 75 39.0 / 99 53.2 / 135 16.5 / 42
50 / 127 29.9 / 76 40.2 / 102 52.8 / 134 71.7 / 182 22.4 / 57
60 / 152 35.8 / 91 48.0 / 122 63.0 / 160 85.8 / 218 27.2 / 69
70 / 178 42.1 / 107 55.9 / 142 73.62 / 187 100.4 / 255 31.5 / 80
80 / 203 48.0 / 122 64.2 / 163 84.3 / 214 114.6 / 291 35.8 / 91
90 / 229 53.9 / 137 72.1 / 183 94.9 / 241 128.7 / 327 40.6 / 103
100 / 254 59.8 / 152 79.9 / 203 105.1 / 267 143.3 / 364 44.9 / 114
110 / 279 66.1 / 168 88.2 / 224 115.8 / 294 157.5 / 400 49.6 / 126
120 / 305 72.1 / 183 96.1 / 244 126.4 / 321 171.7 / 436 53.9 / 137
130 / 325 78.0 / 198 103.9 / 264 137.0 / 348 186.2 / 473 58.7 / 149
140 / 356 83.9 / 213 111.8 / 284 147.2 / 374 200.4 / 509 63.0 / 160
150 / 381 90.2 / 229 120.1 / 305 157.9 / 401 214.6 / 545 67.3 / 171
160 / 406 96.1 / 244 128.0 / 325 168.5 / 428 229.1 / 582 72.1 / 183
170 / 432 102.0 / 259 135.8 / 345 179.1 / 455 243.3 / 618 76.4 / 194
180 / 457 107.9 / 274 144.1 / 366 189.3 / 481 257.9 / 655 81.1 / 206
190 / 483 114.2 / 290 152.0 / 386 200.0 / 508 272.1 / 691 85.4 / 217
200 / 508 120.1 / 305 159.8 / 406 210.6 / 535 286.2 / 727 90.2 / 229
250 / 635 150.0 / 381 200.0 / 508 263.0 / 668 357.9 / 909 112.6 / 286
300 / 762 180.0 / 457 239.0 / 610 315.8 / 802 429.5 / 1091 135.0 / 343
Height
(inch) / (cm)
Width (inch)
/ (cm)
Min. (inch) /
(cm)
Max. (inch) /
(cm)
Floor
Image
Height
(inch) /
(cm)
The above numbers are approximate and may be slightly different from the actual measurements. Only
the recommended screen sizes are listed. If the your screen size is not in the table above, please contact
your dealer for assistance.
An examination of the table reveals that you can place the projector lens in the range from 39.0 in.
(99 cm) to 429.5 in. (1091 cm) distance from the screen, which will give you a projected image from
29.5 in. W x 16.5 in. H (75 cm W x 42 cm H) to 239.0 in. W x 135.0 in. H (610 cm W x 343 cm H).
Positioning your projector
17
Page 18

Connecting various equipment
You can connect the projector to many types of video equipment, such as a VCR, DVD player, digital
tuner, cable box, satellite box, video game console, or digital camera. You can also connect it to a
desktop or laptop PC or Apple Macintosh.
The projector can connect to multiple video devices at the same time by using different cables. Make
sure you select the correct input to display.
When connecting any signal source to the projector, be sure to:
1. Turn off all equipment before making any connections.
2. Use the correct cables for each source.
3. Ensure that the cables are firmly inserted.
4. Connect all audio signals to external speakers. This projector is not equipped with speakers.
In the connections shown below, cables are not included with the projector (see ). Cables are
commercially available from electronics stores.
Connecting video inputs
Connecting HDMITM devices
You must use an HDMITM cable when connecting the projector to an HDMITM device. The HDMITM
(High-Definition Multimedia Interface) terminal supports uncompressed video data transmission
between compatible devices (such as DVD tuners, DVD players, and displays) over a single cable. It
provides a pure digital viewing and listening experience.
TM
device: DVD player, digital tuner, etc.
HDMI
Digital audio cable
p.11
From an audio output
terminal
HDMITM cable
To an audio input
terminal
S-VIDEO
CONTROL
HDMI
COMPONENT 1
VIDEO
R / CR
P
P
B / CB
COMPONENT 2 / GBR
VD
HD
PR/R
B/B
P
Beacuse HDMITM is an evolving technology, it is possible that some devices may not operate properly
with the projector.
Connecting component video devices
Be sure to match the corresponding colors between the cables and the terminals.
AV equipment: DVD player, digital tuner, etc.
From audio output
terminals
Component cable
To audio input
terminals
S-VIDEO
CONTROL
COMPONENT 1
VIDEO
R / CR
P
COMPONENT 2 / GBR
VD
HD
PR/R
Y
Y/G
HDMI
P
B / CB
Y
Y/G
B/B
P
Connecting various equipment 18
Page 19

English
Connecting S-video or video devices
From audio output
terminals
S-Video cable
Or
Video cable
To audio input
terminals
S-VIDEO
CONTROL
HDMI
COMPONENT 1
VIDEO
R / CR
P
P
B / CB
COMPONENT 2 / GBR
VD
HD
Y
Y/G
PR/R
B/B
P
Connecting a computer
Connect the projector to a computer with a VGA-BNC cable.
Laptop or desktop compute r
From an audio output
terminal
VGA-BNC cable
If the selected video image does not display after the projector is turned on and the correct video source
has been selected, make sure the video source is turned on and operating correctly. Also make sure all
signal cables have been connected correctly.
Many laptops do not turn on their external video ports when connected to a projector. Usually a key
combo such as FN + F3 or CRT/LCD key turns the external display on/off. Locate a function key labeled
CRT/LCD or a function key with a monitor symbol on the laptop. Press FN and the labeled function key
simultaneously. Refer to your laptop’s documentation to learn your laptop’s key combination.
To audio input
terminals
S-VIDEO
CONTROL
HDMI
COMPONENT 1
VIDEO
R / CR
P
P
B / CB
COMPONENT 2 / GBR
VD
HD
Y
Y/G
PR/R
B/B
P
Connecting various equipment
19
Page 20

Using the projector and remote control
Preparations
1. Turn on all connected devices.
2. Remove the lens cap.
Turning the power on
Follow the steps below.
1. Make sure the Power light is orange after power has been applied
and the main AC power switch is turned on.
2. Press and hold the ON/STANDBY button on the projector or
remote control to turn the projector on.
The ON/STANDBY button may not work while the projector is warming up.
3. The fans will be running. A start-up image shows on-screen for a
few seconds.
4. "Searching…." will display on-screen before the projector
identifies the input signal. This message will remain on-screen
until a valid signal is detected.
5. If the horizontal frequency of the input signal exceeds the range of the projector, a message
reading "Unsupported timing" will display on-screen. This message will remain on-screen until
you change the input signal.
3. Plug the supplied power cord into the AC inlet on
the rear of the projector and turn the main AC
power switch on.
4. Plug the power cord into a power outlet.
Switching input signals
The projector can be connected to multiple devices at the same time.
To sequentially select input signals, press one of the INPUT buttons on
the remote control or INPUT on the projector.
Q When the projector is turned on, it will search for the input source
you last selected.
Q If you need to use the PIP or POP function, refer to for
advanced operation.
CAUTION
• Do not look into the lens while the lamp is on. The strong light from
the lamp may cause damage to your eyes or sight.
• Do not block the air intake or exhaust. Doing so could cause a fire
due to internal overheating.
• Do not place your hands, face, or other objects near the air
exhaust. Doing so could cause burns, deform/break the object.
Using the projector and remote control 20
p.23
Page 21

English
Adjust the image
Adjusting the angle height
Turn the two feet on the bottom of the projector
to adjust the image height and projection angle (see
illustration at right).
If the screen and the projector are not perpendicular to each other,
the projected image becomes distorted (trapezoidal). To correct
this problem, adjust the Keystone value in the Setup menu.
Auto-adjusting the image
When you press the Auto button on the projector, the built-in intelligent
auto-adjustment function will readjust the values of Frequency and
Clock to provide the best image quality.
The current source information will display at the bottom right cornor of
the screen for 3 seconds.
The screen will be blank while the auto-adjustment is functioning.
Fine-tuning the image size and clarity
1. Use the zoom ring to adjust the projected
image to the size you need.
2. Then sharpen the image by rotating the
focus ring.
Optimizing the image
To optimize the image, use the remote control or on-screen menus. For the operation of on-screen
menus, please refer to .
The following steps are optional. You do not need to follow every step. It depends on the image
quality you desire.
Note
• Note that a lamp characteristics may rarely cause the brightness to fluctuate slightly.
• A lamp is consumable item. If used for extended periods, images will appear dark, and the lamp
could burn out. This is characteristic of a lamp, and is not malfunction. (The lifetime of the lamp
depends on conditions of use.)
• The DMDTM is made using extremely advanced technology, but there may be black spots (pixels
that do not light) or bright spots (pixels that are constantly lit) on the panel. Please note that these
are not malfunctions.
p.26
Using the projector and remote control
21
Page 22

1. Selecting a picture mode
Select a picture mode on the remote control (or in the Picture > Load
Settings menu). The following four modes are available for each
input, with preset values suitable for various projection purposes:
Q Dynamic
Q Standard
Q Theater 1
Q Theater 2
You also can customize the picture settings by adjusting the functions
in the Picture menu, and save those settings as USER MEMORY 1, 2,
or 3. For more information, refer to .
p.27
MENU
+
-
2. Selecting a Screen Size
The aspect ratio is the ratio of image width to image height. HDTV and most DVDs are 16:9, which is
the default for this projector. Most TV shows are 4:3.
Change the image ratio using the SCREEN SIZE buttons on the remote control (or in the Display >
Screen Size menu). Select an aspect ratio to suit the format of the video signal. The following five
aspect ratios are available:
In the pictures below, the black portions are active areas and the white portions are inactive areas.
1. Full: Scales an image so
that it is displayed in the
center of the screen in
16:9 aspect ratio. This
mode is best for squeeze-signal video images.
2. 4:3: Scales an image so
that it is displayed in the
center of the screen in 4:3
aspect ratio. This mode is
best for 4:3-signal video
images displayed on a 4:3 size screen.
3. Zoom: Enlarges an
image with letterbox
format to display it in fullscreen format in 16:9
aspect ratio. The upper
and lower portions of the
image are cropped. Use this setting for
Cinemascope and Vista video wide-screen
formats.
Notes
Using these functions to change the size of the displayed image (i.e. changing the height/width ratio
from the original) for purpose of public display or commercial gain may infringe on copyright laws.
4. Theater Wide®: A
4:3 aspect ratio
image is enlarged
NON-linearly in
horizontal direction
to accommodate 16:9 full-screen
display. This stretches only the right
and left sides of the image; the central
part is unchanged. This mode is best
for 4:3-signal video images displayed
on a wide screen.
5. Through:
Projects the input
signal in its
original size
(without any
scaling), with the image displayed at
the center of the screen.
Using the projector and remote control 22
Page 23

English
3. Other adjustments
You can adjust Brightness, Contrast, Color, and Tint settings in the Picture menu or with the remote
control. Refer to for more information.
Some picture adjustments are available only when certain input ports are in use. Adjustments that are not
available are not shown on the screen.
p.26
Personalizing the projector menu display
The on-screen display (OSD) menus can be set according to your preferences.
•The Language feature in the Setup menu allows you to choose the language for on-screen
menus.
•The Background Color in the Options menu allows you to cho ose a grey, black, or blue.
•The OSD Off (Secs) feature in the Options Menu allows you to set the length of time the OSD (in
seconds) that the OSD will remain on-screen after your last button press.
•The Sleep Timer (Min) feature in the Options menu allows you to set the length of time (in
minutes) before the projector will perform auto-shutdown.
•The OSD Position H and OSD Position V features in the Options menu allows you to adjust the
on-screen position of the OSD.
Saving and loading the video memory
Q Press the PICTURE MODE selection buttons on the remote control
(or MEMORY c on the projector) to recall the settings directly.
Q There are 3 user memories stored according to your preference.
Q For information about saving user memories, refer to .
p.29
Using PIP (Picture-In-Picture) and POP (Picture-OnPicture) functions
There are two groups of inputs classified according to their display modes:
Video Group: Video, and S-Video inputs.
Graphic Group: Component 1, Component 2 (BNC), GBRHV (BNC), and HDMI
The PIP function allows the projector to display one input from the
Graphic Group within one input from the Video Group (Graphic on
Video), or display one input from Video Group within one input from
the Graphic Group (Video on Graphic).
The POP function allows the projector to display one input from the
Graphic Group and one input from the Video Group side by side
(Video by Graphic or Graphic by Video).
If you want to view two images from 2 different input signals at the
same time, refer to the following steps.
1. Select one input source by pressing one of the INPUT buttons
on the remote control to display the first image.
2. Press the PIP or POP button on the remote control.
Video
Graphic
Video
Graphic
TM
inputs.
Video on Graphic
Graphic by Video
MENU
Using the projector and remote control
23
Page 24

3. Select the second signal input from the Display > PIP or Display > POP menu.
4. You can press the SWAP button on the remote control repeatedly to switch the corresponding
positions of the two windows, .
5. Between the two images, the bigger one of PIP or the left one of POP is always the active
window. You can change the input signal settings in the active window only.
6. To adjust the size of the PIP window, press + or -.
7. To adjust the position of the PIP window, press the ARROW buttons (c/e/d/f).
8. To turn off the PIP or POP function, push PIP or POP button again.
PIP ---
+
-
POP ---
+
-
Q If the selected input signal is not available, the image will be black.
Q If you are using this function on comme r cial video software or on a broadcast or cable broadcast
except for the purpose of your private viewing and listening, it may infringe the copyright protected
by the copyright laws.
Q When the PIP/POP function is activated, some of the Faroudja functions may not be available.
Pausing the picture
To pause the picture, press the FREEZE button on the remote control. Pressing the FREEZE button
again cancels the freeze function.
Q The icon will appear while Freeze is in effect.
Q Even if an image is froz en on the screen, the pictures are running on the video or other device. If
the connected devices have active audio output, you will still hear the aud io even though the
image is frozen.
Q Using the Freeze function on commercial video software or on a TV or cable broadcast for any
purpose other than your private viewing may be prohibited under the Copyright Laws of the United
States and other countries, and may subject you to civil and criminal liability.
Turning the power off
Follow the steps below.
1. Press the ON/STANDBY button on the projector or remote
control. A confirmation message will appear. To turn off the
projector, press ON/STANDBY again.
2. The Power indicator light will flash green and the fans will run
for about two minutes to cool the lamp. The projector will not
respond to any commands until the cooling process is
complete.
3. The Power indicator light will be a solid (non-flashing) orange
when the cooling process has finished and fans stop.
4. If the projector will not be used for an extended period, turn off
the main power switch and unplug the power cord from the
power outlet.
Q If you accidentally press the ON/STANDBY button and do not
want to turn off the power, wait until the confirmation message
disappears.
Using the projector and remote control 24
Page 25

English
Menus
Menu structure
Picture Contrast Color Temp Lamp Native, Warm, Middle, Cool,
Brightness Color Enhancement...
Color
Tint To User’s Memory 1
Filter
Sharpness
Extended Picture Settings...
Save Settings...
Load Settings... Dynamic, Standard, Theater 1, Theater 2, User’s Memory 1,
To User’s Memory 2
To User’s Memory 3
User’s Memory 2, User’s Memory 3
User 1, User 2
Red, Green, Blue, Yellow, White
Display Screen Size Full, 4:3, Zoom, Theater Wide, Through
Options Background Color Grey, Black, Blue
Setup Language
Advance White Balance Fine Tuning... Color Temp. Info. Lamp Native, Warm, Middle, Cool,
PIP... Off, Video, S-Video, Component 1, Component 2 (BNC), GBRHV (BNC),
POP... Off, Video, S-Video, Component 1, Component 2 (BNC), GBRHV (BNC),
PIP/POP Source Swap
PC Tuning.. Frequency, Phase, H. Position, V. Position, Auto
OSD Off (Sec)
Sleep Timer (Min)
OSD Position H
OSD Position V
Reset Settings... Load Default Of Current Menu Source. Are You Sure? No, Yes.
Projection Mode Standard, Ceiling, Rear, Rear Ceiling
Keystone
Altitude Hight, Normal
Video Mode... Video Mode (Auto, Manual), NTSC, PAL, SECAM, PAL-N, PAL-M, PAL60,
NTSC Mode... NTSC Mode Japan, US
Test Pattern... Grid, Color Bar
Lamp... Lamp Power High, Standard
Faroudja Setting... Truelife
HDMI
HDMI
English, Français, Español, Deutsch, Italiano, 日本語 , Português
NTSC 4.43
Lamp Time Lamp Hours
Reset Lamp Timer Please Do This Only When You
RGB Curve... Red Gamma, Green Gamma, Blue
RGB Gain... Red Gain, Green Gain, Blue Gain
RGB Offset... Red Offset, Green Offset, Blue Offset
Store Color Temperature To User 1
Store Color Temperature To User 2
Noise Reduction
Change A New Lamp. Are You Sure?
Yes, No
User 1, User 2
Gamma
Menus
25
Page 26

Using the menus
The projector is equipped with on-screen display (OSD) menus
for making various adjustments and settings.
There are several OSD languages provided for your selection.
Refer to for more information about the available
languages.
The following example describes how to correct the keystone
distortion.
p.28
MENU
+
-
1. Press the MENU button to display the onscreen menu.
4. Adjust the keystone values by
pressing e or f.
2. Use e or f to highlight Setup and then press
MENU.
3. Use c or d to select Keystone.
5. Press the MENU button twice* to
save the settings and close the OSD.
*The first press leads you back to the
submenu and the second press closes the
on-screen menu.
Picture menu
The functions provided in this menu allow you to manually adjust image quality. Before making
adjustments, try one of the default modes (Dynamic, Standard, Theater 1, or Theater 2). These
modes have preset values for various lighting environments and presentation purposes.
1. Contrast: Adjusts the degree of difference
between dark and light in the image. The
higher the number, the greater the contrast.
2. Brightness: Adjusts the brightness of the
image. The higher the number, the brighter the
image. The lower the value, the darker the
image. Adjust this control so the black areas of
the image appear as black as possible and that
the detail in the dark areas is visible.
Menus 26
-30
-30
50
50
+70
+70
Page 27

English
3. Color: Increases or decreases the color intensity of the image. The higher the value, the more
vivid and brighter the color.
4. Tint: Adjusts the color tones of the image. The higher the value, the more greenish the picture
becomes. The lower the value, the more purplish the picture becomes.
5. Filter: Turns the video and data filters on or off. Filters can reduce picture noise to produce a
sharper image. The higher the setting, the less the noise.
6. Sharpness: Adjusts the picture sharpness. The higher the number, the sharper the picture.
7. Extended Picture Setting
Q Color Temp: You can choose a preferred color temperature from among Lamp Native, Warm,
Middle, Cool, User 1, and User 2. Refer to for more information about storing the color
temperature to User 1 and 2.
Q Color Enhancement
Red: Adjusts red hues independently. The higher the setting, the greater the intensity of red
color in the image.
Green: Adjusts green hues independently. The higher the setting, the greater the intensity of
green color in the image.
Blue: Adjusts blue hues independently. The higher the setting, the greater the intensity of blue
color in the image.
Yellow: Adjusts yellow hues independently . The higher the setting, the greater the intensity of
yellow color in the image.
White: Adjusts white peaking.
8. Save Settings: There are three video memories in which users can store settings, including all
of the items in the Picture menu. Each input source can store up to 3 sets of User Memories.
Q To store the settings:
i.) Adjust the items in the Picture menu to your desired values.
ii.) Select Save Settings and then press .
iii.) Select To User’s Memory 1, To User’s Memory 2, or To User’s Memory 3 and press to store
the settings.
iv.) To close the OSD, press MENU.
9. Load Settings: Loads the settings from one of three User Memories or one of four default
settings (Dynamic, Standard, Theater 1, or Theater 2).
p.29
Display menu
Use this menu to set the way that the projector displays the picture.
1. Screen Size: Selects the aspect rati o for displaying different video signals.
2. PIP: Selects a second input signal for displaying a second image.
3. POP: Selects a second input signal for displaying a second image.
4. PIP/POP Source Swap: Toggles the active window between the two images. (You can make
adjustments to the active window only.)
5. PC Tuning: The following settings are only available when a PC or RGB signal is selected.
Q Frequency: Adjusts the frequency of the sampling clock that captures the input signal.
Q Phase: Adjusts the phase of the sampling clock.
Q H. Position: Adjusts the horizontal position of the image.
Q V. Position: Adjusts the vertical position of the image.
Q Auto: Adjusts the phase, and frequency automatically.
p.22
Menus
27
Page 28

Options menu
Use this menu to adjust the global settings for the projector.
1. Background Color: Allows you to choose the color of the background screen that will display
when there is no input signal detected.
2. OSD Off (Secs): Sets the length of time the OSD will remain active after your last button press.
The range is from 5 to 60 seconds.
3. Sleep Timer (Min): Sets the auto-shutdown timer. The timer can be set to a value between 10
minutes and 3 hours.
4. OSD Position H: Adjusts the horizontal position of the OSD.
5. OSD Position V: Adjusts the vertical position of the OSD.
6. Reset Settings: Returns all settings to the factory preset values.
Setup menu
Use this menu to adjust basic image setup functions.
1. Language: Sets the language for the OSD menus. There are seven languages available,
English, French, Spanish, German, Italian, Japanese, and Portuguese.
2. Projection Mode: The projector can be installed on a ceiling or behind a screen, or with one or
more mirrors. You ca n choose from four settings. Contact your dealer for the ceiling mounting
bracket if you need to install the projector on a ceiling.
3. Keystone: Corrects for trapezoidal distortion resulting from the angle of projection. It can provide
correction of up to ± 12 degrees.
4. Altitude: Set the Altitude to High when you use the projector in an area higher than 3000 feet in
altitude or when the ambient temperature is higher than 40°C (100°F).
Note: Operating the projector in "High" mode may cause louder fan noise because of increased
fan speed necessary to improve overall cooling system and performance.
If the projector is used in any extreme environment (including those listed above), the projector
may begin auto shut-down to prevent overheating. If this happens, try setting the Altitude feature
to High. If this does not solve the problem, shut down the projector.
Note: This projector was not designed to operate in all harsh or extreme environments.
5. Video Mode: When you set the Video Mode to Auto, the projector will automatically identify the
input signal type. If it fails, set the Video Mode to Manual and select a system from the list.
6. NTSC Mode: If your residential area is using the NTSC system, set the your location as Japan or
US.
7. Test Pattern: Use the Display menu Test Pattern feature when installing the projector without
an input signal, to help you adjust the image size and focus. The test pattern will display in the
aspect ratio setting of the Screen Size.
8. Lamp
Q Lamp Power: Select High lamp power to project brighter images.
Using the High lamp power setting will decrease the life of the lamp faster than using the Standard
setting.
Q Lamp Time: Displays [Lamp Time] as a measure of when the lamp time should be replaced.
(Cannot be used as a counter of guaranteed lamp time.) When the displayed time approaches
2,000 hours, consult with a store about getting TLPLMT70 replacement lamp (sold separately)
prepared.
Q Reset Lamp Timer: Resets the lamp timer. This should only be done after the lamp has been
replaced.
p. 15
Menus 28
Page 29

English
Advanced menu
1. White Balance Fine Tuning: Adjusts the white color.
Q Color temperature information: shows the current color temperature.
*About color temperatures:
There are many different shades that are considered to be “white” for various purposes. One of the
common methods of representing white color is known as the “color tem perature”. A white color with a
low color temperature appears to be reddish white. A white color with a high color temperature appears
to have more blue in it.
Q RGB Curve...--- Adjusts the display characteristic of Red, Green, and Blue.
Q RGB Gain... --- Adjusts the contrast levels of Red, Green, and Blue.
Q RGB Offset... --- Adjusts the brightness levels of Red, Green, and Blue.
To store Color Temperature to User 1 and 2:
i.) Open the Advanced menu, select White Balance Fine Tuning > RGB Gain, and press .
ii.) Press c or d to select the item to be changed and then adjust the value with the e or f button.
iii.) Press MENU to save the settings and close the menu.
iv.) Repeat steps ii and iii to set RGB Offset and RGB Curve values.
v.) Select and enter “Store Color Temperature to User 1” or “Store Color Temperature to User 2” to
save the your settings.
vi.) Press MENU to save the settings and close the menu.
To make the color temperature higher:
Set the value of B Gain higher, and the value of R Gain lower.
To make the color temperature lower:
Set the value of R Gain higher, and the value of B Gain lower.
2. Faroudja Setting
Q Truelife: Ehances uneven edges, for example, without highlighting outl ines on skins.
Q Noise Reduction: Reduces electrical image noise. The higher the setting, the less the noise.
Menus
29
Page 30

Additional information
Care of the projector
To care for your projector, clean the lens and projector case on a regular basis, following the
instructions below.
Never remove any parts of the projector except the user-replaceable lamp. Contact your dealer if other
parts need replacing.
Cleaning the lens
WARNING
• Request cleaning and maintenance of a ceiling-mounted unit from your projector dealership.
Attempting to clean/replace the lamp at a high site by yourself may cause you to drop down,
thus resulting in injury.
Clean the lens whenever you notice dirt or dust on the surface.
CAUTION: HOT SURFACE! Before cleaning the lens, turn the projector off, unplug the power
cord, and allow the projector to cool for at least 45 minutes.
1. Use a canister of compressed air to remove dust (available from building hardware or
photographic suppliers).
2. If there is stubborn dirt or smudge marks, use a photographic lens brush or a clean, soft lens
cloth (moistened with lens cleaner, if necessary) to gently wipe the lens surface.
NEVER touch the lens with your bare hands or rub the lens with abrasive materials (products such as
paper towels can damage the lens coating). ALWAYS use a photographic lens brush or lens cleaning
cloth and solution.
NEVER attempt to clean the lens while the projector is on or while it is still hot from previous use.
Cleaning the projector case
CAUTION: HOT SURFACE! Before cleaning the lens, turn the projector off, unplug the power
cord, and allow the projector to cool for at least 45 minutes.
1. To remove dirt or dust, wipe the case with a soft, dry, lint-free cloth.
2. If the soiling is severe, dip the cloth in a neutral detergent diluted in water, wring well, and gently
wipe off the dirt, then finish up by wiping with a dry cloth.
Never use wax, alcohol, benzene, thinner, or other chemical detergents. These products can damage the
case.
Storing the projector
If you need to store the projector for an extended time, follow these guidelines:
1. Make sure the temperature and humidity of the storage area are within the recommended range
for the projector. Please refer to the Specifications page in this manual or consult your dealer.
2. Retract the adjuster feet.
3. Remove the batteries from the remote control.
4. Pack the projector in its original packing (preferred) or equivalent packing materials.
Transporting the projector
Ship the projector in its original packing (preferred) or equivalent packing materials. If you carry the
projector yourself, use a protective, non-abrasive carrying case.
Additional information 30
Page 31

English
About lamp
The product’s light source is a mercury lamp that lights at increased internal pressure. Be sure to fully
understand the following characteristics of the lamp and handle it with extreme care.
• The lamp may burst with a loud noise due to impact or deterioration, or fail to light at the expiration
of its life.
• How long it takes before the lamp bursts or the life expires may vary greatly by lamp. Some may
explode shortly after first use.
• Burst is likely to happen if the lamp is used after the replacement period has elapsed.
• When the lamp bursts, the broken pieces of glass may get inside the product or be released
outside from the openings for ventilation.
• When the lamp bursts, a slight amount of mercury gas enclosed in the lamp along with glass dust
may be released from the openings for ventilation.
Q Immediately replace the lamp when a sign appears on the screen.
• When the replacement time approaches, a message will appear on the screen.
• The risk of explosion will increase if the lamp is continuously used without being replaced.
• Frequently check the used hours and prepare spares when the replacement time approaches.
(Refer to “Lamp Time” on . )
Q When the lamp is broken
• If glass components, including a lamp and a lens, should break, handle the broken pieces with care
to avoid injury and contact your dealer for repair service.
• In the event of lamp burst, unplug the product from the wall outlet, leave and completely ventilate
the room. Then, thoroughly clean the area around the projector and discard any edible items
placed in that area.
• When the lamp bursts, consult a doctor if glass dust or mercu r y gas gets into your eyes or you
breathe it.
p. 28
Replacing the lamp
CAUTION: HOT SURFACE! The lamp may be very hot after use. Before replacing the lamp,
turn off the projector, unplug the power cord, and allow the projector to cool for at least 45
minutes.
The lamp unit contains mercury. Disposal of mercury may be regulated due to environmental
considerations. Dispose of the used lamp unit by the approved method for your area. Contact your local
authorities or www.eiae.org.
A lamp is consumable supplies. If used for extended periods, images will appear dark, and the lamp
could burn out. This is characteristic of a lamp, and is not malfunction. (The lifetime of the lamp
depends on condition of use.) If this happens, replace it with a new one.
WARNING
• If the projector is mounted on the ceiling, it is recommended to use your Toshiba dealership
when the lamp has to be exchanged.
• When replacing, always use lamp “TLPLMT70” (sold separately).
CAUTION
• If you have been using the projector, the lamp will be very hot, and may cause burn injuries.
Wait for the lamp to cool (for at least 45 minutes) before replacing it.
• If the lamp should break, please handle with care to avoid injury due to broken pieces and contact your dealer for repair service.
1. Turn off the power and unplug the power cord. Turn off all connected devices and disconnect all
other cables.
Additional information
31
Page 32

2. Loosen the screws on the lamp cover.
The lamp door is on the side of the projector.
3. Remove the lamp cover.
4. Loosen the screws that hold the lamp to the projector. It is strongly
recommended that you use a magnetic-head screwdriver to prevent
the screws from dropping inside the projector.
5. Slowly pull the lamp straight out of the projector.
Pulling it too quickly may cause the lamp to break and scatter broken glass in
the projector. To reduce the risk of injuries to fingers and damage to internal
components, use caution when removing lamp glass that has shattered.
Do not place the lamp in locations where water might splash on it, where
children can reach it, near or above heat sources, or near flammable materials.
Do not insert your hands into the projector after the lamp is removed. Touching
the optical components inside the projector can cause color unevenness and distortion of the
projected images.
6. Insert a new lamp. Ma ke sure it is securely in place.
7. Tighten the screws securing the lamp box.
8. Reinstall the lamp cover.
9. Tighten the screws on the lamp cover.
Do not over-tighten the screws.
Loose screws may cause a bad connection, which could result in
malfunction.
10. Turn the power on. Open the Setup > Lamp > Reset Lamp
Timer menu to reset the lamp time.
Do not turn the power on with the lamp cover removed.
Whenever the lamp is replaced, reset the total lamp operation time.
Do not reset the lamp time if the lamp is not replaced, as this could cause damage.
Additional information 32
Page 33

English
Indicator lights
The front of the projector has three lights that indicate its status. Check the following for information
about the indicator lights. If an abnormal condition is indicated, turn off the projector and contact your
dealer.
When the projector is in a normal state:
POWER TEMP LAMP State Remark
Orange Off Off Standby mode. --Flashing
Oange
Green Off Off
Flashing
Green
Off Off The projector is powering up. Cannot turn off the projector.
Off Off
The projector is under normal
operation.
(1) The projector needs 110
seconds to cool down, as it
was abnormally shut down
without the normal cooling
down process. Or
(2) The projector needs to cool
down for 110 seconds after
the power is turned off.
---
Cannot turn on the projector.
When the projector is in an abnormal state:
POWER TEMP LAMP State Remark
Solution:
• Install a new lamp.
• Please contact your dealer
for assistance.
Solution:
• Make sure the ventilation
holes are not blocked.
• Relocate the projector.
• Stop using the projector until
the ambient temperature
falls within the specified
range. The maximum
operating temperature is
specified as 35°C (95°F).
Solution:
• Make sure the power supply
is stable.
• Check if there is an obeject
stuck in the fans.
• Contact your dealer.
Orange Off Red
Orange Red Off
Orange
Flashing
Red
Flashing
Red
(1) The lamp has exceeded its
usage life. Or
(2) The lamp is not properly
attached or is damaged.
The internal temperature is too
high.
• The intake ventilation or the
exhaust ventilation is blocked.
• The projector may be in a
poorly ventilated location.
• The ambient temperature
may be too high.
The fans are not working.
Additional information
33
Page 34

Troubleshooting
Problem Cause Remedy
The
projector
does not
turn on.
No picture.
Image is
unstable.
Picture is
blurred.
Remote
control does
not work
correctly
There is no power from the
power cord.
The power switch is not in the
ON position.
Attempting to turn the projector
on again during the cooling
process.
The lamp cover is not securely
attached.
The video source is not turned
on or connected correctly.
The projector is not correctly
connected to the input source
device.
The input signal has not been
correctly selected.
The connection cables are not
securely connected to the
projector or the signal source.
The projection lens is not
correctly focused.
The projector and the screen
are not aligned properly.
The lens cap is still attached to
the lens
The batteries are out of power. Replace both of the batteries with new
There is an obstacle between
the remote control and the
projector.
You are too far away from the
projector.
Plug the power cord into the AC inlet
on the rear of the projector, and plug
the power cord into to a power outlet. If
the power outlet has a switch, make
sure it is switched on.
Put the power switch in the ON
position.
Wait until the cool i n g-d own process is
completed.
Correctly attach the lamp cover.
Turn the video source on and check
that the signal cable is connected
correctly.
Check the connection.
Select the correct input signal with the
INPUT buttons on the remote control or
INPUT on the projector.
Correctly connect the cables to the
appropriate terminals.
Adjust the focus of the lens using the
focus ring.
Adjust the projection angle and
direction as well as the height of this
unit if necessary.
Remove the lens cap.
ones.
Remove the obstacle.
Stand within 8 meters (26.2 feet) of the
projector.
p. 20
p. 18
p. 21
p. 11
p. 13
p. 20
p. 31
p. 18
p. 20
p. 18
p. 21
p. 20
p. 13
Additional information 34
Page 35

English
Specifications
Optical characteristics
Projection system
DMD chip
Lens
Projection size
Lamp
Electrical characteristics
Color system NTSC / PAL-M / PAL-N / PAL 60 / SECAM
Resolution XGA, SVGA, VGA, Macintosh®,
Max. number of display
colors
Input
Video, S-Video, Component (Y/ CB/ CR, Y/ PB/ PR)
RS-232C, RGBHV, HDMI
TM
Single-chip DLPTM system.
0.8 in. DMD 720P (1280 x 720)
1.35-times zoom ratio, F/# 2.4 ~ 2.8, f = 24 ~ 32
37 to 300 in. (0.94 m to 7.62 m)
250W
1080i, 720p, 576p, 576i, 480p, 480i
16,770,000 colors (full color display)
General characteristics
Weight 12 lbs (5.65 kg)
Power AC 100 - 240V, 4.0 A, 50 / 60 Hz (Automatic)
Power consumption Max 320 W
Operating temperature 5 °C to 35 °C (41°F to 95°F) ( 0 ~ 3000 fe et)
Operating humidity 10% to 90% (without condensation)
Storage temperature -10°C to 60°C (14°F to 140°F)
Storage humidity 10% to 90%
Note
• This model complies with the above specifications.
• Designs and specifications are subject to change without notice.
• This model may not be compatible with features and/or specifications that may be added in the
future.
Q Separately sold product
Replacement Lamp Model Model TLPLMT70
Dimensions
14.41 in. W x 5.28 in. H x 12.24 in. D (366 mm W x 134 mm H x 311 mm D)
14.41 /
366
12.24 /
366
5.28 /
134
Unit: in / mm
Additional information
35
Page 36

Control terminal
5
3
Pin assignment
7
8
6
4
1
2
Mini DIN 8 pin connector 8 NC No connection
Pin No. Signal Name Description
1 RD Receiving data
2 CTS Consent to send
3 DSR Data set ready
4 GND Signal ground
5 RTS Request to send
6 12V trigger Screen trigger. The projector
outputs 12 Voltage after
power-on.
7 TX Sending data
Interface format
1 Communication method RS-232C, 9600bps, No Parity, Data Length: 8 bits;
Stop Bit Length: 1 bit
2 Communication format
If commands are to be sent consecutively, wait for the response from the projector before sending the
next command.
Command (5Byte) CR (0Dh)
Only 1 command valid per communication.
Main Commands
Item Command
Power on/off X001X
Full X061X
4:3 X062X
Zoom X063X
Theater Wide X064X
Through X065X
Video X131X
S-Video X132X
GBR-HD X133X
HDMI
Component 1 X139X
Component 2 X140X
Item Command
TM
X134X
Contact your dealer for control cable and other commands.
Additional information 36
 Loading...