

Page 1
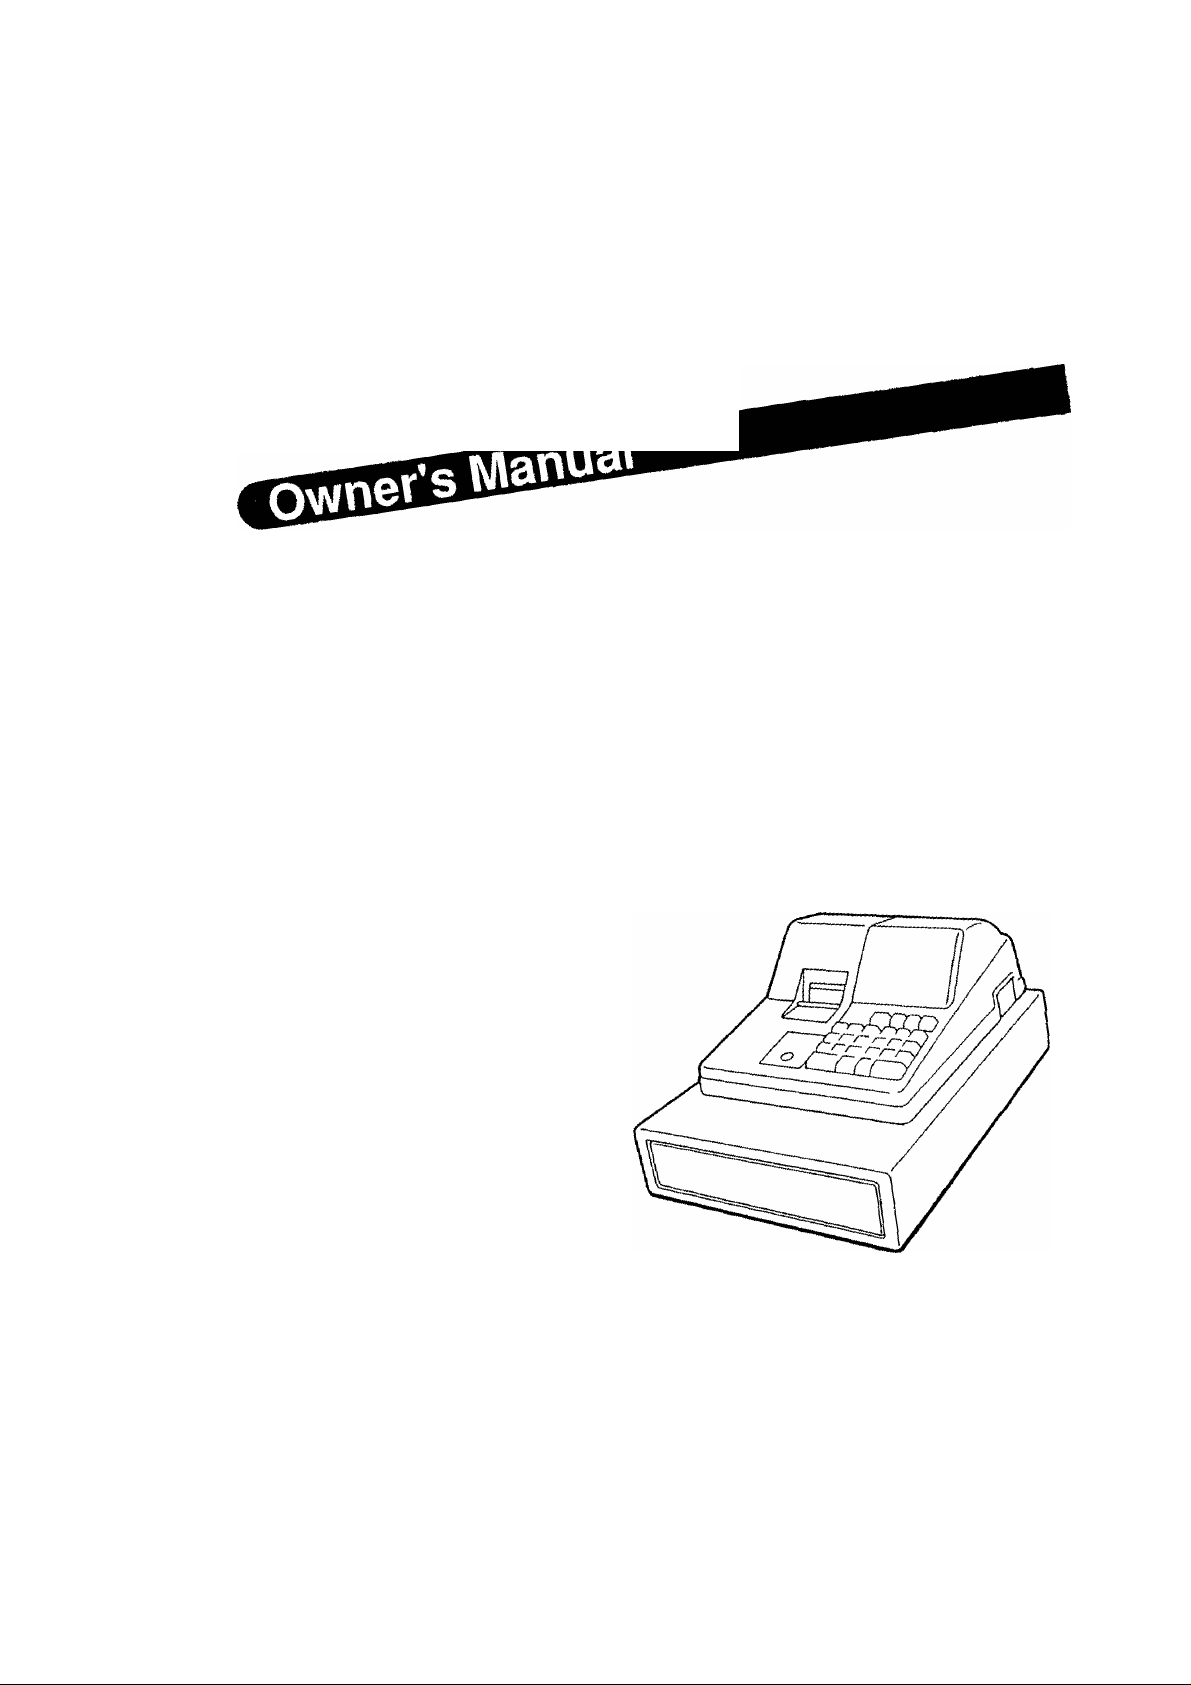
TEC Electronic Cash Register
MA-55 (US Version)
TEC
tokvo
euecTP'C
Page 2

----------------------------------------------------------NOTICE-------------------------------------------------------------
This equipment has been tested and found to comply with the limits for a Class A digital
device, pursuant to Part 15 of the FCC Rules. These limits are designed to provide
reasonable protection against harmful interference when the equipment is operated in a
commercial environment. This equipment generates, uses, and can radiate radio frequency
energy and, if not installed and used in accordance with the instruction manual, may cause
harmful interference to radio communications. Operation of this equipment in a residential
area is likely to cause harmful interference in which case the user will be required to correct
the interference at his own expense.
WARNING
"THIS DIGITAL APPARATUS DOES NOT EXCEED THE CLASS A LIMITS FOR RADIO
NOISE EMISSIONS FROM DIGITAL APPARATUS SET OUT IN THE RADIO INTERFER
ENCE REGULATIONS OF THE CANADIAN DEPARTMENT OF COMMUNICATIONS."
"LE PRÉSENT APPAREIL NUMÉRIQUE N’EMET PAS DE BRUITS RADIOÉLECTRIQUES
DÉPASSANT LES LIMITES APPLICABLES AUX APPAREILS NUMÉRIQUES DE LA
CLASSE A PRESCRITES DANS LE RÉGLEMENT SUR LE BROUILLAGE RADIOÉLEC
TRIQUE ÉDICTÉ PAR LE MINISTÈRE DES COMMUNICATIONS DU CANADA."
Copyright © 1993
by Tokyo EiBCtrIc Co,, Lid.
Ati Righli Reserved
1-ie-tO Uchikenda, Chlyoda-ku. Tokyo, JAPAN
Page 3

1. Introduction
Thank you for choosing the TEC electronic cash register MA'55 series. This
instruction manual provides a description of the functions and handling of this
register and should be read carefully to ensure optimum performance. Since every
consideration has been given to safety and reliability, there is no danger of damaging
the machine by incorrect operation.
Please refer to this manual whenever you have any questions concerning the
machine. This machine has been manufactured under strict quality control and
should give you full satisfaction. However, if the machine is damaged during transit,
or there are any unclear points in this manual:
For supplies, service or assistance call;
LOM1074
Please have the following information available when
you call:
Product Name: TEC Electronic Cash Register
Model: MA-55
Serial Number: ___
Place Purchased;_________
_________________
______________
_
Date of Purchase:
If tor any reason this product is to be returned to the store
where purchased, it must be packed in the original carton.
The specifications described in this manual may be modified by TEC, if neces
sary.
Be sure to keep this manual for future reference.
-1 -
Page 4
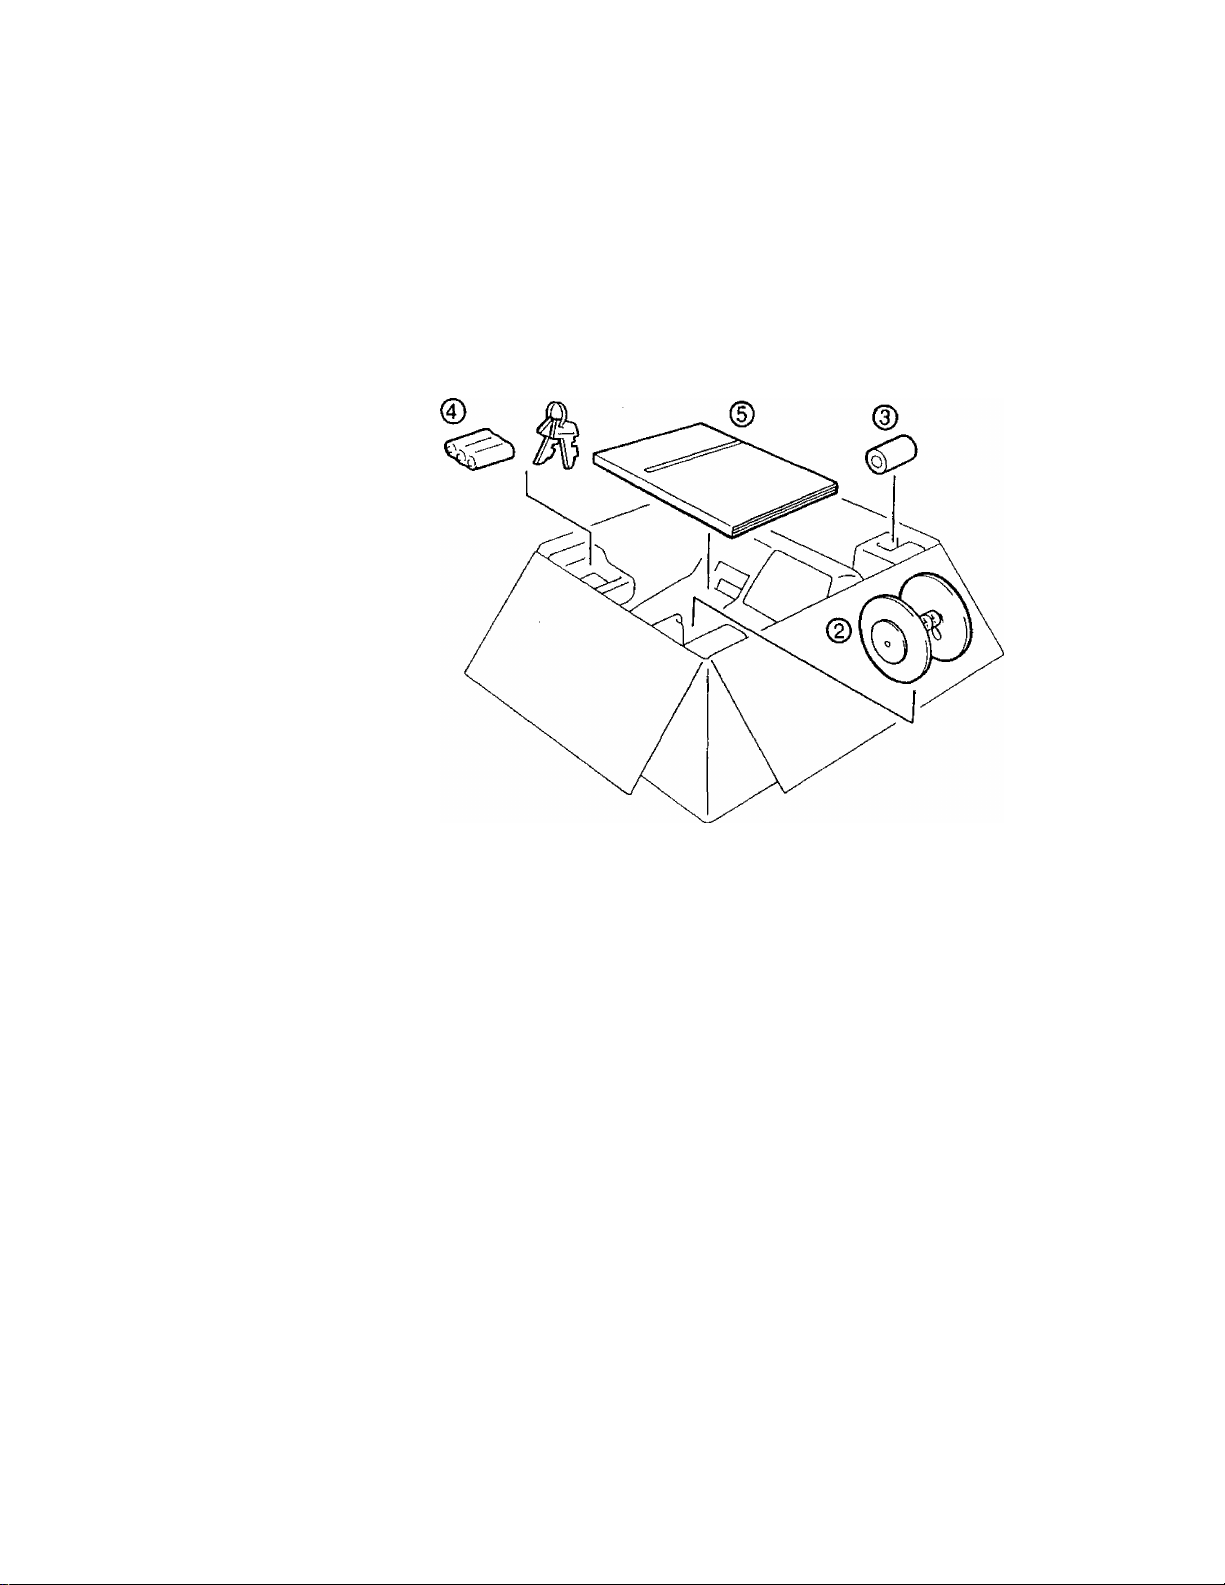
2. Unpacking
E01-11074
©
^Control Keys (M Key; 2 pcs.)
(^Journal Take-up Reel (1 pc.)
@Paper Roll 57mm x 030mm (1 pcs.
(3) Dry Batteries (SUM-3 1.5V; 3 pcs.
(^Owner's Manual (1 pc.)
2 -
Page 5

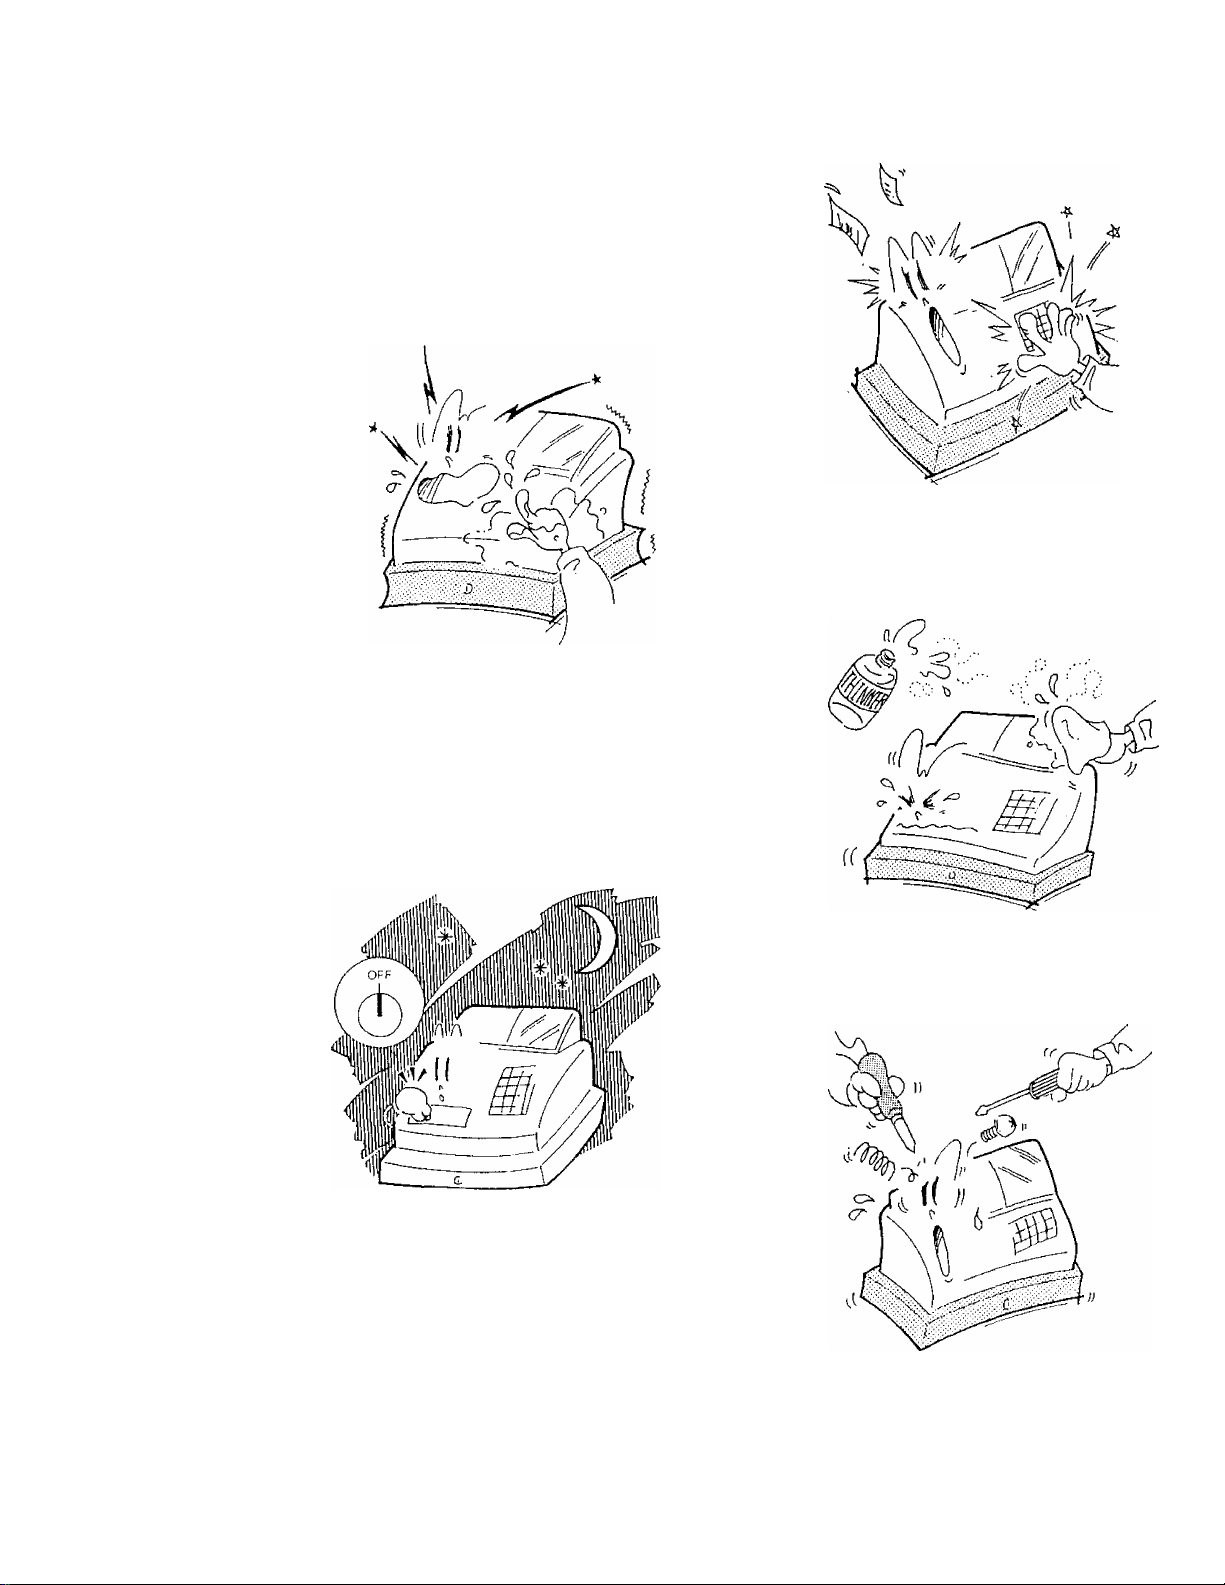
3. Precautions
The ECR is a precision machine. Please handle it carefully considering the following
guidelines.
Remarks on the Location
Do not place it where unusual temperature
changes are expected or where it will be
subject to direct sunlight.
Place it on a flat and level surface with little
dust, humidity, vibration, etc.
EOM1074
Keep it away from water sources.
Be certain that the power voltage in your area
matches that required for the machine. {The
rated voltage is 117V ±10% AC.)
The socket-outlet shall be installed near
the equipment and shall be easily ac
cessible.
- 3 -
Page 6
Remarks on Operating the ECR
The keys on the keyboard function with a light
touch. Avoid pressing the keys too hard.
Do no handle the machine with wet hands,
since this may cause electrical malfunctions
and corrosion of parts.
EO1-11074
Do not apply thinner, benzine, or other vola
tile materials to the cabinet or other plastic
parts. Such liquids will cause discoloration or
deterioration, if dirty, wipe off with a piece of
cloth soaked in a neutral detergent and
wrung out thoroughly.
Turn the Control Lock to OFF position when
all operations are completed after business
hours.
Never try to repair the ECR. In the event of
a problem, please call your authorized TEC
dealer, reseller or local TEC representative.
Page 7

4. Table of Contents
Chapter Page
eol-11074
1. Introduction
2. Unpacking
3. Precautions
............................................
...............................................
.............................................
4. Table of Contents........................................ 5
5. Outline of Preparation Procedure Before Operating the ECR
6. Appearance and Nomenclature
7. Control Lock and Control Key
..............................
.............................
...
8. Display................................................ 10
9. Keyboard............................................... 11
Functions of Each Key
10. Installing the Paper Roll
11. Programming
.........................................
.................................
............................
11
13
16
Time Setting.......................................... 16
Date Setting.......................................... 16
Setting Department Preset Prices
Setting Department HALC and System HALC
Department Tax Status & Negative Status
Department Itemized/Single-item Status
% Preset Rate Setting
.................................
.......................
.................
.................
..................
19
19
20
20
21
% Calculation Fraction Rounding Process Selection........21
Tax Feature Selection..................................22
% Key Type & Tax Status, Amount Form Setting
............
22
System Option 1 Setting................................23
System Option 2 Setting................................23
System Option 3 Setting................................24
Tax Table Setting
12. Verification of Programmed Data
13. Daily Operation Flow
.....................................
.......................
.................................
25
29
30
14. Transaction Entries..................................31
When an error has occurred............................. 31
Displaying the Time and Date........................... 31
No-sale
Sale Item Entries {Department Entries)
Percent Discount or Percent Charge
Void
..............................................
..................
.....................
................................................
32
32
34
34
Manual Tax............................................35
Non-add Number Print
..................................
35
Subtotal Read......................................... 35
Taxable Total Read
Finalizing a Sale
Received-on-Account Payment
Paid Out
.............................................
....................................
.....................................
............................
35
36
38
38
15. Read (X) and Reset (Z) Reports........................39
16. Maintenance
.........................................
40
Replacing the Paper Roll...............................40
Replacing the Ink Roller
Manual Drawer Release
Removing the Drawer
Battery Exchange
17. Specifications
......................................
......................................
..............................
.................................
...................................
41
41
42
42
43
1
2
3
6
8
9
-5-
Page 8
5. Outline of Preparation Procedure Before Operatino
the ECR
This chapter shows the outline of set-up procedure of the ECR before actually starting
the ECR operation.
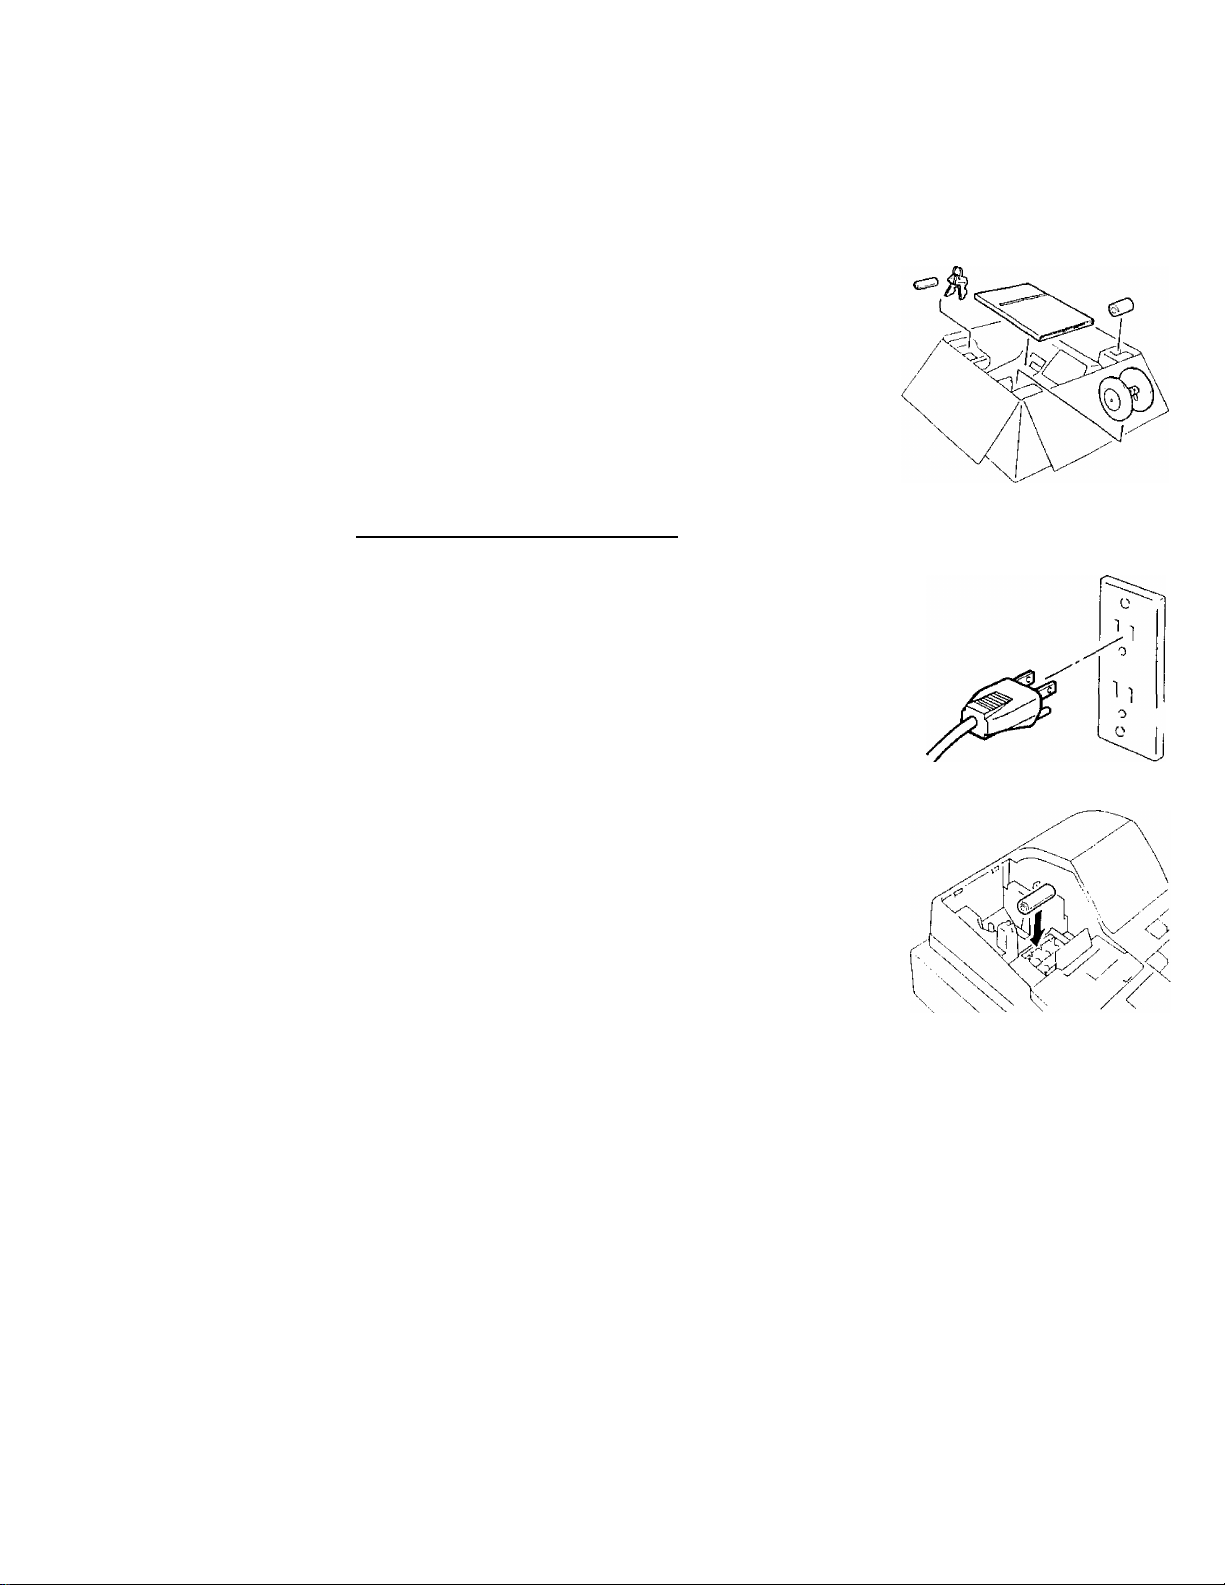
Remove the cash register from the carton, referring to
Chapter "2. Unpacking" on page 2. And take out all the
parts and accessories.
Remove the tapes and seals that are holding parts or
~j| protecting the register surfaces.
________________
EO1-11074
Plug the power cord of the register into a wall outlet.
Make sure that the outlet voltage matches that of the
power required for the register.
NOTE: Before the batteries are inserted, be sure to insert
the power plug.
Detach the Paper Cover and the Battery Cover, then
insert the batteries (3 pieces).
WARNING: Be certain to insert the batteries enclosed in the
package. If they are not insert and the power is
turned OFF (including a power failure occurrence),
the sales data and the programmed data will be
cleared.
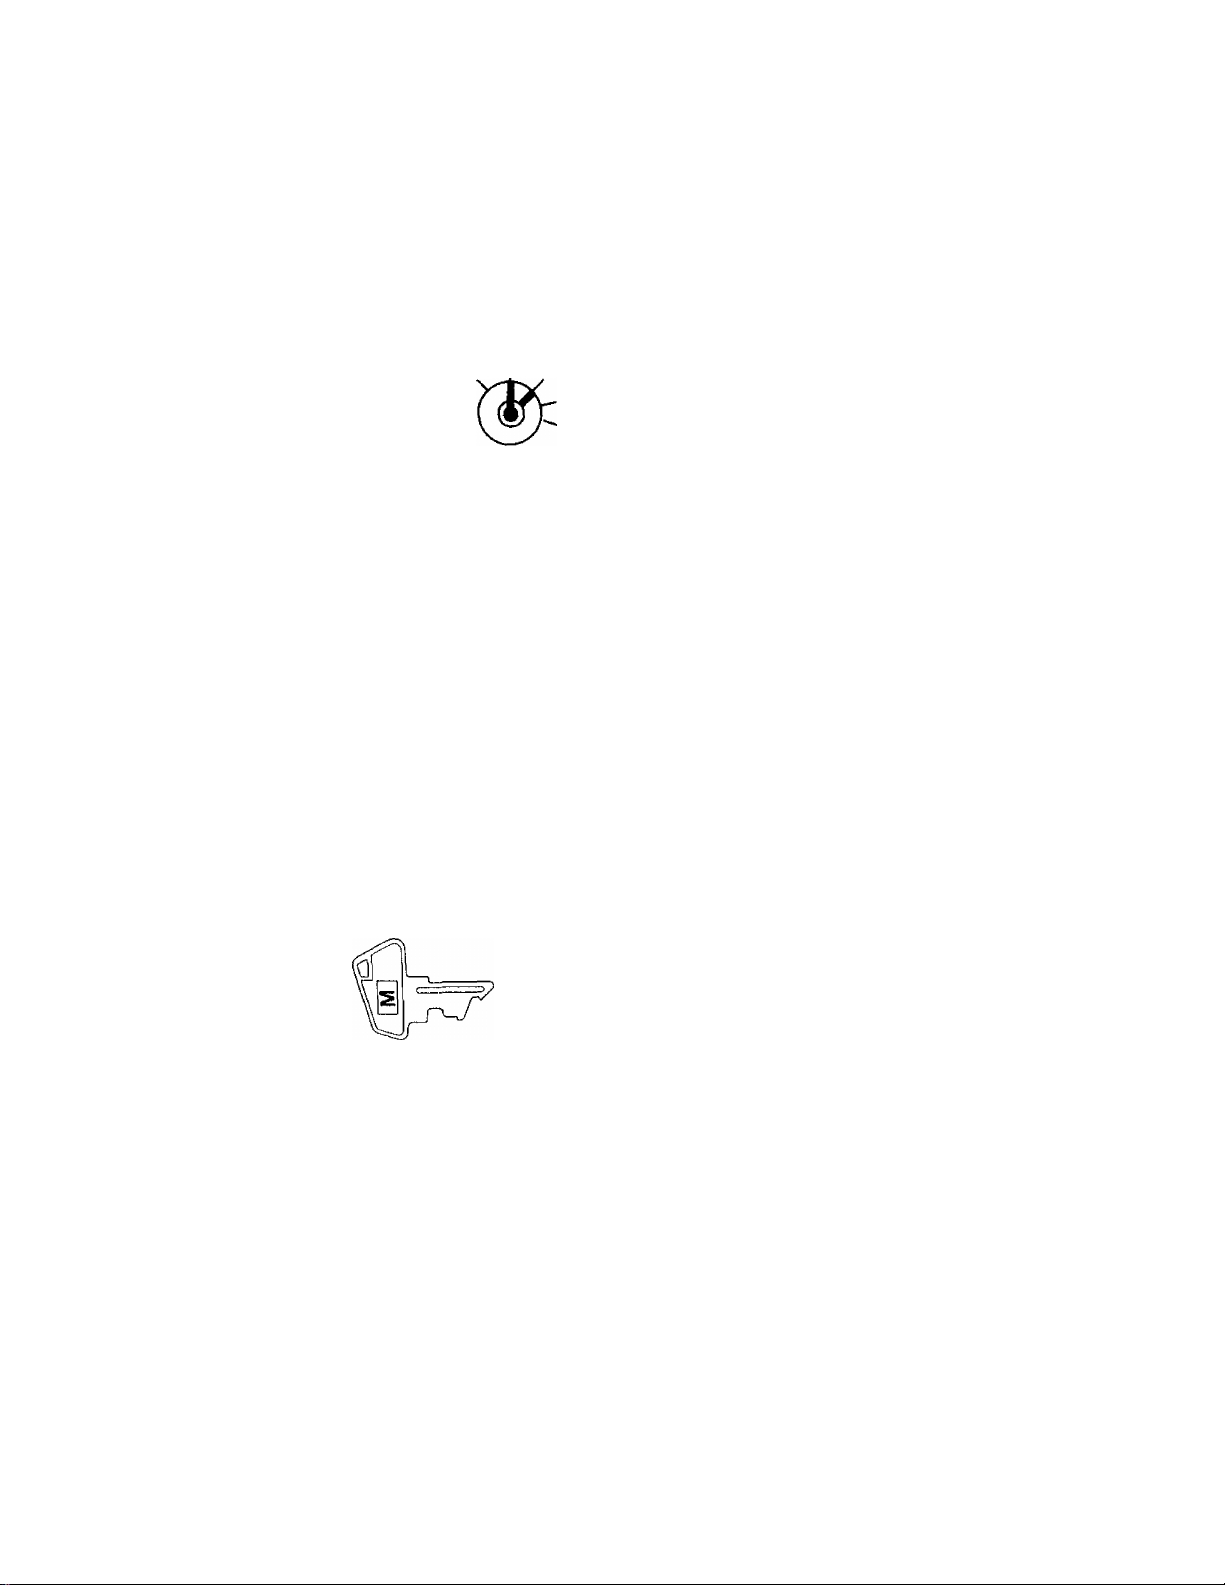
Insert the Control Key (M Key) into the Control Lock.
Turn the Control Lock to the REG1 position.
OFF
REG2 1 REG1
OFF
REG2 i^EGt
-6-
Page 9

Install the Receipt or Journal roll (referring to Chapter
"10. Installing the Paper Roll'}
Set the time and date correctly, referring to "Setting
the Time and Date" in Chapter 11.
Set the tax tables, referring to "Tax Table Setting" in
Chapter 11.
E01-11074
Perform other programming operations, such as pro
gramming of Departments, according to the require
ment of the market and your store (refer to Chapter 11
and thereafter).
- 7-
Page 10
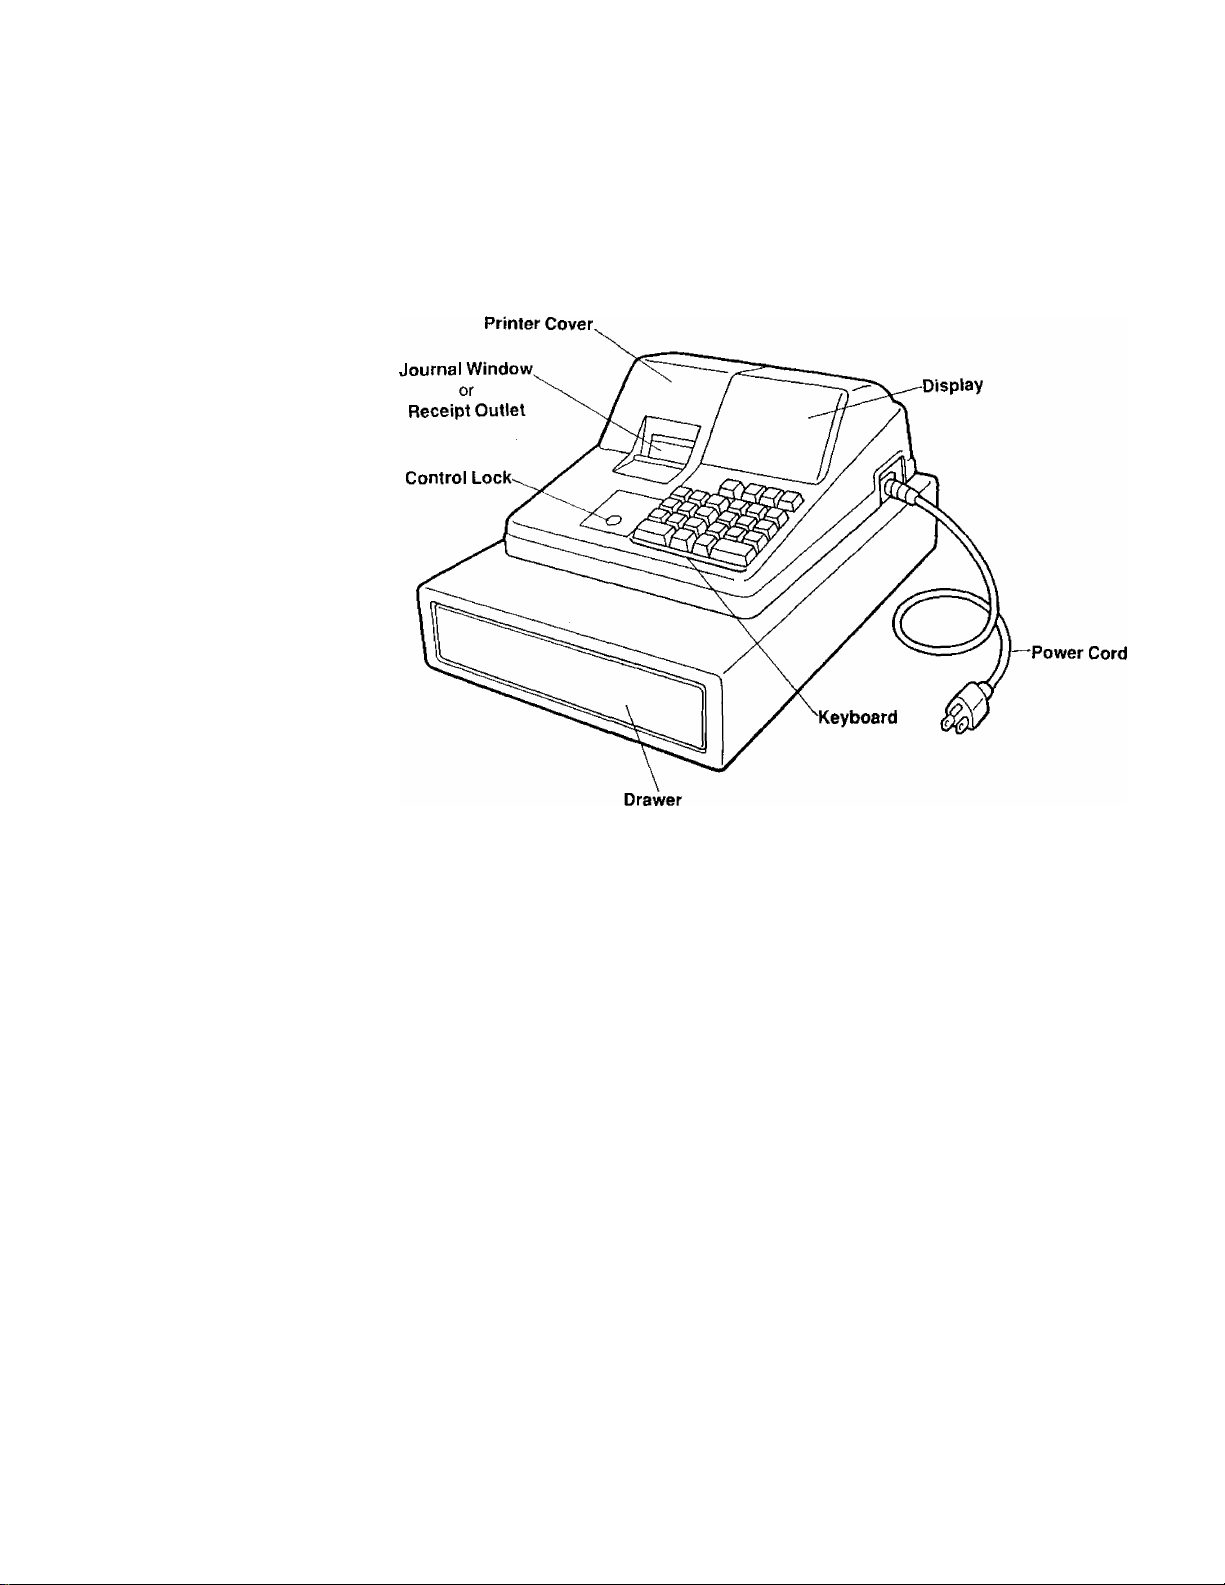
6. Appearance and Nomenclature
EO1-11074
Printer Cover
The cover for the Receipt or Journal paper
holder and the printer.
Receipt Outlet or Journal Window
The receipt for the finalized sale is issued
with the Receipt-format option.
Or, the operator can see which items have
already been entered through this window
with the Journal-format option.
Display
Used by the operator to confirm the entry
contents and the status of the register,
(page 10)
Control Lock
It selects the type of register operations,
(page 9)
Keyboard
Used to enter sale items, {page 11)
Drawer
Cash and other media are kept here. It
automatically opens on finalizing a sale.
8 -
Page 11
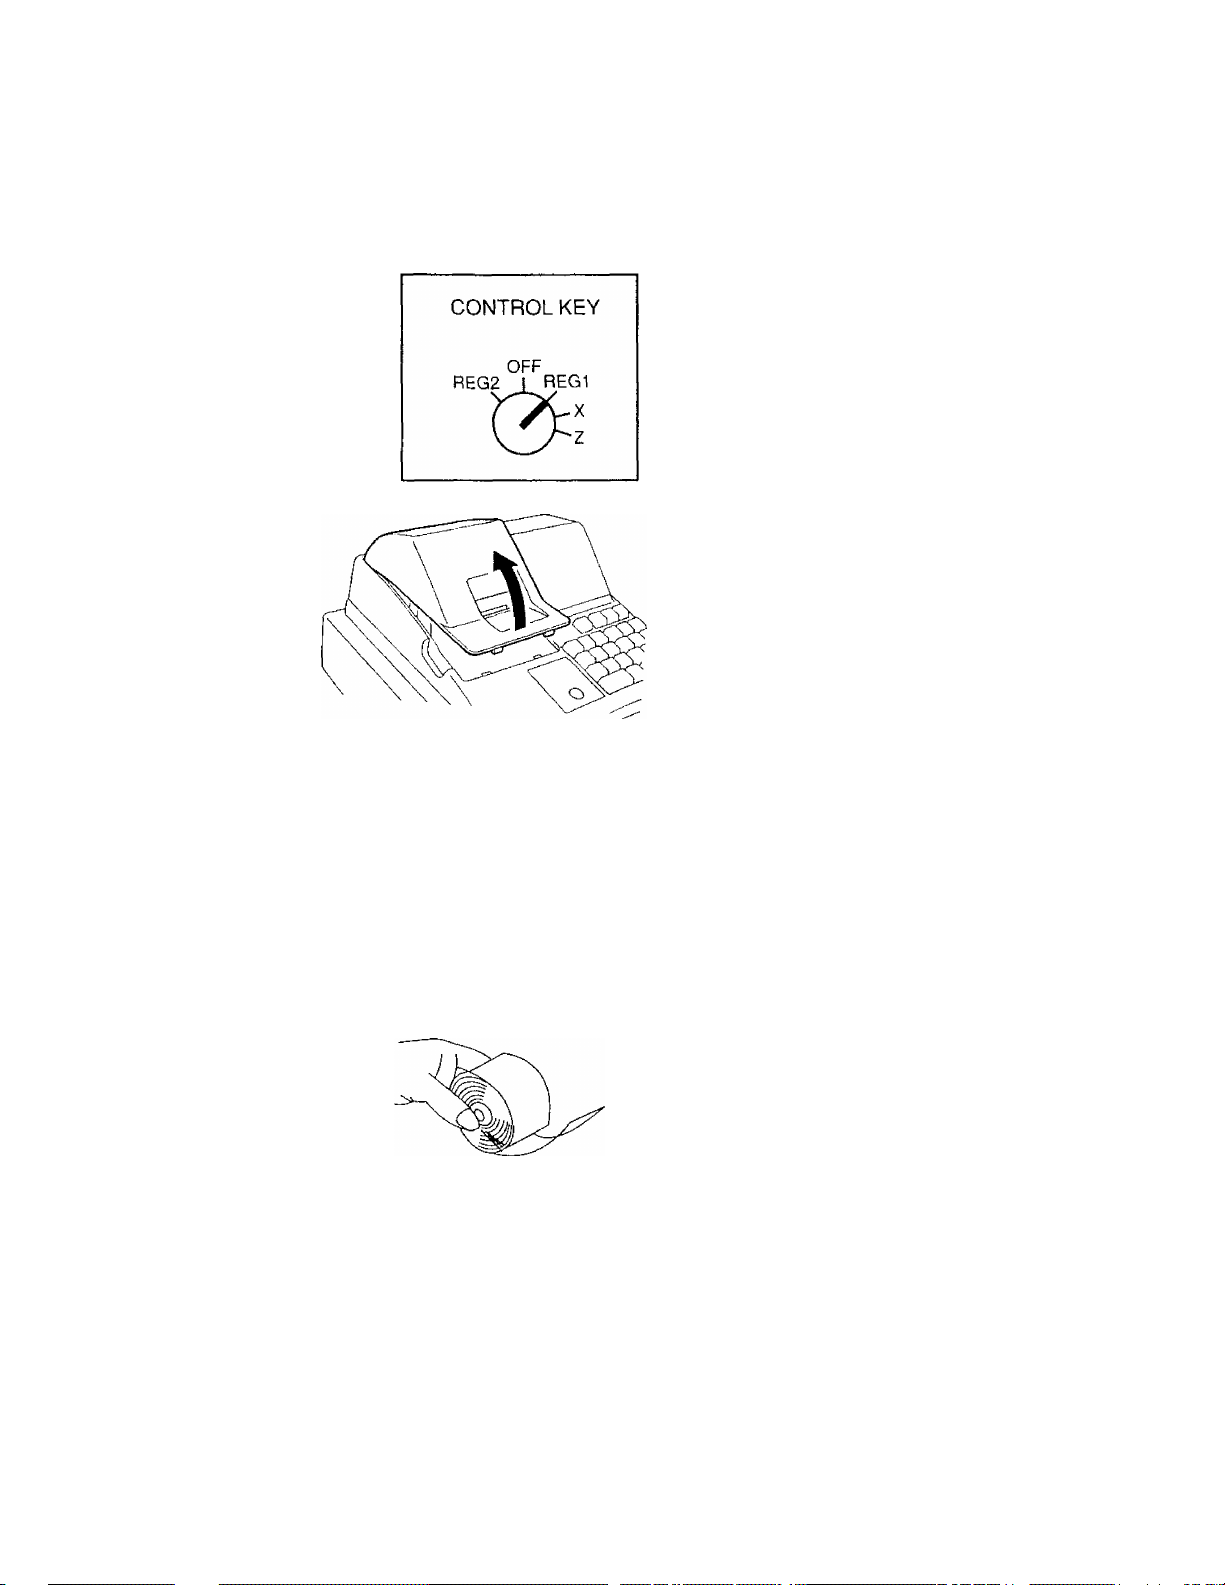
7. Control Lock and Control Key
Control Lock
EOM1074
OFF
REG2 I REGI
OFF...
REGI
REG2
.Stops register operations and
extinguishes the display.
.Used to register normal sales
with receipts (or jounals)
printed.
.Used to register normal sales
without any receipt (or journal)
printed.
.Used to read sales totals proc
essed in the register report
memory (X report). Receivedon-Account and Paid Out op
erations are also performed in
this position.
.Used to read and reset sales
totals in the register report
memory (Z report). Also used to
program preset data and read
those data.
Control Key
Two keys of the same type are packed in the carton. It is used
to turn the Control Lock to a required position. The key may
be inserted or pulled out in the OFF or REG1 position.
- 9
Page 12

8. Display
Description
EOM1074
n n n
U'UU
Amount
- Negative Mark or Repeat Count
n n^n
u f^D LI - a oj
Department Code, Message Descriptor
Amount
Negative Mark
Repeat Count
Department Code
Message Descriptor:
Displays the numeric data, such as amount, quantity, etc.
Displays the current time or date when the [X] key is de
pressed in the REG1 or REG2 mode.
When a Void, Percent Discount, or Negative Department item
has been entered, the Negative Mark is displayed.
The mark is also displayed when the subtotal or sale total is
obtained and the amount is negative.
'Displays the repeat count of the same item being entered.
The count display shows up from the second entry on, and
only the last digit will be displayed even if the count exceeds
nine.
. Displays the Department Code (1 to 4) when the correspond
ing Department Key is depressed for any sale Item entry.
(Subtotal)
O
Indicates that the displayed amount is the current
subtotal of the sale.
(Total)
o
Indicates that the sale is finalized and the displayed
amount is the sale total.
(Change)
n
Indicates that the sale is finalized with an amount
tendered and the displayed amount is the change
due.
n
(Error)
Indicates that the last operation has caused an error.
10-
Page 13
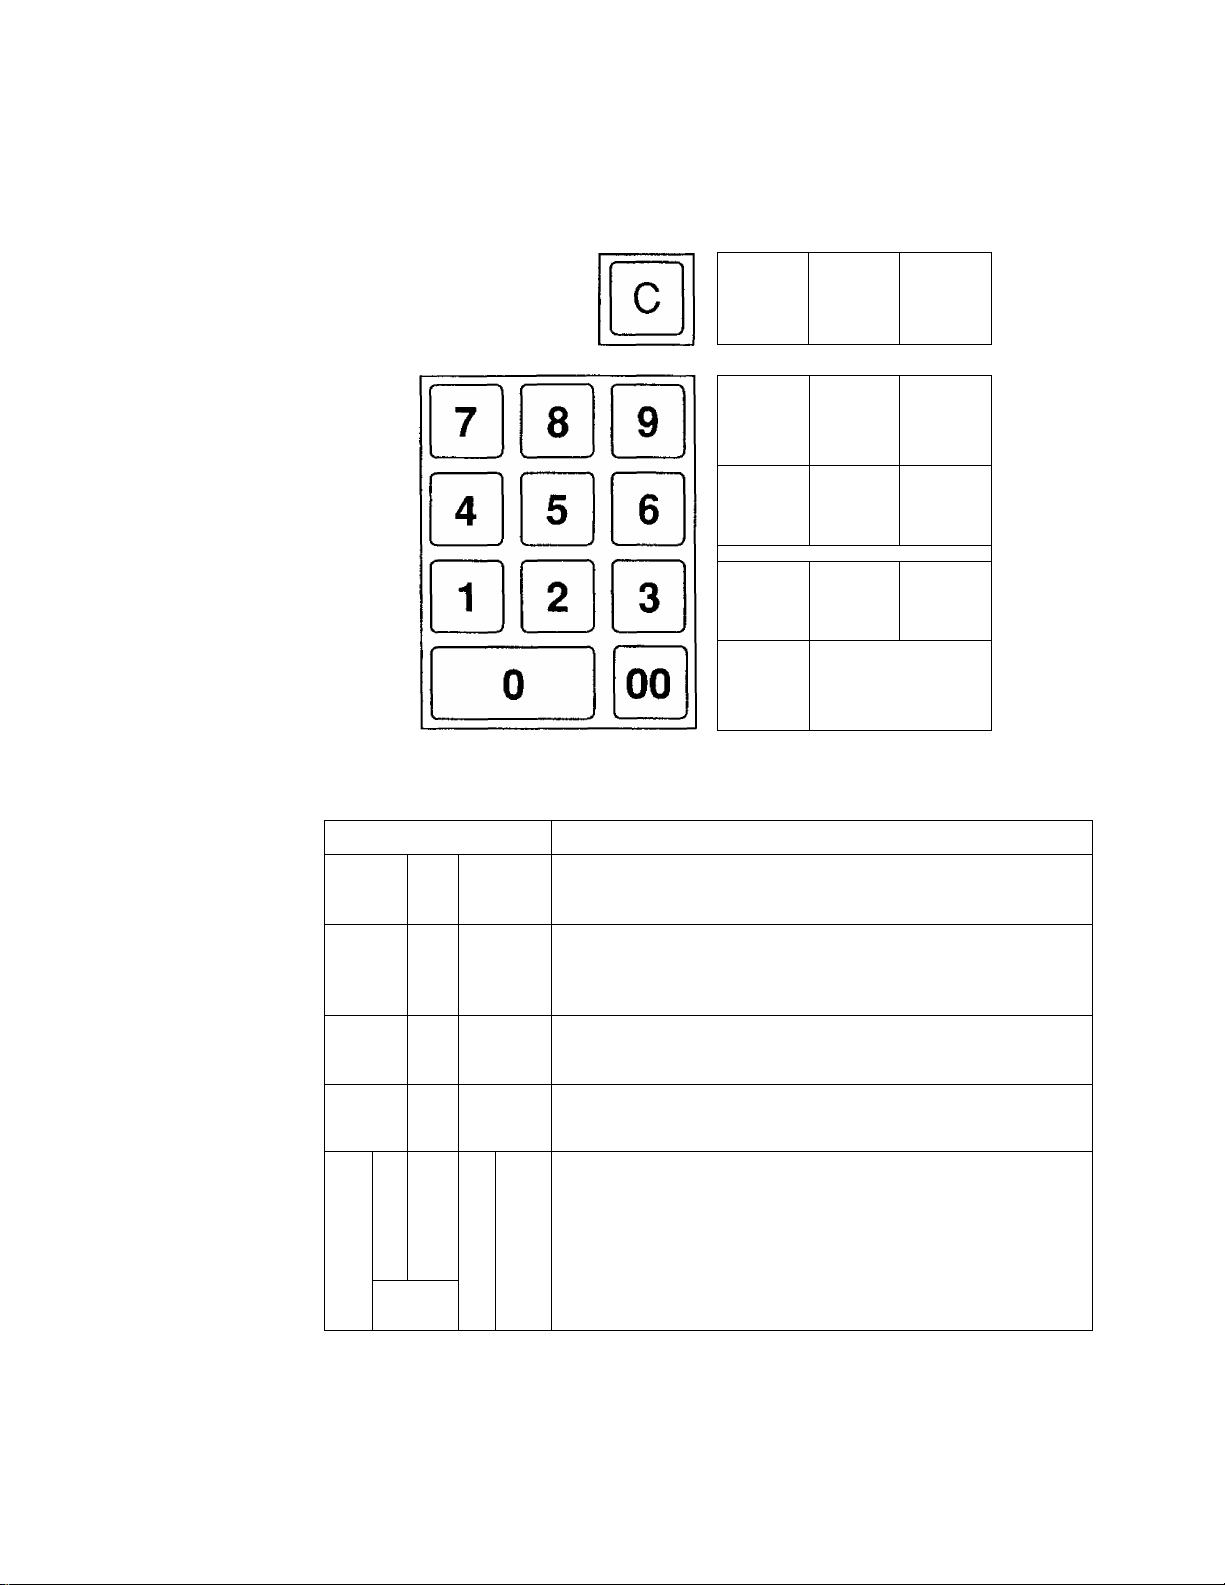
9. Keyboard
The following shows the key layout on the MA-55 keyboard;
------
EO1-11074
'
Functions of Each Key
KEY
'
c
Clear Key: Used to clear a wrong entry or operation error.
X
.
-
^
...... ^
-
VD
TX1/M
4
PO
_
______
' '
TX2/M
3
R/A
ST
2
-
1
FUNCTION
FEED
-
-
--------
-
.
______ j
Chg
AT/TL
-
/o
#/
/NS
7
4
[H
X
VD
FEED
E
B
B
0
9
6
3
00
Multiplication / Date & Time Display Key: Used to enter
sale items by multiplication inside a sale. Also used to
display the time or date outside a sale.
Void Key: Used to delete items already entered in the
current sale.
Feed Key; Used to feed the receipt or journal paper.
Numeric Keys: Used to enter numeric data, such as
amounts, quantities, and code numbers.
The [00] key functions the same as depressing the [0] key
twice consecutively.
11
Page 14

EOM1074
' ^
1
KEY
to
TX1/M
PO
TX2/M
R/A
%
y
/NS
_
____
FUNCTION
Department Keys 1 to 4; Used to enter sale items and
4
^
process the amount into appropriate departments.
Tax 1 Modifier / Paid Out Key (X Mode): Used inside a
sale to reverse the Tax 1 status of departments from
taxable to non-taxable, or vice versa. When outside a sale,
it is used to record amounts paid out of the drawer without
relating to a sale.
Tax 2 Modifier / Received-on-Account Key (X Mode):
Used inside a sale to reverse the Tax 2 status of depart
ments from taxable to non-taxable, or vice versa. When
outside a sale, it is used to record received-on-account
payment amounts.
Percent Charge or Discount Key: Used toadd orsubtract
a percent rate, preset or manually entered, to or from the
sale or an individual sale item. Whether the key is used as
Percent Charge or Percent Discount can be programmed.
Non-add Number Print / No-sale Key: When depressed
with a prior number entry, it functions as Non-add Number
Print Key. When simply depressed without a numeric entry
outside a sale, it functions as No-sale Key.
ST
Chg
AT/TL
Subtotal Key: Used to obtain a subtotal (sale total amount
up to the moment).
Charge Key: Used to finalize a sale as charge (non-cash
media sales, such as check, house charge, credit cards,
etc. defined by the store) by a simple depression without
any numeric entry (Total Function only).
Cash Amount Tender/Total Key; Used to finalize a sale
as cash by depressing with a prior tendered amount entry
(Tender Function) or by a simple depression without any
numeric entry (Total Function).
12-
Page 15
10. Installing the Paper Roll
E01-11074
Turn the Control Lock to the REG1 posi
tion using a Control Key.
Remove the Paper Cover.
rXi
y
j
Cut the paper end to make it sharp.
Hold the paper roll so that the paper end
will be fed from the bottom.
- 13
Page 16

EOM1074
Piace the paper roll in the paper pocket.
Insert the paper end into the Paper Inlet
located on the rear side of the printer, and
hold down the [FEED] key on the keyboard
until the paper end comes out of the outlet.
If the printer is used for journal, fold the top
end of the paper and insert the folded end
into the slit of the Take-up Reel Shaft.
Then wind the paper two or three times, set
the reel to the holder, and hold down the
[FEED] key for a while to tense the paper.
If the printer is used for receipts, do not
wind the paper end around the Journal
Take-up Reel.
- 14-
Page 17

EOM1074
If the printer is used for journal, simply
attach the Paper Cover. The Receipt
Outlet is used as Journal Window.
If the printer is used for receipts, attach the
Paper Cover with the paper end coming
out of the Receipt Outlet located on the
Paper Cover.
15-
Page 18

11. Programming
The time and date should be adjusted and such data as status of each department,
percent rate, etc. should be programmed before starting sale entries. Printing occurs
as programming is proceeded.
• The programmed data will be retained by dry batteries even if the power of
the machine is turned OFF or a power failure occurs.
EOM1074
• Turn the Control Lock to the Z position before starting reg
any programming operation (Time Setting and Date
Setting can be operated in either X or Z position). f
• Key indications in the operation patterns in this manual:
Time Setting
I I
. ..
Entry through a Numeric Key □ . Function Key depression
(Control Lock; X or Z)
2
The 24-hour system (military time} is used for time setting.
□□□□ — Q (No printing occurs. Indicates the set result in the
Hour Minute
display.)
(00 to 23) (00 to 59)
Date Setting
]□ □□ DC
Month Day Year
(Control Lock: X or Z)
X
I
(No printing occurs. Indicates the set
’ result in the display.)
(01 to 12) (01 to 31) (93,94, etc.)
NOTE: The dale entry order above shows the initial set order. The entry order of Day-
Month- Year or Year-Month-Day can be selected instead of Month-Day- Year by the
Date Entry Order option to be described iater.
Sample Programming Operations
To set the time to 1:05 pm and the date to August 5.1993:
Display
(Time Setting)
n 1 nr
LI 1
LIO
(□ to clear the time display
0[1]0[I][9][I][3 (Date Setting)
- 16-
nn nr
UO ~ UO
Value of
seconds
nn
LI LI
nr\n
LMO LI
ri -f
~ oo
Page 19

E01-11074
The following programming operations are performed in the common operation
pattern as shown below. You may go through a specific programming operation or go
through all the operations at one time.
Common Operation Pattern
Control Lock; Z
, nnna
A Subnnode No,
(3 digits)
. □
...................
Entry of data to be set
(Number of digits varies ac
Only displays the set data (no
print occurs).
□[s^
cording to each submode)
To continue to another Submode No.
Prints the set data as well as
preset data of all other
Submode Nos.
Submode
No.
001
002
003
004
005
006
007
008
009
010
oil
012
013
014
Submode No. and Programming Operation
Programming Operation
Department 1 Preset Price
Department 2 Preset Price
Department 3 Preset Price
Department 4 Preset Price
Department HALC & System HALC
Department Tax & Negative Status
Department Single-item Status 4 digits
% Key Preset Rate 4 digits
% Calculation Fraction Rounding 2 digits
Tax Feature Selection
% Key Type & Status, Amount Form &
Amount Division Symbol
System Option 1
System Option 2
System Option 3
Entry data to
be set
Max. 5
digits for
each
5 digits
4 digits
2 digits
2 digits
2 digits
for each
- 17
Page 20

EOI-11074
The following table shows the initial settings of the machine before changing the
programming data. Select the programming operation whose data must be changed
referring to the table.
Initial Settings
Submode No.
001 to 004
Department 1 to 4 Preset Price (one for each)
Programming Operation
Department 1 to 4 HALC (one for each)
005
System HALC
006
Department Tax Status
Department Negative Status
007
008
Department Single-item Status
% Preset Rate
009 % Calculation Fraction Process
010
Oil
Tax Feature
% Key Type, Its Tax Status
Amount Form, Amount Division Symbol
Initial Setting
None {= open price)
None (= 7 digits)
None (= 8 digits)
Dept, 1 : Tax 1 Taxable
Dept. 2: Tax 1 Taxable
Dept. 3: Non-taxable
Dept. 4: Non-taxable
Dept. 4; Negative
Others: Positive
All Depts.: Itemized
10.00%
Round Off
Tax 1: Add-on Tax
Tax 2: Add-on Tax
%- Key, Non-taxable
0.00 (Point)
012
013
014
System Option 1 (Print/Non-print Option in sales)
Consecutive No.
Subtotal (automatic subtotal)
Current Time
Subtotal (manual [ST] key depression)
Taxable Total 1
Taxable Total 2
Print
Print
Print
Non-print
Non-print
Non-print
System Option 2
Printer used for:
Consecutive No. resetting after Z Report
Time System for Display & Print
Receipt
Non-resettable
12-hour system
Date Entry Order Month-Day-Year
System Option 3
Tender to finalize a sale as cash
[ST] Key before finalizing any sale
Not compulsory
Not compulsory
GST Feature (for CANADA) Not applicable
18-
Page 21

Setting Department Preset Prices
A unit price of up to 5 digits can be preset on each Department Key.
E01-11074
Lil —► □
Submode No.:
001 for Dept. 1
002 for Dept. 2
003 for Dept. 3
004 for Dept. 4
................................................
□ \E]
Preset Price
(1 to 99999; max, 5 digits)
When 0 (zero) is entered
here, the Department is set
as an open-price depart
ment.
Display Example) $1.00 is set to Dept. 3:
riri “/
U UJ
Submode No.
Preset Price
(= Dept. No.)
n n I n n
U Li I Li Li
now set
Setting Department HALC and System HALC
The HALC {High Amount Listing Capacity) is used to check excessively high
amounts entered by mistake. By setting HALCs, such mistakes will be prevented
at the earliest stage.
Dept.2 Dept.4
Dept.1 Dept.3 : System
Lll
Submode No.
□□nnnm
HALC for each dept.
0 to 7 {indicating the
number of digits for
max. amount entry
allowed); 0 is the
same as 7.
\
For example, if "3" is entered, it means 3 digits and
the high amount limit is 999 {$9.99},
HALC for Sale Finalization,
Manual Tax, Received-onAccount, Paid Out.
0 to 8 (indicating the
number of digits for max.
amount allowed); 0 is the
same as 8.
______
'/
Display Example)
4 digits for Dept. 1
5 digits for Dept, 2
6 digits for Dept. 3
7 digits for Dept. 4
8 digits for System
-19-
nn r
LI Li 3
/ ir r rin
3 0 to
Page 22

Department Tax Status & Negative Status
Each Department can be set to be taxable to Tax 1 and/or Tax 2, and to be a
negative department. A negative department is used to enter returned merchan-
Dept.2 Dept.4
Dept.1 i Dept.3
EOM1074
Submode No.
Status Code 0 to 7
for each department:
0; Non-taxable, Positive
1: Tax 1 (or VAT1) Taxable, Positive
2; Tax 2 (or VAT2) Taxable, Positive
3: Tax 1 (or VAT1) & Tax 2 (or VAT2) Taxable.
Positive
4; Non-taxable, Negative
5: Tax 1 (or VAT1) Taxable, Negative
6: Tax 2 (or VAT2) Taxable, Negative
7: Tax 1 (or VAT1) & Tax 2 (or VAT2) Taxable.
Negative
NOTE When the GST Feature is selected by program option (Submode No. 014), "Tax 1" will
be GST and “Tax 2" will be PST.
Display Example)
Dept. 1
Dept. 2
Dept. 3
Tax 1 & Tax 2, Positive
Tax 1, Positive
Tax 2, Positive
nn r
u uo
Dept. 4: Non-taxable, Negative
icon
Department Itemized/Single-item Status
This operation selects the receipt-issue type status for each department.
When a department is set to be an "Itemized" department, a sale item entry
through that Department Key will not immediately finalize the sale and will allow
other item entries until a media key {[AT/TL] or [Chg]) is operated.
When a department is set to be a "Single-item" department, a sale item entry
through that Department Key will immediately finalize the sale as cash and issue
a receipt if it is operated outside a sale. However, when a Single-item department
is operated during a sale, it functions the same as an Itemized department.
-20-
Page 23

Dept.2 Dept.4
Dept.1
Dept.3
EOM1074
\J}
Submode No.
□□□□ E
Status Code for
each department:
0; Itemized
1: Single-item
Display Example)
Dept. 1
Dept. 2
Dept. 3
Dept. 4
Itemized
Itemized
Single-item'
itemized ■
n n n
LIU 1
% Preset Rate Setting
HBB nn
Submode No.
NOTE: Whether the [%] key is used as Percent Discount Key or Percent Charge Key is
determined in Submode 011.
Display Example)
□□□□ m
Preset Percent Rate
0001 (0.01%) to 9999 (99.99%);
aiways enter 4 digits.
n n n
LI LI O
LI O LI LI
in
n n
LI LI ILI
n r n n
% Calculation Fraction Rounding Process Selection
nn\E
Submode No.
Display Example)
Rounding Process
Code:
00
Round Down
50
Round Off
99
Round Up
nnn
LI LI O
- 21 -
5% is set
nn
LI LI
Round Down
Page 24

Tax Feature Selection
This operation selects the basic tax feature.
ттмт-»- ппи
Submode No.
Tax 1 Type I
0,1, or 2 Tax 2 Type
_
___________________i
0: Non-taxable
1; Add-onTax
2; VAT
EOM1074
0, 1, or 2
Display Example)
n
in
и
lU
Tax 1 :
Add-on Tax
t 1
1 1
Tax 2:
Add-on Tax
% Key Type & Tax Status, Amount Form Setting
This operation provides selection of whether the % key is used as %- or %-»- key,
sets the Tax Status of the % key, and determines the Amount Form for display and
print.
ИШШШ-» □□на
Submode No.
% Key Type and Status;
0 to 7
0: %-, Non-taxable
1: %-, Tax 1 (or VAT1) Taxable
2: %-, Tax 2 (or VAT2) Taxable
3: %-, Tax 1 (or VAT1) & Tax 2 (or
VAT2) Taxable
4: %+, Non-taxable
5; %+,Tax1 (or VAT1} Taxable
6: %-h, Tax 2 (or VAT2) Taxable
7: %+, Tax 1 (or VAT1) & Tax 2 (or
VAT2) Taxable
Display Example)
n 1 1
и 1 1
Amount Format, Division Symbol Selection;
0to7
0: 0,
1; 0.0
2: 0.00
3: 0.000
4: 0 ,
5: 0,0
6: 0,00
7; 0,000
n n
JC
%-, Tax 1 & Tax 2 Taxable
- 22-
0.00
Page 25

System Option 1 Setting
This setting is for print/non-print selections of some items on the sale receipts.
EOM1074
Consecutive No. Print, Auto Subtotal
Print, Current Time Print
Subtotal by [ST] Non-print, Taxable
Total 1 Print, Taxable Total 2 Print
System Option 2 Setting
This setting is for selections of printer use, Consecutive No. resetting method,
display & print time system, and date entry (setting, display, and print) order.
- 23 -
Month-Day-Year
Page 26

System Option 3 Setting
This setting is for selections of Tender for finalizing a cash sale, [ST] Key
depression before finalizing any sale, and GST Feature selection, and PST
EOM1074
Tender Not compulsory, [ST] Not compulsory
NonGST Feature
Program Receipt Sample Format fSubmodes 001 to 014^
Set Data
Submode No.
001-00000
002-00000
003- 00100
004- 00000
005- 45678
006.-1234
007--0010
006- -0500
009- ---00
010- -.-11
Mode Symbol
oil ■ ■ ■ ■ 22
012--..00
013- --20
014- ---00
02-20
0006#08-05-93
• Current Time
Consecutive No., Date
indicates "pm" when
the 12-hour system.
-24-
Page 27

Tax Table Setting
□00 El
Submode No.
^ ^ I ST I (Tax 1 Table Start Declaration)
I
2) I I.........................I I ST I (Minimum Amount for Tax Rate Calculation)
Max. 4 digits; 0 to 9999(C)
E01-11074
I
__
□□□□□□ El
6 digits; 000000 (0.0000%) to 999999 (99.9999%) See NOTE 1.
4) I |j j
2 digits; 00 for Round Down, 50 for Round Off, 99 for Round Up
I
□
........
Max. 6 digits; 0 to 999999(?;); enter 0 if there are no Cyclic Breaks.
I
6)
□
........
Max. 4 digits; 0 to 9999(C)
: Repeat this break entry for 2nd, 3rd, etc. up to the break that ends one cycle
: of this cyclic breaks. See NOTE 4.
^ If Tax 2 Table setting is not necessary, go to Step 9) after Step 6).
7)
TX2/MI (Tax 2 Table Start Declaration, which automatically declares Tax 1 Ta-
R/A I bleEnd)
(Rate Calculation Fraction Rounding Method)
□ (Start Amount for Cyclic Breaks) See NOTE 2.
□ (Minimum Amount for 1st Break) See NOTE 3.
4
8) Follow the Steps 2) to 6) above and set Tax 2 Rate and Breaks.
I
ST I (to complete the entire Tax Table setting operation)
- 25 -
Page 28

NOTES 1. When no Tax fíate is to be applied and the tax table is made of tax breaks only, enter
"0" in Step 2), enter 000000 in Step 3), and enter 00 in Step 4). Then go on to Steps
4), 5), and 6).
2. When there is no Cyclic Breaks in the tax table, enter "0" for the "Start Amount for
Cyclic Breaks"in Step 5).
3. The "Minimum Amount for 1st Break" indicates the amount to start taxing, and any
amount less than this value will be non-taxable.
4. The difference between the Minimum Amounts of two neighboring breaks, in Step
6), must not exceed 990.
5. When only a Tax fíate is to be applied and no tax break settings are necessary, skip
Steps 5) and 6).
6. The folio wing are calculation methods when both Tax fíate and Tax Breaks are set:
If Objective Amount^Minimum Amount for Tax Rate Calculation (in Step 2):
... The tax is calculated by the Tax Rate (%}.
If Objective Amount < Minimum Amount for Tax Rate Calculation (in Step 2):
When Objective Amount < Minimum Amount for 1 st Break (Step 6):
... Non-taxable
When Objective Amount ^Minimum Amount for 1 st Break (Step 6}:
... the tax is calculated by the Tax Breaks.
7. Even when only part of the tax table is to be changed, set the entire tax table again.
8. VAT Calculation:
VAT =
Objective Sale Amount x Rate
100 -I- Rale
Ë01-11074
Example) When Objective Sale Amount =$1.00, Rate=3.0000%, Round
ing Method = Round Up:
9. Tax Calculation With GST Feature:
To realize the CANADA Tax Feature, it is necessary to select in Submode
014:
Code 3 (GST Applied: RST Taxable Total Amount includes GST)
(If any other code is selected, the ordinary tax calculation will be
applied.)
When the CANADA Tax Feature is selected. Tax 1 and Tax 2 in the Tax Table
Setting operation correspond as in the following:
Tax 1 = GST
Tax 2 = PST
Calculation:
Tax 1 (GST):
Tax 2 (PST);
calculated from Taxable Total 1
calculated from "Taxable Total 2 -i- Tax calculated from
Taxable Total 1 & 2 by Tax 1"
100 x 3.0000
VAT =
100-^3.0000
= 2.912621
Round up
I
= 3
-26-
Page 29

Tax Table Setting Examples
Tax 1 Table Setting Example 1: % Rate only
Tax Rate: 15% applicable to any amount,
Fraction Round Off
{Submode)
jsij (Tax 1 Table Setting Start Deciaratior
01st] (Min. Amount for Tax Rate)
□[ U0000HII I'''®*
00 na (Rounding Method)
StI (to complete setting)
Tax 1 Table Setting Example 2: Tax Breaks only
To set the following Tax Break Table:
Breaks
Tax
$0.01 to $0.10
$0.11 to $0.21
$0.22 to $0.35
$0.36 to $0.50
Amount Difference
from Previous Break
Oi
1C
2c
3C $0.14
$0.51 to $0.644c
$0.65 to $0.78
$0.79 to $0.92
$0.93 to $1.07
$1.08 to$1.21
$1.22 to$1.35
$1.36 to $1.50
5C
6c
7C
8C
9C
10c
:
----
$0.10
$0.11
$0.15
$0.14
$0.14
$0.14
$0.15
$0.14
$0.14
I
----
0008#08-05-93
Non-cyclic Breaks
/
One cycle
of Cyclic Breaks
/
E01-11074
z
T'^ 1
02-20 *
Cyclic Breaks
000 Q (Submode)
[stJ (Tax 1 Table Setting Start Declaration)
[o] |S^ (Min. Amount for Tax Rate)
000000
00^3
00gf&m,—
00[ST| (Break)
----—
0013 (Break)
rilfsIfsTI (Break)
riiri~|[s^ (Break)
00
00 (Break)
0001 (Break)
00001 (Break)
00001(Break)
000
STI (to complete setting)
1
^
-------------------
------------0-11
-------------------
00091/08-05- 93
- 27 -
— 0-00
00-0000
-------
00
0-36
0-22
0-36
0*51
0-65
0- 79
0*93
1- 08
1*22
1-36
02-31
TX 1
Page 30

Tax 1 Table Setting Example 3: Tax Breaks & % Rate
To set the followingTax Break Table;
Breaks
Tax
$0.01 to $0.10
$0.11 to $0.22H
$0.23 to $0.39
$0.40 to $0.56
$0,57 to $0.73
$0,74 to $0.90
$0.91 to $1.08
Amount Difference
from Previous Break
00
$0.10
20
30
A0
50
60
$0.12
$0.17
$0.17
$0.17
$0.17
Non-cyclic Breaks
/
% Rate of 6%, Fraction is Round Off,
UI00C1I (Submode)
|ST| (Tax 1 Table Setting Start Declaration)
rr[) b ||9||s^(Min. Amount for Tax Rate) -
|5]|o||st| (RoundingMethod)
(Cyclic Break Start Amount;
, 0 for no Cyclic Break portion)
(Break)
-----------
00[^ (Break)
(Break)
[sirni^ (Break)
|THT||st1 (Break)
Mm [stI (Break)
mmmf^ (Break)
---------------------------------
1-09
06*0000 %
■50
-------------
------------
--------------
OOtOffOB- 05- 93
0*00
0*11
0*23
0*40
0*57
0*74
0*91
1*09
02-39
EO1-11074
TX 1
I
ST I (to complete setting)
NOTE: Basically, the tax amount levied should increment by 10 every time a break
is set. However, if 20 are to increment for one break, enter the same Break
value (Minimum Amount for the Break) twice.
Example)
00 [13 (Break)
00 H3
miMi^ (Break)
00 m
- 28
Page 31

12. Verification of Programmed Data
The set data of Submodes 001 to 014 and the Tax 1 and Tax 2 table contents can be
verified by the following operations. A receipt is issued for each operation.
OFF
REG2 i^EG1
Control Lock: Z ' - ^
EOM1074
To read set data of Submodes
001 to 014:
□ [¡Li
Submode No.
001-00000
002-00000
003- 00000
004- 00000
005- 00000
006- -1104
007- -0000
008- -1000
009- ---50
010- --- 11
oil ---02
012-..-06
013- -.-00
014- ---00
01-14
0003#08-05-93
Set Data
To read Tax 1 and Tax 2 Tables
[¡][ST
TX 1 %Jax 1 Table:
1*09
06-0000
15-0000
0004#08-05-93
0-11
0-23
0-40
0-57
0-74
0-91
1*09
0-00
01-14
%
50
; /
TX 2
%
50
Tax 2 Table:
)
Receipt Consecutive No.
Date
-29-
Current
Time
When 12-hour
time system is
selected, the
asterisks indi
cates the time
"pm".
Page 32

13. Daily Operation Flow
The following shows a typical daily operation flow on the register.
EOM1074
Before Opening the Store ...
• Ensure that the register is firmly
• Check to see if sufficient portion of
• Checkthetime, date, and print con
plugged in the wall outlet.
paper roll remains.
dition.
Opening the store
Ordinary transaction entries
Received-on-Account and Paid
Out transactions
Taking Read (X) Report.
Reference
Page
13
31,32
31
38
39
After Closing the Store ...
Closing the store
• Taking Reset Report
• Tear off the print portion of Journal
Paper (if the printer is used for
journal recording).
• Leave the drawer open, and turn
the Control Lock to OFF.
• Take all the cash from the drawer
to the office with the journal and
Reset (Z) Report.
30-
39
40
42
42
Page 33

14. Transaction Entries
If the register is programmed with all requirements, it is ready to accept transaction
entries. Before starting to enter transactions, turn the Control Lock to either of the two
positions below;
When an error has occurred ...
When the buzzer sounds continuously and "E" is indicated in the leftmost digit of the display, the
last operation has caused an error and the keyboard is locked, in that case:
Press the El key to cancel the error condition and the keyboard is now operative,
This function of the fC] key is applied to operations in other Control Lock positions.
If errors occur repeatedly on operating the same key sequence, check the cause of
the error. The following are possible causes of error:
■ The Control Lock position is wrong.
■ The numeric value entered exceeds the high amount limit.
■ A numeric value has not been entered where required.
■ A numeric value has been entered where prohibited.
■ The key sequence is wrong, or a wrong key has been pressed.
■ The operation is not allowed at the current timing.
OFF
This position prints the transaction entry data on the
paper roll.
. ..
This position does not print the transaction entry
data on the paper roll.
EOt-11074
Displaying the Time and Date
.. Displays the current time.
hour
n “/
Li C
minute second
r r ir
~ DO
ID
(As for the time display and print, either 12-hour
system or 24-hour system can be selected.)
1 r
Displays the current date.
El
n n
UO
month day
nr
U D
n ~i
~ DD
year
The time or date display will disappear when any key is pressed on the keyboard or the Control
Lock position is changed.
(As for the date display and print order, Day-Month-
Year or Year-Month-Day order can be selected in
stead of Month-Day-Year.)
-31 -
Page 34

EOl-11074
No-sale
The NO'Sale transaction is used to open the drawer without relating to a sale, for such purposes
of money exchanges, checking the print condition on the paper roll, etc.
The drawer opens.
No-sale Symbol
Current Time
{The asterisks
means "pm" when
Receipt Consecutive No.
Date
the 12-hour sys
tem is selected.)
Sale Item Entries (Department Entries)
Department
1) Entry of One Item
Open-price Department
Price
Code
□
...
□ E
Price
Preset-price Department
□
.................
NOTE: The Price entry is possible up to 7 digits. However, it is limited by the Department
2) Repeat Entry
Open-price Department
□
Price Same Department Key
Preset-price Department
(□
NOTE 1.
LJ
Price
HALC (High Amount Listing Capacity) .
...
□ Ml a
...
n)^! El
Price Same Department Key
Depress again the Department key that has been depressed for one item entry.
The item entry will be repeated as many times as the key is depressed.
When a price is manually entered through a Preset-price Department key, the
2.
manual price will be entered by the Repeat Entry operation. If the preset price
must be entered instead of repeating the manually entered price, first depress the
[C] key then depress the Department Key.
3.
An item entered through a Negative Department cannot be repeated.
1*00
)
When a Preset-price Department key is simply depressed,
the preset price is entered. When a price is entered prior to
the Department Key, the manually entered price prevails.
.....
1*00
1*00
......
- 32 -
Page 35

3) Quantity Extension (Multiplication)
Open-price Department
□
.................
□[!]-»-□;
....................................
na
Quantity (max. 3 digits) Unit Price
Preset-price Department
Q)[^
Quantity (max, 3 digits) Unit Price
NOTE The product (obtained by multiplication) must not exceed 7 digits
4) Single-item Department
If a Department Key is programmed with
Single-item status, any entry through the
key wilt immediately finalizes the sale as
cash without operating any media key.
The operation is the same as ordinary
Itemized Department keys already de
scribed (Entry of One Item, Quantity
Extension), except that Repeat Entry is
not possible using a Single-item Depart
ment key.
OO2O#O0- 05- 93
Unit Price Quantity
1*00 3 —
1‘00 ST —
1*00 * 1 —
0*06 TX 1 —
1*00 * 2 —
0*15 TX 2 —
1*21 CA —
03- 06 *
— Dept. Item
— Subtotal
— Taxable 1
— Tax 1
— Taxable 2
— Tax 2
— Cash Total
E01-11074
Product
5) Tax Modification (applicable to Add-on Tax Feature)
Each department is programmed with its own Tax status (Non-taxable, Tax 1 Taxable, Tax 2
Taxable, orTax 1 & 2 Taxable). To reverse the Tax status (from taxable to non-taxable, or vice
versa), depress the following keys before ordering the required department item entry (before
the Department Key, at the latest). (Refer to Entry of One Item, Repeat Entry, Quantity
Extension.)
TX1/M
PO
to reverse Tax 1 status
TX2/M
R/A
111111
,to reverse Tax 2 status
When both Tax 1 status and Tax 2 status must be reversed, depress the two keys
consecutively.
NOTES 1. The tax-modi tied status declared by those Tax Modifier keys will be held until
another item is entered. The modified status is held even when the item is
repeated.
2. When a Department item is tax-modified and repeated and the same item (with
the same price and department) must still be entered consecuf/Ve within a sate
with the original tax status regained, depress the [CJ key before entering original
tax-status item.
6) Negative Department (Returned Merchandise)
When one of the Department keys are programmed with Negative status, an entry through that
department will automatically process the entered amount into negative. Returned merchan
dise may be entered. The operation is the same as positive Department keys (refer to Entry
of One Hem, Quantity Extension) except that Repeat Entry is not possible.
-2*50
- 33 -
Page 36

E01-11074
Percent Discount or Percent Charge
The [%] key can be programmed to function Percent Discounter Percent Charge.
1) Percent Discount/Charge on a Department Item
Department Entry i""" ► H {to activate the preset rate)
-------
► I I I 11 % I (to activate a
1-1
.....I-
Manual Rate; max. 4 digits
1 (0.01%) to 9999 (99.99%)
2) Percent Discount/Charge on Subtotal
Sale Item Entries (to activate the preset rate)
11 III manual rate)
NOTES 1. The Manual Rate can be en
tered in 4 digits at maximum;
to 9999 (result: 0.01% to
99.99%).
2. When a Manual Rate is entered,
the preset rate is disregarded.
3. The Percent Discount/Charge
cannot be operated after a Void
(Last Line Voiding or Desig
nated Line Voiding) entry.
I- I ► I I
^ ^ \ J
....
___ _ _
I I fin {to activate a
L. I LnIJ manual rate)
Manual Rate; max, 4 digits
1 (0.01%) to 9999 (99.99%:
6-00 ST
10-00 %
-0*60
■ Subtotal
10.00%
I]
Discount
Void
Sale items once entered within the current sale can be voided.
1) Last Line Voiding
When the last tine item (that has just been entered within the current transaction) is a
Department item or Percent Discount/Charge item, it can be voided by simply pressing the [VD]
key.
Department Entry i
Percent Discount/Charge —J ""' ' "
2) Designated Line Voiding
When a Department item entered before the last item is cancelled before the sale is finalized,
it can be voided. To operate it, follow the ordinary Department entry procedure (Entry of One
Item, Quantity Extension) except that the [VD] key is depressed iust before the Department
key depression.
2-00
-2-00 VD
voided
Jj[£j[0j Dept. 1|
2l|0 0| Dept.2|
1 0 0
NOTE To void a Preset-price Department entry using the Designated Line Voiding function,
the price must be entered. If the price entry is omitted, the key may function as Last
Line Voiding described in 1) above.
VDI Dept. 1|
- 34 ■
1-00 1
2-00 2
1-00 VD 1
voided
Page 37

EOM1074
Manual Tax
(applicable to Add-on Tax Feature only)
This operation is used to add an irregular tax amount that cannot automatically be calculated on
the basis of the programmed tax tables.
Sale Item Entries
NOTES 1. The Manual Tax entry is not possible
when the taxable total of the desig
nated tax is zero.
2. The Manual Tax entry is allowed only
once for each tax in a sate.
3. After entering manual tax(es), the sale must immediately be finalized.
4. The Manual Tax amount entered replaces the ordinary tax amount that was to be
calculated automatically on the basis of the programmed tax table.
TX1/M
PO
(for Tax 1 Addition)
TX2/M
R/A
(for Tax 2 Addition)
Displays the Taxable max. 8 digits or !im-
Total of the desig- ¡ted by System
natedtax. HALC
□
..
n\E\
: Tax Amount;
1-00 1
0-13 TX 1
Manual
Tax
Non-add Number Print
This function is to print any code number for future reference, such as Customer No., Credit Card
No., House Charge Account No., etc. Non-add numbers can be entered at the starting of a sate
or during a sale if the sale is not finalized. Multiple non-add numbers can be entered in a sale.
□
....
□ E
Non-add Number; max. 8 digits
12345670
■Non-add Number
Subtotal Read
To read the total of the current sale by the customer's request or the operator's requirement, simply
depress the [ST] key.
Sale Item Entries
NOTES 1. Printing of the subtotal amount fpre-taxed
sale total) by the operation above can be
selected by a program option.
2. When the Subtotal Compulsory option is selected, the [ST] key is always
required before finalizing a sale.
Displays the subtotal (sale total including taxes up
to the moment).
5*60 ST
Taxable Total Read (applicable to Add-on Tax Feature only)
tn need of reading the Taxable Total (pre-taxed amount) for a required tax (Tax 1 or Tax 2) during
a sale, operate the following.
Sale Item Entries
TX1/M
PO
(for Tax 1)
TX2/M
R/A
(for Tax 2)
Displays the Taxable Total (pre-taxed
sale portion amount subject to the
required tax).
■ 35 -
Page 38

Finalizing a Sate
1) Cash Total
2) Cash Tender
Sale Hem Entries
(ST
E01-11074
□
...............
□
Cash Tendered Amount
Subtotal (pre-taxed sale total)
■Taxable Total 1 {optional print)
•Tax 1
-Taxable Total 2 (optional print)
■Tax 2
Sale Total including Taxes
-Cash Tendered
■Change due
NOTB:
The sale is finalized as in the sample receipt above when the tendered amount
is equal to or larger than the sale total (including taxes). When the tendered
amount is smaller than the sate total (short-tendered), the balance due is
displayed and the sale is not finalized. In such cases, refer to "A) Multi-tender"
and "5) Split Tender " on the next page.
3) Charge or Credit Total
Sale Item Entries '► ( I ST
6-00 ST
4*00 * 1
0*24 TX 1
5-00 * 2
0*75 TX 2
6*99 CH
03-28 *
0037#08- 05- 93
-36-
Subtotal (manual print or auto-print)
■Taxable Total 1 (optional print)
-Tax 1
-Taxable Total 2 (optional print)
•Tax 2
• Charge or Credit Sale Total
Page 39

4) Multi-tender
EOI-11074
Sale Item Entries
5) Split Tender
Sale item Entries
stJ) -► □
.........................
□ |at/tl| —,
Cash Tendered Amount
less than the sale total
<□
................
D)B
Cash Tendered Amount
equal to or larger than the sale total
Subtotal (pre*taxed sale total)
Taxable Total 1 {optional print)
-Tax 1
■Taxable Total 2 {optional print)
■Tax 2
■ Sale Total including Taxes
■Cash Tendered {short-tendered)
•Balance due
-Cash Tendered {over-tendered)
-Change due
Cash Tendered Amount
less than the sale total
Subtotal {pre-taxed sale total)
•Taxable Total 1 (optional print)
-Tax 1
-Taxable Total 2 {optional print)
■Tax 2
■Sale Total including Taxes
-Cash Tendered (short-tendered)
-Charge or Credit Total
NOTES 1. A maximum of 8 digits can be entered as Tendered Amount (up 79999999).
However, it is limited by the System HALC if a limit of less than 8 digits is
programmed.
The [AT/TLJ key wilt always require a tendered amount entry if "Amount Tender
2.
Compulsory" option is selected.
When the sale total is zero or negative, the sale can only be finalized by Cash Total
3.
function regardless of option selections.
4. Neither Multidender nor Split Tender are possible for a negative sale total.
Chg
-37-
Page 40

EOI-11074
The loilowing operations require the Control Lock position to the X position.
OFF
REG2 I REG1
0=
Received-on-Account Payment (Control Lock: X)
The Received-on-Account transaction is used to identify money which is in the drawer but not due
to business. For example, a customer pays for a sale finalized as house charge on a past day,
or the operator records the change reserve in the drawer loaded from the store office. This
operation must be performed outside a sale only.
TX2/M
EH
...
EH
Payment Amount Received;
max. 8 digits (up to 79999999),
or limited by HALC
Paid Out
The Paid Out transaction is used when an amount of money is removed from the drawer without
relating to a safe, for the purpose of paying to a wholesaler, etc. This operation must be performed
outside a sale only.
□
Amount to be paid out;
max. 8 digits (up to 79999999),
or limited by System HALC
(Control Lock: X)
.................
□
R/A
TX1/M
PO
The drawer opens to enable money entry into the drawer.
10*00 RA
03-38 *
0041#08- 05- 93
The drawer opens to enable paying out.
12*00 PO
03-38 *
0040#08- 05- 93
-38
Page 41

15. Read (X) and Reset (Z) Reports
This chapter describes the operation to take Read and Reset reports and their print
format.
Report Sample Format
Before Taking Reports...
• The Read (X) Report allows to read
the totals but not clear the memory,
while the Reset (Z) Report allows to
read the totals and, at the same
time, clear all the resettable totals
when the report has been issued.
• The symbol "X" is printed at the top
right of a Read Report, while "Z" is
printed on a Reset Report to indi
cate the type of report. The con
tents of the two types of reports are
the same if both are taken at the
same time.
Operation
Read fX) Report
OFF
REG2 I^EG1
0001
87*67
22
26*90
11
24*75
11
29*00
-3*50
77*15
3*00
* TA
#
1
n
2
it
3
2
#
4
TA
#
2
VD
Reset Counter
Reset Report Symbol
("X" for Read Report)
Net Grand Total
(non-resettabte)
Dept. 1 Sales; Item Count
Amount
Dept.2 Sates; Item Count
Amount
Dept.3 Sales: Item Count
Amount
Dept-4 Sales: Item Count
Amount
Sum of Ail Depts.
Void Count
Amount
EOI-11074
0=5
{The drawer
opens.)
Reset iZ) Report
OFF
REG2 1 REG1
■ X
►
(The drawer
opens.)
Memory Balance
Sum of All Depts,
= {Positive Depts, Total)
- (Negative Depts. Total)
Net Sales
= (Cash Sates ) + (Charge Sales)
Cash-in-drawer Amount
= (Cash Sales) + (Received-on-
Account) - (Paid Out)
Net Grand Total
= (Sum of Daily Net Sates)
-0*05 %
53*50
3*13
53*25
7*99 TX 2
24
87*67
74*69
12*98
1
10*00
12*00
72*69
03- 40
0043#08- 05- 93
3
#
Percent {+ or -) Count
Amount
ST
TX 1
ST
Taxable Total 1 Amount
Tax 1 Amount
Taxable Total 2 Amount
Tax 2 Amount
* #
NT
CA
3
CH
RA
1
PO
2
CG
Total Customer Count
Net Sales (with Tax)
Cash Sales Amount
#
Charge Sates Count
Amount
#
Received-on-Account Count
Amount
#
Paid Out Count
Amount
NS
No-sale Count
Cash-in-drawer Amount
♦
Current Time
Consecutive No., Date
- 39 -
Page 42

16. Maintenance
Replacing the Paper Roll
EOM1074
Remove the Paper Cover,
If the printer is used for Journal, hold down
the [FEED] key to wind up the printed
portion of paper, then cut the paper as
shown in the figure. Hold down the
[FEED] key again to advance the remain
ing paper end.
If the printer is used for Receipt, cut the
paper roll as shown in the figure. Then
hold down the [FEED] key to advance the
remaining paper end.
The wound-up portion of the paper (when
used for Journal) can easily be removed
from the Reel by pulling it sideways.
Set the paper roil ready for print. Refer to
Chapter "10. Installing the Paper Roll".
- 40 -
Page 43

EOt-11074
Remove the Paper Cover.
Pinch the Ink Roller Knob with your fin
gers, and pull it up ward.
Manual Drawer Release
Insert the new Ink Roller in the slot of the
carriage by pushing it all the way in until it
is firmly settled with a "click" sound.
The drawer will automatically open on appropri
ate operations. However, in the even of a power
failure, etc., the drawer can be released manu
ally.
The Drawer Release Lever is located on the
bottom side of the register. Push the lever in the
direction of the arrow, and the drawer opens.
-41 -
Page 44

Removing the Drawer
E01 *11074
Pull out the drawer all the way until It hits the
stopper. Then lift up the drawer and pull it again.
To exchange batteries, please keep the
power cord of the register connected to the
wall outlet. If the batteries are removed
with the power cord disconnected, the
programmed data and sales data wilt all be
cleared.
Remove the Paper Cover.
Remove the paper roll, the Take-up Reel
(if used for Journal), and the Battery
Cover.
Replace the old batteries with new ones.
(Batteries: SUM'3 1.5V x 3 pieces)
Return the items removed in Step 3, and
attach the Paper Cover.
- 42
Page 45

17. Specifications
Size...........................................325mm (width) x 425mm (depth) x 224.5mm (height)
EO1-11074
Weight
......................................
Power Required
Power Consumed...................0.16A
Operating Temperature
Operating Humidity
Size of Paper Roll....................57.5±0.5mm (width) x max. 80mm (diameter),
Memory Protection
Handling the Batteries
..When inserting batteries, place them so that the positive (-r) and negative
(-) ends face the proper directions as shown in the battery compartment.
..Do not mix used and new batteries in the battery compartment. Replace
all batteries at the same time.
..Do not leave discharged batteries in the battery compartment. Leakage
from such batteries may damage the register.
..Do not dispose the batteries in a fire, if put in a fire, they may explode.
......................
................
.................
4.8Kg (product only), 6.3Kg (including package)
117V±10%, 60Hz
..........
0°C to 40°C
10% to 90% RH
0.06 to 0.085mm (thickness)
Dry Battery SUM-3 1.5 x 3 pieces;
Life of about 1 year
Specifications are subject to change without notice.
-43-
Page 46

Page 47

Page 48

TOKYO ELECTRIC CO,, LTD.
PRINTED IN JAPAN
EOM1074A 9309850 GS
 Loading...