

Page 1

Toshiba Solid-State Drive PC Upgrade Kit User's Manual
English/Español
GMAA00384011
593696-A1
07/12
Page 2

2
Regulatory Information
FCC Information
Product Name: Toshiba Solid-State Drive PC Upgrade Kit
FCC notice “Declaration of Conformity Information”
This equipment has been tested and found to comply with the limits for a Class B
digital device, pursuant to Part 15 of the FCC Rules. These limits are designed to
provide reasonable protection against harmful interference in a residential
installation.
This equipment generates, uses and can radiate radio frequency energy and, if not
installed and used in accordance with the instructions, may cause harmful
interference to radio communications. However, there is no guarantee that
interference will not occur in a particular installation. If this equipment does
cause harmful interference to radio or television reception, which can be
determined by turning the equipment off and on, the user is encouraged to try to
correct the interference by one or more of the following measures:
❖ Reorient or relocate the receiving antenna.
❖ Increase the separation between the equipment and receiver.
❖ Connect the equipment into an outlet on a circuit different from that to
which the receiver is connected.
❖ Consult the dealer or an experienced radio/TV technician for help.
Changes or modifications made to this equipment, not expressly approved
by Toshiba or parties authorized by Toshiba could void the user's authority to
operate the equipment.
This device complies with Part 15 of the FCC Rules. Operation is subject to the
following two conditions:
1 This device may not cause harmful interference, and
2 This device must accept any interference received, including interference
that may cause undesired operation.
Page 3
Contact
NOTE
Address: TOSHIBA America Information Systems, Inc.
9740 Irvine Boulevard
Irvine, California 92618-1697
Telephone: (949) 583-3000
Canadian ICES-003
This Class B digital apparatus complies with Canadian ICES-003.
NMB -003 du Canada
Cet appareil numérique de la classe B est conforme à la norme NMB-003 du
Canada.
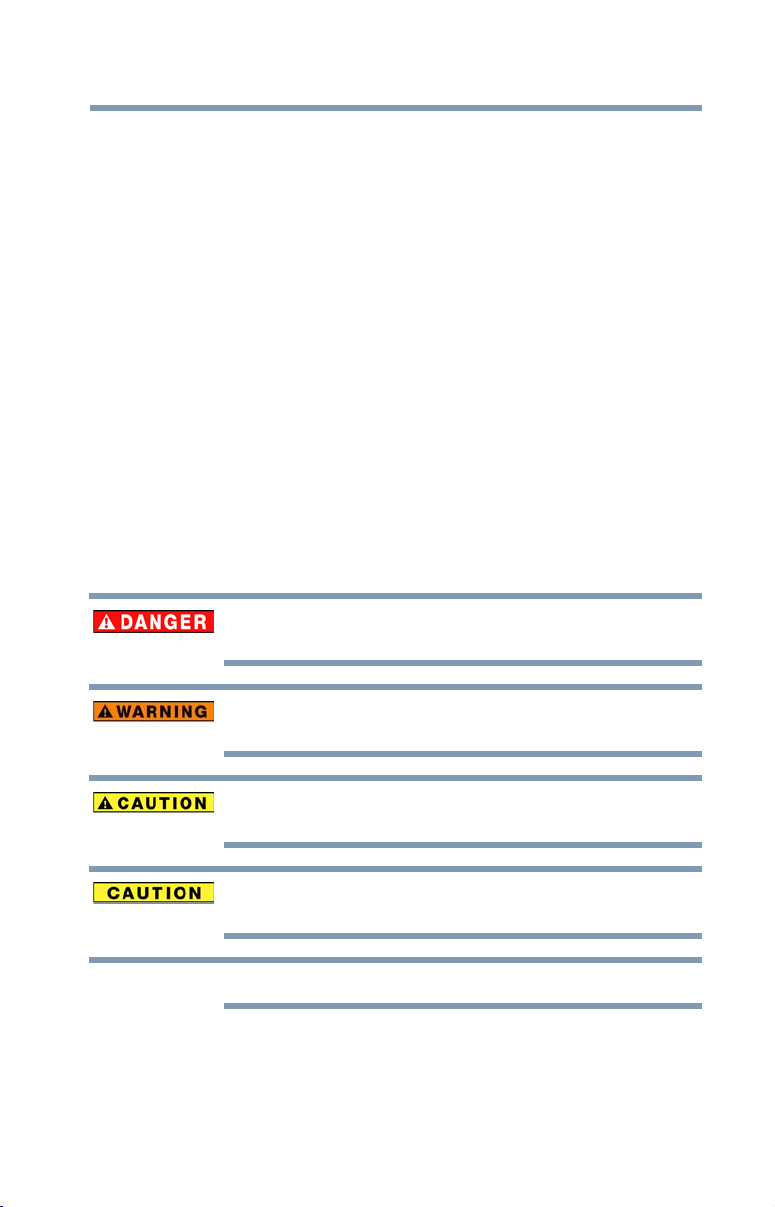
Safety icons
This manual contains safety instructions that must be observed to avoid potential
hazards that could result in personal injuries, damage to your equipment, or loss
of data. These safety cautions have been classified according to the seriousness of
the risk, and icons highlight these instructions as follows:
Indicates an imminently hazardous situation which, if not avoided, will result
in death or serious injury.
3
Indicates a potentially hazardous situation which, if not avoided, could result
in death or serious injury.
Indicates a potentially hazardous situation which, if not avoided, may result
in minor or moderate injury.
Indicates a potentially hazardous situation which, if not avoided, may result
in property damage.
Provides important information.
Page 4

4
Copyright
© Copyright 2012 Toshiba America Information Systems, Inc. All rights
reserved. All other products, services, names and logos used are trademarks,
registered trademarks or service marks of their respective owners. While Toshiba
has made every effort at the time of publication to ensure the accuracy of the
information provided herein, product specifications, configurations, and system/
component availability are all subject to change without notice. For the most upto-date information about your Toshiba product, visit Toshiba's web site at
toshibastorage.com.
Trademarks
Microsoft, Windows, Windows XP, Windows Vista, and Windows 7 are either
registered trademarks or trademarks of Microsoft Corporation in the United
States and/or other countries.
All other brand and product names are trademarks or registered trademarks of
their respective companies.
Page 5

Contents
Chapter 1: Product Information...................................................7
System Requirements...............................................7
Components .............................................................8
Capacity Calculation..................................................9
Chapter 2: Installation................................................................ 10
Precautions.............................................................10
Installing the SSD to a Notebook PC.......................10
Connecting the SSD to your PC ........................10
Replacing the internal HDD with the SSD .........12
Installing the SSD to a Desktop PC .........................13
Connecting the SSD to your PC ........................13
Configuring the SSD as the primary
boot device .................................................15
Migrating PC data to the SSD .................................15
Chapter 3: Other Information.................................................... 19
Toshiba Support .....................................................19
Before you call ..................................................19
Contacting Toshiba .................................................20
Toshiba’s technical support Web site................20
5
Page 6

6
Contents
Toshiba voice contact .......................................20
Warranty .................................................................20
Three (3) year standard limited warranty for
computer accessories and electronics ........20
Obtaining warranty service................................20
Page 7

Chapter 1
NOTE
NOTE
Product Information
System Requirements
❖ Microsoft® Windows® 7, Windows Vista®, or Windows® XP
❖ Available USB 3.0 Port or USB 2.0 Port
IMPORTANT: Toshiba recommends that you install the latest service
packs and updates on your computer to obtain the highest
performance and reliability.
Compatibility may vary depending on user's hardware configuration
and operating system.
7
Page 8
8
Product Information
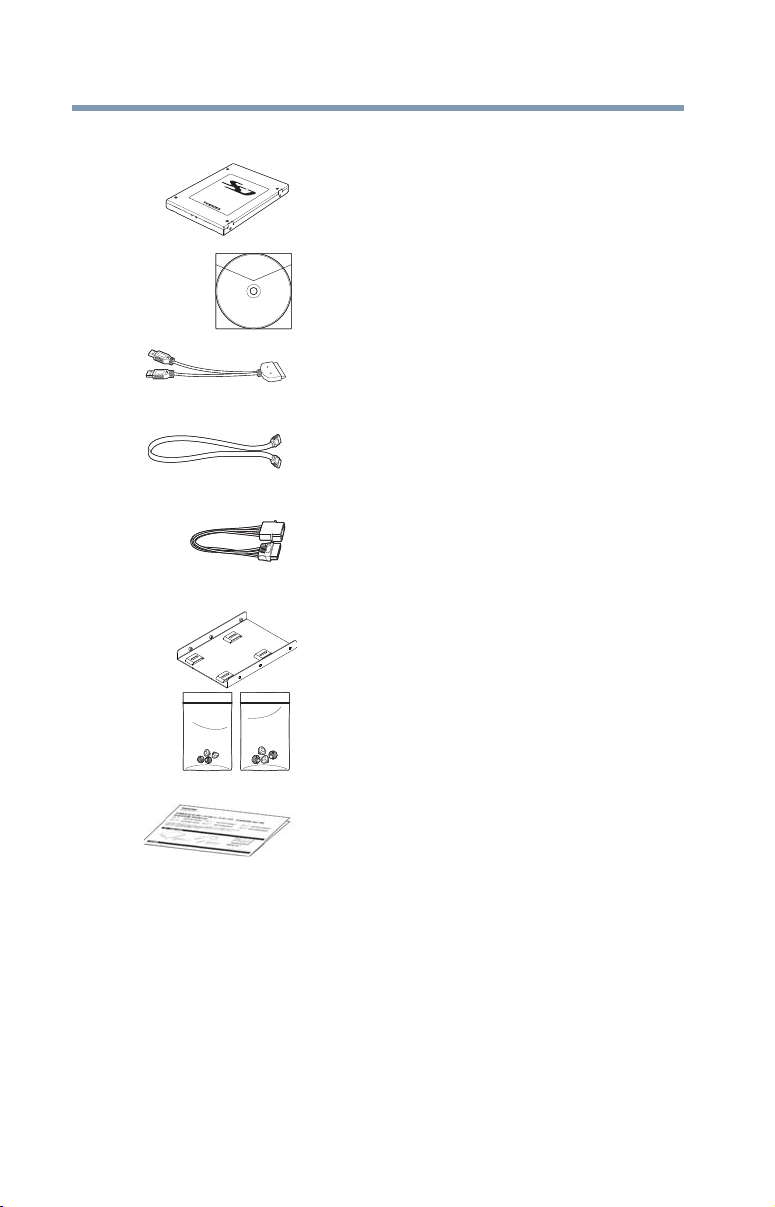
Components
Components
Toshiba SSD (pre-loaded with PC data migration
software)
CD-ROM (includes PC data migration software
(from PC to SSD), User's Manual (this
document), and Warranty information)
USB-SATA Conversion cable for PC data
migration (from PC to SSD)
SATA Signal Cable for mounting SSD into
Desktop PC
SATA Power Cable for mounting SSD into
Desktop PC
Bracket and screws for mounting SSD into
Desktop PC
Quick Installation Guide
Page 9

Capacity Calculation
One Gigabyte (1GB) means 109 = 1,000,000,000 bytes and One
Terabyte (1TB) means 10
powers of 10. A computer operating system, however, reports
storage capacity using powers of 2 for the definition of 1GB= 2
1,073,741,824 bytes and 1TB = 2
therefore shows less storage capacity. Available storage capacity
(including examples of various media files) will vary based on file
size, formatting, settings, software and operating system and other
factors.
Product Information
Capacity Calculation
12
= 1,000,000,000,000 bytes using
40
= 1,099,511,627,776 bytes, and
9
30
=
Page 10

Chapter 2
NOTE
Installation
Precautions
❖ Keep the SSD in the anti-static bag (shipping configuration)
until you are ready to install.
❖ To minimize static electricity, touch the computer case before
handling the SSD.
❖ Handle the SSD with care. Do not touch the connectors.
❖ Do not disassemble the SSD or remove the label, doing so will
void the SSD warranty.
❖ Make sure the SSD you are installing has a storage capacity
larger than data currently stored on your PC.
Toshiba is not responsible for data loss or damage caused by
replacing the storage devices.
Installing the SSD to a Notebook PC
Connecting the SSD to your PC
The first step in installing the SSD to a notebook is to connect the
SSD to the PC in preparation for migrating the data from the
existing drive.
10
Page 11
Installation
NOTE
Installing the SSD to a Notebook PC
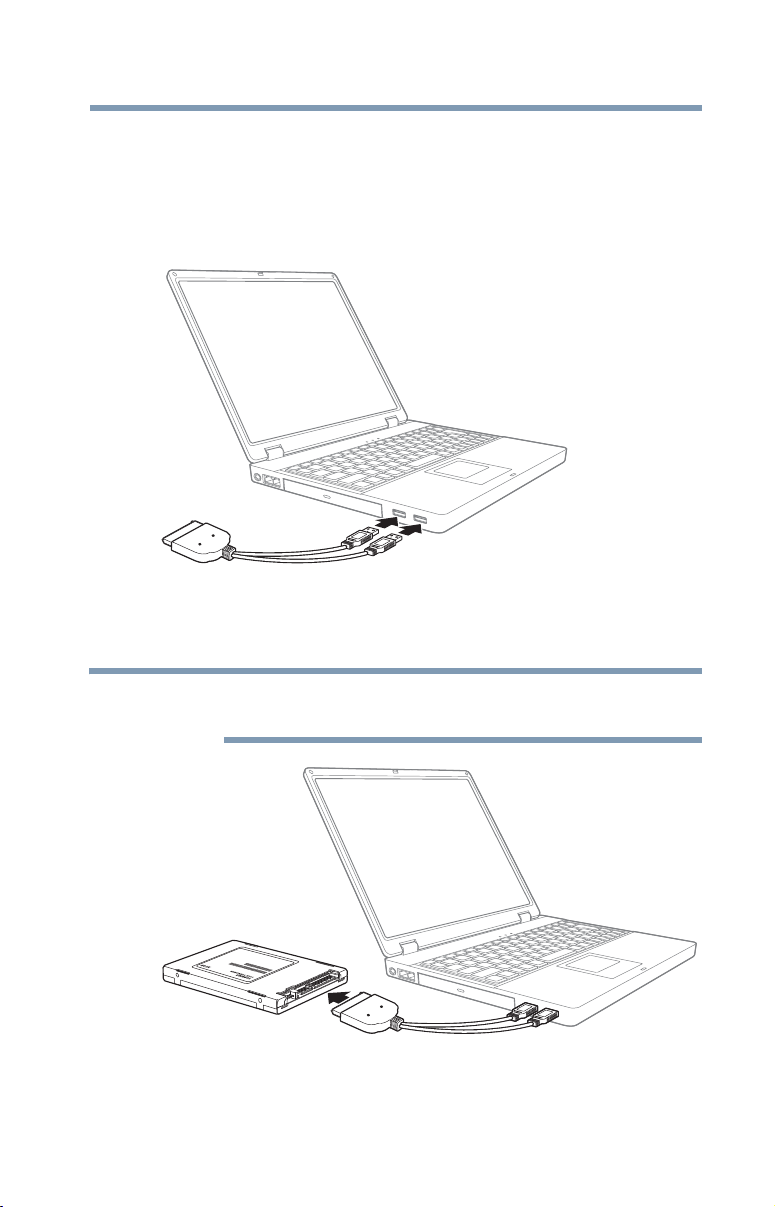
To connect the SSD to your PC:
3 Connect the USB-SATA Conversion cable:
❖ With the PC turned off, connect the two standard USB
connectors of the USB-SATA Conversion cable to your
PC.
11
(Sample Image) Connect USB-SATA Conversion cable to PC
❖ Connect the remaining end of USB-SATA Conversion
cable to the SSD.
This cable is recommended for initial PC data migration only and not
to be reused for other purposes.
(Sample Image) Connect USB-SATA Conversion cable to SSD
4 Turn on your PC, and make sure all programs are closed.
Page 12
12
Installation
Installing the SSD to a Notebook PC
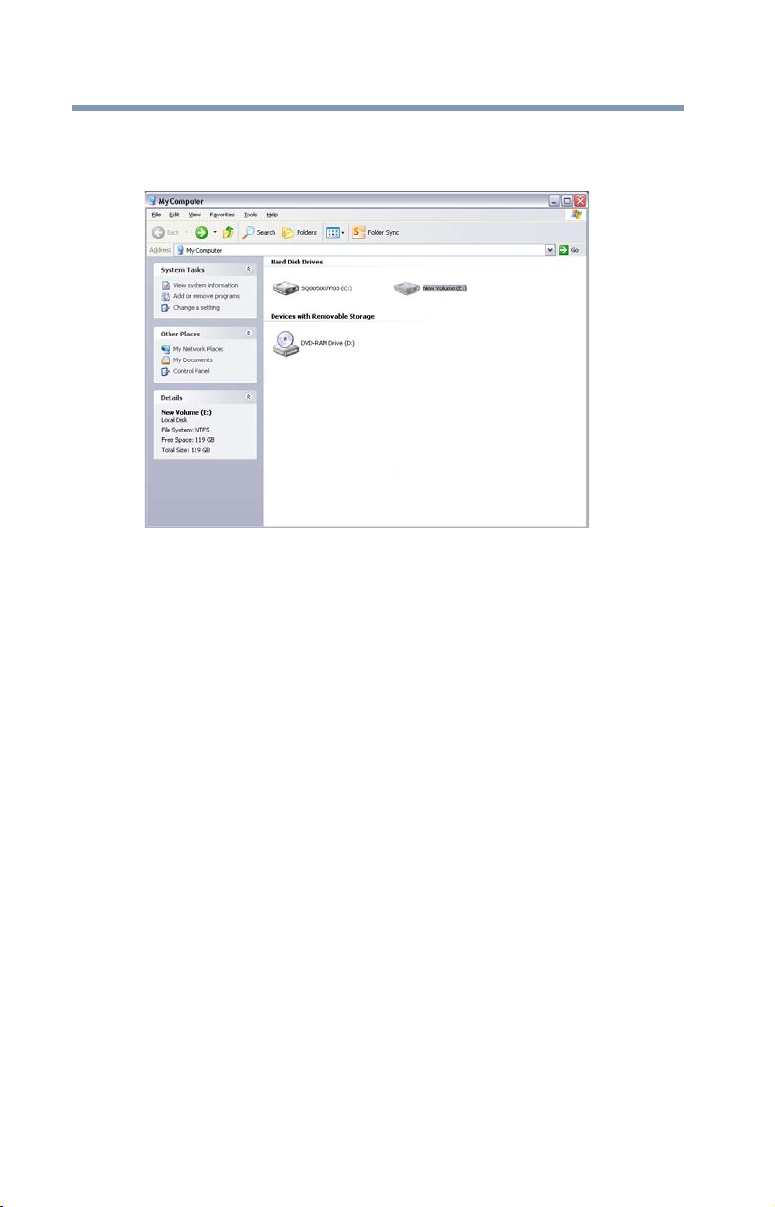
5 Open Windows Explorer.
You will see the SSD volume mounted.
(Sample Image) Explorer window with SSD
6 Follow the instruction in “Migrating PC data to the SSD” on
page 15 to move the data from the computer’s HDD to the
SSD.
Replacing the internal HDD with the SSD
To replace the internal HDD with the SSD:
1 After the data migration has finished and the computer has shut
down, detach the USB-SATA Conversion cable from the SSD
and from your PC.
2 With the computer turned off, remove the HDD from the PC's
storage bay.
Page 13

Installation
Installing the SSD to a Desktop PC
3 Install the SSD in the PC by aligning the SATA connector of
SSD with the SATA connector in the PC and then gently and
firmly connecting the SATA connectors.
13
(Sample Image) Replace the HDD with the SSD
4 Close the cover of the storage bay, and turn on your PC.
Your SSD is now available to boost your PC’s performance.
Installing the SSD to a Desktop PC
Connecting the SSD to your PC
To connect the SSD to your PC:
1 Make sure the PC is turned off.
2 Mount the SSD onto the bracket as shown.
(Sample Image) Mount the SSD onto the bracket
3 Mount the bracket into the 3.5 inch bay of your PC.
Page 14

14
Installation
Installing the SSD to a Desktop PC
4 Find the available SATA connector in your PC, and connect the
SSD using the SA
TA signal cable.
(Sample Image) SATA signal cable
5 Connect the SSD and the PC power supply using the SATA
power cable.
(Sample Image) Desktop SATA connections
6 Turn on your PC, and make sure all programs are closed.
7 Open Windows Explorer.
You will see the SSD volume mounted.
(Sample Image) Explorer window with SSD
Page 15

Migrating PC data to the SSD
NOTE
8 Perform the data migration procedure: “Migrating PC data to
the SSD” on page 15.
At the end of the data migration procedure, the PC shuts down.
You may then remove the HDD from your PC or keep it as
secondary storage.
Configuring the SSD as the primary boot device
After you have transferred the data from the previous storage to the
SSD, you can configure the SSD as the primary boot device.
To configure the SSD as the primary boot device:
1 Turn on your PC.
2 In the BIOS menu, configure SSD as the primary boot device.
(For more information, refer to system help or the manual for
your PC.)
3 Restart your PC.
Your SSD is now available to boost your PC performance.
Migrating PC data to the SSD
Please make sure to back up all data on your storage device prior to
running the data migration software.
Installation
15
Before you can do this procedure, you must connect the SSD to
your notebook or desktop computer, see “Installing the SSD to a
Notebook PC” on page 10 or “Installing the SSD to a Desktop PC”
on page 13.
To migrate PC data to the SSD:
1 Be sure all programs are closed.
2 Install the Data Migration Software as follows:
❖ In Windows Explorer, locate the Data Migration Software
folder in the SSD volume.
❖ Double-click setup.exe, and follow the screen prompts.
3 Perform Data Migration.
❖ Make sure no other programs are running.
❖ Launch the migration software.
Page 16

16
Installation
Migrating PC data to the SSD
❖ Select the PC's HDD as the source storage, and select the
SSD as the destination storage.
(Sample Image) Source and destination selection screen
❖ Click Start.
The following screen will be displayed.
(Sample Image) Confirmation screen
❖ Click OK to confirm the message and perform the data
migration.
Page 17

Installation
Migrating PC data to the SSD
Your PC reboots and the migration software begins the process. The
progress bar is displayed.
17
(Sample Image) Progress screen
At the completion of the migration process, the message below will
be displayed.
(Sample Image) Complete and shut down confirmation screen
Page 18

18
Installation
Migrating PC data to the SSD
❖ Click OK to finish the migration process and shut down
your computer.
You can now proceed with the next installation step for your
computer. For notebooks, see “Replacing the internal HDD
with the SSD” on page 12. For desktop computers, see
“Configuring the SSD as the primary boot device” on page 15.
Page 19

Chapter 3
Other Information
Toshiba Support
If you require help or are having problems operating your product,
you may need to contact Toshiba for additional technical assistance.
Before you call
Since some problems may be related to software, it is important that
you investigate other sources of assistance first. Try the following
before contacting Toshiba:
❖ Review the documentation supplied with your product.
❖ If a problem occurs when you are running software
applications, consult the software documentation for
troubleshooting suggestions. Contact the software company’s
technical support department for assistance.
❖ Consult the reseller or dealer from whom you purchased your
product. They are your best resource for current information
and support.
19
Page 20

20
Other Information
Contacting Toshiba
Contacting Toshiba
Toshiba’s technical support Web site
For technical support, or to stay current on the most recent software
and hardware options for your product and for other product
information, be sure to regularly check the Toshiba Web site at
support.toshiba.com.
Toshiba voice contact
For technical support, call the Toshiba Customer Support Center:
Within the United States at (888) 592-0944
Outside the United States at (949) 583-3305
Warranty
Three (3) year standard limited warranty for computer accessories and electronics
This product is covered by a three (3) year Standard Limited
Warranty. A copy of the warranty is pre-installed on the CD-ROM
or can be viewed online at pcsupport.toshiba.com/accessories3yr.
Obtaining warranty service
Customers located in the fifty United States and District of
Columbia may obtain warranty service by visiting the Toshiba
Acclaim Web site at acclaim.toshiba.com or by contacting the
telephone support center at (888) 592-0944.
Customers located outside the fifty United States and District of
Columbia may obtain warranty service by contacting the telephone
support center at (949) 583-3305.
Page 21

Juego de actualización de Unidad de estado sólido (SSD) para PC de Toshiba
Page 22

2
A D V E R T E N C I A
Información reglamentaria
Información de la Comisión Federal de Comunicaciones de
Estados Unidos (FCC)
Nombre del producto: Juego de actualización de Unidad de estado sólido (SSD)
para PC de Toshiba
Aviso de la FCC “Información sobre la declaración de
conformidad”
Este equipo se probó y se comprobó que cumple con los límites para dispositivos
digitales de Clase B, en virtud de la Parte 15 de las normas de la Comisión
Federal de Comunicaciones de Estados Unidos (Federal Communications
Commission o FCC). Estos límites están diseñados para proporcionar una
protección razonable contra interferencias perjudiciales en una instalación
residencial.
Este equipo genera, utiliza y puede irradiar energía de radiofrecuencia y, si no se
instala y utiliza conforme a las instrucciones, puede provocar interferencias
perjudiciales en comunicaciones de radio. Sin embargo, no se garantiza que no
habrá interferencias en una instalación en particular. Si este equipo provoca
interferencias perjudiciales en la recepción de radio o televisión, lo que se puede
determinar apagando y encendiendo el equipo, recomendamos al usuario que
intente corregir la interferencia adoptando una o varias de las medidas siguientes:
❖ Cambiar la orientación o la ubicación de la antena receptora.
❖ Aumentar la distancia entre el equipo y el receptor.
❖ Conectar el equipo a un tomacorriente en un circuito diferente al que está
conectado el receptor.
❖ Consultar al distribuidor o a un técnico especializado en radio y televisión
para obtener ayuda.
Los cambios o las modificaciones realizadas a este equipo que no estén
aprobados expresamente por Toshiba, o por terceros autorizados por Toshiba,
pueden invalidar el derecho del usuario a utilizar el equipo.
Este dispositivo cumple con la Parte 15 de las normas de la FCC. El
funcionamiento está sujeto a las siguientes dos condiciones:
1 Este dispositivo no debe causar interferencias perjudiciales, y
2 Este dispositivo debe aceptar cualquier interferencia recibida, incluidas
aquéllas que puedan comprometer su funcionamiento.
Page 23

Contacto
P E L I G R O
A D V E R T E N C I A
N O T A
Dirección: TOSHIBA America Information Systems, Inc.
9740 Irvine Boulevard
Irvine, California 92618-1697
Teléfono: (949) 583-3000
Norma canadiense ICES-003
Este aparato digital de Clase B cumple con la norma canadiense ICES-003.
Norma NMB -003 de Canadá
Este aparato digital de Clase B cumple con la norma canadiense NMB -003.
This Class B digital apparatus complies with Canadian NMB -003.
Cet appareil numérique de la classe B est conformé à la norme NMB-003 du
Canada.
Íconos de seguridad
Este manual contiene instrucciones de seguridad que deben seguirse a fin de
evitar posibles peligros que podrían tener como consecuencia lesiones
personales, daños al equipo o pérdida de datos. Son advertencias de seguridad
que están clasificadas de acuerdo con la gravedad del peligro y están
representadas por íconos que distinguen cada instrucción como se muestra abajo:
3
Este ícono indica la presencia de una situación inminentemente peligrosa
que, de no evitarse, ocasionaría muerte o lesiones graves.
Este ícono indica la presencia de una situación potencialmente peligrosa
que, de no evitarse, podría ocasionar muerte o lesiones graves.
Este ícono indica la presencia de una situación potencialmente peligrosa
que, de no evitarse, podría ocasionar lesiones menores o moderadas.
Este ícono indica la presencia de una situación potencialmente peligrosa
que, de no evitarse, podría ocasionar daños a la propiedad.
Este ícono brinda información importante.
Page 24

4
Derechos de autor
© 2012 Toshiba America Information Systems, Inc. Todos los derechos
reservados. Todos los demás productos, servicios, nombres y logotipos utilizados
son marcas comerciales, marcas registradas o marcas de servicio de sus
respectivos propietarios. Si bien Toshiba ha hecho todo lo posible para garantizar
la precisión de la información suministrada en el presente documento en el
momento de su publicación, las especificaciones del producto, las
configuraciones y la disponibilidad del sistema y de los componentes están
sujetas a cambios sin previo aviso. Para obtener la información más actualizada
sobre su producto Toshiba visite el sitio web de Toshiba en toshibastorage.com.
Marcas comerciales
Microsoft, Windows, Windows XP, Windows Vista y Windows 7 son marcas
registradas o marcas comerciales de Microsoft Corporation en Estados Unidos
y/u otros países.
Todos los demás nombres de marcas y productos son marcas comerciales o
marcas registradas de sus respectivas compañías.
Page 25

Contenido
Capítulo 1: Información del producto .........................................7
Requisitos del sistema..............................................7
Componentes............................................................8
Cálculo de la capacidad.............................................9
Capítulo 2: Instalación ............................................................... 10
Precauciones ..........................................................10
Instalación de la SSD a una computadora
portátil ..............................................................10
Conexión de la SSD a la computadora ..............10
Sustitución de la unidad de disco duro
interna con la SSD ......................................12
Instalación de la SSD en una computadora de
escritorio...........................................................13
Conexión de la SSD a la computadora ..............13
Configuración de la SSD como dispositivo
de arranque principal ..................................15
Migración de datos de la computadora a la SSD.....15
Capítulo 3: Información adicional............................................. 19
Asistencia técnica de Toshiba .................................19
5
Page 26

6
Contenido
Antes de contactar a Toshiba............................19
Contacto con Toshiba .............................................20
Sitio web de asistencia técnica de Toshiba .......20
Contacto telefónico con Toshiba.......................20
Garantía ..................................................................20
Garantía limitada estándar de tres (3) años para
accesorios de computadoras y productos
electrónicos. ...............................................20
Obtención del servicio en garantía ....................20
Page 27

Capítulo 1
N O T A
N O T A
Información del producto
Requisitos del sistema
❖ Microsoft® Windows® 7, Windows Vista®, o Windows® XP
❖ Puerto USB 3.0 o USB 2.0 disponible.
IMPORTANTE: Toshiba recomienda que instale siempre en la
computadora los paquetes de servicio y las actualizaciones más
recientes para obtener la mayor fiabilidad y rendimiento.
La compatibilidad puede variar de acuerdo con la configuración del
hardware y el sistema operativo del usuario.
7
Page 28

8
Información del producto
Componentes
Componentes
Unidad de estado sólido (SSD) de Toshiba (con
software de migración de datos de PC
preinstalado)
CD-ROM (incluye software de migración de
datos de PC [de PC a SSD], Manual del usuario
[este documento] e información sobre la
Garantía)
Cable de conversión USB-SATA para migración
de datos de PC (de PC a SSD)
Cable de señal SATA para instalar la SSD en una
computadora de escritorio.
Cable de alimentación SATA para instalar la
SSD en una computadora de escritorio.
Soporte y tornillos para instalar la SSD en una
computadora de escritorio.
Guía de instalación rápida
Page 29

Cálculo de la capacidad
1 gigabyte (GB) representa 109 = 1.000.000.000 bytes y un terabyte
(1TB) representa 10
potencias de 10. Sin embargo, el sistema operativo de la
computadora muestra la capacidad de almacenamiento usando
potencias de 2 de acuerdo con las cuales 1 GB = 2
1.073.741.824 bytes y 1TB = 2
tanto, podría mostrar una capacidad de almacenamiento menor. La
capacidad de almacenamiento disponible (incluso los ejemplos de
diversos archivos de medios) varía de acuerdo con el tamaño del
archivo, la formatación, la configuración, el software, el sistema
operativo y otros factores.
Información del producto
Cálculo de la capacidad
12
= 1.000.000.000.000 bytes si se usan
30
40
= 1.099.511.627.776, y por lo
=
9
Page 30

Capítulo 2
N O T A
Instalación
Precauciones
❖ Mantenga la SSD en la bolsa antiestática (configuración de
envío) hasta que esté listo para instalarla.
❖ Para minimizar la electricidad estática toque el chasis de la
computadora antes de manipular la SSD.
❖ Maneje la SSD con cuidado. No toque los conectores.
❖ No desarme la SSD ni retire la etiqueta, ya que de hacerlo
anularía la garantía de la SSD.
❖ Asegúrese de que la SSD que va a instalar tenga una capacidad
de almacenamiento superior a la cantidad de datos actualmente
almacenados en la computadora.
Toshiba no es responsable de ninguna pérdida de datos o daños
causados por la sustitución de dispositivos de almacenamiento.
Instalación de la SSD a una computadora portátil
Conexión de la SSD a la computadora
El primer paso para instalar la SSD en una computadora portátil es
conectar la SSD a la computadora como preparación para la
migración de los datos de la unidad existente.
10
Page 31

Instalación
N O T A
Instalación de la SSD a una computadora portátil
Para conectar la SSD a la computadora:
3 Conecte el cable de conversión USB-SATA:
❖ Con la computadora apagada, conecte los dos conectores
USB estándar del cable de conversión USB-SATA a la
computadora.
11
(Imagen de muestra) Conexión del cable de conversión USB-SATA
a la computadora
❖ Conecte el otro extremo del cable de conversión USB-
SATA a la SSD.
Este cable se recomienda solamente para la transferencia inicial de
datos a la computadora y no debe reusarse para otros propósitos.
(Imagen de muestra) Conexión del cable de conversión USB-SATA
a la SSD
Page 32

12
Instalación
Instalación de la SSD a una computadora portátil
4 Encienda la computadora y asegúrese de que todos los
programas estén cerrados.
5 Abra el Explorador de Windows.
Aquí podrá ver que el volumen SSD está instalado.
(Imagen de muestra) Ventana del Explorador de Windows con la
SSD
6 Siga las instrucciones que aparecen en “Migración de datos de
la computadora a la SSD” en la página 15 para trasladar datos
del disco duro desde la computadora a la SSD.
Sustitución de la unidad de disco duro interna con la SSD
Para sustituir la unidad de disco duro interna con la SSD:
1 Después de que finalice la migración de datos y la
computadora se apague, desconecte el cable de conversión
USB-SATA de la SSD y de la computadora.
2 Con la computadora apagada, retire la unidad de disco duro del
compartimiento de almacenamiento de la computadora.
Page 33

Instalación
Instalación de la SSD en una computadora de escritorio
3 Para instalar la SSD en la computadora alineé el conector
SATA de la SSD con el conector SATA de la computadora.
Luego, con cuidado, conecte con firmeza los conectores SATA.
13
(Imagen de muestra) Sustitución de la unidad de disco duro con la SSD
4 Cierre la cubierta del compartimiento de almacenamiento y
encienda la computadora.
La unidad SSD está ahora lista para potenciar el rendimiento
de la computadora.
Instalación de la SSD en una computadora de escritorio
Conexión de la SSD a la computadora
Para conectar la SSD a la computadora:
1 Asegúrese de que la computadora esté apagada.
2 Instale la SSD en el soporte como se muestra.
(Imagen de muestra) Cómo instalar la SSD en el soporte
3 Instale el soporte en el compartimiento de 3,5 pulgadas de la
computadora.
Page 34

14
Instalación
Instalación de la SSD en una computadora de escritorio
4 Ubique el conector SATA disponible en la computadora y
conecte la SSD usando el cable de señal SATA.
(Imagen de muestra) Cable de señal SATA
5 Conecte la SSD y la alimentación de la computadora usando el
cable de alimentación SATA.
(Imagen de muestra) Conexiones SATA de la computadora de escritorio
6 Encienda la computadora y asegúrese de que todos los
programas estén cerrados.
7 Abra el Explorador de Windows.
Aquí podrá ver que el volumen SSD está instalado.
(Imagen de muestra) Ventana del Explorador de Windows con la SSD
Page 35

Instalación
N O T A
Migración de datos de la computadora a la SSD
8 Lleve a cabo el procedimiento de migración de datos:
“Migración de datos de la computadora a la SSD” en la
página 15.
Cuando finaliza el procedimiento de la migración de datos la
computadora se apaga. Puede entonces extraer la unidad de
disco duro de la computadora o mantenerla como un
almacenamiento secundario.
Configuración de la SSD como dispositivo de arranque principal
Después de transferir los datos de la unidad de almacenamiento que
utilizaba hasta entonces a la unidad SSD usted puede configurar la
SSD como dispositivo de arranque principal.
Para configurar la SSD como dispositivo de arranque principal:
1 Encienda la computadora.
2 En el menú BIOS, configure la SSD como dispositivo de
arranque principal. (Para obtener información adicional
consulte la ayuda del sistema o el manual de la computadora).
3 Reinicie la computadora.
La unidad SSD está ahora lista para potenciar el rendimiento
de la computadora.
15
Migración de datos de la computadora a la SSD
Asegúrese de hacer copias de seguridad de todos los datos
contenidos en el dispositivo de almacenamiento antes de ejecutar el
software de migración de datos.
Antes de llevar a cabo este procedimiento debe conectar la SSD a la
computadora portátil o a la computadora de escritorio. Consulte
“Instalación de la SSD a una computadora portátil” en la página 10
o “Instalación de la SSD en una computadora de escritorio” en la
página 13.
Para migrar los datos del PC a la SSD:
1 Asegúrese de que todos los programas estén cerrados.
2 Instale el software de migración de datos de la siguiente
manera:
❖ En el Explorador de Windows ubique la carpeta del
software de migración de datos en el volumen SSD.
❖ Haga doble clic en setup.exe y siga las instrucciones que
aparecen en la pantalla.
Page 36

16
Instalación
Migración de datos de la computadora a la SSD
3 Lleve a cabo la migración de datos.
❖ Asegúrese de que no se estén ejecutando otros programas.
❖ Inicie el software de migración.
❖ Seleccione la unidad de disco duro de la computadora
como la fuente y la unidad SSD como el destino de
almacenamiento.
(Imagen de muestra) Pantalla de selección de la fuente y el destino
❖ Haga clic en Start (Iniciar).
Aparece la siguiente pantalla.
(Imagen de muestra) Pantalla de confirmación
❖ Haga clic en OK (Aceptar) para confirmar el mensaje y
llevar a cabo la migración de datos.
Page 37

Instalación
Migración de datos de la computadora a la SSD
Su computadora se reinicia y el software de migración de datos
empieza el proceso. Aparece la barra de progreso.
17
(Imagen de muestra) Barra de progreso
Cuando finaliza el proceso de migración aparece el siguiente
mensaje:
(Imagen de muestra) Pantalla de confirmación de finalización del
proceso y apagado
Page 38

18
Instalación
Migración de datos de la computadora a la SSD
❖ Haga clic en OK (Aceptar) para finalizar el proceso de
migración y apagar la computadora.
Puede proceder ahora al siguiente paso de instalación para su
computadora. Para las computadoras portátiles consulte
“Sustitución de la unidad de disco duro interna con la SSD” en
la página 12. Para las computadoras de escritorio consulte
“Configuración de la SSD como dispositivo de arranque
principal” en la página 15.
Page 39

Capítulo 3
Información adicional
Asistencia técnica de Toshiba
Si necesita ayuda o tiene problemas con el funcionamiento de su
producto, podría ser necesario ponerse en contacto con Toshiba
para obtener asistencia técnica adicional.
Antes de contactar a Toshiba
Puesto que algunos problemas pueden estar relacionados con el
software, es conveniente que recurra primero a otras fuentes de
asistencia técnica. Intente hacer lo siguiente antes de comunicarse
con Toshiba:
❖ Revise la documentación suministrada con el producto.
❖ Si el problema se produce mientras está ejecutando una
aplicación de software, consulte la documentación del software
para sugerencias sobre posibles soluciones de problemas.
Póngase en contacto con el personal de asistencia técnica del
fabricante del software y solicite su ayuda.
❖ Consulte al revendedor o al distribuidor a quien le compró el
producto, ya que es su mejor fuente de información actualizada
y asistencia.
19
Page 40

20
Información adicional
Contacto con Toshiba
Contacto con Toshiba
Sitio web de asistencia técnica de Toshiba
Para obtener asistencia técnica o para mantenerse al día acerca de
las opciones más recientes de software y hardware para el producto,
así como para obtener otro tipo de información sobre los productos,
asegúrese de visitar periódicamente el sitio web de Toshiba en
support.toshiba.com.
Contacto telefónico con Toshiba
Si desea solicitar asistencia técnica, llame al Centro de asistencia al
cliente de Toshiba:
Al (888) 592-0944 en Estados Unidos
Al (949) 583-3305 fuera de Estados Unidos
Garantía
Garantía limitada estándar de tres (3) años para accesorios de computadoras y productos electrónicos.
Este producto incluye una garantía limitada estándar de tres (3)
años. Una copia de la garantía se incluye en el CD-ROM o se puede
consultar en línea en pcsupport.toshiba.com/accessories3yr.
Obtención del servicio en garantía
Los clientes ubicados en uno de los cincuenta estados de Estados
Unidos y en el Distrito de Columbia pueden obtener el servicio en
garantía visitando el sitio Acclaim Web de Toshiba en
acclaim.toshiba.com o llamando el centro de asistencia al
(888) 592-0944.
Los clientes ubicados fuera de los cincuenta estados de Estados
Unidos y en el Distrito de Columbia pueden obtener el servicio en
garantía llamando al centro de asistencia al (949) 583-3305.
 Loading...