

Page 1

Global Stock System
GSS STORE OWNER’S MANUAL
TEC America, Inc.
Page 2

______________________________________________________
Page 3

______________________________________________________
TEC AMERICA, INC.
90-DAY LIMITED WARRANTY
FS-3600 GSS-STORE SOFTWARE
BEFORE USING THIS PRODUCT, YOU SHOULD CAREFULLY READ THE FOLLOWING TERMS AND
CONDITIONS. YOUR USE OF THIS PRODUCT INDICATES YOUR ACCEPTANCE OF THESE TERMS.
IF YOU DO NOT AGREE WITH THEM, YOU SHOULD NOT USE THIS PRODUCT AND SHOULD
PROMPTLY RETURN THE PRODUCT TO THE SELLER.
TEC AMERICA, INC. warrants this product to be free from defects in materials and workmanship for
a period of 90 days from the date of purchase from an authorized TEC AMERICA, INC. dealer. This
warranty is limited to the original purchaser, and to TEC AMERICA, INC. products that are sold and
used within the continental United States and Hawaii. A copy of a valid dated sales receipt must be
submitted with the product for warranty service. Third Party Operating System and Third Party
Application Software are specifically excluded from this warranty.
This limited warranty applies only to TEC AMERICA, INC. products that do not function properly
under normal use, within the manufacturer’s specifications. It does not apply to products that, in the
sole opinion of TEC AMERICA, INC., have been damaged as a result of accident, misuse, neglect, or
improper packing or shipping. This warranty is void if the TEC AMERICA, INC. label or logo, or the
rating label or serial number have been removed or defaced, or the product has been modified or
serviced by other than TEC AMERICA, INC. or an authorized TEC AMERICA, INC. Service Center.
During the 90-day warranty period, TEC AMERICA, INC. will repair or replace, at its option, any
defective product with no charge for parts or labor.
TEC AMERICA, INC.’S LIABILITY HEREUNDER SHALL BE LIMITED TO REPAIR OR REPLACEMENT
OF THE DEFECTIVE PART OR PARTS AND SUCH CORRECTION SHALL CONSTITUTE A
FULFILLMENT OF ITS WARRANTY HEREUNDER.
TEC AMERICA, INC. MAKES NO WARRANTIES, EXPRESS OR IMPLIED, INCLUDING
MERCHANTABILITY OR FITNESS FOR A PARTICULAR PURPOSE, EXCEPT AS EXPRESSLY
STATED HEREIN.
UNDER NO CIRCUMSTANCES SHALL TEC AMERICA, INC. BE LIABLE TO THE PURCHASER OR
ANY USER FOR ANY DAMAGES, INCLUDING INCIDENTAL OR CONSEQUENTIAL DAMAGES,
EXPENSES, LOST PROFITS, LOST SAVINGS, OR OTHER DAMAGES ARISING OUT OF THE USE OF
OR THE INABILITY TO USE THIS PRODUCT.
To obtain warranty service, contact your TEC AMERICA, INC. dealer. You may also write or phone:
TEC AMERICA, INC., 4401-A BANKERS CIRCLE
ATLANTA, GA 30360
PHONE NO.: (770) 449-3040 FAX: (770) 453-0909
If the problem cannot be remedied by telephone, TEC AMERICA, INC. will determine how service will
be provided. Do not ship the equipment to TEC AMERICA, INC. without a return authorization
number. The purchaser must prepay any shipping costs and insurance, and assume the risk of loss
during shipping.
i
Page 4
______________________________________________________
TEC America, Inc. provides this publication as is without Warranty of any kind,
either expressed or implied. This publication could include technical inaccuracies
or typographical errors. Changes are periodically made to the information herein;
these changes will be incorporated in new editions of the publication. TEC
America, Inc. may make improvements and/or changes in the product(s) and/or
program(s) described in this publication at any time.
Copyright 2002 by TEC America, Inc.
4401-A Bankers Circle, Atlanta, GA 30360
All rights reserved.
ii
Page 5

______________________________________________________
CONTENTS
INTRODUCTION..............................................................................................................1
NAVIGATION KEYS .........................................................................................................2
MAINTENANCE ...............................................................................................................3
LOCATION.......................................................................................................................5
Location Details ............................................................................................................ 5
Cash Regis er Details .................................................................................................... 6 t
Subnet De ails .............................................................................................................. 7
NETWORK CONFIGURATION..........................................................................................8
FS-3600 SCREENS ........................................................................................................10
FS-3600 CATEGORIES ..................................................................................................12
FS-3600 DISCOUNTS....................................................................................................13
t
FINANCIAL ...................................................................................................................14
Cash Classifications..................................................................................................... 14
Cash Table ................................................................................................................. 15
Hourly Table............................................................................................................... 16
EMPLOYEE ....................................................................................................................17
Employee To al Names Maintenance............................................................................. 19
SUPPLIER .....................................................................................................................20
GROUP CLASSIFICATIONS ...........................................................................................21
PRODUCT GROUP .........................................................................................................22
STOCK UNITS................................................................................................................23
SALES UNIT ..................................................................................................................24
PRODUCT MAINTENANCE.............................................................................................25
Product G oup ............................................................................................................ 27
Pricing ....................................................................................................................... 28
Stock ......................................................................................................................... 30
Product Options.......................................................................................................... 32
Status Options............................................................................................................ 33
User Fields ................................................................................................................. 34
t
r
RECIPES........................................................................................................................35
RECIPE ...................................................................................................................... 36
iii
Page 6

______________________________________________________
STOCK...........................................................................................................................38
STOCK MANAGEMENT...................................................................................................39
Method 1 - Using Recommended Order......................................................................... 39
Method 2 - Using manual Ordering ............................................................................... 39
Method 3- Using Deliveries and Purchase Invoicing........................................................ 40
Method 4- Using simplistic purchasing .......................................................................... 40
STOCK MANAGEMENT...................................................................................................41
ORDERS ........................................................................................................................43
ORDER DETAILS......................................................................................................... 43
Information Entry ....................................................................................................... 43
DELIVERIES..................................................................................................................45
DELIVERY .................................................................................................................. 45
SUPPLIER DETAILS ..................................................................................................... 45
DELIVERY DETAILS..................................................................................................... 45
Information Entry ....................................................................................................... 46
PURCHASES ..................................................................................................................47
PURCHASE ................................................................................................................. 47
SUPPLIER DETAILS ..................................................................................................... 47
PURCHASE DETAILS.................................................................................................... 47
SPECIAL INSTRUCTIONS............................................................................................. 48
Information Entry ....................................................................................................... 48
TRANSFERS ..................................................................................................................50
Special ins ructions ..................................................................................................... 50 t
INFORMATION ENTRY................................................................................................. 50
WRITE OFFS .................................................................................................................52
STOCK MANAGEMENT...................................................................................................53
Update Current Stock Movements ................................................................................ 53
Take Stock Snapshot................................................................................................... 53
Physically Count Stock Items........................................................................................ 53
Enter Stock Take ........................................................................................................ 53
Analyze resul s of stock count ...................................................................................... 53
t
Update Current Stock .................................................................................................. 53
Set Opening Stock ...................................................................................................... 54
SET OPENING STOCK....................................................................................................55
STOCK TAKING SNAPSHOT ..........................................................................................57
ENTERING STOCK TAKE ...............................................................................................58
Produc s .................................................................................................................... 58
UPDATE CURRENT STOCK ............................................................................................60
UPDATE.........................................................................................................................61
t
iv
Page 7

______________________________________________________
Update Recipe cos s.................................................................................................... 61 t
Clear Sales WARNING ............................................................................................. 61
Clear Stock WARNING !............................................................................................. 61
GLOBAL PRICE CHANGE ...............................................................................................62
REPORTS ......................................................................................................................63
!!!
!!
Produc s .................................................................................................................... 63
Employee................................................................................................................... 63
Financial .................................................................................................................... 64
Hour.......................................................................................................................... 64
REPORT SELECTION .....................................................................................................65
Customizing Reports ................................................................................................... 66
View Report / Print and Save Features.......................................................................... 66
VIEW LOG FILES...........................................................................................................68
GSS STORE OPTIONS....................................................................................................69
Product File ................................................................................................................ 70
Product File 2 ............................................................................................................. 72
Shelf edge.................................................................................................................. 73
Orders /Transfers........................................................................................................ 74
Miscellaneous ............................................................................................................. 75
VIEW - GSS JOURNAL...................................................................................................76
WINDOW ......................................................................................................................78
USER .............................................................................................................................79
Log off User ............................................................................................................... 79
Set-up User................................................................................................................ 79
Users......................................................................................................................... 79
t
GSSEVENT – EVENT MANAGER.....................................................................................81
Event Time Table........................................................................................................ 82
Location..................................................................................................................... 83
Logs .......................................................................................................................... 84
Default Upload Options ............................................................................................... 85
GSSEVENT – Script ..................................................................................................... 86
BACKUPS ......................................................................................................................87
TROUBLESHOOTING.....................................................................................................88
v
Page 8

Page 9
______________________________________________________
INTRODUCTION
This package has been designed to provide a simple and effective solution to the FS3600 stock taking requirements for numerous establishment types.
The simplistic windows based functionality allows for ease of use, with such features as
navigation keys provided through out the package, to assist the user.
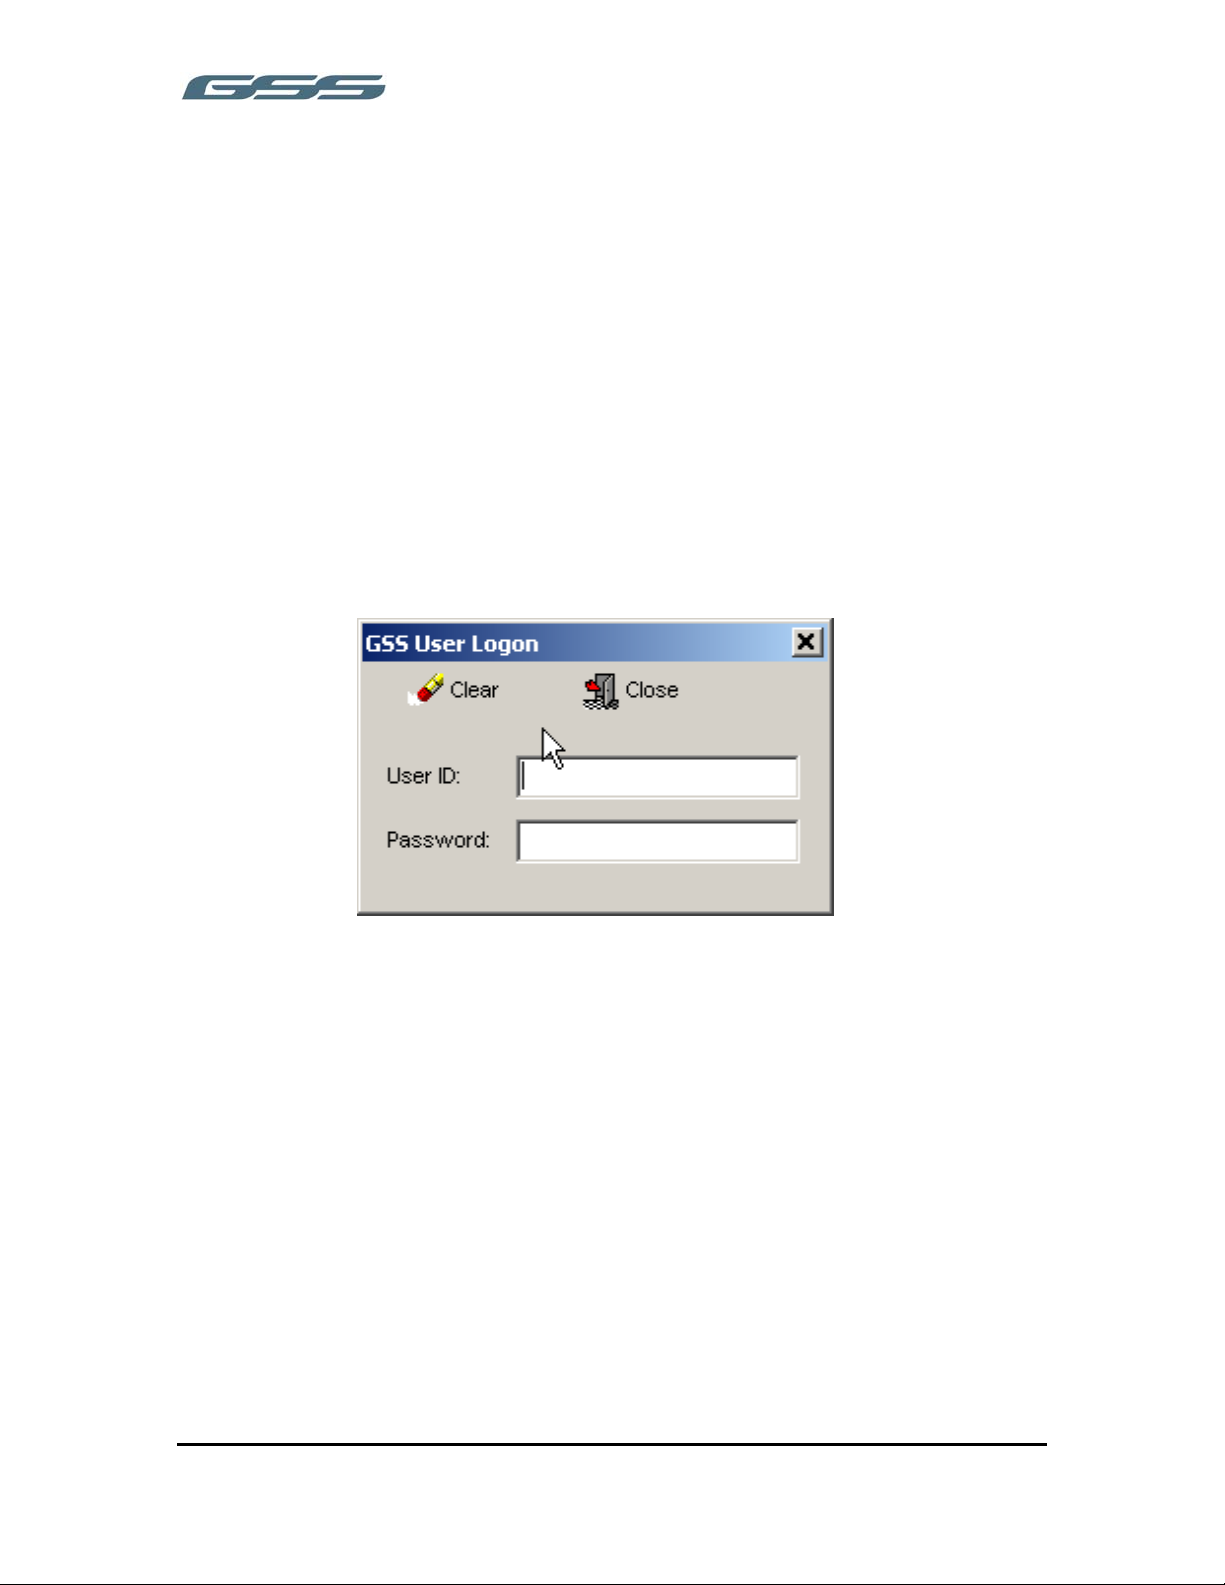
The GSS Store package also has built-in security, with the ability to restrict actions to
individual users. This means it is necessary to select USER and LOG ON after loading to
allow access the main menu options.
If additional security is required on the system this is covered in section “Set-up Users”.
If the password for the Master User is forgotten, access to all options of the system
previously available to that user becomes restricted.
1
Page 10

______________________________________________________
NAVIGATION KEYS
These keys are used through out the package to assist with record management.
SAVE
This is used to save a record, which is being edited. In the case of stock management,
it allows the information to be saved, recalled later for amendments and additions then
committed, to move onto the next stage.
CANCEL
This option cancels the products input and refreshes the users current screen
LABELS
This option allows the user to print product pricing labels for all goods ordered where
the Label Req. box is ticked and the product has barcode label required selected. The
labels are printed to a self adhesive thermal label printer. This option only applies during
Stock Orders/Deliveries/Purchases.
This will display to screen the relevant report, then allow a hard copy to be printed. The
prints can be produced for both saved and committed information. This information can
also be sent to file at this stage in varying formats such as CSV, HTML, XLS, RTF, WMF
etc.
COMMIT
This moves the information onto the next stage; i.e. Orders are accepted and moved to
Delivery stage. Deliveries are accepted and moved to the Purchase stage ready for
invoices to be entered.
DELETE
This will delete a saved Order, Delivery or Purchase, removing the relevant totalizer
from the product file, alternatively this will delete the current record on-screen.
EXIT
This leaves the current screen
F2
This provides a quick access key for finding products
2
Page 11

______________________________________________________
MAINTENANCE
The software package is designed to help you manage your business profitably, the key
to this is understanding your business and translating this into a product file. The first
consideration is the number of establishments you will be controlling using the system.
Each establishment is given a Location. The Location file controls the most basic of
information, such as the name of the site, the type of Point of Sale terminal connected
etc, this information is unique for each Location.
Other details such as the product file can be either Location unique for such details as
the retail price or details can be maintained simultaneously for all sites. It may be
necessary for example to control different price, suppliers etc. for each Location due to
regional differences.
There is a Location box displayed on the Product screen, allowing you to select which
Location, the record is saved to. i.e. by selecting Location 2 while editing a products
retail price you can determine that this information relates solely to Location 2.
The View Options tab, allows on multi-Location packages, to determine which fields are
unique and which fields are have changes updated across the Locations.
Once the software has been installed, the first thought must be how to organize the
data, the main components of any stock control system are the products you sell. These
saleable products consist of two parts; the retail information that is required to appear
on the Point of Sale terminal, i.e. price, description etc. The other consideration is how
the item is to be Purchased. What size box/bottle/barrel etc does the product arrive in
and how many saleable units are in that Stock Unit. This information can then be
organized into two levels of grouping for more comprehensive reporting.
It is recommended the information is created in the following order:
Basic Point of Sale and site Location details
• View Options
• Locations
• Hourly Table
• Cash Classifications
• Cash Table
• Staff Detail
3
Page 12

______________________________________________________
Product and Product related Details
• Supplier Name
• Group Classification Code
• Product Group
• Stock Units
• Sales Units
• Products
4
Page 13
______________________________________________________
LOCATION
This controls the address and Point of Sale model for each site of the establishment.
GSS Store can either be a single Location or multi Location
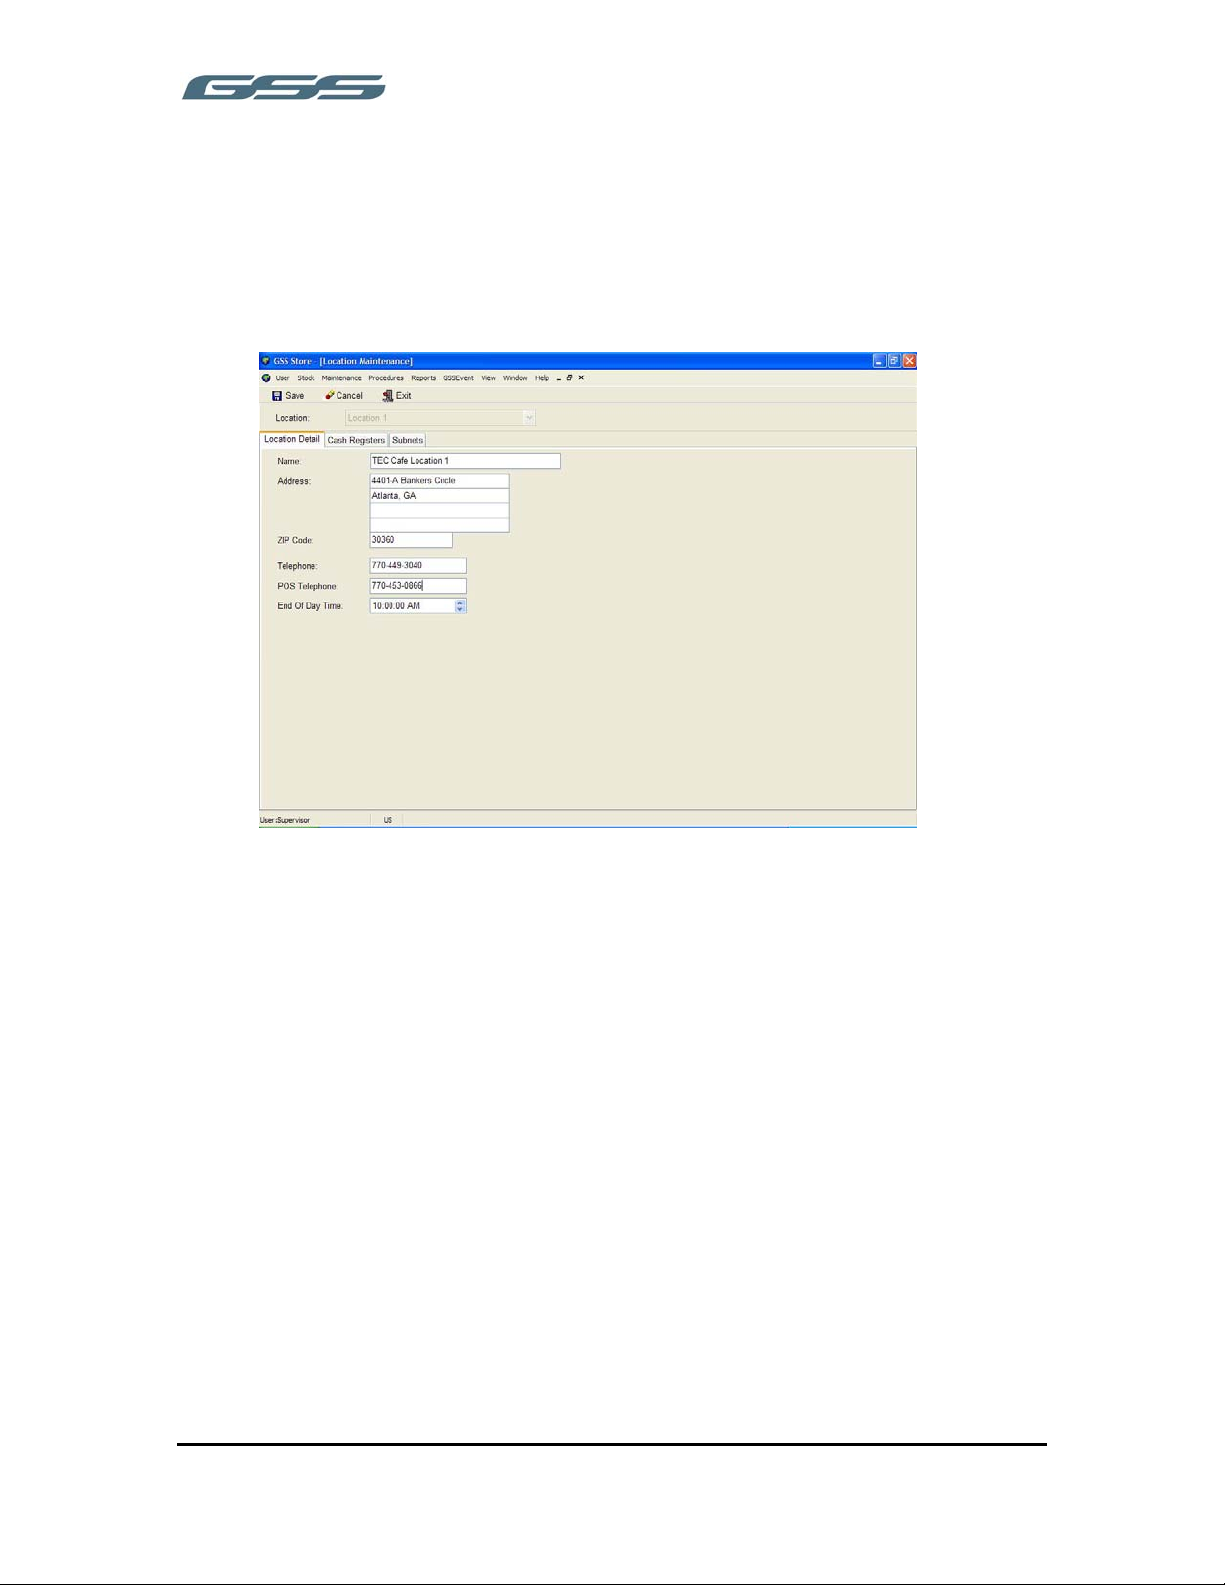
LOCATION DETAILS
Name
This is the name of the Location, which will appear on the reports, and is displayed
when changing between Locations.
Address
This is available for storing the Location’s address for reference purposes and printed on
Orders etc.
ZIP Code
This is part of the address for the Location.
POS (POINT OF SALE) Telephone Number (GSS Host Option)
If you are communicating with the Point of Sale terminal via modem, this is the
telephone number the modem needs to call to connect with the remote Location. Please
note if the telephone normally requires 9 for an outside line, the POS telephone number
must be preceded with 9 followed by a comma. I.e. 9,01234567890 (no spaces to be
entered)
End of Day Time
The end of day time denotes that latest time that communications could take place with
a Location and the figures should be filed into the previous day’s date. For example,
5
Page 14
______________________________________________________
with the end of day time shown as above at 10:00am, any sales figures collected from
the Point of Sale terminals up to 10:00am will be filed into the previous day’s date. This
is used where establishments are open past midnight and the sales figures should be
filed for the previous day.
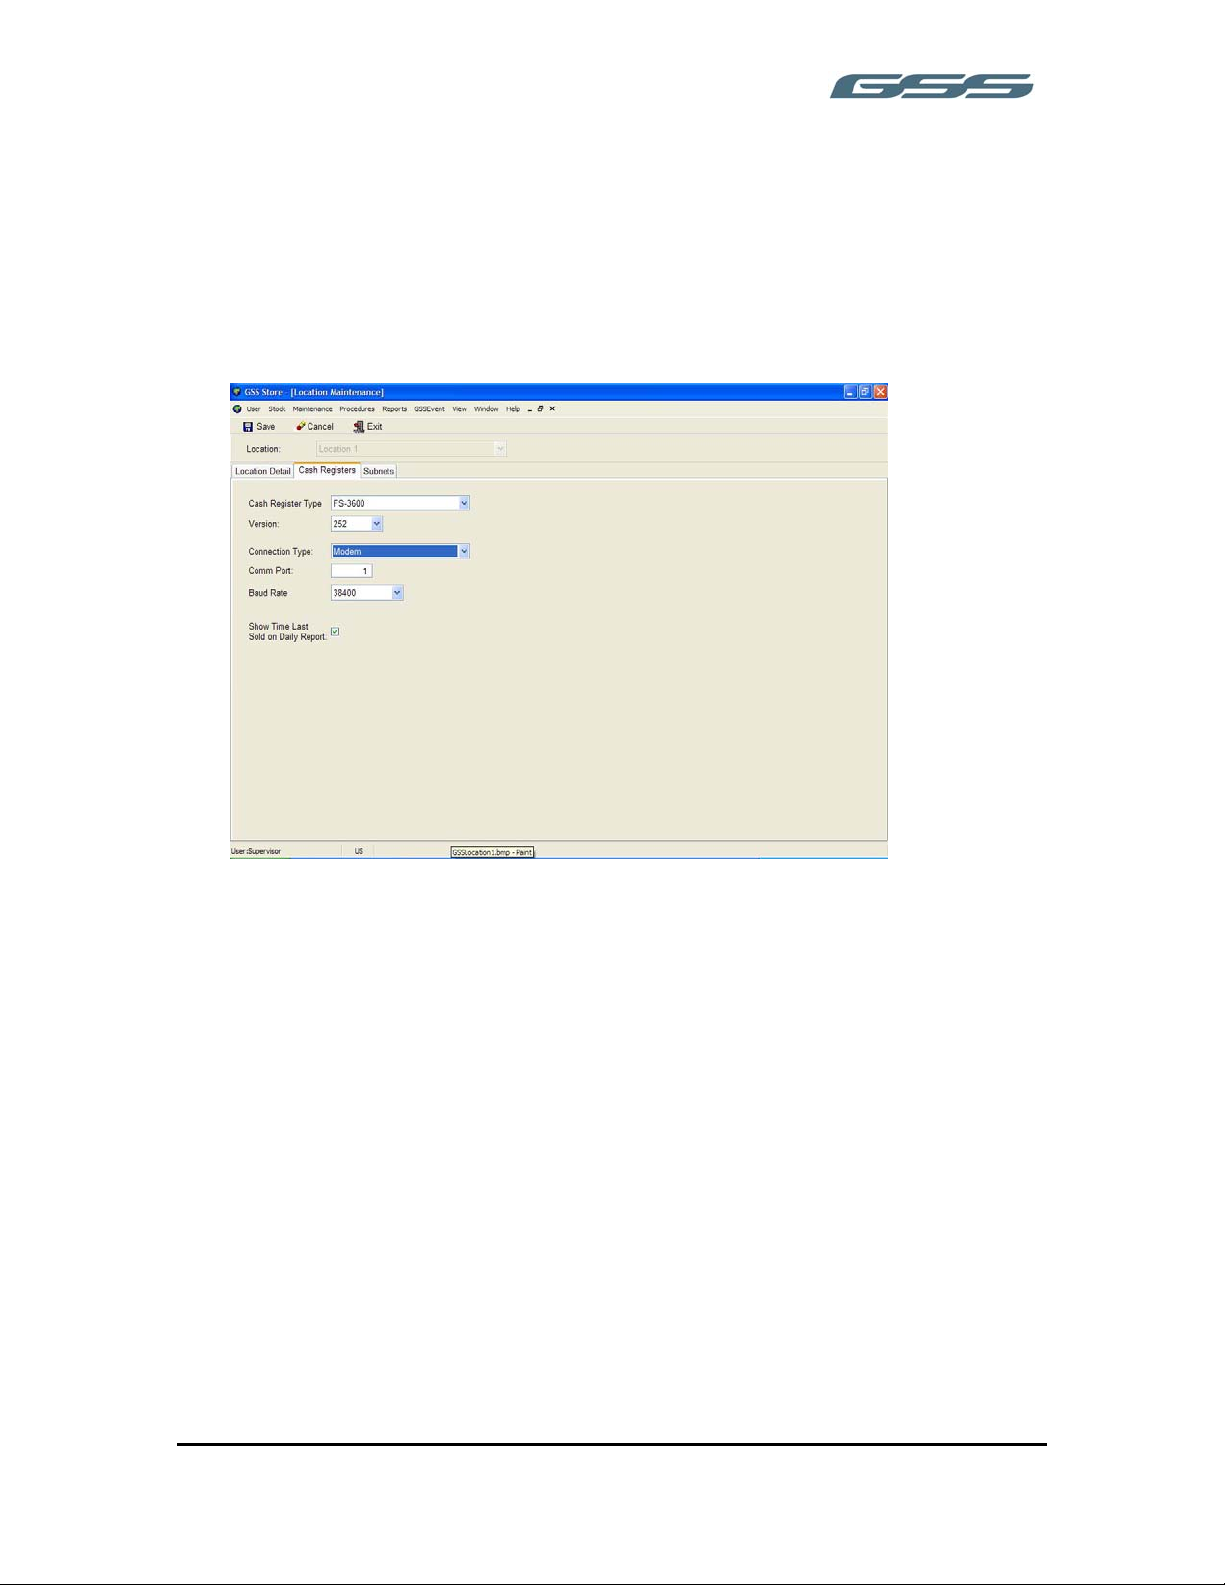
CASH REGISTER DETAILS
Cash Register Type
Currently GSS Store supports the TEC FS-3600 terminal.
Version Number
Must be set to 252.
Connection Type
Available communication modes:
• Direct Serial
• Modem: refer to Terminal Configuration-Help for recommended modem settings
• Network
Comm Port
Used for Direct Serial and Modem only.
Set to the host PC serial port number to which the modem or direct serial cable will be
connected. This is NOT the port on the FS-3600 terminal.
Baud Rate
Used for Direct Serial and Modem only.
6
Page 15
______________________________________________________
This speed must be equivalent to the speed set at the FS-3600 terminal with which it is
communicating. This can be set differently for each location.
Show time last sold on Daily Report
The TEC FS-3600 terminal records the time last sold for each product and if this box is
checked it will be displayed on the Individual Daily Product Sales report.
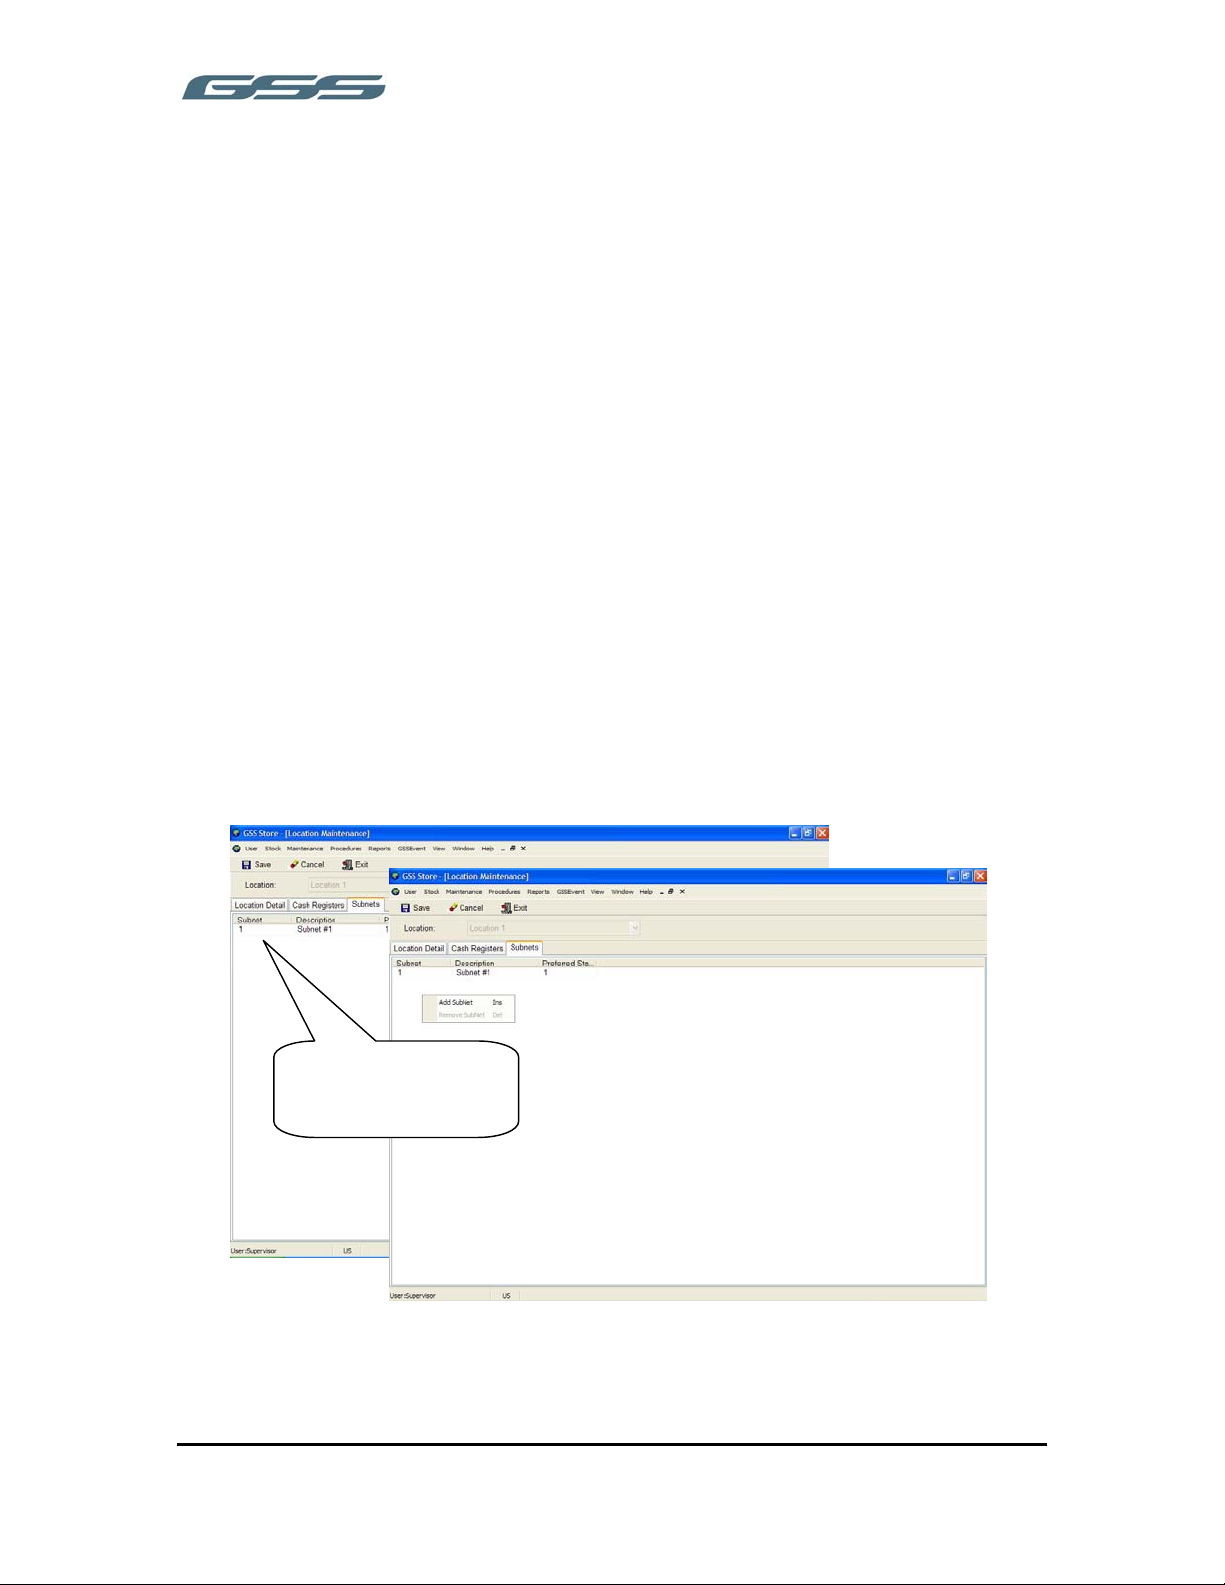
SUBNET DETAILS
Subnet
This is the subnet number for the particular FS-3600 system to be polled.
Description
Enter a unique name for each of the subnets.
Preferred Station
Valid setting is 1-6.
For Network Connection:
This is the station number for the terminal which will generate the export files. The
location of these files are dependent on the Reset options of the FS-3600 terminal.
For Direct Serial and Modem Connection:
This is the station number that the modem or direct connect cable is connected to.
Right-Click here to
add or remove a
7
Page 16
______________________________________________________
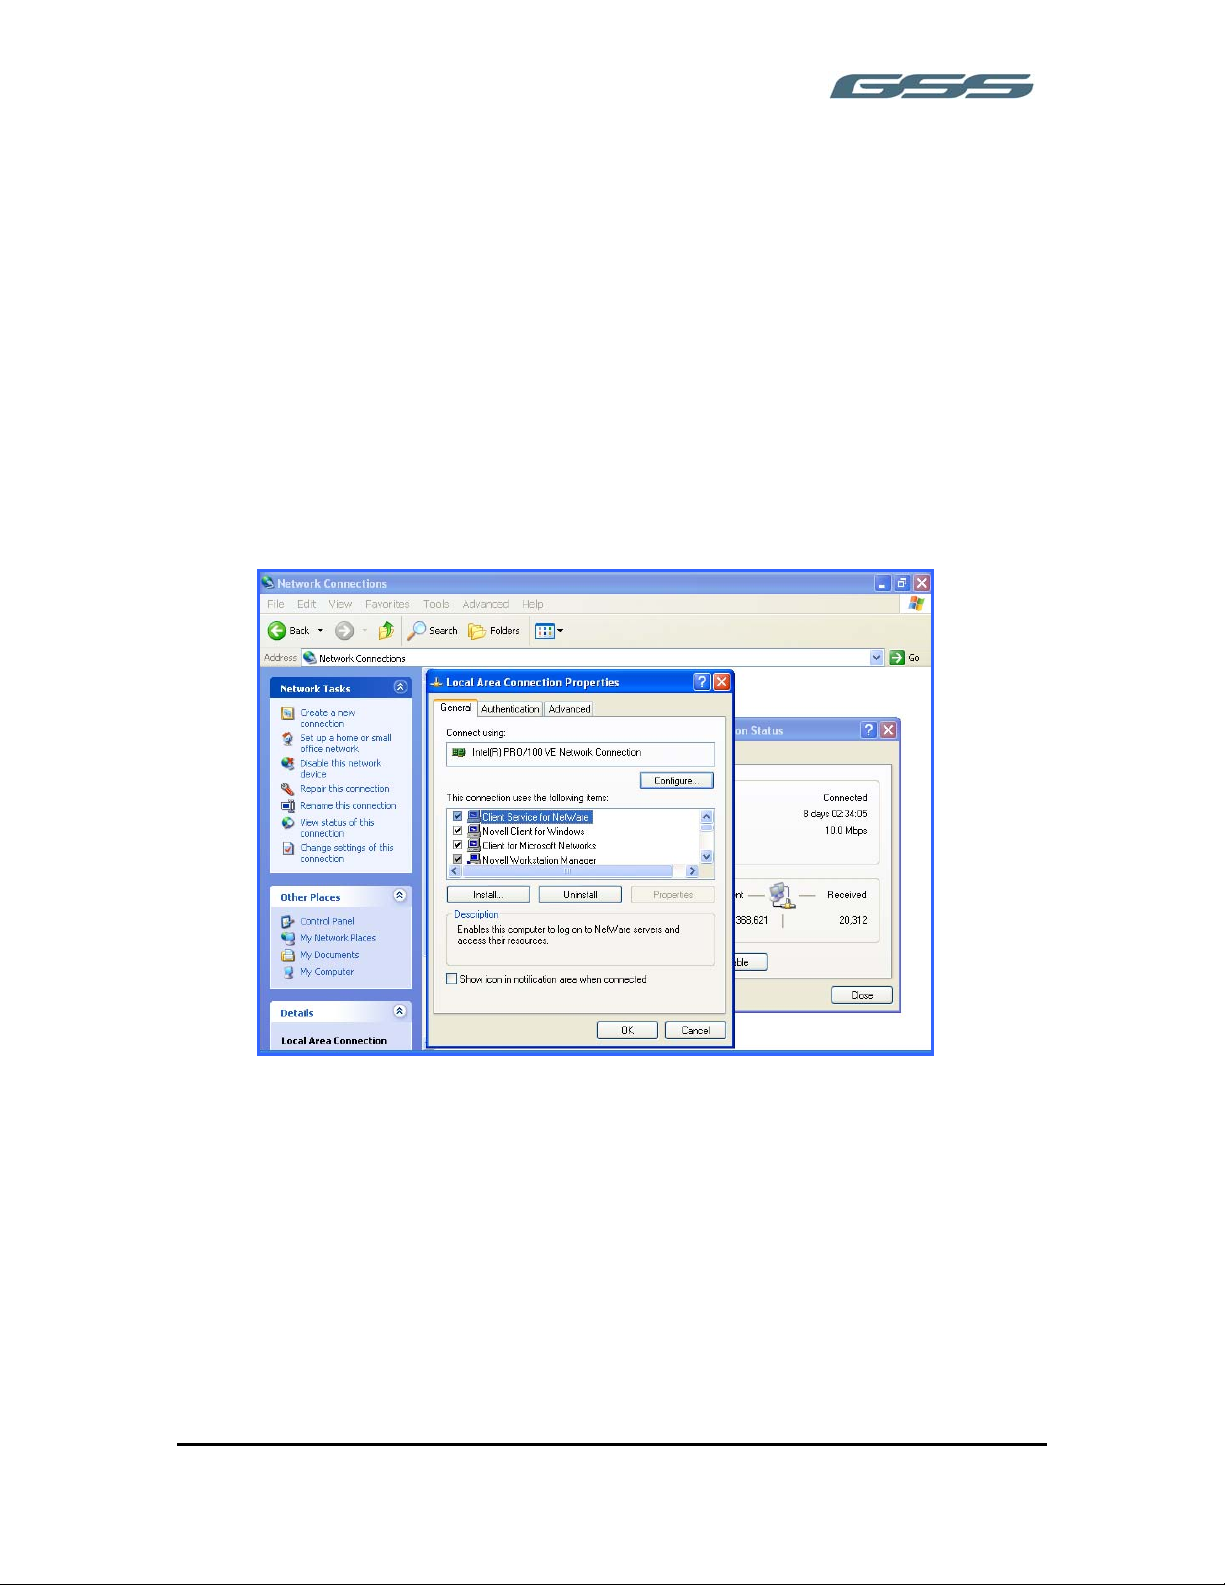
NETWORK CONFIGURATION
Following are some notes to assist with the network configuration for communication to
the FS-3600. However please beware these may not be the exact requirements for the
PC on which GSS is running, especially if there is currently a network environment in
place. Please consult your supplier if there are any concerns over which options relate to
your system. Under no circumstances attempt the following procedure if all the facts
and relevant experience are not at your disposal. Uninformed entry to any following field
may result in existing network failure.
• Select the Start Programs - Settings - Control Panel - Network Settings
• Then within Configuration ensure there is a Client for NetWare networks option. If
this is not available then use the INSTALL option to create the selection.
8
Page 17
______________________________________________________
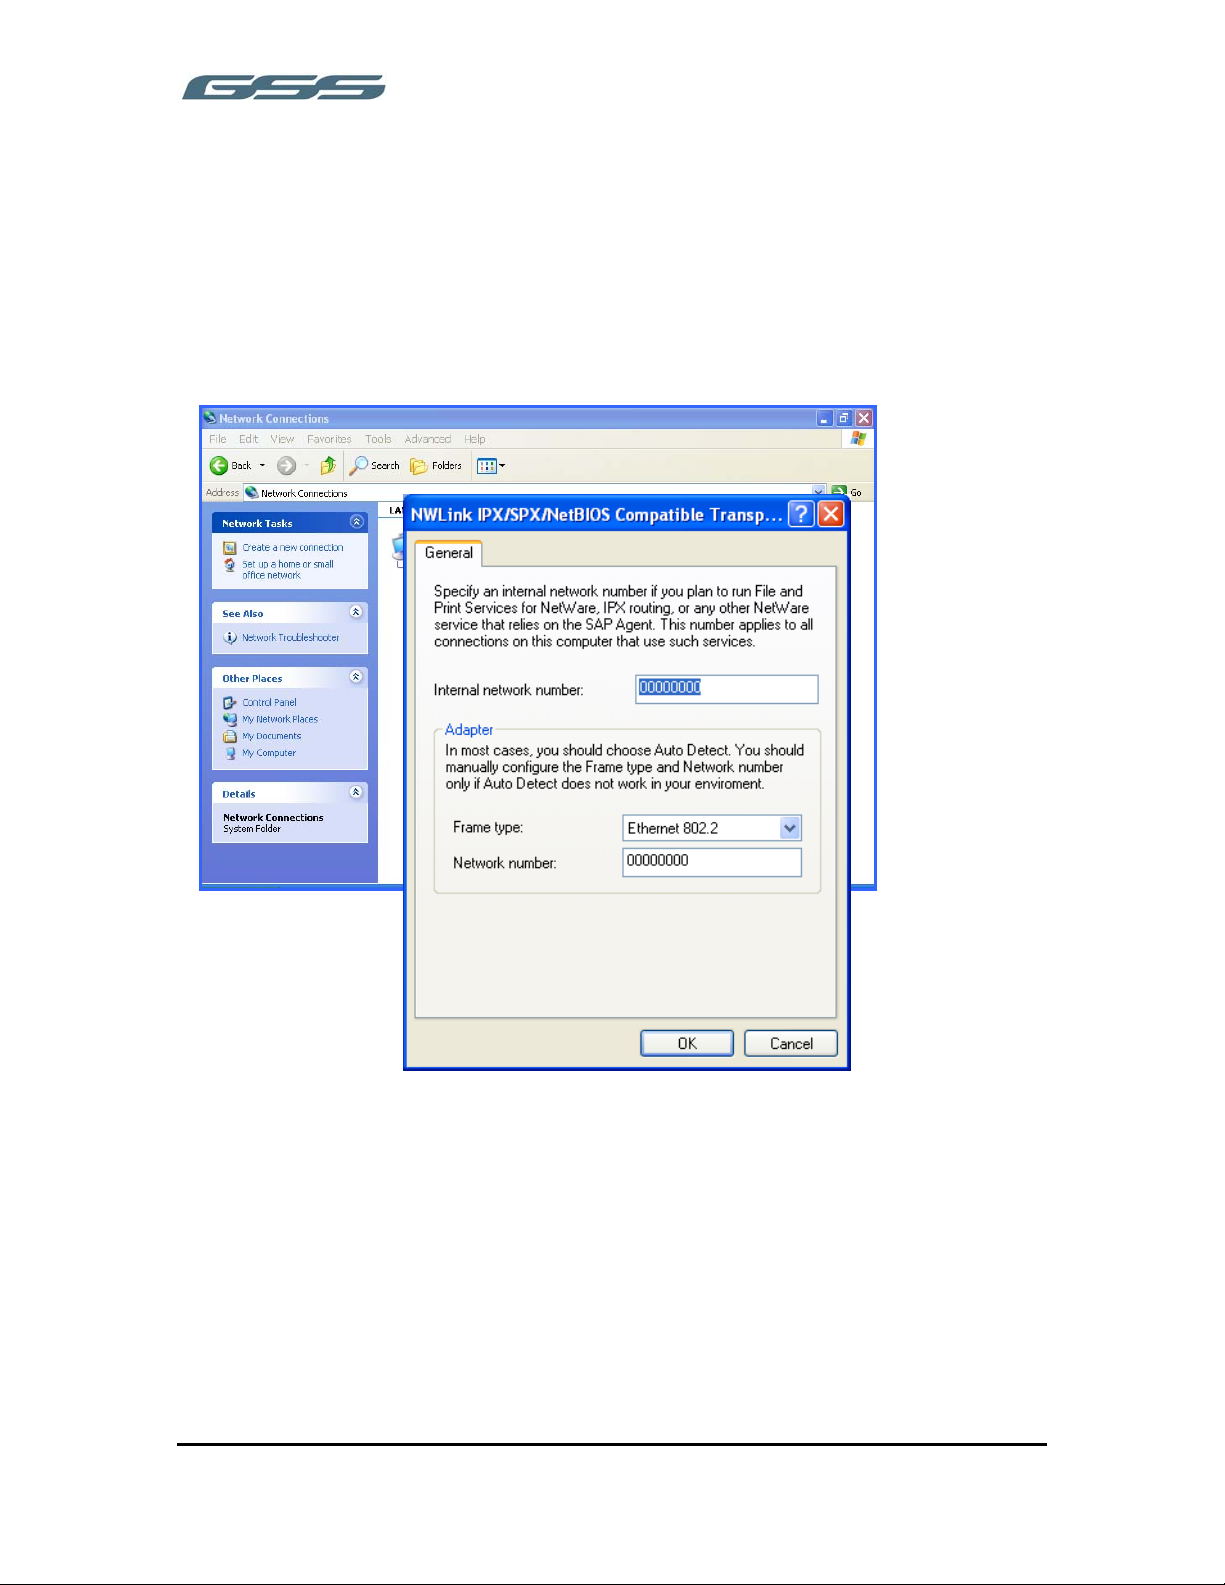
• The Primary Network Logon can then be default to Client for NetWare Networks,
providing there are no other client operations available. Uninformed entry to this
field may result in loss of existing network.
• When Client for NetWare networks is available, this provides the relevant IPX –
options that are used by the FS-3600 network communications.
9
Page 18
______________________________________________________
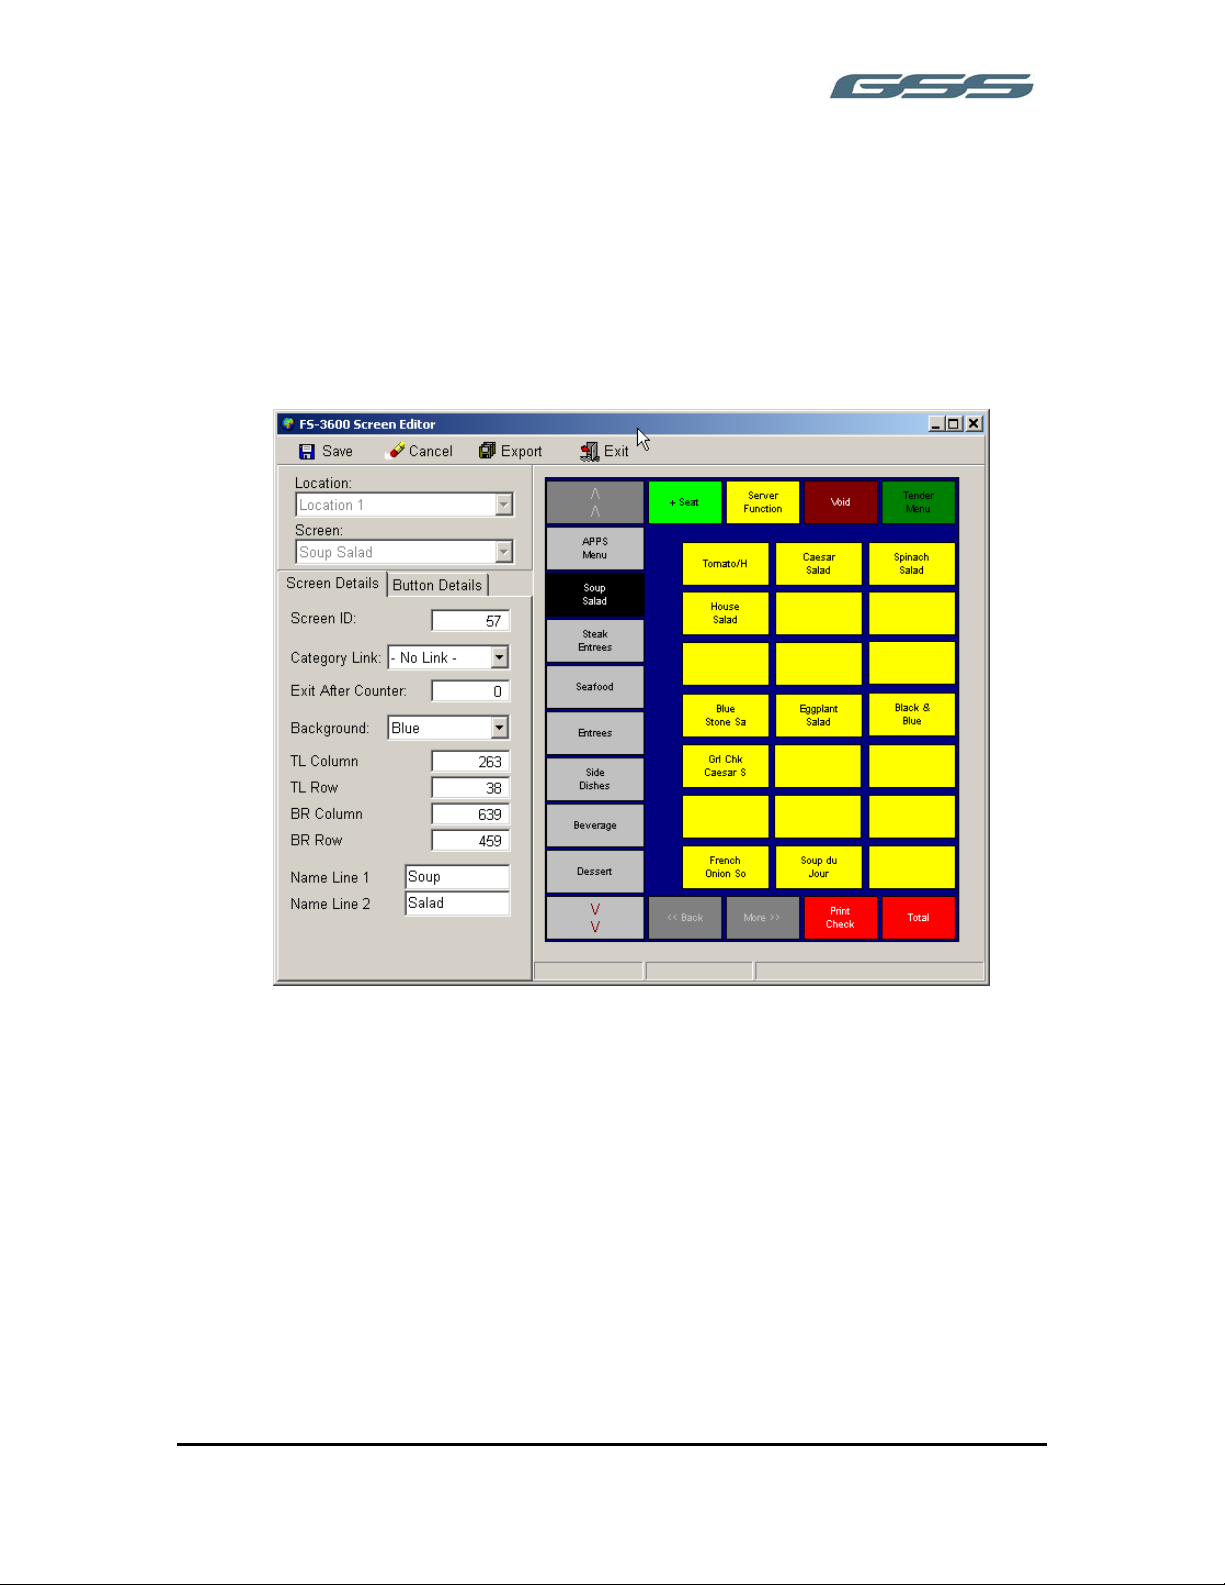
FS-3600 SCREENS
It is possible to manage certain aspects of the ECR from the PC. This is designed to
assist with product creation and restaurant management. New products can be added to
the ECR Screens, and new restaurant table layouts can be designed. However it should
be noted, this option is not designed to manage the ECR programming in it’s entirety
just to assist with the product management aspects of the stock control system.
It is possible to add new buttons to the screen, for selected functions, management of
the buttons is carried out using the following key presses.
Adding a New Button
While holding down the left button of the mouse, drag to create the button size. The
shape of the button can then be control by right clicking. It is then necessary then to
select the button type, and enter the Item ID. If the button is a menu item then the
beacon icon can be used to select from the product list. It should be noted that all types
of functions are shown within the function box. This is to ensure that all keys are
displayed. However, if an unavailable function type is chosen for addition then the item
ID box will be gray, in this instance do not attempt to amend.
10
Page 19

______________________________________________________
Button Re-Sizing
The button can be re-sized using the Width and Height boxes displayed on the left hand
screen. Alternatively, the SHIFT key and CURSOR keys can be used.
Button Movement
The button can be moved by setting the X, Y co-ordinates on the left hand screen
alternatively the ALT key and the CURSOR keys can be used.
Button Copy
Buttons can be copied en-mass across screens. The buttons to be copied are selected by
depressing SHIFT and right clicking then highlighting all required keys. This can then be
copied by selecting EDIT COPY then PASTE.
Deleting Button
The button can be deleted by highlighting the button and pressing the ‘Delete’ key on
the keyboard.
11
Page 20
______________________________________________________
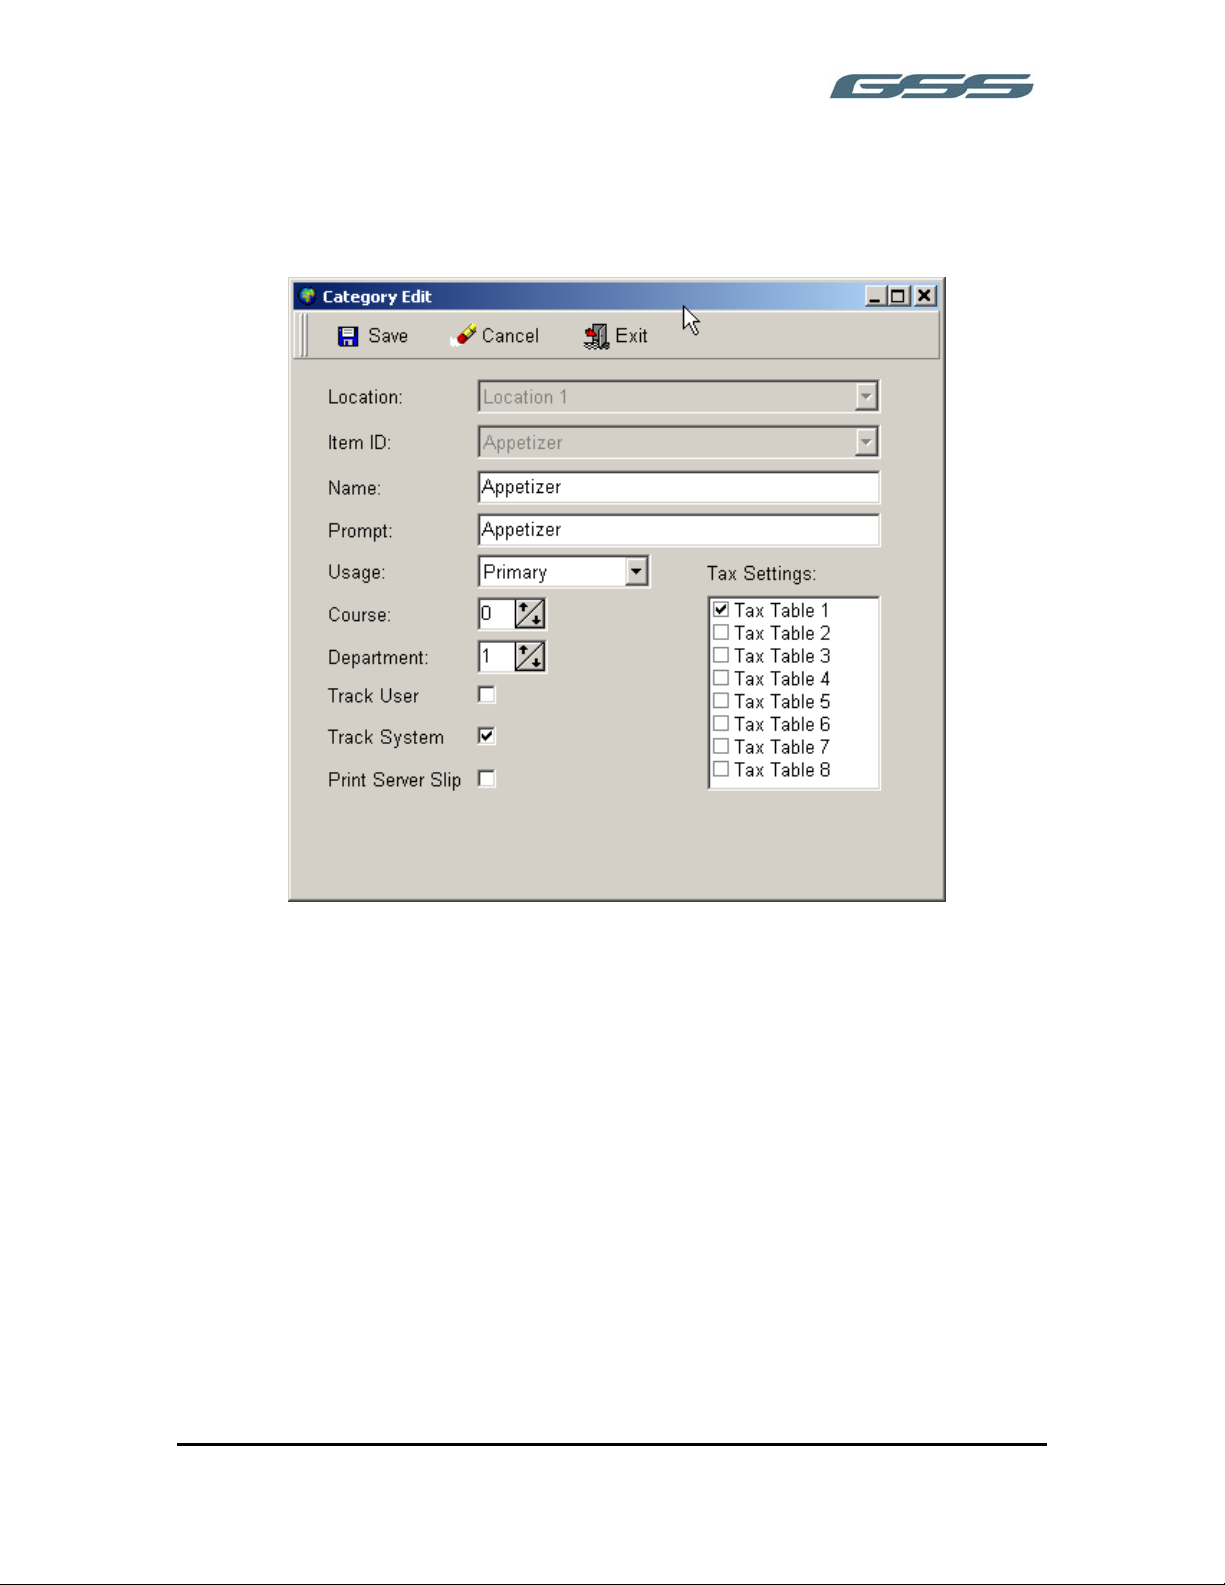
FS-3600 CATEGORIES
This is used, to program category specification for the FS-3600. The following settings
will be detailed by the ECR provider.
12
Page 21
______________________________________________________
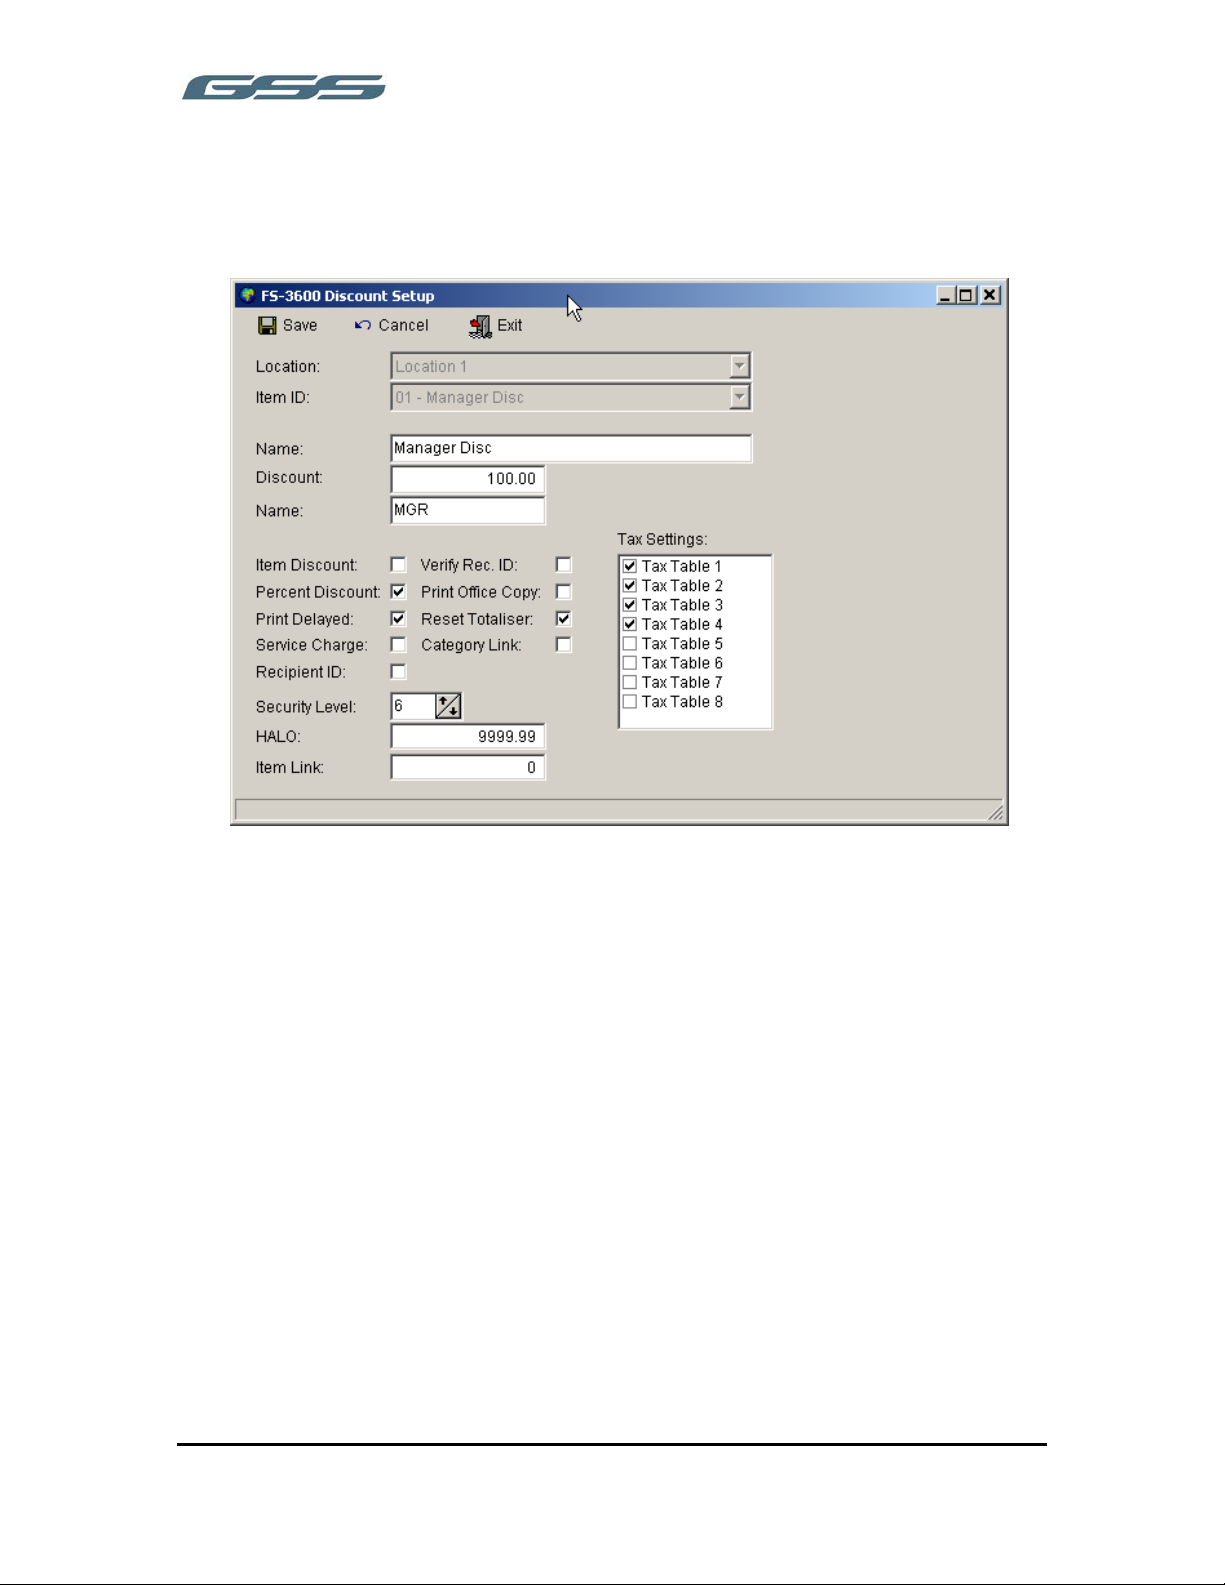
FS-3600 DISCOUNTS
The discounts used within the FS-3600 can be maintained from the Discounts screen.
The settings for this screen would be detailed by the ECR provider.
13
Page 22
______________________________________________________
FINANCIAL
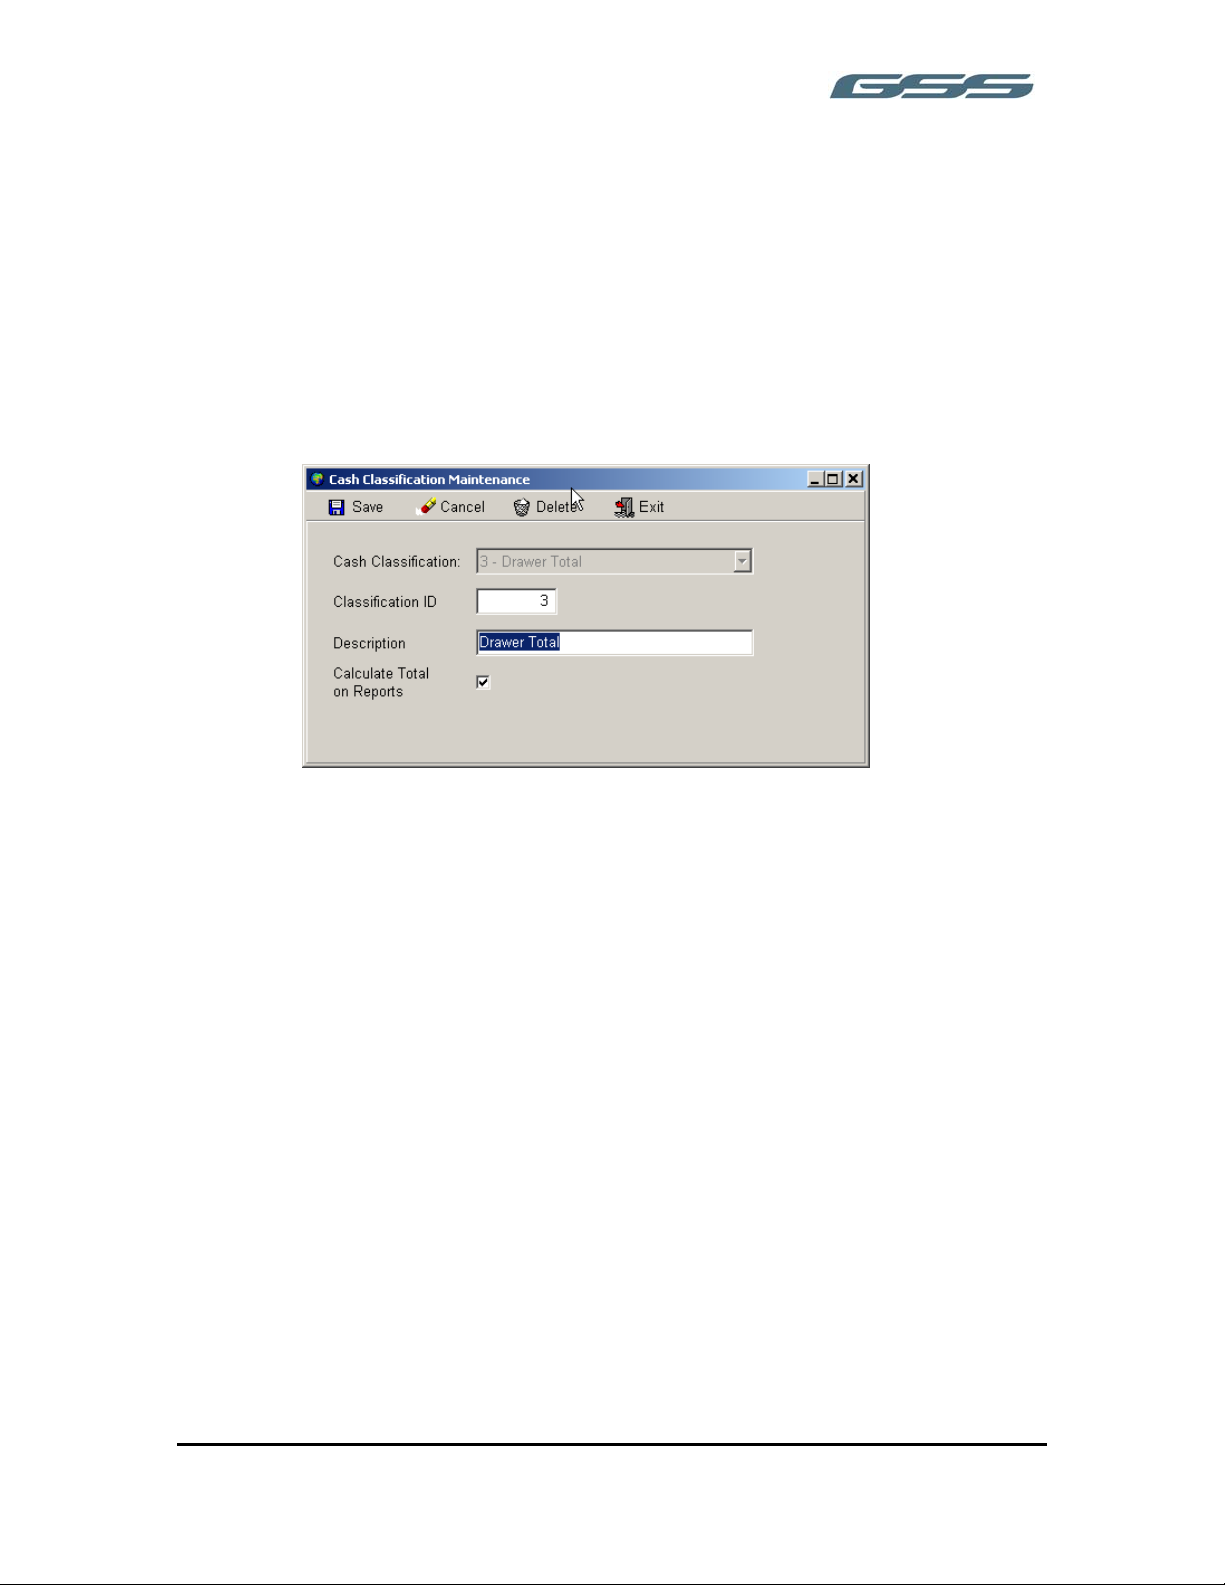
CASH CLASSIFICATIONS
The POS terminal will file the financial sales data to the computer, such as the Cash,
Check and Credit Cards, Voids, Refunds etc. into Media Totals. It is then possible to
group these media totals so that a total will be available, for example, of all Voids and
adjustments etc. They are as standard pre-defined groups, these can be amended if
required.
Classification ID
This is a consecutive record Number
Description
This is the description of the Classification Group
Calculate on totals
This determines if the group will require a subtotal of all values printed on the financial
reports.
14
Page 23
______________________________________________________
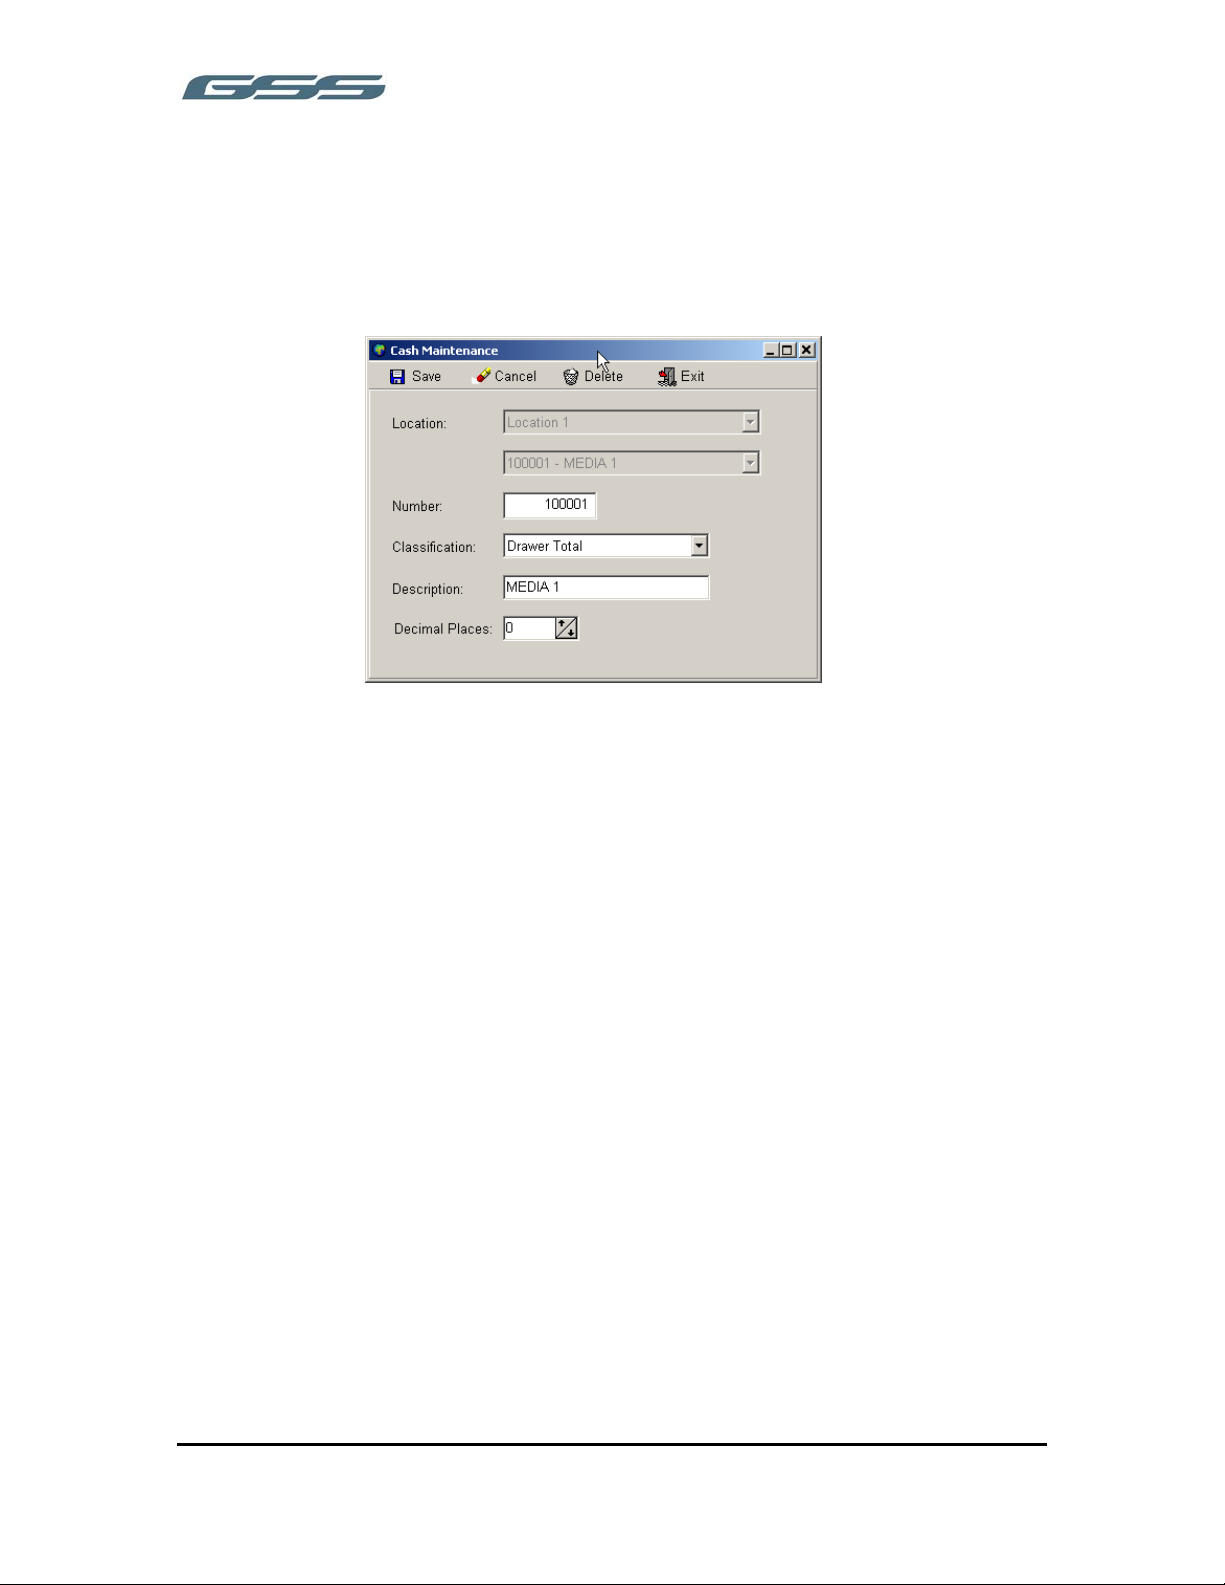
CASH TABLE
This is where the POS terminal cash fields are defined, this relates directly to the Point
of Sale programming and is set-up as part of the initial installation, determining for
example which field is CASH IN DRAWER etc.
Number
This is the financial total record number.
Classification
This will link this financial total such as Cash, Credit Card etc. to the Classification Group.
This will then provide the option to produce reports of specific types i.e. Finalization
keys, Voids.
Description
This is the description of the financial totalizer
Decimal Places
It is necessary for certain fields of financial reporting to set the number of decimal
places. This will be set by your dealer, however if a field is displayed as 600 not 6 on a
financial report, setting this field to 2 decimal places will resolve the issue.
15
Page 24
______________________________________________________
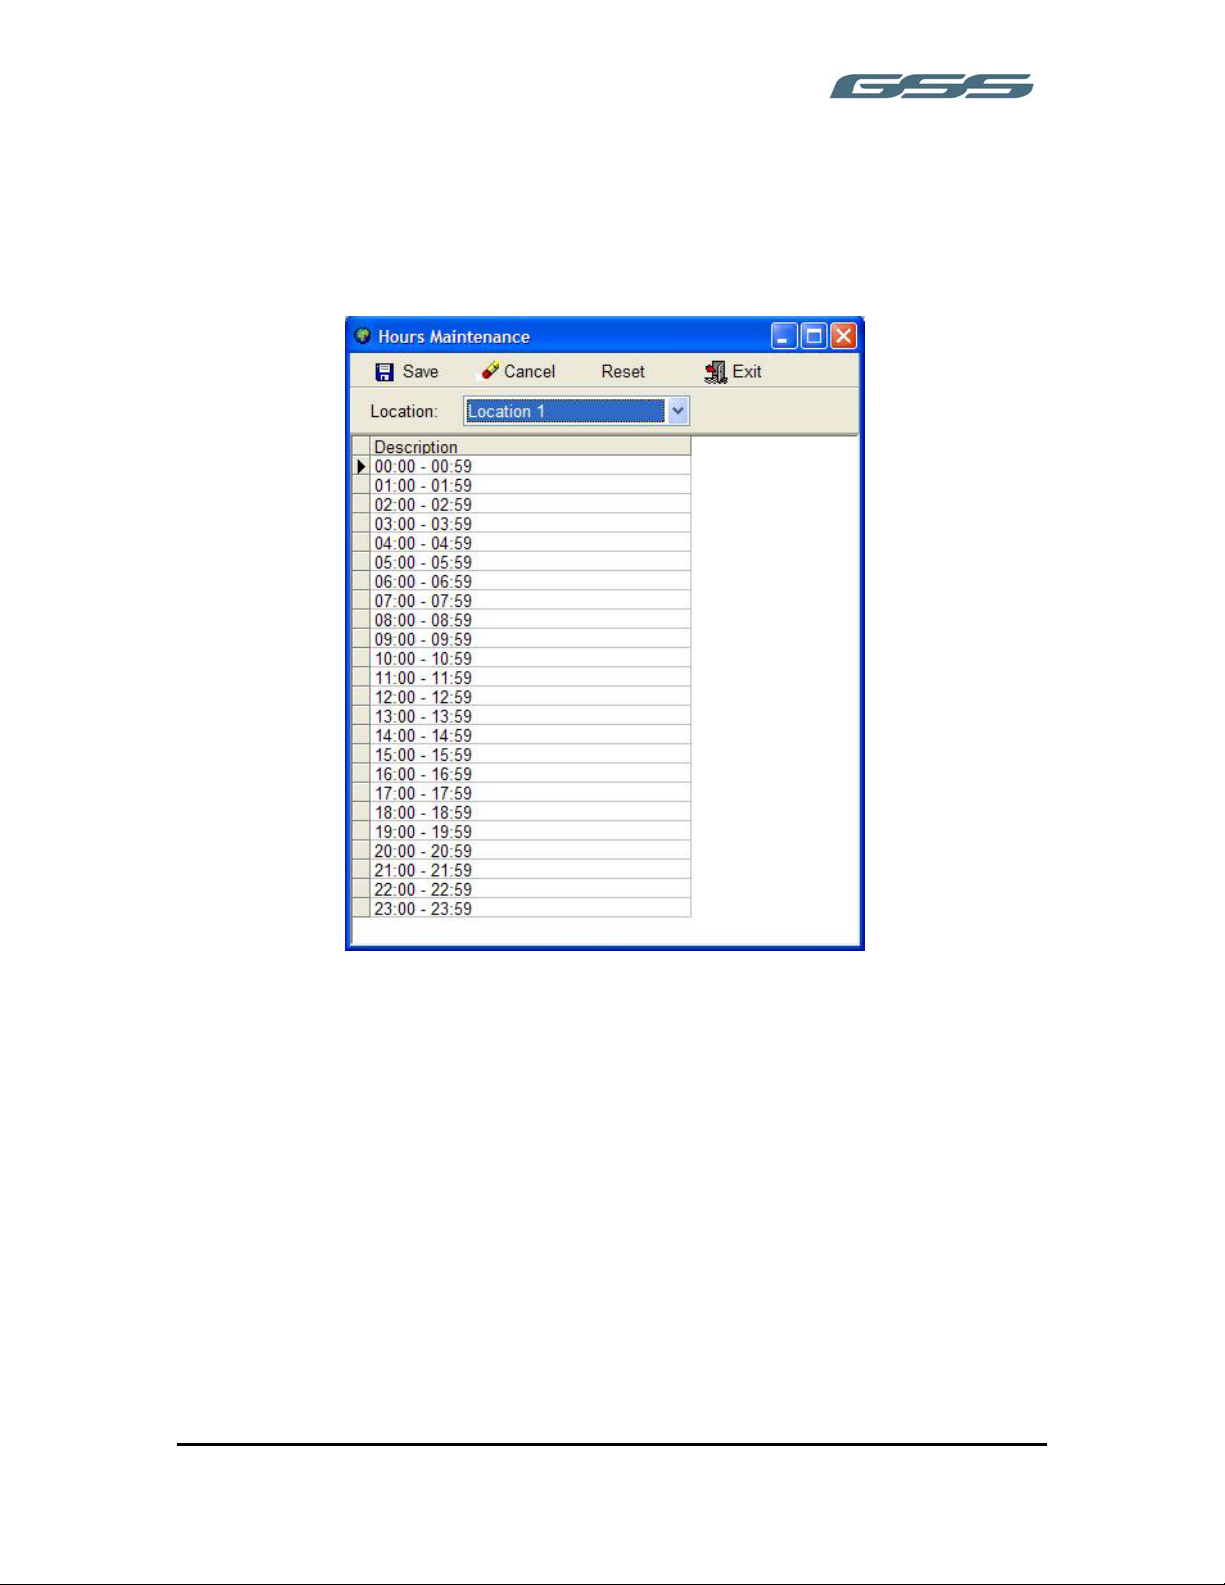
HOURLY TABLE
This controls how the time periods sales analysis collected back from the POS terminal is
reported
Location
Each Location connects with a POS terminal which is capable of storing the sales
transactions value in specific time periods usually 24hour time periods, the descriptions
can be changed or new time periods added depending on the model of POS terminal
which is connected.
Description
The order the report prints can be change by highlighting the row and dragging this to a
new position with the mouse this means that the report can start at 8.00am rather than
midnight.
Reset
This will re-sort the order of the time period descriptions into the original order i.e. time
period 1 midnight as the first option
16
Page 25
______________________________________________________
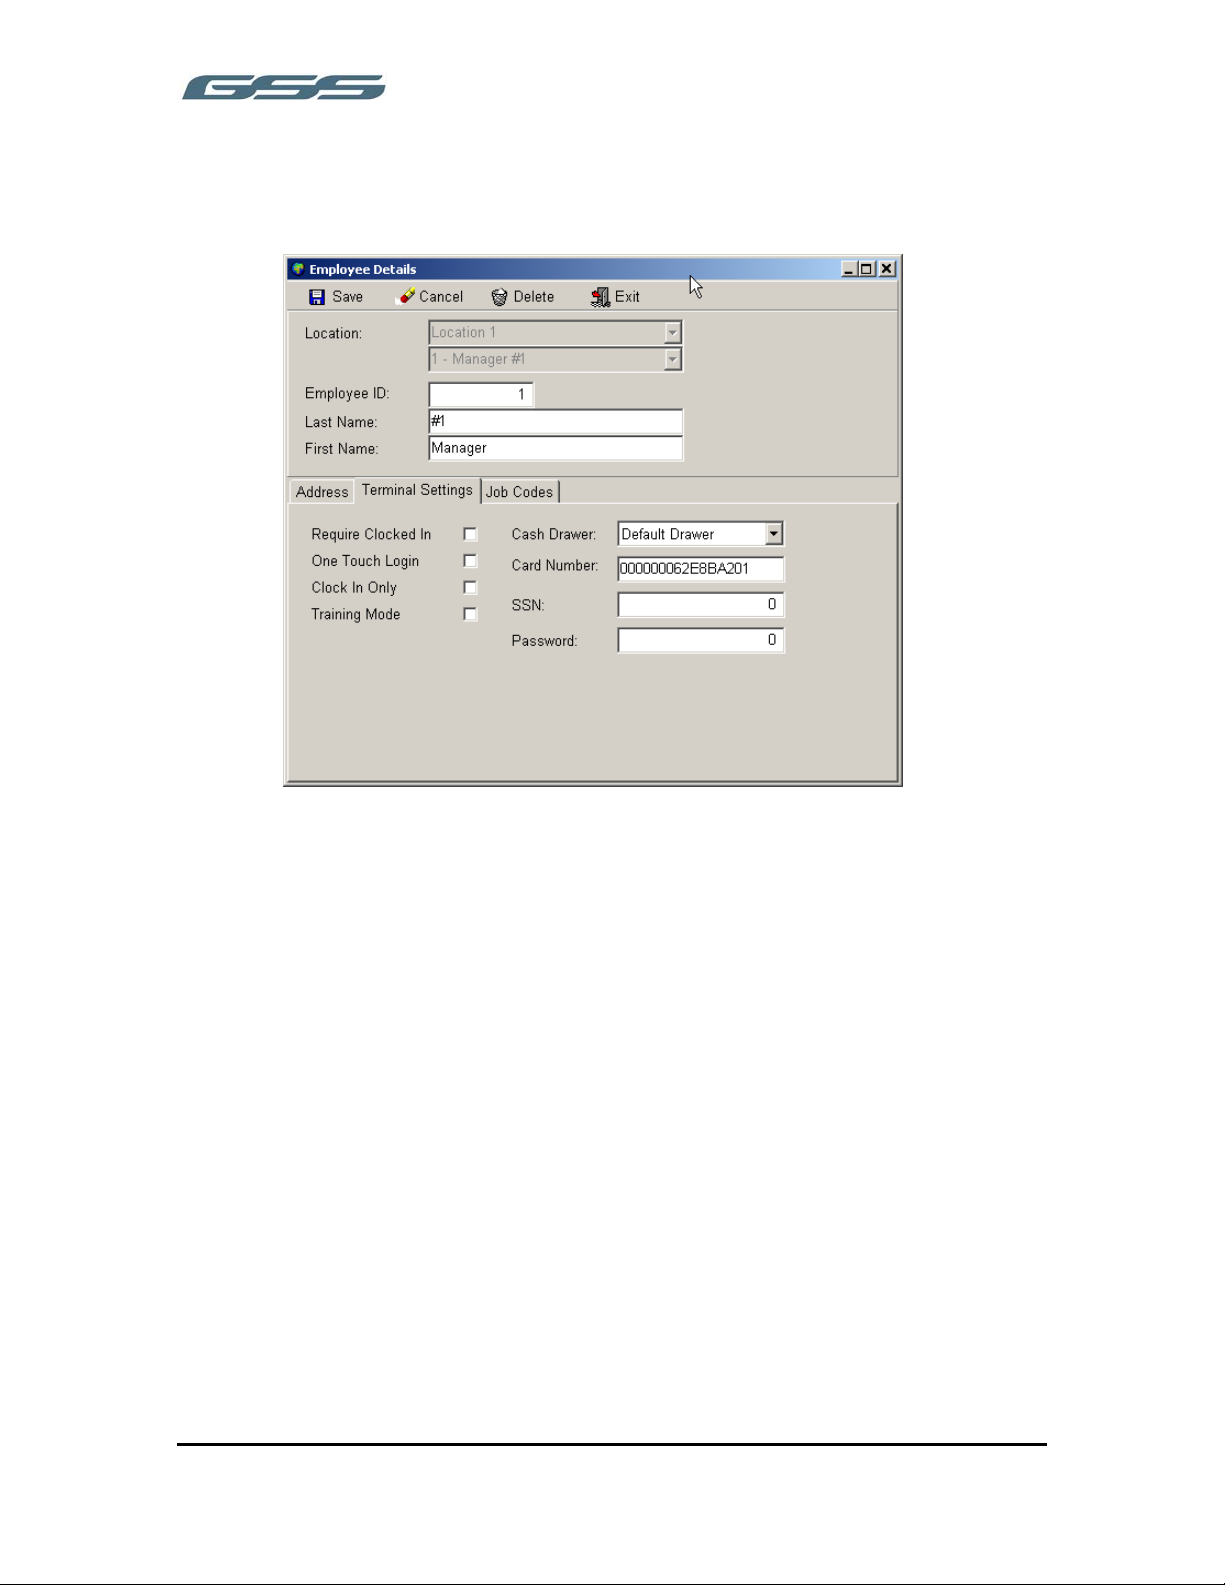
EMPLOYEE
This stores the Employee’s personal details for that Location. The POS terminal will
transmit the value of Employee’s sales back to the computer for reporting purposes.
Employee ID
This corresponds to the User Sign-On number used at the POS terminal
Last Name / First Name
These are the names to be printed on the Employee Sales Reports and used on the
terminal.
Address Tab
Employee address and contact information can be stored on this tab.
Terminal Settings
The settings on this tab determine how the Employee ID will function on the terminal.
Please consult the ECR manual for an explanation of these functions.
Job Codes
This tab determines which Job Code(s) the Employee is allowed to clock in under and
the rate of pay for each Job Code.
17
Page 26
______________________________________________________
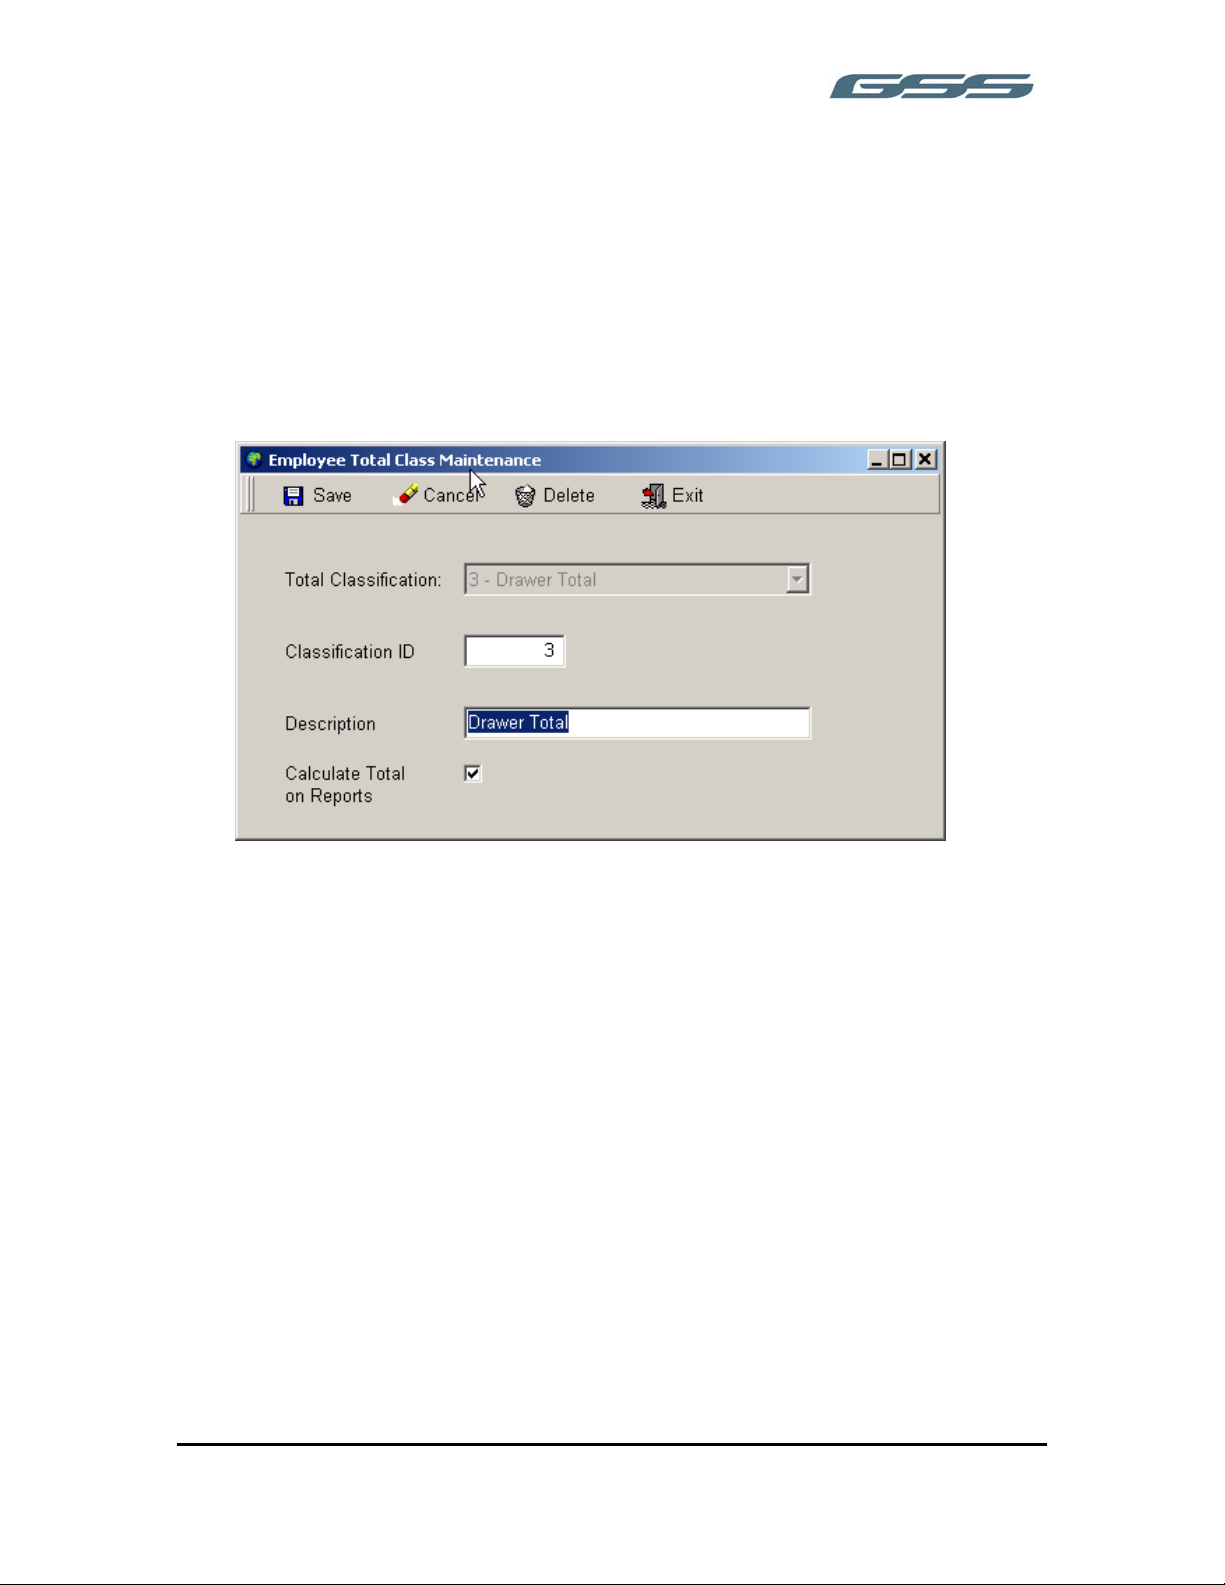
Employee Total Class Maintenance
This section records the information relating to the Point of Sale terminal Employee
reporting. This information is normally set-up by your system provider.
Employee Total Classification Names
The POS terminal will file the Employee Financial Sales data to the computer, such as
the Cash, Check and Credit Card, Voids, Refunds etc. into Media Totals. It is then
possible to group these Media Totals so that a total will be available, for example, of All
Void and adjustments. There are pre-defined groups but these can be amended if
required.
Classification ID
This is a consecutive record Number
Description
This is the description of the Classification Group
Calculate on totals
This determines if the group will require a subtotal of all values included printed on
reports.
18
Page 27
______________________________________________________
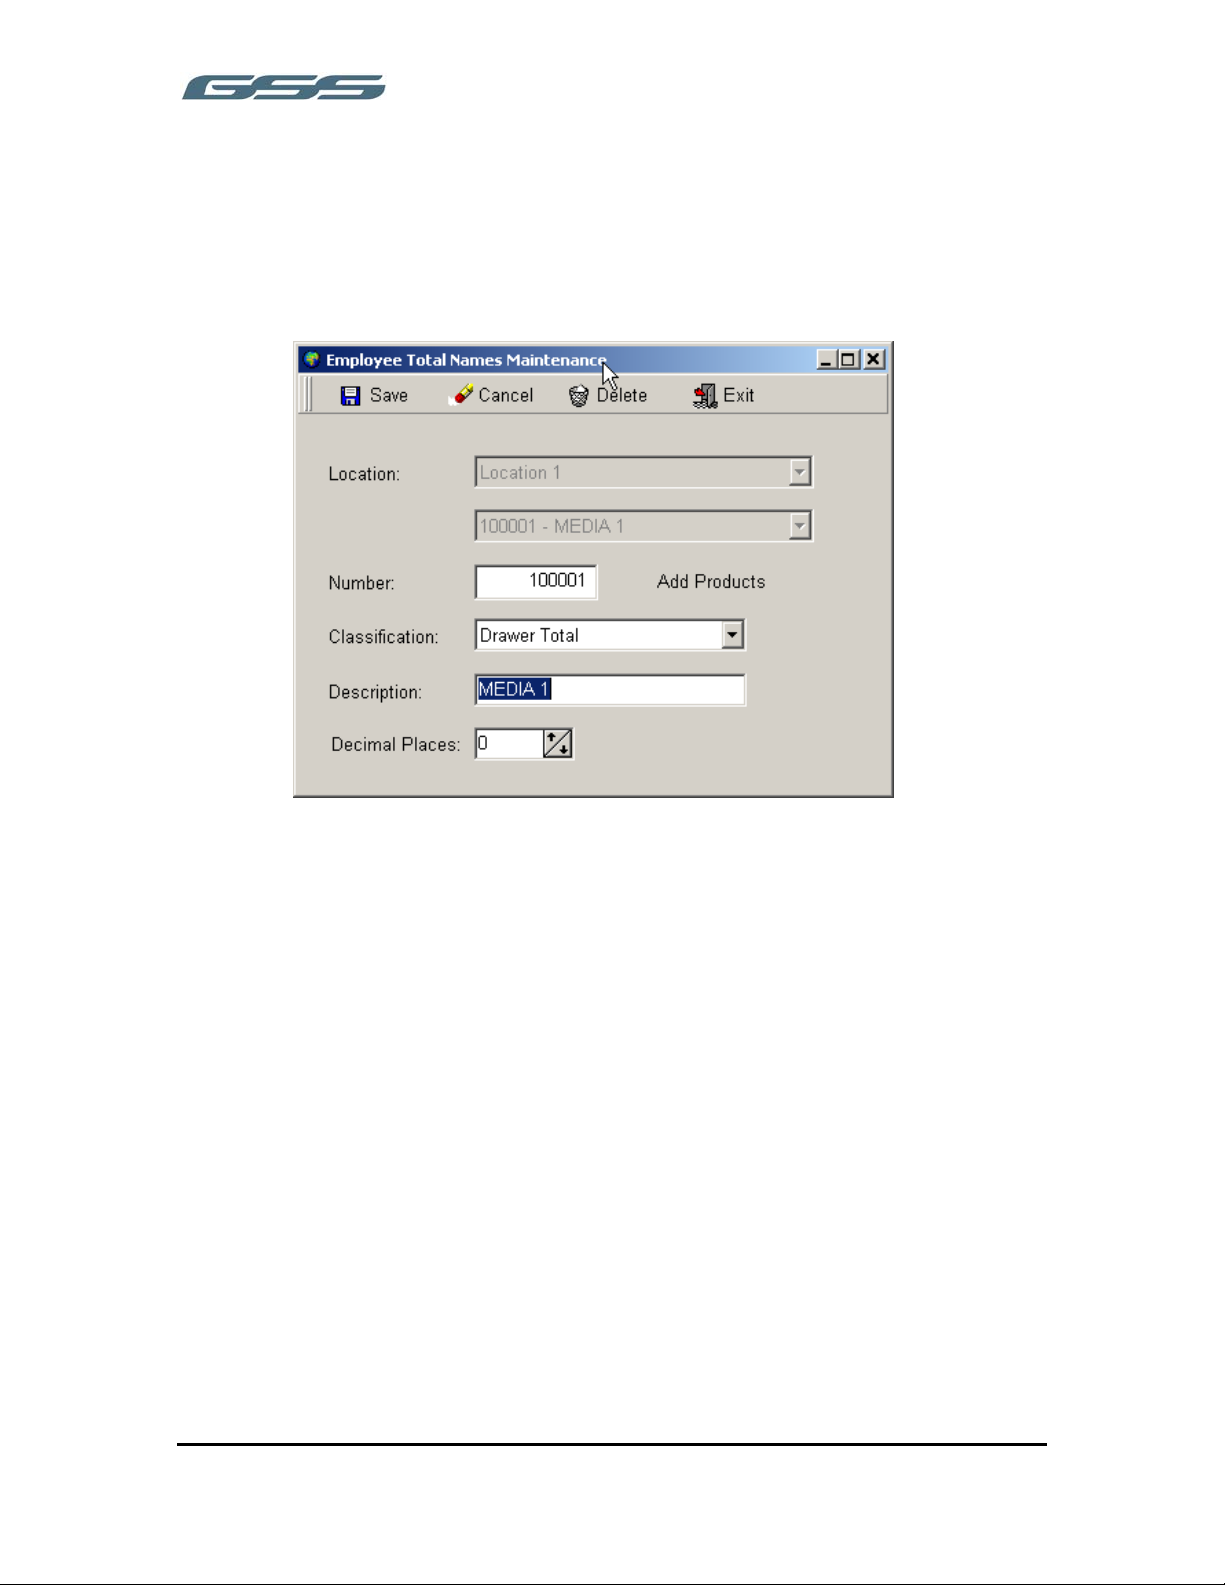
EMPLOYEE TOTAL NAMES MAINTENANCE
Employee Total Names
This is where the POS terminal cash fields are defined, this relates directly to the Point
of Sale programming and is set-up as part of the initial installation, determining for
example which field is CASH IN DRAWER etc.
Number
This is the financial total record number taken from the POS programming book
Classification
This will link this financial total such as Cash, Credit Card etc. to the Classification Group.
This will then provide the option to produce reports of specific types of fields i.e.
Finalization keys,
Description
This is the description of the financial totalizer
Decimal Places
It is necessary for certain fields of financial reporting to set the number of decimal
places. This will be set by your dealer, however if a filed is displayed as 600 not 6 on a
staff report, setting this field to 2 decimal places will resolve the issue.
Add Products
It is possible using the POS terminal to have reporting by each Employee for all
products. Selecting a new classification field then, clicking on Add Products will
automatically set up the file with all the products from the product file start at code
200001 for PLU 1.
19
Page 28
______________________________________________________
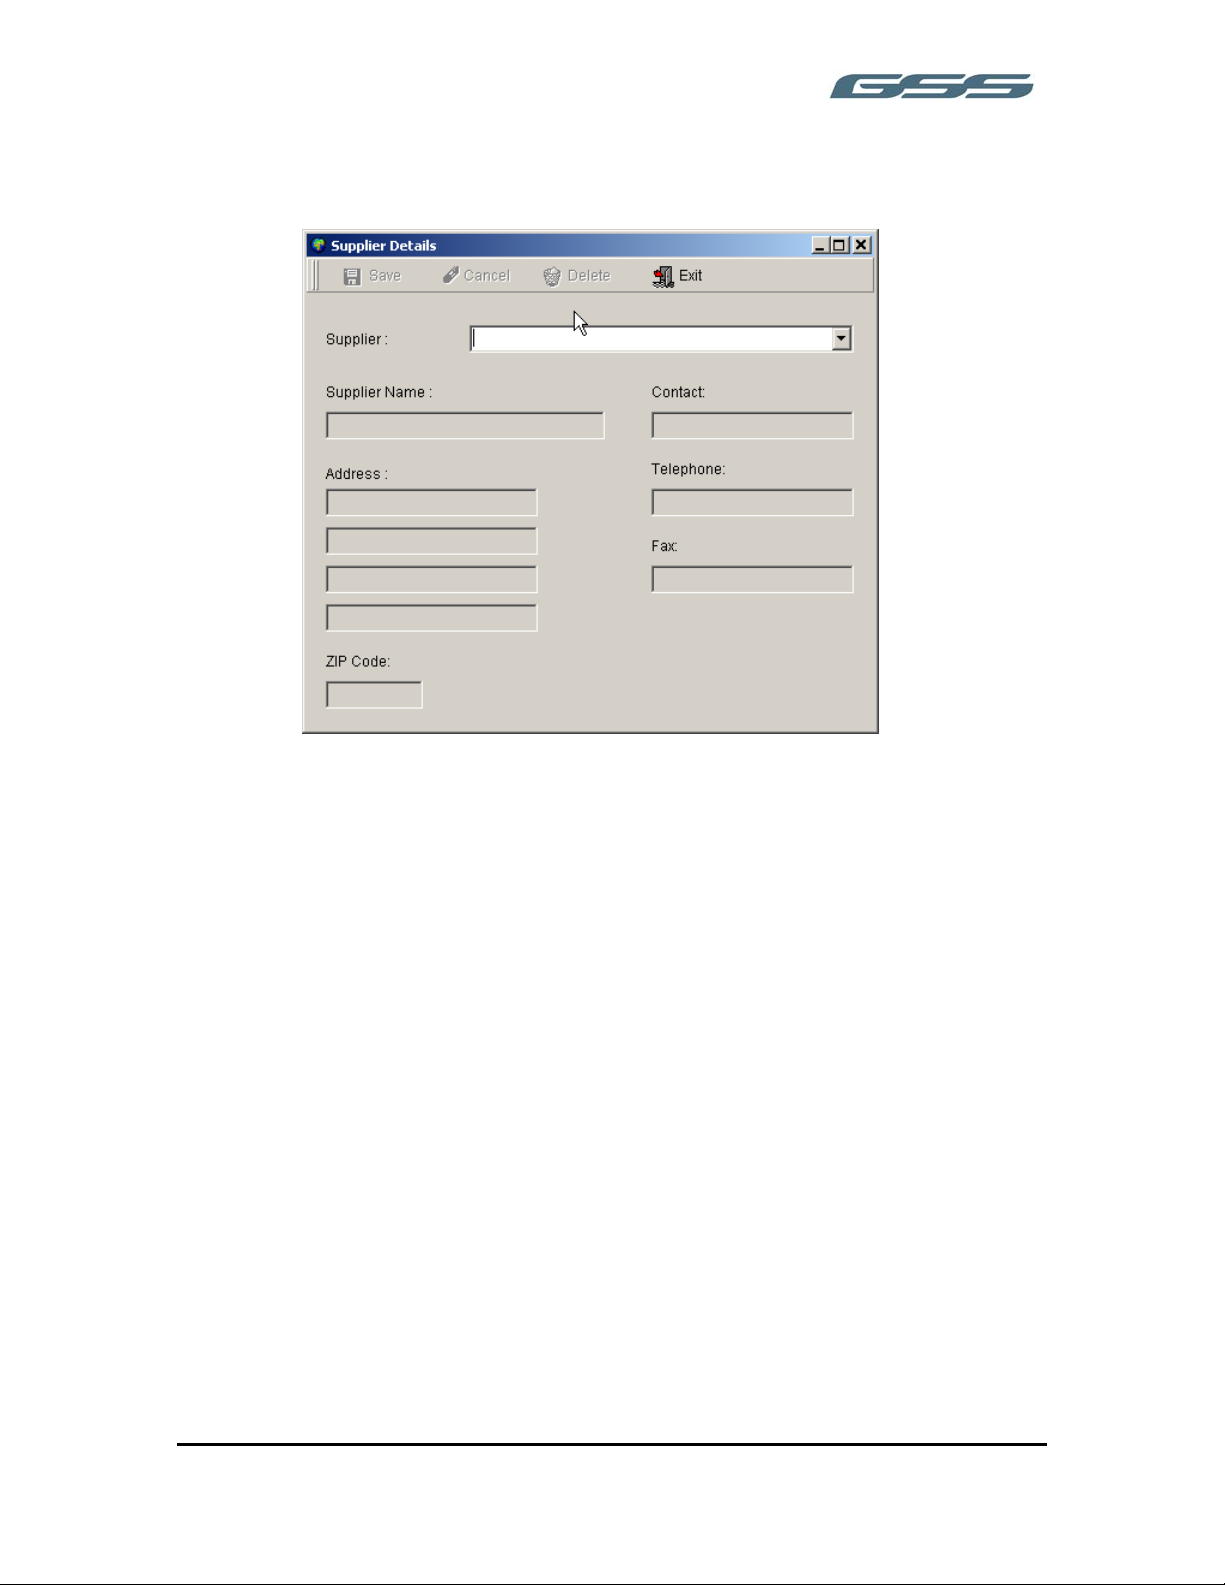
SUPPLIER
This stores all the details for the suppliers from which products are purchased
Supplier Name
This is the name of the supplier which can then be stored against individual products
and used to recall suppliers for ordering and Delivery purposes.
Address, ZIP Code
This is the address of the supplier, this will be printed on the Order, Delivery etc.
Contact, Telephone, Fax number
This stores the relevant contact details for this supplier.
20
Page 29
______________________________________________________
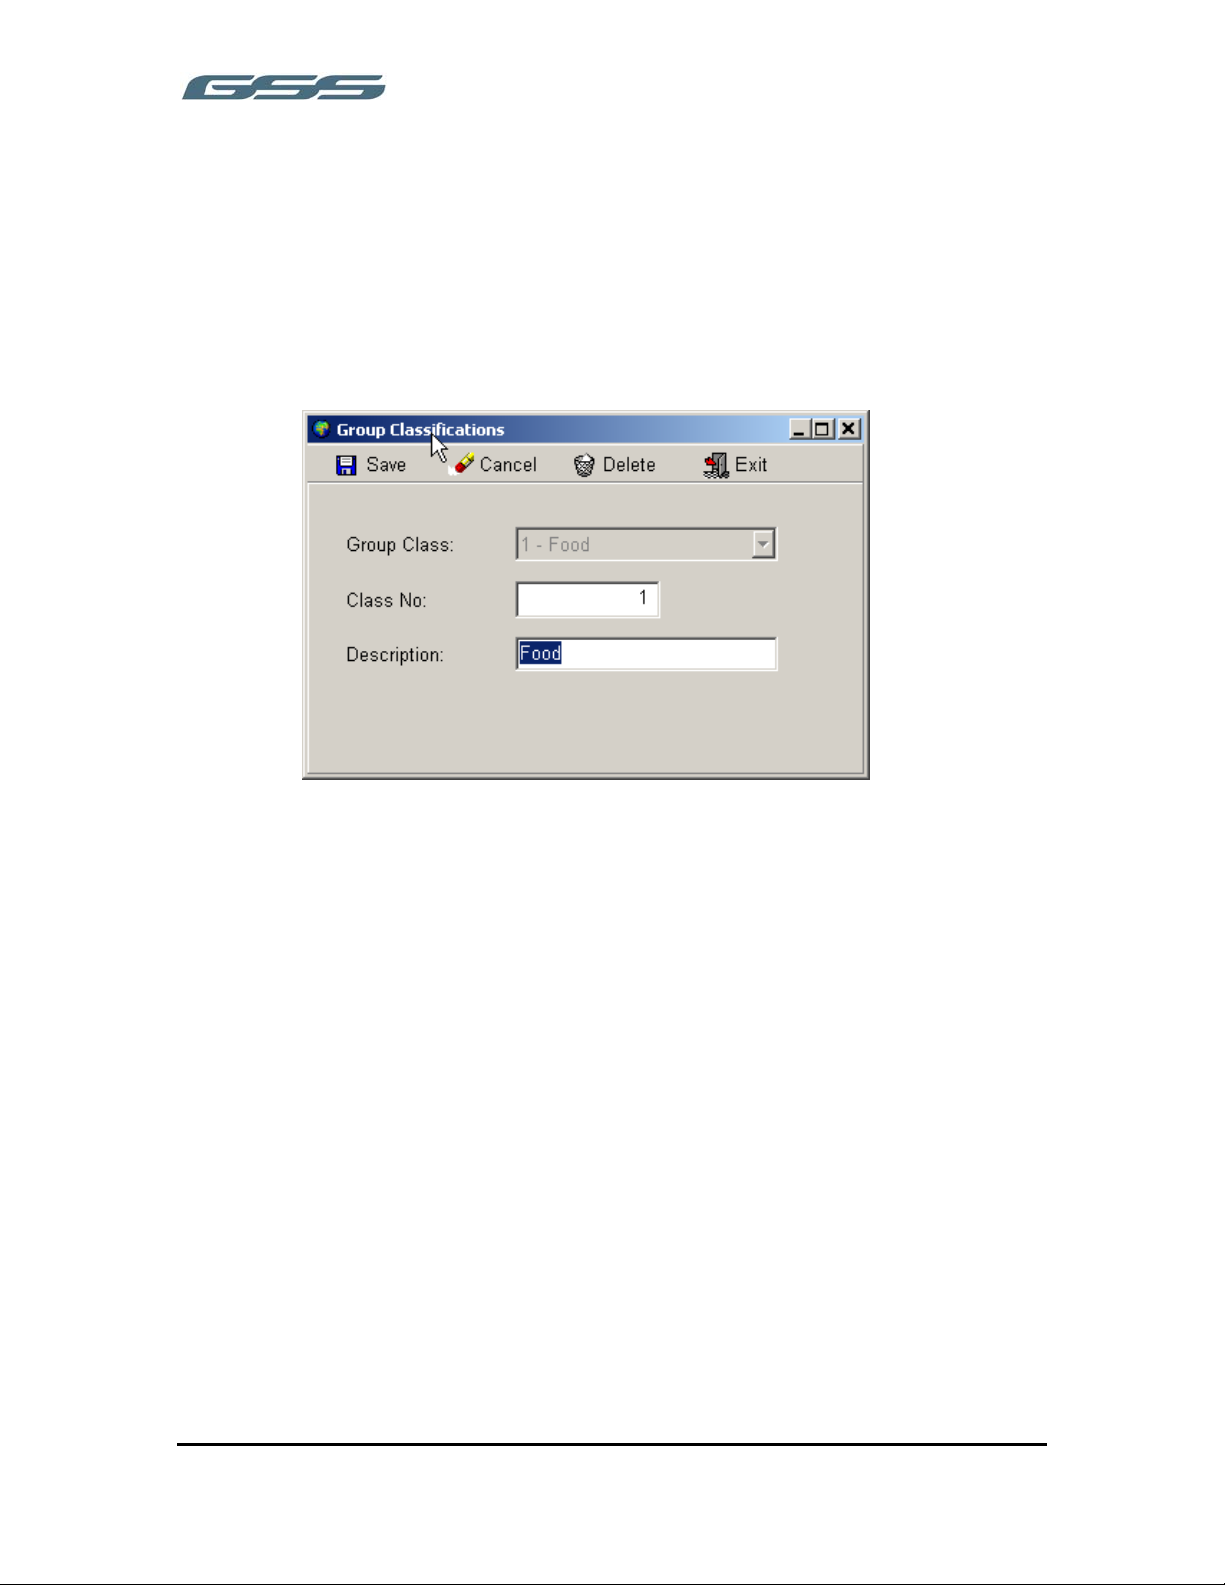
GROUP CLASSIFICATIONS
Group Classification is similar to the Department Names on the FS-3600. It is possible to
link Products into Product Groups such as Domestic Beers, Appetizers etc. These Product
Groups can then be linked to Group Classifications, which are the first level of grouping.
For example total Beers, total Food goods. Therefore entered below should be the
highest level of grouping to which the Product Group categories are to be linked.
Class Number
This is the sequential record number for the Classification Group
Description
This is the description of the highest level of group I.e. Food, Beer, Wine, Liquor, etc. to
which Product Groups such as Domestic Beers, Appetizers etc. are to be linked.
21
Page 30
______________________________________________________
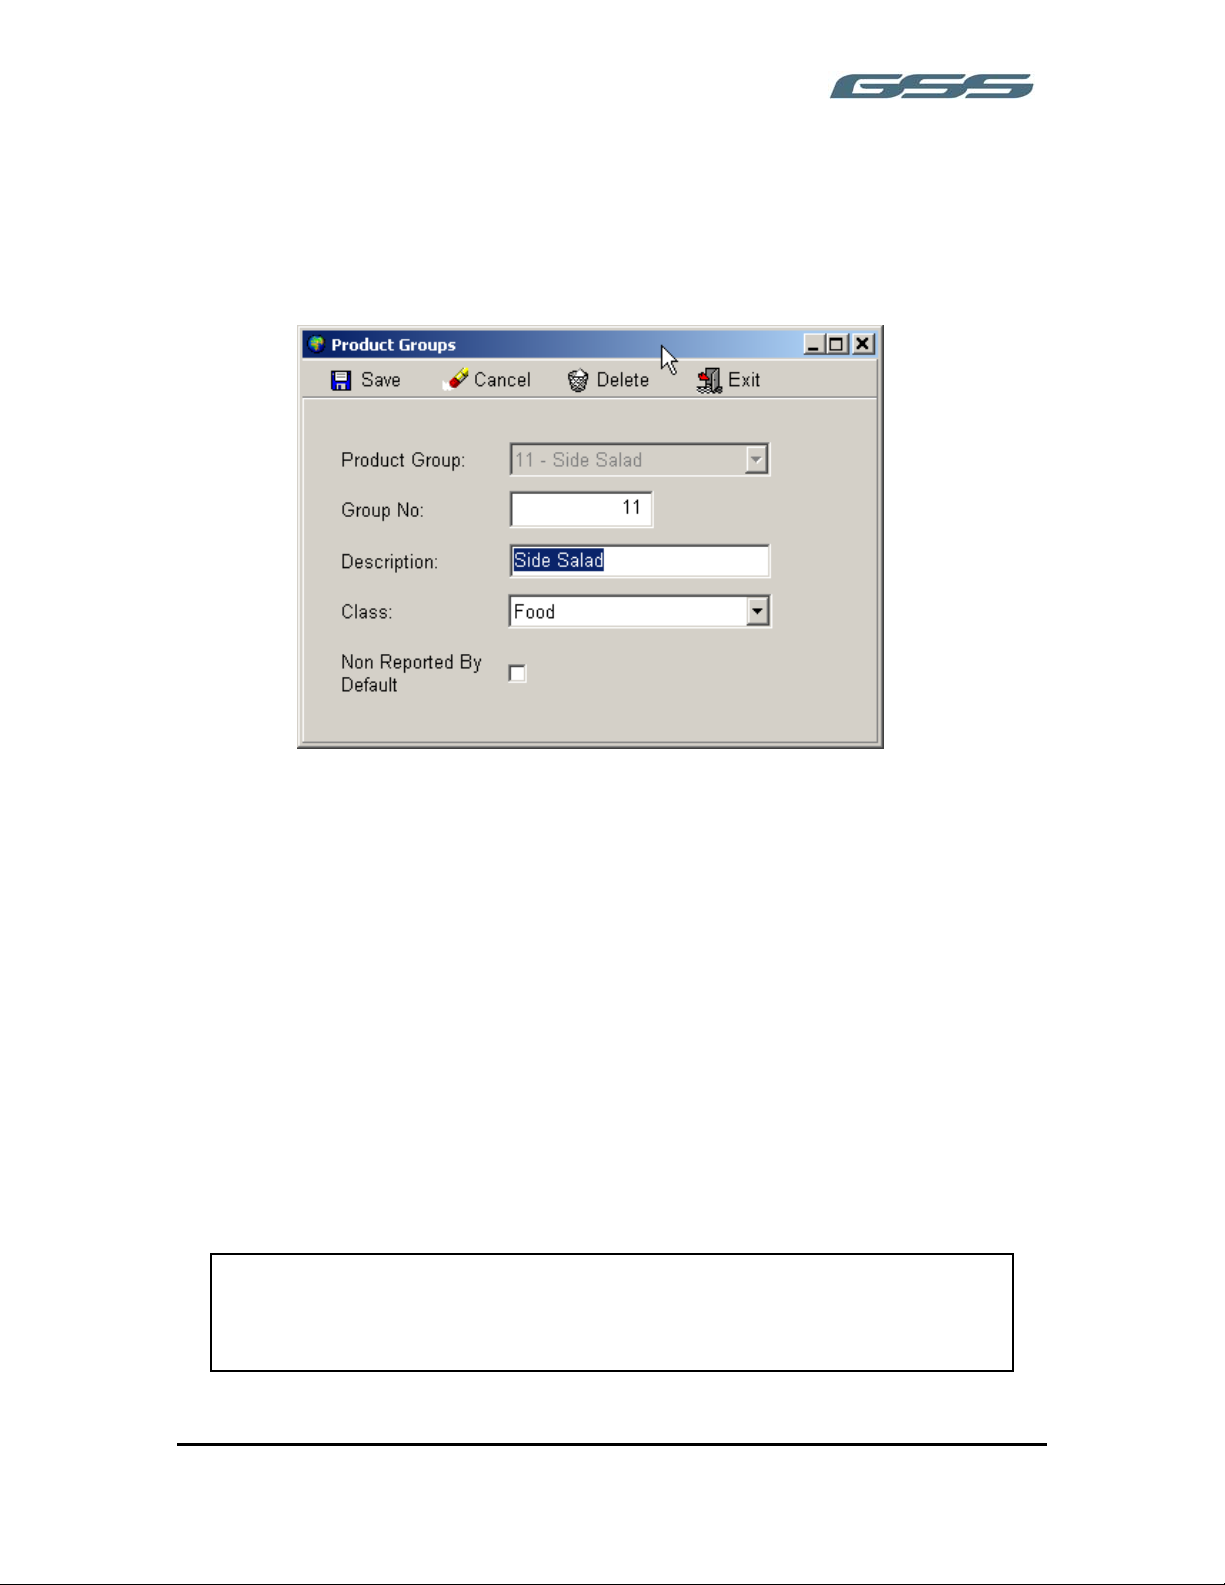
PRODUCT GROUP
Product Group is similar to the Category Names on the FS-3600. This allows products to
be linked to group categories such as Domestic Beers, Appetizers etc, these Product
Groups in turn can be linked, to Group Classification for totaling of a number of Product
Groups. Therefore entered below should be the minor category names.
Group Number
This is the sequential record number for the Product Group
Description
This is the description of the second level of group i.e. Domestic Beers etc
Classification Group
This is a selection box, allowing the Product Group to be linked to a Classification Group,
i.e. Domestic and Bottled Beers groups can be linked to a Classification Group total
beers.
Non Reported By Default
When a product report is selected and this box is checked, this Product Group will be
excluded from the report. It can be added manually, by clicking the add button on the
report screen. This is useful for Product Groups used for kitchen messages, etc. which
are not required to be included in sales reports.
Note:
Initially, the FS-3600 Categories are imported into the GSS Product
Group table. From that point forward they can be managed
separately, providing more reporting flexibility.
22
Page 31

______________________________________________________
STOCK UNITS
This is the section where the Purchases and stock keeping sizes for each Product Group
are created, for example beer may be purchased by the case and wine by the case or
individual bottles.
Product Group
The sizes created are associated with the Product Group for that item, i.e. all purchases
sizes for wine will be associated with the wine Product Group. It is therefore necessary
to create records for each Product Group listing all possible purchase sizes, I.e. Draft
Beers, would require units such as barrel etc.
Description
This is the name of the Purchased/Stock Keeping unit, i.e. box, case, barrel etc
Units for Sale
This is the number of sales units which are purchased in one outer. For example an 11
Gallon Barrel for draft beer would equal 88 pints/units for sales. This is used for
ordering/deliveries purposes to calculate how many saleable units are purchased within
each Stock Unit.
23
Page 32

______________________________________________________
SALES UNIT
Sales units are simply labels to help clarify product sales on product reports.
Description
This is the name of the, sales unit which is to be printed on the report. i.e. Wine is sold
by the Glass, Beer by the Pint.
24
Page 33

______________________________________________________
PRODUCT MAINTENANCE
This screen allows input of all relevant stock keeping and retail information for a
saleable/stock Product Code.
Product Code
This is the in-house code number for the item, it may be an internal reference number,
or it may directly relate to the ECR number.
If the Product Code is to be the same as the ECR number, then the system may benefit
from having the options screen set so the ECR code is automatically updated with the
Product Code. This means only one code number needs to be maintained. (See Options)
It should be noted, due to the fact the Product Code is an alphanumeric field, it is
possible to have Product Codes such as ABC0001, ABC0002etc. It also means in order to
provide numeric sorting the system works on a fixed number of digits i.e. code 1
becomes 000001, 000002, etc.
Description
This is the long description for the product, which appears on the reports.
25
Page 34

______________________________________________________
ECR Description
This is the description, which appears on the Point of Sale terminal, which is 18
characters long, a counter is provided to indicate when 18 characters have been input.
It is recommended upper case be used for the ECR description used for the sales
receipt.
Note :
Do not use a Comma or Quotation marks in the descriptor field as these are a special
field separator characters.
26
Page 35

______________________________________________________
PRODUCT GROUP
Product Group
This is a selection box, allowing this product to be linked to one of the existing groups,
i.e. bottled beers, etc. for reporting and stock keeping purposes, also to assist with
product searching and reporting totalizers.
Default Stock Unit
This is a selection box, which allows you to select the purchase size for this product,
only the sizes allocated to that Product Group, are available for selection
Sales Unit
This is the description of the actual sales unit for reporting and stock keeping purposes,
i.e. if the default Stock Unit is barrel this description may be Pint as that is the unit the
item is sold in
Location
This is the site this product information relates to i.e. at which shop, bar etc.
ECR Code
This is the code number the items sells at on the POS terminal, this is usually the same
as the Product Code but must be in the range 1-9999. If the ECR code is to be the same
as the Product Code number, the system can be set so the ECR code is automatically
updated from the Product Code in the options section. If no ECR code is entered or 0 is
entered for the ECR code, this product is not available for sale at the POS terminal,
27
Page 36

______________________________________________________
PRICING
This selection tab stores all information relating to product cost and retail pricing.
Average Cost Price
This is calculated from the Purchase screen, taking all purchased prices for the products
and varying sizes, producing an average cost price per product
Last Cost
This is the last cost price of this product based on the last price entered on the purchase
GST Rate
This is a selection box, allowing the correct GST rate (where applicable) to be allocated
to this product.
RRP
This is the recommended retail price of the product based on the cost, Vat and the
desired target margin.
Apply Price Change to all Locations
The retail price of this item, may only apply to this particular Location and when
changed it will not affect the retail prices of any other Locations. This flag ticked ensures
that changes made to this product within this Location, will automatically be copied
across Locations. View options determine what information is to be copied across.
28
Page 37

______________________________________________________
Price Level 1 - 4
This is the retail price the product is sold for at the Point of Sale terminal.
The onscreen descriptor for the price levels and the number of price levels available can
be changed within the options section.
Profit
This is the dollar value profit, which is being made, when it is sold at this particular price
level.
Margin
This is the percentage profit, which is being made on this item, when it is sold at this
price
29
Page 38

______________________________________________________
STOCK
This selection tab stores all information relating to the stock holding for this Product
Code.
Current Stock
This is the number of items held in stock, the number of units is determined by the
Default Stock Unit i.e. 176 Pints in a Barrel would show as 1, if the Stock Unit was set to
Barrel. Alternatively if the Stock Unit was changed to Pints, the figure on-screen would
be recalculated as 176 Pints.
Max Stock
This is the maximum holding. When an Item falls below the Re-Order Level or product
supply is insufficient for the number of Days Stock, it is suggested an Order is generated
to this level.
Re-Order Level
This is the number of Stock Units that are required, to be ordered at any one time,
Suppliers may have a minimum re-ordering level, or alternative pricing policies
quantities purchased
Days stock to order
This is the number of day’s stock for this item that you wish to keep, comparisons and
analysis reports can be printed on such reports as the Product Supply report.
Shelf Facings
This is used for printing of the shelf edge label report, the number here indicates how
many Shelf Edge Labels are required for this product, when the report is printed.
30
Page 39

______________________________________________________
Supplier
This is a selection box, allowing a supplier to be associated with this product. More than
one supplier can be used to purchase a product, also more than one Stock Unit can be
purchased from a supplier. This information is stored in the supplier matrix, shown on
the screen. When the appropriate Reference for a purchase size is entered on the
Order/Delivery/Purchase screen, the correct purchase size is automatically brought onscreen using this table information.
Stock Unit
This is a selection box allowing entry of the stock taking size purchased from this
supplier, i.e. Barrel, Case etc.
Reference
This is the supplier reference for this product relating directly to a particular Stock Unit
purchased from a particular supplier.
Barcode label req.
The package has a link to a barcode printer, this can be used to print barcode pricing
labels, for products as they arrive into stock. The availability of this option is set using
this tick box
31
Page 40

______________________________________________________
PRODUCT OPTIONS
This selection tab stores information relating to activities at the Point of Sale terminal.
All necessary explanations can be found within the FS-3600 manuals.
32
Page 41

______________________________________________________
STATUS OPTIONS
This section controls the Point of Sale terminal programming, determining such features
as whether the item is to print on different printers and which price levels are available.
Note:
Item Enabled = Valid (FS-3600)
Addit. Price Item = Add-on (FS-3600)
33
Page 42

______________________________________________________
USER FIELDS
This section allows classification of products by using up to four fields for any
information relating to this product that you require. These are selected via a drop list
and the list of these fields are maintained via the User Fields screen. For example, you
may wish to record the Size, Color or Style of products. It is possible to change the onscreen names of these fields within the View Option section.
34
Page 43

______________________________________________________
RECIPES
There are two main types of recipes :-
Saleable items
Firstly where both the items are saleable products and they are linked together for stock
taking purposes
i.g. Pint and Half of Beer
Both are sold through the POS terminal. The half however is a recipe using the pint as
an ingredient with a quantity of 0.5.
Example 1
Recipe Item Half Pint of Beer
Ingredients Pint of Beer Quantity 0.5
Stock Recipes
The second type of receipt is where a number of ingredients are linked to one recipe to
ensure the stock of the items making up that product is correct.
i.e. a Ham Sandwich is a saleable recipe with the ingredients being 2 slices of bread and
3oz of Ham.
Both the bread and the ham, will be a Product Code which exists with a zero ECR code.
This will prevent the bread or ham from being sold individually at the terminal, only the
Ham sandwich recipe item can be sold.
Example 2
Recipe Item Ham Sandwich
Ingredients Sliced Bread Bought as a Loaf with 32 Slices Qty 2.00 (2 Slices)
Roast Ham Bought as a 2 lbs or 32 ounces Qty 3 (3oz)
When the Product Codes are created for the sliced bread and the ham, the Stock Unit
will be how the product is purchased i.e. a loaf of bread or a pound of ham. The sales
units will then be set as the lowest usable unit within a recipe i.e. 32 ounces in a 2
pounds of ham or 32 slices in a loaf of bread. Then as the recipe is created the quantity
for the ingredients reflects the number of sales units that item uses i.e. 2 slices of bread
or 3oz of ham.
35
Page 44

______________________________________________________
RECIPE
A new recipe can be selected from the box, you are then presented with a list of
products so that you may select which is the recipe item, i.e. the Pint of Beer or the
Ham Sandwich.
Use Prices From The Location in which this item is to be sold and purchased should be entered here for a multi-Location package. The recipe file is for all Locations, this field is to ensure the correct costing are utilized for the on-screen recipe calculations.
Retail Price
This is the retail price of the item from the chosen Location.
Current Cost Price
This is the current cost of the recipe, which does not include the current amendments
until the item is updated.
Current Profit/Margin
This is current stored dollar value and percentage profit of the item, this does not
include the current amendments until the item is updated.
Recipe Cost This is the on-screen calculation of the cost of the recipe.
36
Page 45

______________________________________________________
Recipe Profit/Margin
This is the calculation of the dollar value and percentage profit using the on-screen
quantities.
Product Code
This allows you to use this table to enter the ingredients, if the Product Code is not
known the search icon in the right hand side of the Product Code box can be used.
Description
Once the ingredient is found, such as the Pint of Beer or the Bread then the description
is automatically brought on Screen.
Quantity
This is the quantity of the stock item to be used when this RECEIPE item is sold,
i.e. 0.5 of a pint is used every time a half pint of beer is sold, or 2 slices of bread for
every ham sandwich
When the Recipe screen is exited a prompt appears asking whether recipe costs should
be updated. For example the half pint beer costs nothing until the recipe was created
stating it uses 0.5 of a pint. The half pint will now be updated in the average/cost field
for the product. These costs are also maintained at purchases, as the cost of the
ingredients increases.
Render
If the item is a sub recipe such as roll & butter used in a main recipe such as soup &
roll. It is necessary if a change has been made to the costing of the sub recipe to render
to ensure the true cost of the main recipe is shown. For example, if the number of
butter portions within the bread and butter has increased the cost would also increase.
When the Soup & Roll recipe was called up on screen immediately after this change the
cost would not be correct unless Regenerate is carried out. When a recipe is saved, the
price is automatically rendered.
37
Page 46

______________________________________________________
STOCK
The main Stock menu tab, provides access to all relevant stock movement options such
as :
ORDER SECTION
The system can if required produce a report showing which items should be re-ordered.
This information can be based on either average days usage or re-ordering based on
minimum and maximum stock reporting. This report information can then be entered
manually onto the Order screen. Alternatively the Order can be generated automatically
by using the suggested re-order icon. This will generate a complete Order based on the
users decisions at this stage. Once the Order has been entered it is possible to print the
Order out to be sent to the supplier. The outer on Order field for each of the products is
updated, when an Order is placed, allowing reporting of items on ordered.
DELIVERY SECTION
If the information is entered as an Order this information can then be recalled at the
Delivery stage, and the quantity received can then be entered as necessary.
Alternatively if the goods have arrived with a Delivery Note, and there was no Order
previously entered the information can be entered directly at the Delivery stage
bypassing the Order stage. A Delivery Note can be printed at this stage. When the
Delivery is committed the current stock levels are increased. The costing however are
not updated until the purchase is entered.
PURCHASE SECTION
Deliveries entered can be recalled when the Purchase invoice arrives, allowing any
changes in the cost prices to be entered, a Purchase invoice can be printed out if
required. This option is also ideally used if stock arrives into the building without
previously being ordered and the cost prices are known. This would ensure both the
stock of the item and the costing are updated simultaneously.
TRANSFER SECTION
This section is used to move stock holding between Locations. The stock quantities will
be deducted from one Location and added to another.
WRITE OFF SECTION
This is used for removing items from stock that are used but not sold. I.e. damaged
goods. These can be shown in the Write Off report.
REVIEW INVOICES
This is used for reviewing historically, paid invoices. Once an invoice is completed, it is
stored and available for view within this option.
38
Page 47

______________________________________________________
STOCK MANAGEMENT
The system can provide a very simplistic or sophisticated order system depending on the
nature of the business. Stock’s arrival into the established can be covered in three ways
METHOD 1 - USING RECOMMENDED ORDER
Order The suggested order information is generated based on the following
rules.
Current Stock is less than the Re-Order Level entered for each product
Or Current Stock is less than the Re-Order Level and recommended to max
stock levels.
Or Current Stock based on usage per day is insufficient to meet the days
stock need, recommend the required amount to maintain stock levels.
Or Current Stock based on usage per day is insufficient to meet the days
stock need, recommended the required amount to max stock levels.
Deliver The stock arrives and the previously entered Order is accepted. This
updates the current stock for each product and removes the item from
the on Order list. NOTE: Backorders are not possible, the item(s) needed
to be on backorder will have to be re-ordered or entered at the time of
the Stock Purchase.
Invoice When the invoice arrives the cost prices are entered against the Delivery.
This updates the costing of the products.
METHOD 2 - USING MANUAL ORDERING
Order Enter the details of the products to be ordered. This updates the items on
Order for each product
Deliver The stock arrives and the previously entered Order is accepted. This
updates the current stock for each product and removes the item from
the on Order list. NOTE: Backorders are not possible, the item(s) needed
to be on backorder will have to be re-ordered or entered at the time of
the Stock Purchase.
Invoice When the invoice arrives the cost prices are entered against the Delivery.
This updates the costing of the products.
39
Page 48

______________________________________________________
METHOD 3- USING DELIVERIES AND PURCHASE INVOICING
Deliver The stock arrives is entered into the system. This updates the current
stock field for each product. NOTE: Backorders are not possible, the
item(s) needed to be on backorder will have to be re-ordered or entered
at the time of the Stock Purchase.
Invoice When the invoice arrives the cost prices are entered against the Delivery.
This updates the costing of the products.
METHOD 4- USING SIMPLISTIC PURCHASING
Invoice When the stock arrives the details are entered. This will update both the
current stock and the products costing simultaneously.
40
Page 49

______________________________________________________
STOCK MANAGEMENT
The screen displays a number of icons which are explained below.
SAVE
This allows a screen to be saved while the information is being entered, allowing recall
at a later date for further items to be entered. This does not update any of the
totalizers.
CANCEL
This allows any information entered prior to the last save to be cancelled.
LABELS
It is possible to print labels for product which are Order, Delivered or Purchased.
This will print the current information entered, saving the details prior to printing.
COMMIT
This saves all details, and updates the relevant stock and Order totals.
DELETE
This will delete the current on-screen Order.
41
Page 50

______________________________________________________
SUGGEST
This is used to suggest a recommended re-order. This can be based on :
Current Stock is less than the Re-Order Level entered for each product,
Or
Current Stock is less than the Re-Order Level and recommended to max stock
levels,
Or
Current Stock based on usage per day is insufficient to meet the days stock
need, recommend the required amount,
Or
Current Stock based on usage per day is insufficient to meet the days stock
need, recommended the required amount to max stock levels.
42
Page 51

______________________________________________________
ORDERS
This is used to generate an Order for your Supplier, this has no direct effect on the stock
levels and is designed only to indicate stock has been requested for Delivery.
ORDER REFERENCE
This selection box can be used to begin a new Order or recall a saved Order. Clicking on
the icon, will automatically generate the number, using the View-Options settings would
allow a prefix or suffix to be added to the Order reference when it was generated.
LOCATION
This is the Location to which the stock is to be delivered. Clicking on the Location tab
will allow entry of the delivery address.
SUPPLIER DETAILS
This is the Supplier from whom the goods are to be purchased, the address details are
recalled for the Supplier file, which contains a list of all your Suppliers which were
created previously.
ORDER DETAILS
Reference
This allows an Order reference to be entered, which will print on the Order.
Order Date
This is the date the Order is placed, Orders can be created with dates in advance of the
current date, saved and then committed ready for Delivery at the appropriate time, A
calendar is available by clicking on the small gray selection box.
SPECIAL INSTRUCTIONS
Any relevant information can be entered here for printing on the Order.
INFORMATION ENTRY
Product Code
This is used to recall the product to be ordered, the code can be input at this stage or
recalled from a list of Products by clicking on the small gray selection box.
Description
This is automatically recalled on selecting the Product Code.
Stock Unit
This is the unit the item is purchased in. Stock units are created in maintenance and
attached to a Product Group. These are explained in the section entitled Stock.
Label Req
There is an option to print product pricing labels, as the goods are ordered, This will
print only if barcode required is selected on the Product Maintenance screen for this
item.
43
Page 52

______________________________________________________
Order Qty
This is the number of Stock Units to be ordered i.e. The number of cases or barrels
Last Cost
This is calculated from the Last cost price held on the Product Maintenance screen
multiplied by the number of sales units within the selected Stock Unit. i.e. If 2 Cases of
24 are selected and the cost is 1.00 per unit then 24.00 will be displayed in the Last
Cost column
Line Total
This is the total of goods ordered for this product it is calculated from the last cost
column Which is the last cost per Stock Unit multiplied by the number of Stock Units
purchases. i.e. if 2 Cases of 24 are selected and the cost is 1.00 per unit then 24.00 will
be displayed in the Last Cost column and 48.00 in the line total column.
Current Order Total
This is a running total of the total value of goods purchased on this Order.
Discounts
By clicking on this icon it is possible to allow dollar value or percentage amendments of
the current Order total either discount or premium.
44
Page 53

______________________________________________________
DELIVERIES
This is used to confirm that the Stock has arrived at the premises committing a Delivery
adds the Stock Delivery into the current Stock Holding for the product but this does not
affect the costs of the product.
DELIVERY
DELIVERY REFERENCE
This box is used to recall a saved Delivery, which requires further information to be
entered before being committed as a Purchase. Alternatively, a new Delivery can be
selected.
LOCATION
This is the Location to which the stock is to be delivered. Clicking on the Location tab
will allow entry of the Location delivery address for the supplier.
SUPPLIER DETAILS
This is the supplier from whom the goods are being purchased, the address details are
recalled from the Supplier file, which contains a list of all your Suppliers.
DELIVERY DETAILS
Reference
This allows an Order reference to be entered, which will print on the Order.
Delivery Date
This allows entry of the delivery date. A calendar is available by clicking on the small
grey selection box.
45
Page 54

______________________________________________________
Special Instructions
Any relevant information can be entered here for printing on the delivery, information
previously entered to an Order is automatically recalled.
INFORMATION ENTRY
Product Code
This is used to recall the Product to be ordered, the code can be input at this stage or
the recalled from a list of products by clicking on the small grey selection box.
Description
This is automatically recalled on selecting the Product Code.
Stock Unit
This is the unit the item is purchased in. Stock units are created in Maintenance and
attached to a Product Group.
Label Required
There is an option to print Product Pricing labels, as the goods are ordered. This will
print only if barcode required is selected on the Product Maintenance screen for this
item.
Order Qty
This is the number of Stock Units to be purchased. I.e. The number of cases or barrels.
Delivery Qty
This is the number of Stock Units, which actually arrived and may vary from the order
qty depending if the Order was completely fulfilled.
Last Cost
This is calculated from the Last Cost Price held on the Product Maintenance screen
multiplied by the number of Sales Units within the selected Stock Unit. i.e. If 2 Cases of
24 are selected and the cost is 1.00 per unit then 24.00 will be displayed in the Last
Cost column.
Line Total
This is the total value of goods purchased for this product. It is calculated from the LAST
COST column, which is the last cost per Stock Unit multiplied by the number of Stock
Units delivered. I.e. if 2 Cases of 24 are selected and the cost is 1.00 per unit then
24.00 will be displayed in the Last Cost column and 48.00 in the line total column.
Current Order Total
This is a running total of the total value of goods purchased on this Order.
Example, Delivery Note.
Discounts
By clicking on this icon it is possible to allow dollar value or percentage amendments of
the current Order total either discount or premium.
46
Page 55

______________________________________________________
PURCHASES
This is used to enter the costing for the Products, i.e. when the invoice arrives. The
Delivery can be recalled, the costs adjusted if required and the new costing information
can then be committed to a Product.
PURCHASE
PURCHASE REFERENCE
This box is used to recall a saved Purchase, which requires further information to be
entered before being committed. Alternatively a new Purchase can be selected.
LOCATION
This is the Location to which costing data is to be calculated. Clicking on the Location
tab will allow entry of the Location delivery address for the Supplier.
SUPPLIER DETAILS
This is the Supplier from whom the goods are to be purchased, the address details are
recalled from the Supplier file, which contains a list of all your Suppliers which were
created previously
PURCHASE DETAILS
Reference
This allows an Order reference to be entered, which will print on the Order.
47
Page 56

______________________________________________________
Delivery Date
This allows entry of the delivery date. A calendar is available by clicking on the small
icon to the right.
SPECIAL INSTRUCTIONS
Any relevant information can be entered here for printing on the Purchase, information
previously entered to an Order is automatically recalled.
INFORMATION ENTRY
Product Code
This is used to recall the Product to be ordered. The code can be input at this stage or
the recalled from a list of Products by clicking on the small grey selection box.
Description
This is automatically recalled on selecting the Product Code.
Stock Unit
This is the unit the item is purchased in. Stock units are created in maintenance and
attached to a Product Group. These are explained in the section entitled Stock.
Label Required
There is an option to print Product Pricing Labels, as the goods are ordered. This will
print only if barcode required is selected on the Product Maintenance screen for this
item.
Order Qty
This is the number of Stock Units to be purchased. I.e. The number of Cases or Barrels.
Purchased Qty
This is the number of Stock Units, which actually arrived and may vary from the
delivered qty.
Last Cost
This is calculated from the Last cost price held on the Product Maintenance screen
multiplied by the number of sales units within the selected Stock Unit. i.e. If 2 Cases of
24 are selected and the cost is 1.00 per unit then 24.00 will be displayed in the Last
Cost column.
Line Total
This is the total value of goods purchased for this product it is calculated from the LAST
COST column which is the last cost per Stock Unit multiplied by the number of Stock
Units purchased. I.e. If 2 Cases of 24 are selected and the cost is 1.00 per unit then
24.00 will be displayed in the Last Cost column and 48.00 in the line total column.
48
Page 57

______________________________________________________
Current Purchase Total
This is a running total of the total value of goods purchased on this Order.
Discounts
By clicking on this icon it is possible to allow dollar value or percentage amendments of
the current Order total either discount or premium.
On leaving the Purchases screen the prompt update Recipe Costs appears. If for
example you have purchases a pint of beer and the cost has changed, this will have a
direct effect on the cost of a half pint. Answering Yes ensures the costing and profit
margins of the half-pint are also maintained.
49
Page 58

______________________________________________________
TRANSFERS
This controls the movement of stock from one Location to another.
Stock Transfer
This allows the creation of a new Transfer note or the option to recall a saved Transfer
Reference
This allows entry of a reference number for the Transfer
Date
This is the date of the Transfer
From Location
This is the Location the stock is to be moved / deducted from
To Location
This is the Location the stock is to be moved / added to
SPECIAL INSTRUCTIONS
This allows entry of any special instructions, which can then be printed on the Transfer
Note
INFORMATION ENTRY
Product code
This is used to recall the product to be Ordered. The code can be input at this stage or
recalled from a list of products by clicking on the small gray selection box.
50
Page 59

______________________________________________________
Description
This is automatically recalled on selecting the Product Code.
Stock unit
This is the unit the item is purchased in. Stock units are created in maintenance and
attached to a Product Group.
Label Required
There is an option to print product pricing labels, as the goods are Ordered. This will
print only if barcode required is selected on the Product Maintenance screen for this
item.
Transfer Quantity
This is the number of units to be move to another Location.
Last cost
This is calculated from the Last cost price held on the Product Maintenance screen,
multiplied by the number of sales units within the selected Stock Unit. i.e. If 2 Cases of
24 are selected and the cost is 1.00 per unit then 24.00 will be displayed in the Last
Cost column
Value at Cost
This is the number of units to be transferred multiplied by the last cost price.
Value at Retail
This is the number of units to be transferred multiplied by the retail price
51
Page 60

______________________________________________________
WRITE OFFS
This screen allows for items to be Written Off from stock held on the computer.
Location
This is the Location that this stock item is to be Written Off for.
Product Code
This is the code number for the Product, the item can be searched for using the search
icon.
Date
This is the date, the stock quantity is Written Off.
Quantity
This is the quantity to be Written Off and the number is related to the Stock Unit size.
Reason
This is why the stock is Written Off. i.e. Damaged etc. As reasons are entered they, are
stored in the list for use in the future.
52
Page 61

______________________________________________________
STOCK MANAGEMENT
GSS Store provides a comprehensive Stock Management System, including Period Stock
Discrepancy Reporting, through to complete Month End Analysis.
Stock taking for a given Location in GSS Store can be viewed as a staged procedure.
The purpose of which is to ensure that for a large stock take, such as at a year-end,
there is sufficient time for the count to be entered and analyzed. There is no
requirement for all the steps within stock taking to be completed within one day.
UPDATE CURRENT STOCK MOVEMENTS
Before you begin the stock check you need to make sure that all Sales, Deliveries and
Write Offs have been entered into GSS Store.
TAKE STOCK SNAPSHOT
A Stock Snapshot is a picture of the current stock holding at a known point in time.
When GSS Store takes a Stock Snapshot for a Location, it makes a copy of the current
stock value held for every item at that Location and stores it separately from the current
'live' stock.
PHYSICALLY COUNT STOCK ITEMS
GSS Store has a report specifically for the production of Stock Count Sheets. Using the
Stock Count Sheets, the stock should be counted and entered on the Stock Count
Sheets.
ENTER STOCK TAKE
After counting the stock items, the quantities of each item needs to be entered into GSS
Store
ANALYZE RESULTS OF STOCK COUNT
Once the Stock Count has been entered, you should print out the Stock Variance report
from the list of Product Reports. This report shows the difference and value of that
difference, in terms of both retail and cost values, between the Stock Snapshot and the
Stock Count. Any discrepancies can be investigated and if necessary, the Stock Count
entry re-entered.
UPDATE CURRENT STOCK
The final stage of stocktaking is to update the current stock. This procedure posts the
discrepancies found between the stock Snapshot and the stock count to the current 'live'
stock. Optionally, any items for which no count has been entered can have their stock
set to zero. Following this procedure the current 'live' stock will be correct as of the last
Stock Take.
53
Page 62

______________________________________________________
SET OPENING STOCK
It is optional as to whether at the end of the month the set Opening Stock procedure is
carried out. This will copy the actual month end stock to the Opening Stock value for the
next period. It is possible to use the Opening Stock option more than once during a
given stock period if an Opening Stock per week and movements analysis is required
along with a month option also.
54
Page 63

______________________________________________________
SET OPENING STOCK
In order to produce more, comprehensive reports such as the example given. The Set
Opening Stock sequence would be incorporated into the month end procedure. This can
be carried manually by selecting Set Opening Stock or automatically via the GSSEvent
communications timetable. The sequence will copy the current stock quantity to the
Opening Stock quantity and commencing calculating movements from the period start
date which was set. It is possible to have numerous Opening Stocks running
The concept of storing different Opening Stock names is to allow reports for different
period start dates, once that period date, alternatively to allow a number of period
reports to run within the same time scale.
For example, a 4 Weekly Period reports running within one month, each Opening Stock
name, storing a different start stock value and totaling all the report data such as
transfers etc from a different start point, i.e. the 1
Week3, Week4, which is in actual fact 5 Opening Stock names for a one month period.
st
of the month the Week1, Week2,
55
Page 64

______________________________________________________
The Maintain Opening Stock section, allows the numerous Opening Stock files stored for
various period start dates to deleted or for the descriptor to be edited.
Note:
The Opening Stock reporting is a very sophisticated and date orientated for this reason it is
absolutely necessary that the Opening Stock is set at the beginning of a day, before Deliveries
and stock movement begins. This can be automated using GSSEvent.
56
Page 65

______________________________________________________
STOCK TAKING SNAPSHOT
When the take Snapshot is selected the current stock is then copied to a separate figure
for stock taking calculations. This allows the current stock figure to be updated normally
by sales, deliveries etc without it affecting the stock taking results. If the stock taking
day is Monday, a snap shot of the stock will be taken on Monday.
For example :-
100 pints of beer were the Snapshot on Monday, during the course of the stock taking
week the 100 pints of beer will be decreased by sales and increased by deliveries
leaving at Friday 80 pints of beer. On the Monday of the stock take, 110 pints of beer
were actual counted and finally entered on the Friday as the stock take figure.
It is not the 110 pints that is to be copied back to the current stock figure but the
discrepancy. We had 100 on the computer when we started the stock take, 110 when
we actually counted that means, we were over by 10 pints. The figure in the current
stock figure on Friday of 80 pints as we update the stock quantity should be increased
by 10. Which would result in an actual stock count of 90.
This is because the 100 units decreased during the week from 100 to 80 then readjusted at the end of the stock take week by the 10 units that had not been recorded
on the computer.
Take Stock Snapshot
A Stock Snapshot is a picture of the current stock holding at a known point in time.
When GSS Store takes a Stock Snapshot for a Location, it makes a copy of the current
stock value held for every item at that Location and stores it separately from the current
'live' stock.
A selection box is shown to enable a Location to be selected, this determines which
Location is to be stock taken. This will then hold the correct stock value for the correct
Location.
57
Page 66

______________________________________________________
ENTERING STOCK TAKE
After counting the stock items, the quantities of each item need to be entered in to GSS.
Location
The Location for which the stock taking is to be entered should be selected
Product Groups
This selection box can be used to display on screen for stock entry on items within a
selected Product Group
PRODUCTS
Product Code
This is the code number of the item to be selected.
Description
This the reporting description of the item for which the stock take is to entered.
Stock Snapshot
This field displays the stock holding as it was on the day the snap shot was taken, i.e.
the day of the stock take.
Current Count
This field displays the value counted at this moment in time.
Stock Unit
This is the default Stock Unit for this item.
58
Page 67

______________________________________________________
Count
This is the actual value counted for this item and is based on the Stock Unit size
selected for the Stock unit box.
Stock Unit
This is a selection box used to determine what size the Count value is entered in, I.e. 1
Liter bottle of wine, or 1.5 liter bottle.
Count Entered
Displays the date the last counted value was entered for this product.
59
Page 68

______________________________________________________
UPDATE CURRENT STOCK
The final stage of stocktaking is to update the current stock. This procedure posts the
discrepancies found between the stock Snapshot and the stock count to the current 'live'
stock. Optionally, any items for which no count has been entered can have their stock
set to zero. Following this procedure the current 'live' stock will be correct as of the last
stock take, taking into any movements up to the current date.
Location
This is the Location for which the current stock is to be updated by the stock counted
values.
Set uncounted stock items to zero
This allows you to only stock take one section of products at once, those products which
have not been counted will have a stock counted value of zero. This discrepancy is to be
copied across to the current stock field as the true counted value. Alternatively, if this
box is selected then the current stock field for these items is to remain at zero as they
were not counted.
60
Page 69

______________________________________________________
UPDATE
This section is used to run management maintenance tasks.
UPDATE RECIPE COSTS
The costs of recipes are updated in the system when the ingredient within a recipe
change, i.e. tomato has been added to the ham sandwich recipe increasing the cost,
alternative when the cost price of an ingredient changes at the Purchases stage, i.e. the
cost of a pint of beer changes, which directly affects the cost of the half pint. If the
costs are required to be updated manually selecting this option will ensure that happens,
keeping the costs and profitability of recipe items correct
CLEAR SALES WARNING!!!
This will remove all sales totals from the selected Location or all Locations
CLEAR STOCK WARNING!!!
This will set all stock holding figures to zero in the selected Location.
61
Page 70

______________________________________________________
GLOBAL PRICE CHANGE
It is possible using the global price change option, to automatically update the retail
prices for every product within the system using various criteria.
It should be noted that the global price change has very definite consequences.
retail prices with in system will be changed
backup is carried out before attempting to Execute this procedure.
This procedure can not be un-done once executed, unless a backup was carried out
immediately prior to carrying out the price change.
. It is therefore recommended that a
All
Location
This allows a selection of Locations for which the price updates will apply. Another
consideration is when using a multi-Location package, the system may be set to copy all
prices to all Locations, within the view options settings, working in-conjunction with the
copy to Location flag. This means irrespective of the Locations chosen the prices
be copied to all Locations
Product Groups
This allows a selection of Product Groups for which the price updates will apply.
Change procedure
This allows various methods of update prices, percent, dollar value etc.
that are flagged as copy across.
62
Will
Page 71

______________________________________________________
REPORTS
As the reports screen is loaded a selection box is shown allowing the type of report to
be chosen. This achieved it is then possible to select the report to be printed, by clicking
on the Generate icon, Once the report is on-screen there are various icons to select such
as zoom in and out, Print, next page etc. There is also an optional chart display, as
default the chart shown is for Location 1 the Location required can be changed by
selecting the edit icon once the chart is on-screen.
The following choices of reports are available:-
PRODUCTS
This produces all reports relating to product stock and sales information, either in full
detail or alternatively display just the totals for Product Groups and or Classification
Groups
Date Range (if applicable)
This allows you to print a report relating to any specific date range, a calendar can be
displayed by using the icon provided.
Product Groups
Any combination of Product Groups can be used to produce the report totals.
Locations
Any number of Locations can be printed on the report to provided the required report
totals.
Report Options
Decisions can be made as to whether, the individual product detail is to be printed also
whether the Product Groups and or Classification Groups are to be printed. There is also
the option to Sort by. It is possible for example to print the price list in description order
producing an alphabetical price list. Or alternative the sales report may be sorted by
quantity or value. The decision is then to be made whether this information is to be
printed in ascending or descending order i.e. lowest or highest values first. In order to
make the report easier to read, it is possible to select different print colors for each
category. For example, if Product Groups were printed in red it would easily identifiable
on the report which is the Product Group total.
EMPLOYEE
This shows the sales record at the POS terminal for each employee. This information can
be reported by select Locations for a selected date.
63
Page 72

______________________________________________________
FINANCIAL
This reports all the financial activity of the POS terminal. This can be reported by
Location for a selected date, display any or all of the required cash Classification Groups
such as voids, etc.
HOUR
This reports the dollar value taken per time period at the POS terminal, This can be
reported by Location for a selected date.
64
Page 73

______________________________________________________
REPORT SELECTION
Following is a sample product screen with report options.
Note It is possible to right click on the Product Groups in order to select all Product
Groups within a particular Classification Group.
65
Page 74

______________________________________________________
CUSTOMIZING REPORTS
The report options tab allows for product reports to be summarized either by Group
Classification, Product Group. Various options for formatting and color are available.
It is possible to use the filter reporting criteria to produce reports with very specific
information requirements.
66
Page 75

______________________________________________________
VIEW REPORT / PRINT AND SAVE FEATURES
Following is a sample Product screen with report options
Zoom In & Out
This allows the report to be increased or decreased
Auto Print
This will produce a print out of the report.
Printer Selection
This selects the model of printer and relevant printer settings.
Save
This information can also be sent to file at this
stage in varying formats such as CSV, HTML, XLS.
RTF, WMF etc.
Page Movements
This moves to the first page, previous page,
next page and final page
67
Page 76

______________________________________________________
VIEW LOG FILES
This records the activity of users login into and out of the software.
68
Page 77

______________________________________________________
GSS STORE OPTIONS
This controls the main system features and should only be amended if you fully
understand the options.
Logo Bit Map
The background of the GSS Store screen can be changed to any existing Bitmap, even
one such as the company logo.
Weekend Day
This determines the day of the week when new week totals should begin. Once this is
set, the historical data will then begin to calculate to the correct weeks. Changing this
day will result in the recalculation of the historical data files.
Load GSSEvent at Start-up
The GSSEvent program controls the timetable for Point of Sale terminal
communications; this program can be loaded independently at the start-up of windows
ensuring that the communication timetable is always active. If this is the case, It is not
necessary to load the program when GSS Store starts.
69
Page 78

______________________________________________________
PRODUCT FILE
This controls the main system features and should only be amended if a full
understanding of the option to be amended is achieved
Carry Add Data Forward
This is designed to speed up data entry on the maintenance screen. As a product is
saved and a new Product code started the screen can be automatically filled in with the
information from the previous product i.e. the same Supplier, Product Group etc. This
means time need only be spent amending the changed information such as retail price.
Use ECR code and Product Code.
It may not be required that a separate Product Code be used. If this is the case the
Product Code can automatically update the ECR code.
Price Levels
The Point of Sale terminal can operate using more than one price level i.e. Price level 1
as Normal Price and Price level 2 as Special Offer price. The number of price levels used
by the terminal must be entered here. They can also be given more appropriate names,
which will appear on the maintenance screen.
ECR Description Length
This is the maximum number of characters that can appear on the Point of Sale receipt.
Free Text File 1 – 4
These fields can be input against a product. They will help identify the product i.e. Size,
color style etc. The names of the fields can be given more appropriate descriptions.
70
Page 79

______________________________________________________
Decimal places in product reported
This is design to keep the reports simple, only printing decimal quantities when they are
actually required; not all establishments sell decimal quantities of items.
Decimal Places in Recipes
This how many decimals places will be used when entering quantities on the recipe
maintenance screen.
71
Page 80

______________________________________________________
PRODUCT FILE 2
This controls the main system features and should only be amended if you fully
understand the options.
Data to Copy to Other Locations
When products are created within a multi Location package, it is possible to determine
which of the maintenance data is copied throughout the Locations.
For example, an item may be purchase from the same supplier, in the same size costing
the same price for all Locations. Yet, in Location 1 that same item may retail at $1.00
and in Location 2 for $1.50.
In this instance, all relevant supplier and costing information should be automatically
updated to all Locations when the information is changed within any Location. The retail
price however should not be copied, as this is unique to the Location, it was amended
in.
The selection boxes provide the option of determining which information is to be copied
to all Locations when amended alternative. The amendments will apply solely to the
Location in which they were changed.
This option is applies only to products where the check box on the maintenance screen
“Apply changes to all Locations” is ticked.
It should be noted that if using the global price change options, the setting for Pricing
information, will have a direct bearing on whether the Location tab is used for determine
which Locations receive the price updates.
72
Page 81

______________________________________________________
SHELF EDGE
It is possible to produce a report, which will print on pre-defined labels, in order to
produce shelf front tickets. This allows us to define the print margins etc.
73
Page 82

______________________________________________________
ORDERS /TRANSFERS
This section controls the automatic Order/Transfer number generation
PREFIX
This will place the text entered here as the starting information for the automatically
generated code. I.e. PRE0008 would be a prefixed reference
SUFFIX
This will place the text entered here as the end information for the automatically
generated code. I.E. 0008TSUF would be a suffixed reference
FIXED DIGITS
This determines how many digits the reference number will be i.e. 4 will generate 0001
etc.
NEXT ORDER NUMBER
This stores the next number to be generated when the automatic reference number
generation is selected.
74
Page 83

______________________________________________________
MISCELLANEOUS
This controls the main system features and should only be amended if you fully
understand the options.
Group Classification / Product Groups
When creating new Product Groups, the number is automatically incremented. It is
normally assumed the first group is 1 incrementing in 1’s i.e. 1,2,3,4, as new groups are
created. It is possible to change that increment to any number that is required for
example if this field is changed to 10 when new groups are created the number will
automatically increment in 10’s i.e. 10,20,30 etc.
Report Options
It is necessary on certain ECR types to ensure decimals as opposed to integers are used
for reporting. i.e 1.00 is printed rather than 1
75
Page 84

______________________________________________________
VIEW - GSS JOURNAL
The FS-3600 terminal has the capabilities of storing an electronic journal, which can be
collected to the PC, for report. This section displays the whole journal file for the ECR.
Note:
In order to collect the journal it is necessary that within the terminals system options the
following flags are set to Y, Electronic Journal, Apnd to Exp files and create Backups.
FILTER
This is a very useful tool, allowing search of the whole journal for such information, as
selected register, selected date, etc.
REGENERATE
When a new filter has been selected, it is necessary to click on re-generate to ensure
the correct information is displayed
MOUSE CONTROL
It is possible by using a right click of the mouse; to change the format of the
information displayed. The will be a large degree of information collected that is not
required as not all features are utilized on all terminals. Using the Hide Column will allow
the information to be reduced to the desired requirements. It is also possible to print or
export the information using this option.
76
Page 85

______________________________________________________
SUBQUERY
This function allows a more refined search of the filtered data.
77
Page 86

______________________________________________________
WINDOW
Various windows can be on-screen at any one time; the product file may be open as you
purchase codes these options control how those views are displayed.
Tile
This displays all open screens at once so that the information can be viewed
simultaneously.
Cascade
Displays the windows with the first opened screen behind the next and so forth, allowing
you to select with the mouse which screen is the current working screen.
78
Page 87

______________________________________________________
USER
The current user logged onto the system is shown at the bottom left of the screen. All
tasks carried out in the system can be restricted to a user. It is possible for each user to
have their own level of password security. As standard the system has a default user. It
is advisable to leave this unchanged, so that you can always access the system.
LOG OFF USER
This will log the user of the terminal, allowing the only task to be performed being log
back in.
SET-UP USER
This allows a new user to be created or an existing users access to be changed
USERS
A new or existing User can be selected using this option box.
User Code
This is the log on code that must be entered by the user, this may relate to their name.
User Name
This is the name the user will type in to log into GSS Store.
79
Page 88

______________________________________________________
Password
This allows the creation of a user password.
Menu Options
This allows each user to be restricted to particular tasks. If the +/- indicator is clicked by
each header shown, further screens are shown for selection or de-selection. Using the
mouse right click will highlight in bold an enabled option or deselecting an option as
required.
Reports
Individual reports can also be allowed, disallowed as required for each user.
80
Page 89

______________________________________________________
GSSEVENT – EVENT MANAGER
This is the main communications package it controls all data transmissions to the Point
of Sale terminals within each Location. This option can be used to execute transmissions
immediately or scheduler in a timetable for execution later. As GSS Store is loaded an
icon appears at the bottom right of the main windows taskbar. This is the GSSEvent icon
that is monitoring any communications that are in the timetable and will communicate
as and when required. The GSSEvent program will stay loaded even when GSS Store is
not running; this can be accessed at any time by clicking on the GSSEvent icon.
81
Page 90

______________________________________________________
Specific events are selected from the Event pulldown window.
Upon Actual communications, a window will show activity as it progresses.
The 01-16 will highlight only on networked communications signaling the specific
terminals currently online.
82
Page 91

______________________________________________________
EVENT TIME TABLE
This section allows communications to be scheduled for later communications.
LOCATION
The Location for which the communications are to take place must be selected
New
This allows a new task to be scheduled.
Update
This will save changes to an existing schedule.
Delete
This will remove a schedule from the system.
Available Events
This is the Events available, the choices can be selected as those executed manually e.g.
ZCOLLECT DATA to upload sales data to the computer.
Frequency
The frequency of the communications can be set as ONCE ONLY, DAILY, WEEKLY,
MONTHLY or for a SPECIFIC DATE.
Schedule
As the frequency is set the Schedule will become available as required for example,
weekly will require the day of the week to be entered i.e. Saturday, where as monthly
will require the date of the month to be entered.
Event Time
This is the time at which the communications will take place.
83
Page 92

______________________________________________________
Event Date
Where a date entry is required i.e. once only communications. This is the date the
communications will take place.
LOGS
It is possible using the logs section to view either Failed Events, Events or Filing Actions.
It is a very important management tool when control ECR communications. The failed
events are essential at determining why a system has not established a successful
connection. The ECR systems provider will be able to assist with a detailed explanation
of this section.
84
Page 93
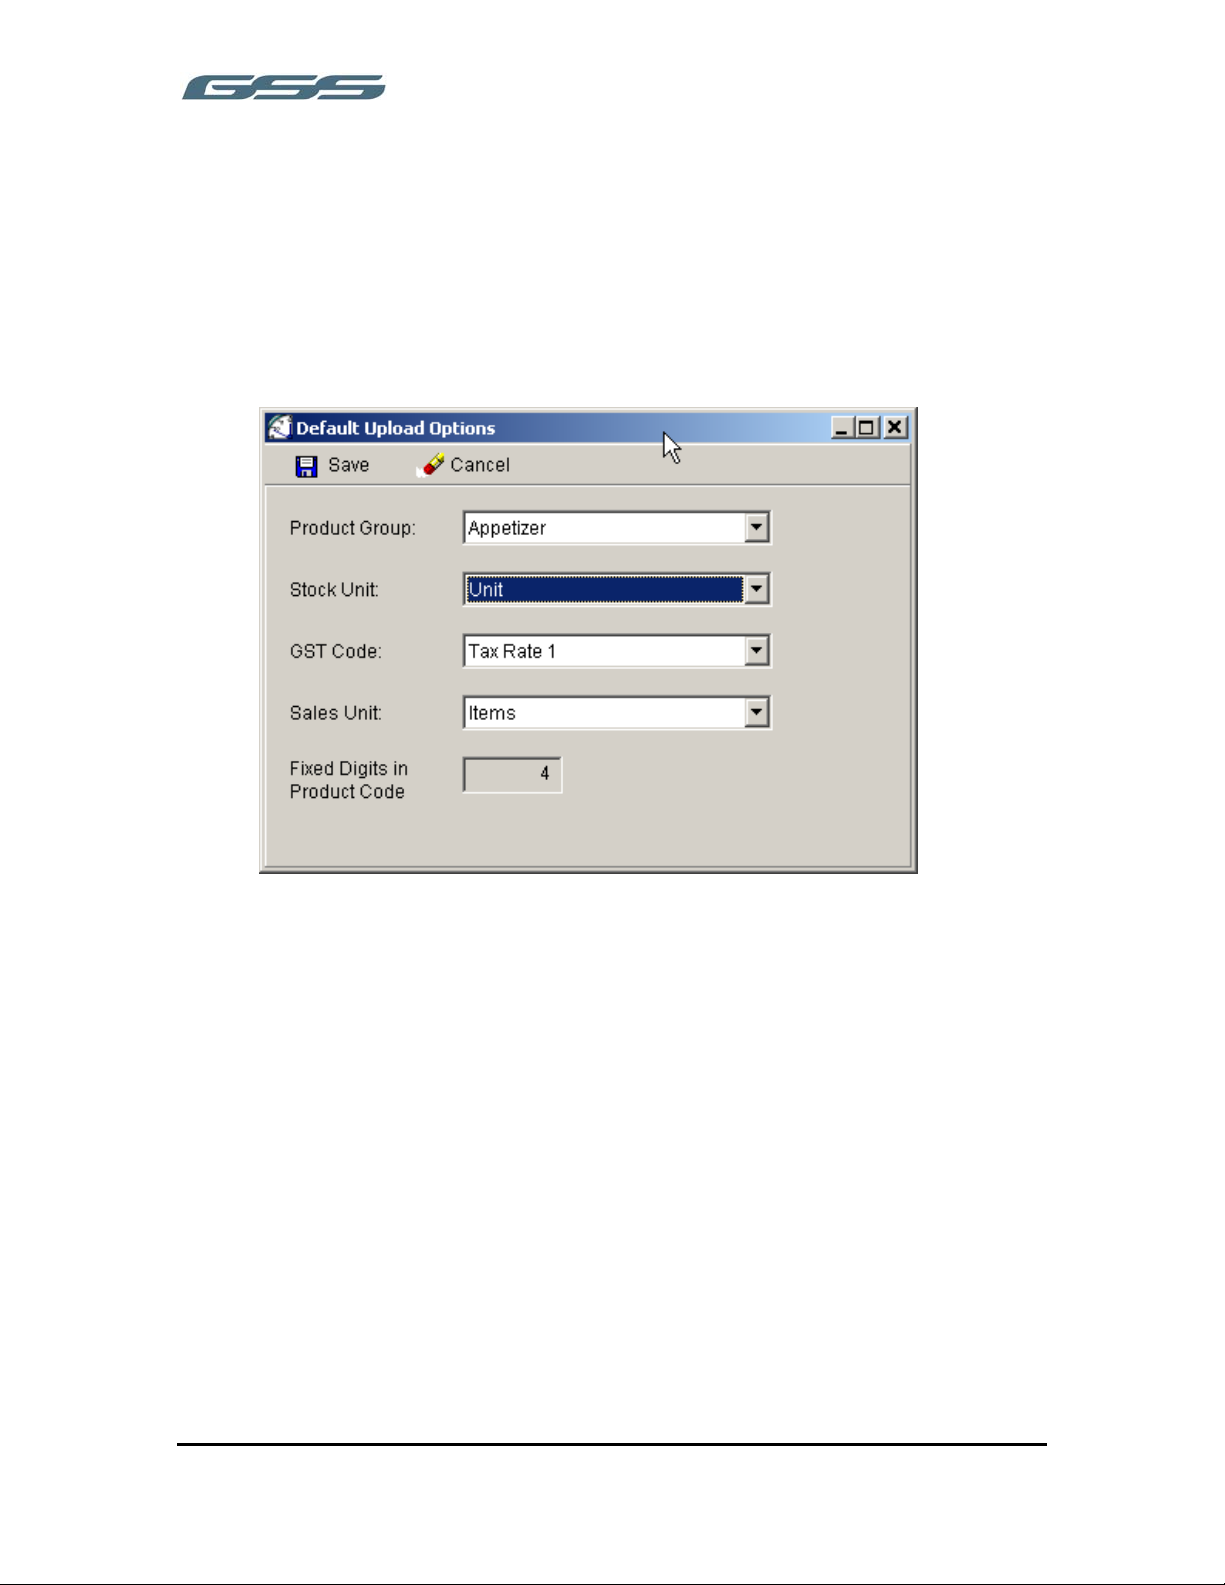
______________________________________________________
DEFAULT UPLOAD OPTIONS
It is possible executed either via a timetable or immediately to upload the ECR
information, to the PC. If the products are to be uploading a created on the PC, it is
possible to determine using this section which Product Group the items are linked to. For
Example if the environment is retail, where not found products are created it is possible
to upload the products using this section link them to a not found group prior to
collecting sales data. This ensures no sales data is lost and all automatically created new
products can be identified on reports by Product Group.
85
Page 94

______________________________________________________
GSSEVENT – SCRIPT
The GSSEvent program uses files located within the \GSS\GSSEvent\ECRData These files
must only be edited with a full comprehensive of the actions they involve as errors
within this file will result in the loss of data.
[Collect Sales Data]
Action01=GSSPOSNET_CREATE
Action02=GSSPOSNET_ATTACH
Action03=GSSPOSNET_GETFILELIST *.BKP
Action04=GSSPOSNET_RECEIVE_LATEST_FILE {LOCATIONNO}\
Action05=GSSPOSNET_VERIFY_BKP_FILES {LOCATIONNO}\
Action06=GSSPOSNET_DELETE_ALL_FILES
Action07=GSSPOSNET_GETFILELIST *.TXT
Action08=GSSPOSNET_DELETE_ALL_FILES
Action09=GSSPOSNET_GETFILELIST *.JNL
Action10=GSSPOSNET_DELETE_ALL_FILES
Action11=GSSPOSNET_DETACH
Action12=GSSPOSNET_FREE
Action13=PROCESS_BKP_FILES {LOCATIONNO}\
Action14=LOAD_JOURNAL JNL{LOCATIONNO}.CSV
Action15=FILE_SALES_DATA
Action16=UPDATE_USAGE
Action17=UPDATE_TOTALS
Shown above is the Z Collect Data event from the FS-3600 Event Library. Preceding the
action list is a section that tells GSSEvent how to deal with failures within the
subsequent action list.
The first line ‘OnFailure=Z Collect Data’ is the default event that GSSEvent should insert
into the event timetable if there is any kind of failure within the script that is not
explicitly dealt with by a subsequent OnFailure line.
GSSEvent will insert a new event into the timetable a number of minutes after the failed
event, up to a maximum number of times. These retry events are controlled by two
lines in the GSSEvent.INI file, in the [GSSEventOptions] section.
‘MaxRetries’ controls how many attempts GSSEvent will try the event and
‘TimeBeforeRetry’ gives the time in minutes that the retry event should be inserted into
the timetable after the failure.
The log of failed events will only show the last failed event after all OnFailure events and
maximum retries has been exhausted.
86
Page 95

______________________________________________________
BACKUPS
It is highly recommended that you back up your data directory on a regular basis.
These can then be used to restore GSS Store in case of serious PC failure, resulting in
data loss. To back up the data directory you can use one of many backup utilities like
Microsoft Backup, which comes with all copies of Microsoft Windows.
To backup your data with Backup follow these simple steps, we've assumed that GSS
Store is installed in the default directory:
•
To launch Microsoft Backup you need to select it from Start Menu >All Programs >
Accessories > System Tools > Backup.
•
Once Backup has loaded select “Next” to continue the backup wizard.
•
Select “Back up files and settings” and click on Next.
•
Select “Let me choose what to back up” and click “Next”.
•
From “Items to back up” select drive C.
•
Double click on the “GSS” folder.
•
Double click on the “GSS” subfolder.
•
Click in the little box to the left of the “Data” folder a check mark should appear in the
box.
•
Click on the Next button.
•
Choose a place to save the back up. (e.g. A:\)
•
Enter a name in the box (e.g. GSS Store_08-3-03).
•
Click on “Finish” to start the backup.
This will then create a backup of your data directory. Remember floppy disks should be
kept away from direct sunlight and magnetic fields i.e. speakers.
87
Page 96

______________________________________________________
TROUBLESHOOTING
•
Confirm PC and FS-3600 Settings. Please note that the terminal configuration
settings are different between the 3.0.0 and 3.1.0 versions of GSS.
•
Comma’s and single or double quotation marks can not be used in FS-3600
Programming Tables (i.e. Location info, menu items, etc.). This will result in loss of
system data once polled by GSS.
•
System Tracking Totals must be set to yes on menu items
•
Confirm Network settings or appropriate connection types.
•
Confirm that the Time and date on GSS computer and FS-3600 are correct.
•
Verify that all FS-3600 are on the correct firmware/software (i.e. APOSTS) version
•
IF LOADPOS batch file, provided on the software CDROM, was not used to update
the FS-3600 software and utilities, confirm that all FS-3600 terminals possess the
correct NCCNET utility version by verifying the date.
•
Perform Check Structures function if GSS software version updates have been
applied.
NOTE: GSSEvent must be shutdown prior to performing this function. Make sure
that the GSSEvent icon is not running in the system tray.
•
Because of personality differences between Power Management schemes, it is
recommended not to enable any power management features if using AUTO POLL.
•
No labor reports will be collected and generated by GSS unless the ‘Close Time
clock’ function is perform prior to the polling process. By setting the FS-3600 option
‘Close with sales’ to YES, the ‘close time clock’ function is automatic with each Z,
thus the labor information will be available on a daily basis.
•
The Software Key must be removed prior to performing and upgrade to GSS. If not
an error message can occur during the installation and sometimes can appear
‘behind’ the active installation window resulting in the installation to appear to ‘stall’.
If this occurs, move the installation window, and there should be an error dialog box.
Click OK and the installation will resume. This error will not occur if the software is
not attached.
88
Page 97

______________________________________________________
89
Page 98

OM-GSS1
GSS STORE OWNER’S MANUAL V3.1.1
 Loading...