

Toshiba e-Studio165, e-Studio205 User Manual

MULTIFUNCTIONAL DIGITAL SYSTEMS
Setup Guide for
Scanning Functions

Software License Agreement
INSTALLING OR OTHERWISE USING THIS SOFTWARE PRODUCT CONSTITUTES YOUR ACCEPTANCE OF THE FOLLOWING TERMS AND CONDITIONS (UNLESS A SEPARATE LICENSE IS PROVIDED BY THE SUPPLIER OF APPLICABLE SOFTWARE IN WHICH CASE SUCH SEPARATE LICENSE
SHALL APPLY). IF YOU DO NOT ACCEPT THESE TERMS, YOU MAY NOT INSTALL OR USE THIS
SOFTWARE, AND YOU MUST PROMPTLY RETURN THE SOFTWARE TO THE LOCATION WHERE
YOU OBTAINED IT.
THE SOFTWARE INSTALLED ON THIS PRODUCT INCLUDES NUMEROUS INDIVIDUAL SOFTWARE
COMPONENTS, EACH HAVING ITS OWN APPLICABLE END USER LICENSE AGREEMENT (“EULA”).
INFORMATION RELATING TO THE EULAS MAY BE FOUND IN AN ELECTRONIC FILE INCLUDED ON
THE USER DOCUMENTATION CD-ROM INCLUDED HEREWITH; HOWEVER, ALL SOFTWARE AND
DOCUMENTATION DEVELOPED OR CREATED BY OR FOR TOSHIBA TEC CORPORATION (“TTEC”)
ARE PROPRIETARY PRODUCTS OF TTEC AND ARE PROTECTED BY COPYRIGHT LAWS, INTERNATIONAL TREATY PROVISIONS, AND OTHER APPLICABLE LAWS.
Grant of License
This is a legal agreement between you, the end-user (“You”), and TTEC and its suppliers. This software,
fonts (including their typefaces) and related documentation (“Software”) is licensed for use with the system
CPU on which it was installed (“System”) in accordance with the terms contained in this Agreement. This
Software is proprietary to TTEC and/or its suppliers.
TTEC and its suppliers disclaim responsibility for the installation and/or use of this Software, and for the
results obtained by using this Software. You may use one copy of the Software as installed on a single System, and may not copy the Software for any reason except as necessary to use the Software on a single
System. Any copies of the Software shall be subject to the conditions of this Agreement.
You may not, nor cause or permit any third party to, modify, adapt, merge, translate, reverse compile,
reverse assemble, or reverse engineer the Software. You may not use the Software, except in accordance
with this license. No title to the intellectual property in the Software is transferred to you and full ownership is
retained by TTEC or its suppliers. Source code of the Software is not licensed to you. You will be held legally
responsible for any copyright infringement, unauthorized transfer, reproduction or use of the Software or its
documentation.
Term
This license is effective until terminated by TTEC or upon your failure to comply with any term of this Agreement. Upon termination, you agree to destroy all copies of the Software and its documentation.
You may terminate this license at any time by destroying the Software and its documentation and all copies.
Disclaimer of Warranty
THIS SOFTWARE IS PROVIDED “AS IS” WITHOUT WARRANTY OF ANY KIND, EITHER EXPRESS OR
IMPLIED, INCLUDING, BUT NOT LIMITED TO, THE IMPLIED WARRANTIES OF MERCHANTABILITY,
FITNESS FOR A PARTICULAR PURPOSE, TITLE, AND NON-INFRINGEMENT. TTEC AND ITS SUPPLIERS DISCLAIM ANY WARRANTY RELATING TO THE QUALITY AND PERFORMANCE OF THE SOFTWARE. IF THE SOFTWARE PROVES DEFECTIVE, YOU (AND NOT TTEC OR ITS SUPPLIERS) SHALL
BE RESPONSIBLE FOR THE ENTIRE COST OF ALL NECESSARY SERVICING, REPAIR OR CORRECTION. TTEC AND ITS SUPPLIERS DO NOT WARRANT THAT THE FUNCTIONS CONTAINED IN THE
SOFTWARE WILL MEET YOUR REQUIREMENTS OR THAT THE OPERATION OF THE SOFTWARE
WILL BE UNINTERRUPTED OR ERROR FREE.
ALL INFORMATION CONTAINED HEREIN THAT IS PROVIDED BY TTEC AND ITS AFFILIATES PURSUANT TO A EULA IS PROVIDED “AS IS” WITHOUT WARRANTY OF ANY KIND, EITHER EXPRESS OR
IMPLIED.
2 Software License Agreement

Limitation of Liability
IN NO EVENT WILL TTEC OR ITS SUPPLIERS BE LIABLE TO YOU FOR ANY DAMAGES, WHETHER IN
CONTRACT, TORT, OR OTHERWISE (EXCEPT PERSONAL INJURY OR DEATH RESULTING FROM
NEGLIGENCE ON THE PART OF TTEC OR ITS SUPPLIERS), INCLUDING WITHOUT LIMITATION ANY
LOST PROFITS, LOST DATA, LOST SAVINGS OR OTHER INCIDENTAL, SPECIAL OR CONSEQUENTIAL DAMAGES ARISING OUT OF THE USE OR INABILITY TO USE THE SOFTWARE, EVEN IF TTEC
OR ITS SUPPLIERS HAVE BEEN ADVISED OF THE POSSIBILITY OF SUCH DAMAGES, NOR FOR
THIRD PARTY CLAIMS.
U.S. Government Restricted Rights
The Software is provided with RESTRICTED RIGHTS. Use, duplication or disclosure by the U.S. Government is subject to restrictions set forth in subdivision (b) (3) (ii) or (c) (i) (ii) of the Rights in Technical Data
and Computer Software Clause set forth in 252.227-7013, or 52.227-19 (c) (2) of the DOD FAR, as appropriate. Contractor/Manufacturer is TOSHIBA TEC Corporation, 6-78, Minami-cho, Mishima-shi, Shizuoka-ken,
411-8520, Japan.
General
You may not sublicense, lease, rent, assign or transfer this license or the Software. Any attempt to sublicense, lease, rent, assign or transfer any of the rights, duties or obligations hereunder is void. You agree that
you do not intend to, and will not ship, transmit (directly or indirectly) the Software, including any copies of
the Software, or any technical data contained in the Software or its media, or any direct product thereof, to
any country or destination prohibited by the United States Government. This license shall be governed by
the laws of Japan or, at the election of a Supplier of TTEC concerned with a dispute arising from or relating
to this Agreement, the laws of the Country designated from time to time by the relevant Supplier of TTEC. If
any provision or portion of this Agreement shall be found to be illegal, invalid or unenforceable, the remaining provisions or portions shall remain in full force and effect.
YOU ACKNOWLEDGE THAT YOU HAVE READ THIS LICENSE AGREEMENT AND THAT YOU UNDERSTAND ITS PROVISIONS. YOU AGREE TO BE BOUND BY ITS TERMS AND CONDITIONS. YOU FURTHER AGREE THAT THIS LICENSE AGREEMENT CONTAINS THE COMPLETE AND EXCLUSIVE
AGREEMENT BETWEEN YOU AND TTEC AND ITS SUPPLIERS AND SUPERSEDES ANY PROPOSAL
OR PRIOR AGREEMENT, ORAL OR WRITTEN, OR ANY OTHER COMMUNICATION RELATING TO THE
SUBJECT MATTER OF THIS LICENSE AGREEMENT.
TOSHIBA TEC Corporation, 6-78, Minami-cho, Mishima-shi, Shizuoka-ken, 411-8520, Japan.
Software License Agreement 3

4 Software License Agreement

Preface
Thank you for purchasing the TOSHIBA multifunctional digital system e-STUDIO165/205.
This Setup Guide for Scanning Functions is a manual for the e-STUDIO165/205 when the following option is installed:
y Network Printer Kit
y Scanner Upgrade Kit
y External Keyboard
This section also explains about functions available with the above options and the Fax Kit
(optional).
This Setup Guide for Scanning Functions describes the following:
y Scan-related settings using the control panel of this equipment
y Settings and management of this equipment from a computer using TopAccess
Be sure to read this manual before using the e-STUDIO165/205 to fully understand and utilize
its functions. Keep this manual handy and retain it for future reference.
Preface 5
Lineup of Our Manuals
These manuals are provided for the operation of the e-STUDIO165/205. Select and read the
manual best suited to your needs.
TOSHIBA multifunctional digital system e-STUDIO165/205
Operator’s Manual for Copying Functions
This manual describes the basic operations, mainly copying functions,
of this equipment. It also describes safety precautions to ensure correct and safe use of this equipment. Be sure to read this before you
use the equipment.
Network Printer Kit (optional, GA-1190)
Quick Start Guide for Printing Functions
This manual describes the operation of the equipment when the Network Printer Kit (optional) is installed on it. This also explains about the
accessories, conditions required for network systems, connecting
method of the network, general description of network settings and
troubleshooting.
Network Administration Guide for Printing Functions (PDF)
This manual is only for the equipment on which the Network Printer Kit
(optional) is installed. This provides you with setup procedures by the
type of platforms or networks you are utilizing, and also setup procedures for network servers to enable various network services.
Setup Guide for Printing Functions (PDF)
This manual is only for the equipment on which the Network Printer Kit
(optional) is installed. The manual consists of the following 2 parts:
Settings Using Control Panel:
This part describes the printer-related settings using the [PRINTER]
and [USER FUNCTIONS] buttons on the control panel of this equipment.
Settings Using TopAccess:
This part describes how to set up this equipment from your computer
through a network using a web-based utility TopAccess. This also
explains about functions to check the current status of this equipment.
Printing Guide (PDF)
This manual is only for the equipment on which the Network Printer Kit
(optional) is installed. This describes how to install client software for
printing data to your computer. This also describes how to print data
sent from your computer to this equipment.
6 Lineup of Our Manuals
Network Fax Guide (PDF)
This manual is only for the equipment on which the Fax Kit (optional),
the External Keyboard (optional) and the Network Printer Kit (optional)
are installed. This explains about the network Fax functions, which
enable Fax transmissions from a client computer through a network.
Scanner Upgrade Kit (optional, GA-1200)
Quick Start Guide for Scanning Functions (PDF)
This manual is for equipment on which the Network Printer Kit
(optional), the Scanner Upgrade Kit (optional) and the External Keyboard (optional) are installed. This also explains about the accessories,
general description of the scanner-related settings and troubleshooting.
Network Administration Guide for Scanning Functions (PDF)
MULTIFUNCTIONAL DIGITAL SYSTEMS
Network Administration
Guide for Scanning
Functions
This manual is for equipment on which the Network Printer Kit
(optional), the Scanner Upgrade Kit (optional) and the External Keyboard (optional) are installed. This provides you with the setup procedures of this equipment by the type of functions you are utilizing.
Setup Guide for Scanning Functions (PDF) (This manual)
This manual is for equipment on which the Network Printer Kit
(optional), the Scanner Upgrade Kit (optional) and the External Keyboard (optional) are installed. The manual consists of the following 2
parts:
Settings Using Control Panel:
This part describes the scanner-related settings using the [USER
FUNCTIONS] button on the control panel of this equipment.
Settings Using TopAccess:
This part describes how to set up this equipment from your computer
through a network using the web-based utility TopAccess. This also
explains about functions to check the current status of this equipment.
Scanning Guide (PDF)
This manual is for equipment on which the Network Printer Kit
(optional), the Scanner Upgrade Kit (optional) and the External Keyboard (optional) are installed. This describes how to install the TWAIN
driver or how to utilize various scanning functions.
Lineup of Our Manuals 7

To read manuals of PDF (Portable Document Format) files
Viewing and printing this operator‘s manual of PDF files require that you install Adobe Reader or
Adobe Acrobat Reader on your PC. If Adobe Reader or Adobe Acrobat Reader is not installed
on your PC, download and install it from the website of Adobe Systems Incorporated.
8 Lineup of Our Manuals

Before Reading This Manual
Signal in this manual
To ensure correct and safe use of this equipment, this operator's manual describes safety precautions according to the three levels shown below.
You should fully understand the meaning and importance of these items before reading this
manual.
Indicates a potentially hazardous situation which, if not avoided, could result
in death, serious injury, or serious damage, or fire in the equipment or surrounding assets.
Indicates a potentially hazardous situation which, if not avoided, may result in
minor or moderate injury, partial damage of the equipment or surrounding
assets, or loss of data.
Indicates information to which you should pay attention when operating the
equipment.
Other than the above, this manual also describes information that may be useful for the operation of this equipment with the following signal:
Describes handy information that is useful to know when operating the equipment.
Trademarks
y The official name of Windows 98 is Microsoft Windows 98 Operating System.
y The official name of Windows Me is Microsoft Windows Me Operating System.
y The official name of Windows 2000 is Microsoft Windows 2000 Operating System.
y The official name of Windows XP is Microsoft Windows XP Operating System.
y The official name of Windows Server 2003 is Microsoft Windows Server 2003 Operating
y Microsoft, Windows, Windows NT, and the brand names and product names of other
y Apple, AppleTalk, Macintosh, Mac, TrueType, and LaserWriter are trademarks of Apple
y Postscript is a trademark of Adobe Systems Incorporated.
y Netscape is a trademark of Netscape Communications Corporation.
y IBM, AT and AIX are trademarks of International Business Machines Corporation.
y NOVELL, NetWare, and NDS are trademarks of Novell, Inc.
y Other company names and product names in this manual are the trademarks of their respec-
©2006 TOSHIBA TEC CORPORATION All rights reserved
This manual is protected by copyright laws. No part of this manual shall be duplicated or reproduced without the permission of TOSHIBA TEC CORPORATION. TOSHIBA TEC CORPORATION shall not be liable in terms of granting patents for any use of information contained in this
manual by third parties.
Pages describing items related to what you are currently doing. See these
pages as required.
System.
Microsoft products are trademarks of Microsoft Corporation in the US and other countries.
Computer Inc. in the US and other countries.
tive companies.
Before Reading This Manual 9

10 Before Reading This Manual

CONTENTS
Setup Guide for Scanning Functions
Software License Agreement ...................................................................... 2
Preface...........................................................................................................5
Lineup of Our Manuals ................................................................................ 6
To read manuals of PDF (Portable Document Format) files .....................8
Before Reading This Manual ....................................................................... 9
Signal in this manual ................................................................................. 9
Trademarks ............................................................................................... 9
Chapter 1 OVERVIEW
Overview...................................................................................................... 16
Contents ..................................................................................................16
Use environments of TopAccess............................................................. 17
Chapter 2 BASIC OPERATIONS ON SCREENS
(EQUIPMENT)
Various Screens ........................................................................................ 20
Basic Operations on Each Screen ............................................................22
To select mode main screen ...................................................................22
To select each menu ............................................................................... 23
To key in digits.........................................................................................25
Chapter 3 SETTING TEMPLATES (EQUIPMENT)
To Enable Templates..................................................................................28
Chapter 4 PRINTING LISTS (EQUIPMENT)
To Print Lists............................................................................................... 30
Configuration Page.................................................................................. 30
Menu List................................................................................................. 31
Chapter 5 The mode of TopAccess
The mode of TopAccess ............................................................................34
End User Mode........................................................................................34
Administrator Mode .................................................................................35
CONTENTS 11

Chapter 6 TopAccess REGISTRATION TAB PAGE
Checking Public Templates....................................................................... 38
Checking public templates from the “Panel View” ................................... 38
Checking public templates from the “List View”....................................... 39
Managing Address Book ........................................................................... 40
Managing contacts in the address book .................................................. 40
Managing groups in the address book .................................................... 44
Managing Mailboxes .................................................................................. 47
Setting up an Open Mailbox ....................................................................48
Deleting an Open Mailbox ....................................................................... 55
Managing Inbound FAX Routing By TSI................................................... 57
Setting up Inbound FAX routing by TSI ................................................... 57
Deleting Inbound FAX routing by TSI...................................................... 66
Chapter 7 TopAccess COUNTER TAB PAGE
Viewing Counters .......................................................................................70
Displaying the total counter ..................................................................... 70
Displaying the department counter.......................................................... 71
Chapter 8 TopAccess ADMINISTRATION TAB PAGE - SETUP MENU
(Scanning Function)
Setting up Network Settings (Scanning Function) .................................. 74
Setting up the SMTP Client .....................................................................76
Setting up the SMTP Server.................................................................... 77
Setting up the POP3 Network Service..................................................... 78
Setting up the FTP Client ........................................................................79
Setting up Save As File Settings...............................................................80
Setting up Remote 1 and Remote 2 ........................................................81
Setting up Email Settings .......................................................................... 83
Email Settings..........................................................................................84
Setting up InternetFax Settings ................................................................86
InternetFax Setting .................................................................................. 87
Setting up Print Service Settings (Scanning Function) .......................... 89
Setting up the Email Print........................................................................90
Displaying Version Information ................................................................ 92
12 CONTENTS

Chapter 9 TopAccess ADMINISTRATION TAB PAGE - MAINTENANCE
MENU
About the Maintenance Functions............................................................ 94
Switching Languages................................................................................. 95
Backing up Data ......................................................................................... 97
Restoring Data from Backup File............................................................ 100
Setting up Notification Functions ........................................................... 103
Importing Address Book Data................................................................. 105
Exporting Address Book Data.................................................................108
Exporting Department Code Data ........................................................... 110
Chapter 10 TopAccess ADMINISTRATION TAB PAGE - REGISTRATION
MENU
About Registration Functions .................................................................114
Registering Public Templates ................................................................. 115
Panel Setting ......................................................................................... 119
Destination Setting (Public Template) ...................................................120
Email Setting (Public Template) ............................................................123
Save As File Setting (Public Template) ................................................. 124
TWAIN Setting....................................................................................... 125
Scan Setting .......................................................................................... 126
Resetting Public Templates................................................................... 127
Registering Fax and InternetFax Received Forward.............................130
Destination Setting (Fax/InternetFax Received Forward) .....................132
Email Setting (Fax/InternetFax Received Forward)............................... 135
Save As File Setting (Fax/InternetFax Received Forward) ...................136
Chapter 11 MANAGING DEPARTMENT CODES ON TopAccess
(FOR ADMINISTRATORS)
Managing Department Codes (For Administrators) ..............................140
Chapter 12 APPENDIX
List Print Format....................................................................................... 142
INDEX .......................................................................................................................................145
Setup Guide for Scanning Functions
CONTENTS 13

14 CONTENTS

1.OVERVIEW
This chapter describes the contents of this manual and the required use environments of TopAccess.
Overview ..................................................................................................................16
Contents............................................................................................................................................16
Use environments of TopAccess.......................................................................................................17

1OVERVIEW
Overview
Contents
This manual consists of the following 2 parts:
y Scan-related settings using the control panel of this equipment
y Settings and management of this equipment from a computer using TopAccess
Scan-related settings using the control panel of this equipment
The former part of this manual describes how to set up scan-related items and how to print lists
using the PRINTER] and [USER FUNCTIONS] buttons of the control panel.
See the following chapters for your reference:
Chapter 2 BASIC OPERATIONS ON SCREENS (EQUIPMENT)
Chapter 3 SETTING TEMPLATES (EQUIPMENT)
Chapter 4 PRINTING LISTS (EQUIPMENT)
Describes the basic operations on the control panel screens of this equipment.
P.19 “BASIC OPERATIONS ON SCREENS (EQUIPMENT)”
Describes how to set a template using the control panel of this equipment.
P.27 “SETTING TEMPLATES (EQUIPMENT)”
Describes how to print the scan-related lists from the control panel of this
equipment.
P.29 “PRINTING LISTS (EQUIPMENT)”
Scan-related settings and management of this equipment using
TopAccess
The latter part of this manual describes how to set up and manage this equipment from your
computer through a network using a web-based utility TopAccess. TopAccess has 2 access levels; the end user level and administrator level. All the setting and maintenance functions of
TopAccess can be utilized in the administrator level.
The following functions of this equipment are described:
y Scanning functions
y Scanning functions with the Fax Kit (optional) installed
See the following pages for your reference:
Chapter 5 The mode of TopAccess
Describes the mode of TopAccess when the Scanner Upgrade Kit and the
Extension Key Board are installed.
P.33 “The mode of TopAccess”
Chapter 6 TopAccess REGISTRATION TAB PAGE
Describes how to check the templates and manage the address book,
Mailboxes and Fax receiving and forwarding on the TopAccess Registration tab page.
P.37 “TopAccess REGISTRATION TAB PAGE”
Chapter 7 TopAccess COUNTER TAB PAGE
Describes how to display total counters on the TopAccess Counter tab
page.
P.69 “TopAccess COUNTER TAB PAGE”
Chapter 8 TopAccess ADMINISTRATION TAB PAGE-SETUP MENU
Describes the scanning setup done by the TopAccess administrator.
P.73 “TopAccess ADMINISTRATION TAB PAGE - SETUP MENU
(Scanning Function)”
16 Overview

Chapter 9 TopAccess ADMINISTRATION TAB PAGE-MAINTENANCE MENU
Describes the maintenance of TopAccess performed by the TopAccess
administrator.
P.93 “TopAccess ADMINISTRATION TAB PAGE - MAINTENANCE
MENU”
Chapter 10 TopAccess ADMINISTRATION TAB PAGE-REGISTRATION MENU
Describes the registration of TopAccess performed by the TopAccess
administrator.
P.113 “TopAccess ADMINISTRATION TAB PAGE - REGISTRATION
MENU”
Chapter 11 MANAGING DEPARTMENT CODES ON TopAccess (FOR ADMINISTRA-
TORS)
Describes management of department codes by an administrator.
P.139 “MANAGING DEPARTMENT CODES ON TopAccess (FOR
ADMINISTRATORS)”
For the lists printed by this equipment, see “Appendix”.
P.141 “APPENDIX”
Use environments of TopAccess
To operate a web-based utility TopAccess, this equipment must be properly connected to a network and also TCP/IP protocol and HTTP network server service must be properly configured.
When these configurations are completed, you can access the website of TopAccess using web
browsers such as Netscape Navigator or Internet Explorer.
TCP/IP protocol and HTTP network server service must be configured on the equipment prior to
using TopAccess.
TopAccess can be used under Windows, Macintosh and UNIX environments. Use the following
browsers to view TopAccess website:
Windows
y Internet Explorer 5.5 or later
y Netscape Navigator 7.02 or later
Macintosh
y Netscape Navigator 7.02 or later
Unix
y Netscape Navigator 7.02 or later
Overview 17

1OVERVIEW
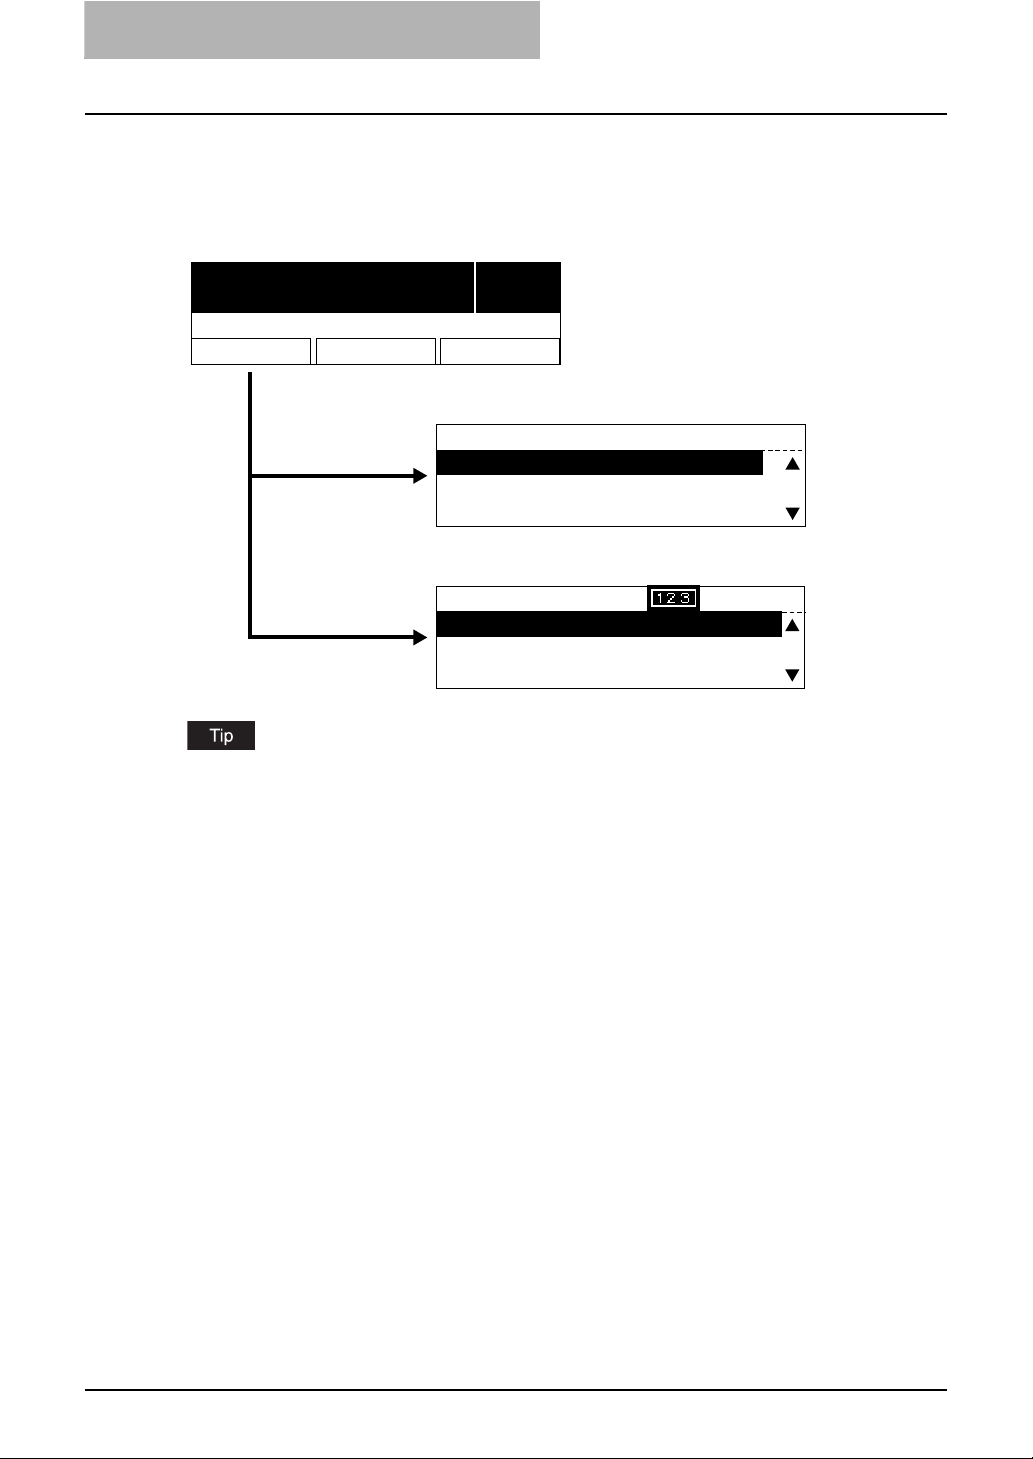
Settings on equipment side and settings/management of this equipment using TopAccess:
Equipment's
settings*1
Settings/management of this equipment using
TopAccess
TopAccess
Windows
Windows
Machintosh
UNIX
*1 TCP/IP and HTTP must be configured on the equipment prior to using TopAccess.
TopAccess is a web-based utility to set or manage the equipment on the screen of your computer using a web browser. TopAccess can be utilized in a network environment (Windows, Macintosh and UNIX) in which any web browser can run.
18 Overview

2.BASIC OPERATIONS ON SCREENS
(EQUIPMENT)
This chapter describes the basic operations on the control panel screens of this equipment.
Various Screens ......................................................................................................20
Basic Operations on Each Screen ........................................................................22
To select mode main screen .............................................................................................................22
To select each menu .........................................................................................................................23
To key in digits...................................................................................................................................25
2 BASIC OPERATIONS ON SCREENS (EQUIPMENT)
Various Screens
Major screens appearing on the control panel LCD of this equipment are shown below.
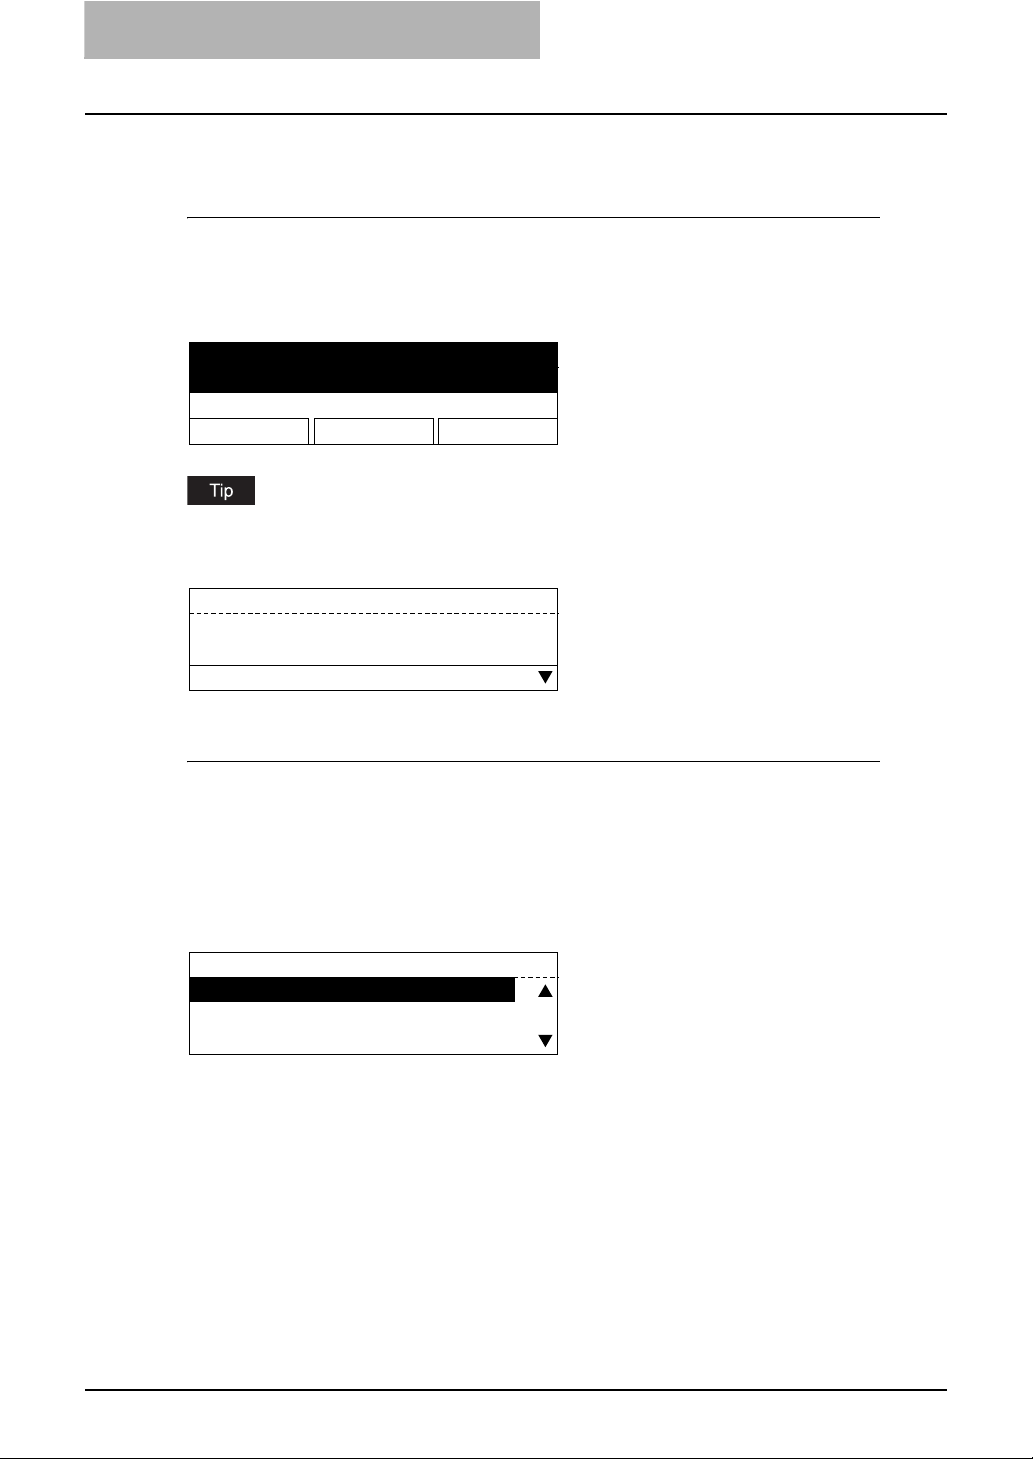
Ready Screen (“Copy mode” main screen)
This screen appears a few tenths of a second after you turn the power of this equipment ON.
The copying functions can be used.
This screen appears also when you have pressed the [COPY] button to switch the equipment
into the copy mode from other modes.
READY
100% SORT
ZOOM FINISHING EDIT
If the ready screen is set for the Fax functions, the screen below appears after you turn the
power ON.
Ready screen for Fax functions (“Fax mode” main screen):
ENTER TEL NUMBER(MAX128):
AUG 20-2006 11:56AM M:100%
RESOLUTION:STANDARD
COMM. OPTION
1
Mode Main Screens
The mode selection main screens are 5 screens; the “copy mode” main screen, “printer mode”
main screen, “scan mode” main screen, “user functions mode” main screen, and “Fax mode”
main screen. In these main screens, menus selectable in the subject mode appear.
To select and operate the mode selection main screen for the printer mode, see the following
pages:
P.22 “To select mode main screen”
Example of “scan mode” main screen:
SELECT SCAN MENU
1.SCAN TO E-MAIL
2.SCAN TO FILE
3.SCAN TO TWAIN
20 Various Screens
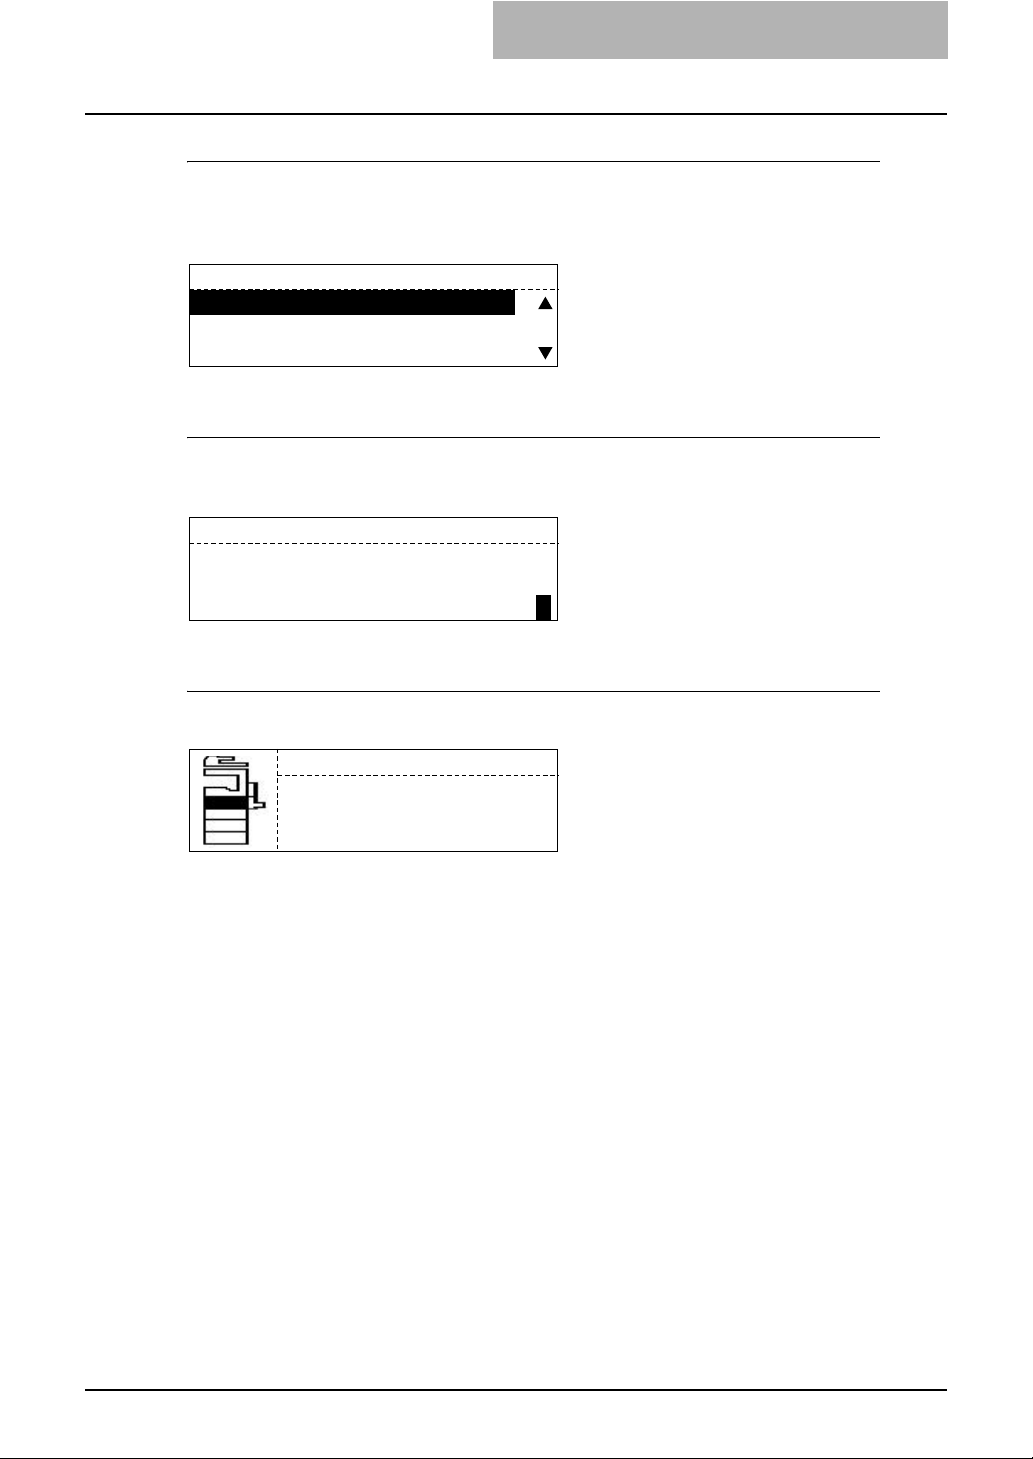
Menu Selection Screen
This screen appears when you select desired menus or items. The name of the menus, submenus or items are displayed in this screen.
Example of “ON/OFF” selection screen:
TEMPLATE
1.ON
2.OFF
Digit Entry Screen
This screen appears when you key in any digits. Enter digits using the digital keys on the control
panel.
DEPARTMENT CODE
ENTER DEPARTMENT NUMBER(1-99):
6
Error Message Screen
This screen appears when an error has occurred.
DRAWER1 empty
Open DRAWER1
Load paper
Close DRAWER1
Various Screens 21
2 BASIC OPERATIONS ON SCREENS (EQUIPMENT)
Basic Operations on Each Screen
To select mode main screen
When you press the mode selection button (= [SCAN] or [USER FUNCTIONS]) in the ready
screen displayed after power-ON, the main screen for each mode appears.
Ready screen ("Copy mode" main screen)
READY
100% SORT
ZOOM FINISHING EDIT
"Scan mode" main screen
[
SCAN] button
[
USER FUNCTIONS
button
SELECT SCAN MENU
1.SCAN TO E-MAIL
2.SCAN TO FILE
3.SCAN TO TWAIN
"User functions mode" main screen
]
USER FUNCTIONS 1216
01.DEFAULT SETTINGS
02.LISTS
03.INITIAL SETUP
1
If the ready screen is set for the Fax functions, the “Fax mode” main screen appears as the
ready screen.
[USER FUNCTIONS] button and screen transition:
y When you press the [USER FUNCTIONS] button while you are operating the copy or scan
menu, the screen shifts to the “user function” main screen.
y When you press the [USER FUNCTIONS] button while you are operating the user functions
menu, the screen returns to the previously selected main screen, i.e. the ready screen (“copy
mode” main screen) or “scan mode” main screen.
Also, if you press the [CANCEL] button when the “user function” main screen is displayed,
the screen returns to the previously selected main screen.
[SCAN] button and screen transition:
When you press the [SCAN] button while you are operating each menu, the screen shifts to the
“scan mode” main screen.
For example, when you press it while you are operating the user functions menu, the “scan
mode” main screen appears.
To return to main screen for each mode:
If you press the [FUNCTION CLEAR] button while you are operating each menu, the screen
returns to the main screen for the current mode.
22 Basic Operations on Each Screen
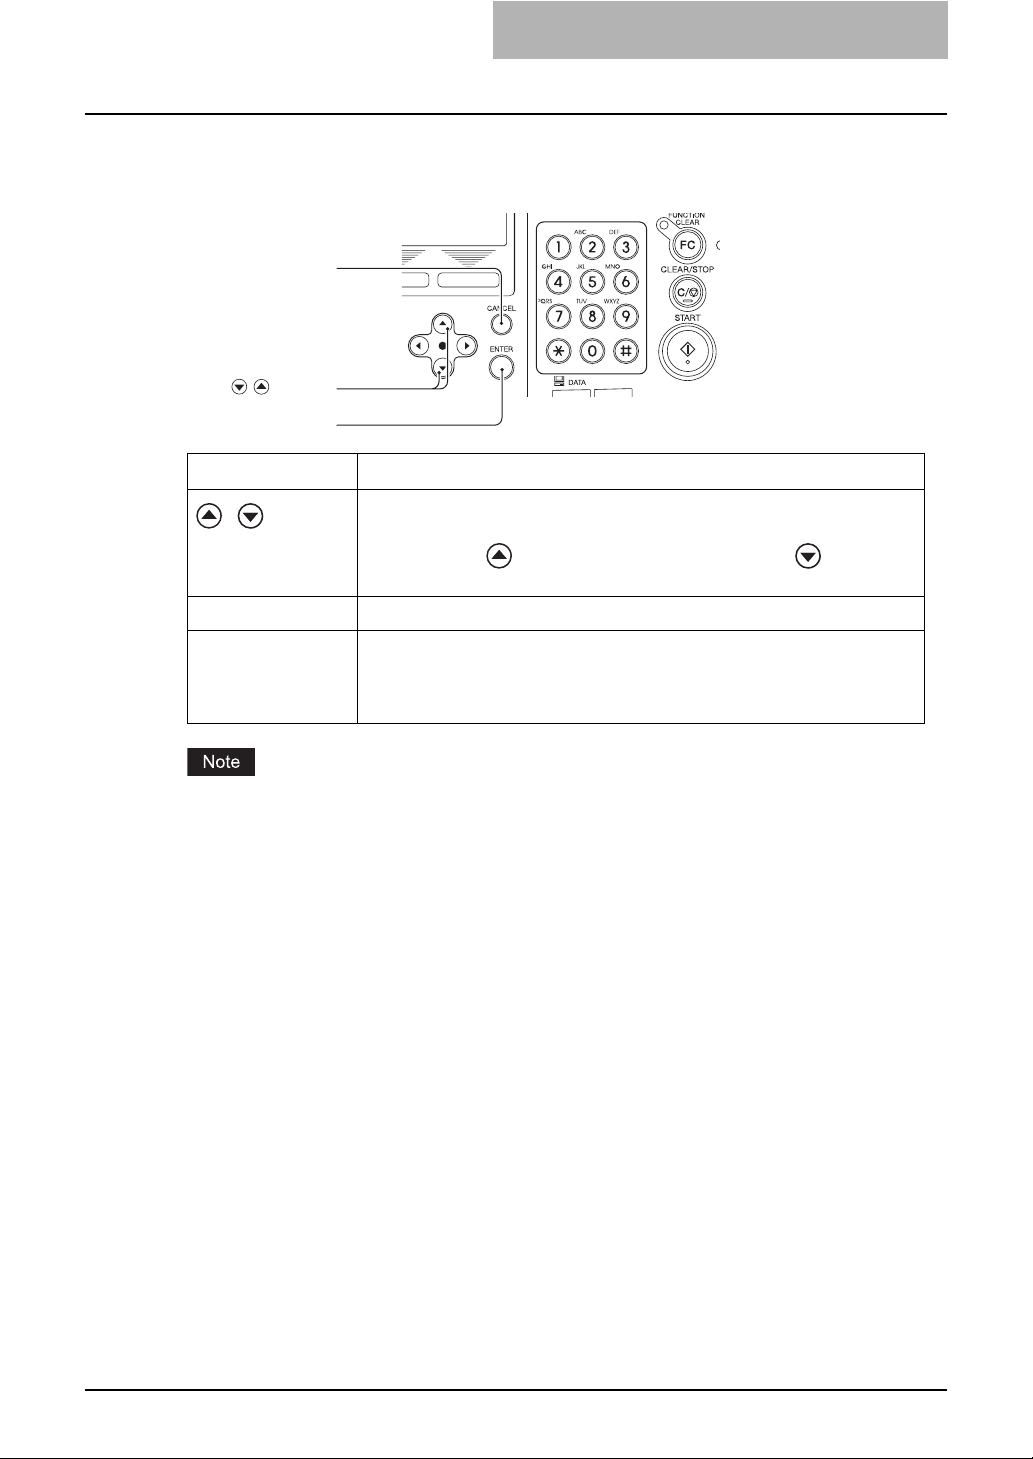
To select each menu
You can select the desired menu or item in the menu selection screen.
[
CANCEL] button
/ buttons
[
ENTER] button
Button Function
/
[ENTER] Press this button to execute the selected menu or item.
[CANCEL] Press this button to cancel the selected operation. The screen returns to the
Press these buttons to select menus or items. The cursor moves to the menu
or item selected. The selected menu or item is highlighted.
When you press , the cursor scrolls up. When you press , it scrolls
down.
previous one.
(If you press this several times, the screen returns to the main screen for the
current mode.)
The menus displayed in the screen differ depending on which options are installed. Some
menus displayed in the menu selection screen shown in this manual may not be displayed in the
actual screen, if the corresponding option is not installed.
Basic Operations on Each Screen 23
2 BASIC OPERATIONS ON SCREENS (EQUIPMENT)
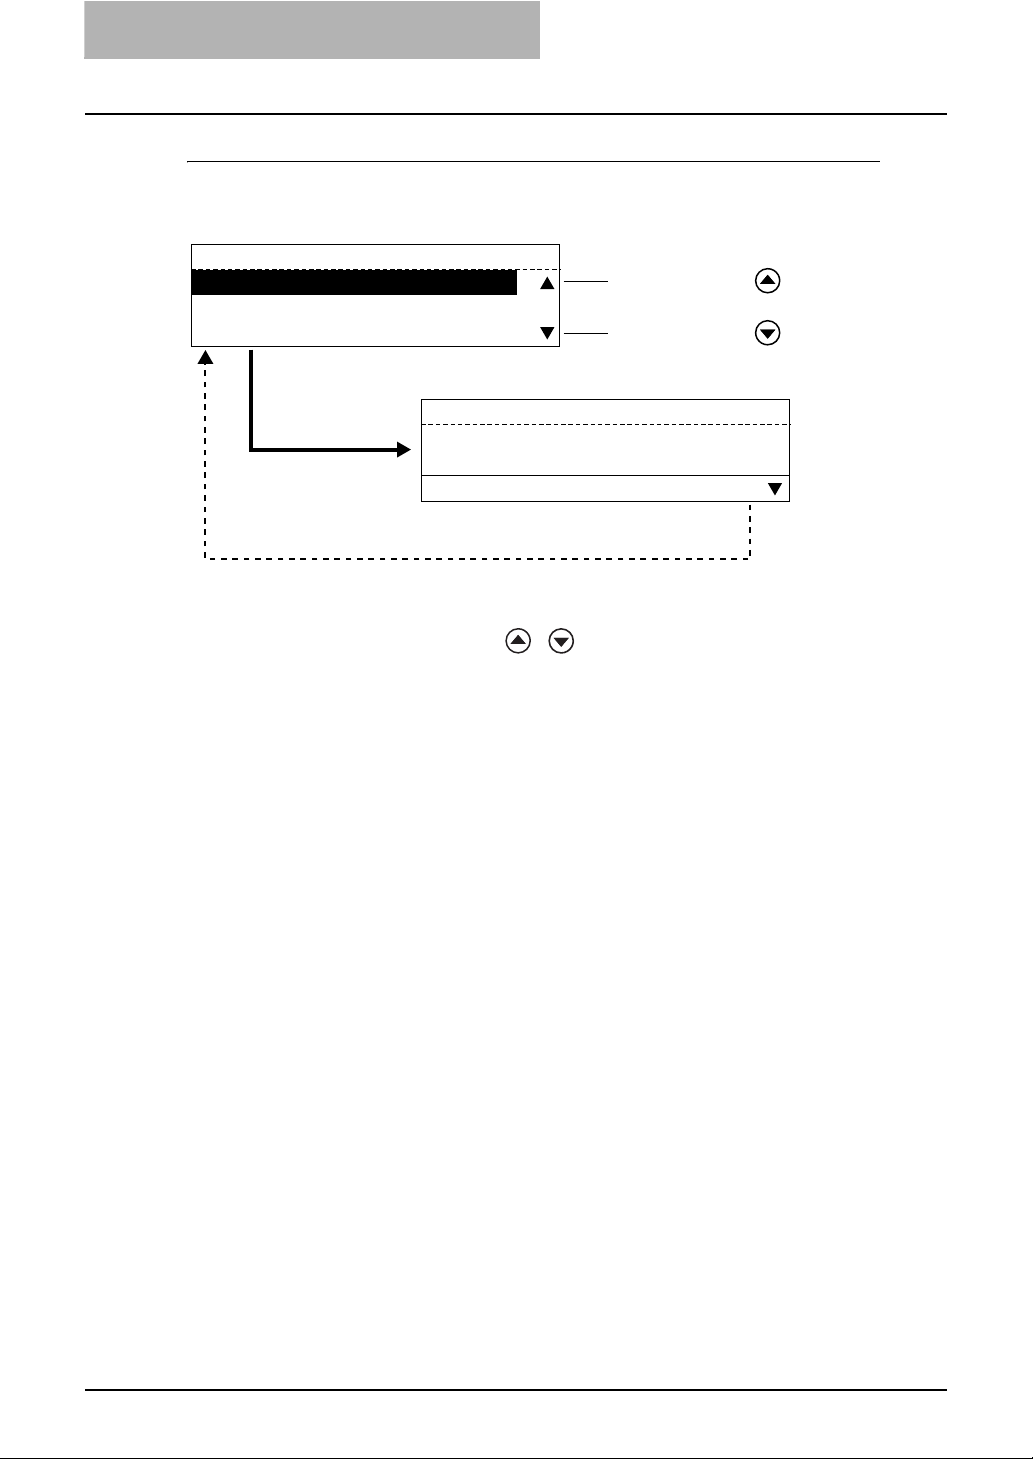
Example of menu selection
The menu selection procedure to cancel a scan job in the “scan mode” main screen is shown
below.
SELECT SCAN MENU
1.SCAN TO E-MAIL
2.SCAN TO FILE
3.SCAN TO TWAIN
[ENTER] button or a digital key [1]
ENTER E-MAIL ADDRESS(192MAX)
AUG 20-2006 11:56 M: 100%
RESOLUTION
The selected menu is canceled and the screen returns
to the previous one.
*1 Each menu in this equipment has a serial number. When you key in the first 1 or 2 digits of
the serial number, you can immediately select this menu. (In other words, this procedure
substitutes for the entry by pressing / and the [ENTER] button.) With this function,
you can select a menu located at the bottom of the hierarchical menu-tree structure by enter-
ing a series of numbers (e.g. “03” “03” “02”).
*1
:200dpi
When you press , the cursor
scrolls up.
When you press , the cursor
scrolls down.
COMM.OPTION
[
FUNCTION CLEAR] button
24 Basic Operations on Each Screen

To key in digits
You can enter digits using the digital keys.
[
CLEAR/STOP] button
Button /Digital key Function
Digital Keys Press these keys to enter digits when the digit entry screen is displayed.
[ENTER] Press this button to determine the digits keyed in.
/ buttons
[
ENTER] button
Digital keys
/
[CLEAR/STOP] Digits keyed in are all cleared.
Press these buttons to move the cursor to the right or left.
When you press , the cursor moves to the left. When you press ,
it moves to the right.
When you want to correct a digit already keyed in, move the cursor to the
digit and then key in a new digit. The digit is replaced with a new one.
Basic Operations on Each Screen 25

2 BASIC OPERATIONS ON SCREENS (EQUIPMENT)
26 Basic Operations on Each Screen

3.SETTING TEMPLATES (EQUIPMENT)
This chapter describes how to set a template using the control panel of this equipment
To Enable Templates ..............................................................................................28

3 SETTING TEMPLATES (EQUIPMENT)
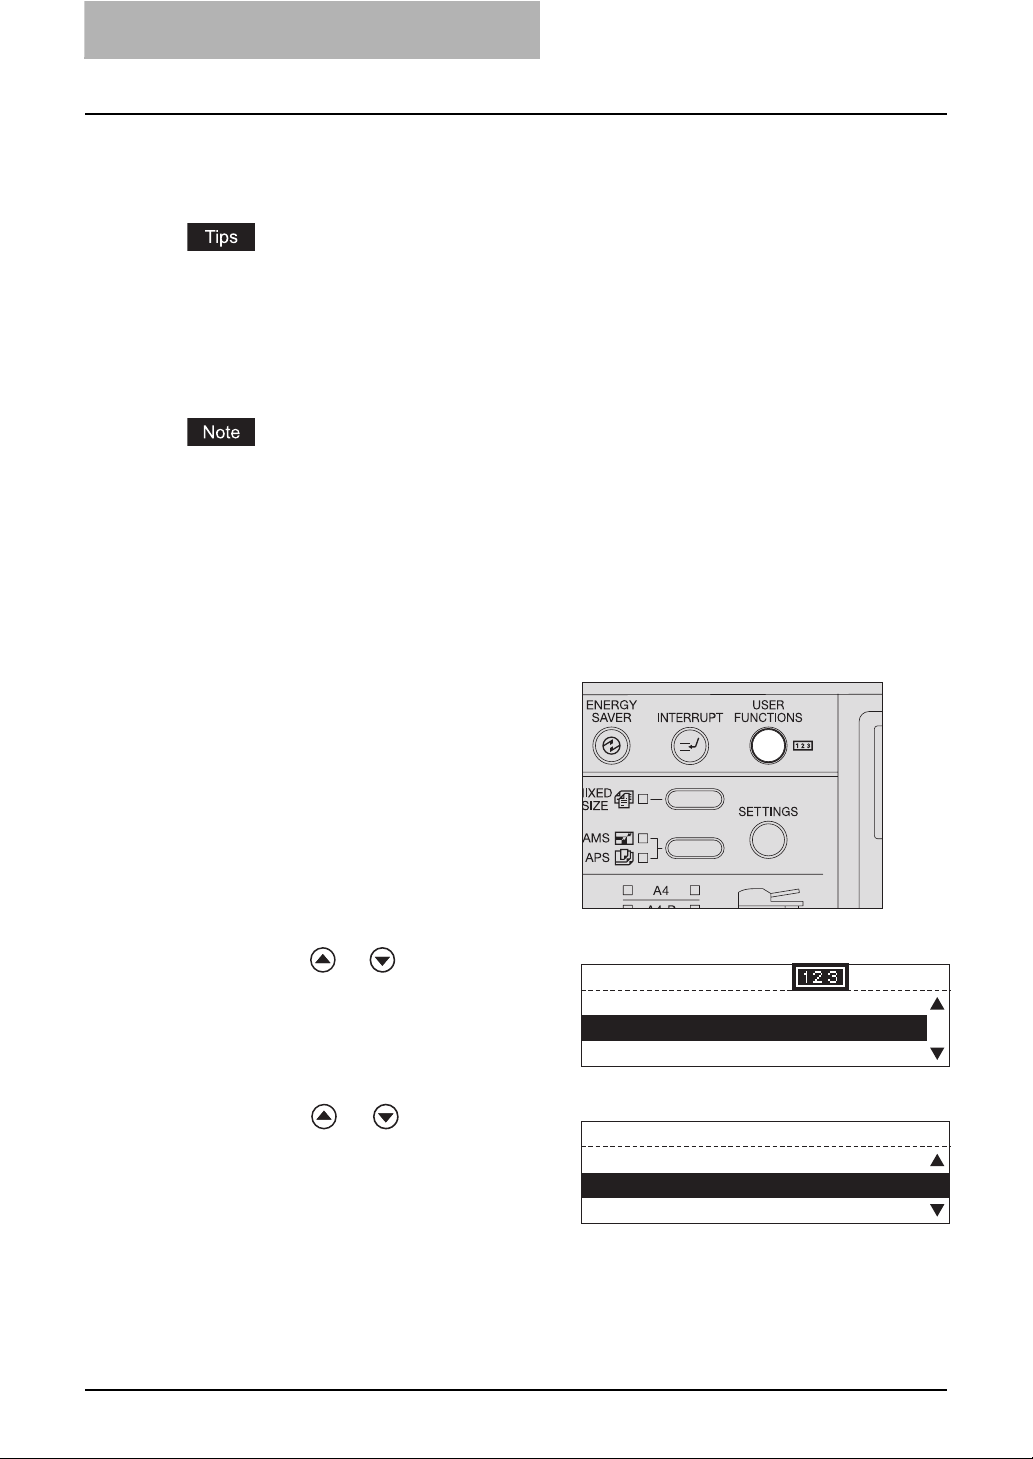
To Enable Templates
You can set the use of templates.
Press the [USER FUNCTIONS]
1
button.
Press or to select
2
"INITIAL SETUP" and press
the [ENTER] button.
USER FUNCTIONS
01.DEFAULT SETTINGS
02.LISTS
03.INITIAL SETUP
00001216
Press or to select
3
"TEMPLATE" and press the
[ENTER] button.
Press or to select "ON"
4
and press the [ENTER] button.
The screen returns to the menu in step
3.
Press the [CANCEL] or [FUNCTION CLEAR] button to return to the
5
"user function mode" main screen.
INITIAL SETUP
04.DIAL IN
05.NETWORK
06.TEMPLATE
TEMPLATE
1.ON
2.OFF
28 To Enable Templates

4.PRINTING LISTS (EQUIPMENT)
This chapter describes how to print scan-related lists from the control panel of this equipment.
To Print Lists ...........................................................................................................30
Configuration Page ...........................................................................................................................30
Menu List...........................................................................................................................................31
4 PRINTING LISTS (EQUIPMENT)
To Print Lists
You can print the scan-related lists shown below in the “user functions mode”.
y Configuration page
y Menu List
y For each list mentioned above, see the following page:
P.142 “List Print Format”
y For examples of the lists below, see the Setup Guide for Printing Functions.
- NIC status page
- PS font list
- PCL font list
List printing is not possible when this equipment is actually printing a job. In this case, “Not
allowed now” appears. Attempt list printing again after the completion of the print job.
Configuration Page
You can print out the setting status of the Network Printer Kit (optional) and the Scanner
Upgrade Kit (optional).
Press the [USER FUNCTIONS]
1
button.
The “user functions mode” main screen
appears.
Press or to select LISTS,
2
and then press the [ENTER]
button.
Press or to select CON-
3
FIGURATION PAGE, and then
press the [ENTER] button.
“Printing accepted” appears and the
configuration page is printed out. The
screen returns to the one shown in step
2.
USER FUNCTIONS
01.DEFAULT SETTINGS
02.LISTS
03.INITIAL SETUP
LISTS
4.ITU MAILBOX
5.CONFIGURATION PAGE
6.NIC STATUS PAGE
1216
30 To Print Lists
 Loading...