

Page 1

Page 2

Telecommunication Systems Division
External Wireless Handset
TM
User Guide
May 1999
Page 3

Publication Information
Toshiba America Information Systems, Inc., Telecommunication
Systems Division, reserves the righ t, wit hout prior notice, to
revise this information publication for any reason, including, but
not limited to, utilizati on of new advances in the state of
technical arts or t o simply change the des ign of this document .
Further, Toshiba America Information Systems, Inc.,
Telec ommunica ti on Systems Division, also reserves the right,
without prior notice, to make such changes in equipment design
or components as engineering or manufacturing me thods may
warrant.
DKA-UG-WATEL-VA
4016153
Version A.1, May 1999
Versi on A, A ugust 1998
© Copyright 1999
Toshiba America Information Systems, Inc.
Telecommunication Systems Division
All rights reserved. No part of this man ual, covered by the
copyrights hereon, m ay be reproduced in any form or by any
means—graphic, electronic, or mechanical, including recording,
taping, photocopyi ng, or information retrieval syst ems—without
express written permission of the publ isher of this material.
Strata is a registered trademark of Toshiba Corporation. Strata
AirLink and Call Center Viewer are trademarks of Toshiba
America Information Syste ms, Inc. Stratagy is a registered
trademark of Toshiba America Informat ion Systems, Inc.
Trademarks, registered trademarks, and s ervice marks are the
property of their respective owners.
Page 4

Contents
Introduction
Organization ................................................................................................................iii
Conventions.................................................................................................................iv
Related Documents....................................................................................................... v
Chapter 1 – The Grand Tour
Handset.........................................................................................................................2
Charger Base.................................................................................................................5
Chapter 2 – Installation
LCD Low-battery Indicator....................................................................................... 9
Removing and Re-installing the Handset Battery................................................... 10
Chapter 3 – Features
Powering ON and OFF............................................................................................... 14
Making and Receiving Calls....................................................................................... 14
Menu Operation..........................................................................................................15
Auto Answer............................................................................................................16
Change Idle Message............................................................................................... 17
Click Volume ..........................................................................................................18
Delete Last Number Dialed.....................................................................................18
Display Contrast.......................................................................................... ............ 19
Strata AirLink External Wireless Handset i
Page 5

Display Test Option................................................. ................................................20
Ringer Type.............................................................................................................20
Ringer Volume........................................................................................................ 21
Time Format............................................................................................................ 21
Using the Hookswitch (Flash)....................................................................................22
Adjusting Volume.......................................................................................................23
Mute............................................................................................................................23
Locking the Dial Pad..................................................................................................24
FCN Feature Access...................................................................................................24
Speed Dial................................................................... ......... ....................................... 25
Appendix.......................................................................................................................33
Troubleshooting.......................................................................................................... 33
Specifications.............................................................................................................. 36
Index ...............................................................................................................................37
ii Strata AirLink External Wireless Handset
Page 6

Introduction
This guide describes the features and operation of t he Strata AirLink External
Wireless handset. If you are a new user, you should read this entire guide. It
introduces you to all the features and enables you to start working with the
wireless handset quickly.
The wireless handset is supported by Strata® DK systems and many nonToshiba systems.
Organization
♦ Chapter 1 – The Grand Tour describes the wireless handset, including
buttons, icons, and the Charger Base.
♦ Chapter 2 – Installation covers proper handset location, charging the
batteries, and verifying the assigned system and handset IDs.
♦ Chapter 3 – Features describes the basic features of the handset,
including menu options and Speed Dial calling by number or name.
♦ Appendix covers troubleshooting techniques, range and performance,
radio interference, and specifications.
Introduction iii
Page 7
Conventions ——————————————————————————————————————
Conventions
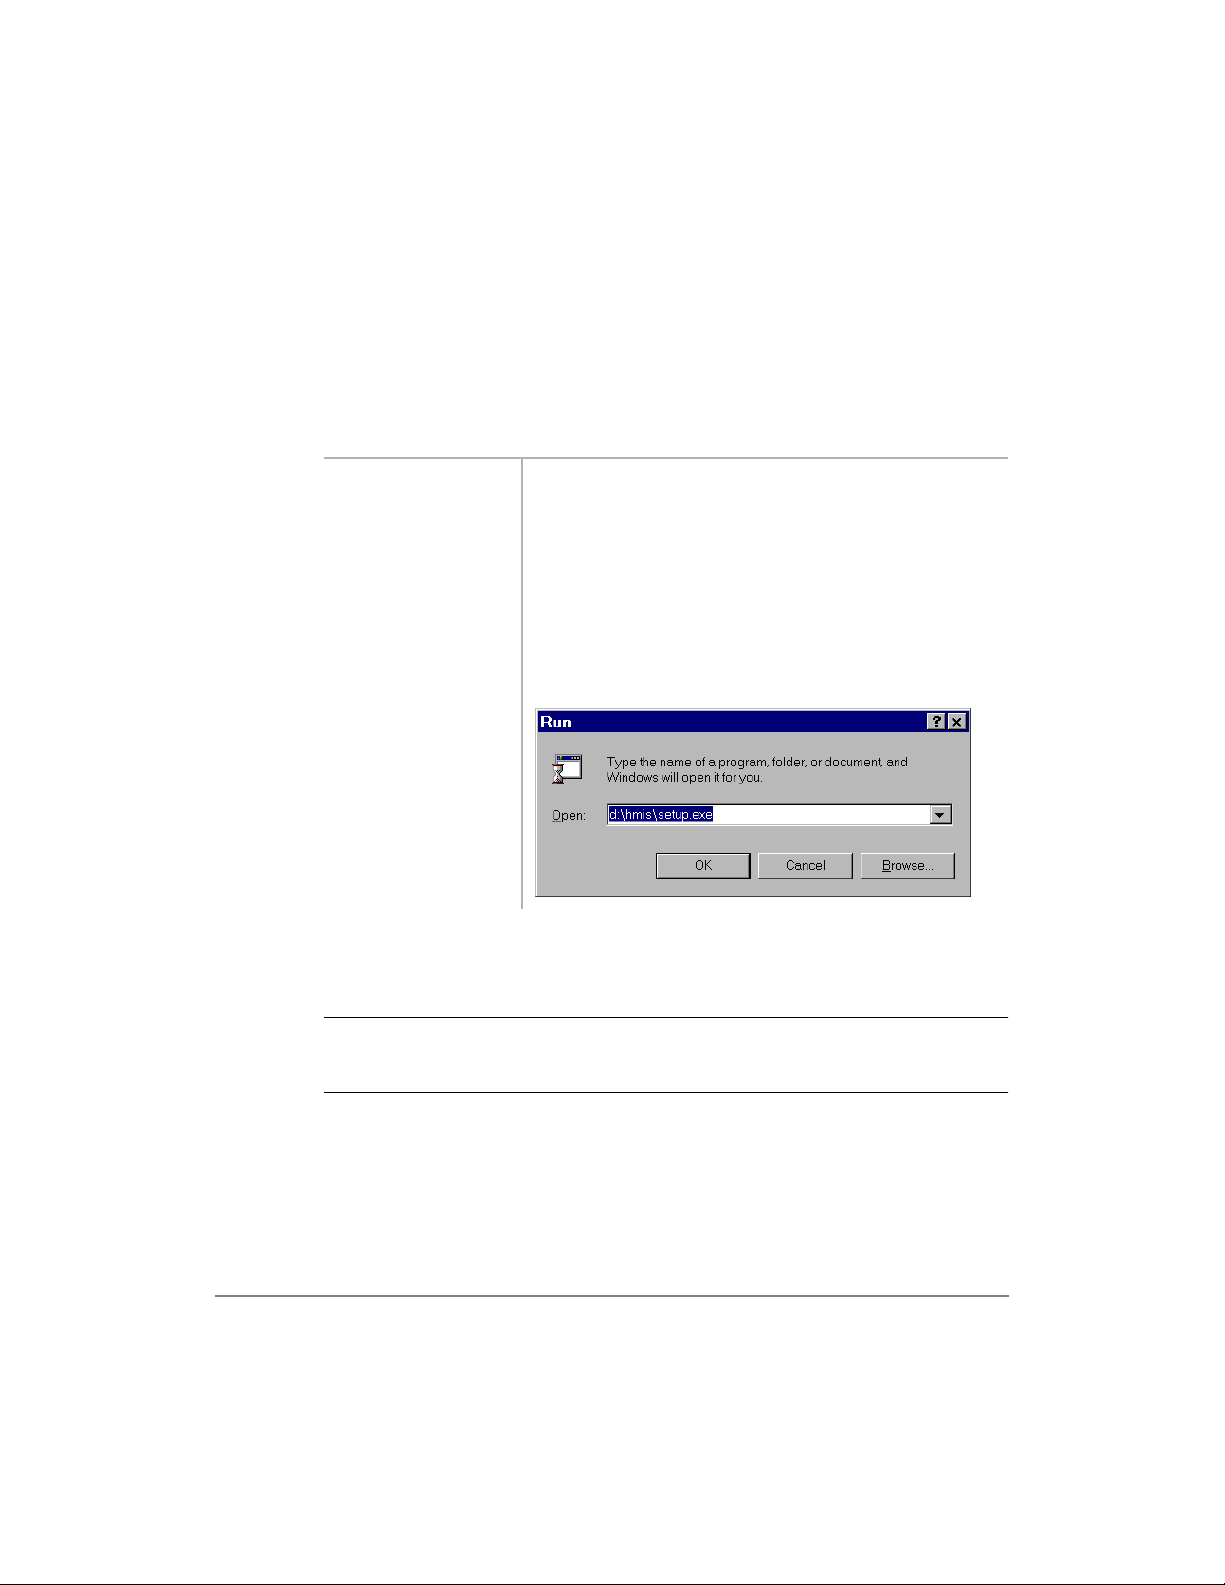
This guide uses the following conventions:
➤ denotes a procedure
1. Actions you
perform appear
in this column.
The immediate response to the action performed
appears in this column. Addtional notes and
comments are also included.
They can
consist of
either a single
step or a series
of numbered
steps.
2. When the
action you
perform results
in a screen,
menu, etc., the
screen displays
to the right .
2765
Note Elaborates specific items or references other information.
Important! Calls attention to important instructions or information.
CAUTION! Advises you that hardware, software applications, or data could
be damaged if the instructions are not followed closely.
iv Strata AirLink External Wireless Handset
Page 8

—————————————————————————————————— Related Documents
([WUDEROG letters represent telephone buttons. For example:
.
➤ denotes the step in a one-step procedure.
~
means “through”. For example: 5 ~ 10.
+ is used for multiple key entries.
Example: Press
(
;; = 08~60 seconds).
see Figure 12 Grey words within the printed text denotes cross-
references. In the electronic version of this manual
(Strata DK Libr ary CD-ROM or FY I Internet
download), cross-references appear in blue hypertext.
Related Documents
♦ The Strata AirLink External Wireless System Installation Guide can be
used as a reference for more information.
♦ Strata AirLink External Wireless Handset Quick Reference Guide
contains instructions for operation of commonly used Strata AirLink
External Wireless Handset features.
6SHHG'LDO + ;; + 5HGLDO
+
6SNU
Introduction v
Page 9

Related Documents ——————————————————————————————————
vi Strata AirLink External Wireless Handset
Page 10

The Grand Tour 1
Your wireless telephone brings mobility and productiv ity to of fice te lephones. Gre ater
call access cuts down on “tel ephone t ag” dela ys, and it s compact de sign makes it easy
to take with you.
The wireless telephone was designed and engineered to provide reliability, long life,
and outstanding performanc e. It operate s in the range of 1.9 GHz Unli censed Perso nal
Communication Service (UPCS), which represents state-of-the-art design and
engineering.
Your wireless telephone provides unsurpassed range, clarity, and fully-secured
communications using scrambled voice information.
The handset comes with one Nickel Metal Hydride (NiMH) battery. When fully
charged your handset provides up to 4 hours of talk and 40 hours of standby time.
It also has 12 handset volume adjustments (plus silent), 8 ring levels, and a lockable
dial pad.
The Grand Tour 1
Page 11
Handset ———————————————————————————————————————
You can access up to eight se parat e tel ephone syste ms, beca use th e wire less tele phone
is capable of storing multiple system IDs. This enables you to move from building to
building, system to system.
The handset easily accesses telephone system features, such as Call Forwarding, Call
Pickup, and Redial by using
)/6+ or )&1.
There are 70 internal Speed Dial memory locations with maximums of 8 characters
for names and 30 character s for number s, so that you can Speed Dial by name or code.
Handset
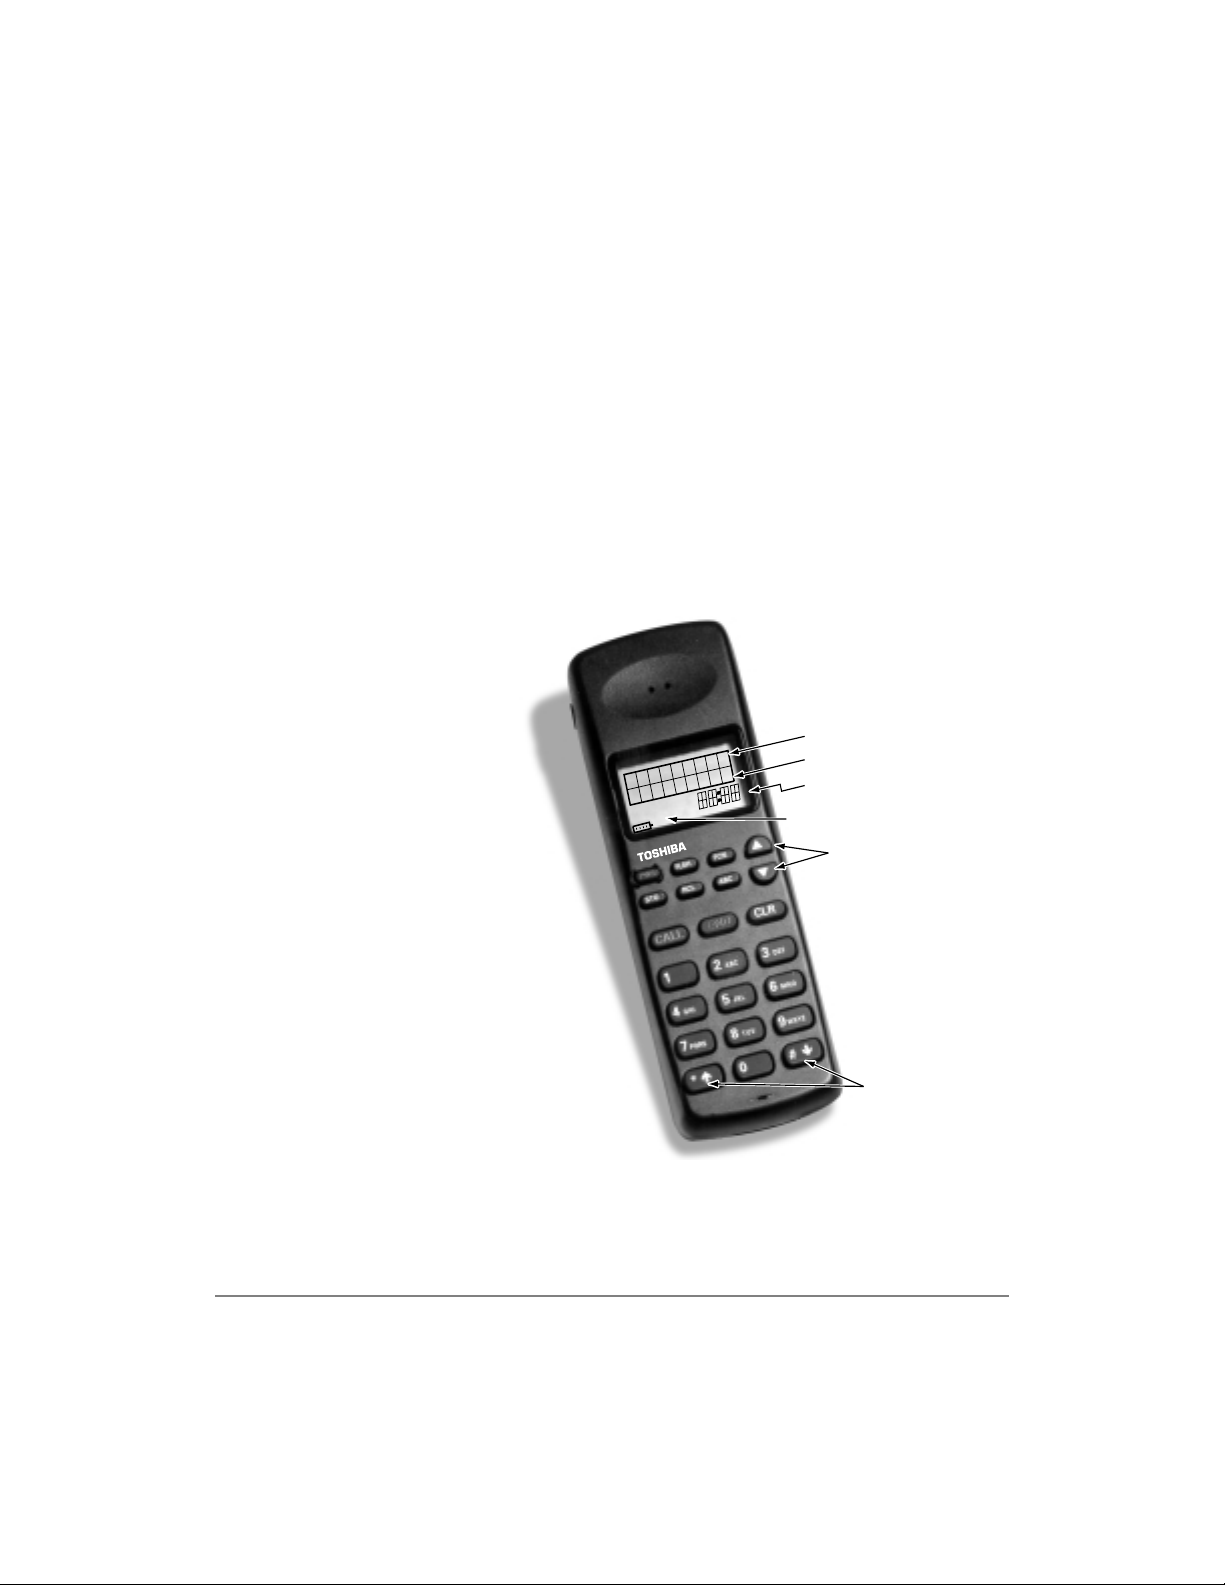
Your wireless handset
(shown at right) stores up to
eight system and handset
IDs that are configured by
your System Administrator.
The handset has a two-line
Liquid Crystal Display
(LCD) that show
alphanumeric information,
including the idle message,
date, call duration , and icons
with specific call activity.
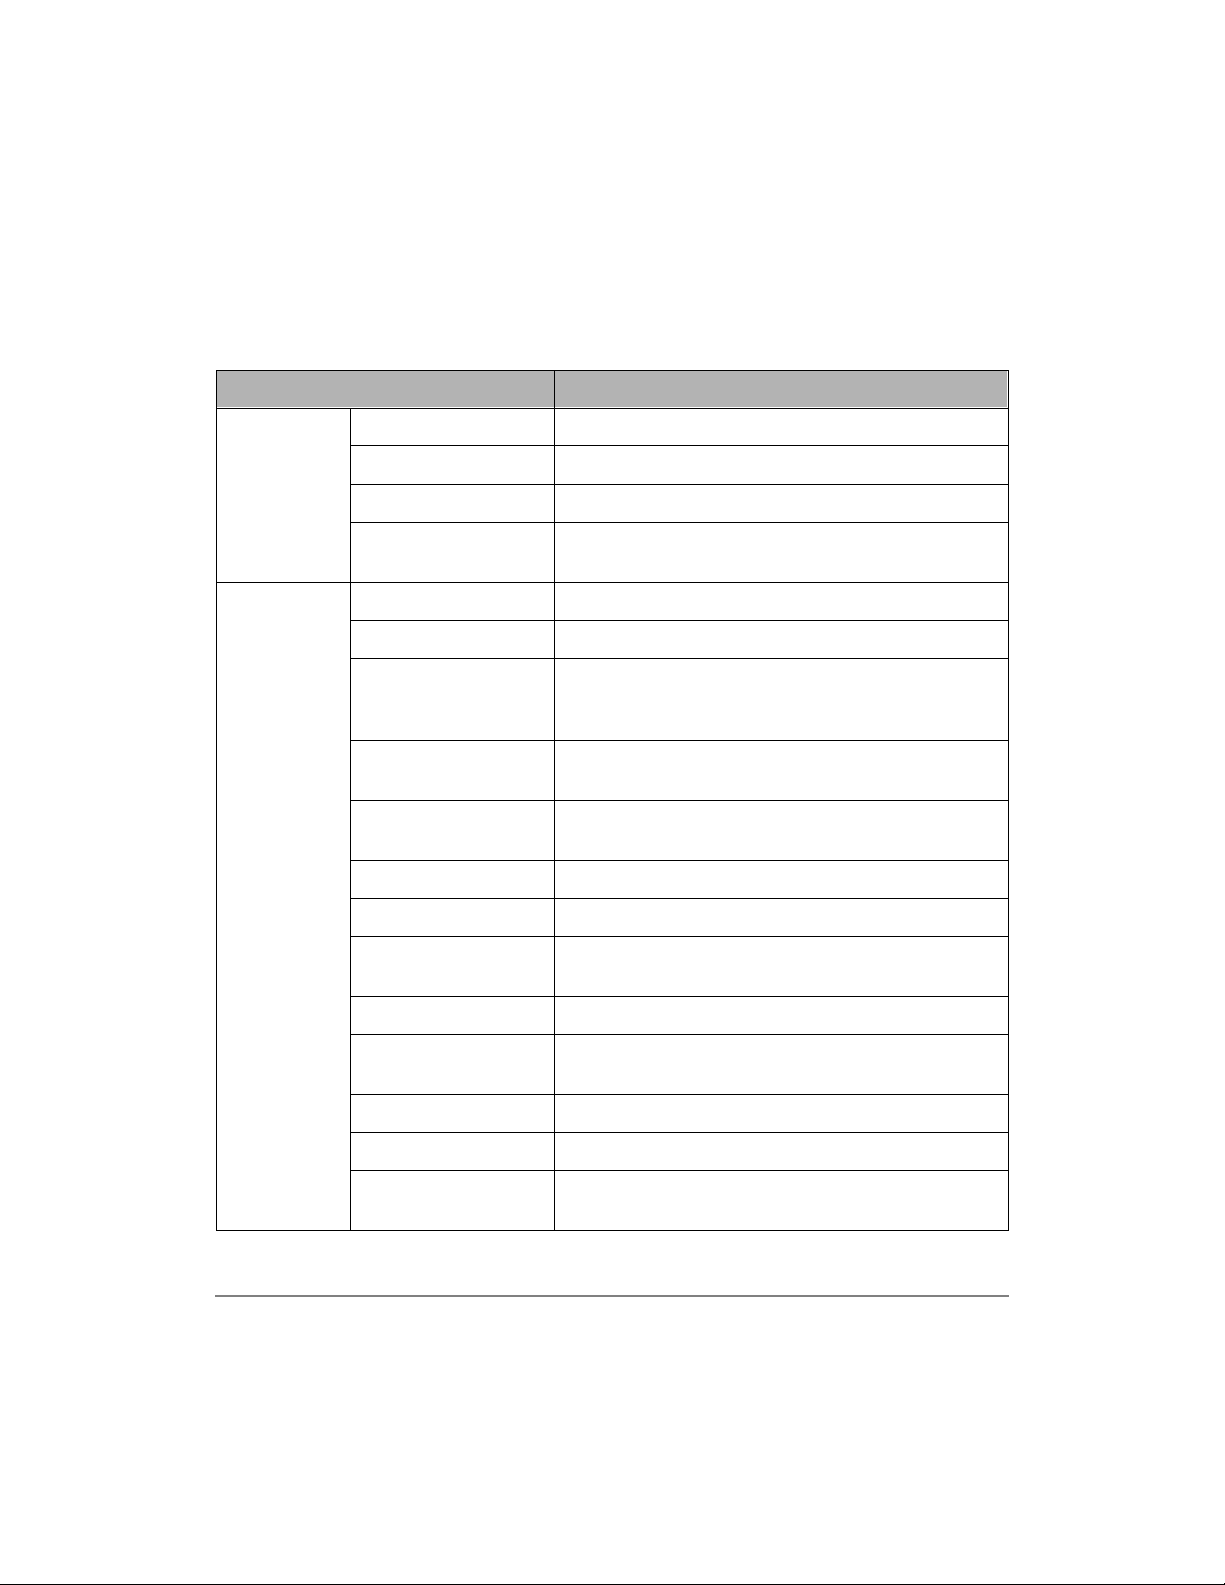
Table 1 briefly describes the
functions of the LCD fields
and the buttons.
PWR
CALL
END
Idle Message
Date
Time/Call Duration
Icon Display Area
Volume/Scroll Buttons
Scroll/Lock Buttons
Important! Do not make changes to system and handset IDs without contacting
your System Administrator.
2 Strata AirLink External Wireless Handset
Page 12
———————————————————————————————————————— Handset
Table 1 LCD Fields and Button Descriptions
Handset Description
Idle Message Displays an idle messa ge.
Date Displays the current date.
LCD Fields
Time/Call Duration Displays the call dura tio n.
Buttons
Icon Display Area
Displays icons that represent different battery and
handset conditions.
3:5 Turns the power ON and OFF.
)/6+ Performs hookflash functions.
Enables features with the use of other buttons; for
)&1
example, Call Forward, Transfer, Speed Dial, and
Conference.
▲
▼
Increases listeni ng volume and scrolls forwa rd through
menu options.
Decreases list ening volume and scrolls backward
through menu options.
$%& Toggles handset between alpha and numeric modes.
5&/ Recalls numbers stored in memory.
672
Stores Speed Dial numbers/names and the idle
message.
&$// Places the handset off-hook to enable calling.
(1'
Places the handset on-hook and exits from 5&/,
)&1, 672, and $%& modes.
&/5 Erases one or more digits in the display.
È Scrolls backwards through the Speed Dial list.
É
The Grand Tour 3
Scrolls forward through the Speed Dial list and locks/
unlocks the dial pad.
Page 13

Handset ———————————————————————————————————————
The handset icons that display in the LCD area represent different conditions. Some
icons display consistently while others appear under certain conditions.
Table 2 Handset Icon Description
Icon Description
The handset is off-hook or ringing.
The battery strength is low, medium, or high—one bar is low and four is
high.
The handset is ringing. The bars beneath the bell indicate the currently
configured ring volume.
ABC
The handset is in alpha mode—you can use the dial pad to enter letters in
the display.
The handset is locked onto a base station. The number of bars indicate
signal strength. You can make and receive cal ls only w hen the lo ck ico n is
on.
4 Strata AirLink External Wireless Handset
Page 14
————————————————————————————————————— Charger Base
Charger Base
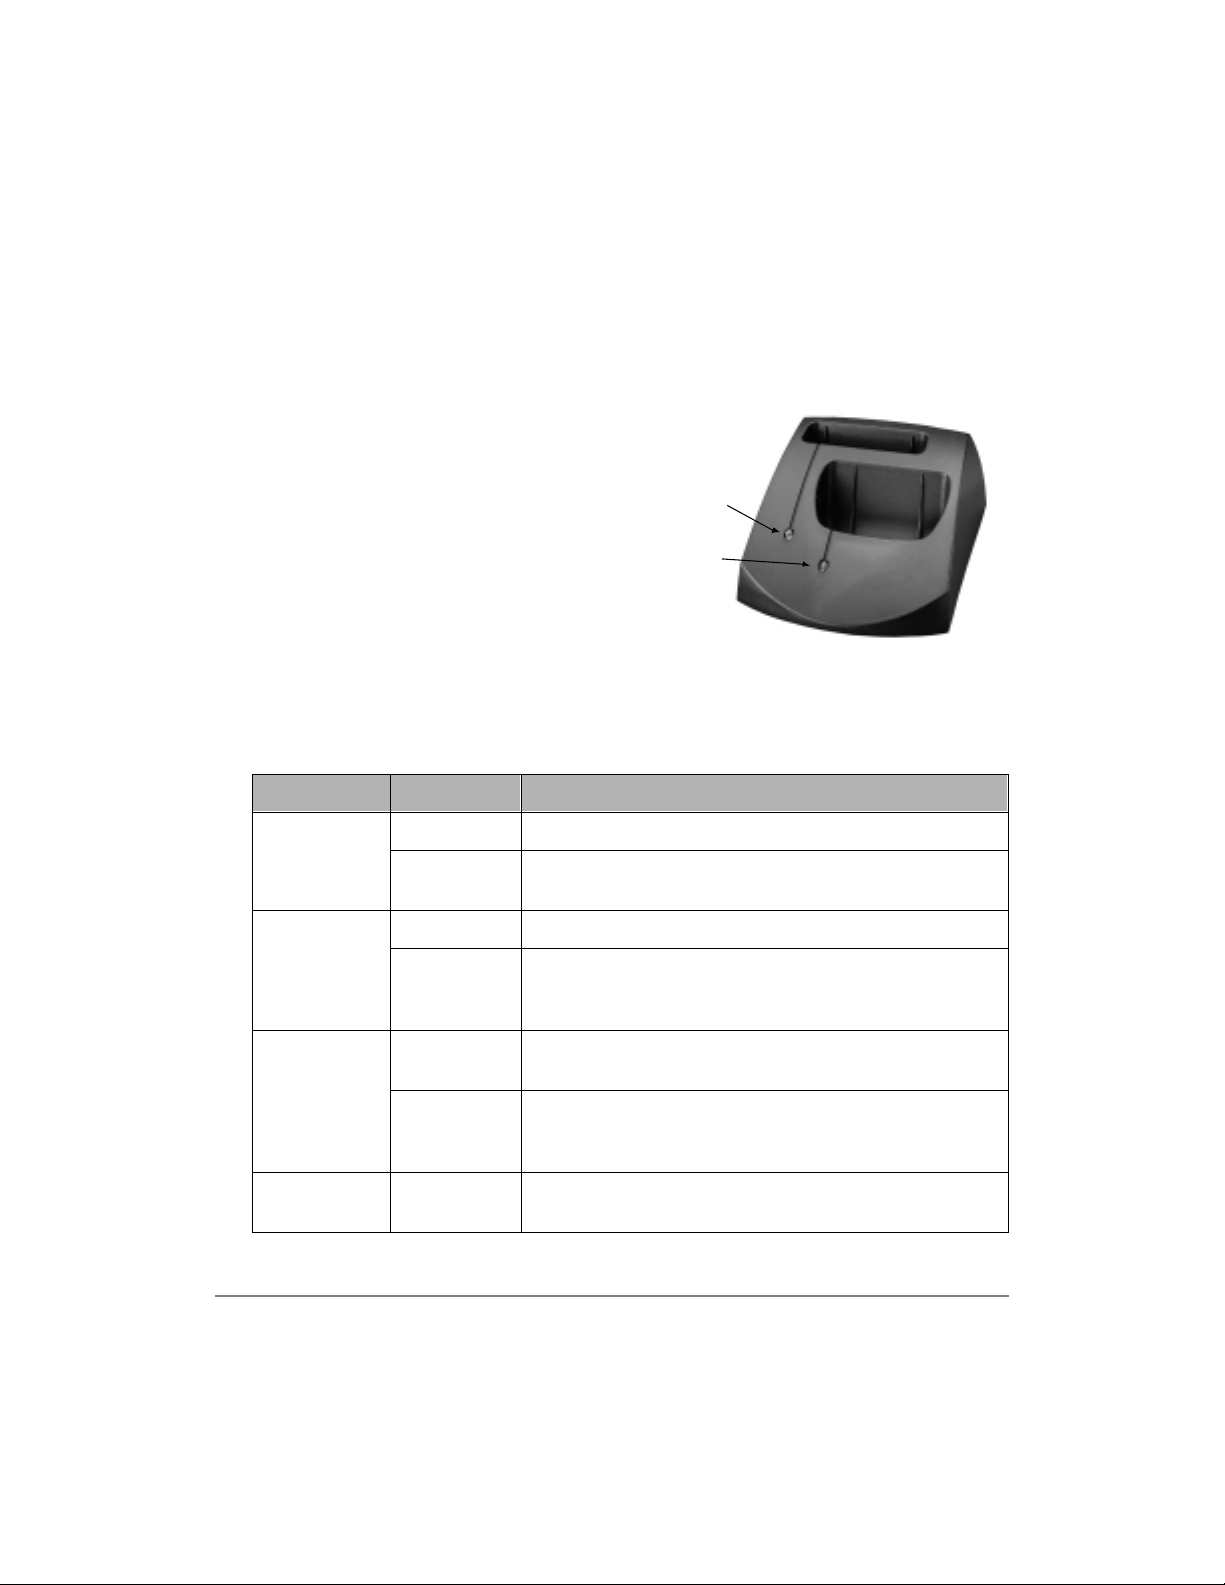
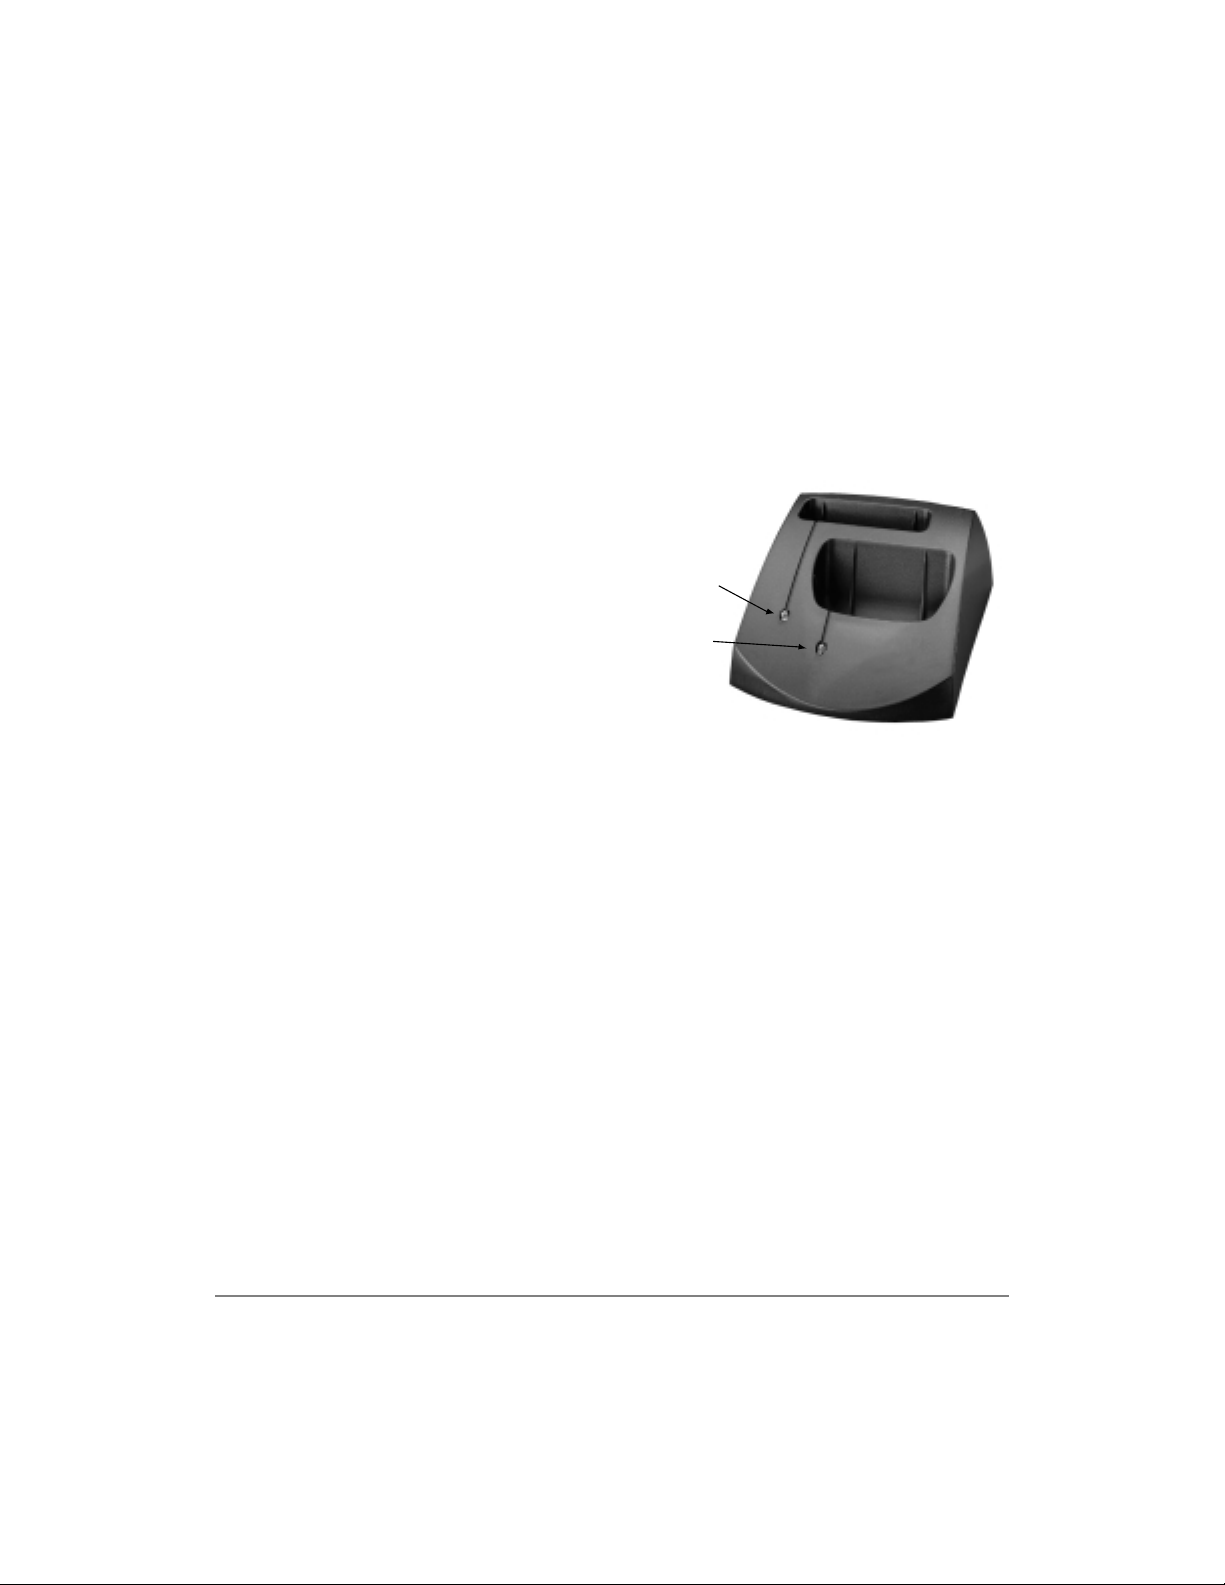
The handset comes with a charger base
(shown at the right). The rear slot of the
charger is for the spare battery and
automatically starts its discharge function
when it detects that di schargi ng is necessa ry .
The front slot functions as a cradle for the
handset and a charger for the handset
battery. It provides rapid charging only.
The unit has LEDs that indicate battery
status whil e charging. The LEDs flash and
use the colors red, green, and amber to
indicate different conditions (shown in
Table 3).
Table 3 LED Indications
Color State Description
Steady Battery is rapid charging.
Red
Flashing
Internal battery fault; battery unusable. Try charging the
battery again. If the problem persists, replace the battery.
Battery LED
Handset LED
2959
Steady Battery is charged.
Green
Amber
Amber/Green
The Grand Tour 5
Flashing
Steady
Flashing
Alternate
Flashing
Battery is charged, but standby/talk time may be reduced.
Repeated rapid charging m ay rejuvenat e the battery. If not,
replace th e battery.
Charger is evaluating the state of the han dset or ba ttery, or
waiting for one battery to complete charging.
Short circuit or over-discharged battery is detected. Make
sure contacts are clean and leave the battery in the
charger until rapid charging starts and completes.
Battery is discharging.
Page 15

Charger Base —————————————————————————————————————
6 Strata AirLink External Wireless Handset
Page 16

Installation 2
This chapter describes installation procedures, including charging the batteries for
your wireless telephone.
Important! Y our wireless telephone system must be pr ogrammed before the handset
operates. Please see your System Administrator for more information.
Step 1: Select Location
1. Select a location for your handset and charger base. Avoid excessive heat or
humidity.
2. Place them on a desk or tabletop near a standard 120VAC outlet.
3. Keep the handset away from sources of electrical noise (motors, fluorescent
lighting, etc.)
Installation 7
Page 17
Charge the Batteries ——————————————————————————————————
Step 2: Charge the Batteries
1. Remove the handset’s carrying case, if it has one.
2. Turn the power OFF.
3. Insert the handset (with the battery in
it) in the front slot of the charger base
(shown at right).
The Handset LED changes to amber
and then to red. This indicates rapid
charging.
Battery LED
Note If you place a fully charged ba ttery
Handset LED
in the charger base, it detects the
charged condition and cancels
rapid charging. The Handset LED
changes to amber, red, and then
green.
4. If you have a spare battery, insert it in the rear slot of the charger base.
The Battery LED changes to amber whil e waiting for the handset to finish
charging or alternates between green and amber to indicate discharge is in
progress.
5. Remove the handset or spare battery when the LEDs change to a steady green.
The steady green LED indicates a fully charged element. The charger base
switches to a “trickle charge” until you remove the handset or battery.
Important! Do not use the handset before its battery has completed the rapid
charge cycle (steady red), even if the battery icon reports full strength.
The handset has reduced talk/standby time under these conditions.
2959
8 Strata AirLink External Wireless Handset
Page 18
—————————————————————————————————— Charge the Batteries
LCD Low-battery Indicator
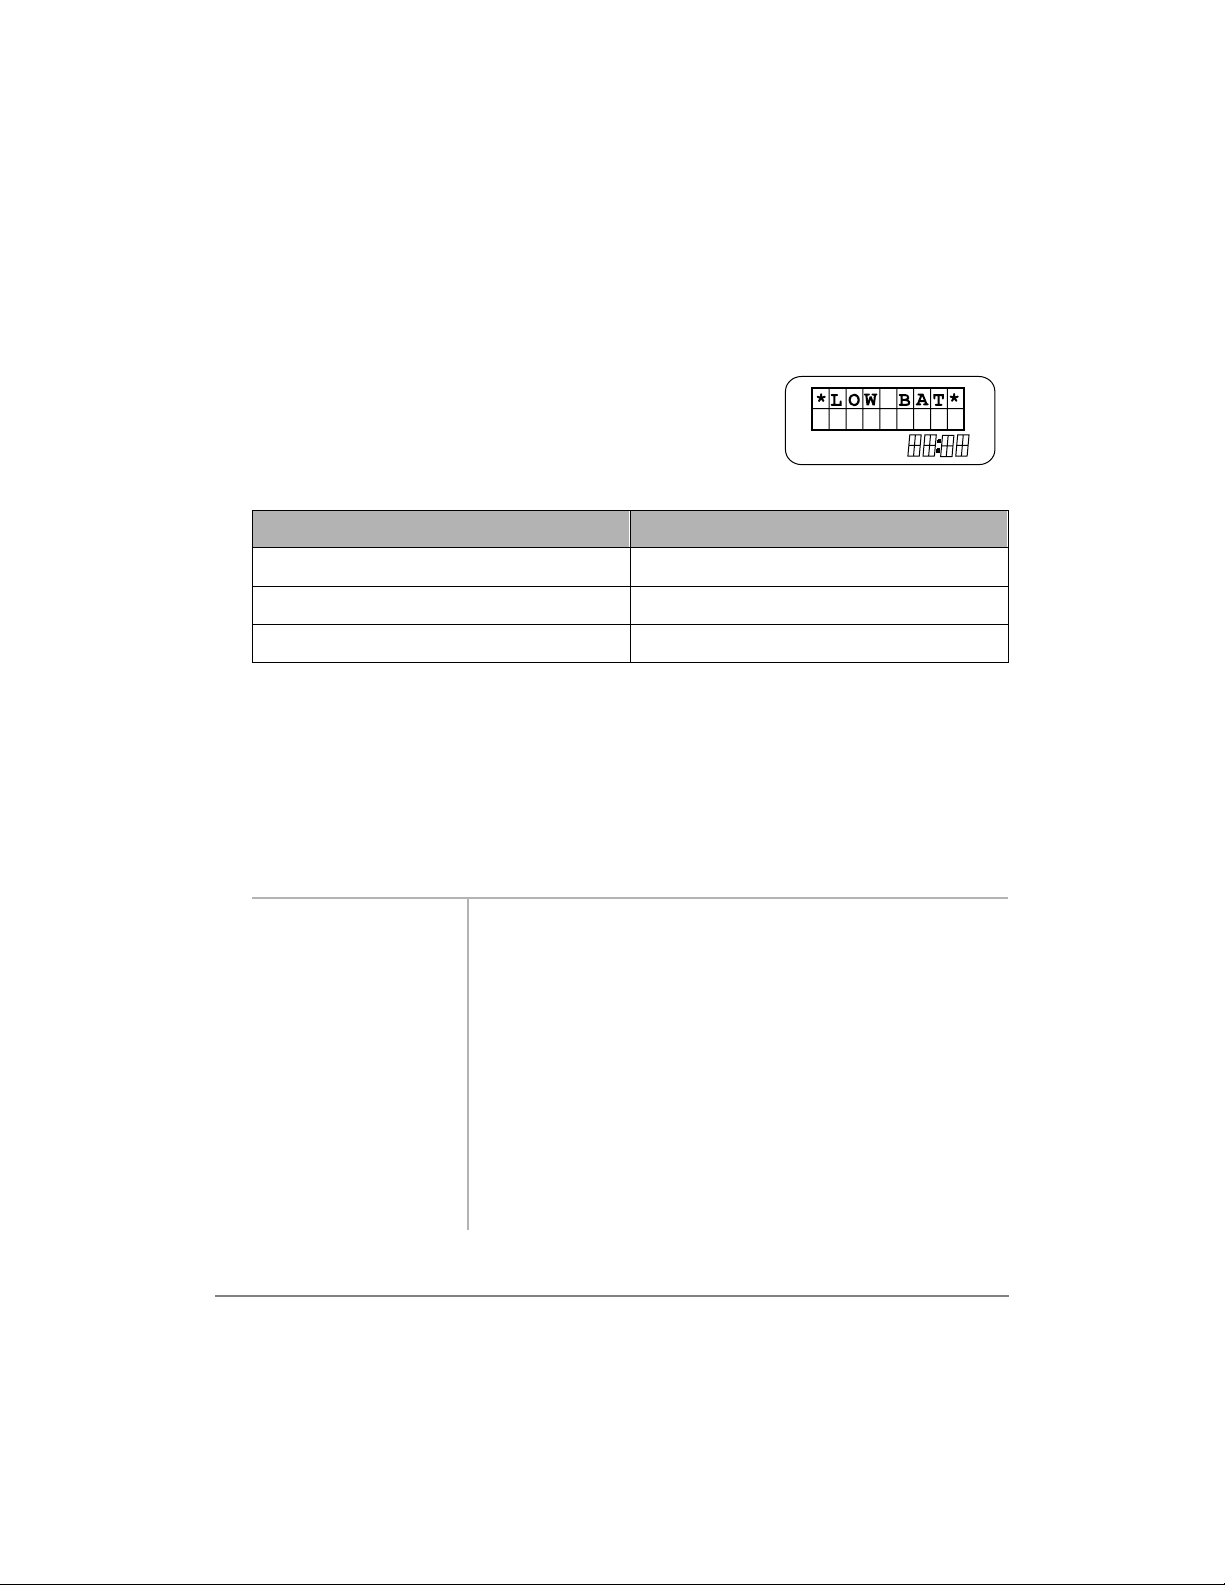
When the handset battery is low, the message shown at
the right displays. The ha ndse t beeps every 30 seconds in
standby or every minute in conversation before shutting
off. Table 4 lists low-battery symptoms.
2965
Table 4 Low-battery Symptoms
On a Call In Standby Mode
Only the 3:5 button operates. None of the keys operate.
Handset beeps once every minute. Handset beeps every 30 seconds.
Reduced talk time. Cannot make a call.
➤
To restore the battery charge
➤
Return the handset to the charger base or replace the handset battery with the
charged spare.
Important! The battery must char ge for two cont inuous h ours or i t may not operat e
properly.
➤
To discharge the handset or spare battery
1. Insert the spare
battery in the r ear
slot of the
charger or the
handset with its
If the LED alternates between green and amber, leave the
battery in the charger to complete discharging.
After the discharge cycle completes, the LED changes to
steady red which indicates rapid charging is in progress.
battery in the
front slot.
2. When the LED
changes to steady
green, remove
the spare battery
and handset from
the charger base.
Installation 9
Page 19
Charge the Batteries ——————————————————————————————————
Removing and Re-installing the Handset Battery
CAUTION! If you have to remove the battery, always turn the power
OFF to permanently save your me nu changes and Speed Dial
additions since the last power ON.
➤
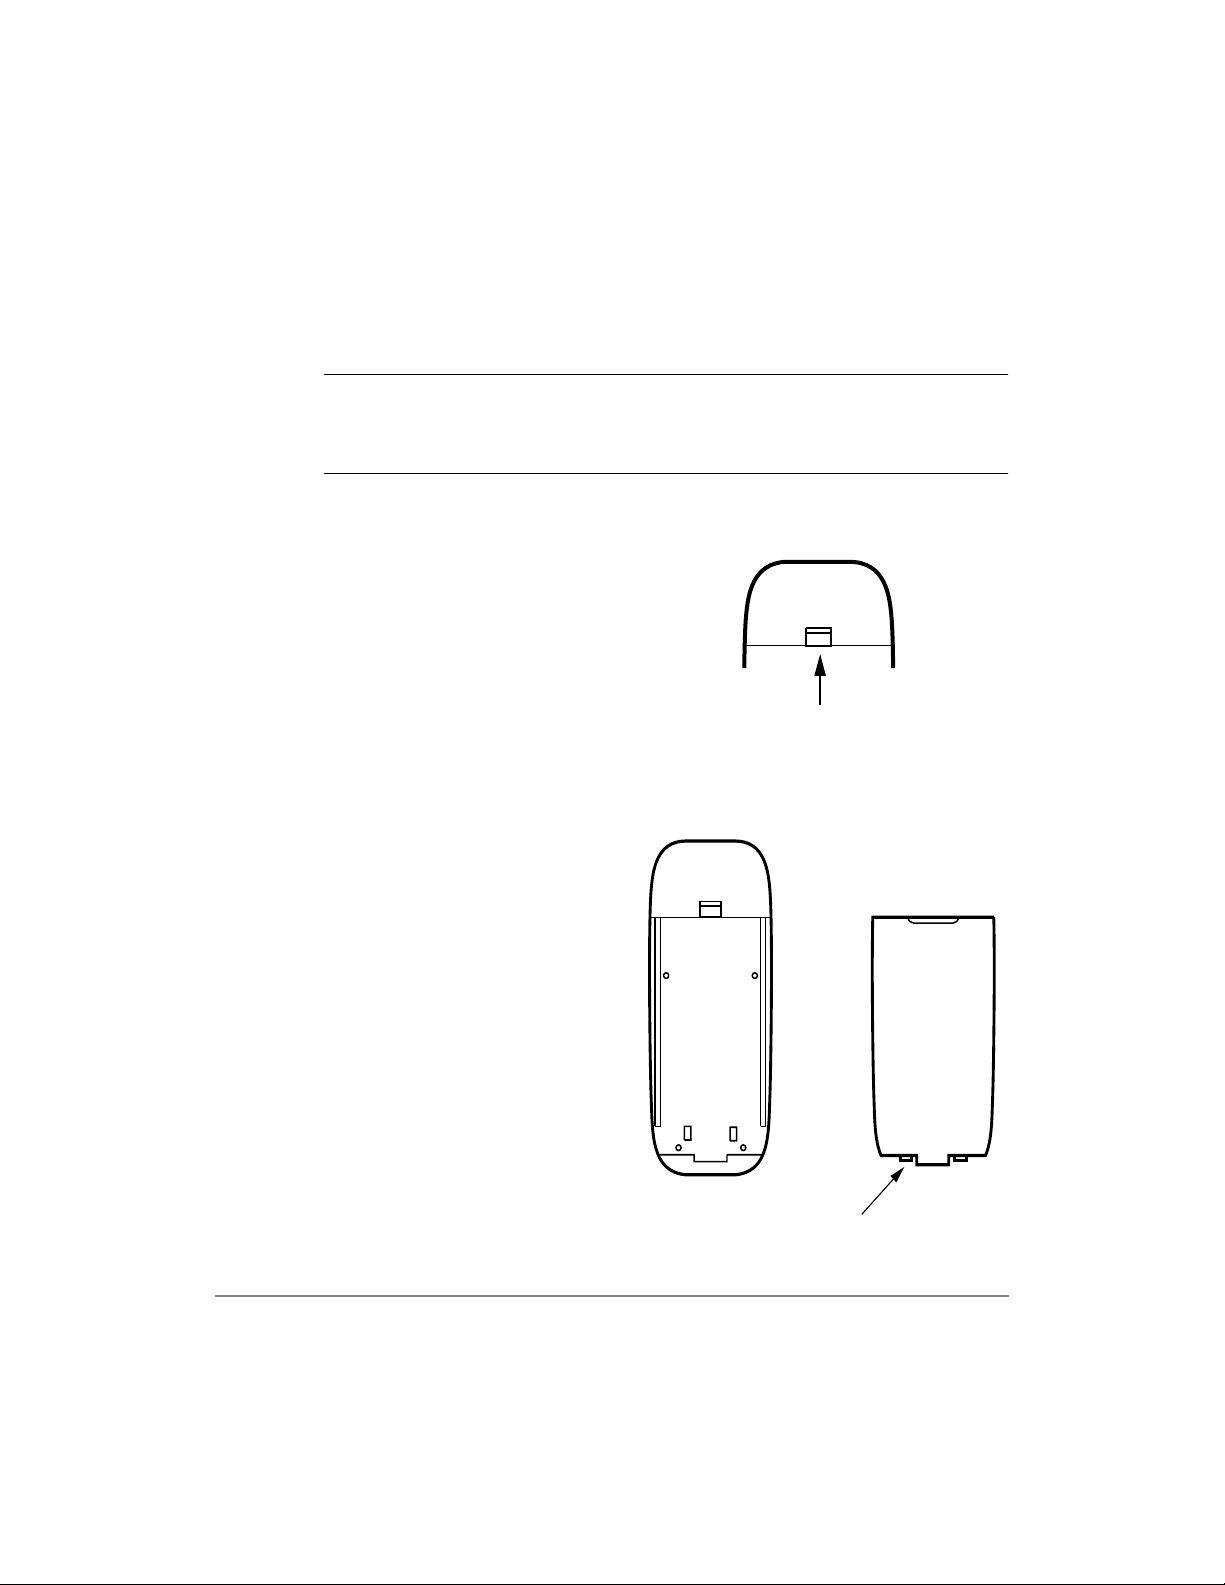
To remove the battery
1. Press the battery release (shown at right)
towards the top of the handset.
2. Lift out the battery.
➤
To re-install the battery
1. Fit the battery notches into the
base of the handset (shown at
right).
2. Snap the upper part of the
battery into the handset.
3019
Handset without Battery
X X
X X
3020
Battery Release
Handset Battery
Notches
10 Strata AirLink External Wireless Handset
Page 20

—————————————————————————————— Verify the System/Handset IDs
Step 3: Verify the System/Handset IDs
Your System Administrator can program one or more system and handset IDs into
your handset to enable you to use your handset in one or more telephone systems. If
you need to use your wireless telephone in a system that you were not originally
programmed to use, you can ask your System Administrator to program the
appropriate IDs into your telephone.
Installation 11
Page 21

Verify the System/Handset IDs ——————————————————————————————
12 Strata AirLink External Wireless Handset
Page 22

Features 3
This chapter describes all of the available wireless telephone features that include:
♦ Powering ON and OFF
♦ Making and receiving calls
♦ Menu operation
♦ Adjusting th e volume
♦ Muting voice and ring
♦ Locking the dial pad
♦ FCN feature access
Note See your System Administrator to find out which system features and access
codes apply to your telephone and the handset software version.
Features 13
Page 23
Powering ON and OFF —————————————————————————————————
Powering ON and OFF
➤
Press
3:5
once to power
ON
3:5 to
...or
power OFF.
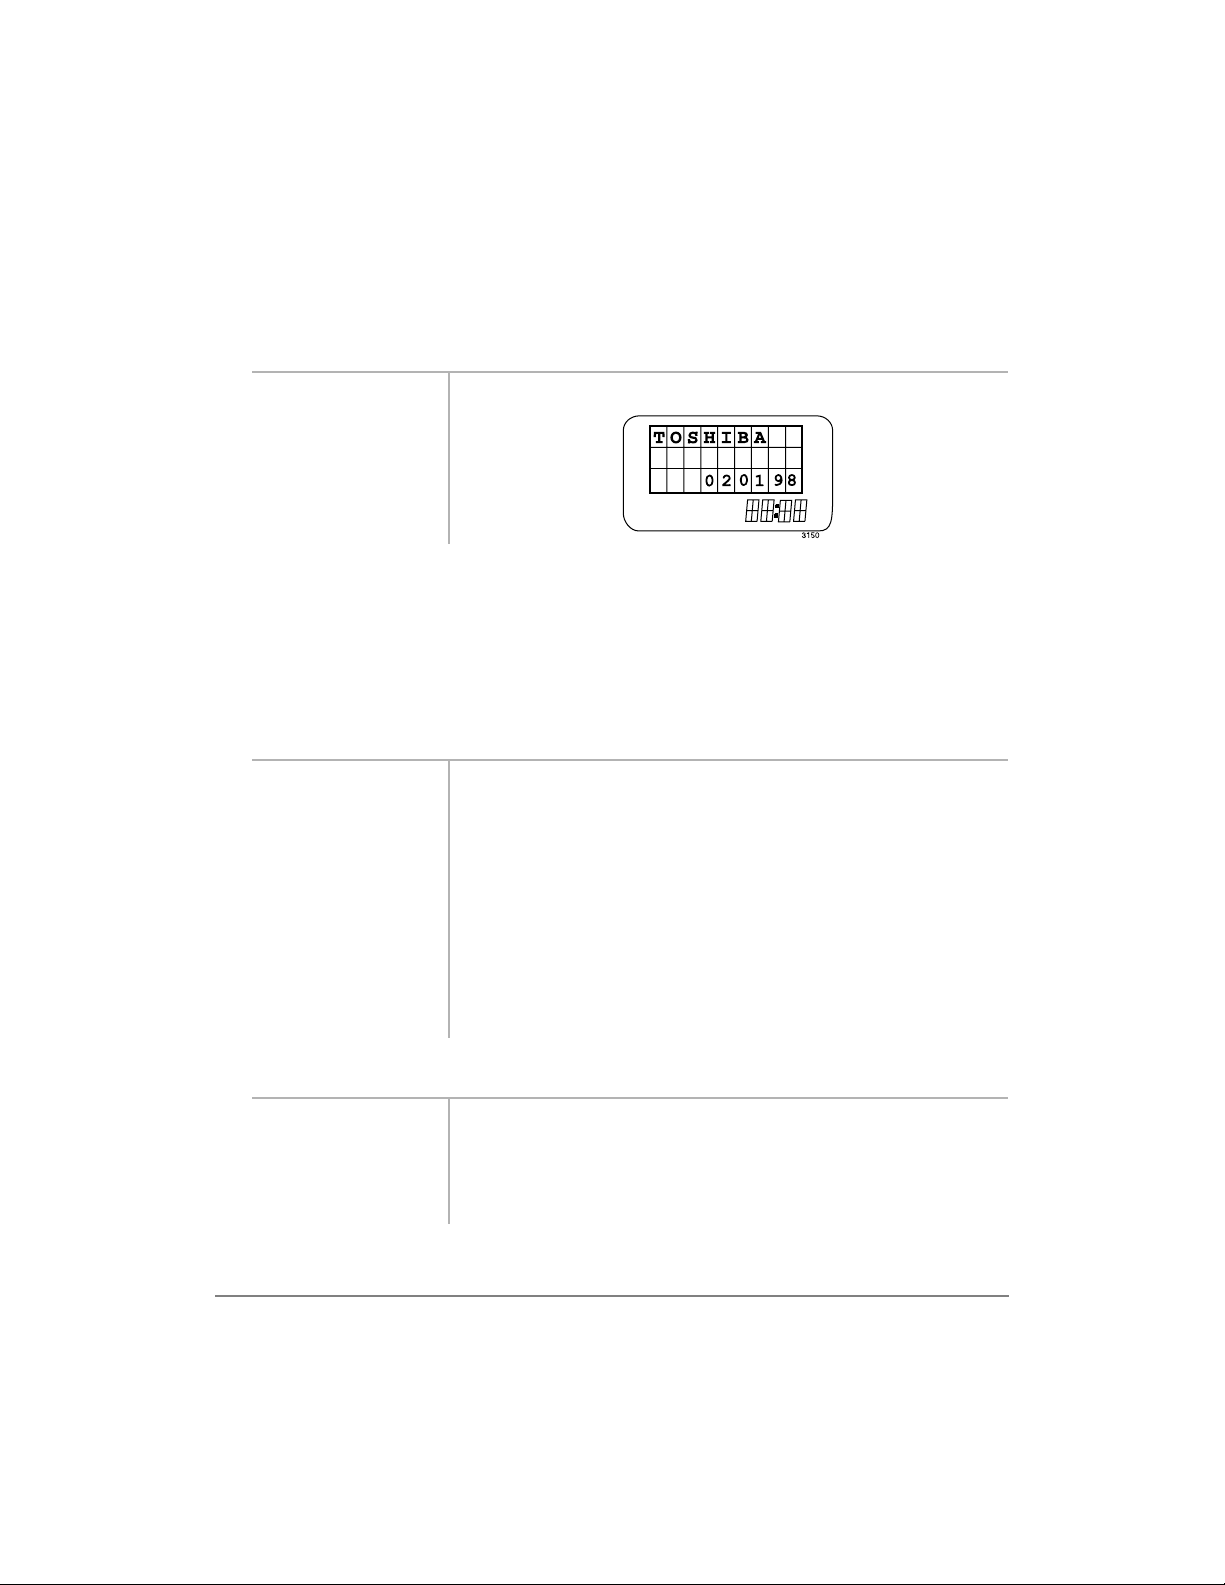
The handset beeps twice and this displays:
Making and Receiving Calls
You can make or receive calls from telephones outside the telephone system by
dialing direct or using CO Line access codes.
➤
To make a call
1. Enter a
telephone
number and
press
&$//
...or press
&$// first
and dial the
telephone
number.
2. Press
➤
To redial the last number you called
1. Press
2. Press
3. Press
(1'. Your call terminates.
&$//. Wait for the last numb er dialed to appear in the displ ay.
&$//
again.
(1'. Your call terminates.
The handset displays the number. If it is longer than 18
digits, the display scrolls t o an other l ine. You can enter up to
32 digits.
You hear dial tone and your call connects.
The last number dials.
14 Strata AirLink External Wireless Handset
Page 24

———————————————————————————————————— Menu Operation
➤
To receive a call
1. Press
&$//. The call connects. If you are in Auto Answer mode, you
automatically connect with an incoming call without having
2. If you want to
to press
The call mutes.
&$//.
mute the
ringing of an
incoming call,
press
&/5.
Menu Operation
You can configure some aspects of handset operation using its menu. The handset
must be idle to use the menu. Table 5 briefly describes each option.
➤
To access the menu options
1. Press
2. Press
)&1 +
The display scrolls forward through the menu options.
▲
...or ▼. The display scrolls backward through the menu options.
)&1
again when the
desired option
is displayed.
Important! You must power OFF the handset first or all
menu changes, except the idle message, are
lost when you remove the handset battery.
Features 15
Page 25
Menu Operation ————————————————————————————————————
Table 5 Menu Options
Number Option Action
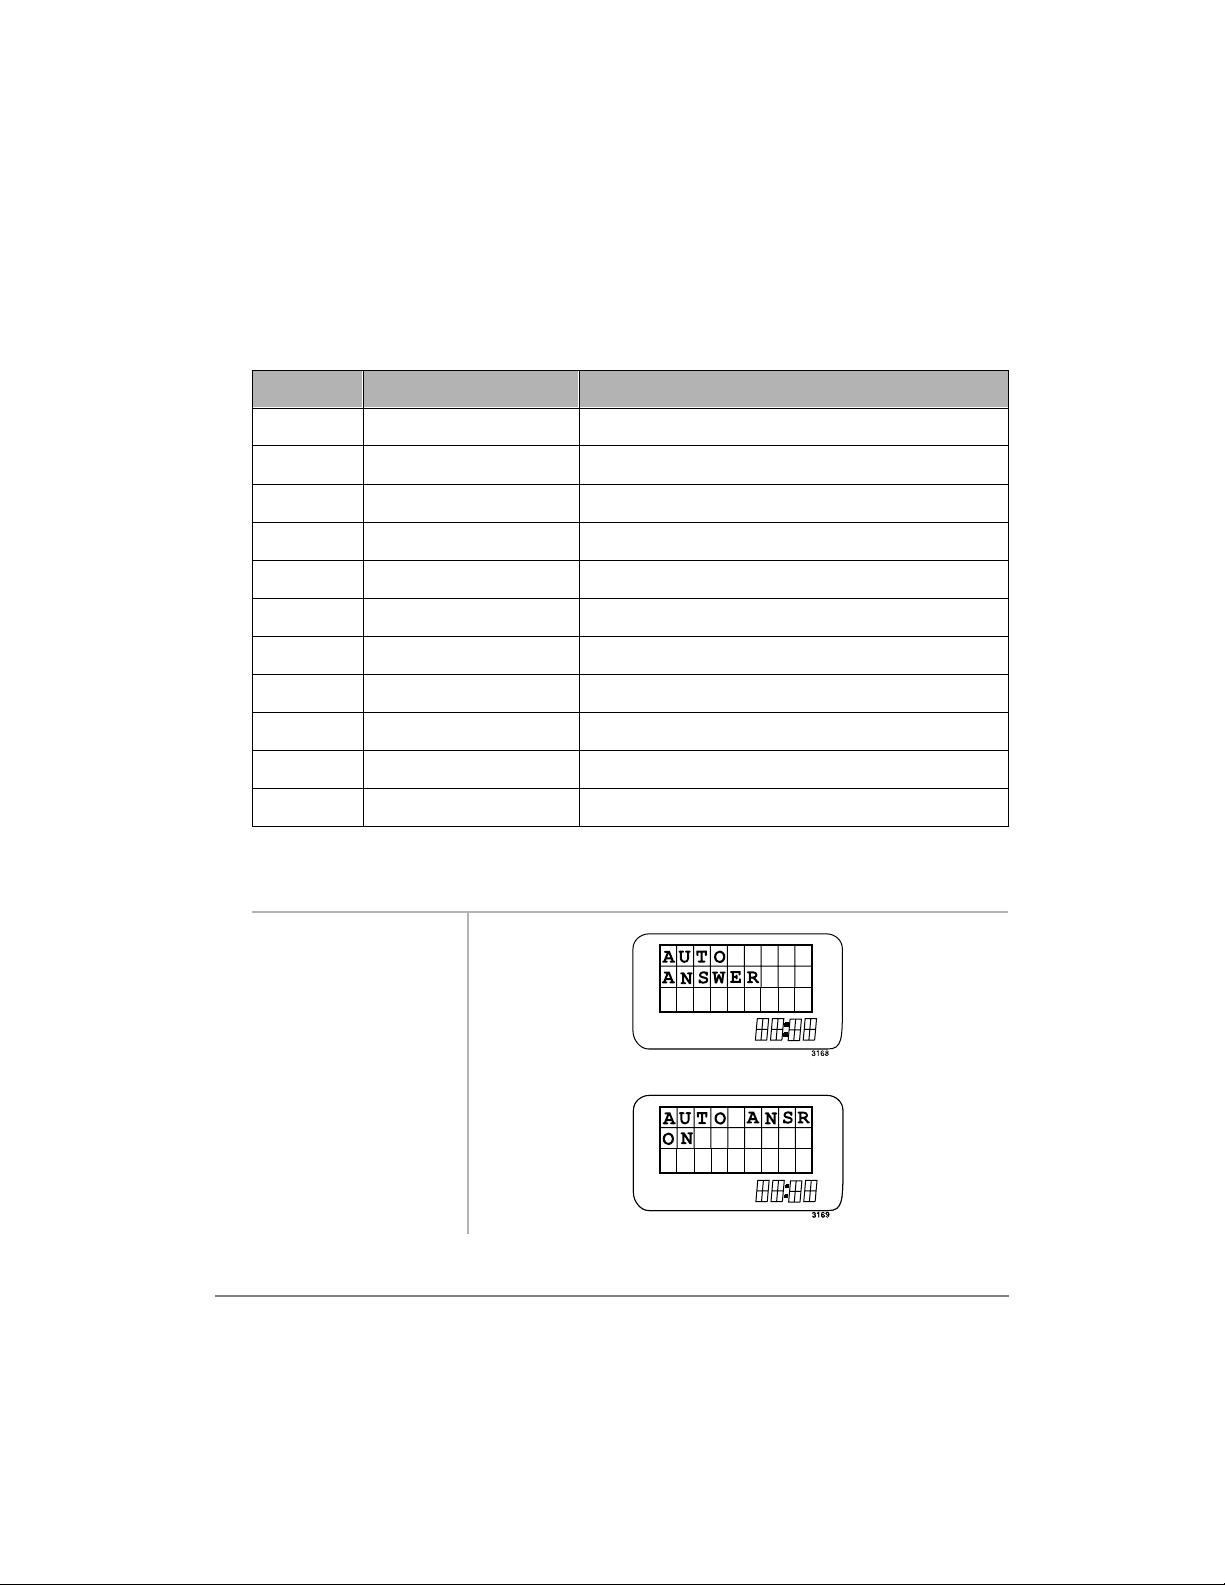
FCN + 7 Auto Ans wer Toggles Auto Answer ON/OFF.
FCN + 13 Change Idle Message Changes the idle message.
FCN + 4 Click Volume Adjusts the beep volume when pressing a button.
FCN + 11 Del All Speed Dial #s Deletes all Speed Dial numbers.
FCN + 12 Del Last # Dialed Deletes the last number dialed.
FCN + 8 Display Contrast Sets the display contrast .
FCN + 9 Display Test Option Tests the icon disp lay.
FCN + 2 Ringer Type Option Sets the ringer type.
FCN + 3 Ringer Volume Sets the ringer volume.
FCN + 6 Time Format Sets the time format.
FCN + 10 System Configuration For Toshiba use only.
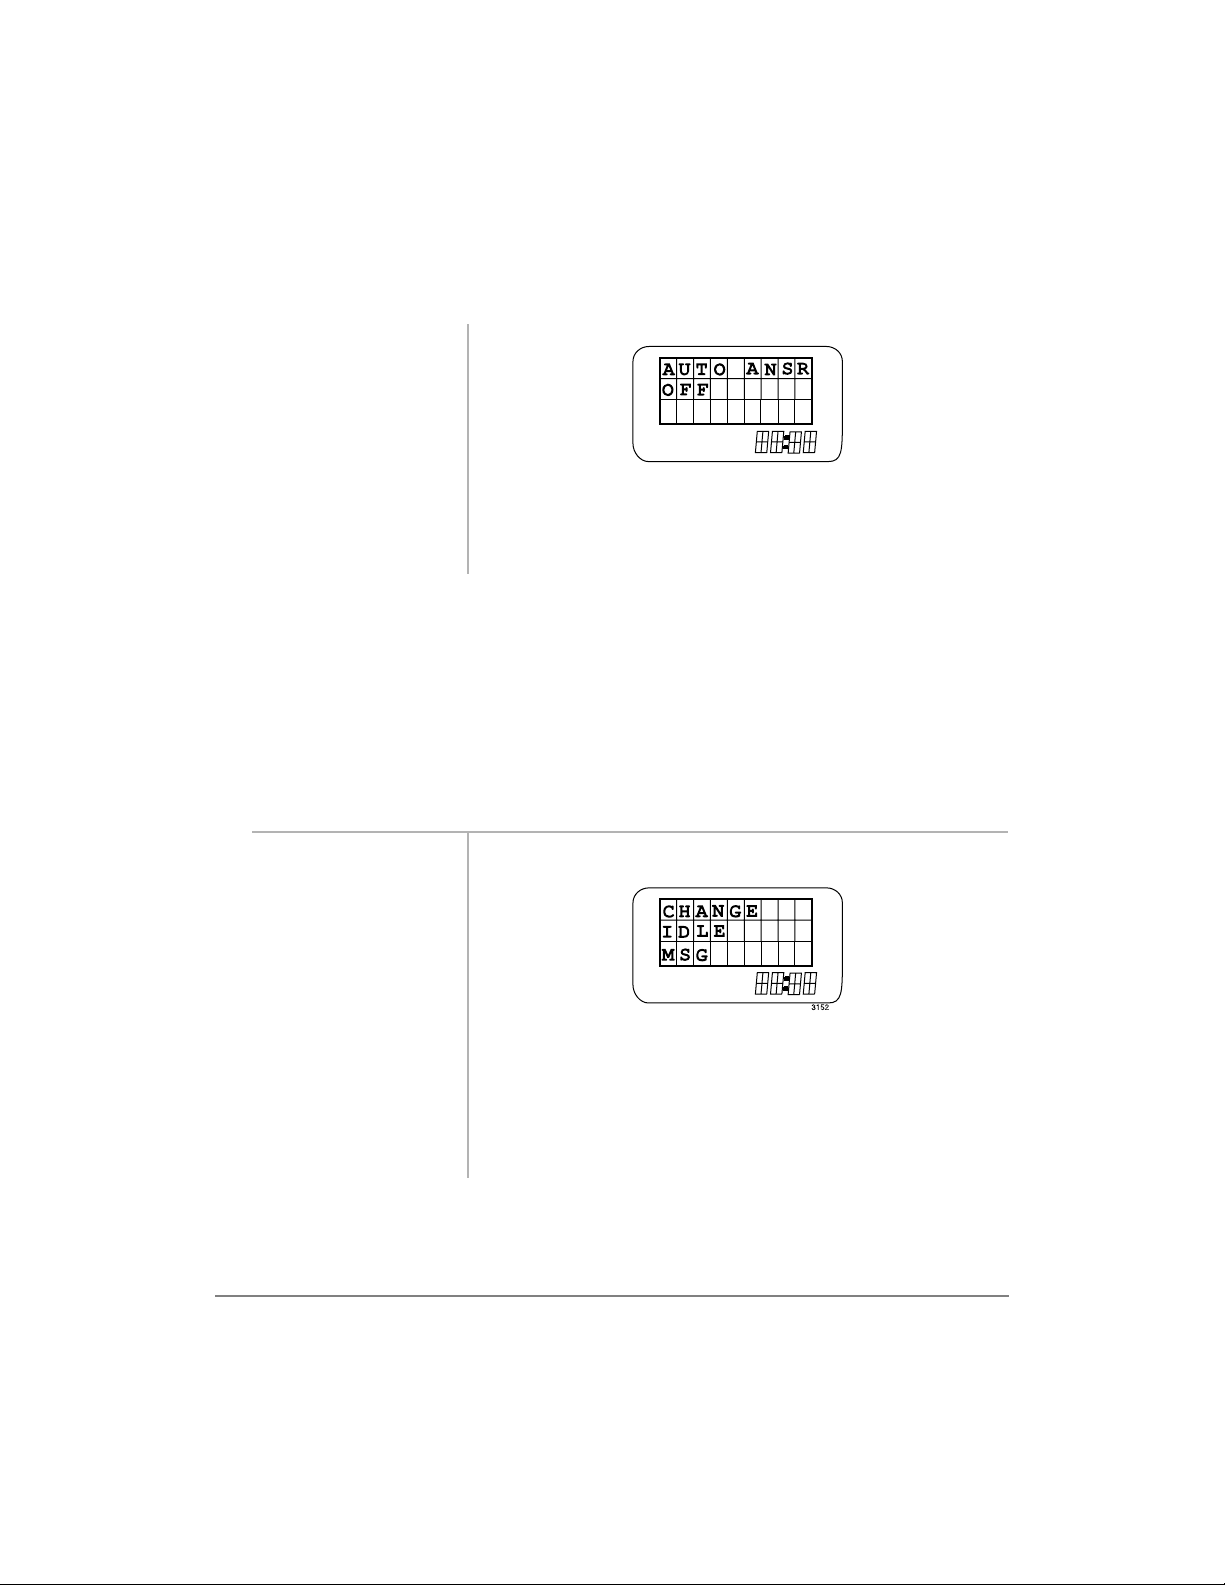
Auto Answer
1. Press )&1 +
...or
+ )&1.
2. Press
)&1.
16 Strata AirLink External Wireless Handset
▼
Page 26
———————————————————————————————————— Menu Operation
3. Press
)&1 again.
3499
Note You can toggle ON and OFF once you perform
Step 2.
4. Press
(1'. Clears the display and saves the value selected last.
Change Idle Message
The handset displays a message when it is idle, which you can change or delete. The
message can have up to 18 characters.
Important! When the handset is idle, the second line of the LCD displays the date,
so you should not use the full 18 characters for your message.
➤
To change the message
1. Press
2. Press
...or
+ )&1.
)&1.
▼
3. Press
4. Press characters
5. Press
Features 17
)&1. The handset changes to alpha mode.
The new idle message displays. Refer to Table 6 on Page
or numbers.
672 +
(1'
.
28 for specific character examples.
The new idle message is store in memory, and Menu
Operation displays.
Page 27
Menu Operation ————————————————————————————————————
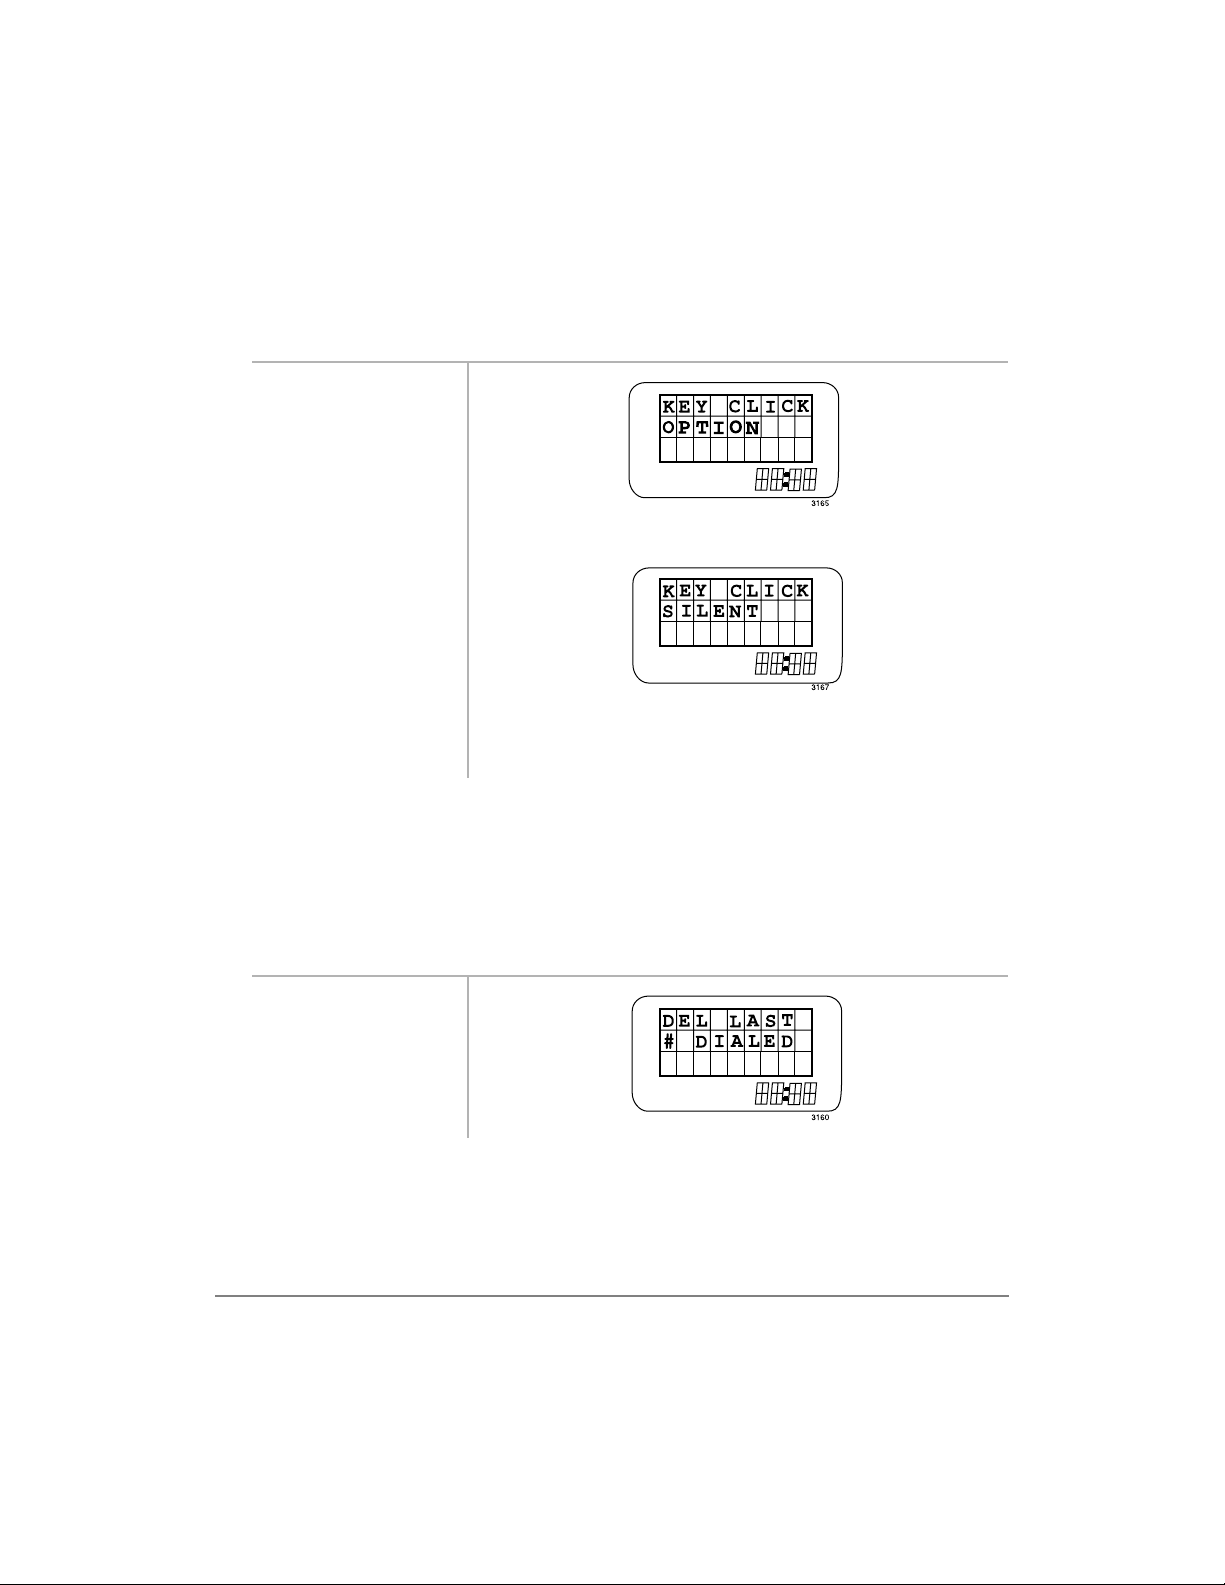
Click Volume
1. Press
...or
2. Press
3. Press
)&1 +
+ )&1.
)&1. You hear levels of volume or this displays:
(1'. Clears the display and saves the last value selected.
▼
Note Your choices are VOL1~3 and silent.
Delete Last Number Dialed
The handset stores the last number that you dialed and displays it when you press
&$//.
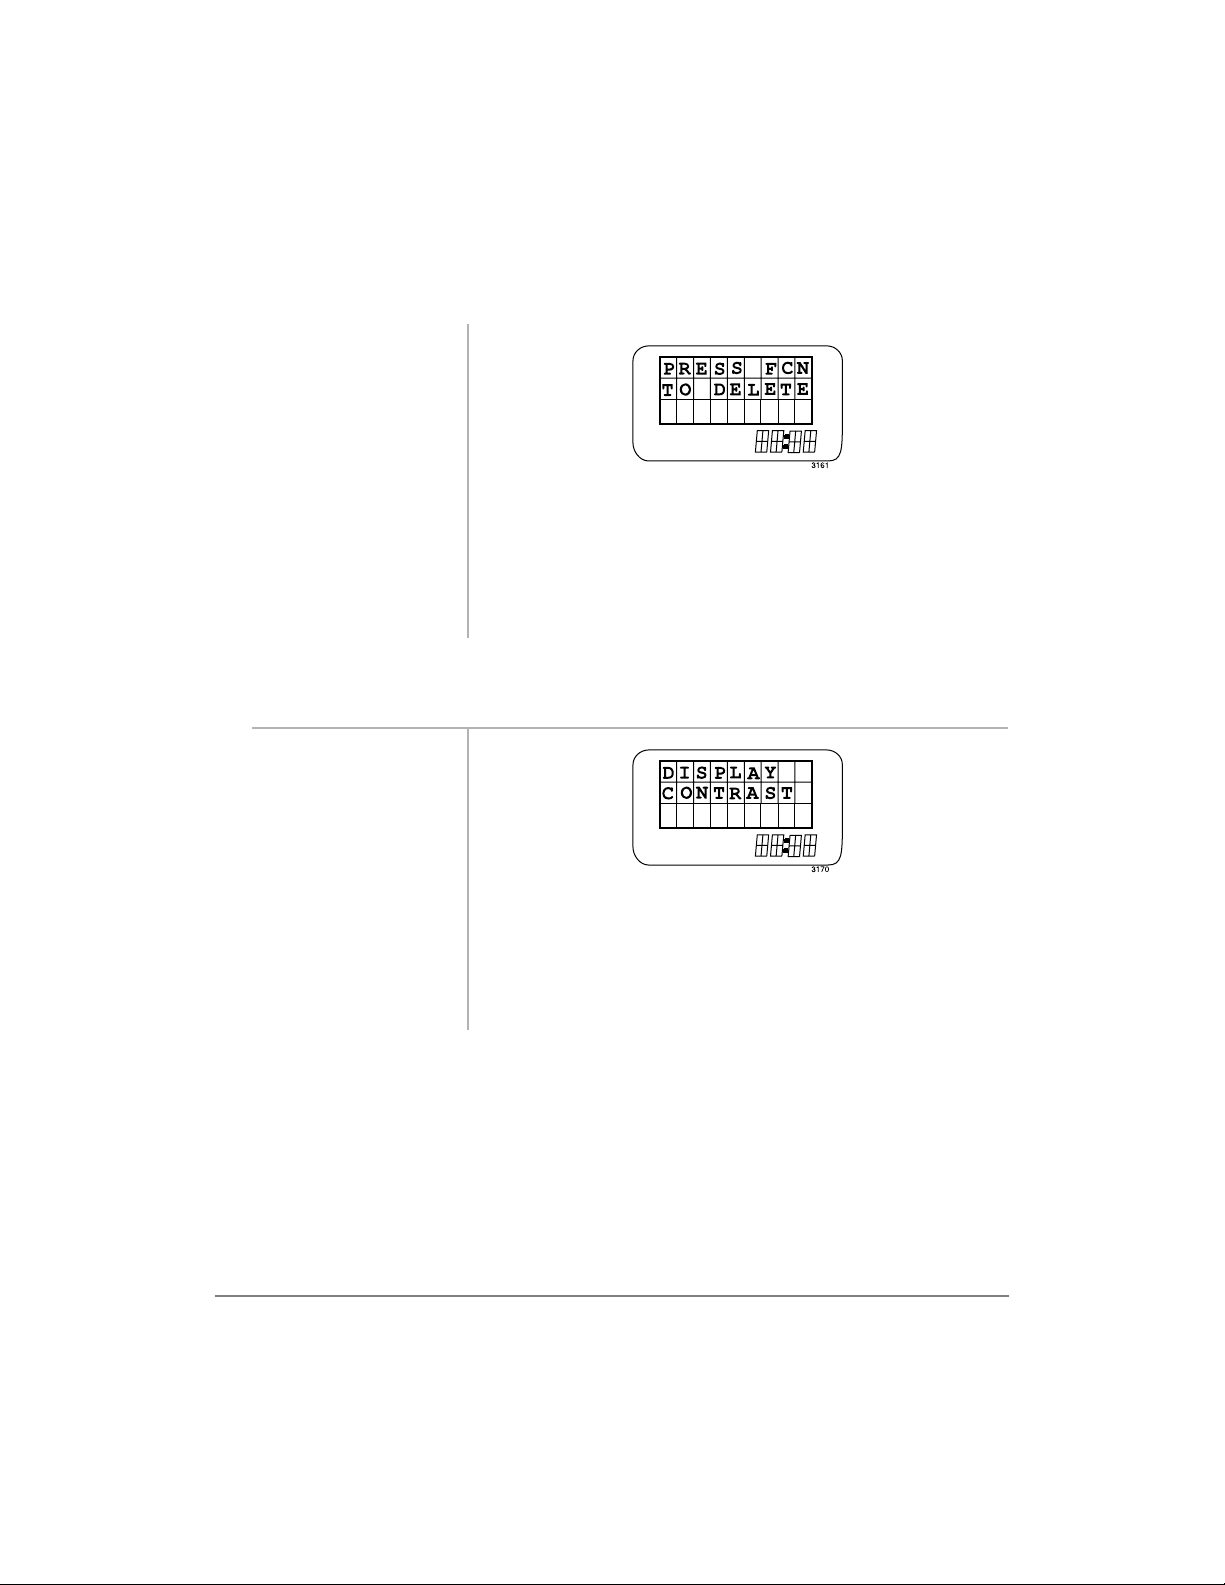
➤
To delete the last number dialed
1. Press
)&1 and
▼
+ )&1.
...or
18 Strata AirLink External Wireless Handset
Page 28
———————————————————————————————————— Menu Operation
2. Press )&1 again.
3. Press
)&1 once
more to confirm
...or
(1' to
cancel.
4. Press
(1'.
Display Contrast
1. Press
2. Press
3. Press
)&1 +
...or
+ )&1.
)&1 until
the contrast that
you want
displays.
(1'.
If you confirm, the LDN is deleted.
▼
There are seven types of contrast available.
Features 19
Page 29
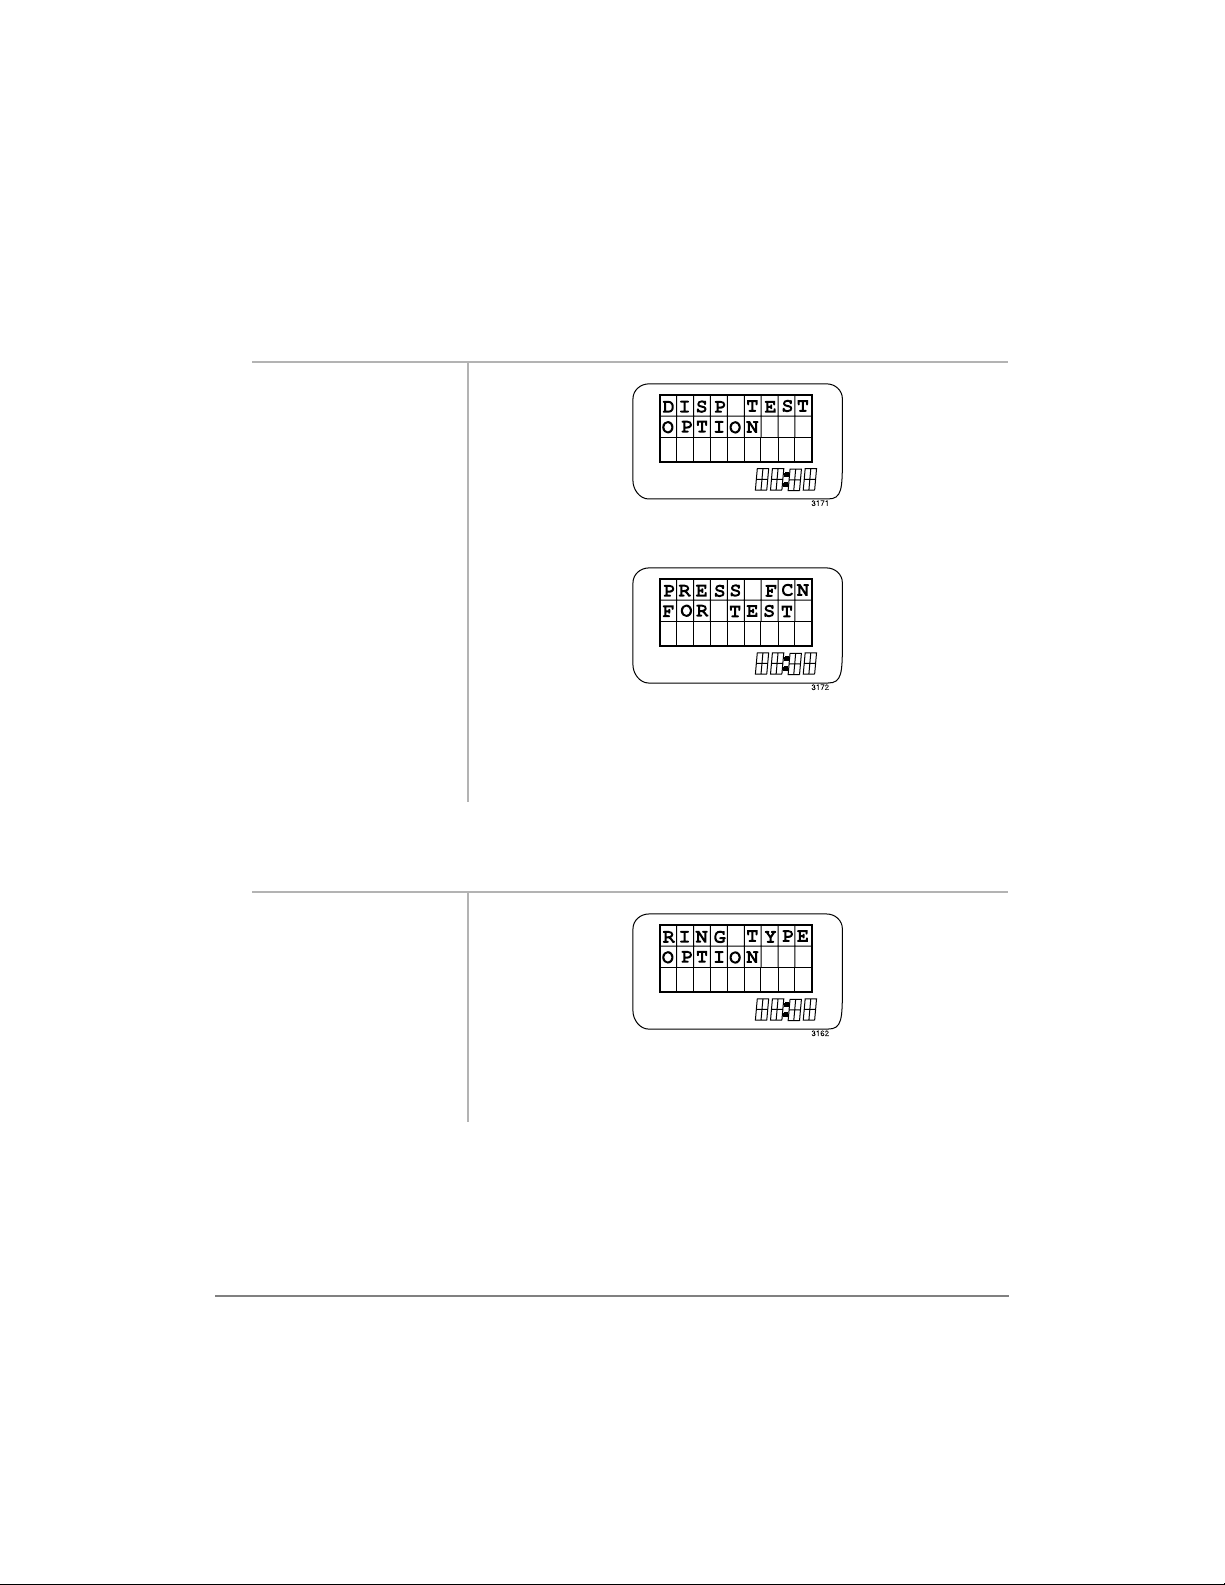
Menu Operation ————————————————————————————————————
Display Test Option
1. Press )&1 + ▼
(several times)
...or
+ )&1.
2. Press
turn the test ON
and OFF.
3. Press
Ringer Type
1. Press
+ )&1.
...or
2. Press
3. Press
)&1 to
When the test is OFF, this displays:
When the test is ON, all icons display and the
alphanumeric area fills with boxes.
(1'.
)&1 +
)&1. You hear the chosen (1~8) ringer type.
(1'.
▼
20 Strata AirLink External Wireless Handset
Page 30
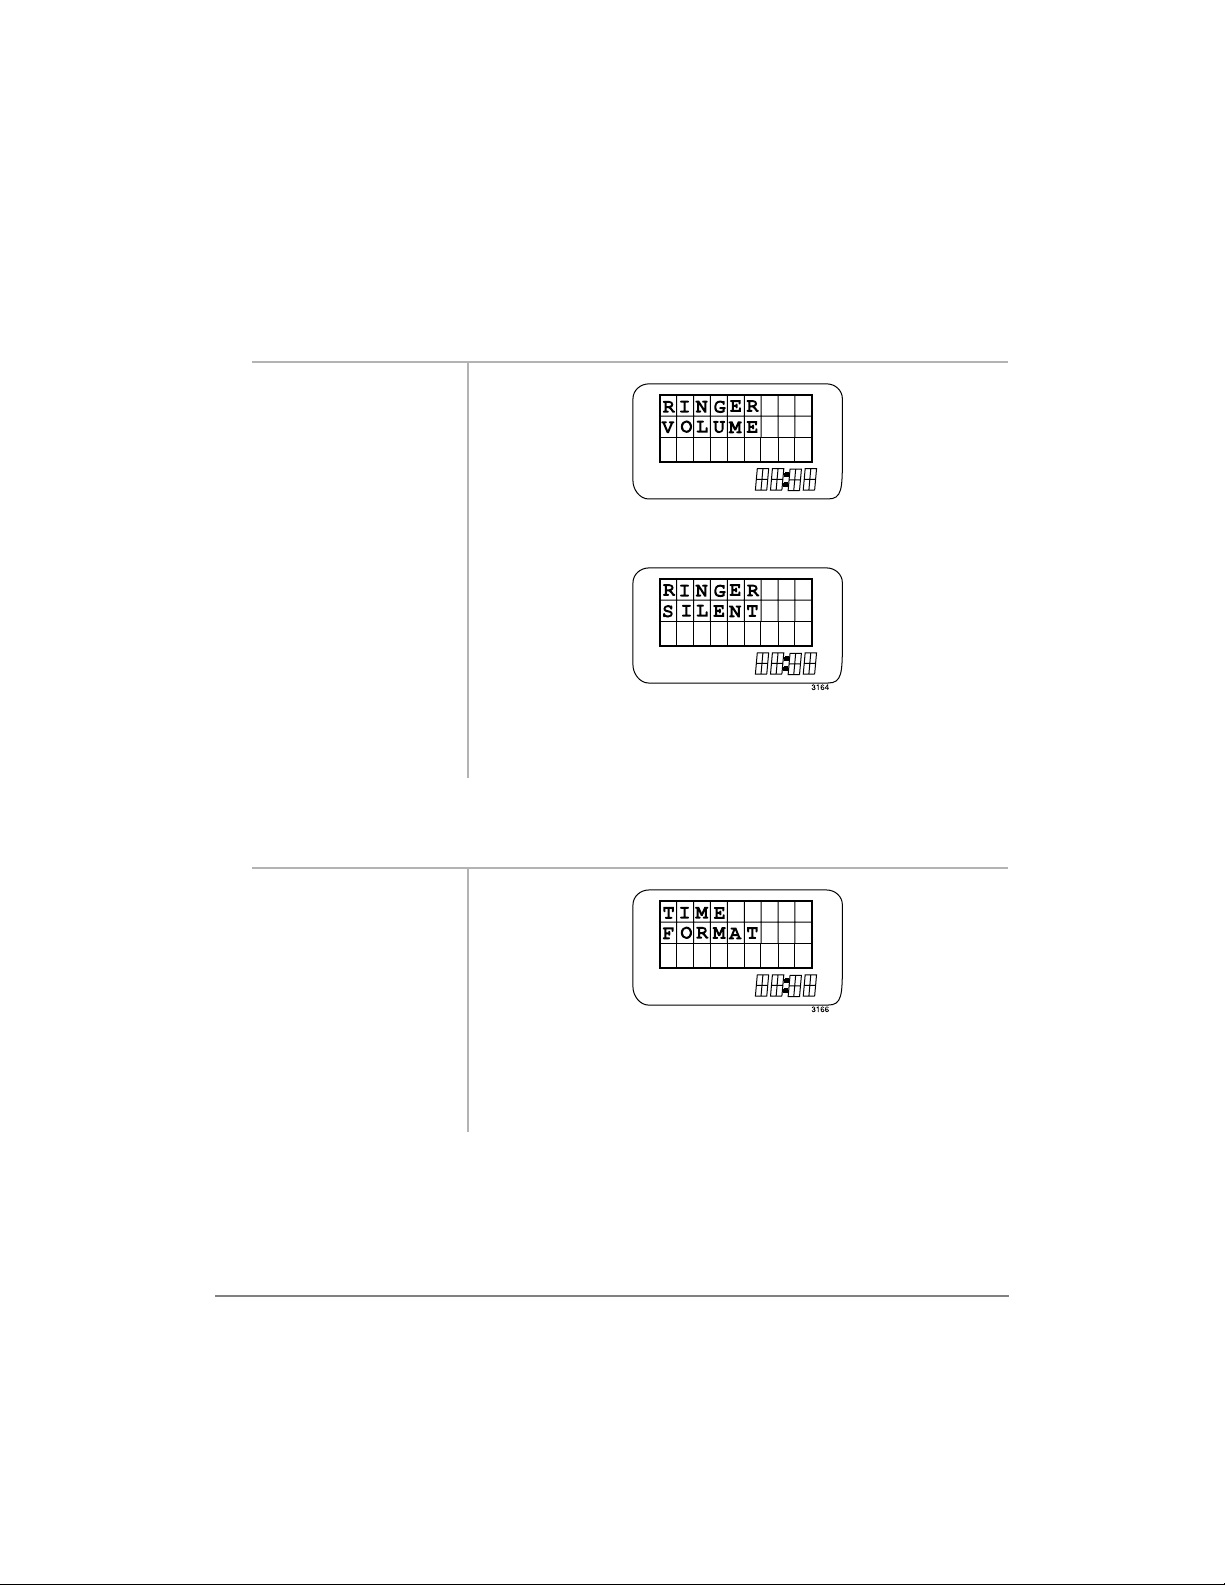
———————————————————————————————————— Menu Operation
Ringer Volume
1. Press )&1 +
+ )&1.
...or
2. Press
3. Press
)&1. You hear levels of volume or this displays:
(1'.
Time Format
1. Press
...or
)&1 +
+ )&1.
▼
3163
Note Your choices are VOL1~3 and silent.
▼
2. Press
3. Press
4. Press
Features 21
)&1. Your format displays, or 12H OR 24H displays.
)&1 again. The values are toggled between 12H and 24H.
(1'.
Page 31

Using the Hookswitch (Flash) ——————————————————————————————
Using the Hookswitch (Flash)
The ordinary telephone hookswitch is located in the handset crad le of your telephone.
The wireless telephone has a special button (
hookswitch.
)/6+ enables a number of features.
Conferencing, Centrex, or behind PBX operation, which are CO line features, require
“flashing a CO Line” to enab le Centrex/PBX acc ess codes or ext ension numbers. Bot h
the ordinary use of
➤
To use the hookswitch during a call
➤
Press
)/6+. You hear dial tone.
➤
To flash a CO Line
)/6+ and accessing a CO Line are explained below.
)/6+), however, that flashes the
1. Press
2. Press
)/6+. You hear dial tone.
BBBBB. Note The access code depends upon the Centrex or
3. Enter a Centrex or
PBX feature access
code or extension
number.
Important! This hookflas hes the office telephone
system only.
PBX that you have. Check with your System
Administrator.
22 Strata AirLink External Wireless Handset
Page 32

———————————————————————————————————— Adjusting Volume
Adjusting Volume
You have 13 volume settings in your handset to make adjustments to the calling
party’s voice level.
➤
To raise the volume
➤
Press ▲ until
you reach the
level you want.
➤
To lower the volume
➤
Press ▼ until
you reach the
level you want.
The selected volume setting briefly displays as VL01~12.
The selected volume setting briefly displays as VL01~12.
Mute
There are two types of mute:
♦ Voice – the handset mic rophone tempora rily discon nects, so th e other party c annot
hear you.
♦ Ring – the ringer temporarily disconnects during an incoming call without
affecting the call .
➤
To mute your voice while in conversation
➤
Press and hold ▼.
➤ To mute the ringer when you receive an incoming call
➤ Press
➤ To cancel the mute feature
➤ Press ▼.
Features 23
&/5.
Page 33
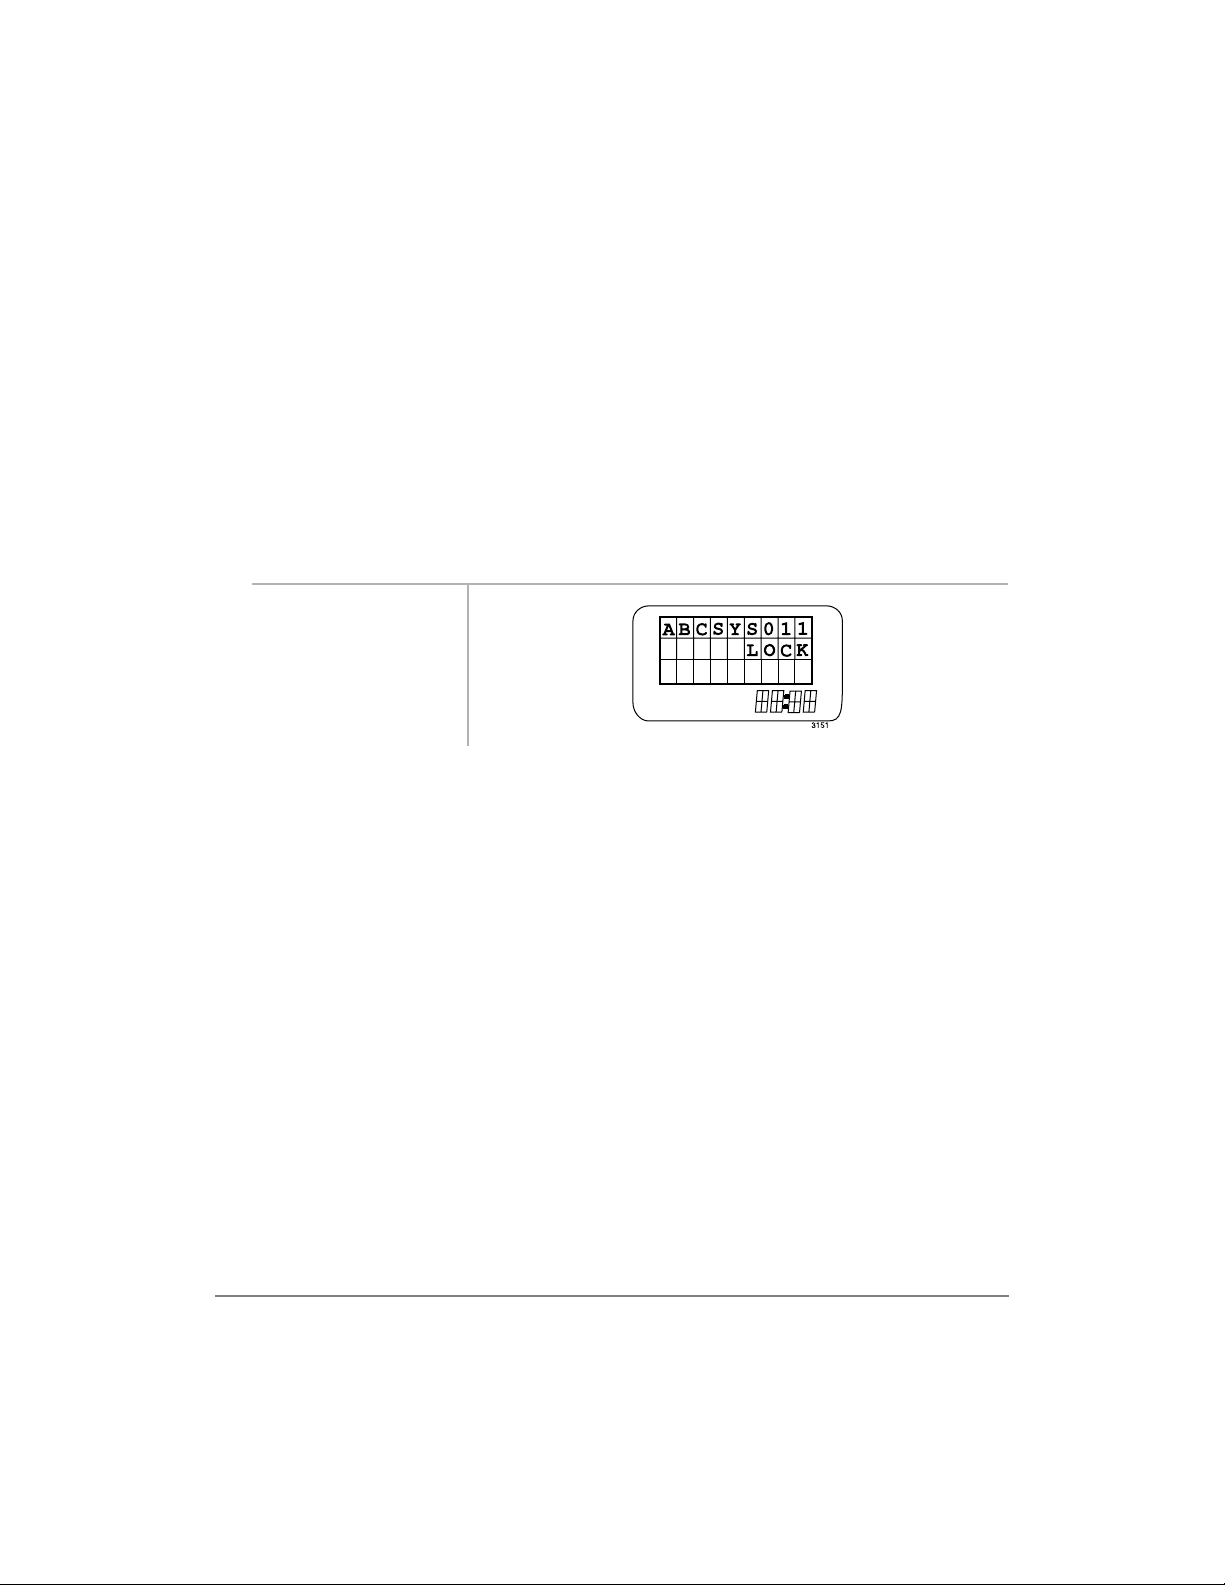
Locking the Dial Pad ——————————————————————————————————
Locking the Dial Pad
You can lock the dial pad to avoid the accidental pressing of buttons. The handset
must be idle.
Note You cannot use any but tons excep t 3:5 when th e dial pad is locked. The dial
pad automatically unlocks when you receive an incoming call and then
relocks when the call ends.
➤
To lock the dial pad
➤
Press and hold
É.
➤
To unlock the dial pad
➤
Press and hold
É
...or power OFF.
FCN Feature Access
Press )&1 with other buttons to access office telephone system features, such as
Automatic Call Back, Speed Dialing, and Call Forward.
Some features require a few steps before you use the
establish a conference, you must be in conversation with one party and have another
party on hold before you press
Note Use of these buttons requires system progr amming and can vary depe nding on
your office telephone system. Your System Administrator can provide
information specific to your telephone system.
)&1 + .
24 Strata AirLink External Wireless Handset
)&1 key. For example, to
Page 34
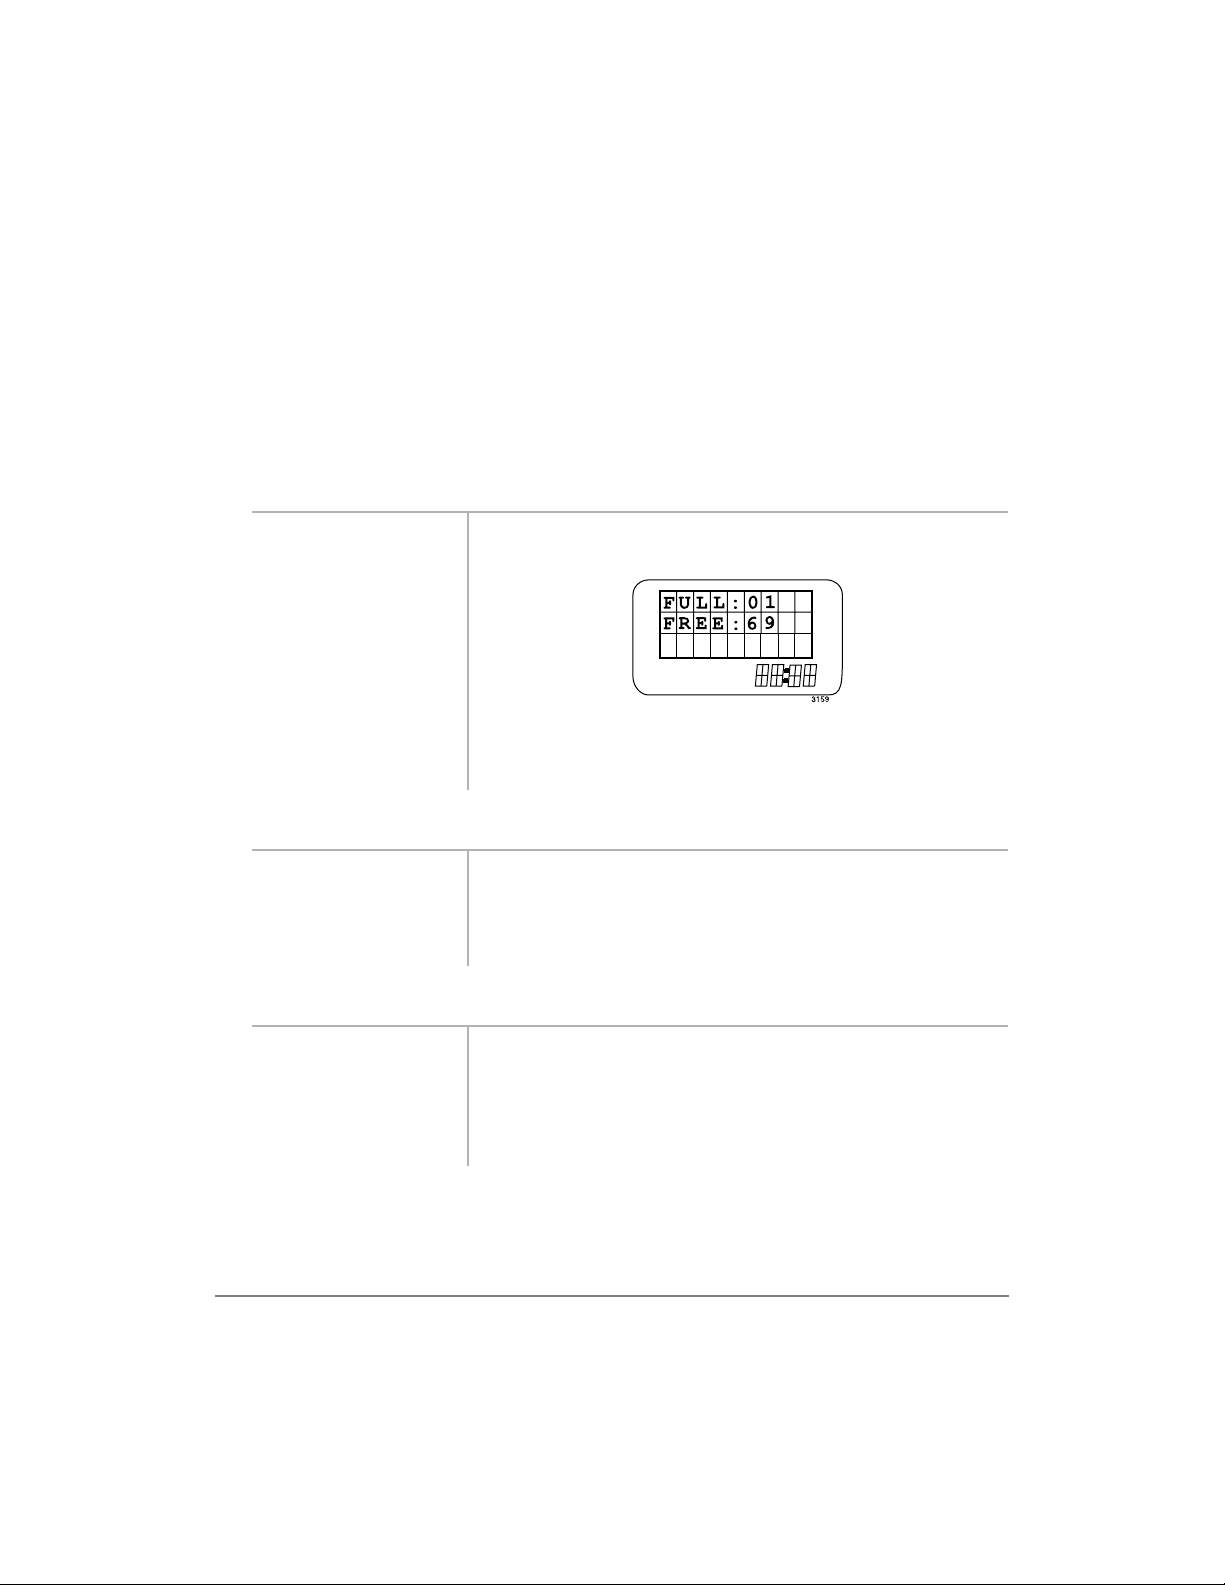
—————————————————————————————————————— Speed Dial
Speed Dial
Your handset stores 70 speed dial numbers, 10 of which can be dial ed by pressi ng one
button. You can also assign memory locations or names. Before you store any
numbers or names, you need to know how many locations are available.
➤
To f ind the availab le memory locatio ns
1. Press
5&/.
É +
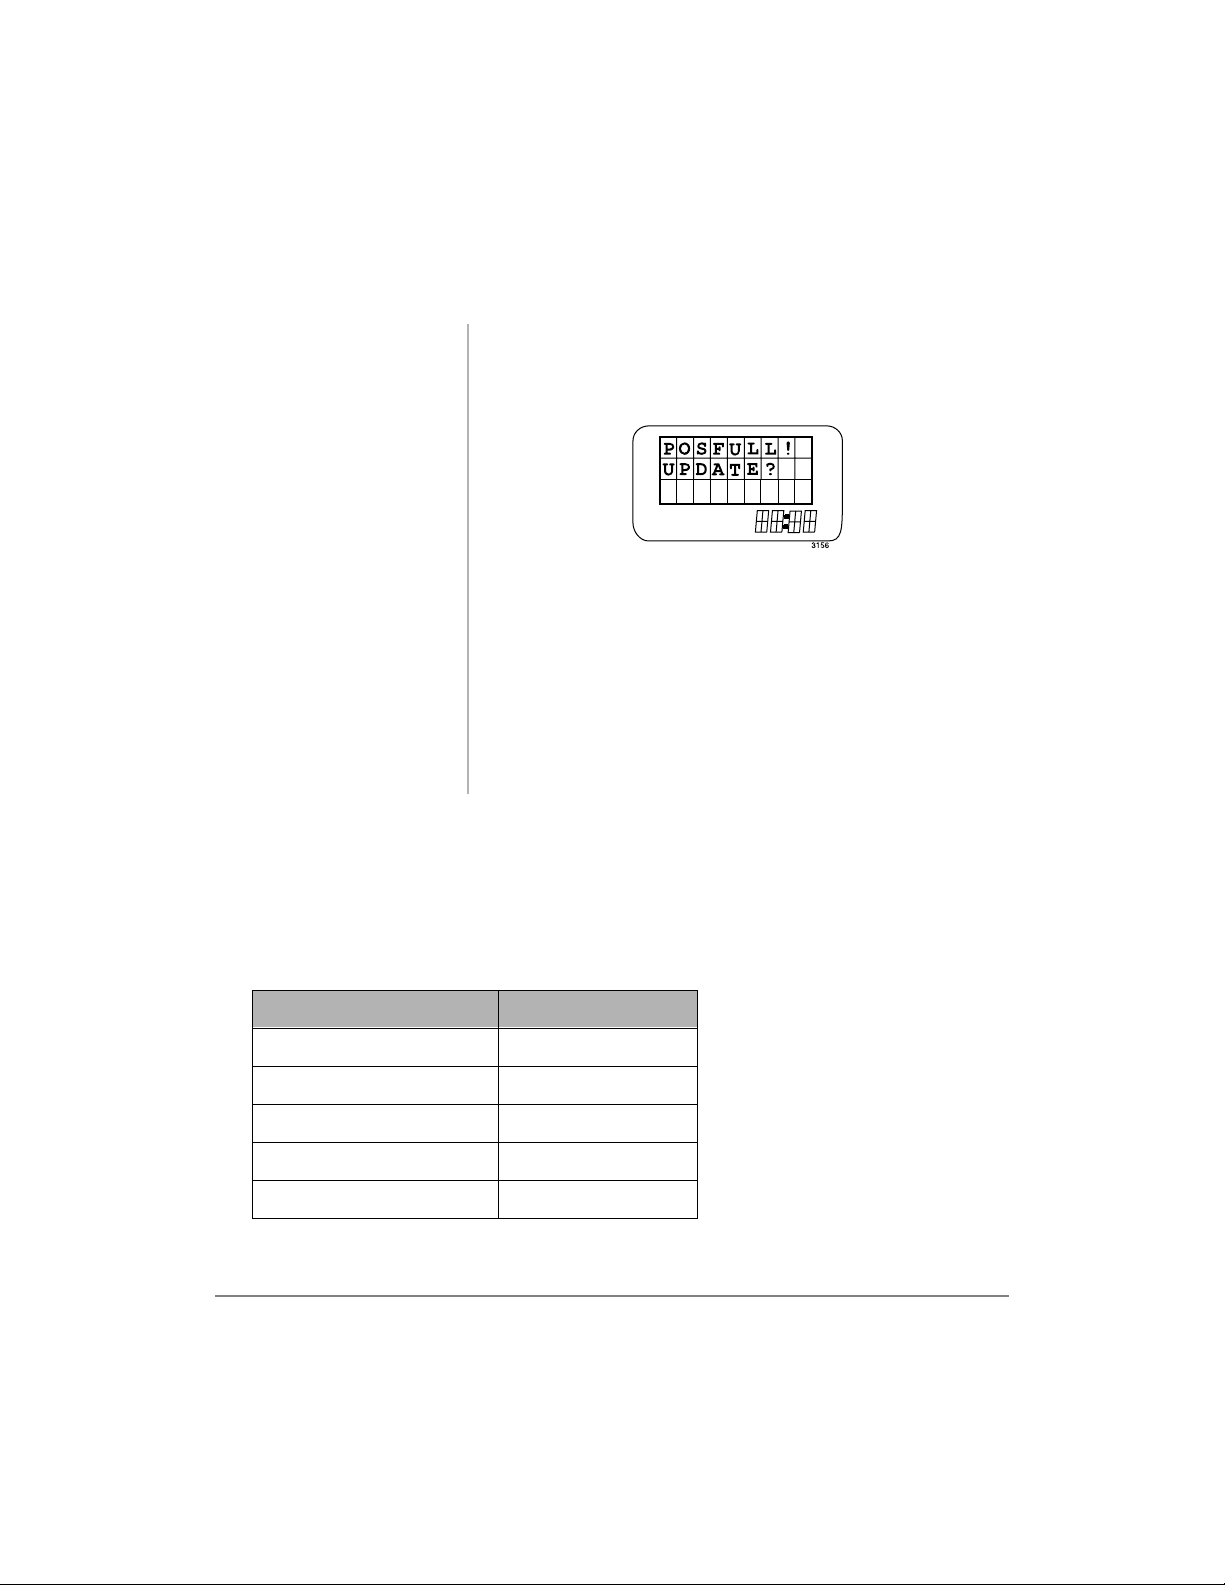
FULL is the number of used locations, and FREE is the
number of available locations.
2. Wait
...or press
➤
To Speed Dial using one button
1. Press and hold
~.
2. Release the
(1'.
The number stored in the chosen memory location dials
and displays on the LCD.
The call connects.
button.
➤
To Speed Dial using memory locations 10~69
1. Dial a memory
The number displays.
location
(
~).
2. Press
5&/ +
&$//.
Features 25
Page 35
Speed Dial ——————————————————————————————————————
➤
To scroll memory locations for Speed Dial numbers
1. Press
5&/. The name and the first nine digits of the number displays.
2. Press ▲ or ▼ to
search
É
...or
...or
3. Press
➤
To Speed Dial by entering a name
1. Press
È.
&$//. The displayed number rings.
$%&. You are in alpha mode.
2. Enter firs t letters
of a name.
3. Press
4. Press
5&/.
&$//. The call connect s.
Each SD number displays.
The handset displays the first name that matches the
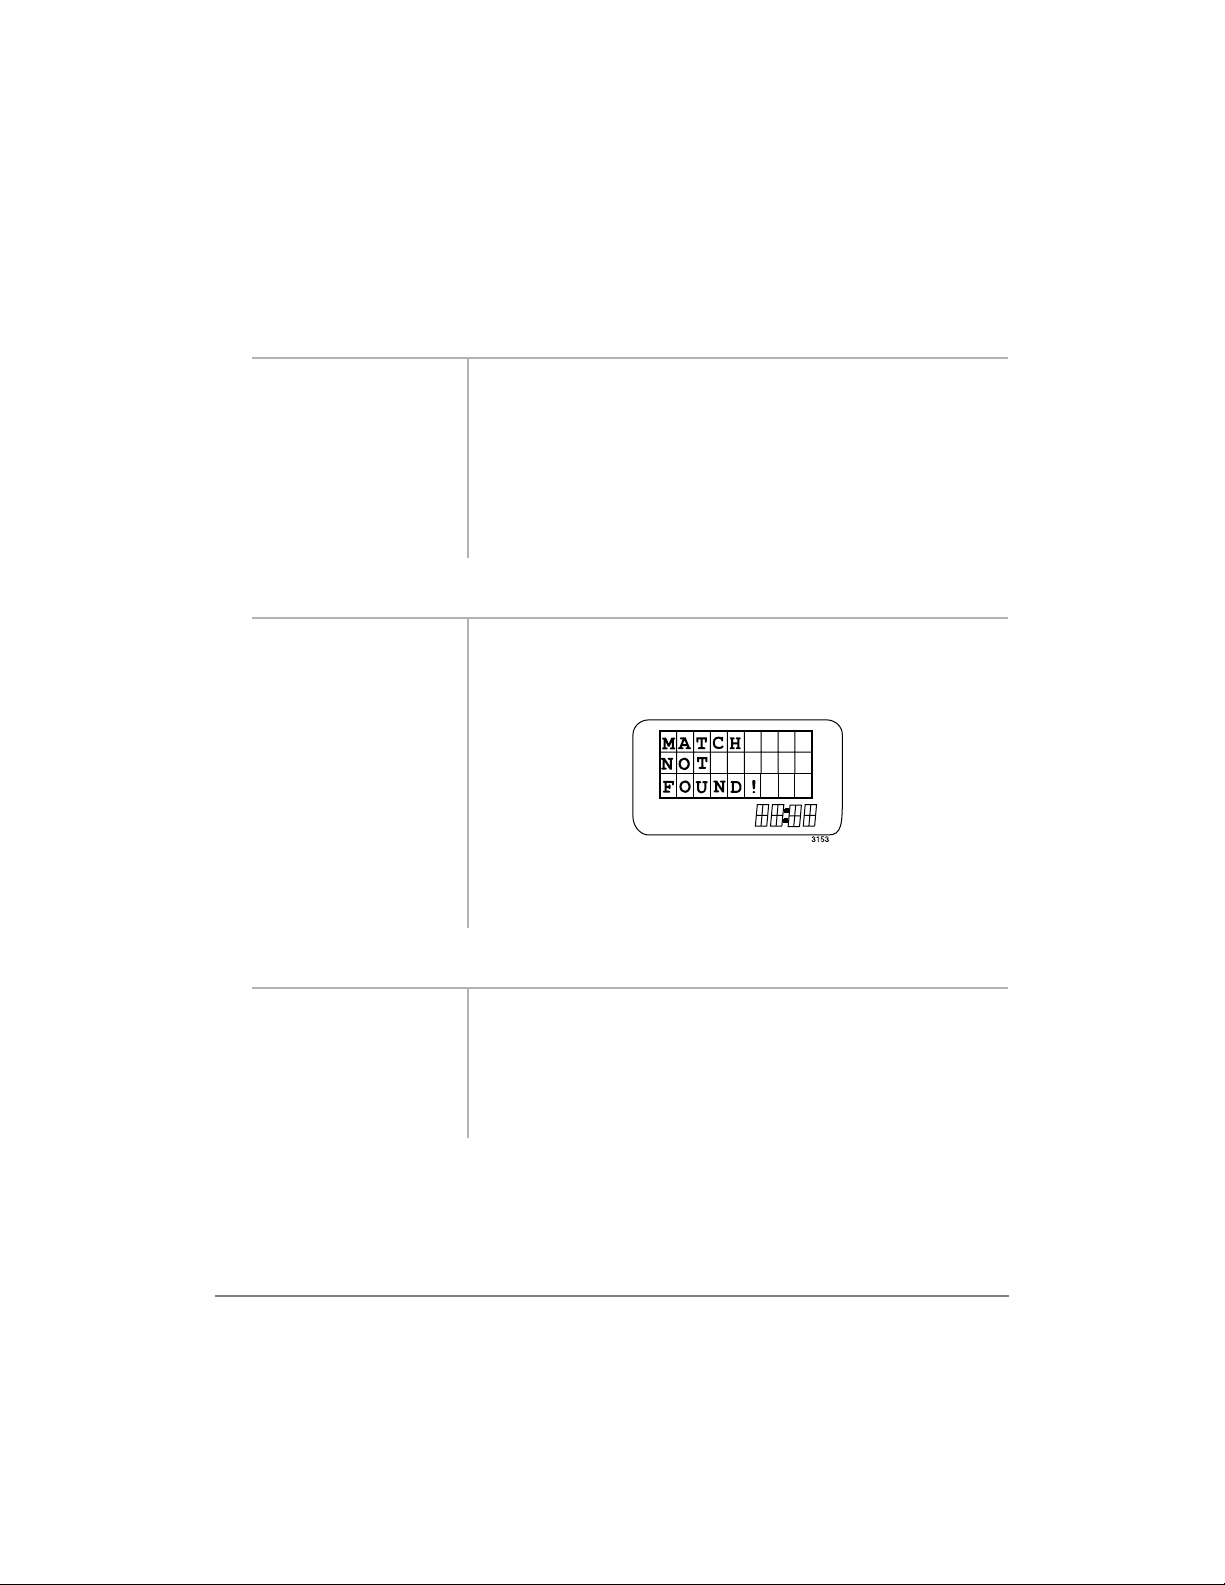
entered letters. If no match is found, this displays:
➤
To search for the name you want
1. Press ▲, ▼,
or
É
...or
5&/. The handset searches for a match for you.
2. Press
&$// +
(1'.
È,
You scroll through the memory lcoations to locate the
name.
Your call connects.
26 Strata AirLink External Wireless Handset
Page 36
—————————————————————————————————————— Speed Dial
➤
To program a pause
p” displays.
1. Press and hold
È.
2. Enter
and
➤
To enter a “wait”
.
a,
,
A “
A one-second pause is programmed.
1. Press
&$//. You can continue dialing.
2. Press and hold
É.
➤
To store a Speed Dial number
1. Enter the number
672.
+
2. Press
➤
To store a name (optional)
1. Press
672 again.
$%&.
2. Quickly press the
button
corresponding to
the character that
you want, one or
more times.
w” displays.
A “
For example, to enter the letter F, press
times. See Table 6 for more information.
quickly three
Features 27
Page 37
Speed Dial ——————————————————————————————————————
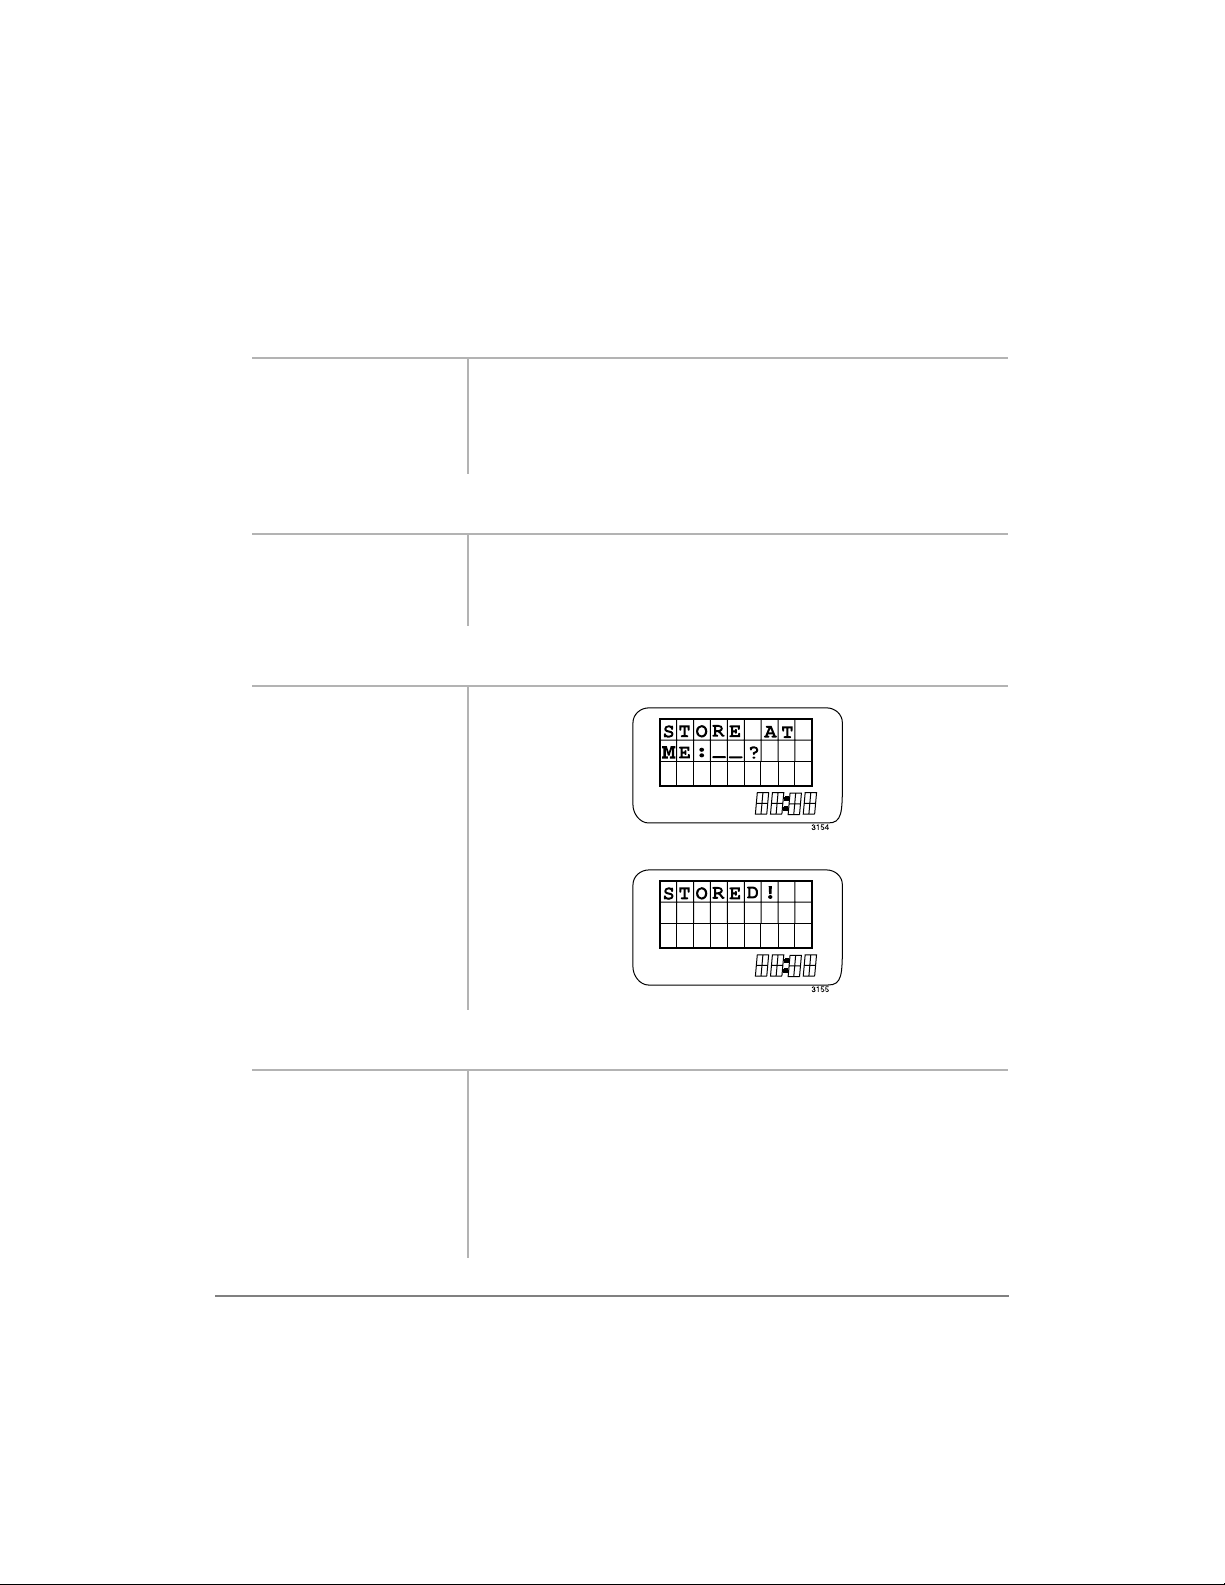
3. Press 672. The memory location displays, and you are prompted to
verify the memory location.
4. Press
672 again
If you enter a used memory location, this displays:
...or enter a
number (
and press
5. Press
~)
672
672.
The memory location is confi rmed.
...or (1' + 672
to enter another
location.
6. If you want to
store another
name, repeat
Steps 1~6.
If the number or name is longer than 18 digits, it is scrolled to another line on the
display. You should reserve memory locations 0~69 for numbers you dial most
frequently.
Important! Power OFF the handset before removing the battery or all Speed Dial
numbers will be lost.
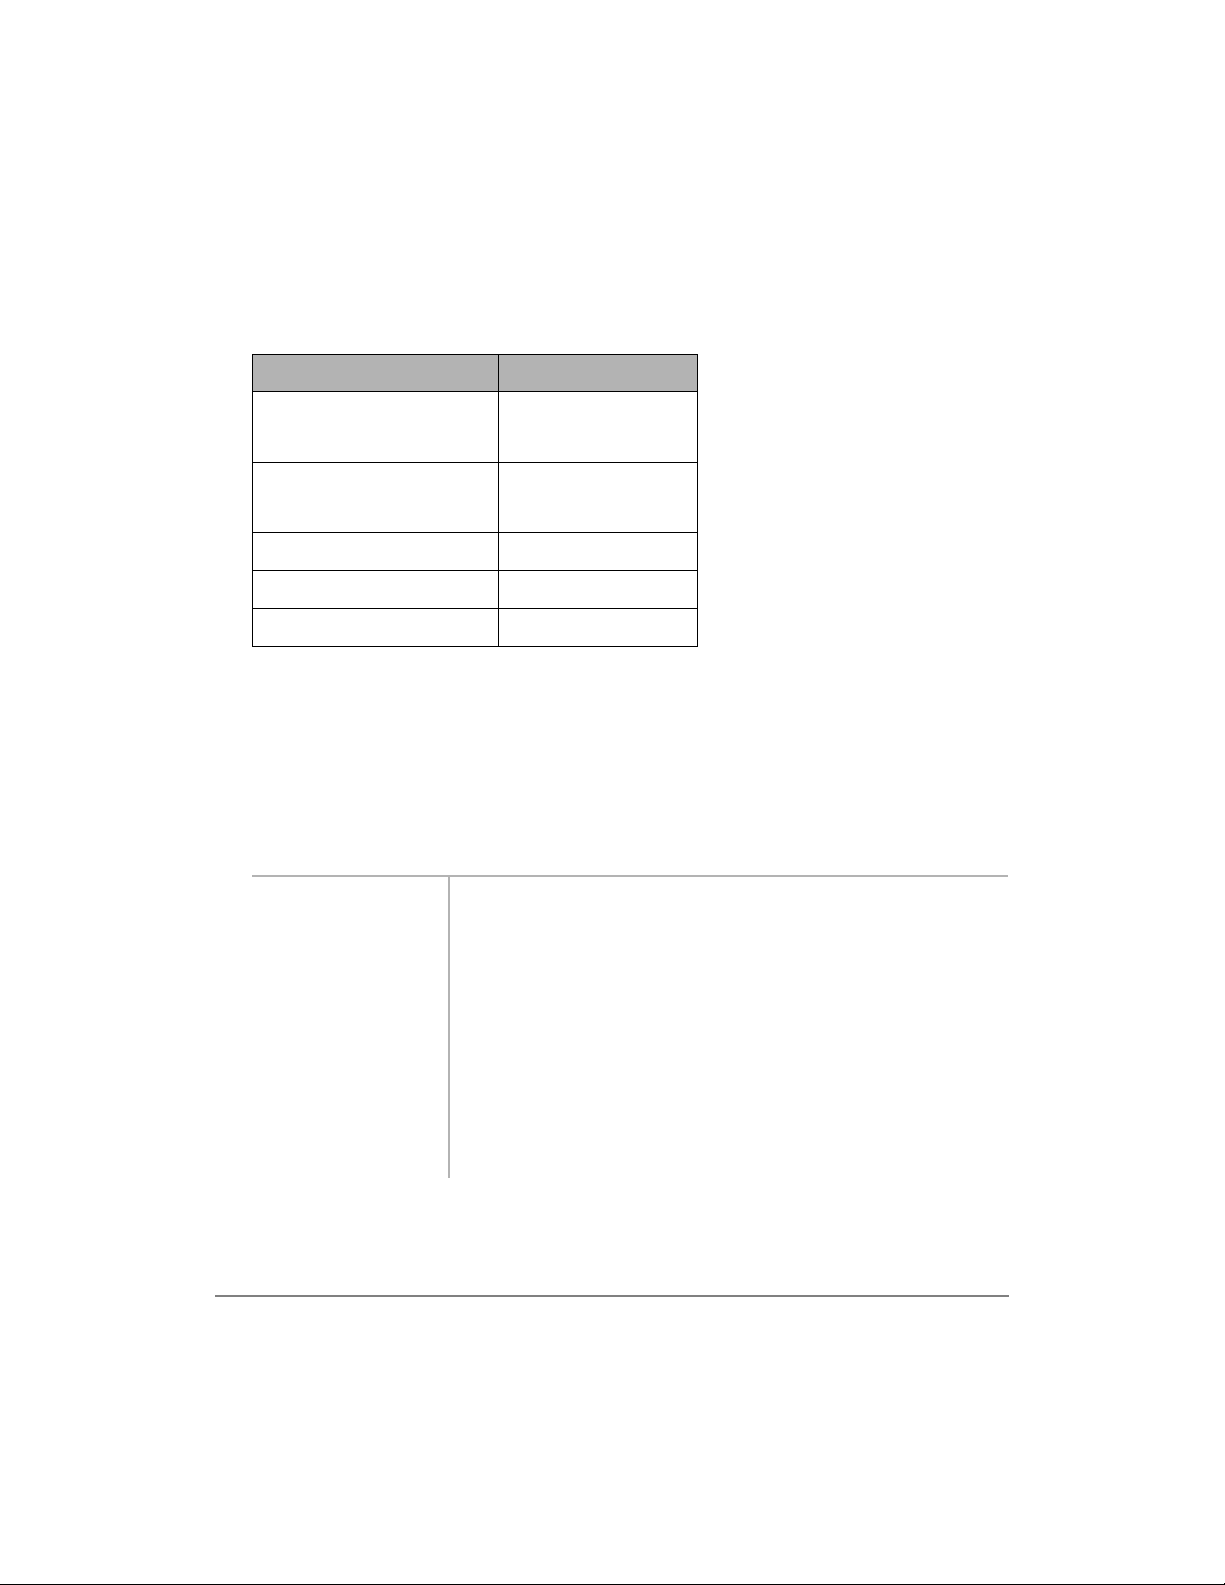
Table 6 Entering Special Characters and Names
Press Result
once 1
twice –
once A
twice B
three times C
28 Strata AirLink External Wireless Handset
Page 38
—————————————————————————————————————— Speed Dial
Table 6 Entering Special Characters and Names
Press Result
four times
four times
five times
five times
È *
É space
0 (zero)
Important! Wait or press É
to advance to the next letter position before entering
2
S
7
9
another character. The handset is ready for another character when the
underscore ( _ ) character displays.
➤
To cancel storing a number
Press
(1'.
The location displays.
➤
➤
To edit stored Speed Dial numbers/names
1. Enter a
memory
location and
press
5&/
(continued)
...or
▼
,
5&/ +
É, or
▲
,
È
to search for
the number/
name.
2. Press
Features 29
&/5.
$%& +
The digits number/name is deleted.
Page 39
Speed Dial ——————————————————————————————————————
3. Enter the new
digits (number/
name) and
672.
press
➤
To cancel the editing process at anytime
Press
(1'.
The location displays.
➤
➤
To delete one stored number/name
1. Enter a
memory
location and
5&/
press
...or
▼
,
É, or È.
2. Press
3. Press
5&/ +
▲
,
The handset searches memory.
&/5. You are prompted to confirm the deletion.
&/5
The number/name is deleted.
again
(1' to
...or
cancel.
➤
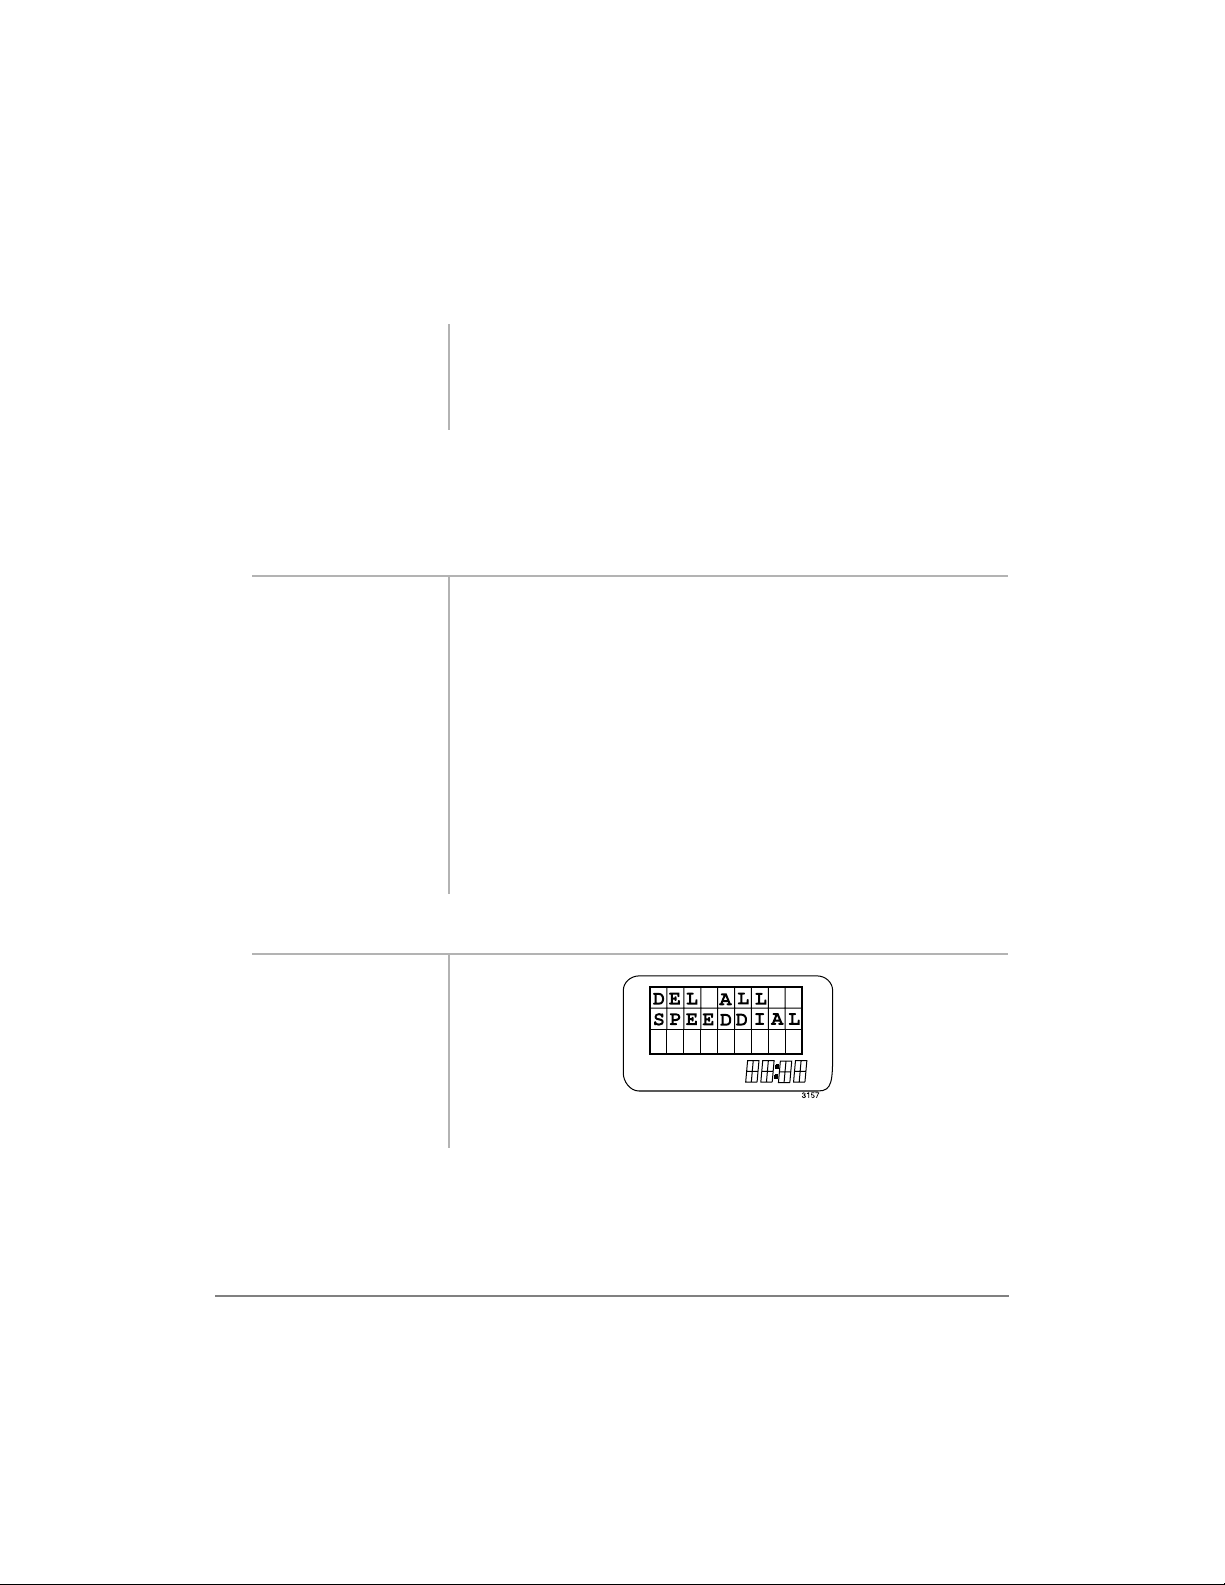
To d elete all numbers/names
1. Press
)&1 +
▼
until the
message at
right displays
...or (in idle
mode),
)&1.
+
30 Strata AirLink External Wireless Handset
Page 40
—————————————————————————————————————— Speed Dial
2. Press )&1.
3. Press
again
...or
cancel.
4. Press
again to exit.
)&1
(1' to
(1'
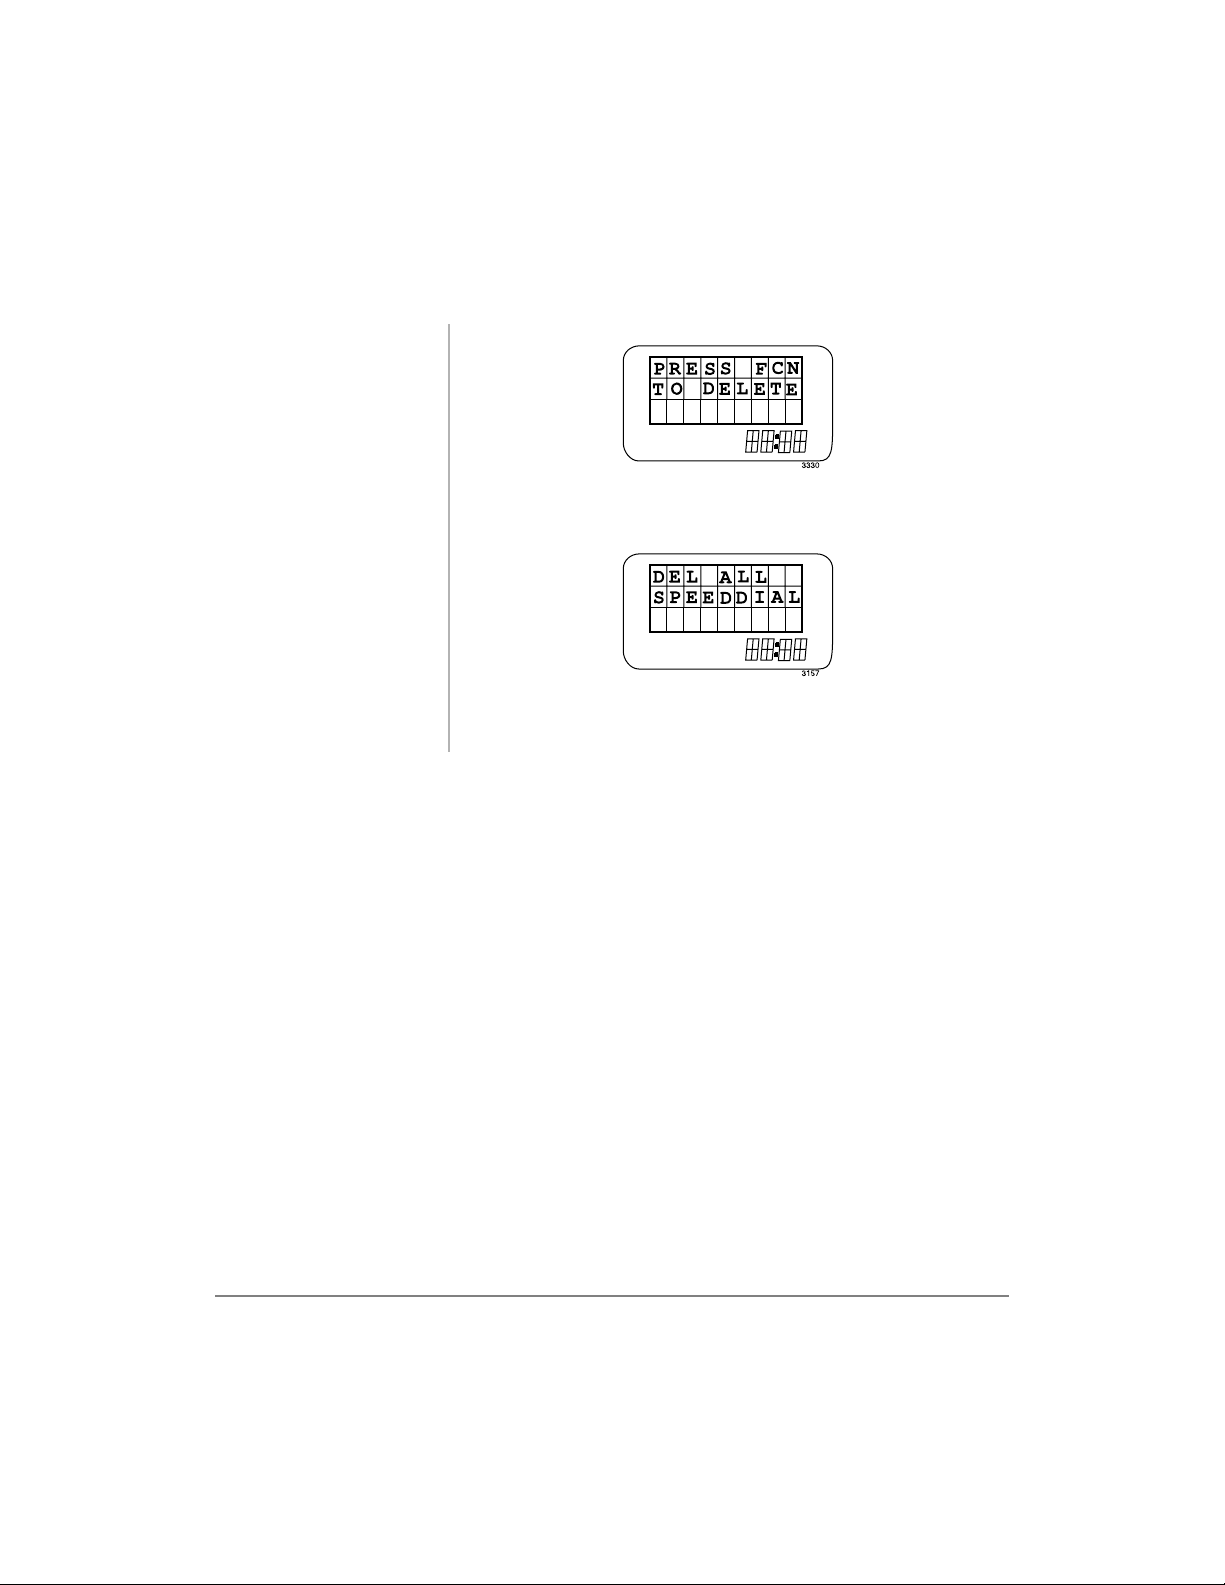
All Speed Dial numbers/names are deleted, and this
displays:
Features 31
Page 41

Speed Dial ——————————————————————————————————————
32 Strata AirLink External Wireless Handset
Page 42

Appendix
This appendix contains additional information about your wireless handset. It is
divided into:
♦ Troubleshooting
♦ Specifications
Troubleshooting
If your wireless handset is not performing to your expectations, try the suggestions in
Table 7. If you are still unable to resolve the problem, contact your telephone System
Administrator.
Important! Do not attempt to service this uni t yourself. All servic e mus t be done by
qualified service personnel.
Appendix 33
Page 43
Troubleshooting ————————————————————————————————————
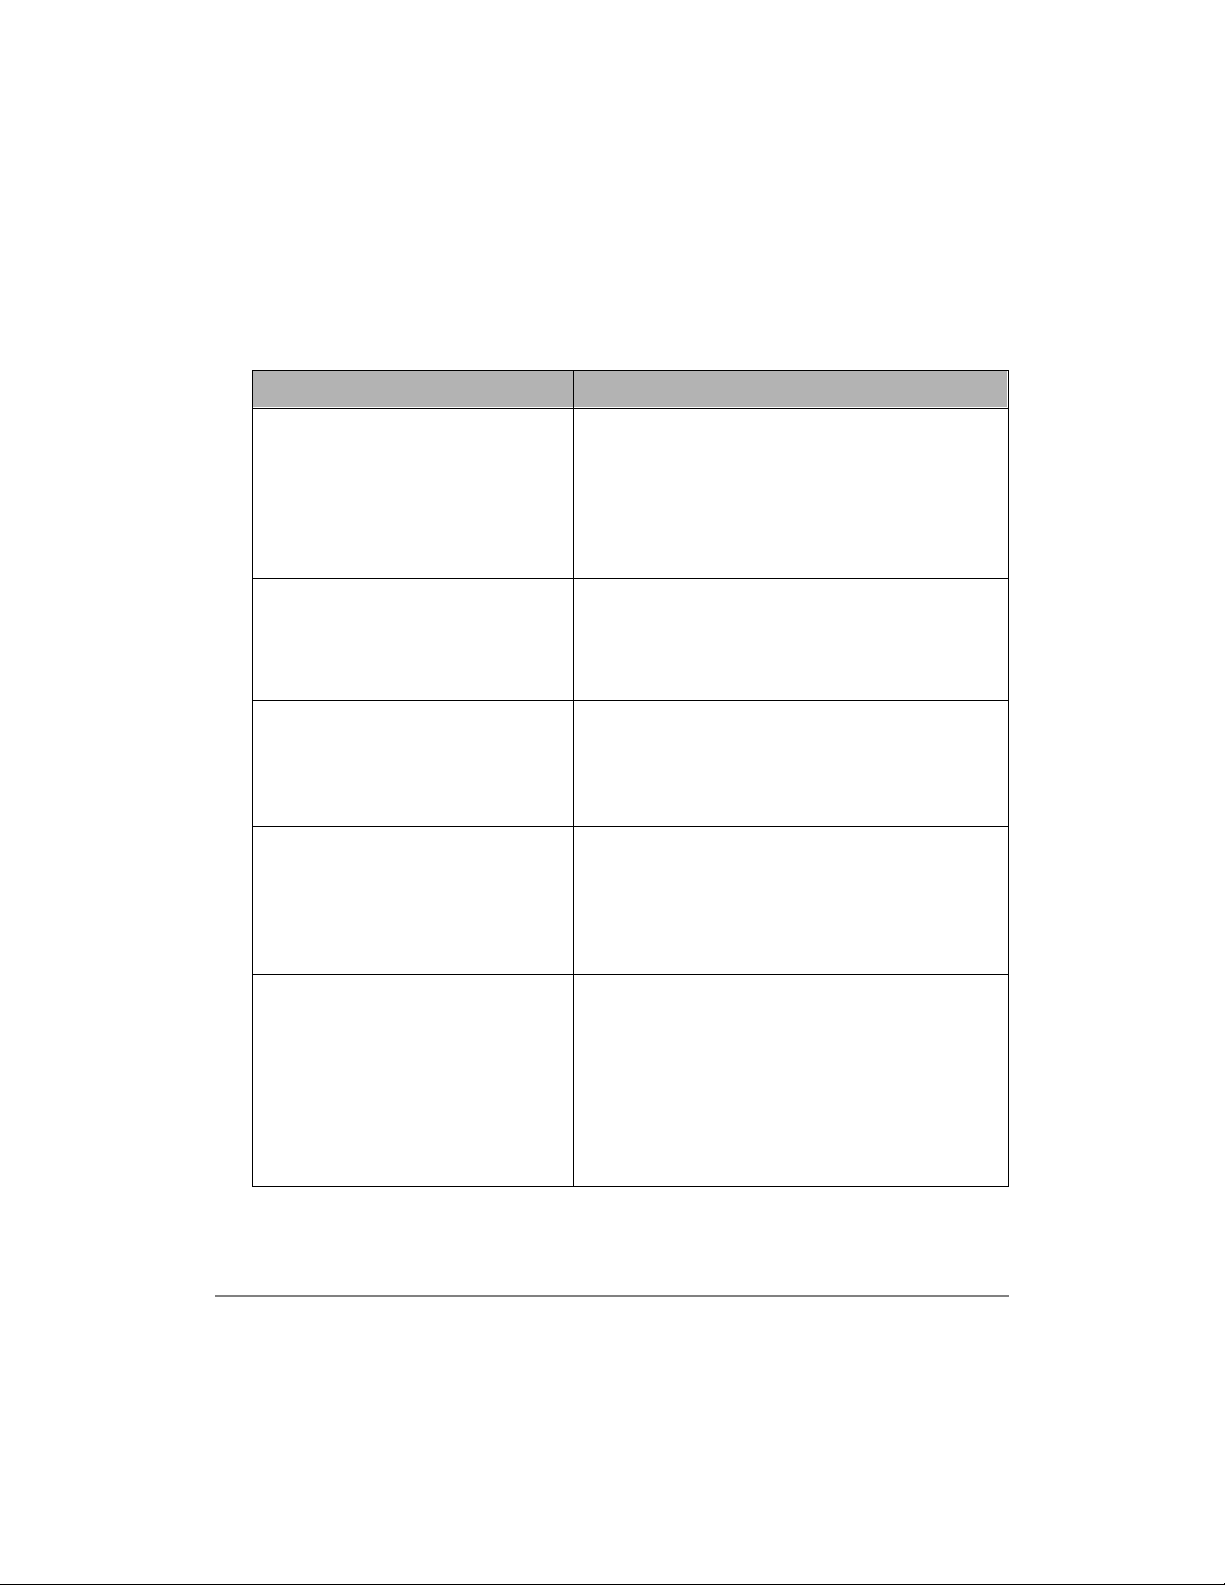
Table 7 Troubleshooting Suggestions
Problem Suggestion
Called party can hear y ou, but cannot
be heard.
Check the handset s ignal streng th by mov ing c loser
Conversation is broken up.
Handoff clicks occur during
conversation.
Display does not contain date, time
and signal strength.
No dial tone.
to a base station . For best resu lts the sig nal strength
indicator should show three to five bars.
Try powering the handset OFF and ON or moving
closer to a base station.
Note It ca n take up to a minute for the full display
to appear.
Make sure the handset dial pad is not locked and
check the handset volume level. If the problem still
exists, the handset is not locked onto a base station.
Try powering the handset OFF and ON or try
moving closer to a base station.
Check the handset volume level. Make sure the
handset aligns with y our ear rather than yo ur mouth.
Weak or delayed dial tone.
NO SERVICE! message.
Consider using the pre-d ial metho d to make ca lls by
dialing the number and pressing the
(rather than pressing
tone).
Try powering the handset OFF and ON or try
moving closer to a base station. A handset is
properly locked when you see the handset date,
time, and signal strength icons after power ON.
You can get this message if you pressed
a handset that is not locked, is out of range, or all
eight channels are busy.
Reset handset to factory defaults.
&$// and waiting for dial
&$// button
&$// on
34 Strata AirLink External Wireless Handset
Page 44
———————————————————————————————————— Troubleshooting
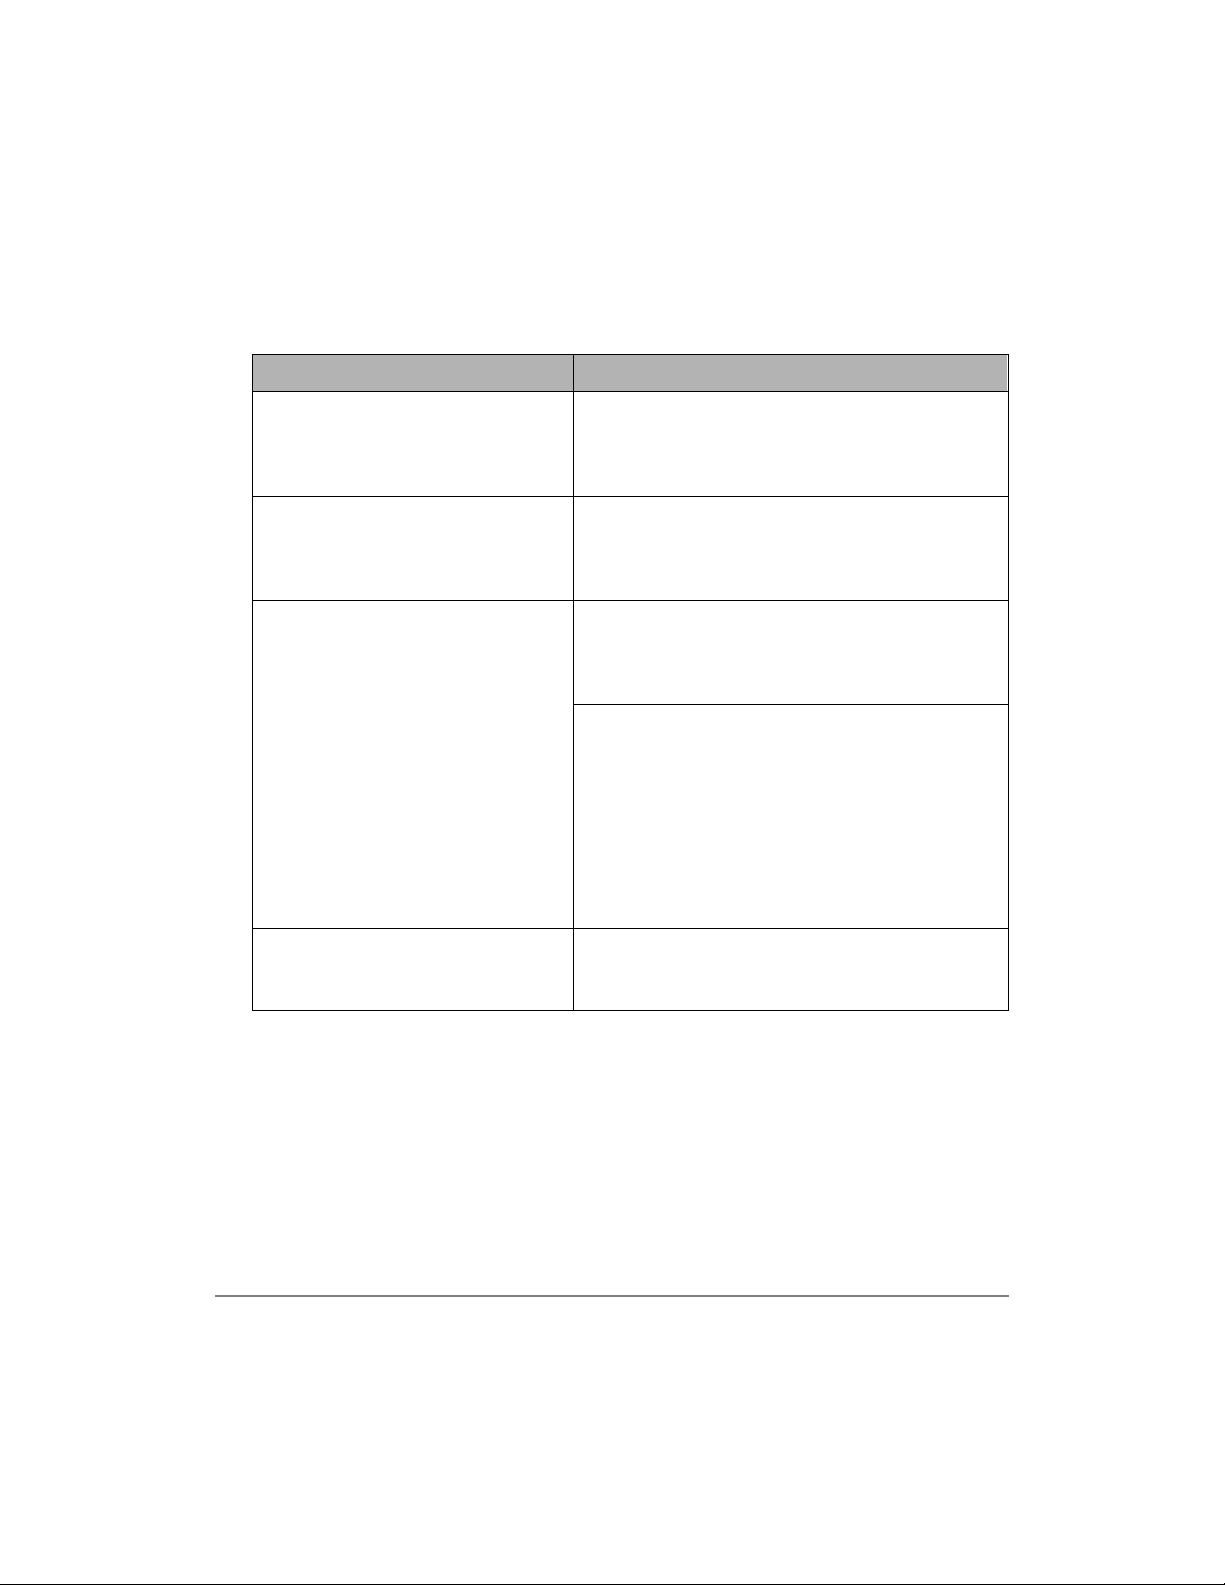
Table 7 Troubleshooting Suggestions
Problem Suggestion
SYSTEM BUSY message.
Unexpected digits in display.
Battery has reduced talk/standby
time.
(continued)
Check to see if one or more base station channels
are in a maintenance busy state; or, your handset
may not be locked well enough to complete the
request for service.
Consider using the dial pad lock feature, because it
is very easy to inadvertent ly press keys when the
handset is not in use. To clear digits from the
display, use the handset
Try disch arging and rech arging the batter y using the
instructions on Page 9. The battery in the fully
charged handset was left unpowered for a long
period of time and has slowly drained.
If you remove a battery from the charger before the
green LED appears, you will have these sy mp tom s.
Do not remove the battery because the battery
strength icon shows full p ower after a short period of
charging.
Let the full charg ing cycle complete before us ing the
handset. You should also use the handset during
the day and recharge it at the end of the day, rather
than performing intermittent charging during the day .
&/5 button.
Try recharging t h e battery us ing the instructions on
Charger has a flashing green LED.
Appendix 35
Page 9. If the problem continues, the battery could
be defective.
Page 45
Specifications —————————————————————————————————————
Specifications
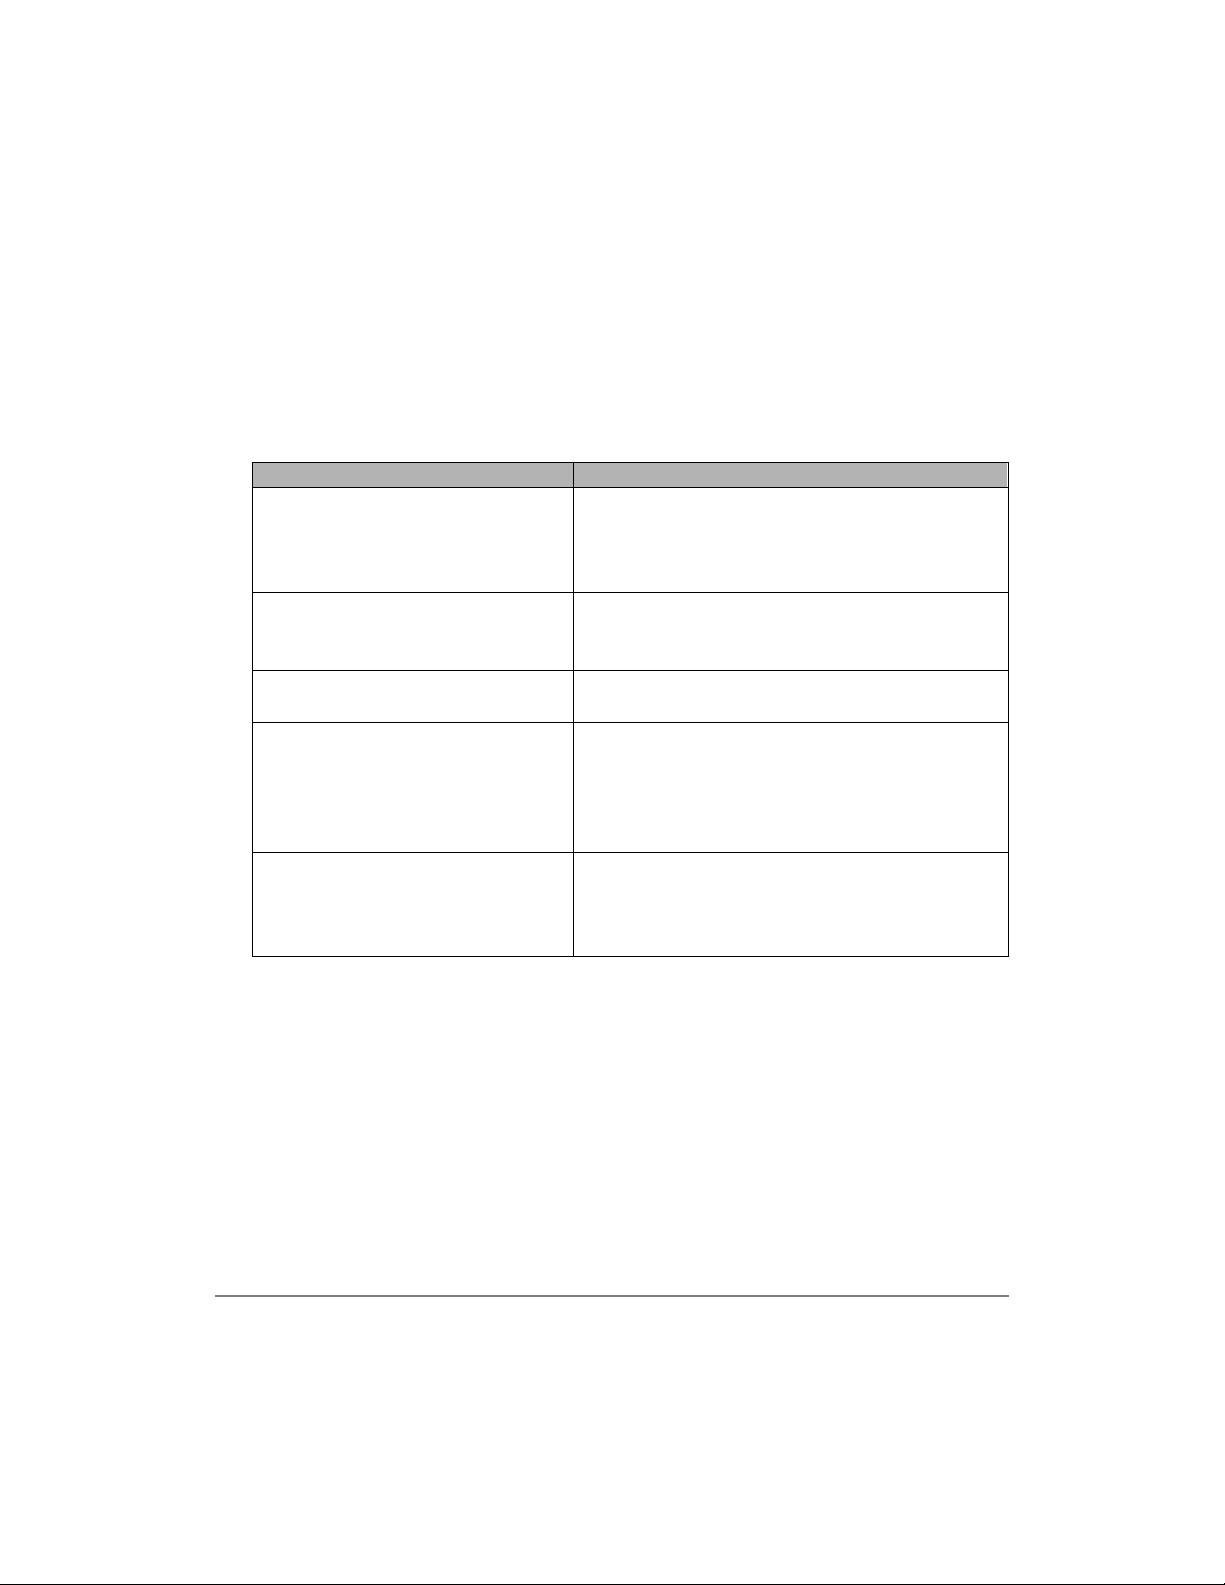
Table 8 lists the specifications for your wireless handset and its battery.
Table 8 Wireless Telephone Specifications
Item Specification
Access method FDMA/TDMA/TDD
Transmission
Temperature
Power
Battery
Size
1 internal antenna
Modulation technique p/4 (QPSK)
Gross bit rate 384 kbps
Operating 0° to 40° C
Storage -10° to 50° C
Humidity 95% non-condensing
Minimum output peak <5 dbm
Maximum output peak 15 dbm ± 1dbm
Rechargeable Nickel Metal Hydride
Capacity:
● Volts 3.6
● Talk Mode 4 hours (typi cal)
● Standby Mode 40 hours (typical)
Width 2.3 inches
Depth 1.0 inches
Height 6.0 inches
Weight Approximately 7 oz.
36 Strata AirLink External Wireless Handset
Page 46

Index
A
accessing features with FCN button, 24
adjusting volume, 23
appendix, 33
specifications, 36
troubleshooting, 33
auto answer, 16
B
buttons, 3
C
changing the idle message, 17
D
delete the last number dialed, 18
display contrast, 19
F
FCN, 24
flash a CO line, 22
H
handset, 2
buttons, 3
charger base, 5
charger LEDs, 5
icons, 4
hookswitch operation, 22
I
icons, 4
installation, 7
battery life
low battery,
charge the handset and batteries, 8
select location, 7
8
L
LCD
low battery indicator,
locking the dial pad, 24
8
M
making calls, 14
memory locations, 25
memory locations 10~69, 25
menu options
adjusting the display contrast,
19
Index 37
Page 47

adjusting the volume of the click, 18
auto answer, 16
change the idle message, 17
delete the last number dialed, 18
ringer type, 20
ringer volume, 21
testing the display, 20
time format, 21
O
one button speed dialing, 25
operation
adjusting volume,
deleting a stored number or name, 30
editing speed dial numbers and
names,
enter a wait, 27
FCN feature access, 24
finding av ailable memory
locations,
flashing a CO line, 22
locking the dial pad, 24
making calls, 14
menu
adjusting the display contrast,
auto answer, 16
changing the idle message, 17
changing the ringer, 20
changing the ringer volume, 21
changing the time format, 21
click volume change, 18
delete the last number dialed, 18
display test option, 20
power on and off, 14
program a pause, 27
receiving calls, 15
29
23
25
19
ring mute, 23
scroll memory locations for spee d dial
numbers,
searching for the speed dial name, 26
special characters and names, 28
speed dial, 25
entering a name, 26
using memory locations
with one button, 25
storing a speed dial name, 27
storing a speed dial number, 27
unlock the dial pad, 24
using the hookswitch, 22
voice mute, 23
10~69,
26
25
P
pause, 27
power on and off, 14
R
receiving calls, 15
ring mute, 23
ringer type feature, 20
ringer volume feature, 21
S
scrolling for speed dial memory
locations,
special characters and names, 28
specifications, 36
speed dial, 25
enter a name, 26
numbers and names, editing, 29
search for a name, 26
storage, 27
26
38 Strata AirLink External Wireless Handset
Page 48

stored number or name, deleting, 30
storing a speed dial name, 27
T
testing the display feature, 20
time format feature, 21
troubleshooting, 33
suggestions, 34
U
unlock the dial pad, 24
V
voice mute, 23
volume
18
click,
ringer, 21
W
wait, 27
Index 39
 Loading...