

Page 1

TOSHIBA Label Printer
BCP Setting Tool
B-EX4 series Operation Manual
5th Edition: June 01, 2017
Page 2

TABLE OF CONTENTS
1. INTRODUCTION 4
SUPPORTED PRINTERS .......................................................................................................................................... 4
2. START-UP 5
PRINTER ............................................................................................................................................................... 5
PC ....................................................................................................................................................................... 6
3. PREPARATION 7
MAIN SCREEN ....................................................................................................................................................... 7
MENUS ................................................................................................................................................................. 9
File ................................................................................................................................................................... 9
Edit ................................................................................................................................................................. 11
View ............................................................................................................................................................... 12
Help ............................................................................................................................................................... 13
PRINTER SETTING ............................................................................................................................................... 14
USB ............................................................................................................................................................... 16
LAN ................................................................................................................................................................ 17
COM .............................................................................................................................................................. 19
ENVIRONMENT .................................................................................................................................................... 21
[Interface] ....................................................................................................................................................... 21
[Environment] ................................................................................................................................................ 22
Password Change ......................................................................................................................................... 24
PROCESSING SCREEN ......................................................................................................................................... 25
Progress Bar Screen ..................................................................................................................................... 25
Completion Screen ........................................................................................................................................ 27
Progress Status ............................................................................................................................................. 28
4. FUNCTIONS 30
PARAMETER SETTING .......................................................................................................................................... 30
General Tab ................................................................................................................................................... 32
General (2) Tab .............................................................................................................................................. 37
Device Tab ..................................................................................................................................................... 42
LAN Tab ......................................................................................................................................................... 44
WLAN Tab ..................................................................................................................................................... 47
WLAN (2) Tab ................................................................................................................................................ 51
RFID Tab........................................................................................................................................................ 54
MAINTENANCE ..................................................................................................................................................... 57
Self Diagnosis Tab ......................................................................................................................................... 57
Setting Tab ..................................................................................................................................................... 58
DOWNLOAD ......................................................................................................................................................... 63
Firmware Download....................................................................................................................................... 63
BASIC Download ........................................................................................................................................... 65
Emulation ....................................................................................................................................................... 68
Create HTML/XML ROM ............................................................................................................................... 72
TOOL .................................................................................................................................................................. 74
Tool Tab ......................................................................................................................................................... 74
Create External Character Tab ...................................................................................................................... 75
Test Print Tab ................................................................................................................................................. 79
EMULATION ......................................................................................................................................................... 83
Z MODE SYSTEM PARAMETER SETTING ................................................................................................................ 84
Z Mode Parameter Tab .................................................................................................................................. 84
Z MODE INITIAL VALUES & TABLE SETTING ............................................................................................................. 89
Z Mode InitValue Tab ..................................................................................................................................... 89
Z Mode FontTable Tab ................................................................................................................................... 93
Z Mode DriveMapping Tab ............................................................................................................................ 97
Z Mode ResponseCommand Tab .................................................................................................................. 98
D MODE INITIAL VALUES SETTING ........................................................................................................................ 106
D Mode InitValue Tab .................................................................................................................................. 106
D Mode ResponseCommand Tab ................................................................................................................ 110
5. APPENDIX 113
Page 3

ERROR MESSAGE LIST ....................................................................................................................................... 113
Page 4

1. Introduction
Thank you for purchasing the "BCP Setting Tool", a setting tool for the label printers of TOSHIBA TEC
Corporation (hereinafter referred to as "TOSHIBA TEC").
This document gives you a general description of the "BCP Setting Tool" (hereinafter referred to as "this
Product") including the installation procedure and features.
Supported Printers
The Product supports the following printers:
B-EX4T1-G/T (203dpi/305dpi)
B-EX4T1-T JP (305dpi)
B-EX4T2-G/T (203dpi/300dpi)
B-EX4D2-G/T (203dpi/300dpi)
B-EX4T2-H (600dpi)
B-EX4T3-H (600dpi)
Page 5

2. Start-up
Printer
The printer shall be idle in the online mode which accepts print jobs (hereinafter referred to as "online mode")
to communicate with this Product.
The functions of this Product are not executed unless the printer is in the online mode or idle state.
Exceptionally, the file transmissions and reset function are accepted regardless of the printer status. Some
functions may not be enabled depending on the printer status. In this case, turn off the printer and back to
on.
Changes in the parameter settings take effect upon completion of the setting. Depending on the changed
parameters, printer configurations need to be changed accordingly.
In the case the security settings for the wireless LAN are changed, alternate the security settings for the
computer, too.
When an IP address, port number, or host name for LAN is changed, the setting on the printer will be
automatically alternated properly.
When the command control code is changed, the environment setting will be automatically alternated
accordingly.
Page 6
PC
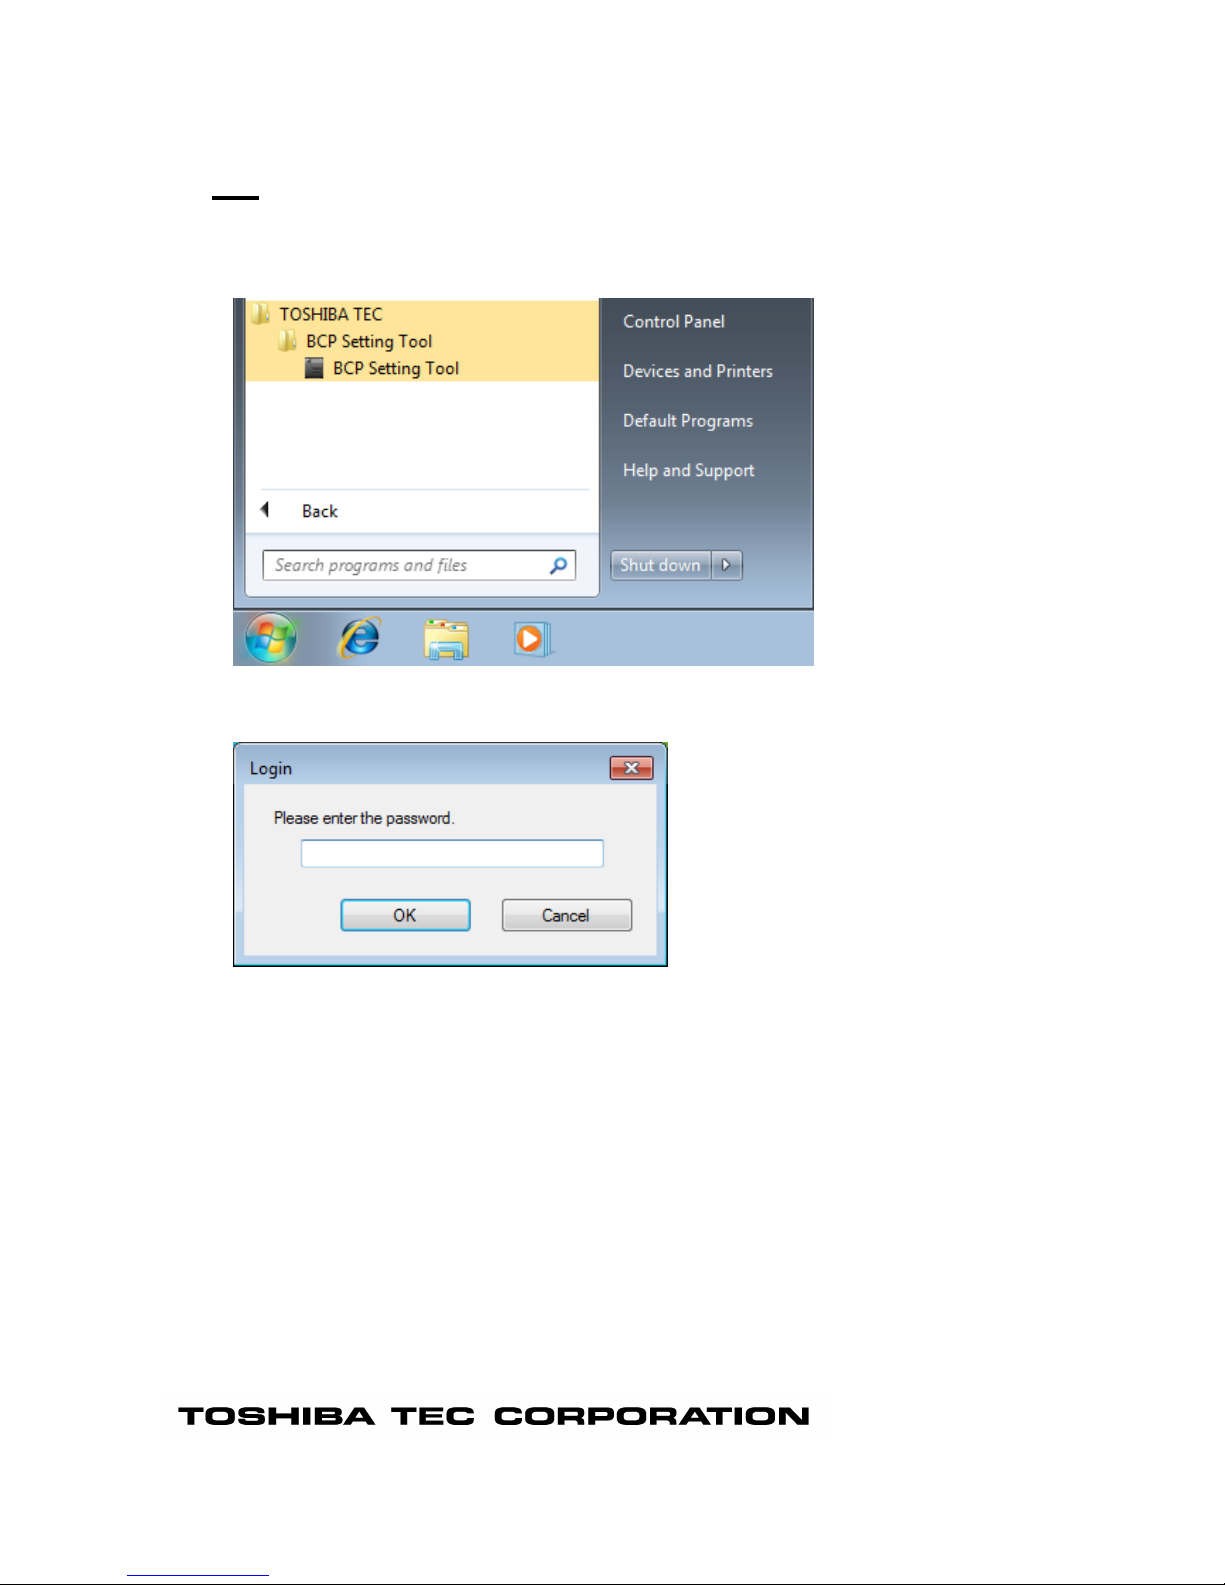
1. Select [Start] - [All Programs] - [TOSHIBA TEC] - [BCP Setting Tool] - [BCP Setting Tool] and click
[BCP Setting Tool].
2. The [Login] screen is displayed when the log-in password has been set.
Enter the password, then click [OK].
When [Cancel] is clicked, the [Login] screen is closed.
The entered password is displayed with hidden characters.
When the password matched, this Product starts.
If a wrong password is entered, the error message is displayed.
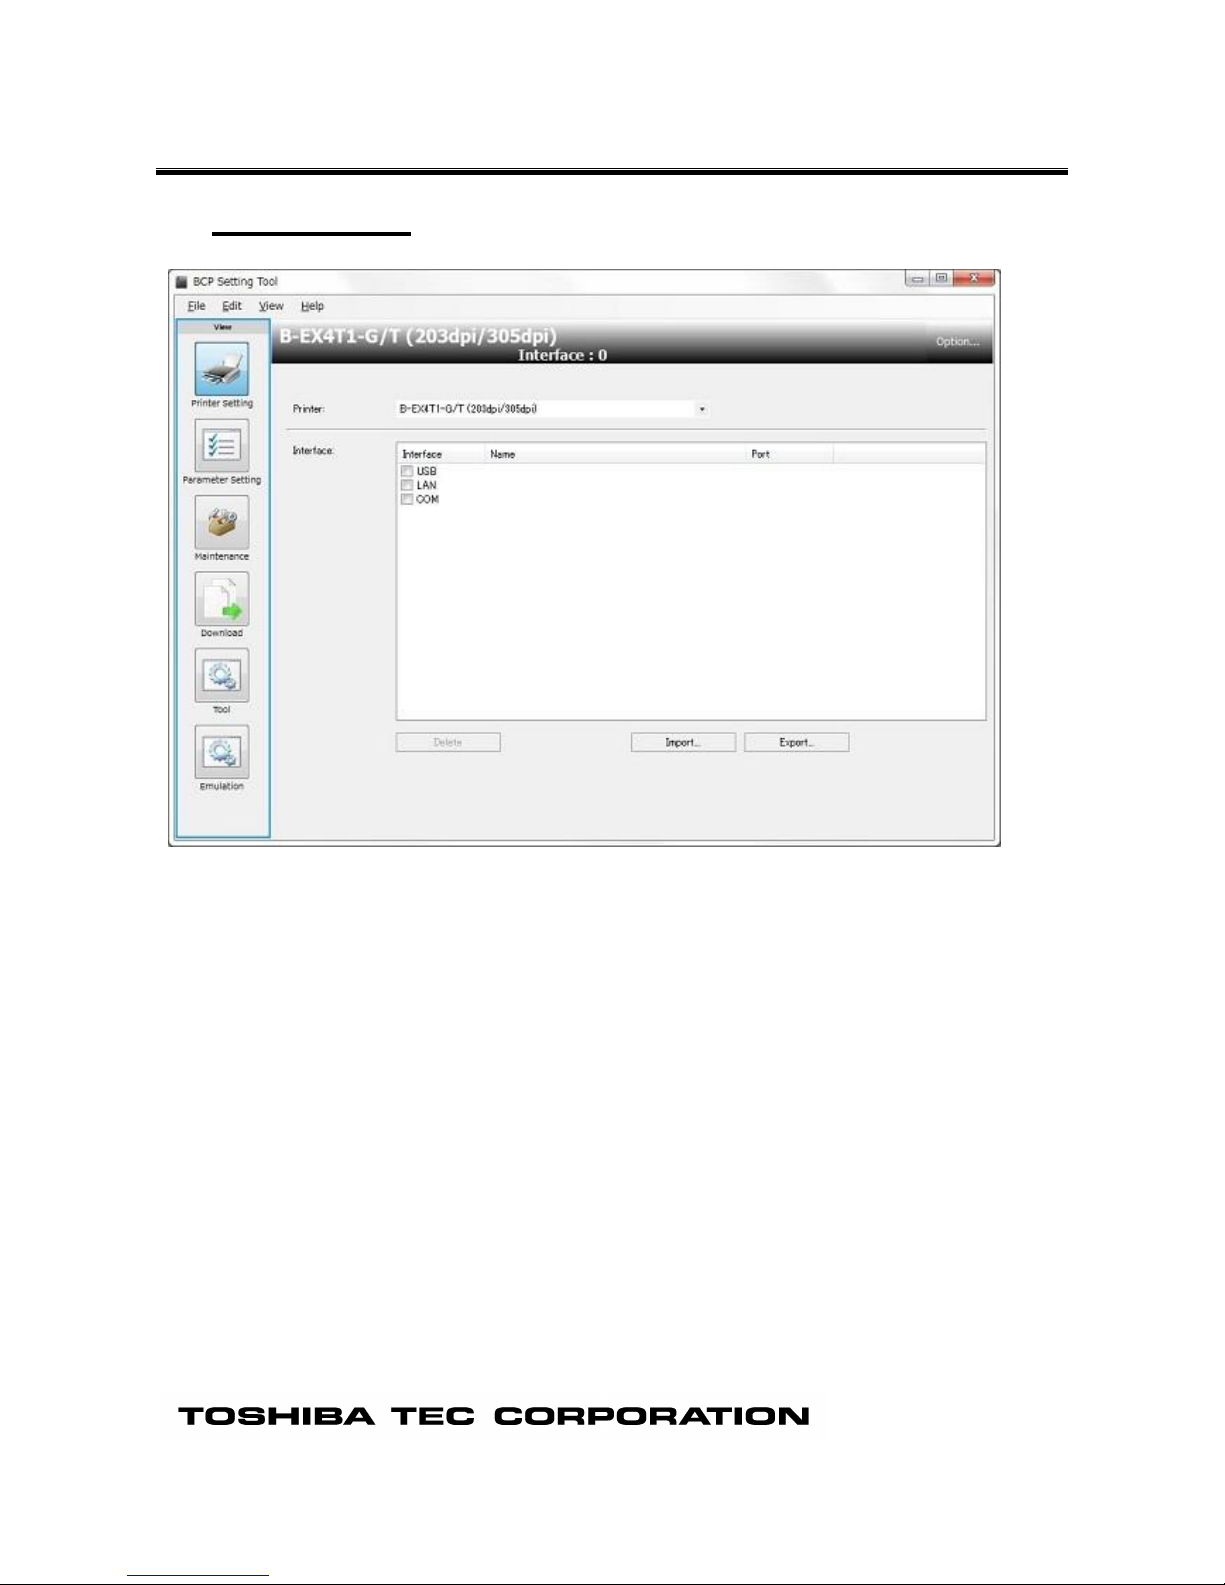
3. When this Product is started, the [Printer Setting] screen is displayed.
Select the printer model to be connected and the interface used for communication.
Page 7
3. Preparation
Main Screen
When this Product is started, the [Printer Setting] screen is displayed.
Menu bar
Menus to support each function are provided.
Menu icon
The Menu icons are placed in this area.
When an icon is clicked, the corresponding menu screen appears on the main view area.
The icon being selected is highlighted.
Printer Setting: Enables selecting the printer model to be connected and configuring the
interface used.
Parameter Setting: Obtains or changes the parameter settings.
▪ General Tab, General (2) Tab: Settings related to basic printer behaviors
and fine adjustment
▪ Device Tab: Settings related to the device including the
interface
▪ LAN Tab: Settings related to the network
▪ WLAN Tab, WLAN (2) Tab: Settings related to wireless LAN
▪ RFID Tab: Settings related to RFID encoding
Maintenance: Obtains or initializes the printer maintenance information.
▪ Self Diagnosis Tab: Processing related to self-diagnosis
▪ Setting Tab: Processing related to the memory
Download: Downloads the printer firmware.
Page 8

▪ Firmware Download Tab: Downloads printer firmware
▪ BASIC Download Tab: Downloads the BASIC program
▪ Emulation Download Tab: Downloads the Z Mode/D Mode BASIC
program
▪ Create HTML/XML ROM Tab: Creates HTML/XML ROM file
Tool: Other functions
▪ Tool Tab: Sends a selected file in a binary format.
▪ Create External Character Tab: Creates external character files to be stored
in the printer.
▪ Test Print Tab: Performs a test print for checking the
communication and print quality.
Emulation: Settings related to Z Mode/D Mode parameters
▪ Z Mode System Parameter Setting: Settings related to Z Mode parameters
▪ Z Mode Initial values & table Setting Tab: Settings related to Z Mode
default parameter, font mapping table and
drive allocation
▪ D Mode Initial values Setting Tab: Settings related to D Mode default
parameters
Header view
Displays the conditions for communication with the printer.
The settings specified in the [Printer Setting] screen are reflected.
[Options...] button
Displays the [Environment] screen which allows changing the operating conditions for this Product.
This Product needs to be restarted for the changed language take effect.
Main view
Displays the setting screen of the selected menu icon.
The functions of the selected menu are executed on this area.
Page 9
Menus
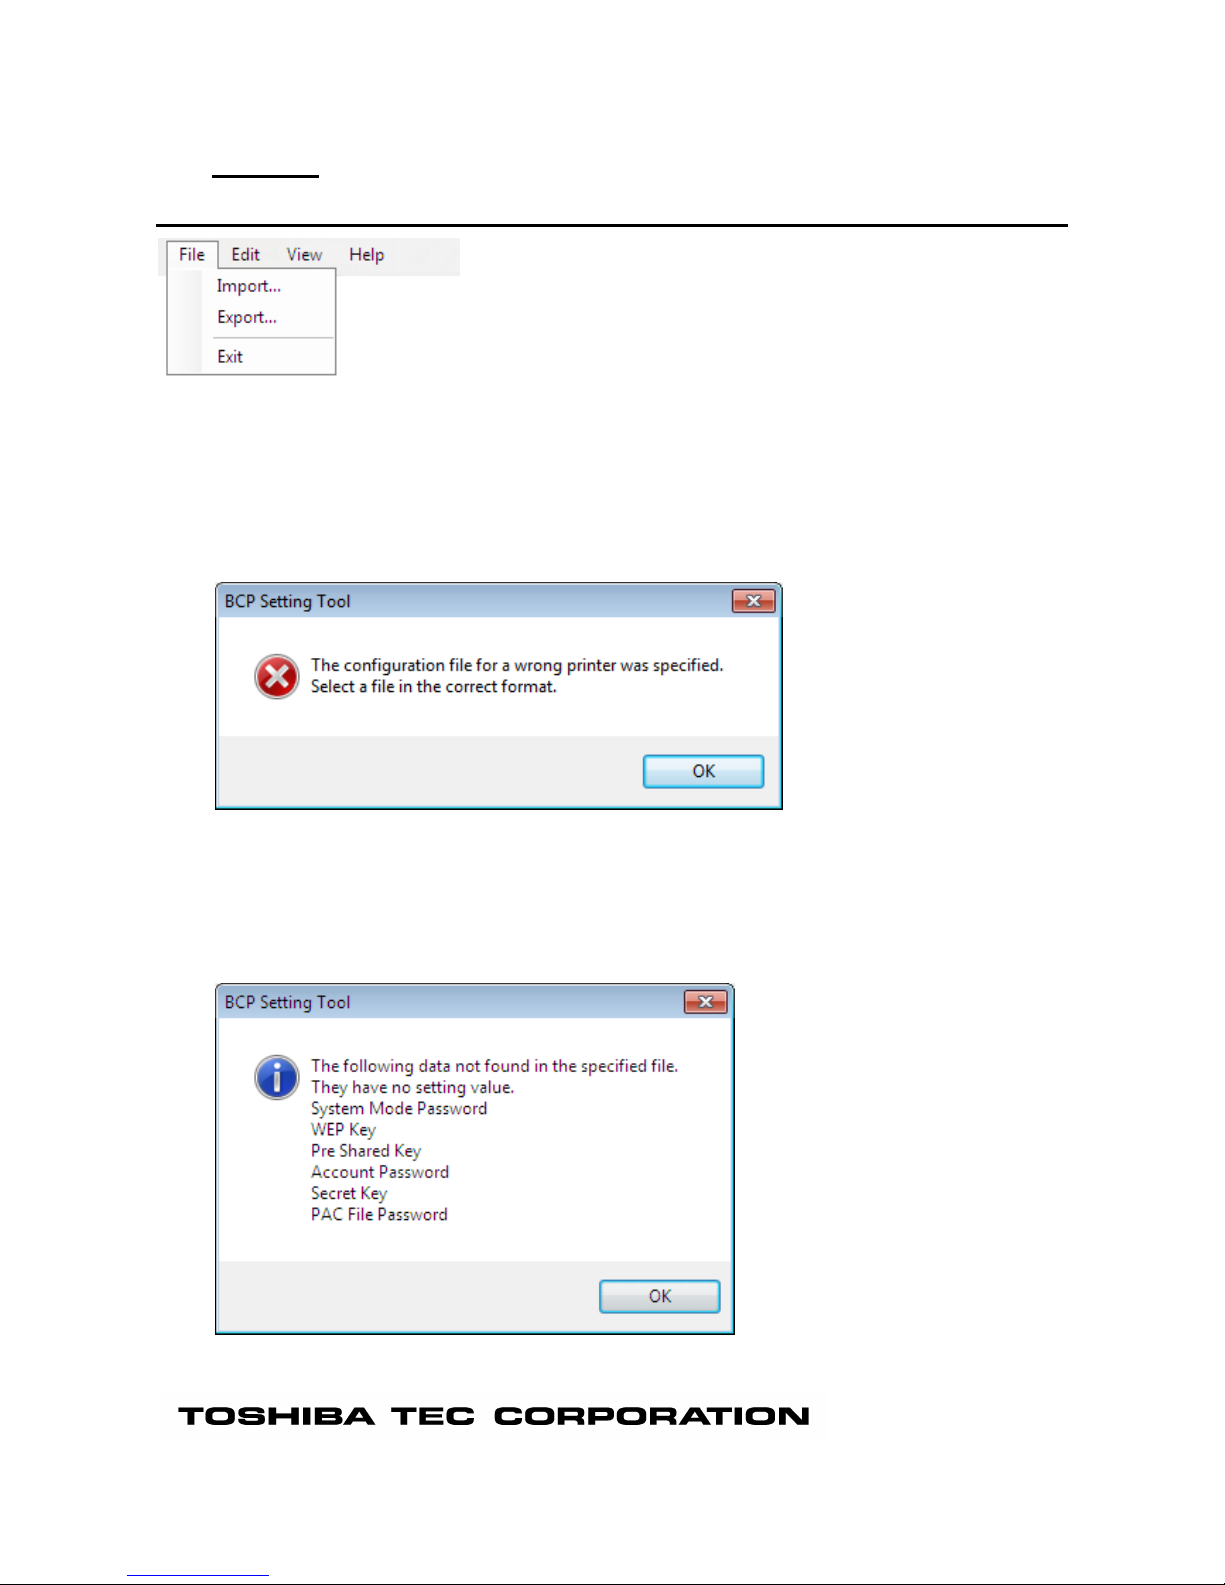
File
[Import...]
This menu is used to retrieve setup information from a specified file.
This menu is selectable only when the [Parameter Setting] screen is activated.
When this menu is clicked, the [Import] screen is displayed. Specify a setup information file, click [Open],
and the file import is started.
When a file other than the setup information file is specified, the error message is displayed
When the setup information file is not for the printer model selected on the [Printer Setting] screen, the
following confirmation message appears.
When [Yes] is clicked, the printer model selected on the [Printer Setting] screen is changed and a file
import is executed.
When [No] is clicked, the file import is canceled.
The setup screen status at storage can be reproduced.
In addition to parameters, the checkbox settings for groups are reproduced.
When no security information is found in the specified file, the following message is displayed.
When the specified file contains security information, imported security information is displayed with
Page 10
hidden characters.
[Export...]
This menu is used to store setup information in a specified file.
This menu is selectable only when the [Parameter Setting] screen is activated.
When this menu is clicked, the [Export] screen is displayed. Specify a file where the setup information is
saved, click [Save], then the file export is started.
If writing the data into the specified file fails, an error message will be displayed.
It also stores the status of the current setup screen.
In addition to parameters, the checkbox settings for groups are reproduced.
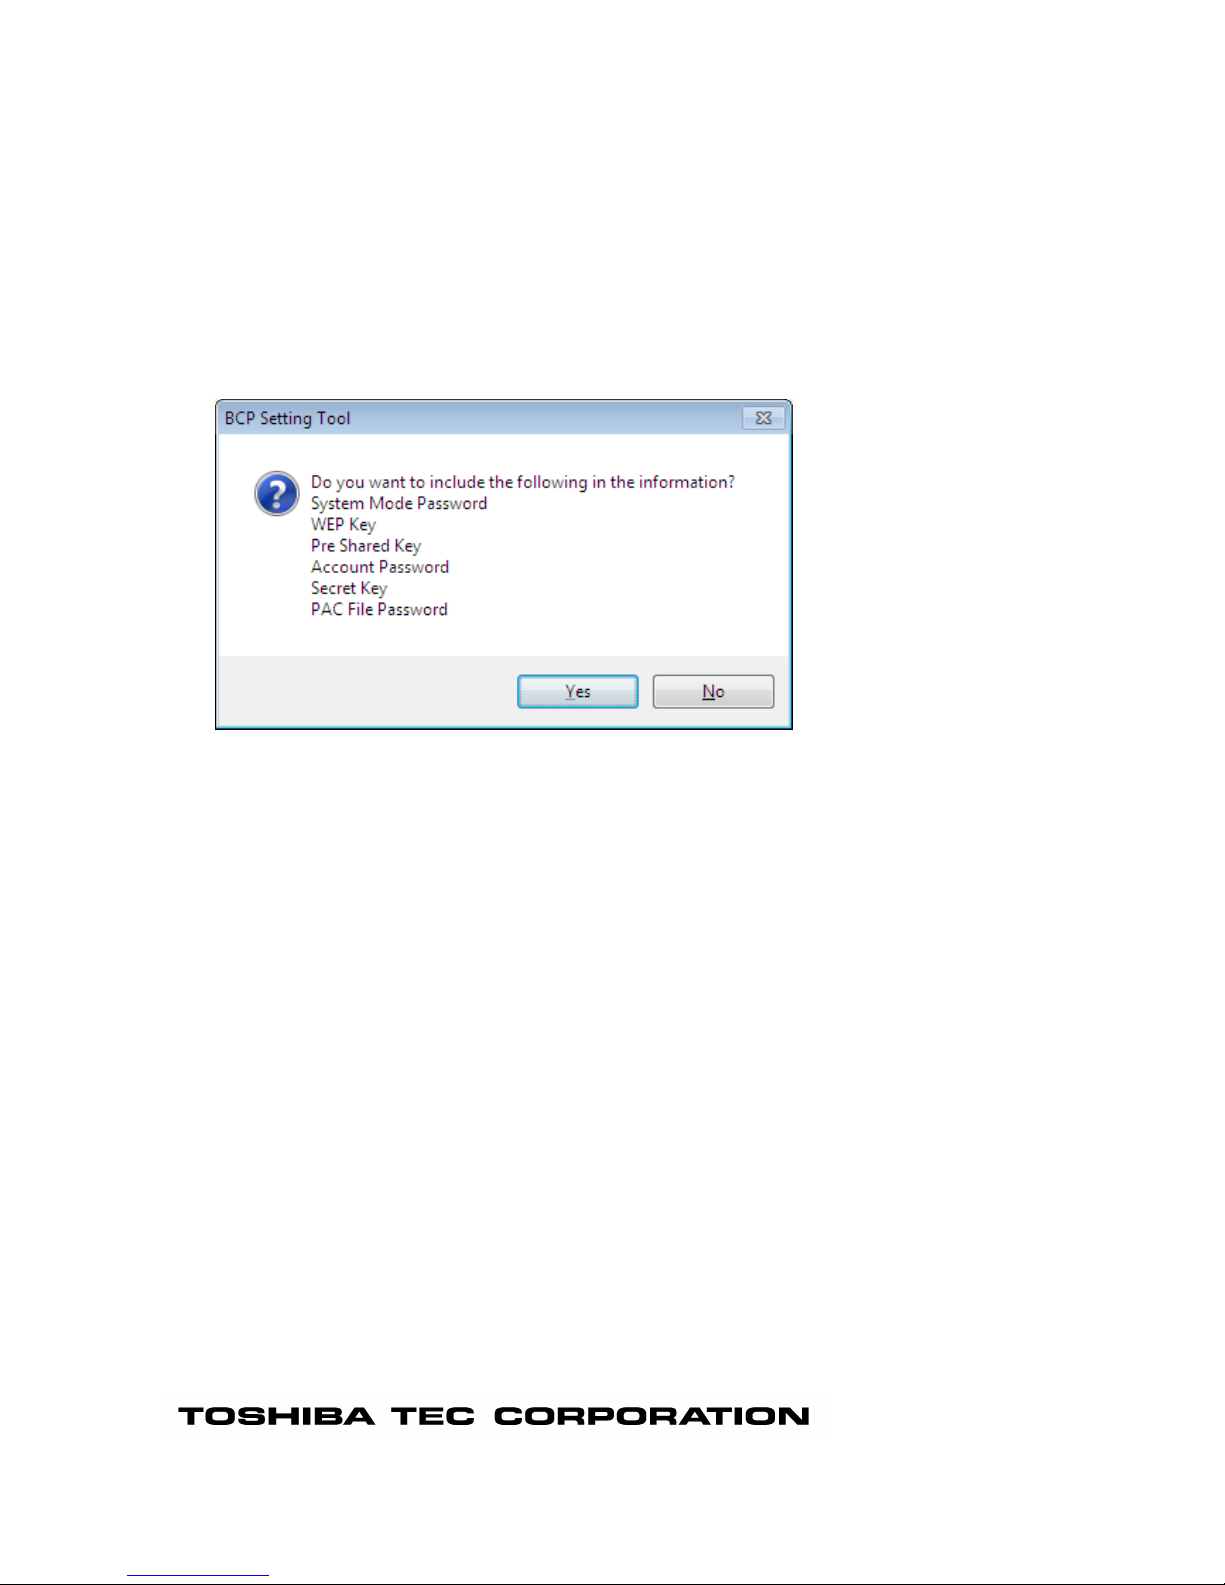
Before storage, the following message is displayed.
When you want to store security information contained in the setup information, click [Yes]. Since
security information is important, be careful before storing files.
When you do not want to store security information, click [No].
[Exit]
When this menu is clicked, this Product exits without saving the current settings.
However, the settings on the [Printer Setting] screen and [Environment] screen remain effective.
When this Product is started next time, the settings in the all pages except the [Printer Setting] screen
and [Environment] screen are initialized.
Page 11
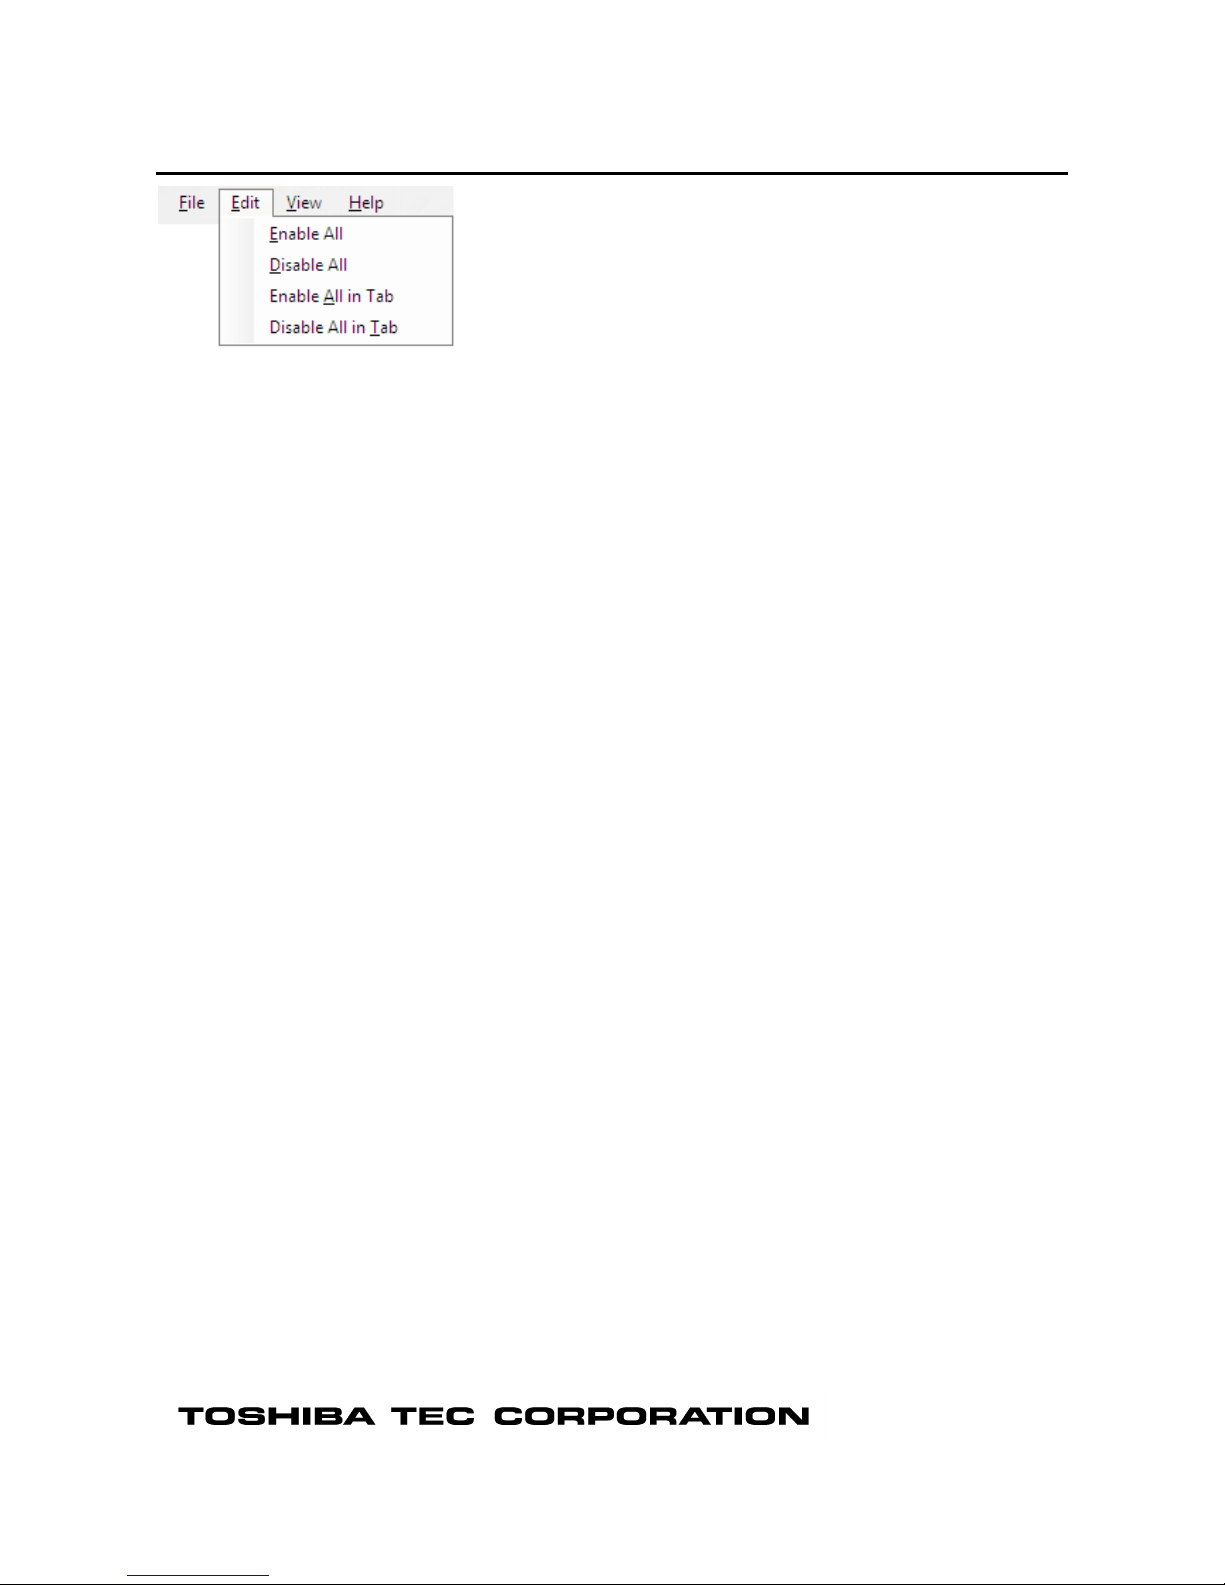
Edit
[Enable All]
This menu is used to check all checkboxes on all tabs.
This menu is selectable only when the [Parameter Setting] screen is activated.
[Disable All]
This menu is used to uncheck all checkboxes on all tabs.
This menu is selectable only when the [Parameter Setting] screen is activated.
[Enable All in Tab]
This menu is used to check all checkboxes on the tab.
This menu is selectable only when the [Parameter Setting] screen is activated.
[Disable All in Tab]
This menu is used to uncheck all checkboxes on the tab.
This menu is selectable only when the [Parameter Setting] screen is activated.
Page 12

View
[Restore to Default]
This menu is used to restore the all setting values on the all tab pages to the default.
This menu is selectable only when the [Parameter Setting] screen is activated.
[Restore Display to Default]
This menu is used to restore all setting values on the selected tab page to the default.
While the [Parameter setting] screen is activated, the setting values only on the displayed tab page are
restored to the default.
Page 13
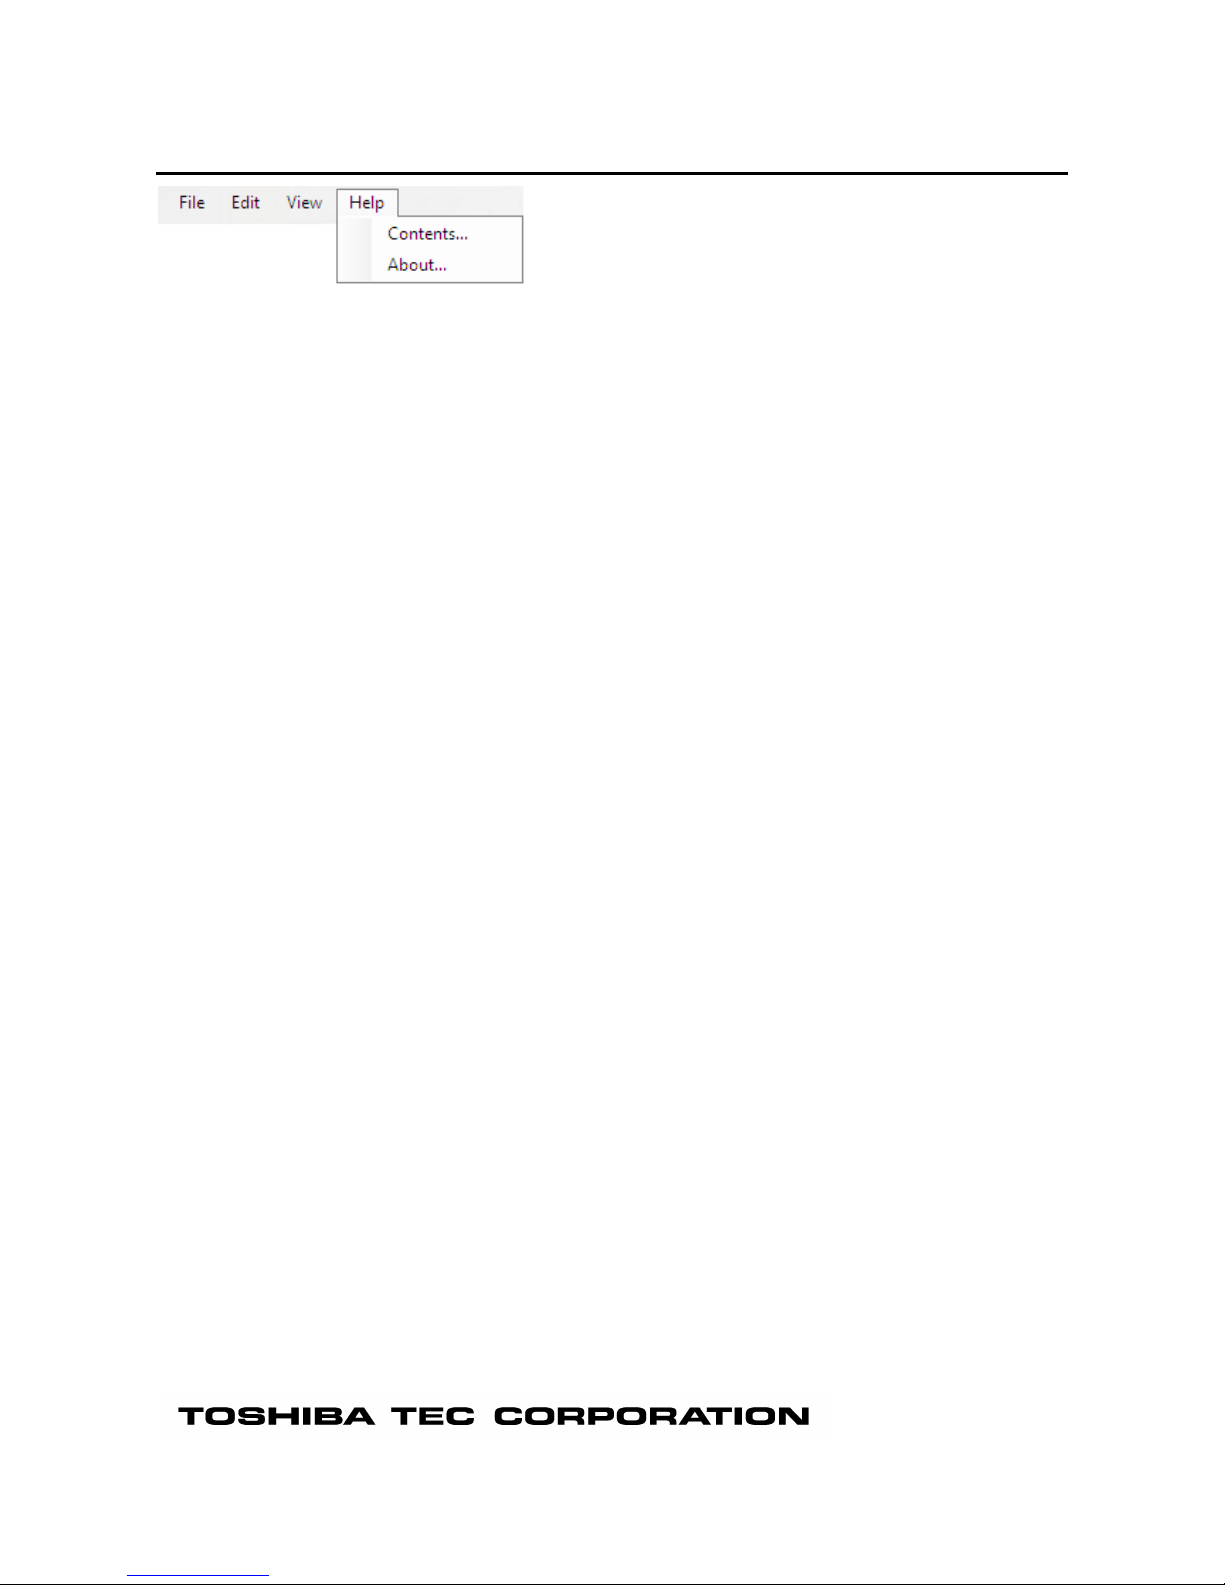
Help
[Contents...]
This menu is used to display the main screen for Help.
[About...]
This menu is used to display version information.
Page 14
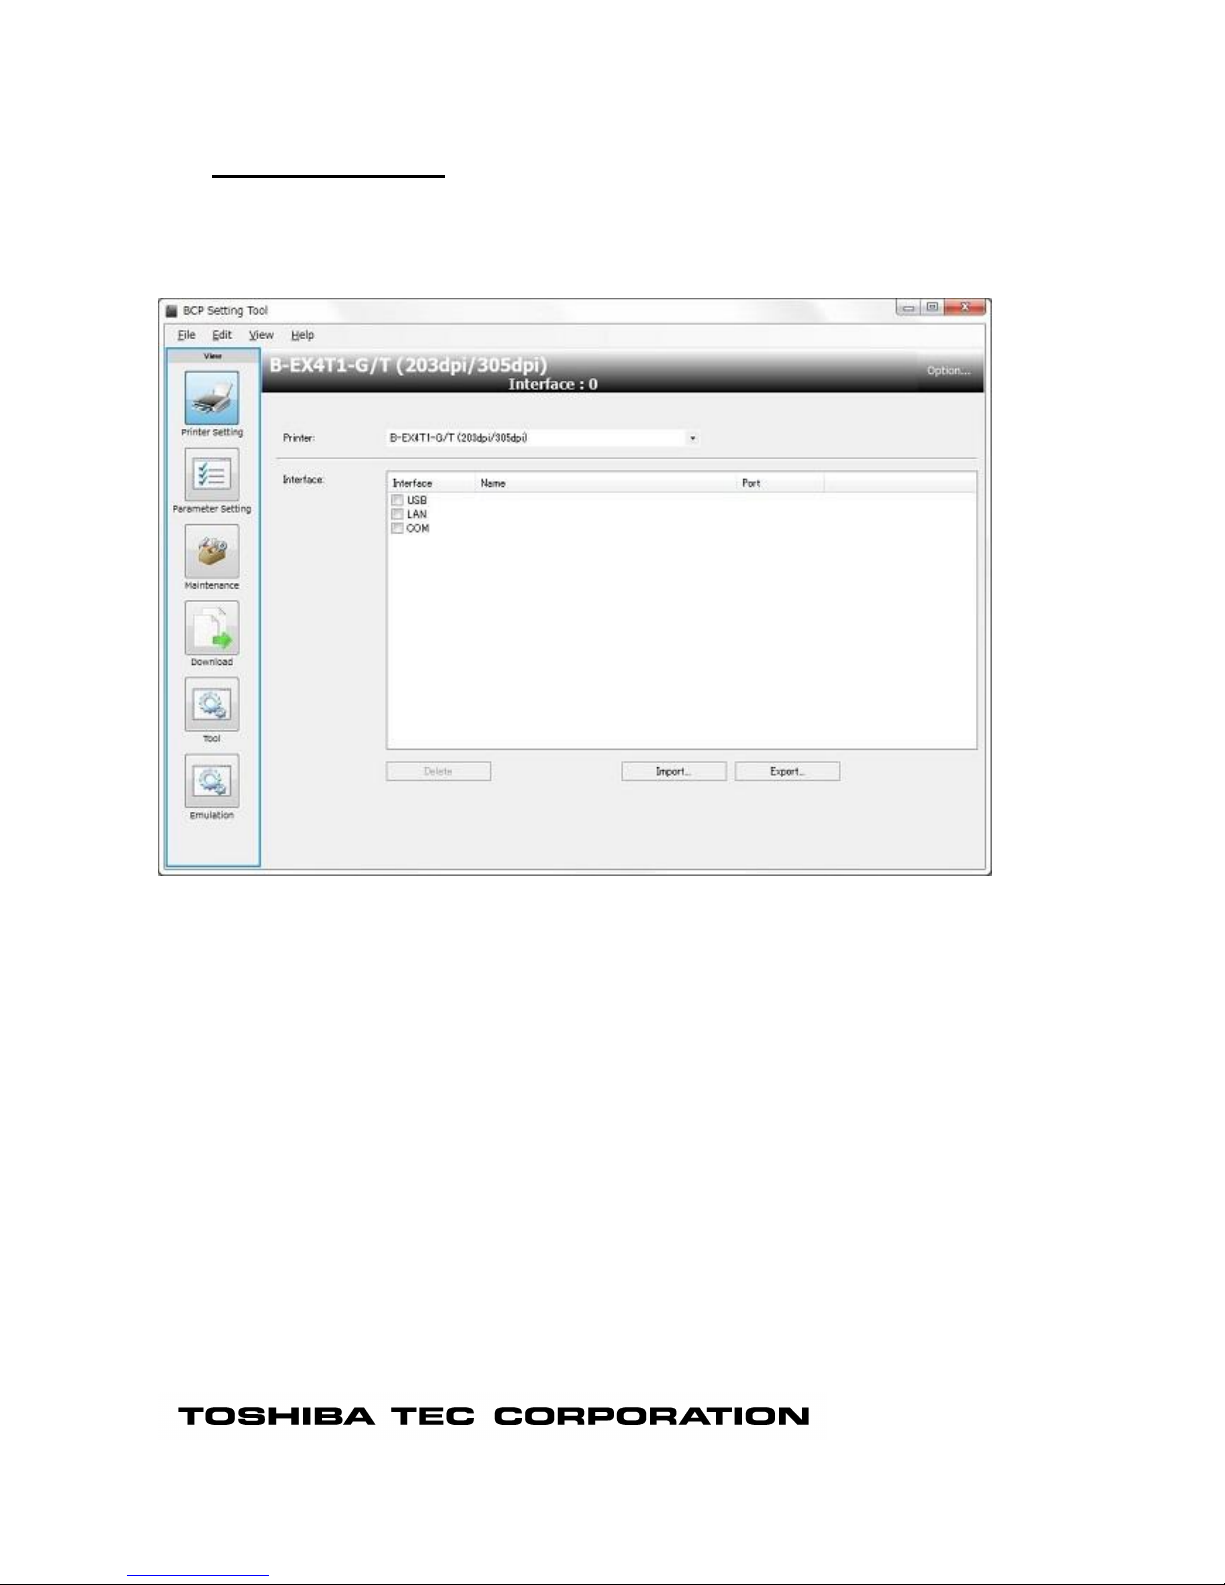
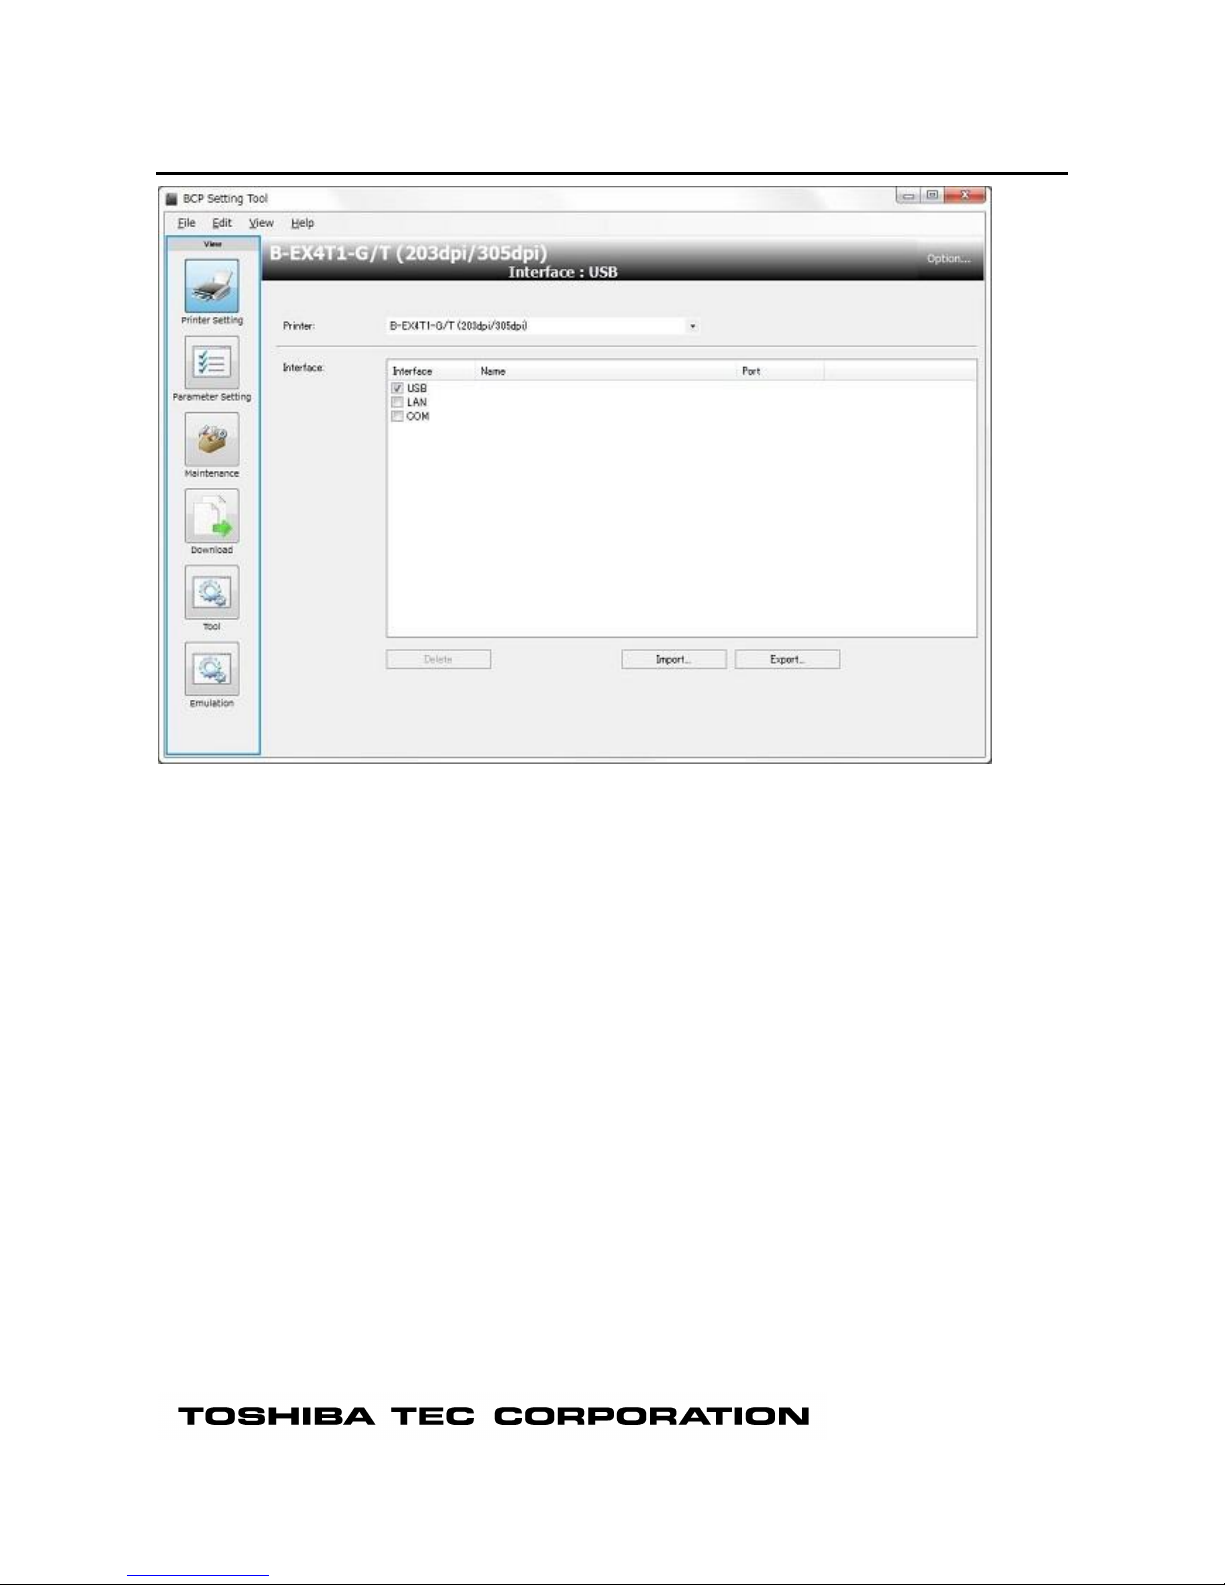
Printer Setting
The printer setting menu enables selecting a printer model to be connected and configuring the interface
used.
When the [Printer Setting] icon on the menu icon area is clicked, the following screen is displayed.
The setting is not saved by a member of the Users.
Page 15
[Printer]
Select a printer model to be connected.
Restart this Product for the changed setting to take effect.
When the specified printer model is different from the actually connected one, this Product does not work
properly.
Be sure to select the same printer model with the one to be connected.
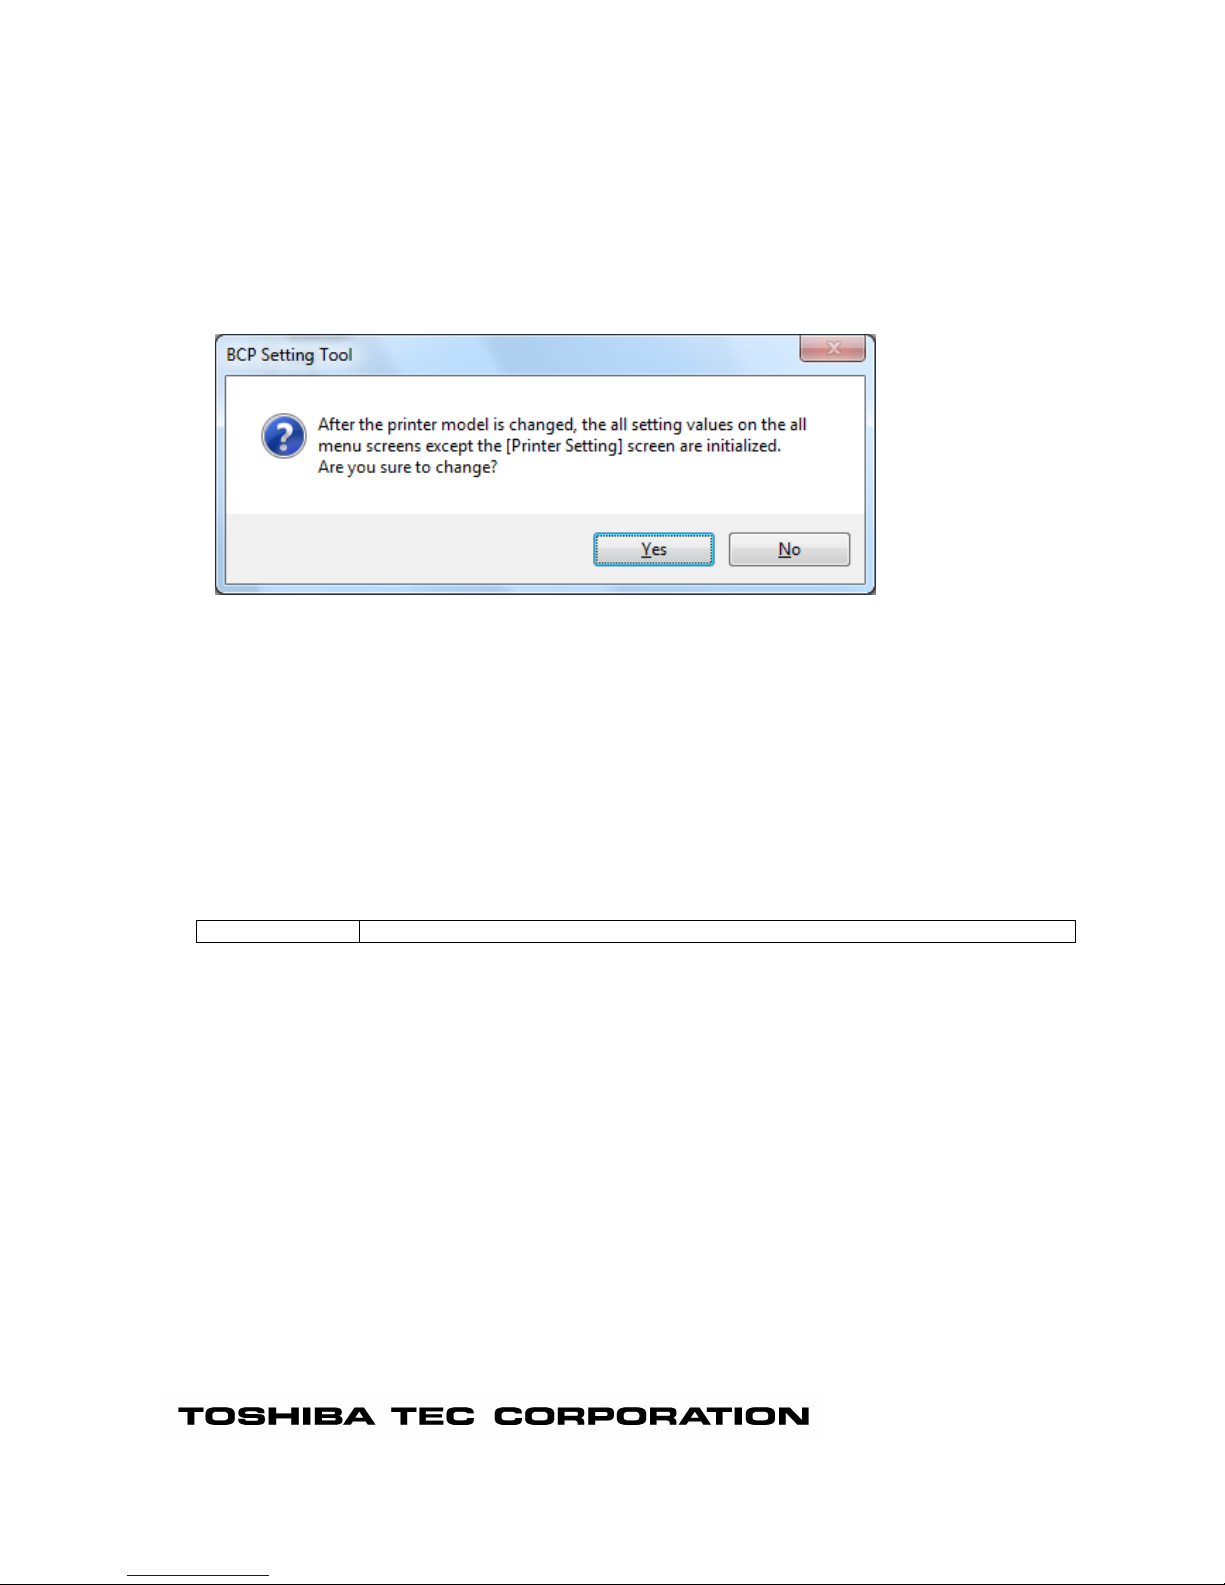
When the printer model is changed, all setting values on all menu screens except the [Printer Setting]
screen are restored to the initial values.
At this time, the confirmation message is displayed.
When [Yes] is clicked, this Product is restarted after saving the changes.
When [No] is clicked, the screen returns to the [Environment] screen without saving the changes.
[Interface]
Select an interface to be used.
The default is not selected during the installation.
The setting is saved upon changed, and reflected in the header view.
When USB, LAN or COM is selected, the communication parameters are displayed.
Communication with the printer is performed with the selected interface and communication parameter
settings.
Interface enables collective processing for multiple printers connected to the network. Up to 50 printers
can be registered.
Options
USB, LAN, COM
Note: When COM is used, be sure to set the port of the installed driver to the one other than the setting value. If
the same interface as the port of the printer driver is set, communication will not be performed appropriately.
Page 16
USB
On connecting Printer and USB cable, it enables automatically.
Page 17

LAN
[Name]
Displays the host name or IP address set for the connected printer.
[Port]
Displays the port number set for the connected printer.
Page 18
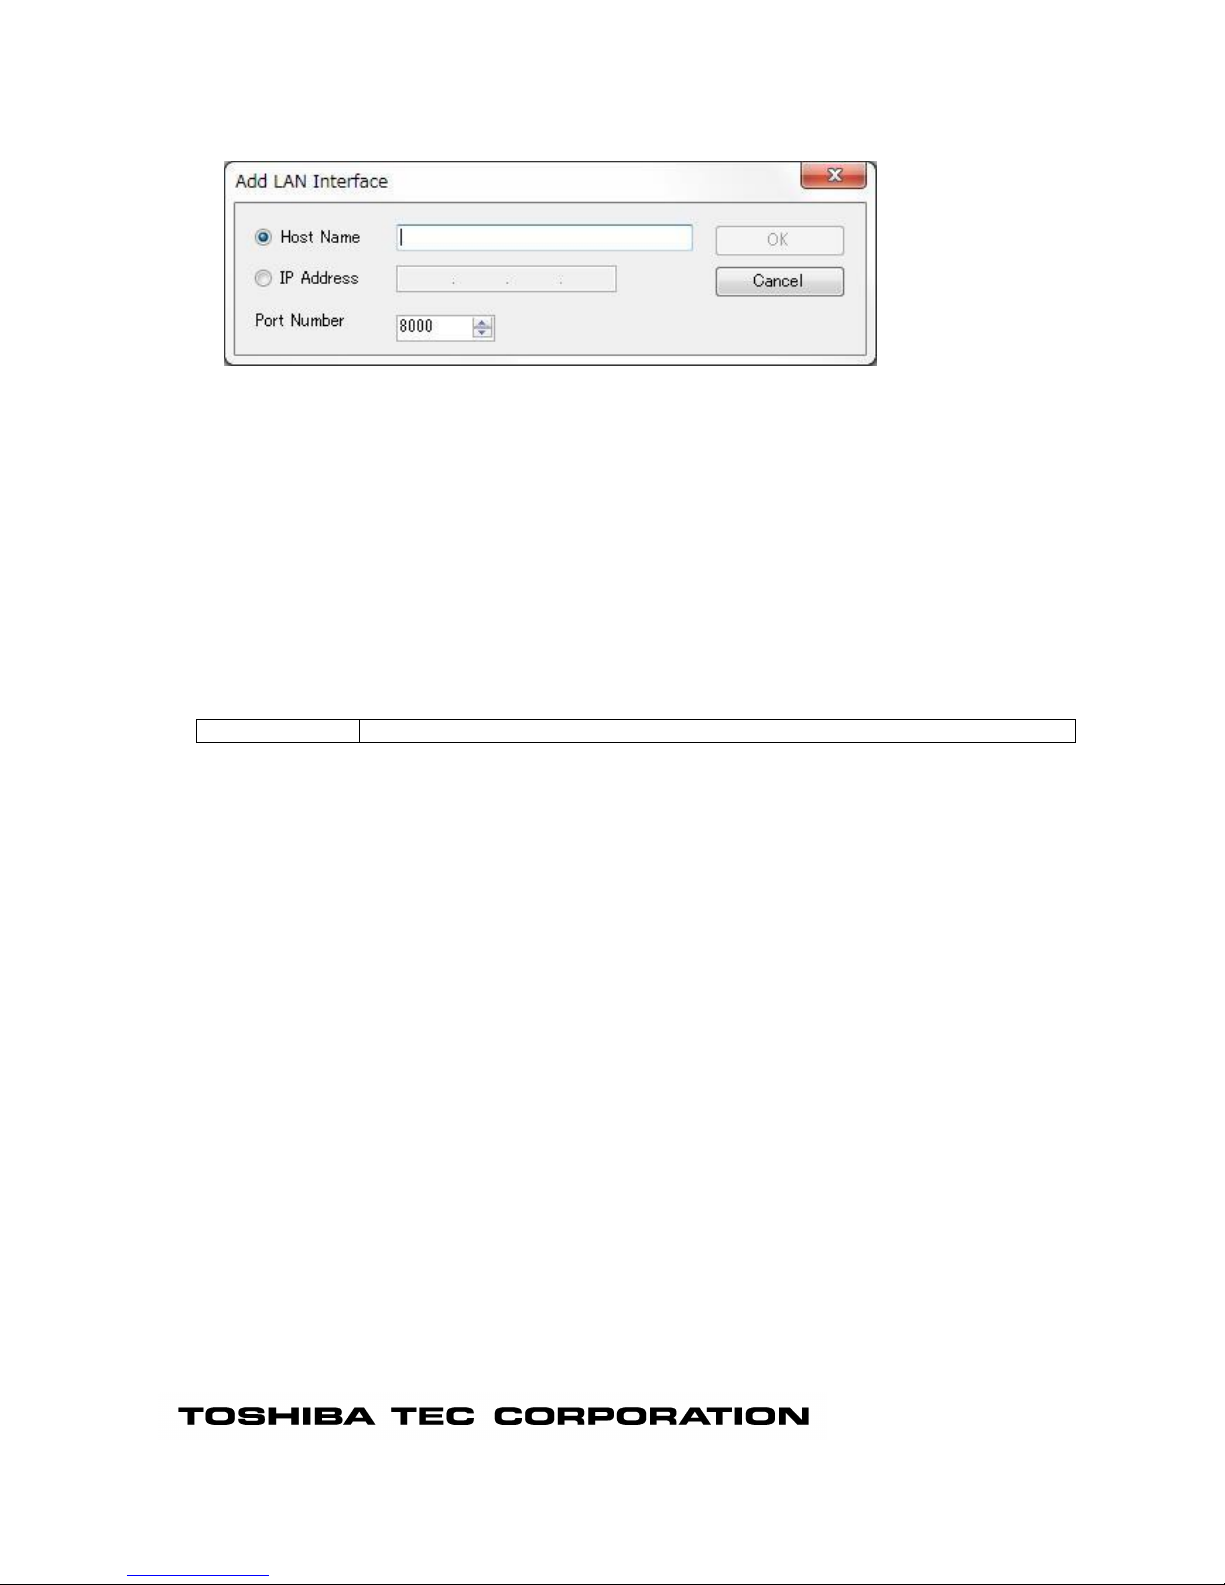
When the [LAN] checkbox is selected, the “Add LAN Interface” dialog box is displayed.
After the value is filled in and [OK] is clicked, the dialog box is closed and the setting is reflected in the
interface list.
At selecting [Cancel], the process is canceled.
[Host Name]
Enter the host name set for the connected printer.
Up to 255 alphanumeric characters
[IP Address]
Enter the IP address set for the connected printer.
"X.X.X.X" format
[Port Number]
Set the port number set for the connected printer.
The default value differs depending on the models.
Range
0 to 65535
[Notes]
The maximum number of registerable printers in the list is 50.
Page 19
COM
[Name]
Displays each parameter of the COM ports,.
Page 20
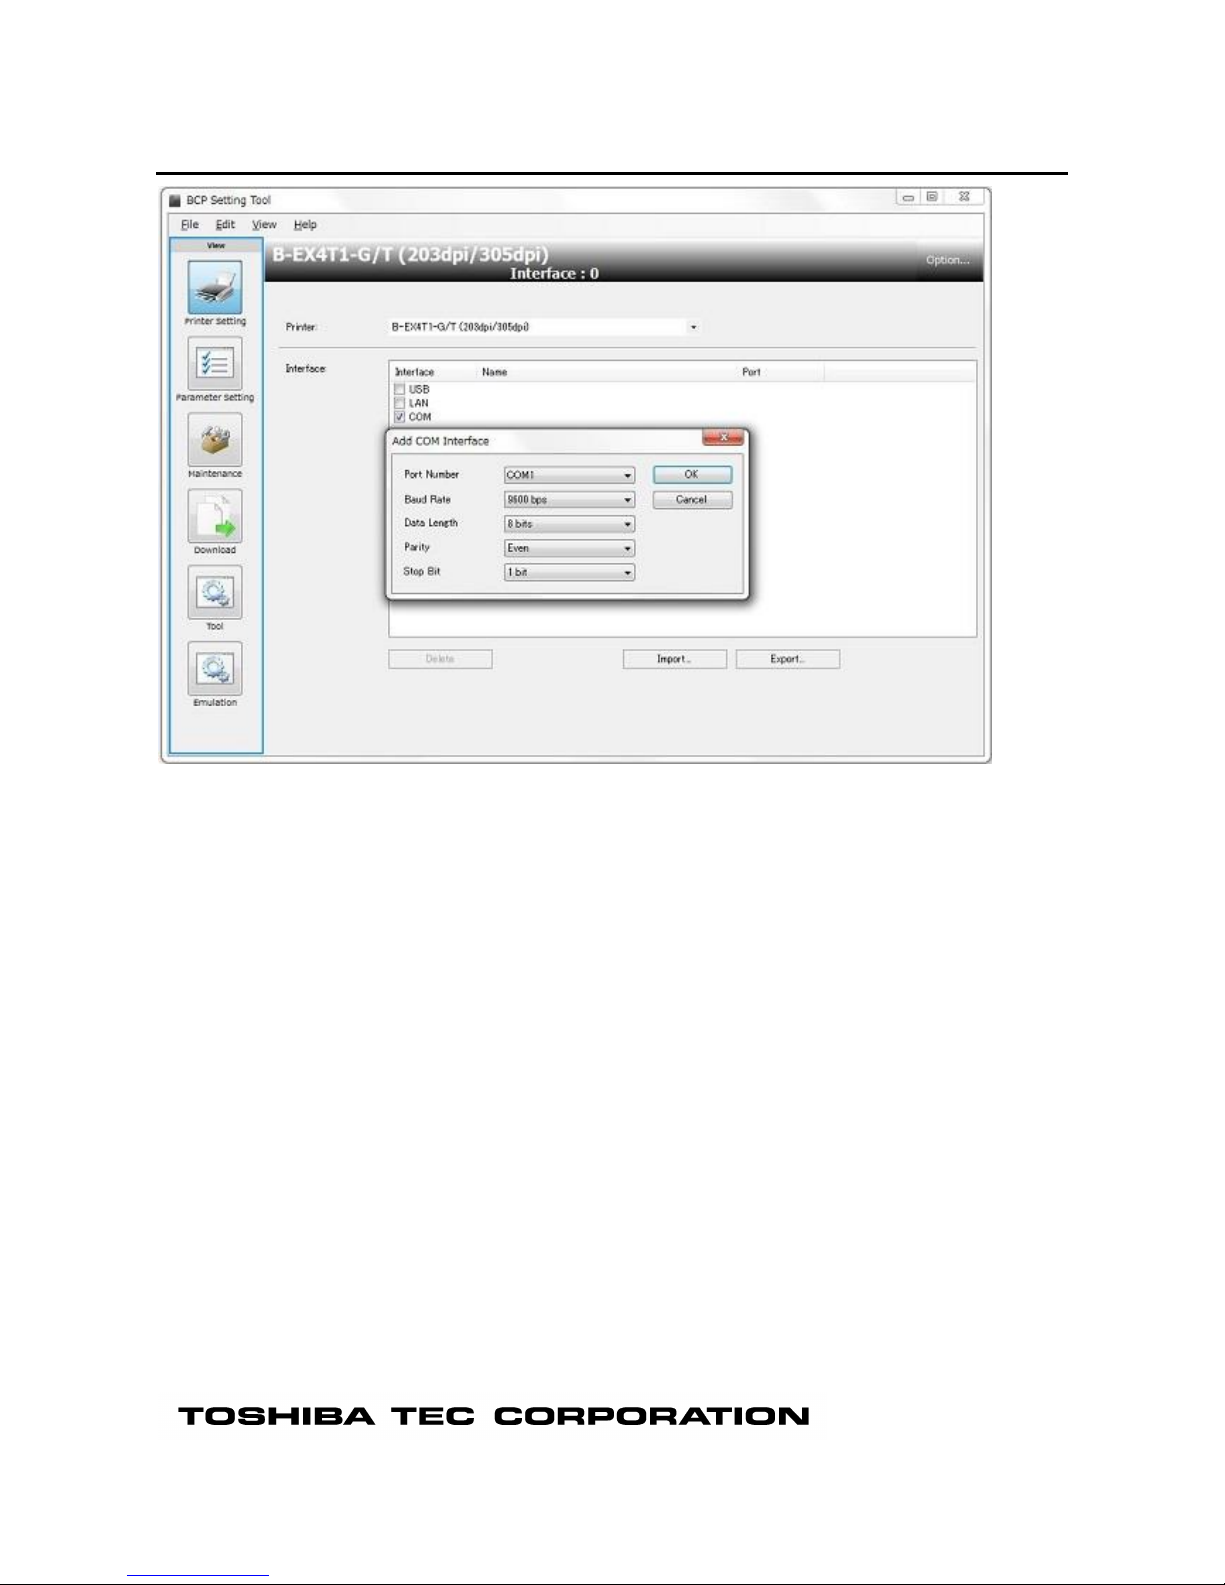
When the [COM] checkbox is selected, the “Add COM Interface” dialog box is displayed.
After the value is filled in and [OK] is clicked, the dialog box is closed and the setting is reflected in the
interface list.
At selecting [Cancel], the process is canceled.
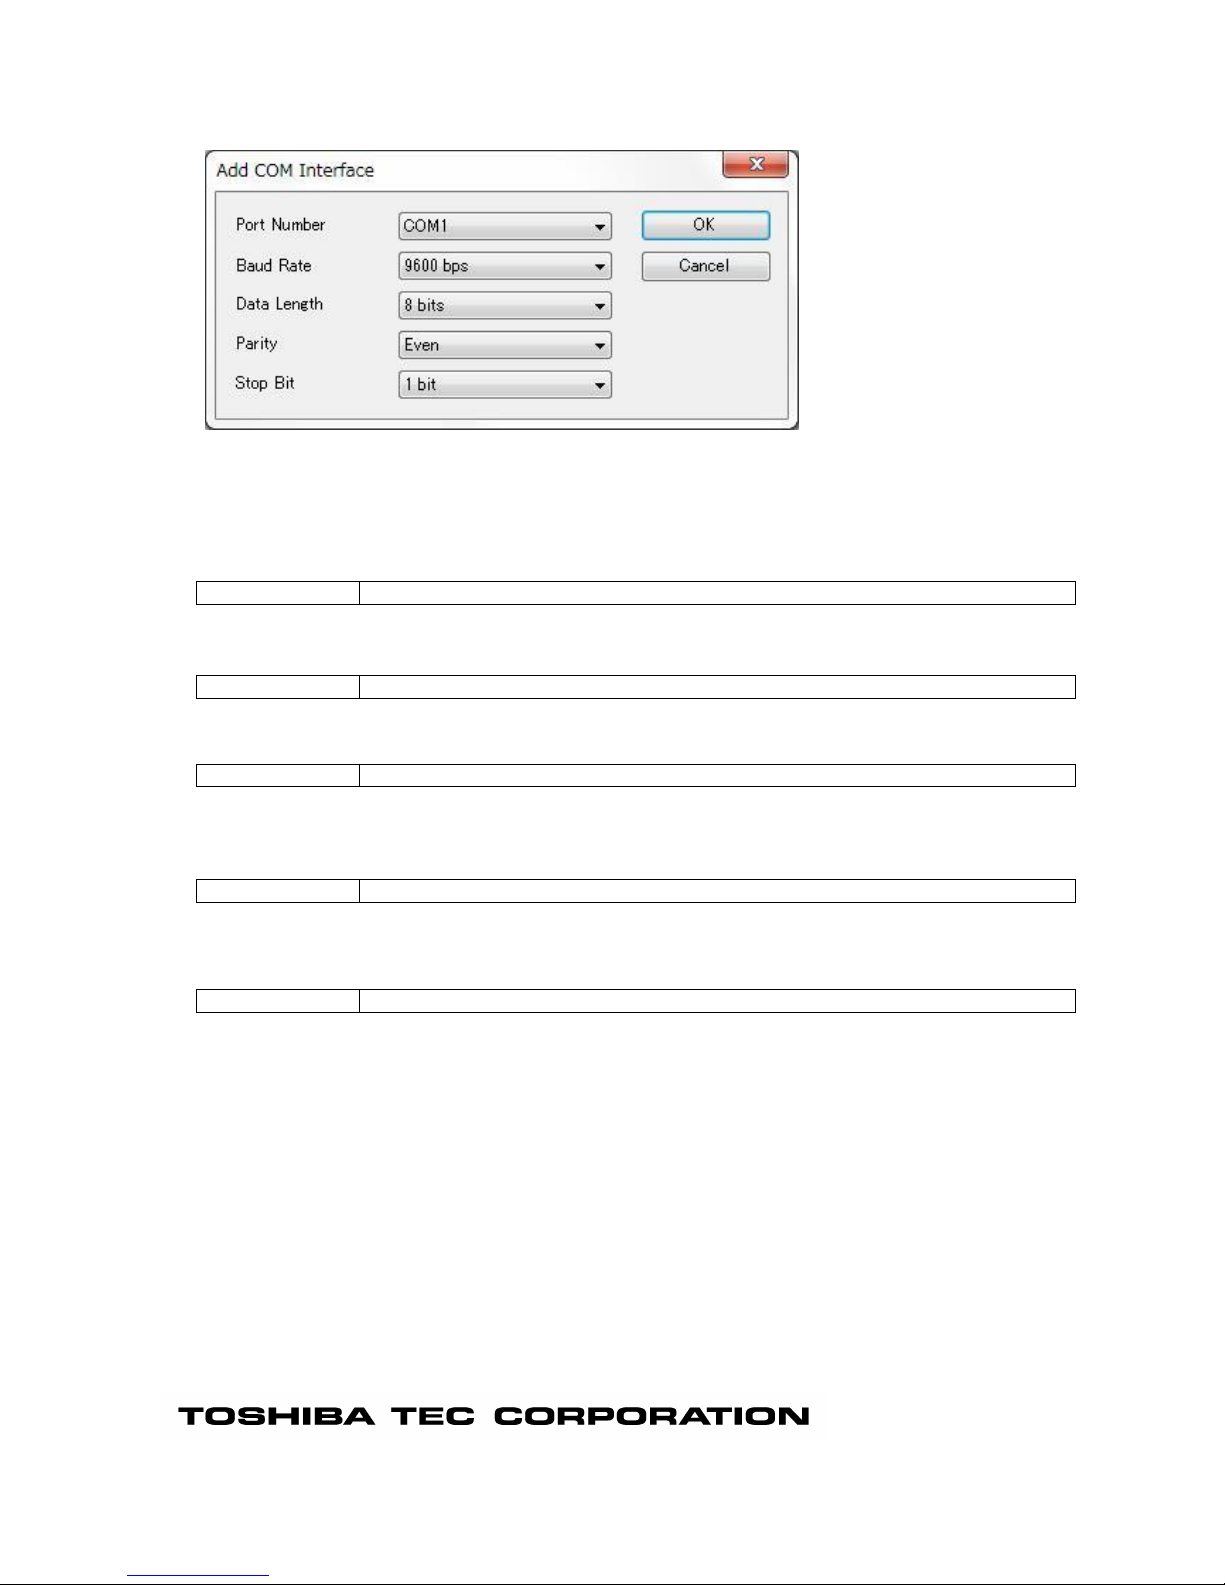
[Port Number]
Selects the COM port number used for communication.
Options
COM port on the Operation System
[Baud Rate]
Selects the baud rate for the RS-232C port set for the connected printer.
Options
2400 bps, 4800bps, 9600 bps, 19200 bps, 38400 bps, 115200 bps
[Data Length]
Selects the data length for the RS-232C port set for the connected printer.
Options
7 bits, 8 bits
[Parity]
Selects the parity for the RS-232C port set for the connected printer.
The setting is saved upon changed, and reflected in the header view.
Options
None, Even, Odd
[Stop Bit]
Selects the stop bit for the RS-232C port set for the connected printer.
The setting is saved upon changed, and reflected in the header view.
Options
1 bit, 2 bits
Page 21

Environment
Set the operating environment for this Product.
When [Options] at the right end on the header view is clicked, the [Environment] screen appears.
The setting is not saved by a member of the Users.
[Interface]
[Multiple select device]
Enabling the check box can use multiple interfaces
[Max device count]
Setting the maximum number of connecting to printers
[Get parameter on start up]
Parameters will be retrieved during application startup time.
Parameters will not be retrieved, if an available USB is not connected.
[Default Domain Name]
Domain name setting for LAN connectable
Page 22
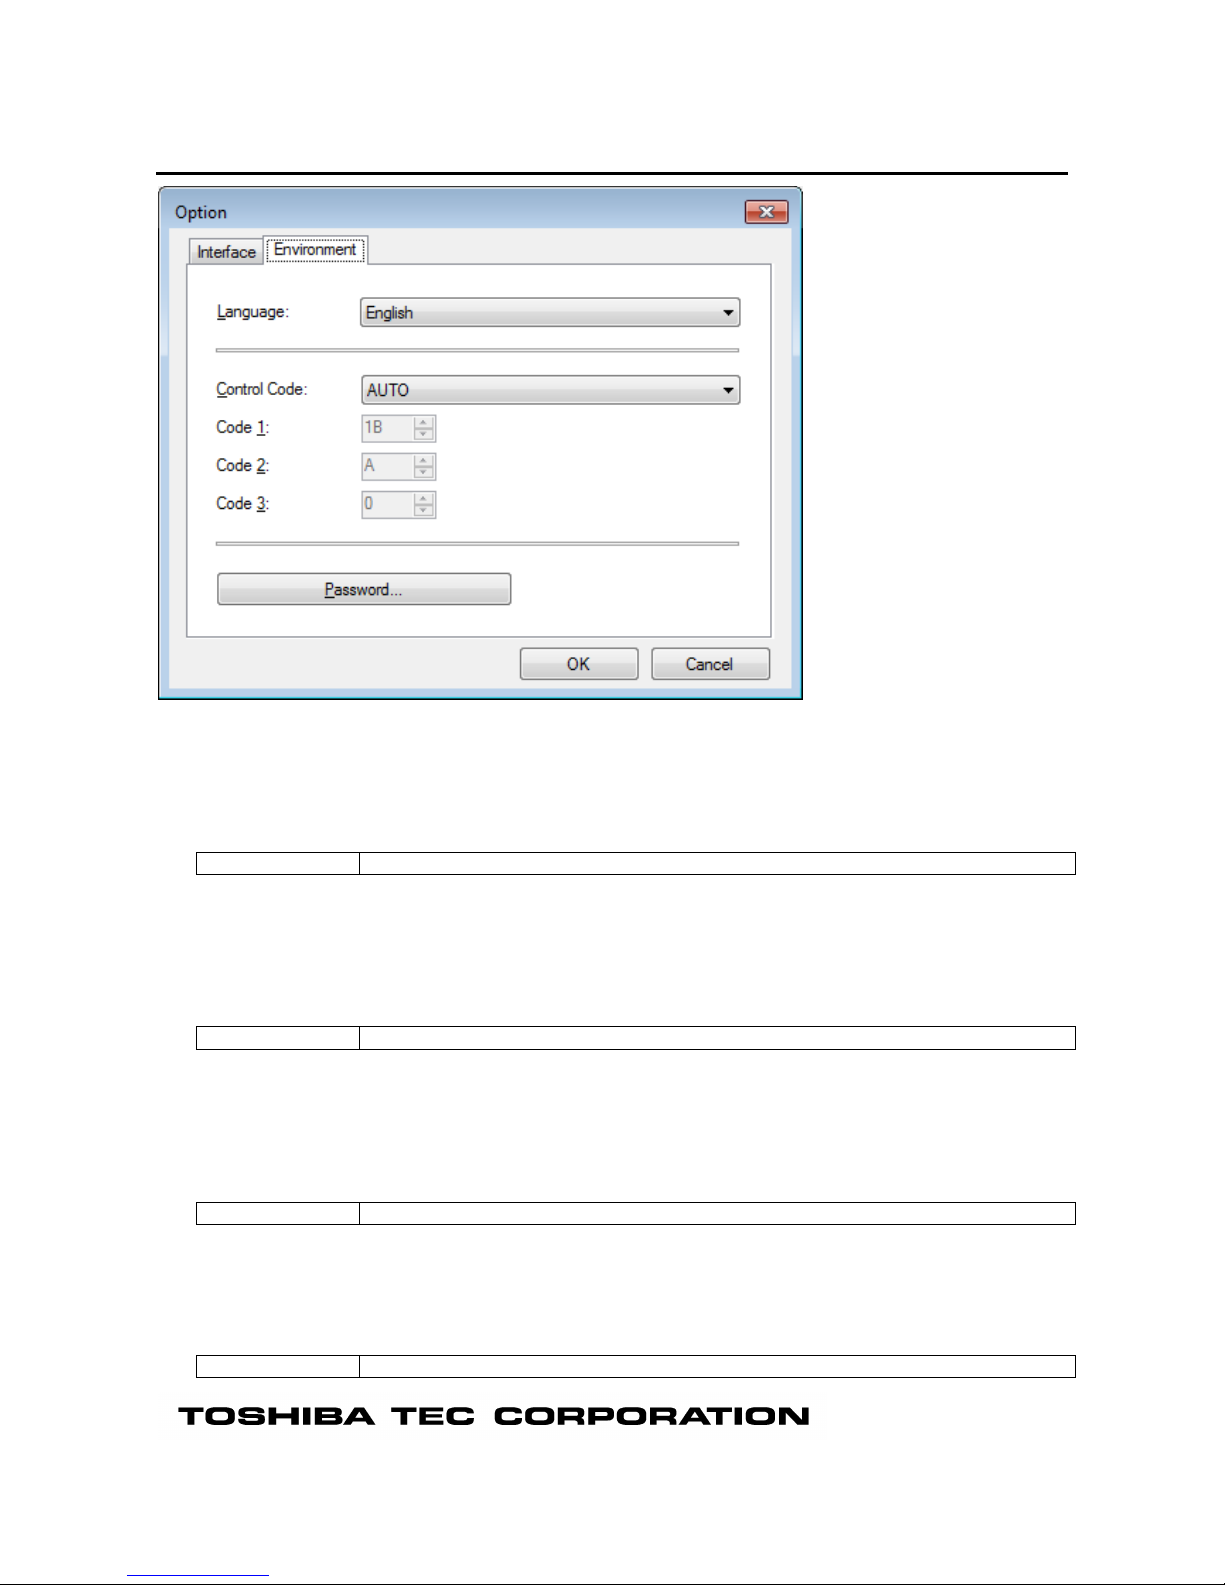
[Environment]
[Language]
Selects a language used to display this Product.
The language selected during the installation has been set as default.
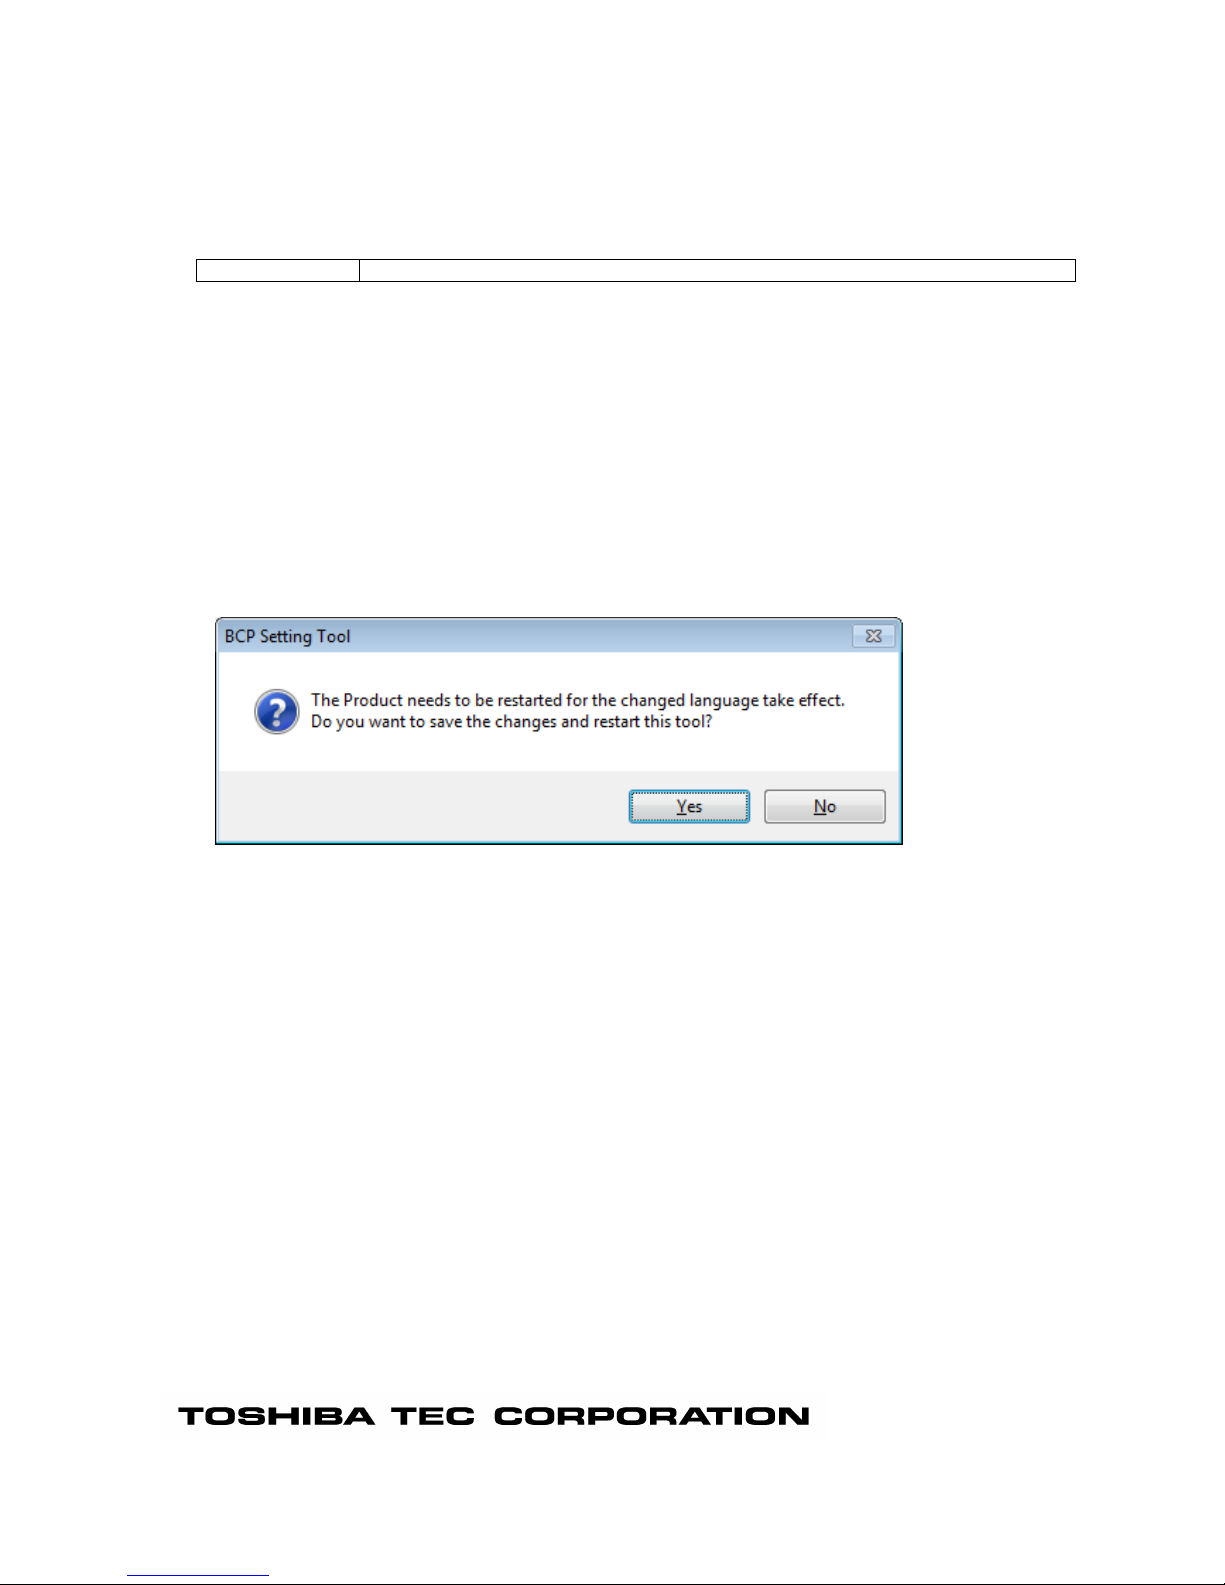
Restart this Product for the changed language to take effect.
After this Product is restarted, all values on all screens, except the [Printer Setting] and [Environment],
are initialized.
Options
Japanese, English
[Control Code]
Selects the same control code that is set for the connected printer.
The default value immediately after the installation is "AUTO".
Basically, it is not necessary to change this value as the default for the printer has been selected.
Entering the same value for all of the [Code 1], [Code 2], and [Code 3] results in an error.
If a value improper for the control code is entered, this Product does not work properly.
Options
AUTO, [ESC] [LF] [NUL], { | }, Manual
[Code 1]
Enter the same value in hex. format that is set for the connected printer.
The default right after the installation is "1B".
[Code 1] is editable only when "Manual" is selected for the [Control Code].
Change the value when the control code is set to "Manual" for the printer.
Range
00 to FF
[Code 2]
Enter the same value in hex. format that is set for the connected printer.
The default right after the installation is "0A".
[Code 2] is editable only when "Manual" is selected for the [Control Code].
Change the value when the control code is set to "Manual" for the printer.
Range
00 to FF
Page 23
[Code 3]
Enter the same value in hex. format that is set for the connected printer.
The default right after the installation is "00".
[Code 3] is editable only when "Manual" is selected for the [Control Code].
Change the value when the control code is set to "Manual" for the printer.
Range
00 to FF
[Password...]
Sets a password to log in this Product.
No password is set immediately after the installation.
When you want to protect this Product from unauthorized use, set a password.
When this button is clicked, the [Password Change] screen is displayed.
Once the password is set, the [Login] screen appears at a start-up of this Product and entry of the
password is requested.
Up to 16 one-byte alphanumeric characters can be used for the password.
The password is case-sensitive.
The password cannot be set when this Product is started by a user without administrative authority.
[OK]
When this button is clicked, the [Environment] screen is closed saving the changes.
The Restart confirmation message is displayed only when the [Language] is changed.
When [Yes] is clicked, this Product is restarted after saving the changes.
When [No] is clicked, the screen returns to the [Environment] screen without saving the changes.
[Cancel]
When this button is clicked, the [Environment] screen is closed without saving any changes.
However, the password set on the [Password Change] screen remains effective.
Page 24
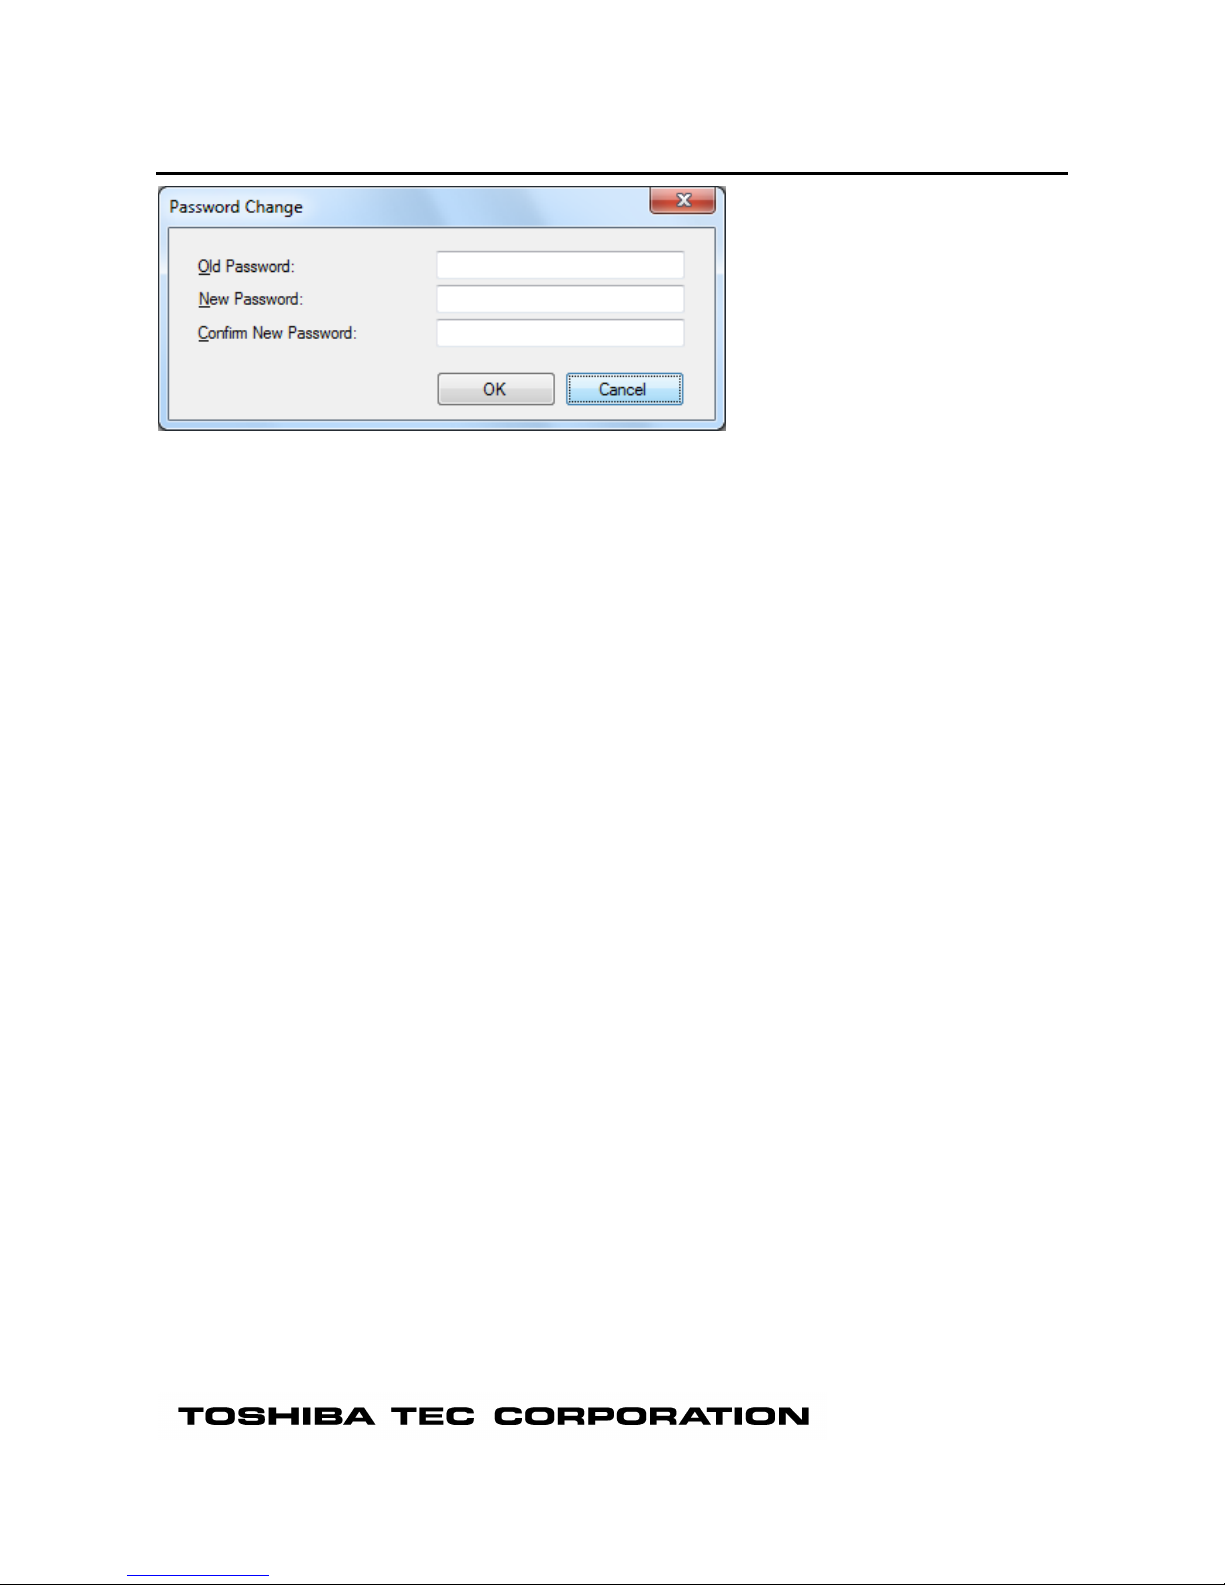
Password Change
[Old Password]
When the password has been set, enters the current password.
It is not necessary to enter a password when this is the first time to set the password.
The entered password is displayed with hidden characters.
[New Password]
Enters a new password.
It is not necessary to enter a password when you want to invalidate the current password.
The entered password is displayed with hidden characters.
[Confirm New Password]
Re-enters the new password to confirm it.
It is not necessary to enter a password when you want to invalidate the current password.
The entered password is displayed with hidden characters.
[OK]
When this button is clicked, the [Password Change] screen is closed saving the new password.
Clicking [Cancel] on the [Environment] screen does not affect password saving.
If the incorrect password is entered in [Old Password] or if the password entered in [New Password] and
[Confirm New Password] do not match, an error message appears.
Entering the password only in [Old Password] invalidates the password.
[Cancel]
When this button is clicked, the [Password Change] screen is closed without saving any changes.
Page 25
Processing Screen
When processing involving communication between the printer and this Product is executed, the processing
screen is displayed.
The progress bar screen is displayed during the processing, and the completion screen appears when the
processing is completed.
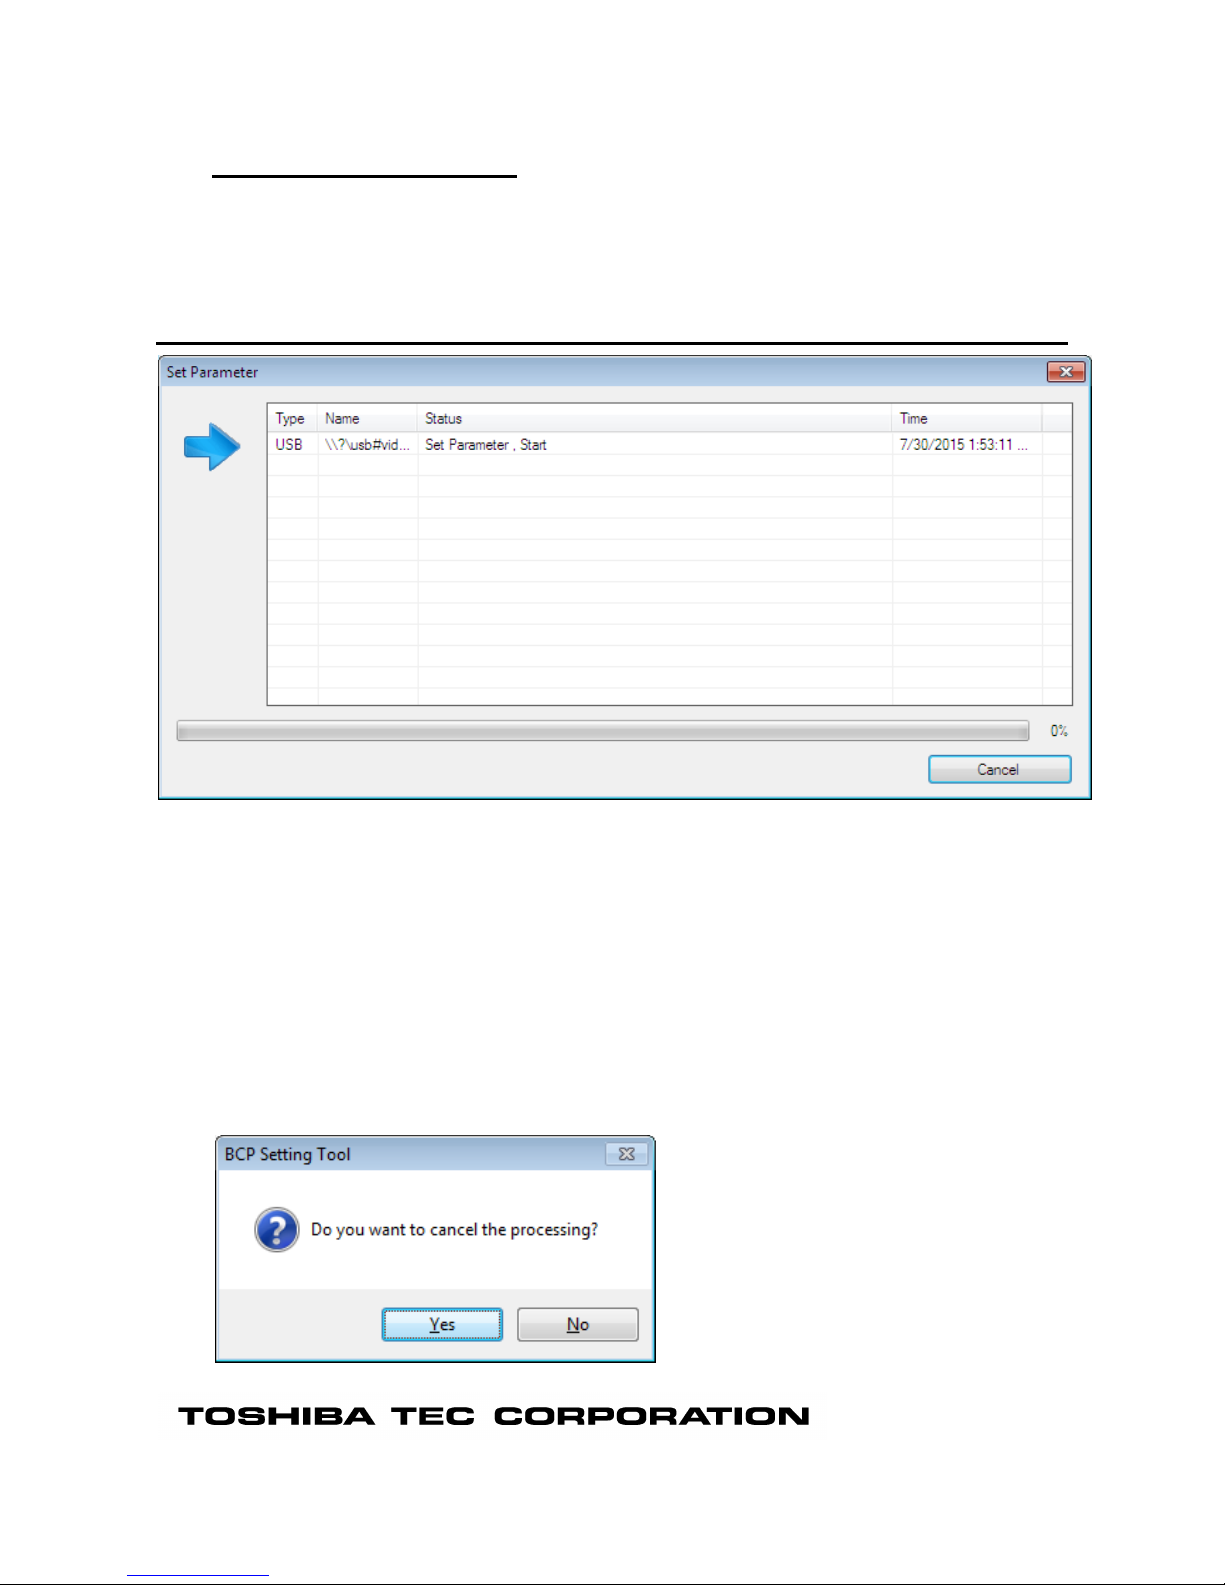
Progress Bar Screen
Title
Processing being executed is displayed.
Progress status
The current status is indicated by an icon, text and progress bar, and updated as needed.
While the processing is in progress, the corresponding icon is displayed.
In the case an error occurs, the processing is stopped.
However, processing that has been completed before the occurrence of an error becomes effective.
If the interface has been set, processing is executed to all printers regardless of the status for each
printer.
[Cancel...]
The processing is stopped.
When this button is clicked, the following confirmation message is displayed.
Page 26

When [Yes] is clicked, the processing is canceled. However, the processing that has been completed
before the cancellation becomes effective.
When [No] is clicked, the processing is continued.
Even while the confirmation message is displayed, the processing is being executed.
Page 27
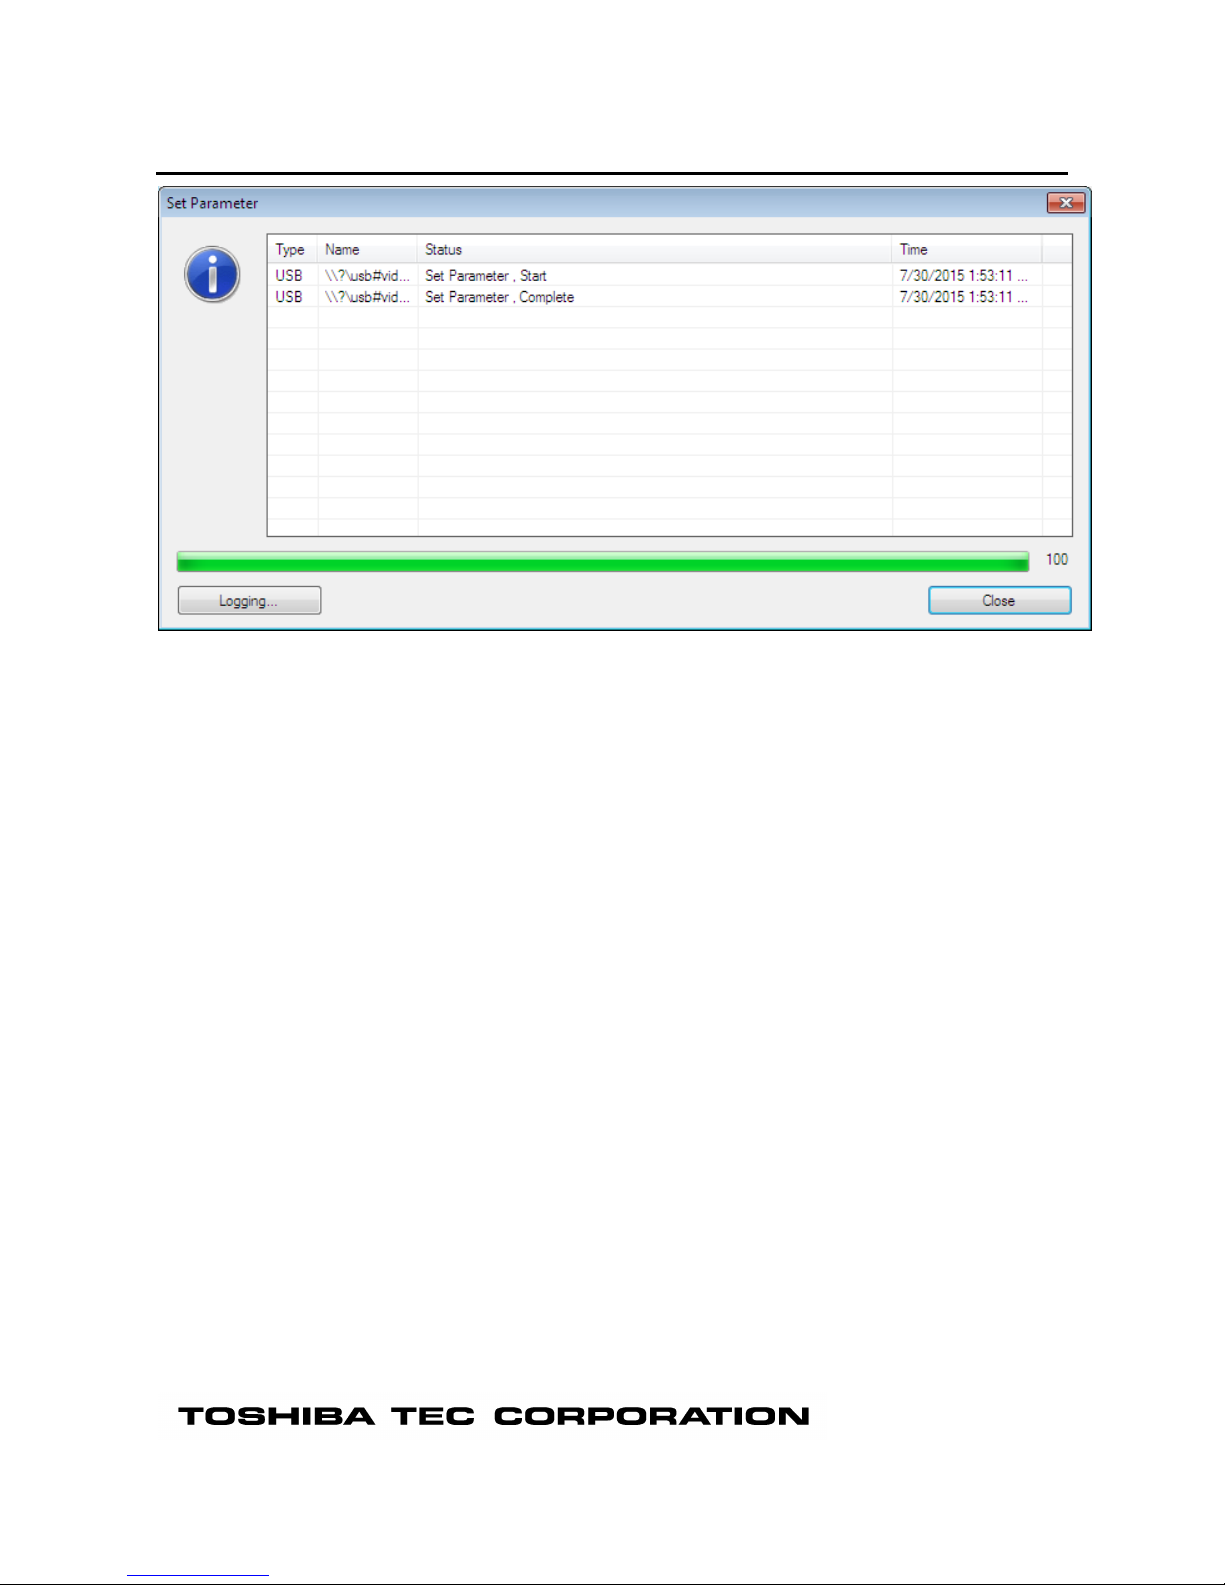
Completion Screen
Title
Processing currently performed is displayed. The same title shown on the progress bar screen is taken
over.
Progress status
When the progress bar reaches 100%, the final result is indicated by text.
When proceeding succeeds, the normal end icon is displayed.
If the processing fails due to an error, the abnormal end icon is displayed.
When the processing is canceled, the cancellation icon is displayed.
[Logging...]
The result indicated by text is saved in the specified file in a CSV format.
When this button is clicked, the file selection screen is displayed. Specify the file where the log data are
stored, click [Save], and then the data are saved.
The specified file is initialized and the log data are saved.
If writing the data into the specified file fails, an error message will be displayed.
[Retry]
The same processing is retried for the printers which resulted in an abnormal end.
When this button is clicked, a retry of the processing is started.
This button becomes active only when the processing abnormally ended.
[Close]
When this button is clicked, the completion screen is closed.
Page 28
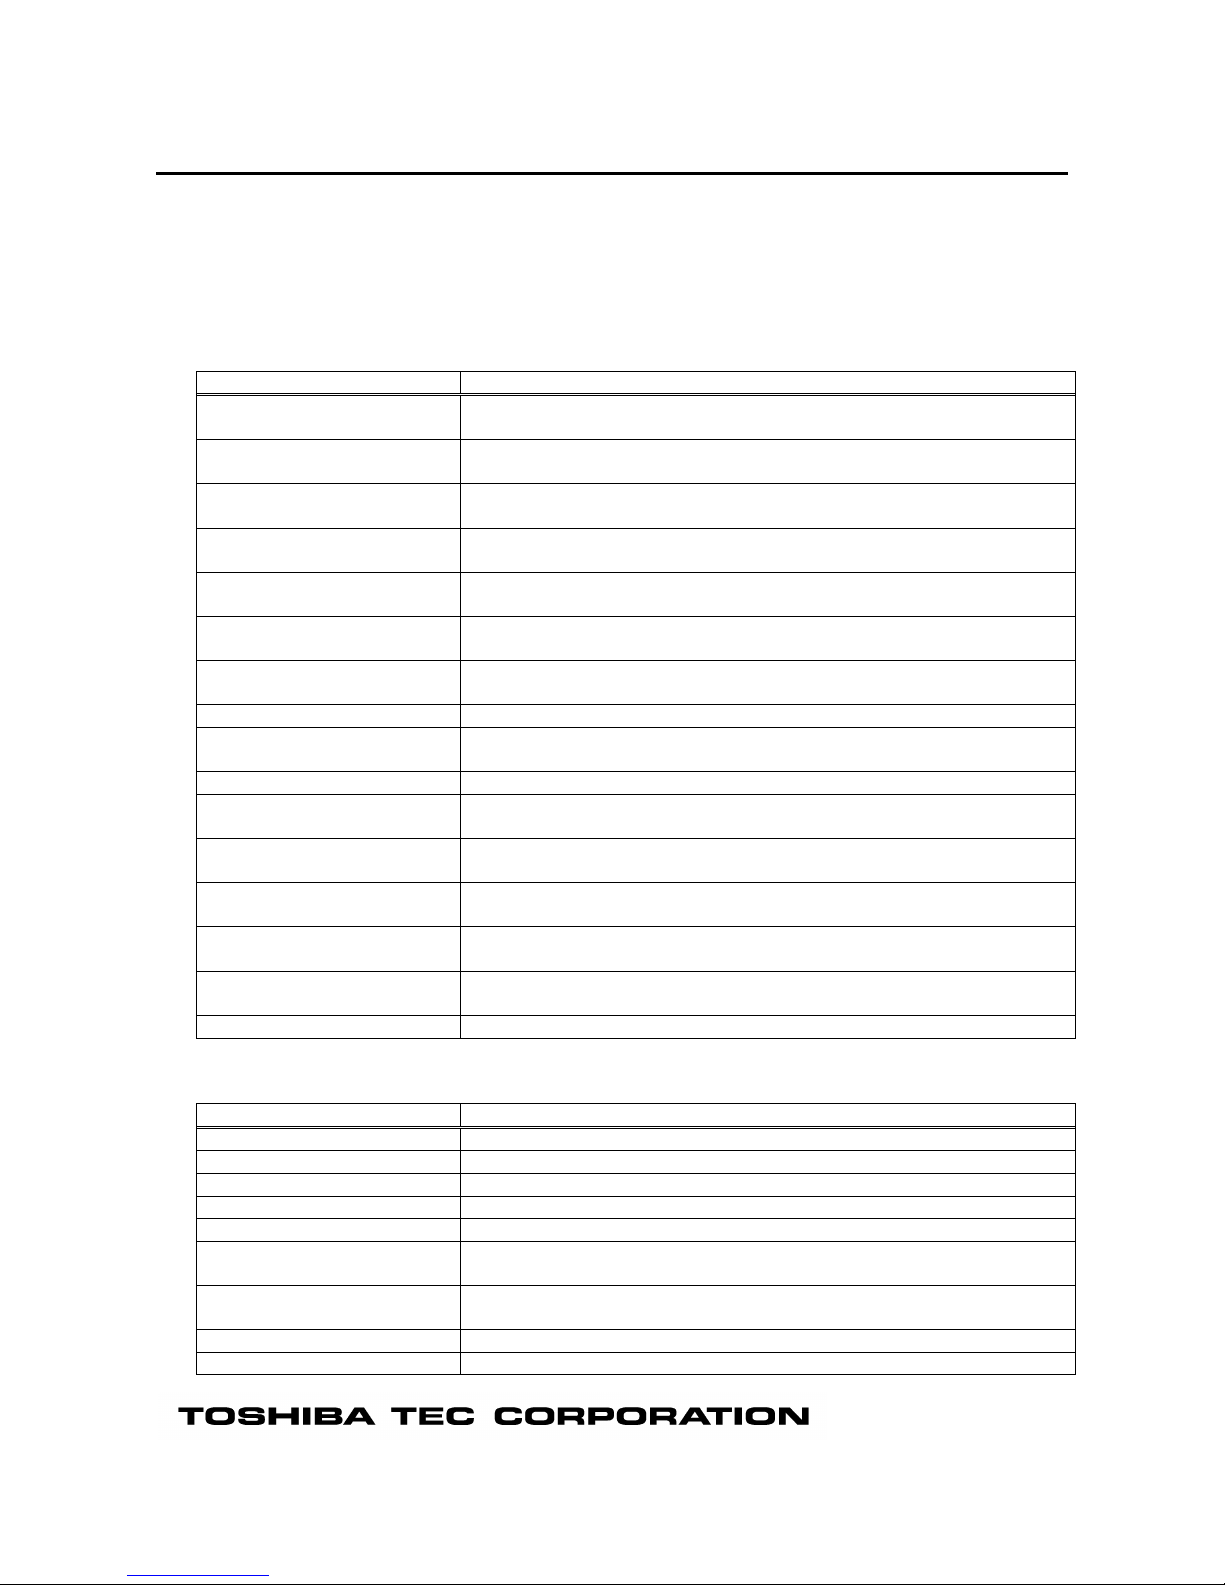
Progress Status
Textual information about the processing in progress is added to the progress status as needed.
Progress status format:
["Device Name"], "Processing", "Process", "Detailed status" ("Error code")
Processing
Processing in progress is displayed.
Processing
Description
Get Parameter
Obtains the parameter setting values from the connected printer on the
[Parameter Setting] screen.
Set Parameter
Downloads the parameter setting values to the connected printer on the
[Parameter Setting] screen.
Firmware Download
Downloads the firmware to the connected printer on the [Firmware] tab
page in the [Download] screen.
BASIC Download
Downloads the BASIC program to the connected printer on the [BASIC]
tab page in the [Download] screen.
Emulation Download
Downloads the Z Mode/D Mode BASIC program to the connected
printer on the [Emulation] tab page in the [Download] screen.
Get Printer Info
Obtains the printer information in a file on the [Self Diagnosis] tab page
in the [Maintenance] screen.
Save Printer Info
Saves the printer information in a file on the [Self Diagnosis] tab page in
the [Maintenance] screen.
Printer Reset
Resets the printer on the [Setting] tab page in the [Maintenance] screen.
Head Check
Performs a print head check on the [Setting] tab page in the
[Maintenance] screen.
Data Logging
Takes the log on the [Setting] tab page in the [Maintenance] screen.
Maintenance Counter Clear
Performs a maintenance counter clear on the [Setting] tab page in the
[Maintenance] screen.
Parameter Clear
Performs a parameter clear on the [Setting] tab page in the
[Maintenance] screen.
Memory Allocate
Performs a memory allocation on the [Setting] tab page in the
[Maintenance] screen.
Memory Format
Formats the memory on the [Setting] tab page in the [Maintenance]
screen.
Send File
Sends a specified file to the printer on the [Tool] tab page in the [Tool]
screen.
Test Print
Performs a test print on the [Test Print] tab page in the [Tool] screen.
Process
Process in progress is displayed.
Process
Description
Start
Processing is started.
Succeed
Processing normally ends.
Fail
Processing abnormally ends.
Cancel
Processing ends due to cancellation.
Preparing for downloading...
Preparing for download.
Updating the printer...
The firmware is being updated on the printer.
The parameter setting values are being updated on the printer.
Sending "section name"
firmware to the printer...
ROM file is being sent to the printer in the Firmware Download
processing.
Memory Allocate
A memory is being allocated in the BASIC Download processing.
Updating the main
The main program is being sent or updated in the BASIC Download
Page 29
program…
processing.
Updating the system mode
program…
The system mode program is being sent and updated in the BASIC
Download processing.
Updating the data file…
The data file is being sent and updated in the BASIC Download
processing.
Detailed status
Detailed status at the end of processing is displayed.
Message
Description
No printer connection is
detected.
No printer connected via the specified interface was found.
Check the communication conditions, then retry the operation. If the
same message is displayed again, restart the printer.
Cannot confirm the printer is
in online mode.
The processing was not executed as whether or not the printer is in the
online mode could not be confirmed.
Check the communication conditions, then retry the operation. If the
same message is displayed again, restart the printer.
The printer is not in idle
state.
The processing could not be executed since the printer has an error.
Clear the printer error, then retry the operation.
An error ("status code")
occurred on the printer.
An error occurred on the printer while processing is in progress.
Clear the printer error, then retry the operation.
The print head has a broken
element.
A broken element was detected during the print head check.
No data can be saved in the
specified file.
Printer information or print log data obtained from the connected printer
could not be written into the specified file.
Check if the file is writable.
Obtaining the printer settings
failed. ("Tab name"/"Group
name")
Obtaining the setup information from the printer failed.
"Tab name"/"Group name" indicates the location where the error
occurred.
Check the communication conditions, then retry the operation. If the
same message is displayed again, restart the printer.
Updating the printer settings
failed. ("Tab name"/"Group
name"/"Control name")
Updating the setup information on the printer failed.
"Tab name"/"Group name"/"Control name" indicates the location where
the error occurred.
Correct the setting value for "control name" if necessary, then retry the
operation. If the same message is displayed again, restart the printer.
Processing error
Firmware downloading failed in upgrading the firmware version.
The maintenance counter could not be cleared.
The parameter clear failed in initialization.
Check the communication conditions, then retry the operation. If the
same message is displayed again, restart the printer.
Printer is not ready.
Current execution is not supported in this mode.
Set the correct mode by referring to “3.Start up - Printer”.
Timeout error
A response from the printer resulted in timeout.
Check the communication conditions, then retry the operation. If the
same message is displayed again, restart the printer.
Communication error
An error occurred with the communication processing via the specified
interface.
Check the communication conditions, then retry the operation. If the
same message is displayed again, restart the printer.
Page 30
4. Functions
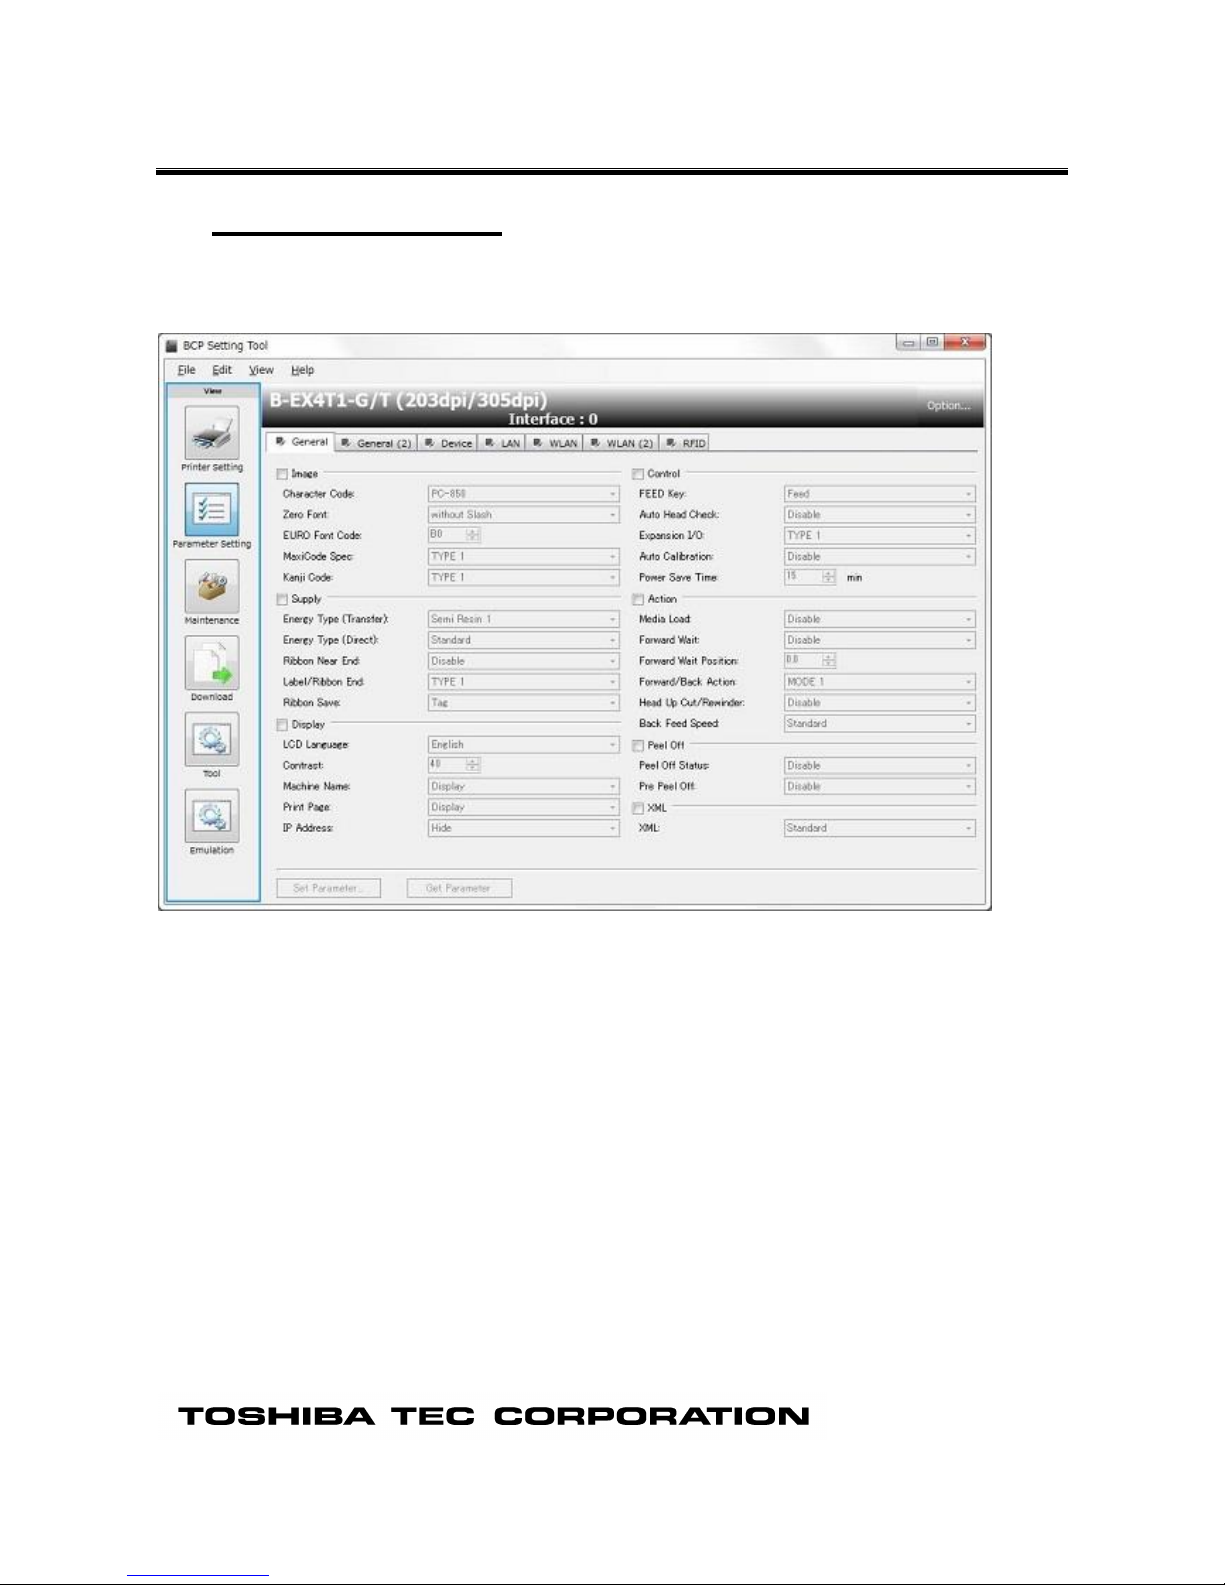
Parameter Setting
The parameter setting menu enables configuring or obtaining the printer parameter settings.
When the [Parameter Setting] icon on the menu icon area is clicked, the [Parameter Setting] screen is
displayed.
Control
Parameters are classified, grouped and placed depending on their types and purposes to allow for easy
check or update of parameter values.
Each control becomes active and editable when the group checkbox is checked.
The parameter setting values are obtained from the printer for all controls.
However, only active controls are reflected in the printer when the printer settings are updated.
Group
Each control is grouped according to the types, such as [Image], [Notice] and [Command].
When the checkbox of a group is checked, the controls in that group become active.
The parameter setting values are obtained from the printer for all controls, regardless of whether the
checkbox is checked or not.
However, only active controls are reflected in the printer when the printer settings are updated.
Tab
The [Parameter Setting] screen has [General], [Option] and [Device] tabs.
When any of these tabs is clicked, the selected tab page is displayed to allow setting the related
parameters.
The parameter setting values are obtained from the printer at one time for all controls in all tab pages.
However, only active controls are reflected in the printer when the printer settings are updated.
Page 31

[Set Parameter...]
The parameter setting values displayed on the screen are downloaded to the printer to update the printer
settings.
When there is no group to be downloaded, this button is grayed out.
If an improper value is included in the downloaded data, an error message will be displayed.
When the processing starts, the progress status screen is displayed. When the processing is completed,
the completion screen is displayed.
This function is executed only when the printer is in the system mode.
After downloading the setting values for all active controls to the printer, obtain the setting values from the
printer to check if the update succeeded or not.
[Get Parameter]
Currently set parameter setting values are obtained from the printer and are displayed.
When this button is clicked, the processing starts.
When the processing starts, the progress status screen is displayed. When the processing is completed,
the completion screen is displayed.
This function is executed only when the printer is in the system mode.
The obtained values are reflected in each control on the [Parameter Setting] screen.
The currently set values are obtained from the printer for all controls in all tab pages except for a part of
the objects (File information of Bonding).
Page 32

General Tab
[Image] Group
[Character Code]:
Selects a character code table to be applied to the printer font.
Default
PC-850
Options
PC-850, PC-8, PC-852, PC-857, PC-851, PC-855, PC-1250, PC-1251, PC-1252,
PC-1253, PC-1254, PC-1257, LATIN9, Arabic, PC-866, UTF-8
[Zero Font]:
Selects whether or not a slash is attached to the printer font character "0".
Note that the no slash is attached for the following fonts, regardless of settings.
<Bitmap fonts> OCR-A, OCR-B, Gothic 725 Black, Kanji, Chinese
<Outline fonts> Price Font 1, Price Font 2, Price Font 3, Dutch 801, Brush 738, Gothic 725,
True Type Font
Default
without Slash
Options
without Slash, with Slash
[EURO Font Code]:
Sets printer font characters you want to assign to EURO fonts.
Enter two alphanumeric characters from "0" to "F".
Entries are not case-sensitive.
Two characters indicate one HEX character. (Example: "0" -> "30" or "A" -> "41")
Default
B0
Range
20 to FF
[MaxiCode Spec]:
Selects a type of the barcode font to create a MaxiCode.
Default
TYPE 1
Options
TYPE 1 (Compatible with current version), TYPE 2 (Special specification)
Page 33

[Kanji Code]:
Selects a type of the Kanji font code.
Default
TYPE 1
Options
TYPE 1 (Windows code), TYPE 2 (Original code)
[Supply] Group
[Energy Type (Transfer)]:
Selects a print head energy control type for thermal transfer printing.
B-EX4T1-G/T (203dpi/305dpi):
Default
Semi Resin 1
Options
Semi Resin 1, Semi Resin 2, Resin 1, Resin 2, Resin 3, SX Compatible, Reserve 1,
Reserve 2, Reserve 3, Reserve 4
B-EX4T1-T JP (305dpi):
Default
Semi Resin 1
Options
Semi Resin 1, Semi Resin 2, Resin 1, Resin 2, Reserve 1, Reserve 2, Reserve 3,
Reserve 4, Reserve 5, Reserve 6,
B-EX4T2-G/T (203dpi/300dpi):
Default
Wax 1
Options
Wax 1, Wax 2, Semi Resin 1, Semi Resin 2, Resin 1, Wax 3, Semi Resin 3, Resin 2,
Multiple Type, Reserve 1
B-EX4D2-G/T (203dpi/300dpi):
Default
Wax 1
Options
Wax 1, Wax 2, Semi Resin 1, Semi Resin 2, Resin 1, Wax 3, Semi Resin 3, Resin 2,
Reserve 1, Reserve 2
B-EX4T2-H (600dpi):
Default
Resin 1
Options
Resin 1, Resin 2, Resin 3, Reserve 1, Reserve 2, Reserve 3, Reserve 4, Reserve 5,
Reserve 6, Reserve 7
B-EX4T3-H (600dpi):
Default
Resin 1
Options
Resin 1, Resin 2, Resin 3, Resin 4, Resin 5, Reserve 1, Reserve 2, Reserve 3,
Reserve 4, Reserve 5
[Energy Type (Direct)]:
Selects a print head energy control type for direct thermal printing.
Default
Standard
Options
Standard, Reserve 1, Reserve 2, Reserve 3, Reserve 4, Reserve 5, Reserve 6,
Reserve 7, Reserve 8, Reserve9
[Ribbon Near End]:
Selects the condition for ribbon near end detection.
Default
Disable
Options
Disable, 30 m, 70 m
[Label/Ribbon End]:
Specifies how the printer behaves when a label end or ribbon end is detected.
Default
TYPE 1
Options
TYPE 1 (Immediately stops), TYPE 2 (Stops when the next label is at home position.)
Page 34

[Ribbon Save]:
Selects whether to enable or disable the ribbon saving function.
B-EX4T1-G/T (203dpi/305dpi):
Default
JA: Tag
Other than JA: Disable
Options
Disable, Tag, Label
B-EX4T1-T JP (305dpi):
Default
JA: Tag
Other than JA: Disable
Options
Disable, Tag, Label, Tag 2, Label 2
Other than B-EX4T1-G/T (203dpi/305dpi) / B-EX4T1-T JP (305dpi):
Default
Disable
Options
Disable
[Type Of Ribbon]:
Selects the ribbon roll direction.
This parameter is fixed to “Coated Side Out” for the B-EX4T1-G/T (203dpi/305dpi), B-EX4T1-T JP
(305dpi) and B-EX4T3-H (600dpi).
Default
Coated Side Out
Options
Other than B-EX4T1-G/T (203dpi/305dpi) / B-EX4T1-T JP (305dpi) / B-EX4T3-H
(600dpi):
Coated Side Out, Coated Side In
[Display] Group
[LCD Language]:
Selects a language of messages to be displayed on the LCD.
Default
JA: Japanese
Other than JA: English
Options
B-EX4T1-T JP (305dpi) / B-EX4T3-H (600dpi):
English, German, French, Dutch, Spanish, Japanese, Italian, Portuguese
Other than B-EX4T1-T JP (305dpi) / B-EX4T3-H (600dpi):
English, German, French, Dutch, Spanish, Japanese, Italian, Portuguese,
Simplified Chinese, Korean, Turkey, Polish
[Contrast]:
Sets an even number for the LCD contrast fine adjustment.
When an odd number is set, it will be automatically corrected to an even number.
Default
40
Range
24 to 50
[Machine Name]:
Selects whether or not to display the printer model name on the LCD.
Default
Display
Options
Hide, Display
[Print Page]:
Selects whether or not to display the number of copies on the LCD.
Default
Display
Options
Hide, Display
[IP Address]:
Selects whether or not to display the IP address on the LCD.
Default
Hide
Options
Hide, Display
Page 35

[Control] Group
[FEED Key]:
Specifies how the printer behaves when the [FEED] key is pressed.
Default
Feed
Options
Feed, Print
[Auto Head Check]:
Selects whether or not a head broken dots check is automatically performed when the power is
turned on.
Default
Disable
Options
Disable, Enable
[Expansion I/O]:
Selects the expansion I/O specification.
Default
TYPE 1
Options
TYPE 1 (Standard), TYPE 2 (In-line)
[Auto Calibration]:
Selects whether to enable or disable the auto calibration feature.
Default
Disable
Options
B-EX4T1-G/T (203dpi/305dpi) / B-EX4T1-T JP (305dpi):
Disable, Transmissive Sensor, Reflective Sensor, All Sensor,
Transmissive Sensor (with Back Feed), Reflective Sensor (with Back Feed),
All Sensor (with Back Feed)
Other than B-EX4T1-G/T (203dpi/305dpi) / B-EX4T1-T JP (305dpi):
Disable, Transmissive Sensor, Reflective Sensor, All Sensor
[Power Save Time]:
Sets a period of time from when the printer ceases to be used until it enters the power save mode.
Enter a number.
Default
15 min
Range
1 to 240 min
[Action] Group
[Media Load]:
Selects whether or not to feed media to the home position.
Default
Disable
Options
B-EX4T1-G/T (203dpi/305dpi) / B-EX4T1-T JP (305dpi):
Disable, Standard, ECO, ECO (with Back Feed)
Other than B-EX4T1-G/T (203dpi/305dpi) / B-EX4T1-T JP (305dpi):
Disable, Standard, ECO
[Forward Wait]:
Selects whether an automatic forward feed is performed after an issue is enabled or disabled.
If "Enable" is selected, the printer will automatically feed the media forward by 13.7 mm when the
printer is idle for one sec. or more after printing.
Default
Disable
Options
Disable, Enable
[Forward Wait Position]:
When the [Forward Wait] is enabled, it is possible to make fine adjustment to the standard feed
distance of 13.7 mm, in units of 0.1mm.
Default
0.0 mm
Range
-5.0 to +5.0 mm
Page 36

[Forward/Back Action]:
Specifies how the printer behaves when the [Forward Wait] is enabled.
Default
MODE 1
Options
B-EX4T1-G/T (203dpi/305dpi) / B-EX4T1-T JP (305dpi):
MODE 1 (13.7 mm forward feed), MODE 2 (6 mm back feed & 3 mm forward feed),
MODE 3 (31.2 mm forward feed)
Other than B-EX4T1-G/T (203dpi/305dpi) / B-EX4T1-T JP (305dpi):
MODE 1 (13.7 mm forward feed), MODE 2 (6 mm back feed & 3 mm forward feed)
[Head Up Cut/Rewinder]:
Selects whether or not head-up cut is performed in the cut issue mode, or whether or not the
rewinder is used.
The head-up function is available only to B-EX4T1-G/T (203dpi/305dpi) and B-EX4T1-T JP (305dpi).
Default
Disable
Options
Disable, Enable
[Back Feed Speed]:
Selects the back feed speed.
Default
Standard
Options
Standard (3 inch/sec), Low (2 inch/sec)
[Peel Off] Group
[Peel Off STATUS]:
Selects whether or not a peel-off waiting status is generated and sent in the strip issue mode.
Default
Disable
Options
Disable, Enable
[Pre Peel Off]:
Selects whether or not a pre-peel feed is performed in the strip issue mode before printing.
Default
Disable
Options
Disable, Enable
[XML] Group
[XML]:
Selects whether or not XML is enabled.
Default
Standard
Options
Disable, Standard, Oracle, SAP, Standard (External memory),
Oracle (External memory), SAP (External memory)
Page 37

General (2) Tab
[Position Adjustment] Group
[Feed]:
Sets a fine adjustment value for the stop position in units of 0.1 mm.
When the value is negative (-), the feed length becomes longer.
The fine adjustment value set by the Position Fine Adjust command [AX] is displayed in the left box.
When the parameter is not retrieved, the value in the left box becomes zero (0).
Default
0.0 mm
Range
-50.0 to +50.0 mm
[Cut/Peel Off]:
Sets a fine adjustment value for a cut (strip) position in units of 0.1 mm.
When the value is negative (-), the feed length to the cut (strip) position becomes longer.
The fine adjustment value set by the Position Fine Adjust command [AX] is displayed in the left box.
When the parameter is not retrieved, the value in the left box becomes zero (0).
Default
0.0 mm
Range
-50.0 to +50.0 mm
[Back Feed]:
Sets a fine adjustment value for the back feed length in units of 0.1 mm.
When the value is negative (-), the back feed length becomes shorter.
The fine adjustment value set by the Position Fine Adjust command [AX] is displayed in the left box.
When the parameter is not retrieved, the value in the left box becomes zero (0).
Default
0.0 mm
Range
-9.9 to +9.9 mm
Page 38

[X-coordinate]:
Sets a fine adjustment value to offset the print position perpendicular to the paper feed direction in
units of 0.1 mm.
When the value is negative (-), the upper right reference coordinate shifts to the left from the zero
point.
Default
0.0 mm
Range
-99.5 to +99.5 mm
[Tone Adjustment] Group
[Thermal Transfer]:
Sets a fine adjustment value for print density in the thermal transfer print mode.
The fine adjustment value set by the Print Density Fine Adjust command [AY] is displayed in the left
box.
When the parameter is not retrieved, the value in the left box becomes zero (0).
Default
0
Range
-20 to +10
[Direct Thermal]:
Sets a fine adjustment value for print density in the direct thermal print mode.
The fine adjustment value set by the Print Density Fine Adjust command [AY] is displayed in the left
box.
When the parameter is not retrieved, the value in the left box becomes zero (0).
Default
0
Range
-20 to +10
[Command] Group
[Control Code]:
Selects a control code used for command analysis.
Default
AUTO
Options
AUTO, [ESC] [LF] [NUL], { | }, Manual
[Code 1]:
When "Manual" is selected for the [Control Code], sets a code for the first byte in a HEX format.
Enter two alphanumeric characters from "0" to "F".
Entries are not case-sensitive.
Two characters indicate one HEX character. (Example: "0" -> "30" or "A" -> "41")
Default
1B
Range
20 to FF
[Code 2]:
When "Manual" is selected for the [Control Code], sets a code for the second byte in a HEX format.
Enter two alphanumeric characters from "0" to "F".
Entries are not case-sensitive.
Two characters indicate one HEX character. (Example: "0" -> "30" or "A" -> "41")
Default
0A
Range
20 to FF
[Code 3]:
When "Manual" is selected for the [Control Code], sets a code for the third byte in a HEX format.
Enter two alphanumeric characters from "0" to "F".
Entries are not case-sensitive.
Two characters indicate one HEX character. (Example: "0" -> "30" or "A" -> "41")
Default
00
Range
20 to FF
Page 39

[BASIC] Group
[Basic Interpreter]:
Selects whether or not the basic interpreter is enabled.
Default
Disable
Options
Disable, Enable
[Basic Trace]:
Selects whether or not the basic trace is enabled.
Default
Disable
Options
Disable, Enable
[Product] Group
[Printer Serial No.]:
The serial number specific to the printer is displayed.
This setting cannot be changed.
[SHELL]:
The status of the SHELL function is displayed.
This setting cannot be changed.
[Sensor] Group
[Reflective Sensor Threshold Select]:
Selects how to set the threshold for the reflective sensor.
Default
Command Set
Options
Other than B-EX4T3-H (600dpi):
Manual Set, Command Set
B-EX4T3-H (600dpi):
Command Set, Manual1 Set, Manual2 Set, Manual3 Set, Manual4 Set, Manual5 Set
[Reflective Sensor Threshold]: (Other than B-EX4T3-H (600dpi))
Sets a fine adjustment value for the threshold to the reflective sensor output in units of 0.1 V.
Default
1.0 V
Range
0.1 to 4.0 V
[Reflective Sensor Threshold 1 to 5]: (B-EX4T3-H (600dpi))
Sets a fine adjustment value for the threshold to the reflective sensor output in units of 0.1 V.
Up to 5 threshold fine adjustment values can be registered to Reflective Sensor Threshold 1 to 5 for
different media to be used.
Default
1.0 V
Range
0.1 to 4.0 V
[Transmissive Sensor Threshold Select]:
Selects how to set the threshold for the transmissive sensor.
Default
Command Set
Options
Other than B-EX4T3-H (600dpi):
Manual Set, Command Set
B-EX4T3-H (600dpi):
Command Set, Manual1 Set, Manual2 Set, Manual3 Set, Manual4 Set, Manual5 Set
[Transmissive Sensor Threshold]: (Other than B-EX4T3-H (600dpi))
Sets a fine adjustment value for the threshold to the transmissive sensor output in units of 0.1 V.
Default
1.4 V
Range
0.1 to 4.0 V
Page 40

[Transmissive Sensor Threshold 1 to 5]: (B-EX4T3-H (600dpi))
Sets a fine adjustment value for the threshold to the transmissive sensor output in units of 0.1 V.
Up to 5 threshold fine adjustment values can be registered to Transmissive Sensor Threshold 1 to 5
for different media to be used.
Default
1.4 V
Range
0.1 to 4.0 V
[Ribbon Adjustment] Group
[Ribbon Width]: (Other than B-EX4D2-G/T (203dpi/300dpi) / B-EX4T1-T JP (305dpi) / B-EX4T3-H
(600dpi))
Selects the width of a ribbon.
Default
TYPE1
Options
TYPE1 (Standard), TYPE2 (Narrow)
[Drive Voltage (Take-up)]: (B-EX4T1-T JP (305dpi) / B-EX4T3-H (600dpi))
Sets fine adjustment of the ribbon take-up motor voltage (torque).
The fine adjustment value set by the Ribbon Motor Drive Voltage Fine Adjust command [RM] is
displayed in the left box.
When the parameter is not retrieved, the value in the left box becomes zero (0).
Default
0
Range
-15 to +10
[Drive Voltage 1 (Take-up)]: (Other than B-EX4T1-T JP (305dpi) / B-EX4T3-H (600dpi))
Sets fine adjustment of the ribbon take-up motor voltage (torque).
This setting is used when Ribbon Width is TYPE1.
The fine adjustment value set by the Ribbon Motor Drive Voltage Fine Adjust command [RM] is
displayed in the left box.
When the parameter is not retrieved, the value in the left box becomes zero (0).
Default
0
Range
-15 to +10
[Drive Voltage (Feed)]: (B-EX4T1-T JP (305dpi) / B-EX4T3-H (600dpi))
Sets fine adjustment of the ribbon feed motor voltage (torque).
The fine adjustment value set by the Ribbon Motor Drive Voltage Fine Adjust command [RM] is
displayed in the left box.
When the parameter is not retrieved, the value in the left box becomes zero (0).
Default
0
Range
-15 to +10
[Drive Voltage 1 (Feed)]: (Other than B-EX4T1-T JP (305dpi) / B-EX4T3-H (600dpi))
Sets fine adjustment of the ribbon feed motor voltage (torque).
This setting is used when Ribbon Width is TYPE1.
The fine adjustment value set by the Ribbon Motor Drive Voltage Fine Adjust command [RM] is
displayed in the left box.
When the parameter is not retrieved, the value in the left box becomes zero (0).
Default
0
Range
-15 to +10
[Drive Voltage 2 (Take-up)]: (Other than B-EX4D2-G/T (203dpi/300dpi) / B-EX4T1-T JP (305dpi) /
B-EX4T3-H (600dpi))
Sets fine adjustment of the ribbon take-up motor voltage (torque).
This setting is used when Ribbon Width is TYPE2.
The fine adjustment value set by the Ribbon Motor Drive Voltage Fine Adjust command [RM] is
displayed in the left box.
When the parameter is not retrieved, the value in the left box becomes zero (0).
Default
0
Range
-15 to +10
Page 41

[Drive Voltage 2 (Feed)]: (Other than B-EX4D2-G/T (203dpi/300dpi) / B-EX4T1-T JP (305dpi) /
B-EX4T3-H (600dpi))
Sets fine adjustment of the ribbon feed motor voltage (torque).
This setting is used when Ribbon Width is TYPE2.
The fine adjustment value set by the Ribbon Motor Drive Voltage Fine Adjust command [RM] is
displayed in the left box.
When the parameter is not retrieved, the value in the left box becomes zero (0).
Default
0
Range
-15 to +10
[RTC] Group
[Date Time]:
The current date and time programmed for the RTC module are displayed.
This setting cannot be changed.
[Battery Check]:
Selects whether to enable or disable the battery check function.
Default
Disable
Options
Disable, Enable
[Renewal]:
Selects the timing when the date and time are updated during printing.
Default
Batch
Options
Batch, Page
[Password] Group
[System Mode Password]:
Selects whether or not the password used for entering the SYSTEM mode is enabled.
To set this field, the old password is required.
When you enter an incorrect old password, you cannot change the password.
[New Password]:
Sets a password to be used for entering the SYSTEM mode.
To set the password, the old password is required.
When you enter an incorrect old password, you cannot change the password.
This field is effective only when the SYSTEM mode password is enabled.
Enter four characters from "0" to "F".
Entries are not case-sensitive.
Since passwords are security information, they are displayed with hidden characters except when
they are being entered.
Default
0000
Range
0000 to FFFF
[Old Password]:
Enters the password currently set on the printer.
This password is set to cancel a password for entering the SYSTEM mode.
Enter four characters from "0" to "F".
Entries are not case-sensitive.
Since passwords are security information, they are displayed with hidden characters except when
they are being entered.
To enable the new password, enter "0000".
Default
0000
Range
0000 to FFFF
Page 42

Device Tab
[RS-232C] Group
[Baud Rate]:
Sets a communication baud rate for the RS-232C port.
Default
9600 bps
Options
2400 bps, 4800bps, 9600 bps, 19200 bps, 38400 bps, 115200 bps
[Data Length]:
Selects the data length for the RS-232C port.
Default
8 bits
Options
7 bits, 8 bits
[Parity]:
Selects the parity checking to be used by the RS-232C.
Default
JA: Even
Other than JA: None
Options
None, Even, Odd
[Stop Bit]:
Selects the stop bit length for the RS-232C port.
Default
1 bit
Options
1 bit, 2 bits
[Control]:
Selects the method of the flow control to be used by the RS-232C port.
Default
XON+READY AUTO
Options
XON+READY AUTO, XON/XOFF AUTO, READY/BUSY RTS, XON+XOFF,
READY/BUSY
Page 43

[Centro.] Group
[ACK/BUSY]:
Selects the Centronics ACK/BUSY signal timing.
Default
TYPE 1
Options
TYPE 1 (BUSY goes LOW at the same time as ACK goes HIGH.),
TYPE 2 (BUSY goes LOW at the same time as ACK goes LOW.)
[Input Prime]:
Selects whether or not a reset is performed when the Centronics nInit signal is ON.
Default
Enable
Options
Disable, Enable
[Plug & Play]:
Selects whether or not the plug-and-play function is active on the centronics port.
Plug & Play cannot be disabled for the USB interface.
Default
Disable
Options
Disable, Enable
[USB] Group
[USB Serial Number]:
Selects whether or not USB serial numbers are enabled.
When the numbers are disabled, connection to the USB port is established.
Whenever the USB port is changed, printer driver installation is required.
When the numbers are enabled, connection to the displayed serial number is established.
Printer driver installation is required for each serial number.
Default
Disable
Options
Disable, Enable
A serial number is a number specific to the printer.
This setting cannot be changed.
[Auto Status Response]:
Selects whether to enable or disable the auto status response for the communication via USB.
Default
Disable
Options
Disable, Enable
Page 44

LAN Tab
[TCP/IP] Group
[LAN I/F]:
Selects whether to enable or disable the communication via wired LAN or wireless LAN.
Default
Enable (AUTO)
Options
Disable, Enable (AUTO), Enable (Wired LAN), Enable (Wireless LAN)
[IP Address]:
Sets an IP address.
Default
192.168.10.20
Range
0.0.0.0 to 255.255.255.255
[Subnet Mask]:
Sets a subnet mask.
Default
255.255.255.0
Range
0.0.0.0 to 255.255.255.255
[Default Gateway]:
Sets an address of the default gateway.
Default
0.0.0.0
Range
0.0.0.0 to 255.255.255.255
[Protocol] Group
[LPR]:
Sets whether to enable or disable the communication via an LRP protocol.
Default
Enable
Options
Disable, Enable
Page 45

[Socket]:
Sets whether to enable or disable the socket communication.
Default
Enable
Options
Disable, Enable
[Port Number]:
Sets a port number used for the socket communication.
Default
8000
Range
0 to 65535
[WEB Printer]:
Selects whether to enable or disable the Web server function.
Default
Disable
Options
Disable, Enable, Enable (External Memory)
[SNMP]:
Selects whether to enable or disable the SNMP feature.
Default
Enable
Options
Disable, Enable
[SNMP Trap] Group
[1] [2] [3] [4] [5] [6] [7] [8] [9] [10]:
Selects whether to enable or disable the SNMP trap.
Default
Disable
Options
Disable, Error, Job End, Error & Job End
When enabled, set the IP address of the terminals that monitors the SNMP trap.
When this parameter is set to other than "Disable", entry of an IP address becomes enabled.
When "Disable" is selected, the IP address returns to the default.
Default
0.0.0.0
Range
0.0.0.0 to 255.255.255.255
[Server] Group
[DHCP]:
Selects whether to enable or disable DHCP clients.
Default
Disable
Options
Disable, Enable
[DHCP Host Name]:
Sets a host name.
When no name is entered, the printer's MAC address is used.
Use up to 32 alphanumeric characters to enter a name.
[DHCP Client ID]:
Sets a DHCP Client ID.
When "HEX" is selected for [Input Type], set the ID using up to 128 characters ranging from "0" to
"F".
Enter two alphanumeric characters from "0" to "F".
Entries are not case-sensitive.
Two characters indicate one HEX character. (Example: "0" -> "30" or "A" -> "41")
Entering an odd number of characters results in an error.
When "ASCII" is selected for [Input Type], set the ID using up to 64 alphanumeric characters.
Page 46

[Input Type]:
Selects a code used for entering a DHCP client ID.
When the code is changed, the DHCP client ID currently set is cleared.
Default
HEX
Options
HEX, ASCII
[WINS]:
Selects whether to enable or disable the WINS protocol.
When "Enable (STATIC)" is selected, [WINS Server Address] is used.
When "Enable (DHCP)" is selected, [DHCP] is used.
Default
Disable
Options
Disable, Enable (STATIC), Enable (DHCP)
[WINS Server Address]:
Sets the IP address of the WINS server.
Default
0.0.0.0
Range
0.0.0.0 to 255.255.255.255
Page 47

WLAN Tab
[WLAN Basic] Group
[Communication Standard]:
Selects the wireless LAN standard.
Default
802.11b/g
Options
802.11b, 802.11g, 802.11b/g
[WLAN Detail] Group
[ESS ID]:
Sets an ESS ID, using up to 32 alphanumeric characters.
Default
TOSHIBATEC
[Beacon Transmitting Interval]:
Selects an interval between transmissions to the beacon.
Default
1000 msec
Range
1 to 65535 msec
[Roaming Threshold]:
Selects a threshold of roaming sensitivity.
Default
70
Range
0 to 99
[Country Code]:
The country code is displayed.
This setting cannot be changed.
Page 48

[802.11b] Group
[Channel]:
Sets a channel for IEEE 802.11b.
The printer corrects channels that cannot be used due to country code settings.
Default
1
Range
1 to 14
[Baud Rate]:
Selects the maximum transmission rate for IEEE 802.11b.
The transmission rate is adjusted to a value enabling communication by the communicating device.
Default
11 Mbps
Options
11 Mbps, 5.5 Mbps, 2 Mbps, 1 Mbps
[Priority AP] Group
[Property]:
Selects ANY SSID/priority AP.
Default
11 Mbps
Options
ANY SSID OFF, ANY SSID ON / Priority AP OFF,
ANY SSID ON / Priority AP ON / Other AP OFF,
ANY SSID ON / Priority AP ON / Other AP ON
[MAC Address 1] [MAC Address 2] [MAC Address 3] [MAC Address 4] [MAC Address 5]:
Set MAC addresses for access points that you want to connect preferentially.
The numbers indicate order of priority.
Connection to the MAC addresses is made in the order of descending priorities.
Use 12 characters from "0" to "F" to enter addresses.
Entries are not case-sensitive.
When no address is entered, you can disable the current settings.
[Authentication] Group
[(1) Connection Mode]:
Selects the connection mode.
Default
Infrastructure
Options
Adhoc, Infrastructure
[(2) Encryption]:
Selects the encryption scheme.
Options are displayed depending on the [(1) Connection Mode] settings.
Default
Disable
Options
Disable, WEP40, WEP104, TKIP, AES
[(3) Network Authentication]:
Selects the network authentication system.
Options are displayed depending on the [(1) Connection Mode] and [(2) Encryption] settings.
Default
Open System
Options
Open System, Shared Key, WPA-EAP, WPA-PSK, WPA2-EAP, WPA2-PSK
[(4) EAP Method]:
Selects the EAP method.
Options are displayed depending on the [(1) Connection Mode], [(2) Encryption] and [(3) Network
Authentication] settings.
Default
Disable
Options
Disable, EAP-MD5, EAP-TLS, EAP-TTLS, LEAP, LEAP (NetworkEAP), PEAP,
PEAP (w/o Cert.), EAP-FAST
Page 49

< Authentication System Settings >
(1) Connection Mode
(2) Encryption
(3) Network Authentication
(4) EAP Method
Adhoc
Disable
Open System
Disable
WEP40
Open System
Disable
WEP104
Open System
Disable
Infrastructure
Disable
Open System
Disable
WEP40
Open System
Disable
EAP-MD5
EAP-TLS
EAP-TTLS
LEAP
LEAP (NetworkEAP)
PEAP
PEAP (w/o Cert.)
EAP-FAST
Shared Key
Disable
EAP-MD5
WEP104
Open System
Disable
EAP-MD5
EAP-TLS
EAP-TTLS
LEAP
LEAP (NetworkEAP)
PEAP
PEAP (w/o Cert.)
EAP-FAST
Shared Key
Disable
EAP-MD5
TKIP
WPA-EAP
EAP-TLS
EAP-TTLS
LEAP
LEAP (NetworkEAP)
PEAP
PEAP (w/o Cert.)
EAP-FAST
WPA-PSK
Disable
AES
WPA2-EAP
EAP-TLS
EAP-TTLS
LEAP
LEAP (NetworkEAP)
PEAP
PEAP (w/o Cert.)
EAP-FAST
WPA2-PSK
Disable
[WEP] Group
[Default Key]:
Sets a WEP key used by default.
Default
1
Range
1 to 4
[Input Type]:
Selects the code for entering a WEP key.
When the code is changed, the WEP key is cleared.
Page 50

Default
HEX
Options
HEX, ASCII
[WEP Key #1] [WEP Key #2] [WEP Key #3] [WEP Key #4]:
Selects the WEP key used for encrypting the authentication system.
Select the WEP key size and enter the WEP key.
When the WEP key size is changed, the WEP key is cleared.
<40 bits>
When the HEX mode is used for entries, use 10 characters from "0" to "F".
Entries are not case-sensitive.
When the ASCII mode is used for entries, use 5 alphanumeric characters.
<104 bits>
When the HEX mode is used for entries, use 26 characters from "0" to "F".
Entries are not case-sensitive.
When the ASCII mode is used for entries, use 13 alphanumeric characters.
Since WEP keys are security information, they are displayed with hidden characters except when
they are being entered.
Default
Disable
Options
Disable, 40 bits (64 bits), 104 bits (128 bits)
Page 51

WLAN (2) Tab
[WPA-PSK] Group
[Pre Shared Key]:
Sets a key to be used for WPA encryption in network authentication, using 8 to 64 alphanumeric
characters.
Since the key is security information, it is displayed with hidden characters except when it is being
entered.
Default
00000000
[Account] Group
[User Name]:
Sets a username to authenticate the supplicant.
Use up to 32 alphanumeric characters.
[Password]:
Sets a password to authenticate the supplicant.
Use up to 32 alphanumeric characters.
Since the password is security information, it is displayed with hidden characters except when it is
being entered.
[802.1X] Group
[Reauthentication Interval]:
Sets an interval between reauthentications.
Default
2 min
Range
2 to 4320 min
Page 52

[Supplicant] Group
[Server Certificate]:
Sets an absolute path to the server certificate file to be transmitted.
The button is used to select the path on the file selection screen.
When no path is entered, data transmission is not performed.
When entering a path to a blank file without data, you can disable the current settings.
Setting a non-existent file results in an error.
[Client Certificate]:
Sets an absolute path to the client certificate file to be transmitted.
The button is used to select a path on the file selection screen.
When no path is entered, data transmission is not performed.
When entering a path to a blank file without data, you can disable the current settings.
Setting a non-existent file results in an error.
[Key File]:
Sets an absolute path to the key file for client certificate to be transmitted.
The button is used to select a path on the file selection screen.
When no path is entered, data transmission is not performed.
When entering a path to a blank file without data, you can disable the current settings.
Setting a non-existent file results in an error.
[Secret Key]:
Sets a secret key passphrase, using up to 64 alphanumeric characters.
Since the passphrase is security information, it is displayed with hidden characters except when it is
being entered.
[Random Seed]:
Sets an absolute path to a SEED file for creating random values to be transmitted.
The button is used to select a path on the file selection screen.
When no path is entered, data transmission is not performed.
When entering a path to a blank file without data, you can disable the current settings.
Setting a non-existent file results in an error.
[EAP-FAST] Group
[Provisioning Method]:
Selects a Provisioning method.
Default
Auto Provisioning
Options
Auto Provisioning, Manual Provisioning
[Internal Authentication]:
Selects an internal authentication method.
Default
MSCHAPV2
Options
MSCHAPV2, GTC
[PAC File]:
Selects whether to send or delete the PAC file.
Default
No change
Options
No change, Send the PAC file for Manual Provisioning,
Delete the PAC file for Manual Provisioning, Delete the PAC file for Auto Provisioning,
Delete the PAC files for Manual Provisioning and Auto Provisioning
Page 53

[PAC File Path]:
Specifies the PAC file for Manual Provisioning with absolute path.
This is available only when "Send the PAC file for Manual Provisioning" is selected.
The button is used to select a path on the file selection screen.
If the path is not selected, data transmission will not be performed.
If the specified file is not found, an error results.
[PAC File Password]:
Sets the password for the PAC file used for the Manual Provisioning.
Up to 32 digits of 1-byte alphanumeric characters can be set.
Page 54

RFID Tab
[Module] Group
[Module Type]:
Sets the RFID module type installed in the printer.
Default
None
Options
B-EX4T1-G/T (203dpi/305dpi) / B-EX4T1-T JP (305dpi):
None, H1 (HF Band), H2 (HF Band), U2/U4 (UHF Band)
Other than B-EX4T1-G/T (203dpi/305dpi) / B-EX4T1-T JP (305dpi):
None, H1 (HF Band), H2 (HF Band), U4 (UHF Band)
[Tag Type]:
Selects the RFID tag type.
The displayed options differ depending on the RFID module type.
Default
NONE
Options
None: NONE, I-Code, Tag-It, C220, IOS15693, C210, C240, C320, EPC C1 Gen2
H1: NONE, I-Code, Tag-It, C220, IOS15693, C210, C240, C320
H2: NONE, IOS15693
U2/U4: NONE, EPC C1 Gen2
U4: NONE, EPC C1 Gen2
[Country]:
The country where the RFID module can be used is displayed.
This setting cannot be changed.
Displayed country may be incorrect.
This symptom will be corrected by a future firmware upgrading.
Page 55

[UHF] Group
[Power Level]:
Sets the power output level for the UHF band.
Default
18
Range
0 to 255
[Q Value]:
Sets the sensitivity for detecting RFID tags.
Default
0
Range
0 to 15
[AGC Threshold]:
Sets the threshold value used to determine an RFID tag is defective or not.
Default
0
Range
0 to 15
[Write AGC Threshold]:
Sets the threshold value used to determine whether or not to write data to RFID tags.
Default
0
Range
0 to 15
[Write Retry Min. AGC]:
Sets the lower limit value used to determine whether or not to retry data write.
Default
0
Range
0 to 15
[RF Channel]:
Sets a channel used for data write.
Default
AUTO
Options
AUTO, 2 CH, 3 CH, 4 CH, 5 CH, 6 CH, 7 CH, 8 CH
[Multi-word Write]:
Selects whether to enable or disable the multi-word write function for Gen2-compatible Hibiki tag.
When this function is used, the data write efficiency is increased.
Default
Disable
Options
Disable, Enable
[Calibration Mode]:
Selects whether or not an RFID calibration is performed.
This parameter is exclusive for the B-EX4T1-G/T (203dpi/305dpi).
Default
Disable
Options
Disable, Enable
[Calibration AGC]:
Sets an AGC value for the optimum RFID tag write/read position.
This parameter is exclusive for the B-EX4T1-G/T (203dpi/305dpi).
Default
0
Options
0 to 15
[Calibration Position]:
Sets a distance from the home position to the optimum RFID tag write/read position.
This parameter is exclusive for the B-EX4T1-G/T (203dpi/305dpi).
Default
0
Options
-999.9 to 999.9 mm
Page 56

[Antenna Position]:
Selects the actual RF antenna position.
This setting is required for properly performing an RFID calibration.
This parameter is exclusive for the B-EX4T1-G/T (203dpi/305dpi).
Default
FRONT
Options
FRONT, CENTER, REAR
[Retry] Group
[Retry Position Adjustment]:
Sets the amount the printer feeds the RFID label forward or backward to retry data write.
Default
0 mm
Range
-99 to 99 mm
[Issue Retry Labels]:
Sets the number of RFID labels to be issued for retry.
Default
3 labels
Range
0 to 255 labels
[Read Retry Count]:
Sets the max. number of times reading one RFID tag is retried.
Default
5 times
Range
0 to 255 times
[Read Retry Timeout]:
Sets the timeout value for retry to read one RFID tag.
Default
4.0 sec
Range
0.0 to 9.9 sec
[Write Retry Count]:
Sets the number of times writing data to one RFID tag is retried.
Default
5 times
Range
0 to 255 times
[Write Retry Timeout]:
Sets the timeout value for retry to write data to one RFID tag.
Default
2.0 sec
Range
0.0 to 9.9 sec
[Head Up Action] Group
[Head Up Action]:
Selects whether or not a head up action is performed during a reverse feed of an RFID tag.
This parameter is exclusive for the B-EX4T1-T JP (305dpi).
Default
MODE 1
Range
MODE 1, MODE 2
Page 57

Maintenance
The Maintenance menu enables the self-diagnosis and memory management.
When the [Maintenance] icon on the menu icon area is clicked, the [Maintenance] screen is displayed.
Self Diagnosis Tab
[Firmware Info]
Printer firmware information is displayed.
Refreshing the display causes the latest data to be shown.
[Maintenance Counter Info]
The maintenance counter values are displayed.
Refreshing the display or performing a maintenance counter clear causes the latest data to be shown.
[Refresh]
Current printer information is obtained, and the displayed maintenance counter, firmware information and
maintenance counter Information are updated.
When this button is clicked, the processing starts.
When the processing starts, the progress status screen is displayed. When the processing is completed,
the completion screen is displayed.
[Save Printer Info…]
Retrieved dialog information and contents of the maintenance counter will be saved as one file.
On clicking, it will display the File selection screen. Enter a file name and click this to save the file.
On successful retrieval of information from the printer, the button gets enabled.
Page 58

Setting Tab
[Head Check...]
A print head broken element check is performed.
When this button is clicked, the following confirmation message is displayed.
When [Yes] is clicked, the processing starts.
When [No] is clicked, the processing is canceled.
When the processing starts, the progress status screen is displayed. When the processing is completed,
the completion screen is displayed.
This function is executed only when the printer is in TPCL or TPCL1 mode and idle state.
If a broken element is detected, the printer results in an error after the head check finished. Clicking
[Printer Reset] restores the printer to the idle state.
Page 59

[Printer Reset...]
The printer is reset.
When this button is clicked, the following confirmation message is displayed.
When [Yes] is clicked, the processing starts.
When [No] is clicked, the processing is canceled.
When the processing starts, the progress status screen is displayed. When the processing is completed,
the completion screen is displayed.
A reset will be executed regardless of the printer status.
However, the printer reset may not succeed depending on the printer status.
[Data Logging...]
The print log is obtained from the printer, and saved in a file.
When this button is clicked, the file selection screen is displayed. Select a file where the print log is
stored, click [Save], then the processing is started.
When the processing starts, the progress status screen is displayed. When the processing is completed,
the completion screen is displayed.
The print log is used for examining the commands when an error occurred.
[Maintenance Counter Clear]
Selects the option to clear maintenance counter.
Default
All Counter
Options
All Counter, Feed Distance (FEED), Print Distance (PRINT), Cut Count (Cut), Others
(other than FEED, PRINT, CUT)
[Clear...]
Selected maintenance counter is cleared to zero.
When this button is clicked, the following confirmation message is displayed.
When [Yes] is clicked, the processing starts.
When [No] is clicked, the processing is canceled.
When the processing starts, the progress status screen is displayed. When the processing is
completed, the completion screen is displayed.
The maintenance counter data display is updated after the maintenance counter clear is completed.
This function is executed only when the printer is in the online mode and in the idle state.
Page 60

[Parameter Clear]
[Destination]
Selects the destination used after the parameter clear is performed.
Default
QM
Options
QM, JA, CN
[Initialize...]
A RAM clear is performed to initialize to the parameter setting values for the selected destination.
When this button is clicked, the following confirmation message is displayed.
When [Yes] is clicked, the processing starts.
When [No] is clicked, the processing is canceled.
When the processing starts, the progress status screen is displayed. When the processing is
completed, the completion screen is displayed.
The parameter setting data display is updated after the parameter clear is completed.
This function is executed only when the printer is in the online mode and in the idle state.
[Memory Allocate]
The specified size of onboard flash memory is allocated to each storage area.
The sum of the memory size for each storage area shall be equal to the total onboard memory size.
If they do not match, the printer automatically adjusts the size.
Priority of allocation: True Type Font > Bitmap External Character > BASIC File > PC Save
[True Type Font Storage Area]
Sets the area size for storing TrueType fonts.
Default
0 KB
Options
0 to 3072 KB (in units of 128KB)
[Bitmap External Character Storage Area]
Sets the area size for storing bitmap external characters.
Default
1792 KB
Options
0 to 3072 KB (in units of 128 KB)
[Retain BASIC Area]
Selected: The BASIC file storage area size and the data stored in this area will not be
changed. (Stored files are not deleted.)
Not selected: The [BASIC file registration area] can be selected and allocated with the selected
size.
[BASIC File Storage Area]
Sets the area size for storing the BASIC program.
Default
0 KB
Options
0 to 3072 KB (in units of 128KB)
Page 61

[PC Save Storage Area]
The storage area size for printer commands is displayed.
After the memory is allocated to the above three, the rest of the memory is automatically allocated to
the PC Save storage area.
It is required to adjust the storage area size for True type fonts, bitmap external characters and
BASIC files so that the PC Save storage area size does not become a negative value.
When [Retain BASIC Area] is selected, no memory size is displayed.
[Allocate...]
The specified size of memory is allocated to each storage area.
When this button is clicked, the following confirmation message is displayed.
When [Yes] is clicked, the processing starts.
When [No] is clicked, the processing is canceled.
When the processing starts, the progress status screen is displayed. When the processing is
completed, the completion screen is displayed.
This function is executed only when the printer is in the online mode and in the idle state.
This Product waits for the end of memory allocation after sending a Storage Area Allocate command
to the printer.
A memory allocation causes the existing data to be deleted even if the allocated memory size is
unchanged.
[Memory Format]
Currently stored data in the specified memory are deleted.
[Location]
Selects the memory to be formatted.
Default
Onboard Flash Memory
Options
Onboard Flash Memory, USB Memory
[Area]
Selects the area to be formatted.
Default
PC Save & Bitmap External Character
Options
PC Save & Bitmap External Character, PC Save, Bitmap External Character
Page 62

[Format...]
The specified range of the specified memory is formatted.
When this button is clicked, the following message is displayed.
When [Yes] is clicked, the processing starts.
When [No] is clicked, the processing is canceled.
When the processing starts, the progress status screen is displayed. When the processing is
completed, the completion screen is displayed.
This function is executed only when the printer is in the TPCL or TPCL1 mode and in the idle state.
This Product waits for the end of memory format after sending a Flash Memory Format command to
the printer.
Page 63

Download
The Download menu enables downloading the printer firmware program.
When the [Download] icon on the menu icon area is clicked, the [Download] screen is displayed.
Firmware Download
Be sure to avoid the environment where a power failure may occur in the middle of the downloading.
If a power failure occurs during a firmware updating, the printer may not start up.
Even when the printer can normally start up, download the firmware again.
If cannot, please contact TOSHIBA TEC sales representative.
[ROM List]
ROM files of the firmware to be downloaded to the printer are displayed.
No file has been displayed as default.
ROM files are listed by the program section, rather than in a chronological order. The program sections
are sorted in the order of BOOT, MAIN, C/G, XML, HTML, KANJI and CHINESE.
Downloading is performed from the top of the list.
When a ROM file is selected, the firmware information is displayed under the list.
[Add...]
Specified ROM files are added to [ROM List].
When this button is clicked, the file selection screen appears. Choose a ROM file and click [Open].
Then this ROM file is added to [ROM List].
If the specified file is not a ROM file, or if the specified ROM file is not for the printer model selected for
this Product, an error message will be displayed.
Up to four ROM files can be added.
One file per program section is accepted. In the case the second file is chosen for a program section,
the following confirmation message is displayed.
Page 64

When [Yes] is clicked, the existing file is replaced.
When [No] is clicked, the processing is canceled.
[Delete]
When this button is clicked, selected ROM files in [ROM List] are deleted.
This button becomes active when a ROM file is selected in [ROM List].
[Start Download...]
The ROM files in [ROM List] are downloaded to the printer.
When this button is clicked, the following confirmation message is displayed.
When [Yes] is clicked, the processing starts.
When [No] is clicked, the processing is canceled.
When reading the ROM file or creating download data failed, an error message will be displayed.
When Multi LAN is selected for the interface, the [Printer List] screen is displayed to allow choosing the
printers to which the files are downloaded.
When the processing starts, the progress status screen is displayed. When the processing is completed,
the completion screen is displayed.
This function is executed only when the printer is in the online mode and in the idle state.
When no file is listed in [ROM List], this button is grayed out.
After the ROM files are sent to the printer, this Product waits for the end of the printer update.
Regarding the Main and Boot programs, whether or not the firmware version has been updated is
confirmed at the completion of the download.
When multiple files are downloaded, the processing is repeated one by one.
The printer firmware is replaced with the specified ROM files regardless of the current printer version.
Page 65

BASIC Download
Be sure to avoid the environment where a power failure may occur in the middle of the downloading.
If a power failure occurs during a downloading, retry the operation.
[Memory Allocate]
Selects whether or not an on-board flash memory is divided and allocated to different types of data.
The checkbox has not been checked as default.
When checked, the memory allocation is enabled.
The specified memory size of an on-board flash memory is allocated to each storage area when
downloading is executed.
The sum of the memory size for each storage area shall be equal to the total onboard memory size.
If they do not match, the printer automatically adjusts the size.
Priority of allocation: Bitmap External Character > BASIC File > Form > Graphic > PC Save
[True Type Font Storage Area]
Set the area size for storing TrueType fonts.
Default
0 KB
Options
0 to 3072 KB (in units of 128KB)
[Bitmap External Character Storage Area]
Sets the area size for storing bitmap external characters.
Default
1792 KB
Options
0 to 3072 KB (in units of 128KB)
Page 66

[Retain BASIC Area]
Selected: The BASIC file storage area size and the data stored in this area will not be
changed. (Stored files are not deleted.)
Not selected: The [BASIC file registration area] can be selected and allocated with the selected
size.
[BASIC File Storage Area]
Sets the area size for storing the BASIC program.
Default
512 KB
Options
0 to 3072 KB (in units of 128KB)
[PC Save Storage Area]
The storage area size for printer commands is displayed.
After the memory is allocated to the above three, the rest of the memory is automatically allocated to
the PC Save storage area.
It is required to adjust the storage area size for bitmap external characters, BASIC files, Form and
Graphic so that the PC Save storage area size does not become a negative value.
When [Retain BASIC Area] is selected, no memory size is displayed.
[BASIC Main Program]
Selects whether or not to download the BASIC main program.
The checkbox has not been checked as default.
When checked, the starting block and the program file can be selected.
The specified file is downloaded to the specified block of the printer memory.
Starting block
Specifies the area where the program is stored.
Set a value so that the area does not overlap the other blocks.
Default
0
Range
0 to 23
Program file
Click [Add] to open the file selection screen. Select a BASIC main program, click [Open], then the
full path of the file is displayed.
[BASIC Main Program] does not become effective unless a file is selected.
When reading a file or creating download data failed, the error message is displayed.
[BASIC System Mode Program]
Selects whether or not to download the BASIC system mode program.
The checkbox has not been checked as default.
When checked, the starting block and the program file can be selected.
The specified file is downloaded to the specified block of the printer memory.
Starting block
Specifies the area where the program is stored.
Set a value so that the area does not overlap the other blocks.
Default
1
Range
0 to 23
Program file
Click [Add] to open the file selection screen. Select a BASIC system mode program, click [Open],
then the full path of the file is displayed.
[BASIC System Mode Program] does not become effective unless a file is selected.
When reading a file or creating download data failed, the error message is displayed.
Page 67

[BASIC Data File]
Selects whether or not to download the BASIC data file.
The checkbox has not been checked as default.
When checked, the starting block and data file setting become editable.
The specified file is downloaded to the specified block of the printer memory.
Starting block
Specifies the area where the program is stored.
Set a value so that the area does not overlap the other blocks.
Default
2
Range
0 to 23
Data file
Click [Add] to open the file selection screen. Select a BASIC data file, click [Open], then the full
path of the file is displayed.
[BASIC Data File] does not become effective unless a file is selected.
When reading a file or creating download data failed, the error message is displayed.
[Start Download...]
Download of the effective programs or update of parameter settings is executed.
When this button is clicked, the following confirmation message is displayed.
When [Yes] is clicked, the processing starts.
When [No] is clicked, the processing is canceled.
When the processing starts, the progress status screen is displayed. When the processing is completed,
the completion screen is displayed.
This function is executed only when the printer is in the online mode and in the idle state.
This button is grayed out unless the above settings are properly configured.
After the program or data is sent to the printer, this Product waits for the end of the printer update.
When multiple BASIC files are effective, the processing is executed from the top, one by one.
Download of the program or update of parameter settings are performed regardless of the current printer
program.
Page 68

Emulation
Be sure to avoid the environment where a power failure may occur in the middle of the downloading.
If a power failure occurs during a downloading, retry the operation.
[Memory Allocate]
Selects whether or not an on-board flash memory is divided and allocated to different types of data.
The checkbox has not been checked as default.
When checked, the memory allocation is enabled.
The specified memory size of an on-board flash memory is allocated to each storage area when
downloading is executed.
The sum of the memory size for each storage area shall be equal to the total onboard memory size.
If they do not match, the printer automatically adjusts the size.
Priority of allocation: TrueType Font > Bitmap External Character > BASIC File > PC Save
[True Type Font Storage Area]
Sets the area size for storing TrueType fonts.
Default
0 KB
Options
0 to 3072 KB (in units of 128KB)
[Bitmap External Character Storage Area]
Sets the area size for storing bitmap external characters.
Default
1792 KB
Options
0 to 3072 KB (in units of 128KB)
Page 69

[Retain BASIC Area]
Selected: The BASIC file storage area size and the data stored in this area will not be
changed. (Stored files are not deleted.)
Not selected: The [BASIC file registration area] can be selected and allocated with the selected
size.
[BASIC File Storage Area]
Sets the area size for storing the BASIC program.
Other than B-EX4T2-H (600dpi) : Set 768KB (6 Blocks) or more.
B-EX4T2-H (600dpi) : Set 512KB (4 Blocks) or more.
Default
Other than B-EX4T2-H (600dpi) : 768KB
B-EX4T2-H (600dpi) : 512 KB
Options
0 to 3072 KB (in units of 128KB)
[PC Save Storage Area]
The storage area size for printer commands is displayed.
After the memory is allocated to the above three, the rest of the memory is automatically allocated to
the PC Save storage area.
It is required to adjust the storage area size for True type fonts, bitmap external characters and
BASIC files so that the PC Save storage area size does not become a negative value.
When [Retain BASIC Area] is selected, no memory size is displayed.
[BASIC Main Program]
Selects whether or not to download the BASIC main program.
The checkbox has not been checked as default.
When checked, the starting block and the program file can be selected.
The specified file is downloaded to the specified block of the printer memory.
Starting block
Specifies the area where the program is stored.
Set a value so that the area does not overlap the other blocks.
Default
0
Range
0 to 23
Program file
Click [Add] to open the file selection screen. Select a BASIC main program, click [Open], then the
full path of the file is displayed.
[BASIC Main Program] does not become effective unless a file is selected.
When reading a file or creating download data failed, the error message is displayed.
[BASIC System Mode Program]
Selects whether or not to download the BASIC system mode program.
The checkbox has not been checked as default.
When checked, the starting block and the program file can be selected.
The specified file is downloaded to the specified block of the printer memory.
Starting block
Specifies the area where the program is stored.
Set a value so that the area does not overlap the other blocks.
Default
Other than B-EX4T2-H (600dpi) : 2
B-EX4T2-H (600dpi) : 1
Range
0 to 23
Page 70

Program file
Click [Add] to open the file selection screen. Select a BASIC system mode program, click [Open],
then the full path of the file is displayed.
The [BASIC System Mode Program] does not become effective unless a file is selected.
When reading a file or creating download data failed, the error message is displayed.
[Z Mode System parameter file]
Select whether or not to download the BASIC data file.
The system parameter file is downloaded to the specified block of the printer memory.
Starting block
Specify the area where the program is stored.
Set a value so that the area does not overlap the other blocks.
Default
Other than B-EX4T2-H (600dpi) : 3
B-EX4T2-H (600dpi) : 2
Range
0 to 23
Data file
Click the Add button to open the file selection screen. Select a BASIC data file, click [Open], then
the full path of the file is displayed.
The [System parameter file] does not become effective unless a file is selected.
When reading a file or creating download data failed, the error message is displayed.
[Z Mode Initial values & table file]
Select whether or not to download the BASIC data file.
The Initial values & table file is downloaded to the specified block of the printer memory.
Starting block
Specify the area where the program is stored.
Set a value so that the area does not overlap the other blocks.
Default
Other than B-EX4T2-H (600dpi) : 4
B-EX4T2-H (600dpi) : 3
Range
0 to 23
Data file
Click the Add button to open the file selection screen. Select a BASIC data file, click [Open], then
the full path of the file is displayed.
The [Initial values & table file] does not become effective unless a file is selected.
When reading a file or creating download data failed, the error message is displayed.
[D Mode Initial values file]
Select whether or not to download the BASIC data file.
The Initial values & table file is downloaded to the specified block of the printer memory.
Starting block
Specify the area where the program is stored.
Set a value so that the area does not overlap the other blocks.
Default
5
Range
0 to 23
Data file
Click the Add button to open the file selection screen. Select a BASIC data file, click [Open], then
the full path of the file is displayed.
The [Initial values file] does not become effective unless a file is selected.
When reading a file or creating download data failed, the error message is displayed.
[MODE ON/OFF]
Select whether or not to sends the emulation mode ON/OFF command.
Page 71

[Send test file]
A specified file is sent to the printer in binary format.
Click the Add button to open the file selection screen. Select a data file, click [Open], then the full
path of the file is displayed.
The [Send test file] does not become effective unless a file is selected.
When reading a file or creating download data failed, the error message is displayed.
[Start Download...]
Download of the effective programs or update of parameter settings is executed.
When this button is clicked, the following confirmation message is displayed.
When [Yes] is clicked, the processing starts.
When [No] is clicked, the processing is canceled.
When the processing starts, the progress status screen is displayed. When the processing is completed,
the completion screen is displayed.
This function is executed only when the printer is in the online mode and in the idle state.
This button is grayed out unless the above settings are properly configured.
After the program or data are sent to the printer, this Product waits for the end of the printer update.
When multiple BASIC files are effective, the processing is executed from the top, one by one.
Download of the program or update of parameter settings are performed regardless of the current printer
program.
Page 72

Create HTML/XML ROM
[ROM Type]
Selects a ROM file type to be created.
The "Load Address" and "Size" differ depending on the ROM file type.
Default
HTML/XML
Options
HTML/XML
[Source Path]
Specifies the location where the HTML/XML files are stored.
Click the button to display the folder selection screen. Select the folder where HTML/XML files
are stored, click [OK]. The full path of the file is displayed.
When "HTML/XML" is set for [ROM Type], the source files in the specified folder are displayed in [Source
List].
If there is no file in the specified folder, an error message will appear. A blank file or a file with the name
including 24 characters or more is excluded.
[Section]
Specifies the section information for the HTML/XML ROM.
* Do not change the setting from the default one.
[Version]
Specifies the version information for the HTML/XML ROM.
* Up to 5 alphanumeric characters and dot symbols can be used.
[Model]
Specifies the model name for the HTML/XML ROM.
* Do not change the setting from the default one.
[Address]
Page 73

Specifies the address information for the HTML/XML ROM.
* Do not change the setting from the default one.
[Size]
Specifies the size for the HTML/XML ROM.
* Do not change the setting from the default one.
[Date]
Specifies the date information for the HTML/XML ROM.
Enter the date in a "DDMMMYYYY" format.
DD: Day (00, 01, 02……….29, 30, 31)
MMM: Month (JAN, FEB, MAR, APR, MAY, JUN, JUL, AUG, SEP, OCT, NOV, DEC)
YYYY: Year (2016, 2017, 2018….)
[Source List]
When "HTML/XML" is set for [ROM Type], the files in the specific path under the specified folder are
shown.
ROM files for XML are created from the displayed files.
\XML folder: File for XML
\GRP_DATA folder: File for graphics
\ENG\HTML folder: File for English language
\ENG\PASS folder File for English language
\JPN\HTML folder: File for Japanese language
\JPN\PASS folder: File for Japanese language
\MAIL folder: File for emails
\MAIL\TEXT folder: File for emails
The file size and the ratio to the maximum size in percentage are displayed under [Source List].
[ROM List]
The data configuration of the created ROM file is displayed.
When creation of a ROM file is started, the display is cleared and the status of file conversion into a ROM
file is shown.
In the case the same file name is assigned to both the files for English and Japanese languages, they are
handled as one common file.
[Create]
A ROM file is created from the files in the file list on the specified conditions.
When this button is clicked, the folder selection screen is displayed and the processing starts.
The progress status is indicated with the progress bar and in [ROM List]. Cancellation is not acceptable
during the creation of the ROM file.
The result of the conversion is displayed in [ROM List].
This button is grayed out unless the file list and output file are configured.
Download the created ROM files to the printer using [Start Download...] on the [Firmware Download] tab
page.
When the number of files exceeds 128 or the total file size in the ROM list exceeds the value shown at
"Size", an error message will be displayed.
When reading the file, creating or saving ROM files failed, an error message will also be displayed.
Page 74

Tool
The functions useful for operating the printer are provided.
When the [Tool] icon on the menu icon area is clicked, the [Tool] screen is displayed.
Tool Tab
[Send File...]
A specified file is sent to the printer in a binary format.
When this button is clicked, the file selection screen is displayed. Select a desired file and click [Open].
Then, the file transmission is started.
When the processing starts, the progress status is displayed. When the file transmission is completed,
the completion screen is displayed.
This function is used for sending the files such as external characters and printer commands to the
printer.
A file transmission is executed regardless of the printer status.
[Enable Emulation]
Enable the emulation function of the printer.
[Disable Emulation]
Disable the emulation function and return the "Print Command Mode" to TPCL.
Page 75

Create External Character Tab
[Specification Method]
Selects the specify method the bitmap file path.
"File": When an external character is created from one bitmap file
"Folder": When an external character is created from more than one bitmap file
Default
File
Options
File, Folder
[Location]
Selects the type of a memory where the files are stored.
Default
Onboard Flash Memory
Options
Onboard Flash Memory, USB Memory
[Bitmap Path]
Specifies the location where the bitmap file is stored.
Click the button to show the full path of the specified location.
Only monochrome (black and white) bitmaps are acceptable. One dot of a bitmap is equivalent to one
pixel specified in Paint.
When "File" is selected for [Specification Method], specify one bitmap file from the screen.
If the selected file is not a monochrome bitmap, an error message will be displayed.
If the selected file exceeds the acceptable upper limit of the width or height, an error message will be
displayed.
When "Folder" is selected for [Specification Method], specify a folder in which more than one bitmap file
is stored. The bitmap files in the specified folder are displayed in [Bitmap List] as long as their file
names conform to the format described below.
When no monochrome bitmap file with proper name is found in the specified folder, an error message will
be displayed.
Page 76

Bitmap file name format
G_"Type""Code" (_"Left Offset"_"Top Offset"_"Character Spacing").bmp
<Example> When Type = 01, Code = 20: G_0120.bmp or G_0120_0_0_0.bmp
When Type = 51, Code = FFFF: G_51FFFF.bmp or G_51FFF_0_0_0.bmp
Restriction on the bitmap file
When [Type] = "41", the size shall be 16 x 16 dots.
When [Type] = "42", the size shall be 24 x 24 dots.
When [Type] = "43", the size shall be 32 x 32 dots.
When [Type] = "44", the size shall be 48 x 48 dots.
When [Type] = other value than above:
Location
Printer
Resolution
Range
Onboard Flash Memory
- - 720 x 720 dots
USB Memory
B-EX4T1-G/T (203dpi/305dpi)
B-EX4T2-G/T (203dpi/300dpi)
B-EX4D2-G/T (203dpi/300dpi)
203 dpi
832 x 5460 dots
B-EX4T1-G/T (203dpi/305dpi)
305 dpi
1248 x 5460 dots
B-EX4T1-T JP (305dpi)
-
1248 x 5460 dots
B-EX4T2-G/T (203dpi/300dpi)
B-EX4D2-G/T (203dpi/300dpi)
300 dpi
1248 x 5460 dots
B-EX4T2-H (600dpi)
B-EX4T3-H (600dpi)
-
1248 x 5460 dots
[Bitmap List]
Bitmap files in the location specified for [Bitmap path] are displayed.
Displayed files are original files used for creating an external character file.
[Size]
The size and image of the selected bitmap file are displayed.
[Type]
Specifies a type number used for storing the file as an external character.
When "Folder" is selected for [Specification Method], this becomes invalid.
Default
01
Range
When [Location] = "Onboard Flash Memory": 01 to 44, 51
When [Location] = "USB Memory": 01 to 44, 51 to 55
[Code]
Sets the character code in a hex. format for storing the file as an external character.
One hexadecimal code is expressed with two characters. (Example: "0" -> "30", "A" -> "41")
When "Folder" is selected for [Specification Method], this becomes invalid.
Default
20
Range
When [Type] = any of "01" to "40": 20 to FF
When [Type] = any of "41" to "44": 40 to 7E, 80 to FC
When [Type] = any of "51" to "55": 020 to FFFF
Page 77

[Left Offset]
Sets a value for the left offset from the reference coordinate.
When any of "41" to "44" is set for [Type], this becomes invalid.
When "Folder" is selected for [Specification Method], this becomes invalid.
Location
Printer
Resolution
Range
Default
Onboard Flash Memory
- - 0 to 719 dots
0 dot
USB Memory
B-EX4T1-G/T (203dpi/305dpi)
B-EX4T2-G/T (203dpi/300dpi)
B-EX4D2-G/T (203dpi/300dpi)
203 dpi
0 to 831 dots
B-EX4T1-G/T (203dpi/305dpi)
305 dpi
0 to 1247 dots
B-EX4T1-T JP (305dpi)
-
0 to 1247 dots
B-EX4T2-G/T (203dpi/300dpi)
B-EX4D2-G/T (203dpi/300dpi)
300dpi
0 to 1247 dots
B-EX4T2-H (600dpi)
B-EX4T3-H (600dpi)
-
0 to 2454 dots
[Top Offset]
Sets a value for the top offset from the reference coordinate.
When any of "41" to "44" is set for [Type], this becomes invalid.
When "Folder" is selected for [Specification Method], this becomes invalid.
Default
0 dot
Range
When [Location] = "Onboard Flash Memory": 0 to 719 dots
When [Location] = "USB Memory": 0 to 5460 dots
[Character Spacing]
Sets a fine adjustment value for the space between characters.
When any of "41" to "44" is set for [Type], this becomes invalid.
When "Folder " is selected for [Specification Method], this becomes invalid.
Location
Printer
Resolution
Range
Default
Onboard Flash Memory
- - 0 to 999 dots
0
USB Memory
B-EX4T1-G/T (203dpi/305dpi)
B-EX4T2-G/T (203dpi/300dpi)
B-EX4D2-G/T (203dpi/300dpi)
203 dpi
0 to 832 dots
B-EX4T1-G/T (203dpi/305dpi)
305 dpi
0 to 1248 dots
B-EX4T1-T JP (305dpi)
-
0 to 1248 dots
B-EX4T2-G/T (203dpi/300dpi)
B-EX4D2-G/T (203dpi/300dpi)
300 dpi
0 to 1248 dots
B-EX4T2-H (600dpi)
B-EX4T3-H (600dpi)
-
0 to 2455 dots
[Resolution]
Select the resolution。
Option
B-EX4T1-G/T (203dpi/305dpi)
203 dpi、305 dpi
B-EX4T2-G/T (203dpi/300dpi)
B-EX4D2-G/T (203dpi/300dpi)
203 dpi、300 dpi
B-EX4T1-T JP (305dpi)
B-EX4T2-H (600dpi)
B-EX4T3-H (600dpi)
Not displayed
[Confirmation File]
Selects whether or not to generate a print command file for checking the created external characters.
When the checkbox is checked, a print command will be created in accordance with the settings specified
in [Magnification], [Print Method], [Label Length] and [Label Width]. [Print Speed], [Sensor] and [Issue
Mode] are fixed to "Auto", "None" and "Batch", respectively.
Page 78

By sending the created print command to the printer in which the external character file is stored, you can
print the external characters for check.
The file extension is "prn" and the file name is the same as the output file name.
When "Folder" is selected for [Specification Method], this becomes invalid.
[Magnification]
Selects a magnification of the external character for test print.
Default
1.0 x 1.0
Options
0.5 x 0.5, 1.0 x 1.0, 2.0 x 2.0, 3.0 x 3.0, 1.0 x 2.0, 2.0 x 1.0
[Print Method]
Selects the print method.
Default
Other than B-EX4D2-G/T (203dpi/300dpi): Thermal Transfer
B-EX4D2-G/T (203dpi/300dpi): Direct Thermal
Options
B-EX4T1-G/T (203dpi/305dpi) / B-EX4T1-T JP (305dpi):
Thermal Transfer, Thermal Transfer (Ribbon Saving), Direct Thermal,
Direct Thermal (Head Up)
B-EX4T2-G/T (203dpi/300dpi) / B-EX4T2-H (600dpi):
Thermal Transfer, Direct Thermal
B-EX4T3-H (600dpi): Thermal Transfer
B-EX4D2-G/T (203dpi/300dpi): Direct Thermal
[Label Length]
Sets the effective print length of media. The label gap is fixed to 2 mm.
Default
74 mm
Range
Other than B-EX4T2-H (600dpi) / B-EX4T3-H (600dpi): 8 to 1498 mm
B-EX4T2-H (600dpi) / B-EX4T3-H (600dpi): 8 to 498 mm
[Label Width]
Sets the effective print width of media.
Default
54 mm
Range
10 to54 mm
[Output File]
Specifies the file where an external character is stored.
Click the button to display the file selection screen. Specify a file and click [Save]. Then, the full
path is displayed in the file name.
The file extension is "gai".
After the specified file is initialized, an external character is stored in it.
[Create]
A Bitmap External Character Command is created from the bitmap on the specified conditions.
When this button is clicked, the processing starts.
The progress status is indicated with the progress bar. Cancellation is not acceptable during the
creation of the command.
This button is grayed out unless data are set for [Bitmap Path] and [Output File].
When "File" is selected for [Specification Method], an external character file is created from the specified
bitmap file.
When "Folder" is selected for [Specification Method], an external character file is created from the bitmap
file in the Bitmap list.
A Bitmap External Character Command is created with nibble data.
Send the created external character files to the printer using [Send File] on the [Tool] tab page.
When reading, creating or saving the external character files failed, an error message will be displayed.
Page 79

Test Print Tab
[Print Pattern]
Selects a print pattern for the test print.
Default
Other than B-EX4T3-H (600dpi):
Slant Lines (1 dot)
B-EX4T3-H (600dpi):
Slant Lines (3 dot)
Options
Other than B-EX4T3-H (600dpi):
Slant Lines (1 dot), Slant Lines (3 dots), Characters, Barcodes
B-EX4T3-H (600dpi):
Slant Lines (3 dot), Slant Lines (4 dots) , Slant Lines (7 dots), Characters, Barcodes
[Resolution]
Selects a reolution for the test print.
Default
B-EX4T1-G/T (203dpi/305dpi)
B-EX4T2-G/T (203dpi/300dpi)
B-EX4D2-G/T (203dpi/300dpi)
203 dpi
B-EX4T1-T JP (305dpi)
305 dpi
B-EX4T2-H (600dpi)
B-EX4T3-H (600dpi)
600 dpi
Options
B-EX4T1-G/T (203dpi/305dpi)
203 dpi, 305 dpi
B-EX4T2-G/T (203dpi/300dpi)
B-EX4D2-G/T (203dpi/300dpi)
203 dpi, 300 dpi
B-EX4T1-T JP (305dpi)
305 dpi
B-EX4T2-H (600dpi)
B-EX4T3-H (600dpi)
600dpi
Page 80

[Print Condition]
[Issue Count]
Sets the print count.
Default
1
Range
1 to 9999
[Print Speed]
Selects a print speed.
Printer
Resolution
Options
Default
B-EX4T1-G/T (203dpi/305dpi)
203 dpi
3 inch/sec、6 inch/sec、10 inch/sec、
12 inch/sec、14 inch/sec
6 inch/sec
305 dpi
3 inch/sec、5 inch/sec、8 inch/sec、
10 inch/sec、12 inch/sec、14 inch/sec
5 inch/sec
B-EX4T1-T JP (305dpi)
305 dpi
3 inch/sec、5 inch/sec、8 inch/sec、
10 inch/sec、12 inch/sec、14 inch/sec
5 inch/sec
B-EX4T2-G/T (203dpi/300dpi)
B-EX4D2-G/T (203dpi/300dpi)
203 dpi
3 inch/sec、6 inch/sec、10 inch/sec、
12 inch/sec
6 inch/sec
300 dpi
3 inch/sec、5 inch/sec、8 inch/sec、
10 inch/sec、12 inch/sec
5 inch/sec
B-EX4T2-H (600dpi)
B-EX4T3-H (600dpi)
600 dpi
2 inch/sec、3 inch/sec、4 inch/sec、
5 inch/sec、6 inch/sec
3 inch/sec
[Sensor]
Selects a sensor to be used.
Default
None
Options
Other than B-EX4T3-H (600dpi):
None, Reflective, Transmissive, Transmissive (Preprinted Labels),
Reflective (Manual)
B-EX4T3-H (600dpi):
None, Reflective, Transmissive, Transmissive (Preprinted Labels 1), Transmissive
(Preprinted Labels 2), Transmissive (Preprinted Labels 3), Transmissive (Preprinted
Labels 4), Transmissive (Preprinted Labels 5), Reflective (Manual 1) , Reflective
(Manual 2) , Reflective (Manual 3) , Reflective (Manual 4) , Reflective (Manual 5)
[Issue Mode]
Selects an issue mode.
Default
Batch
Options
Batch, Peel-off
[Print Method]
Selects a print method.
Default
Other than B-EX4D2-G/T (203dpi/300dpi): Thermal Transfer
B-EX4D2-G/T (203dpi/300dpi): Direct Thermal
Options
B-EX4T1-G/T (203dpi/305dpi) / B-EX4T1-T JP (305dpi):
Thermal Transfer, Thermal Transfer (Ribbon Saving), Direct Thermal,
Direct Thermal (Head Up)
B-EX4T2-G/T (203dpi/300dpi) / B-EX4T2-H (600dpi):
Thermal Transfer, Direct Thermal
B-EX4T3-H (600dpi): Thermal Transfer
B-EX4D2-G/T (203dpi/300dpi): Direct Thermal
Page 81

[Label Length]
Sets the effective print length of media.
Default
74 mm
Range
Other than B-EX4T2-H (600dpi) / B-EX4T3-H (600dpi): 8 to 1498 mm
B-EX4T2-H (600dpi) / B-EX4T3-H (600dpi): 8 to 498 mm
[Label Gap]
Sets the length of the gap between labels.
Default
2 mm
Range
0 to 20 mm
[Label Width]
Sets the effective print width of media.
Default
104 mm
Range
10 to 104 mm
[Tone Adjustment]
Sets a fine adjustment value for the print tone.
A Print Density Fine Adjust command only for the selected print method is transmitted. The fine
adjustment value set in the Print Density Fine Adjust command will be effective until it is changed.
Default
0
Range
-20 to +10
Page 82

[Test Print]
The printer performs a test print on the specified conditions.
When this button is clicked, the processing starts.
When the processing starts, the progress status screen is displayed. When the processing is completed,
the completion screen is displayed.
This function is executed only when the printer is in the online mode and in the idle state.
When reading the file or creating an image data failed, an error message will be displayed.
Slant Lines (1 dot)
Slant Lines (3 dot)
Characters
Barcodes
Page 83

Emulation
The Emulation menu enables configuring or obtaining the Z Mode/D Mode parameter settings.
When the [Emulation] icon on the menu icon area is clicked, each menu is displayed.
Support printer:
B-EX4T1-G/T (203dpi/305dpi)
B-EX4T2-G/T (203dpi/300dpi)
B-EX4D2-G/T (203dpi/300dpi)
B-EX4T2-H (600dpi)
Page 84

Z Mode System Parameter setting
Z Mode Parameter Tab
Sets the Z Mode system parameter. The same settings those for the printer can be set.
[Label length]
Printer
Range
Default
B-EX4T1-G/T (203dpi/305dpi)
B-EX4T2-G/T (203dpi/300dpi)
B-EX4D2-G/T (203dpi/300dpi)
10.0 to 1500.0 mm
105.0
B-EX4T2-H (600dpi)
10.0 to 500.0 mm
105.0
[Label width]
Printer
Range
Default
B-EX4T1-G/T (203dpi/305dpi)
B-EX4T2-G/T (203dpi/300dpi)
B-EX4D2-G/T (203dpi/300dpi)
B-EX4T2-H (600dpi)
10.0 to 104.0 mm
104.0
Page 85

[Ribbon]
Printer
Range
Default
B-EX4T1-G/T (203dpi/305dpi)
WITHOUT RIBBON
WITH RIBBON SAVE
WITH RIBBON
WITHOUT RIBBON H
WITH RIBBON
SAVE
B-EX4T2-G/T (203dpi/300dpi)
B-EX4D2-G/T (203dpi/300dpi)
B-EX4T2-H (600dpi)
WITHOUT RIBBON
WITH RIBBON
WITH RIBBON
[Print mode]
Printer
Range
Default
B-EX4T1-G/T (203dpi/305dpi)
B-EX4T2-G/T (203dpi/300dpi)
B-EX4D2-G/T (203dpi/300dpi)
B-EX4T2-H (600dpi)
NO CUT
PEEL OFF
PEEL OFF A
WITH CUT
DELAYED CUT
RFID
NO CUT
[Sensor]
Printer
Range
Default
B-EX4T1-G/T (203dpi/305dpi)
B-EX4T2-G/T (203dpi/300dpi)
B-EX4D2-G/T (203dpi/300dpi)
B-EX4T2-H (600dpi)
NONE
REFLECT
TRANS
TRANS PREPRINT
REFLECT MANUAL
TRANS
[Print speed]
Printer
Range
Default
B-EX4T1-G/T (203dpi/305dpi)
3 inch/sec (G/T)
5 inch/sec (T)
6 inch/sec (G)
8 inch/sec (T)
10 inch/sec (G/T)
12 inch/sec (G/T)
14 inch/sec (G/T)
3 inch/sec (G/T)
B-EX4T2-G/T (203dpi/300dpi)
B-EX4D2-G/T (203dpi/300dpi)
3 inch/sec (G/T)
5 inch/sec (T)
6 inch/sec (G)
8 inch/sec (T)
10 inch/sec (G/T)
12 inch/sec (G/T)
3 inch/sec (G/T)
B-EX4T2-H (600dpi)
2 inch/sec
3 inch/sec
4 inch/sec
5 inch/sec
6 inch/sec
2 inch/sec
[Max. label length (for calibration)]
Printer
Range
Default
B-EX4T1-G/T (203dpi/305dpi)
B-EX4T2-G/T (203dpi/300dpi)
B-EX4D2-G/T (203dpi/300dpi)
10.0 to 1500.0 mm
500.0
B-EX4T2-H (600dpi)
5.0 to 500.0mm
500.0
Page 86

[Calib. after power on]
Printer
Range
Default
B-EX4T1-G/T (203dpi/305dpi)
B-EX4T2-G/T (203dpi/300dpi)
B-EX4D2-G/T (203dpi/300dpi)
B-EX4T2-H (600dpi)
CALIBRATE
SHORT CALIBRATE
SET LENGTH
NONE
FEED
CALIBRATE
[Calib. after head close]
Printer
Range
Default
B-EX4T1-G/T (203dpi/305dpi)
B-EX4T2-G/T (203dpi/300dpi)
B-EX4D2-G/T (203dpi/300dpi)
B-EX4T2-H (600dpi)
CALIBRATE
SHORT CALIBRATE
SET LENGTH
NONE
FEED
CALIBRATE
[Dots/mm]
Printer
Range
Default
B-EX4T1-G/T (203dpi/305dpi)
B-EX4T2-G/T (203dpi/300dpi)
B-EX4D2-G/T (203dpi/300dpi)
12 or 8 dot/mm
6 or 4 dot/mm
12 or 8 dot/mm
B-EX4T2-H (600dpi)
24 dot/mm
12 dot/mm
24 dot/mm
[Format convert]
Printer
Range
Default
B-EX4T1-G/T (203dpi/305dpi)
B-EX4T2-G/T (203dpi/300dpi)
B-EX4D2-G/T (203dpi/300dpi)
B-EX4T2-H (600dpi)
NONE
150 -> 300
150 -> 600
200 -> 600
300 -> 600
NONE
[Graphic position]
Printer
Range
Default
B-EX4T1-G/T (203dpi/305dpi)
B-EX4T2-G/T (203dpi/300dpi)
B-EX4D2-G/T (203dpi/300dpi)
B-EX4T2-H (600dpi)
SPEED-ORIENTED
PRECISE POSITION
SPEED-ORIENTED
[Tab -> Space]
Printer
Range
Default
B-EX4T1-G/T (203dpi/305dpi)
B-EX4T2-G/T (203dpi/300dpi)
B-EX4D2-G/T (203dpi/300dpi)
B-EX4T2-H (600dpi)
0 to 99
4
[RFID tag position adj]
Printer
Range
Default
B-EX4T1-G/T (203dpi/305dpi)
B-EX4T2-G/T (203dpi/300dpi)
B-EX4D2-G/T (203dpi/300dpi)
B-EX4T2-H (600dpi)
-999.9 to +999.9 mm
0.0
Page 87

[RFID offset print]
Printer
Range
Default
B-EX4T1-G/T(203dpi/305dpi)
B-EX4T2-G/T (203dpi/300dpi)
B-EX4D2-G/T (203dpi/300dpi)
B-EX4T2-H (600dpi)
NONE
WITHOUT BACKFEED
WITH BACKFEED
NONE
[LABEL SHIFT]
Printer
Range
Default
B-EX4T1-G/T(203dpi/305dpi)
B-EX4T2-G/T (203dpi/300dpi)
B-EX4D2-G/T (203dpi/300dpi)
B-EX4T2-H (600dpi)
-999.9 to +999.9 mm
0.0
----- Code setting -----
1. Control prefix(~)
Range: 00 to FF (hexadecimal)
2. Format prefix(~)
Range: 00 to FF (hexadecimal)
3. Delimiter char(~)
Range: 00 to FF (hexadecimal)
----- Effective command -----
Sets which setting, the command parameter or system mode parameter (set by means of this tool and a
printer), is effective by means of the selection of the check box.
Selected: The command parameter is valid. (The system mode parameter is invalid.)
Not selected: The system mode parameter is valid. (The command parameter is invalid)
1. Label size(LL)
2. Label type(MN)
3. Media type(MN)
4. Tone Adj(SD)
5. Tone Adj(MD)
<Button>
[Load]
Reads the settings from a specified file.
[Save]
Saves the settings in a specified file.
[Download]
Downloads the settings to the printer.
[Get printer param.]
Retrieves the settings from the printer.
Note: If no Initial Values & Table files have been sent to the printer before, no data cannot be obtained
from the printer.
[Reset to default]
Restores all settings to the default.
Page 88

Download menu
[Start block]
Sets the parameter saving area.
Default
Other than B-EX4T2-H (600dpi) : 3
B-EX4T2-H (600dpi) : 2
Range
0 to 23
[Active Emulation after download]
When it is selected, Emulation starts after downloading.
[Start to send]
Starts the parameter download.
[Cancel]
Cancels the process.
Page 89

Z Mode Initial values & table setting
The Z Mode default value, font mapping table and drive allocation can be set.
Z Mode InitValue Tab
Sets the default value if the command or parameter is omitted in Z Mode and the movement in a converter.
<Setting item>
[BarCode(BY)] group
[Default height]
Default
10
Range
1 to 999
[Module size]
Default
2
Range
1 to 10
[Narrow to wide bar ratio]
Default
3.0
Range
2.0 to 3.0
Page 90

[Field(FP)] group
[Text rotation]
Default
Normal(Left to right)
Option
Normal(Left to right), Vertical, Reverse(Right to left)
[Inter-character space]
Default
0
Range
0 to 999
[Serialization(S)] group
[INC/DEC]
Default
1
Range
-9999999999 to 9999999999
[Zero suppress]
Default
Checked(zero suppress)
Option
Checked(zero suppress), Not check(Not zero suppress)
[Unit(MU)] group
[Unit]
Default
dot
Option
Dot, inch, mm
[Field Block(FB)] group
[Field width]
Default
dot
Range
0 to paper width (Do not fill in the value which exceeds the paper width.)
[Number of Lines]
Default
1
Range
0 to 999
[Space dot between lines]
Default
0
Range
-999 to 999
[Alignment]
Default
Align left
Option
Align left, center, right, justify
[X position correction]
Default
0
Range
0 to 999
[Graphic(GB,GC,GD)] group
[Line weight]
Default
1
Range
0 to 999
[Darkness(SD,MD)] group
[Tone fine adj. value]
Default
0
Range
-30 to 30
Page 91

[Code Page(CI)] group
[Character set]
Default
0
Range
0 to 30
[Label(LH,LS,PM,PO,PF,LT)] group
[X position of label home position]
Default
0
Range
0 to 9999
[Y position of label home position]
Default
0
Range
0 to 9999
[Label rotation / Mirror print]
Default
Bottom first
Option
Bottom first, Top first, Bottom first mirror print, Top first mirror print
[Y position offset]
Default
0
Range
0 to 9999
[Feed amount fine adj]
Default
0
Range
-120 to 120
[Print(PQ)] group
[Print count]
Default
1
Range
1 to 9999
[Cut interval]
Default
0
Range
0 to 999
[PC Save Area Allocate] group
Specifies the memory size (number of blocks) for storing the format data used in Z Mode. The PC
save area of the TPCL is used. In Z Mode, the PC save area is divided into two. One is used for
format data and the other is used for the graphic data.
Specify the number of blocks used for storing the commands. The remaining blocks are used as the
graphic data area.
[Format data area]
Other than 0: Sets the number of blocks to allocate for format. (Remain area is for graphic.)
0: Sets to share the PC save area with the format data and the graphic data half and half.
Default
1
Range
0 to 99
Page 92

[GETCMDZB] group
[Get data form]
Default
Receive buffer
Option
Receive buffer, BASIC application
Receive buffer: Standard option for Z Mode. (Basically, do not change the setting.)
The converter firmware analyzes the data in the receive buffer and converts
into a command.
BASIC Application: If data cannot be converted into a command in Z Mode, a BASIC application
is used to modify a received command so that the converter firmware can
convert it into a command.
Note: When this option is selected, a BASIC application needs to be changed.
<Button>
[Load]
Reads the settings from a specified file. (Settings of all pages will be read.)
[Save]
Saves the settings in a specified file. (Settings of all pages will be saved.)
[Download]
Downloads the settings to the printer. (Settings of all pages will be downloaded.)
[Get printer param.]
Retrieves the settings from the printer. (Settings of all pages will be retrieved.)
Note: If no Initial Values & Table files have been sent to the printer before, no data cannot be obtained
from the printer.
[Reset to default]
Restores the all settings to the default.
Page 93

Z Mode FontTable Tab
<Button>
[Add]
Adds a new line to the font conversion table.
When a font code (a character from 0 to 9 and A to Z) assigned to an added font is not determined (in
the case CW command is used), add a new line and enter an appropriate value for the added font.
[Change]
Changes an existing setting.
Select the line to be change and then click [Change].
[Delete]
Deletes a line added by [Add].
* Only the lines added can be deleted.
Select the line to be deleted and then click [Delete].
[OK]
Updates the display to reflect the changes made with [Add] or [Change] in the table.
[Cancel]
Cancels the changes made with [Add] or [Change].
[Load]
Reads the settings from a specified file. (Settings of all pages will be read.)
[Save]
Saves the settings in a specified file. (Settings of all pages will be saved.)
[Download]
Downloads the settings to the printer. (Settings of all pages will be downloaded.)
Page 94

[Get printer param.]
Retrieves the settings from the printer. (Settings of all pages will be retrieved.)
Note: If no Initial Values & Table files have been sent to the printer before, no data cannot be obtained
from the printer.
[Reset to default]
Restores all settings to the default.
<Font Conversion Table set items>
Z font
Item
Description
Z Font Code
Font code for Zebra font (0 to 9, A to Z) is displayed.
Z Font Name
Specifies a file name of the Zebra font.
Note: Storage location of the file must be specified, like “Z:A.FNT”.
Z:ROM,R:RAM,B:FLASH CARD,E:COMPACT FLASH,A:ON BOARD FLASH
Z Font Kind
Selects a Zebra font type from the following three:
S: Scalable (0 font)
M: Bitmap Monospace (A to H font)
P: Bitmap Proportional (P to V)
Note: Set a proper value according to the ZPL II Specification.
Minimum width
Sets the minimum width of the selected font in units of dots.
Note 1: Set a proper value according to the ZPL II Specification.
Note 2: Be sure to set “0” for the scalable font.
Minimum height
Set the minimum height of the selected font in units of dots.
Note 1: Set a proper value according to the ZPL II Specification.
Note 2: Be sure to set “0” for the scalable font.
Page 95

TPCL font
Item
Description
Font type
Selects a TEC font type from the following 4 types:
B: Bitmap
O: Outline
G: Writable character
T: TrueType
Font Code
Specifies a TEC font which the Zebra font is converted into.
Note: Set a proper value according to the External Equipment Interface
Specification (TPCL command manual).
BMP Width
correction factor
Sets the minimum width of the selected TEC bitmap and writable character in
units of dots.
Basically, the width of the original sized font (no magnification) should be
specified.
Note: Be sure to set “0” for the outline/TTF.
BMP Cap height
correction factor
Sets the minimum cap height of the selected TEC bitmap and writable
character in units of dots. (*1)
Basically, the cap height of the original sized font (no magnification) should be
specified.
Note: Be sure to set “0” for the outline/TTF.
BMP Descender
correction factor
Sets the minimum descender size of the selected TEC bitmap and writable
character in units of dots. (*2)
Basically, the descender size of the original sized font (no magnification)
should be specified.
Note: Be sure to set “0” for the outline/TTF.
Outline Cap height
correction factor
Sets the ratio of the cap height to the height of the selected TEC outline and
TrueType font in units of percentage. (1 = 0.1%)
Note 1: The sum of this value and that of the descender correction factor
below must be 1000.
Note 2: Be sure to set “0” for the bitmap/writable character.
Outline Descender
correction factor
Sets the ratio of the descender size to the height of the selected TEC outline
and TrueType font in units of percentage. (1 = 0.1%)
Note 1: The sum of this value and that of the cap height correction factor
above must be 1000.
Note 2: Be sure to set “0” for the bitmap/writable character.
Outline Width
correction factor
Sets the width correction factor for the selected TEC outline and TrueType font
in units of percentage. (1 = 1%, Range: 50 to 300, 100% = No correction)
Note: Be sure to set “0” for the bitmap/writable character.
Outline height
correction factor
Sets the height correction factor for the selected TEC outline and TrueType
font in units of percentage. (1 = 1%, Range: 50 to 300, 100% = No correction)
Note: Be sure to set “0” for the bitmap/writable character.
BMP
Inter-character
space
Sets the inter-character space correction factor for the selected TEC bitmap
and writable characters in units of dots. (0 dot = No correction)
Note: Be sure to set “0” for the outline/TTF.
Outline
inter-character
Sets the ratio of the inter-character space correction factor to the character
width of the selected TEC outline and TrueType font in units of percentage. (1
Page 96

Item
Description
space
= 0.1%, 0% = No correction)
Note: Be sure to set “0” for the bitmap/writable character
Drive (Store in)
Specifies the storage location of the selected TEC font.
Note: Set a proper value according to the External Equipment Interface
Specification (TPCL command manual).
Note 1: "Cap height" is the height of characters above the baseline
Note 2: "Descender" is the height of characters below the base line.
Page 97

Z Mode DriveMapping Tab
Sets how to assign the printer driver specified in the command to the one in TPCL.
<Setting items>
[TPCL drive]
Sets the TPCL drive corresponding to the ZPL drive.
<Button>
[Load]
Reads the settings from a specified file. (Settings of all pages will be read.)
[Save]
Saves the settings in a specified file. (Settings of all pages will be saved.)
[Download]
Downloads the settings to the printer. (Settings of all pages will be downloaded.)
[Get printer param.]
Retrieves the settings from the printer. (Settings of all pages will be retrieved.)
Note: If no Initial Values & Table files have been sent to the printer before, no data cannot be obtained
from the printer.
[Reset to default]
Restores all settings to the default.
Page 98

Z Mode ResponseCommand Tab
Sets the response data to the ZPL command.
<Setting items>
[HI command]
Sets the response data to the HI command.
[HM command]
Sets the response data to the HM command.
[HS-1 command]
Sets the response data to the HS-1 command.
[HS-2 command]
Sets the response data to the HS-2 command.
[HS-3 command]
Sets the response data to the HS-3 command.
[HQMA command]
Sets the response data to the HQMA command.
[HQMI command]
Sets the response data to the HQMI command.
[HQOD command]
Sets the response data to the HQOD command.
[HQPH command]
Sets the response data to the HQPH command.
Page 99

[HQES command]
Sets the response data to the HQES command.
[HQHA command]
[Sets the response data to the HQHA command.
[HQJT command]
Sets the response data to the HQJT command.
[HQPP command]
Sets the response data to the HQPP command.
[HQSN command]
Sets the response data to the HQSN command.
[HQUI command]
Sets the response data to the HQUI command.
ZPL
Command
Character string
Data
length
Response data
HI
Printer model name - print
head resolution (dpi)
Variable
length
Omissible
(e.g.) “B-SX4-200dpi”
Max. 63 bytes
1 Comma
Version information
Variable
length
Omissible
(e.g.) “C5.4”
Max. 63 bytes
1 Comma
Dots/mm
Variable
length
Omissible
8
12
Only numeric values are effective.
1 Comma
Memory
Variable
length
Omissible
“512KB”
“1024KB”
“2048KB”
“4096KB”
“8192KB”
1 Comma
Option information
Variable
length
Omissible
“CUTTER DETECTED”: When the cutter
module is installed.
Max. 63 bytes
HM
Total RAM size
Variable
length
Omissible
(e.g.) “8192”
Only numeric values are effective.
1 Comma
Max. RAM size
Variable
length
Omissible
(e.g.) “8192”
Only numeric values are effective.
1 Comma
Page 100

ZPL
Command
Character string
Data
length
Response data
Currently available RAM size
Variable
length
Omissible
(e.g.) Available RAM size
Only numeric values are effective.
HS String 1
Communication Setting
3
Omissible
For details, refer to ZPLI II Manual. Enter bit
data in the Decimal ASCII format.
(e.g.) 7th bit is ON.
Hex.: 0x80 -> Decimal: 128
Data to be sent: “128”
Only numeric values are effective.
1 Comma
Paper out flag
1
Omissible
0
1: No paper
Only numeric values are effective.
1 Comma
Pause flag
1
Omissible
0
1: In a pause state
Only numeric values are effective.
1 Comma
Label length
Variable
length
Omissible
Label length
Only numeric values are effective..
1 Comma
Number of formats in receive
buffer
Variable
length
Omissible
0 to 999
XA to XZ: Number of the formats
Only numeric values are effective.
1 Comma
Buffer full flag
1
Omissible
0
1: Buffer full
Only numeric values are effective.
1 Comma
Communications diagnostic
mode flag
1
Omissible
0
1: In dump mode
Only numeric values are effective.
1 Comma
Partial format flag
1
Omissible
0
1: Command is being analyzed.
Only numeric values are effective.
1 Comma
Unused
3
Omissible
000
Only numeric values are effective.
1 Comma
Corrupt RAM flag
1
Omissible
0
1
Only numeric values are effective.
1 Comma
 Loading...