

Toshiba 55WL800AZ, 46WL800A, 55WL800A Owner's Manual

Owner's Record
Y
TV
o ow v
TOSHIB g
:
VX1A00215900
Integrated Digital LCD TV
O
WNER'S
M
ANUAL
© TOSHIBA CORPORATION, 2011
All Rights Reserved
TD/CA
55WL800AZ
®

2
Welcome to Toshiba ������������������������������2
Important Safety Instructions ����������������2
Introduction ������������������������������������3
Important information ���������������������������6
Getting started �������������������������������� 8
Connecting an aerial ������������������������������8
Exploring your new TV �������������������������8
TV panel controls ����������������������������������9
Learning about the remote control ������11
Turning the TV on �������������������������������13
Tuning the TV for the first time ����������13
Using the Quick Menu ������������������������14
MENU structure ����������������������������������16
Programming channels into
the TV’s channel memory ����������������17
Watching TV programmes�������������������20
Using the TV’s features (General) �������� 22
Picture adjustment ������������������������������22
Sound adjustment �������������������������������28
Other feature settings���������������������������30
Viewing 3D images �����������������������������31
The timers �������������������������������������������37
Resetting the TV ����������������������������������38
Channel List ����������������������������������������39
Selecting the video input source ����������39
Setting the Colour System �������������������39
Setting the external input skip �������������39
Labeling video input sources ���������������40
Using REGZA-LINK ��������������������������40
Teletext ������������������������������������������������42
Subtitle and Audio �������������������������������44
Other Digital TV features and settings ��� 45
Using the EPG
(Electronic Programme Guide) ��������45
Digital settings - Channel Options ������45
Digital settings - PIN Setting���������������45
Using the System Information �������������46
Local Time Settings �����������������������������46
Performing a Software Upgrade ����������46
Viewing the Software Licences �����������47
Setting the Digital Audio ���������������������47
Connecting your TV ������������������������� 49
Back connections ���������������������������������49
Connecting HDMI and DVI devices ���50
Selecting the PC/HDMI 3 audio mode
���51
Setting the HDMI 3 audio mode ���������52
Connecting a computer (PC) ���������������52
REGZA-LINK connection ������������������54
Using the PC Settings ��������������������������55
Connecting a home network ����������������55
Using your home network �������������������56
Setting up the Network ������������������������57
Network Connection Test ��������������������60
Setting the Network Lock��������������������61
Using the software keyboard ���������������61
Setting Network Device setup �������������61
Using the Media Player �����������������������65
Using the Photo Frame feature ������������71
Setting up the USB HDD ��������������������72
Using the USB HDD function �������������73
About the Camera Sensor ��������������������78
Using Personal TV Mode ��������������������80
Using the MHL Function���������������������82
Reference section �������������������������� 83
Troubleshooting �����������������������������������83
APPENDIX �����������������������������������������84
Specifications �������������������������������������89
Contents
Welcome to Toshiba
• Thank you for purchasing this Toshiba LCD Colour TV.
This manual will help you use the exciting features of
your new TV�
• Instructions in this manual are based on using the remote
control�
• Please read all safety and operating instructions in
this manual carefully, and keep this manual for future
reference�
Important Safety Instructions
Be sure to observe the following instructions and
precautions to ensure safe use of this TV�
Installation
1)
WARNING: To prevent injury, this apparatus
must be securely attached to the floor/wall in
accordance with the installation instructions.
Install the TV in a horizontal, stable
location.
3
Introduction
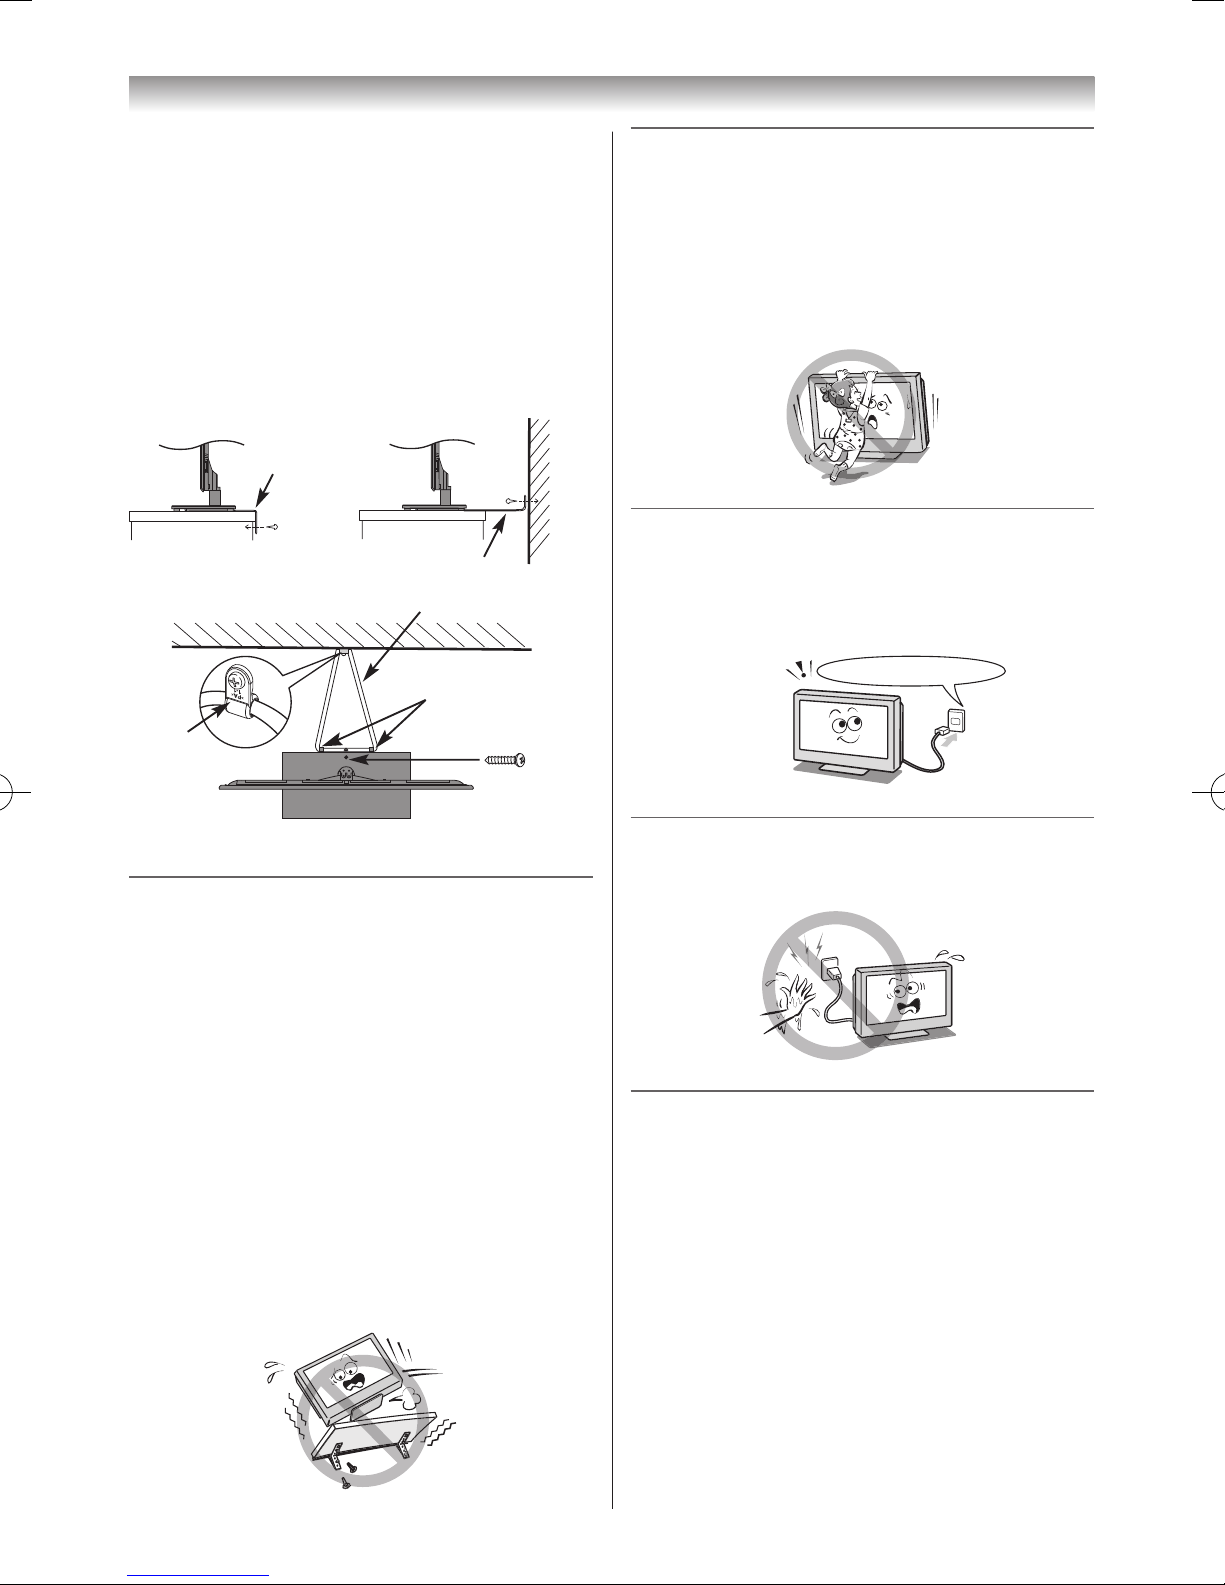
Attach the TV to the stand with the
mounting screw provided, or secure the TV
to the level surface using the strap if fitted,
or to a wall using a sturdy tie to the clip
provided.
• IftheTVisnotinstalledsecurely,itmaylean
orfalloverandcauseaninjury.
• Topreventinjury,usetheexclusiveoptional
standorwall-hangingbrackettoinstall
thisTVontheoororwallsecurelyin
accordancewithaqualiedtechnician.
Sturdy tie (as short as possible)
Stand clips
Fixing strap
Screw
(supplied)
Fixing strap
Clip
(supplied)
2) Never place the TV in an unstabilized
location such as on a shaky table, incline
or location subject to vibration.
• Onlyusecabinetsorstandsrecommended
bytheTVmanufacturer.
• Onlyusefurniturethatcansafelysupport
theTV.
• EnsurethattheTVisnothangingoverthe
edgeofthesupportingfurniture.
• NeverplacetheTVontallfurniture(for
example,cupboardsorbookcases)without
anchoringboththefurnitureandtheTVtoa
suitablesupport.
• NeverstandtheTVonclothorother
materialplacedbetweentheTVand
supportingfurniture.
TheTVmaydroporfalloff,whichmaycause
aninjuryordamage.
3) Never stand or climb on the TV.
• Educatechildrenaboutthedangersof
climbingonfurnituretoreachtheTVorits
controls.
Beespeciallycarefulinhouseholdswith
childrentopreventthemthroughclimbingon
topoftheTV.Itmaymove,fallover,break,
becomedamagedorcauseaninjury.
4) Always connect the power plug to an
appropriate electrical outlet equipped with
220-240V, AC 50Hz.
NeverusetheTVoutsidethespeciedvoltage
range.Itmaycauseareoranelectricshock.
Check!
Ex. 220-240V AC, 50Hz
5) Never insert or remove the power plug with
wet hands.
Thismaycauseanelectricshock.
6) Never block or cover the slots and
openings in the cabinet.
• NeverplacetheTVsothatitisfacing
upwardoronitsside.
• NeverplacetheTVinacloset,bookcaseor
othersimilarareawheretheventilationis
poor.
• Neverdrapeanewspaper,tableclothor
curtainontheTV.
• WheninstallingtheTVagainstawall,
alwayskeeptheTVatleast10cmaway
fromthewall.
• NeverplacetheTVonasoftunstable
surface,suchasacarpet,oracushion.
TheinsideofthisTVwilloverheatifthe
ventilationholesarecovered,blockedor
sealed,whichmayresultinare.
4
7) Never place the TV near a heater or in
direct sunlight.
Thesurfaceofthecabinetorpowercordmay
meltandresultinareoranelectricshock.
8) Never place the TV in an area exposed
to high humidity levels, such as in a
bathroom or close to a humidifi er.
Thismaycauseareoranelectricshock.
9) Never place the TV next to a stove where it
will be exposed to oil, smoke, or steam, or
in a location where there is a large quantity
of dust.
Thismaycauseareoranelectricshock.
10
) Precautions for moving the TV
• WhenmovingtheTV,besuretoremovethe
plugfromthewalloutletanddisconnectthe
aerialcableandaudio/videocables,any
steadytiesandmountingscrew.Areoran
electricshockmayresultifthepowercordis
damaged.
• WhencarryingtheTV,atleasttwopeople
areneeded.Besuretocarryitupright.
• NevercarrytheTVwiththescreenfacingup
ordown.
Introduction
11)
Precautions for installing on outdoor aerial
Anoutsideaerialsystemshouldnotbe
locatedinthevicinityofoverheadpowerlines,
orotherelectriclightorpowercircuits.
Iftheaerialfallsdownordrops,itmaycause
aninjuryoranelectricshock.
Use
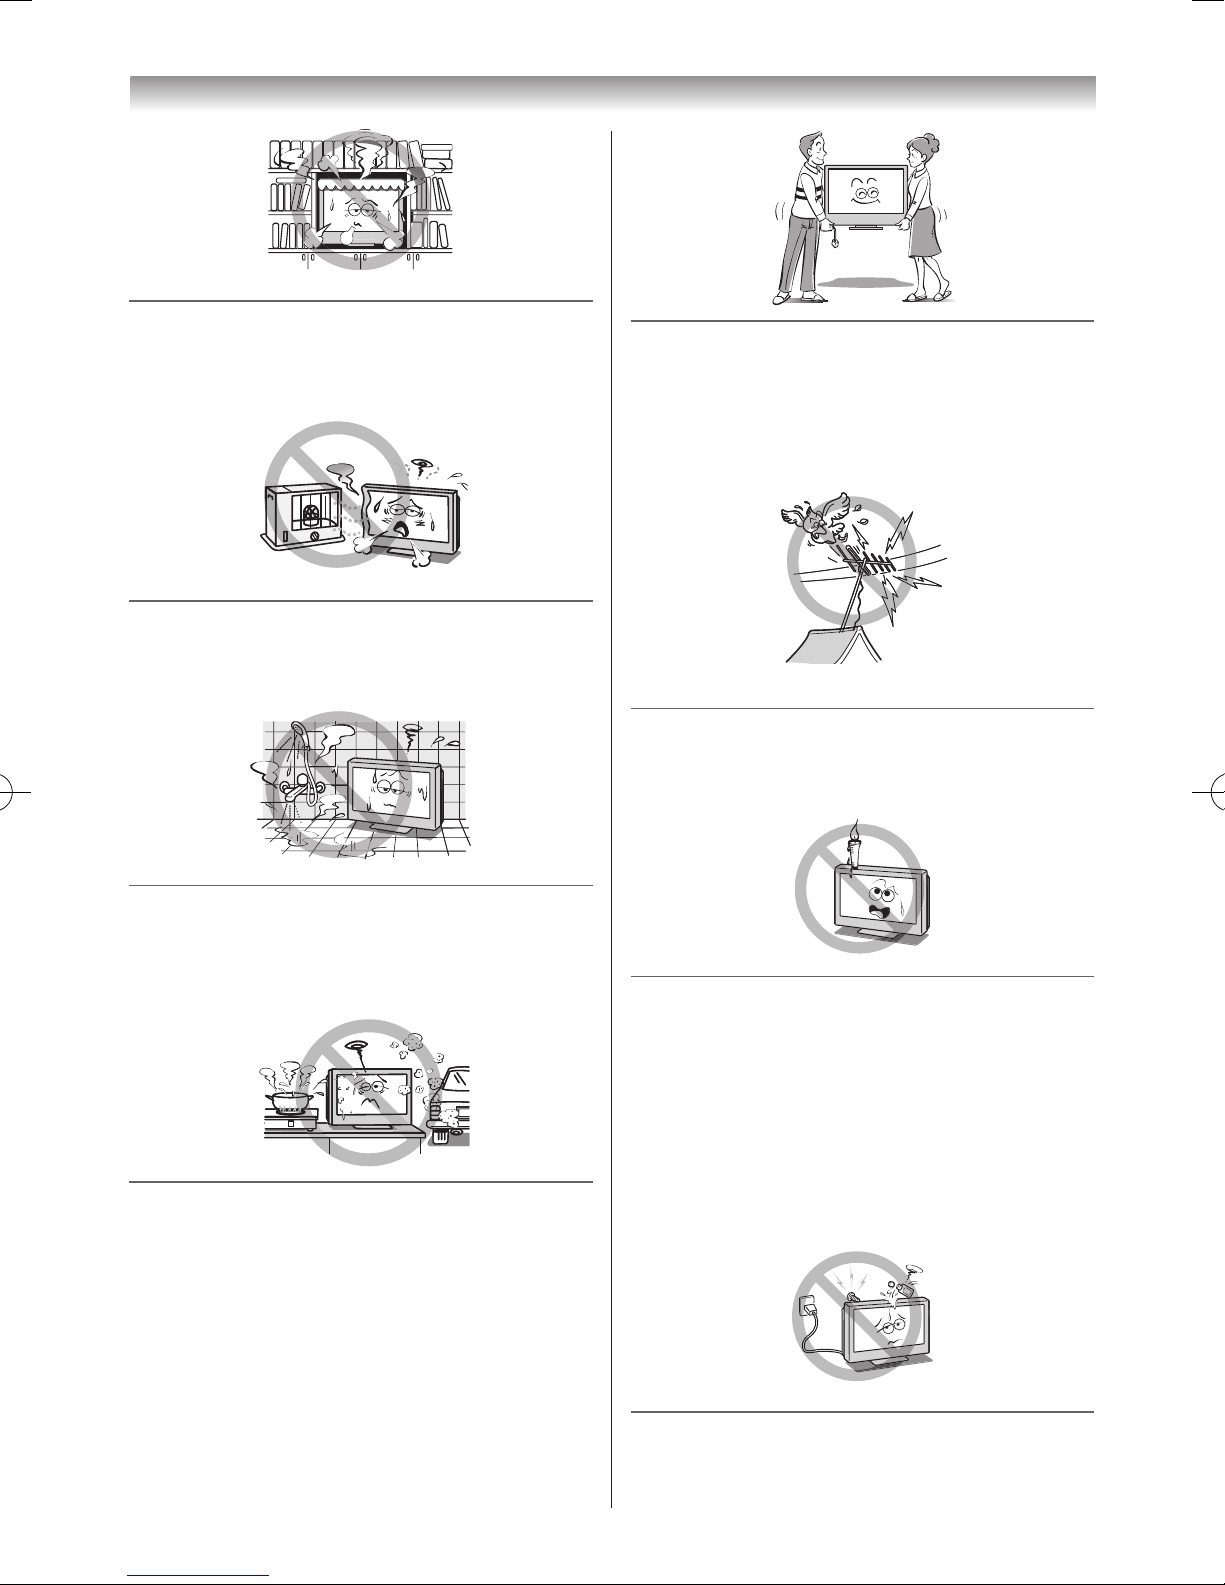
1) Never place hot objects or open fl ame
sources, such as lighted candles or
nightlights, on or close to the TV.
Hightemperaturescanmeltplasticandleadtores.
2) The apparatus shall not be exposed to
dripping or splashing and that no objects
fi lled with liquids, such as vases, shall be
placed on the apparatus.
Whenliquidsarespilledorsmallitemsare
droppedinsidetheTV,thismaycauseareor
anelectricshock.
IfsmallobjectsdropinsidetheTV,turnoffthe
TVandremovethepowerplugfromtheoutlet
immediatelyandcontactaservicetechnician.
3) Never insert objects (metal or paper)
or pour water inside the TV through
ventilation holes and other openings.
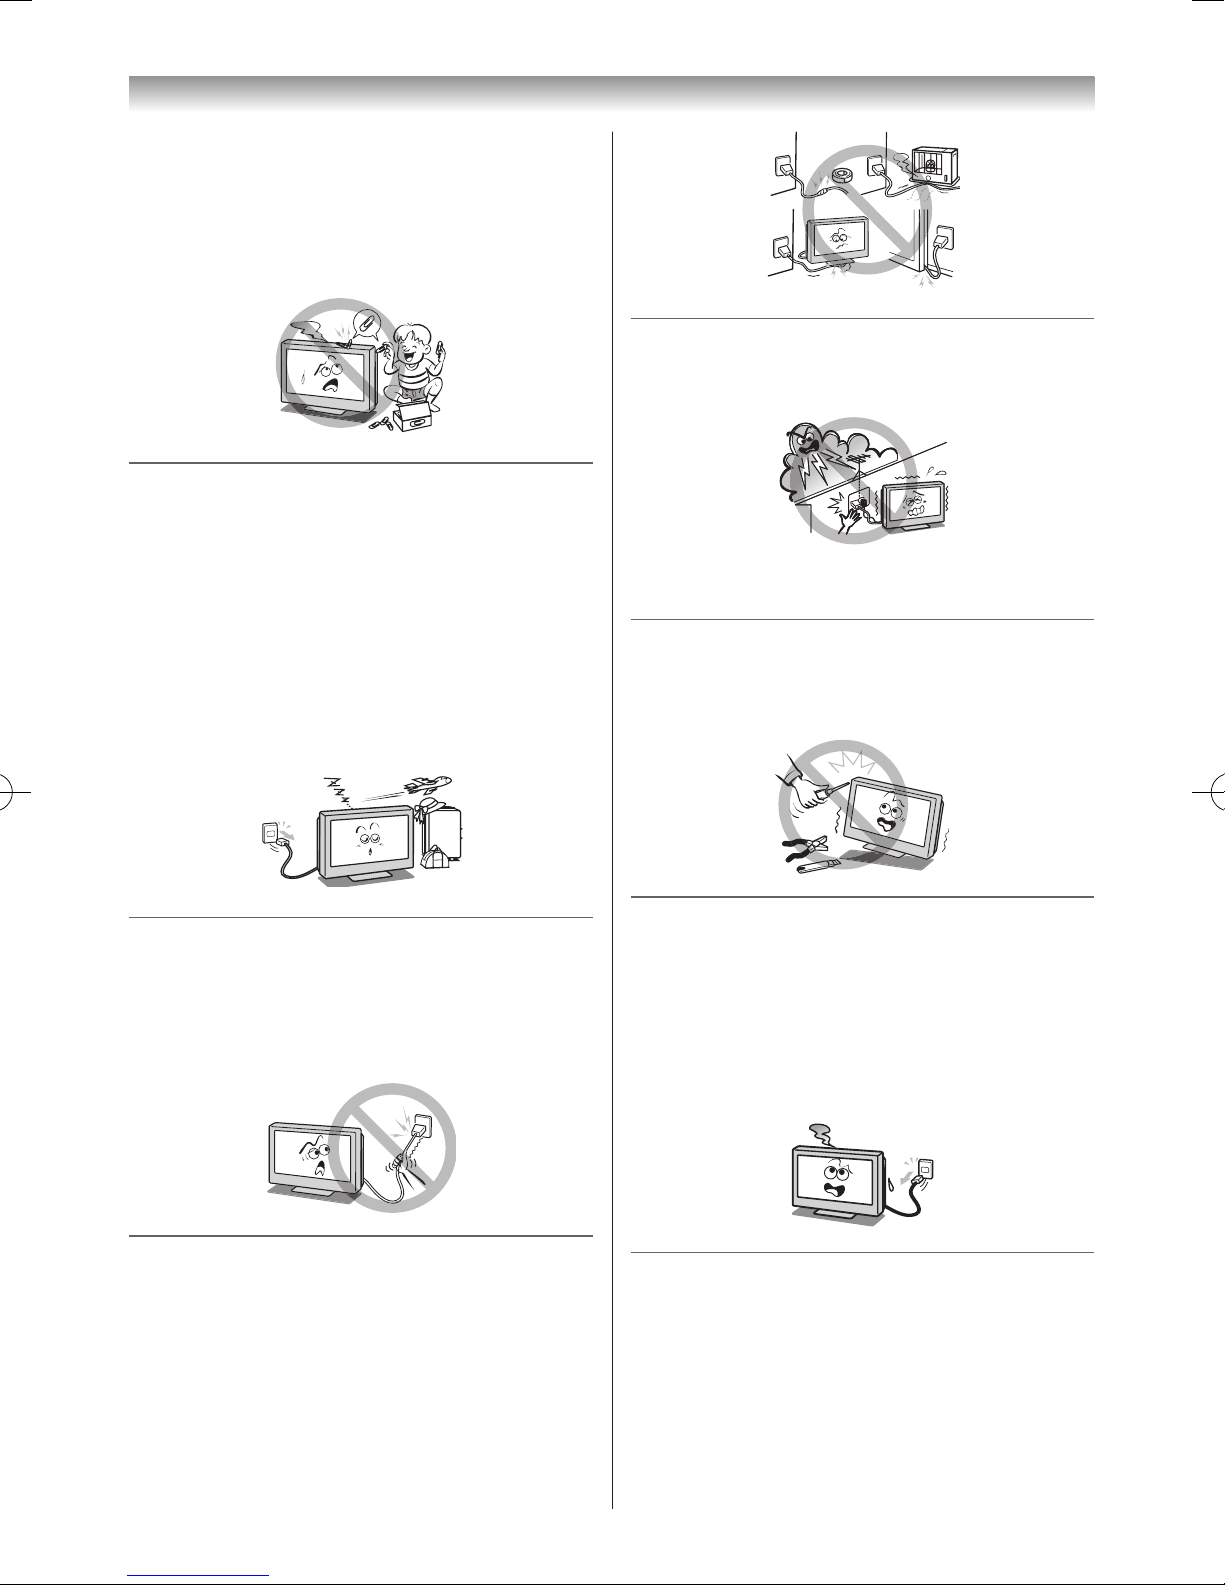
5
Theseitemsmaycauseareoranelectric
shock.Iftheseobjectsareinsertedinsidethe
TV,turnofftheTVandremovethepowerplug
fromtheoutletimmediatelyandcontacta
servicetechnician.Beespeciallycarefulthat
childrendonotinsertobjectsintheTV.
Clip
4) When the TV will not be used for a long
period of time, such as during vacation or
travel, remove the power plug from the wall
outlet for safety.
• TheTVisnotcompletelydisconnectedfrom
thepowersupplyline,asminutecurrentis
consumedevenwhenthe1Powerswitchis
turnedoff.
• TheMainsplugoranappliancecoupleris
usedasthedisconnectdevice,therefore
thedisconnectdeviceshallremainreadily
operable.
5) Never pull on the power cord when
removing the plug from the wall outlet.
Alwaysholdtheplugrmlywhenremoving
it.Ifthepowercordisyanked,thecordmay
becomedamagedandareoranelectric
shockmayoccur.
6) Never cut, break, modify, twist, bunch up or
bent the cord or apply excessive force or
tension to it.
Neverplaceheavyobjectsonthecord
orallowittooverheatasthismaycause
damage,areoranelectricshock.Contact
aservicetechnicianifthepowercordis
damaged.
7) If there is thunder or lightning, never touch
the aerial cable or other connected cables.
Youmaysufferanelectricshock.
Service
1) Never repair, modify or disassemble the TV
by yourself.
Itmaycauseareoranelectricshock.
Consultaservicetechnicianforinspectionandrepairs.
2) When a malfunction occurs, or if smoke or
an unusual odour comes from the TV, turn
off the TV and remove the power plug from
the outlet immediately.
Makesurethatthesmokeorsmellhas
stopped,thencontactaservicetechnician.
IftheTVisstillusedinthiscondition,itmay
causeareoranelectricshock.
3) If the TV is dropped or the cabinet is
broken, turn off the TV and remove the
power plug from the outlet immediately.
IftheTVhaspowerinthiscondition,itmay
causeareoranelectricshock.Ifthecabinet
isbroken,becarefulwhenhandlingtheTVto
preventaninjury.
Contactaservicetechnicianforinspectionand
repair.
Introduction
6
4) When the TV reaches the end of its useful
life, ask a qualified service technician to
properly dispose of the TV.
Cleaning
1) Remove the power plug before cleaning.
Neverusesolventssuchasbenzeneor
thinnertocleantheTV.
• Thesesolventsmaydistortthecabinetor
damageitsnish.
• Ifrubberorvinylproductsremainincontact
withtheTVforalongtime,astainmay
result.
Ifthecabinetbecomesdirty,cleanitwitha
soft,drycloth.
WhencleaningthesurfaceoftheLCDdisplay,
wipethepanelsurfacegentlywithasoft,dry
cloth.
2) Periodically disconnect the power plug from
the outlet and check it.
If dust has collected on the power plug
connectors, clean off the dust with a dry
cloth.
Thisdustmaycauseareduetoreduced
insulationontheplug.
Clean here
Introduction
Important information
1) LCD screen
• IfyouhavetheLCDscreenfacingtothesun,
theLCDscreenwillbedamaged.Beawareof
locatingtheTVclosetoawindoworoutdoors.
•NeverpresstheLCDscreenstronglyor
scratchit,andneverputanythingonit.These
actionswilldamagetheLCDscreen.
2) Cabinet and LCD screen
Neversprayvolatilecompoundssuchas
insecticideonthecabinetandLCDscreen.
Thismaycauseadiscolourationordamagethe
cabinetandLCDscreen.
3) Some pixels of the screen do not light up
TheLCDdisplaypanelismanufactured
usinganextremelyhighlevelofprecision
technology;however,sometimessomepixels
ofthescreenmaybemissingpictureelements
orhaveluminousspots.Thisisnotasignof
malfunction.
4) Interference
TheLCDdisplaymaycauseinterference
inimage,sound,etc.ofotherelectronic
equipmentthatreceiveselectromagneticwaves
(e.g.AMradiosandvideoequipment).
5) Using in low temperature areas
IfyouusetheTVintheroomof0°Corless,
thepicturebrightnessmayvaryuntiltheLCD
monitorwarmsup.
Thisisnotasignofmalfunction.
6) Afterimages
Ifastillpictureisdisplayed,anafterimagemay
remainonthescreen;however,itwilldisappear.
Thisisnotasignofmalfunction.
Exemptions
• Toshiba is not liable for any damage caused by res,
natural disaster (such as thunder, earthquake, etc�), acts
by third parties, accidents, owner’s misuse, or uses in
other improper conditions�
• Toshiba is not liable for incidental damages (such as
prot loss or interruption in business, modication or
erasure of record data, etc�) caused by use or inability to
use product�
• Toshiba is not liable for any damage caused by neglect
of the instructions described in the owner’s manual�
• Toshiba is not liable for any damage caused by misuse
or malfunction through simultaneous use of this product
and the connected equipment�

7
Trademark Information
• Manufactured under license from Dolby Laboratories.
Dolby and the double-D symbol are trademarks of
Dolby Laboratories�
• Audyssey EQ is based on the same core technology as
Audyssey MultEQ that is used for automatic correction
of room acoustics� Audyssey EQ uses time-domain
lters to correct problems that arise from speaker drivers
and enclosures and is calibrated to account for the
acoustical problems in a typical listening environment�
• Manufactured under license from Audyssey
Laboratories� U�S� and foreign patents pending�
Audyssey EQ is a registered trademark of Audyssey
Laboratories�
• HDMI, the HDMI logo, and High-Denition Multimedia
Interface are trademarks or registered trademarks of
HDMI Licensing LLC in the United States and other
countries�
• DVB is a registered trademark of Digital Video
Broadcasting Project�
• DivX
®
, DivX Certied®, DivX PlusTMHD and associated
logos are trademarks of DivX, Inc�, and it is used under
license�
Covered by one or more of the following U�S� Patents:
7,295,673; 7,460,668; 7,515,710; 7,519,274
• INSTAPORT
™
and INSTAPORT logo are trademarks
of Silicon Image, Inc� in the United States and other
countries�
• DLNA
®
, the DLNA® Certication Logo and DLNA
CERTIFIED™ are trademarks, service marks, or
certication marks of the Digital Living Network
Alliance�
• YouTube and the YouTube Logo are trademarks of
Google Inc�
• This product contains NetFront Browser of ACCESS
CO�, LTD�
ACCESS, the ACCESS logo and NetFront are
trademarks or registered trademarks of ACCESS CO�,
LTD� in the United States, Japan and other countries�
© 2010 ACCESS CO�, LTD� All rights reserved�
This software is based in part on the work of the
Independent JPEG Group�
• This product contains Adobe
®
Flash® Player software
under license from Adobe Systems Incorporated�
Copyright © 1995-2009 Adobe Systems Incorporated�
All rights reserved� Adobe and Flash are trademarks of
Adobe Systems Incorporated�
• MPEG Layer-3 audio coding technology licensed from
Fraunhofer IIS and Thomson�
• THIS PRODUCT IS LICENSED UNDER THE
AVC PATENT PORTFOLIO LICENSE FOR THE
PERSONAL AND NONCOMMERCIAL USE
OF A CONSUMER TO (i) ENCODE VIDEO IN
COMPLIANCE WITH THE AVC STANDARD (AVC
VIDEO) AND/OR (ii) DECODE AVC VIDEO THAT
WAS ENCODED BY A CONSUMER ENGAGED
IN A PERSONAL AND NONCOMMERCIAL
ACTIVITY AND/OR WAS OBTAINED FROM A
VIDEO PROVIDER LICENSED TO PROVIDE AVC
VIDEO� NO LICENSE IS GRANTED OR SHALL BE
IMPLIED FOR ANY OTHER USE. ADDITIONAL
INFORMATION MAY BE OBTAINED FROM MPEG
LA, L�L�C�
SEE HTTP://WWW�MPEGLA�COM
• THIS PRODUCT IS LICENSED UNDER THE MPEG-
4 VISUAL PATENT PORTFOLIO LICENSE FOR
THE PERSONAL AND NON COMMERCIAL USE
OF A CONSUMER FOR (i) ENCODING VIDEO
IN COMPLIANCE WITH THE MPEG-4 VISUAL
STANDARD (MPEG-4 VIDEO) AND/OR (ii)
DECODING MPEG-4 VIDEO THAT WAS ENCODED
BY A CONSUMER ENGAGED IN A PERSONAL
AND NON COMMERCIAL ACTIVITY AND/OR
WAS OBTAINED FROM A VIDEO PROVIDER
LICENSED BY MPEG LA TO PROVIDE MPEG-4
VIDEO� NO LICENSE IS GRANTED OR SHALL BE
IMPLIED FOR ANY OTHER USE. ADDITIONAL
INFORMATION INCLUDING THAT RELATING TO
PROMOTIONAL, INTERNAL AND COMMERCIAL
USES AND LICENSING MAY BE OBTAINED
FROM MPEG LA, L� L� C�
SEE HTTP://WWW� MPEGLA� COM
• MHL, the MHL logo, and Mobile High-Denition
Link are trademarks or registered trademarks of MHL
licensing, LLC�
Introduction
8
Getting started
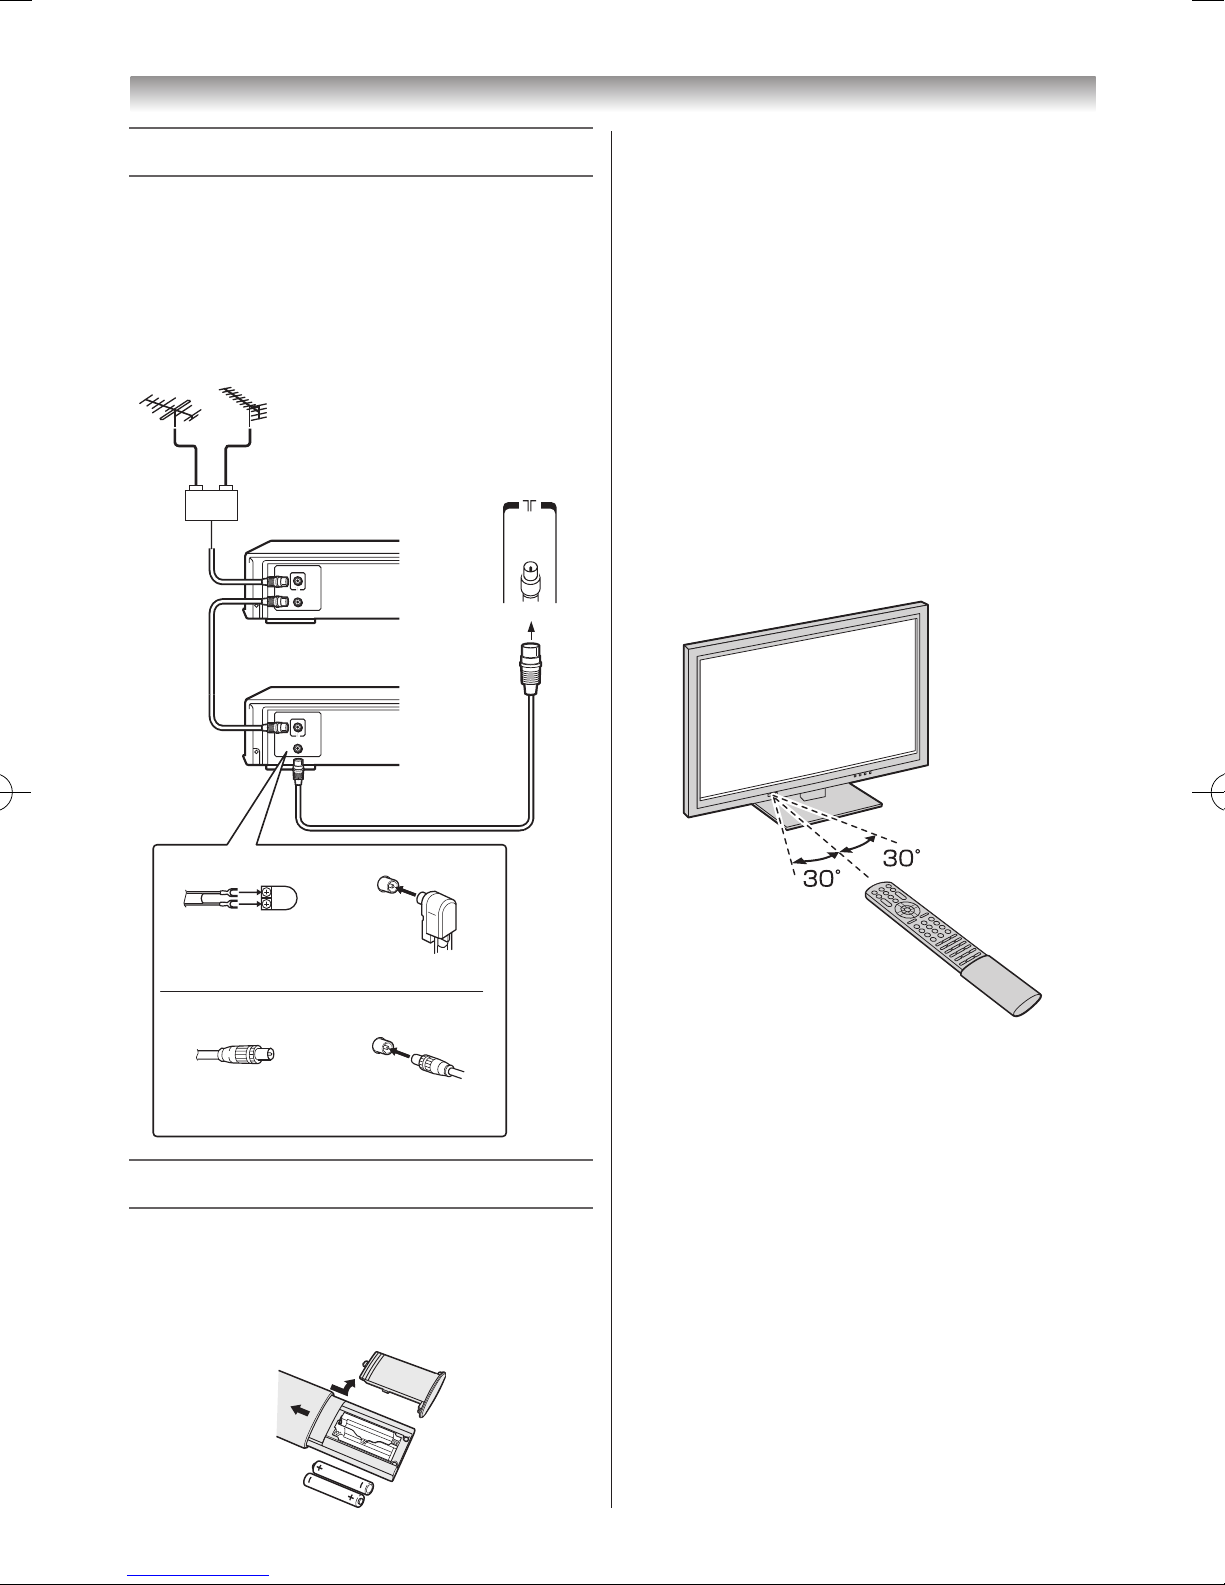
Connecting an aerial
Optimum reception of colour requires a good signal and
will generally mean that an outdoor aerial must be used�
The exact type and positioning of the aerial will depend
upon your particular area�
Your Toshiba dealer or service personnel can best advise
you on which aerial to use in your area�
Before connecting the aerial cable, turn off all main power
switches�
IN
OUT
IN
OUT
VHF UHF
300 7 twin-lead feeder
757
aerial
terminal
Aerial adaptor
Aerial cable (757 coaxial)
(not supplied)
Outdoor aerial
Mixer
(not supplied)
(not supplied)
757 aerial
terminal
75 7 coaxial cable
Plug
Decoder
Media Recorder
Back of TV
Exploring your new TV
Installing the remote control batteries
Remove the battery cover�
Insert two R03 (AAA) batteries matching the –/+ polarities of
the battery to the –/+ marks inside the battery compartment�
Cautions:
• Dispose of batteries in a designated disposal area.
Batteries must not be exposed to excessive heat
such as sunshine, fire or the like.
• Attention should be drawn to the environmental
aspects of battery disposal.
• Never mix battery types or combine used batteries
with new ones.
Notes:
•
If the remote control does not operate correctly, or
if the operating range becomes reduced, replace
both batteries with new ones.
•
If the batteries are dead or if you will not use the
remote control for a long time, remove the batteries
to prevent battery acid from leaking into the battery
compartment.
Effective range
within 5 m
9
Getting started
TV panel controls
• You can operate your TV using the Touch Keys on the front of the panel or the remote control. The back and side of the
panel provide the terminal connections to connect other equipment to your TV (- “Connecting your TV” pages 49 – 82)�
• For the use of each control, see the pages in brackets.
TV top view
You can swivel the TV screen.
Swivel angle: 15 degrees to left and right.
TV front view
7 5 / 8 4 / 8 3 / 8 2 / 8 1 / 6
Brightness sensor
(- page 24)
IR sensor
(- page 32)
(when using the 3D mode,
this sensor will lights in red.)
Camera sensor
(- page 78)
!
1 (power on/standby)
— Touch to turn the TV
on/ standby (
-
page 13)�
pBb
2 (Programme position)
— When no
menu is on-screen, these keys select the programme
position�(
-
pages 17, 20)�
U u
(menu up/down)
— When a TV menu is
on-screen, these keys function as up/down menu
navigation keys (- page 16)�
2
3
– / +
(volume)
— When no menu is on-screen,
these keys adjust the volume level�
I i
(menu left/right)
— When a TV menu is onscreen, these keys are used for left/right menu
navigation and to adjust settings (- page 16)�
MENU4
— Press to access the TV menu
(
-
page 16)�
BACK
— When a TV menu is on-screen, this button
will take you back to the previous menu�
o
5 (input source selection)
— When no menu is
on-screen, this button selects the input source
(
-
page 39)�
OK
— When a TV menu is on-screen, this button
will make a selection or take you to the next available
menu layer�
!6
(power LED)
— Power indicator (
-
page 13)�
7 (programme timer LED)
— Programme timer
indicator (
-
page 37)�
Touch key LED8
— Touch key indicator (except for
the power indicator)�
10
Getting started
D
9 (Headphone jack)
— For use with headphones
(- page 30)�
O
10 DIGITAL AUDIO (OPTICAL) (output
terminal)
— For use when connecting an amplier
with optical type digital audio input (
-
pages 49,
50)�
USB Ports 1-2 11
— For use when inserting a USB
device (photo, movies, music) (
-
page 65)�
o
12 (2) (video 2 input terminals)
— High-
denition component video and standard stereo audio
inputs (
-
page 49)�
Notes:
• Use for the component adaptor cable
(supplied).
(1pin: light green/3-pins: green, blue and red).
• The audio terminals are shared with o (3).
o
13 (3) (video 3 input terminal)
— Standard video
and standard stereo audio input (
-
page 49)�
Note:
Use for the A/V adaptor cable (supplied)
(1pin: yellow/3-pins: yellow, white and red).
o
14 HDMI 1 - 4 (input terminal)
— High-Denition
Multimedia Interface input receives digital audio and
uncompressed digital video from an HDMI device
(
-
page 51)�
o
HDMI 1 (ARC) (input terminal) only
—
For use when connecting to a HDMI audio system
(
-
page 50)�
o
HDMI 3 (input terminal) only
— High-
Denition Multimedia Interface input receives digital
audio and uncompressed digital video from a DVI
device (
-
pages 51, 53)�
Note:
The audio terminals are shared with o RGB/PC.
o
HDMI 4 (input terminal) only
— For use when
connecting a MHL Device (mobile phone etc�) (
-
page 82)�
o
15 RGB/PC and PC/HDMI3 (AUDIO) (input
terminal)
RGB/PC
— For use when connecting a personal
computer (PC) (
-
page 52)�
PC/HDMI 3 (AUDIO) (input terminal)
— PC
audio input terminal is shared with the HDMI 3
analogue input terminal, and its use can be congured
in the
Preferences
menu (- pages 51-53)�
Note:
Use the RGB/PC and audio adaptor cable
(supplied) (21-pins: black/15-pins: black/1-pin:
black).
o
16 (1) (video 1 input terminal)
— Standard
(composite) video and standard (analogue) stereo
audio input (
-
page 49)�
Note:
Use for the A/V adaptor cable (supplied)
(22-pins: black/3-pins: yellow, white and red).
LAN port 17
— For use when connecting to Network
function (
-
page 56)�
A
18 (aerial input terminal)
— Aerial signal input
(
-
page 8)�
Cableholders*(forStandtype)
Cableholders*
(forWallMounttype)
VIDEO
LAN
RGB/PC
HDMI USB USB
VIDEO
(AUDIO)
2
COMPONENT
VIDEO INPUT
HDMI 3
(AUDIO)
DIGITAL
AUDIO
TV back and left side view
* You can use the cable
holders to hold the aerial
cable, video and audio
cables etc.
Never grasp the holders
when moving the TV.
11
13
12
10
9
14
1718 16 15
11
Picture Mode
Picture Size
Picture Still
To switch between 2D and 3D mode
To record TV programme
Input source selection
Power on/Standby
Text and interactive control
buttons
(Four coloured buttons:
Red, Green, Yellow, Blue)
Teletext function:
Teletext on/Superimpose
Teletext/off
To reveal concealed text
To hold a specific page
To enlarge the teletext display
size
To select a page while viewing
a normal picture
To select the time display
- analogue -
Media Player function:
Stereo/Bilingual selection
To select TV mode
Subtitle on/off
To return to the previous
programme
•
To display on-screen information
• Initial/index
This button turns the sound off/on
Position up/down
To display the channel list
• To display digital on-screen
Programme Guide
• To menu up, down, left or right
• To exit menu
To access “TOSHIBA PLACES”
Top Page
To access Media Player Menu
To access More Information Menu
These buttons adjust the
volume level
To access the Quick Menu
Switch the Audio Description
On/Off
Number buttons (0-9)
• On-screen Menus
• To confirm your selection
•
To return to the previous menu
Press to STOP
Press to PLAY
Press to PAUSE
Press to SKIP BACK
Press to REVERSE
Press to FORWARD
Press to SKIP FORWARD
* For REGZA-LINK remote control functions, please refer to “Location of controls for REGZA-LINK mode” (- page 12).
Getting started
Learning about the remote control
Location of controls
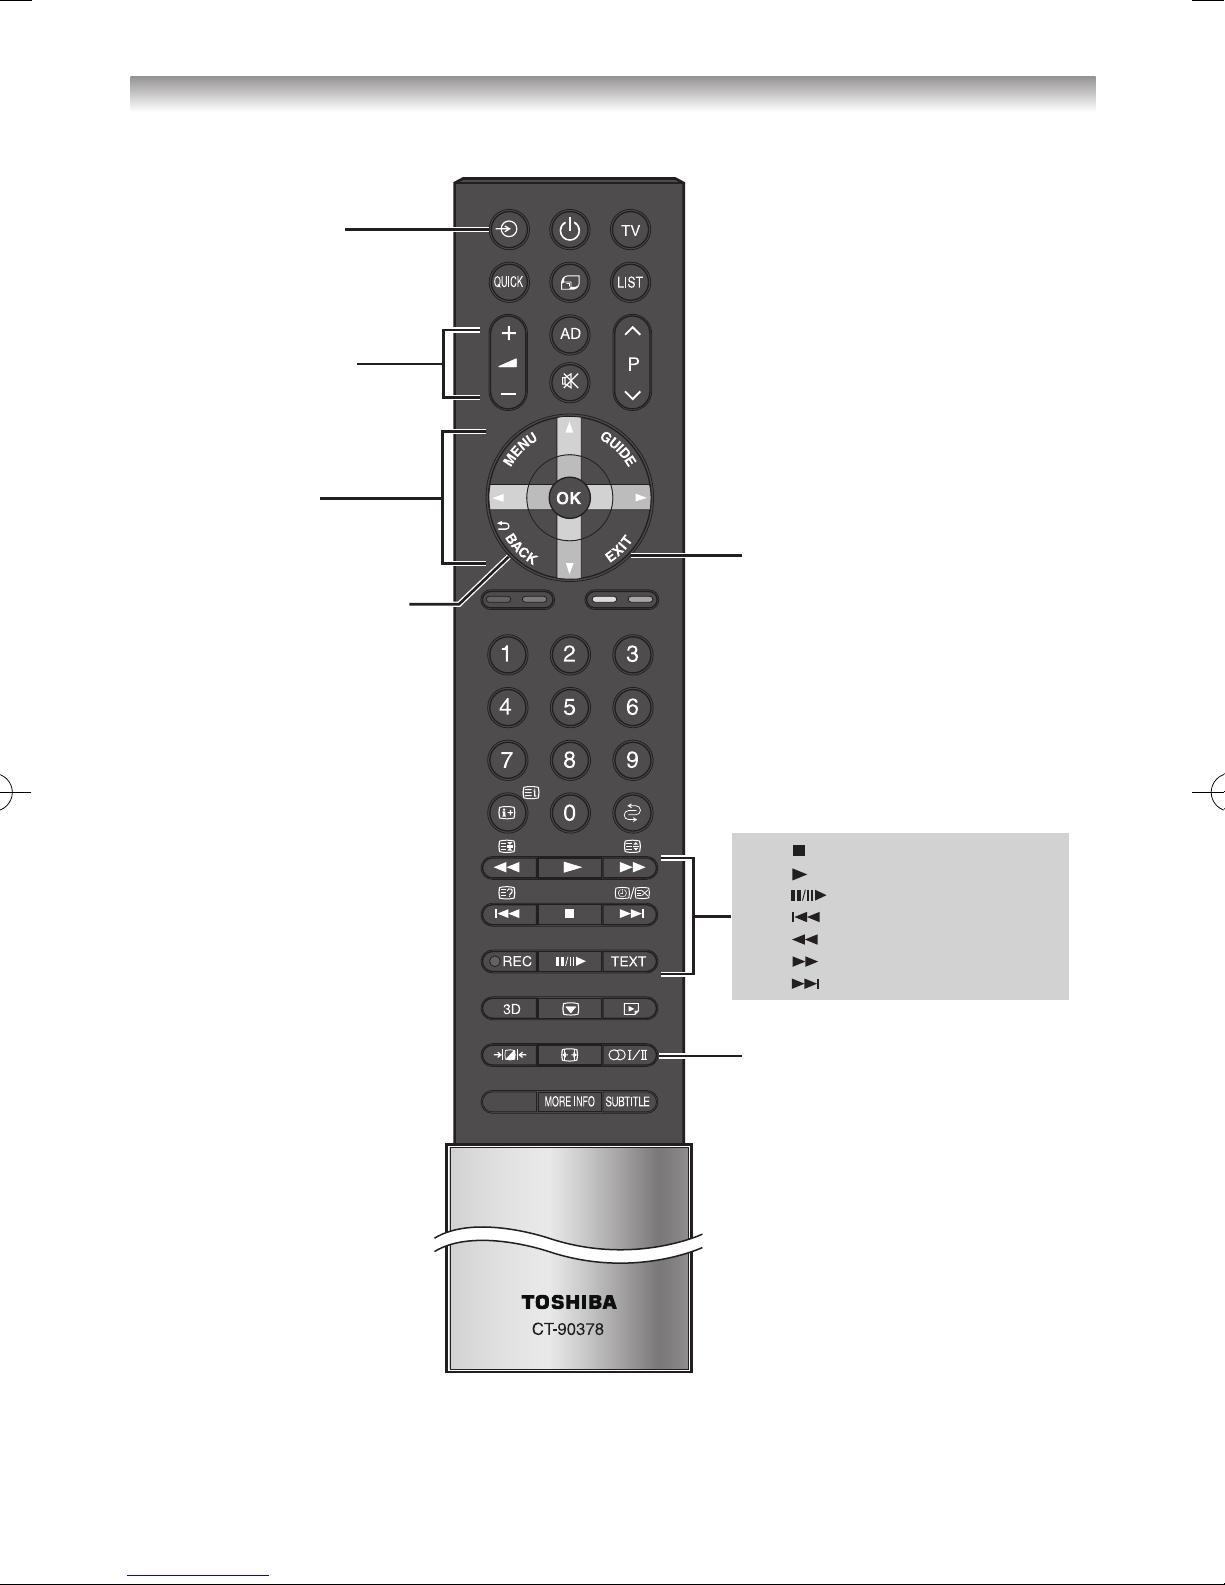
12
To select input from
external source
To change volume of
AV amplifier
To operate menu
To exit menu
To select audio mode
To return to previous menu
accessed
Press to STOP
Press to PLAY
Press to PAUSE
Press to SKIP BACK
Press to REVERSE
Press to FORWARD
Press to SKIP FORWARD
Getting started
Note:
These functions are dependent on the connected device. Not all of the remote control buttons may be
available. Please refer to the owner’s manuals of the connected devices.
Location of controls for REGZA-LINK
13
Getting started
Turning the TV on
Switching on the TV
Connect the power cord to a wall outlet� The ! power
indicator light should be red (standby mode)�
1
Press 1 on the remote control or ! on the TV front
panel� The ! power indicator lights in Blue�
Note:
If you watch black and white programmes when the
Colour System
mode is set to Auto, colour noise
may appear on the screen. In this case select the
appropriate
Colour System
(
-
page 17).
Switching off the TV
1
Press 1 on the remote control or ! on the TV front
panel to switch to the standby mode�
Notes:
• The TV is not fully disconnected from the main
supply, as minute current is consumed even when
!
is turned off. When the TV will not be used for
a long period of time, such as during vacation or
travel, remove the power plug from the wall outlet.
• If power is cut off while you are viewing the TV,
the Last Mode Memory function turns on the TV
automatically when power is applied again. If
power is going to be off for a long time and you are
going to be away from your TV, unplug the power
cord to prevent the TV from turning on in your
absence.
Tuning the TV for the first time
Before switching on the TV, put your decoder and media
recorder to standby, if they are connected, and ensure that
the aerial is connected� To setup the TV, use the buttons on
the remote control as detailed on page 11�
1
Press the 1 button� The
Menu Language
screen
will appear. This screen will appear the rst time that
the TV is switched on and each time “
Reset TV
” (-
page 38) is executed�
Menu Language
English
2
Press v or w to select the menu language
English
or
Français
�
3
Press OK, to display the
Primary/Secondary
Language
and
Primary/Secondary Audio
Language
item� Press s, r,v or w to set the
selectings as desired�
4
Press OK, to display the
Location
menu (- page
19)�
Press
v
or w to select
Home
or
Store
� For normal
home use, select
Home
�
Location
Home
To use the TV for displaying in a store showroom, please
select [Store]. [Home] mode is recommended for normal
use.
Store mode:
• A conrmation menu will appear.
• AutoView menu is not available�
5
Press OK, to display the
USB 2 Prot Setup
menu,
press v or w to select
Recorder
or
Media Player
�
(- page 48)
6
Press OK, to display the
TV Mounting
menu, press
v
or w to select
Stand
or
Wall
�
TV Mounting
Stand
If you are mounting the TV on a wall please select [Wall].
[Stand] is recommended for other uses.This setting may be
modified later under Sound Navigation in the SOUND menu.
7
Press OK, to display the
AutoView
menu
(- page 23)�
Press v or w to select
Yes
or No�
AutoView
No
AutoView mode automatically adjusts picture settings to
suit ambient light conditions.
Do you wish to enable AutoView mode?
8
Press OK to display the
Auto Tuning
startup screen�
Use v or w to select
DTV and ATV, DTV
or
ATV
�
Then, press s to select
Start Scan
and press OK�
You must allow the TV to complete the search.
Auto Tuning
Progress Found
ATV Tune Waiting...
Channel: 10
DTV Tune 3% 2
When the search is complete, the TV will
automatically select position one�
The
Auto Tuning
results screen will display the
services that are found�
Pos. NameType
DTV
DTV Services Found : 7 ATV Services Found : 12
ATV
Auto Tuning
1
6
9
10
11
12
21
14
Getting started
9
Press v or w to view the
DTV
(digital channel) or
ATV
(analogue channel) lists�
Name
DTV
DTV Services Found : 7 ATV Services Found : 12
ATV
Auto Tuning
0
1
2
3
4
5
6
10
Select s or r to move through the list to select a
channel and press OK to view�
Note:
The
Quick Setup
menu can also be displayed at
any time from the
System Setup
menu.
Using the Quick Menu
Quick Menu
helps you access some options quickly, such
as
Picture Mode, Picture Size, More Information
,
Sleep Timer
etc�
Press
QUICK
to display the
Quick Menu
and use s or
r
to select the option�
Quick Menu
Picture Size
Personal Mode
Wide
3D Settings
00:00
TV Speakers
More Information
Channel Options
REGZA-LINK Device Control
Sleep Timer
Speakers
Headphone Level
Standard
Picture Mode
30
Wireless Information
Recording Information
Note:
Quick Menu
items are different depending on the
current mode.
Quick menu item example
Mode Quick menu item Description
When viewing a
TV programme
or pictures from
the external input
Picture Mode
-
page 23�
Picture Size
-
page 22�
3D Settings
-
pages 35 – 37�
Personal Mode
-
page 80�
More Information
-
page 20�
Channel Options
-
page 45�
Sleep Timer
-
page 38�
REGZA-LINK
Device Control
-
page 41�
Speakers
-
page 41�
Headphone Level
-
page 30�
Wireless Information
-
page 59�
Recording Information
-
page 77�
When viewing in
3D mode
Picture Mode
-
page 23�
Picture Size
-
page 22�
3D Settings
-
pages 35 – 37�
Personal Mode
-
page 80�
More Information
-
page 20�
Channel Options
-
page 45�
Sleep Timer
-
page 38�
REGZA-LINK
Device Control
-
page 41�
Speakers
-
page 41�
Headphone Level
-
page 30�
Wireless Information
-
page 59�
Recording Information
-
page 77�
Library Personal Grouping
-
page 74�
When using
Media Player
(Photo Multi
View)
Sort
-
page 67�
Playback Mode
-
page 67�
Interval Time
-
page 67�
Repeat
-
page 67�
Shufe
-
page 67�
Device Information
-
page 68�
Wireless Information
-
page 59�
When using
Media Player
(Photo Single
View, Slide
Show)
Picture
-
page 24�
Picture Size
-
page 22�
3D Settings
-
pages 35 – 37�
Sound
-
page 28�
Personal Mode
-
page 80�
Interval Time
-
page 67�
Repeat
-
page 67�
Shufe
-
page 67�
Background Music
-
page 67�
Sleep Timer
-
page 38�
Wireless Information
-
page 59�
15
Mode Quick menu item Description
When using
Media Player
(Photo Play
DMR)
Picture
-
page 24�
Picture Size
-
page 22�
3D Settings
-
pages 35 – 37�
Personal Mode
-
page 80�
Sleep Timer
-
page 38�
Wireless Information
-
page 59�
When using
Media Player
(Movie List)
Sort
-
page 68�
Repeat
-
page 68�
Device Information
-
page 69�
Wireless Information
-
page 59�
When using
Media Player
(Movie Play)
Picture
-
page 24�
Picture Size
-
page 22�
3D Settings
-
pages 35 – 37�
Sound
-
page 28�
Personal Mode
-
page 80�
Repeat
-
page 68�
Sleep Timer
-
page 38�
Speakers
-
page 41�
Headphone Level
-
page 30�
Wireless Information
-
page 59�
When using
Media Player
(Movie Play
DMR)
Picture
-
page 24�
Picture Size
-
page 22�
3D Settings
-
pages 35 – 37�
Sound
-
page 28�
Personal Mode
-
page 80�
Sleep Timer
-
page 38�
Speakers
-
page 41�
Headphone Level
-
page 30�
Wireless Information
-
page 59�
When using
Media Player
(Music List)
Sound
-
page 28�
Personal Mode
-
page 80�
Sort
-
page 70�
Repeat
-
page 70�
Shufe
-
page 70�
Speakers
-
page 41�
Headphone Level
-
page 30�
Device Information
-
page 71�
Wireless Information
-
page 59�
When using
Media Player
(Music
Fullscreen Play)
Sound
-
page 28�
Personal Mode
-
page 80�
Repeat
-
page 70�
Shufe
-
page 70�
Sleep Timer
-
page 38�
Speakers
-
page 41�
Headphone Level
-
page 30�
Wireless Information
-
page 59�
Mode Quick menu item Description
When using
Media Player
(Music Play
DMR)
Sound
-
page 28�
Personal Mode
-
page 80�
Sleep Timer
-
page 38�
Speakers
-
page 41�
Headphone Level
-
page 30�
Wireless Information
-
page 59�
When using
Photo Frame
Picture
-
page 24�
Picture Size
-
page 22�
3D Settings
-
pages 35 – 37�
Personal Mode
-
page 80�
When using
YouTube
Picture
-
page 24�
3D Settings
-
pages 35 – 37�
Sound
-
page 28�
Personal Mode
-
page 80�
Sleep Timer
-
page 38�
Speakers
-
page 41�
Headphone Level
-
page 30�
Wireless Information
-
page 59�
Getting started
16
Getting started
MENU structure
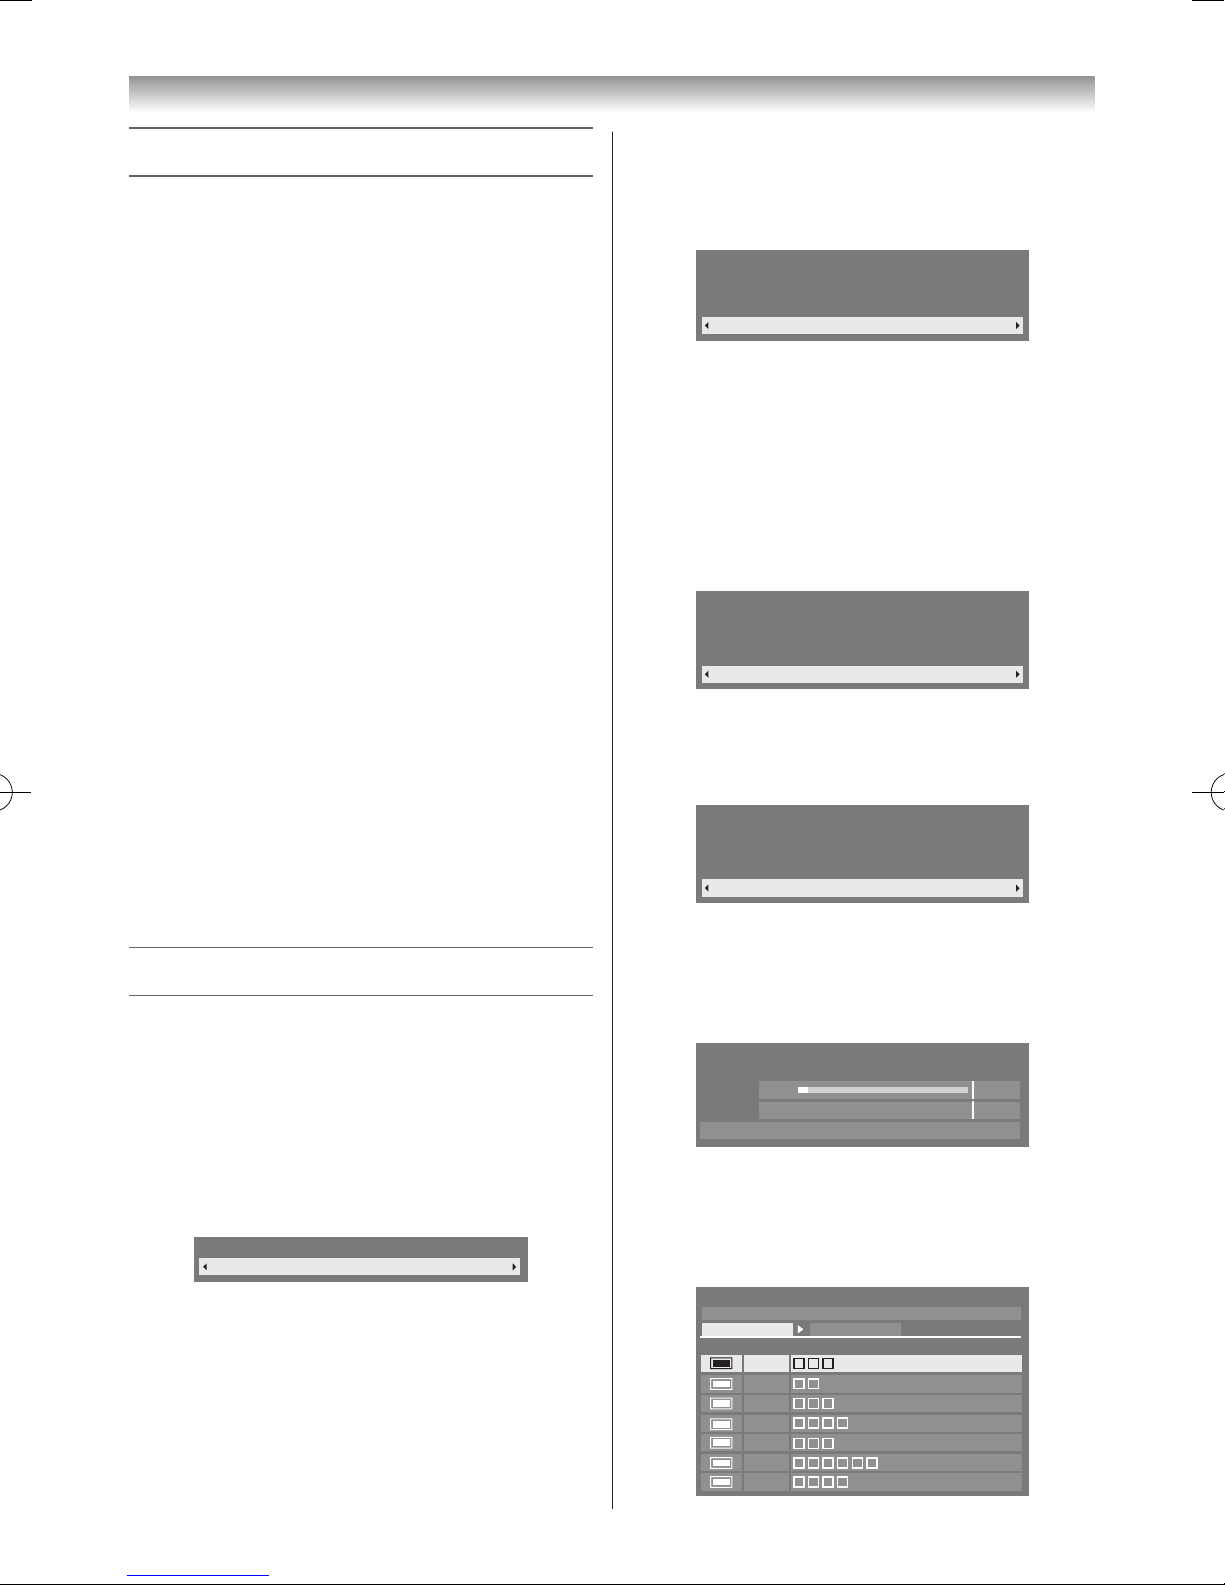
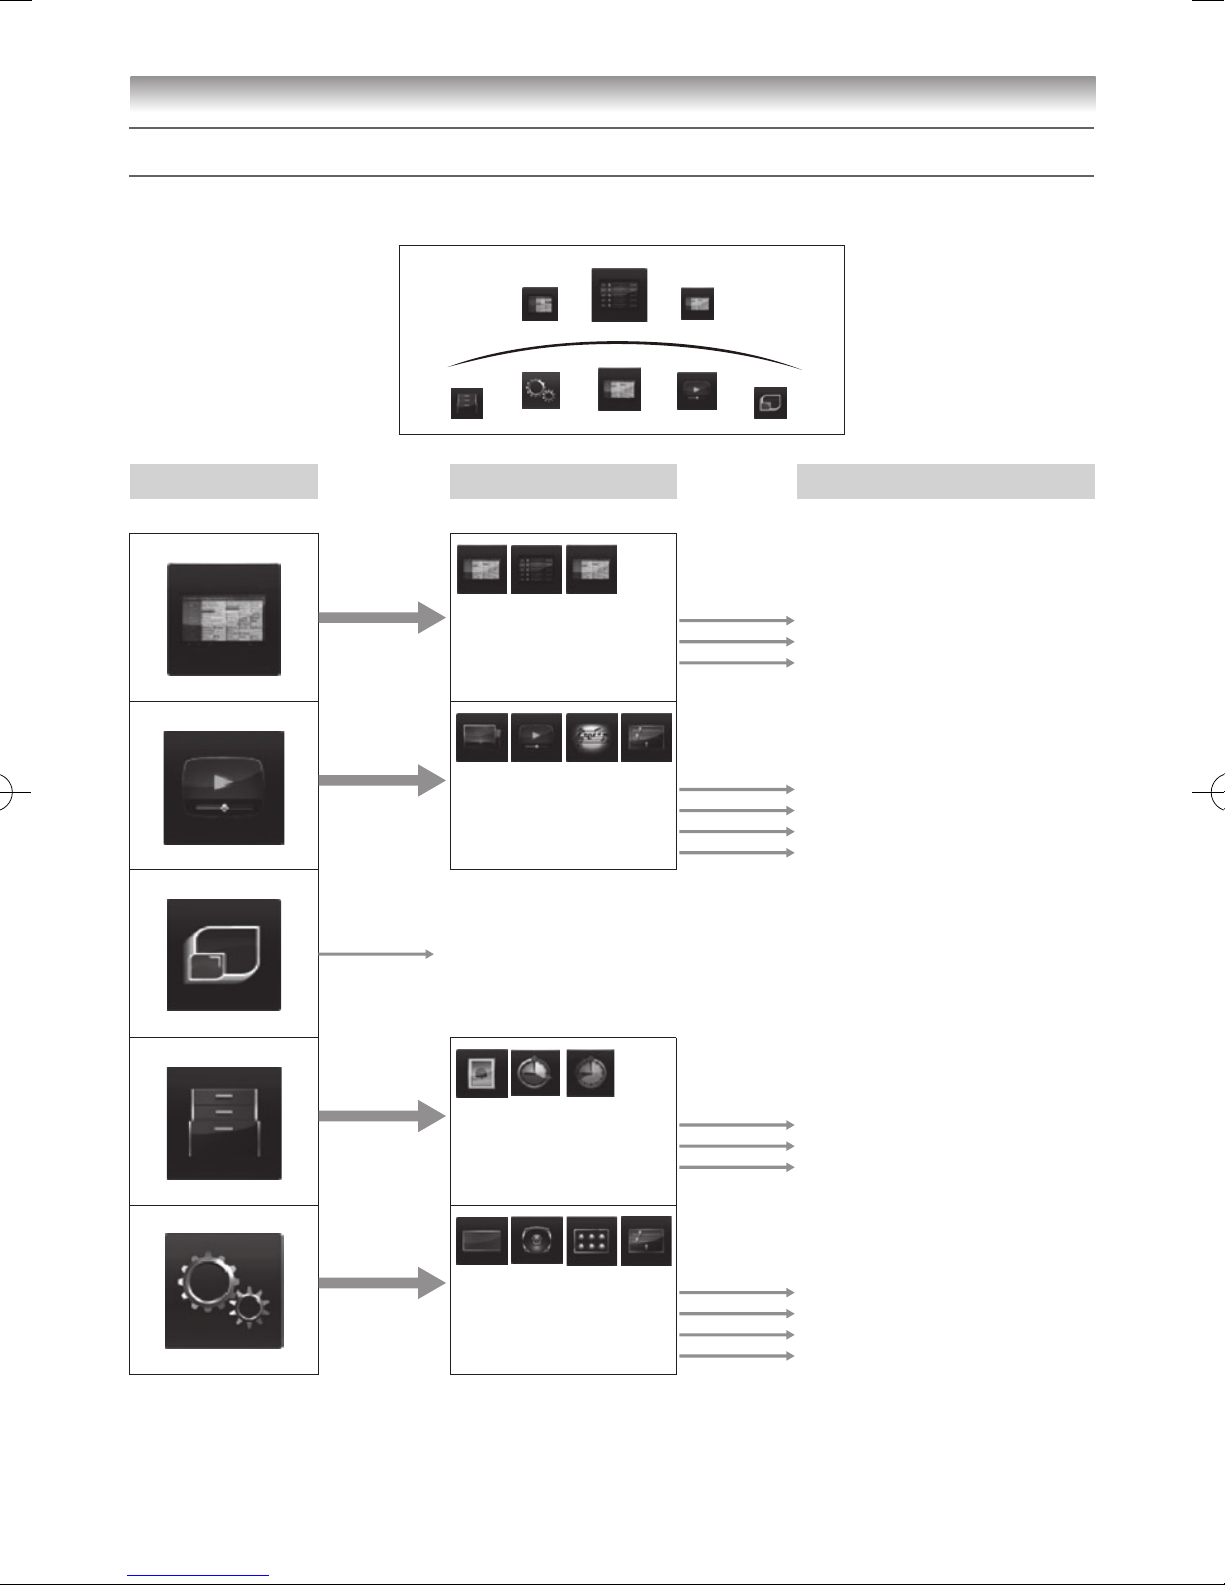
To open the main menu (illustration below), press MENU on the remote control or on the TV control panel.
1st Layer 2nd Layer 3rd Layer
Press MENU. Press OK.Press
or /. Press , , or .Press or .
TV Programmes
Guide
Programme Timers
Library
Jump to Programme Guide (EPG)
Jump to Programme Timers
Jump to Library
Media Player
Photo
Movie
Music
Media Player Setup
Jump to Photo menu
Jump to Movie menu
Jump to Music menu
Media Player Setup Menu
Toshiba Places
Jump to Toshiba Places
Function
Photo Frame
On Timer
Sleep Timer
Jump to Photo Frame
On Timer Menu
Sleep Timer Menu
Setup
Picture
Sound
Preferences
System Setup
Picture Menu
Sound Menu
Preference Menu
System Setup Menu
TV ProgrammesSetup
Function Toshiba Places
Media Player
Programme Timers
Guide Library
MENU structure
17
Getting started
Programming channels into the
TV’s channel memory
Auto Tuning
Auto Tuning
will completely re-tune the TV and can be
used to update the channel list�
It is recommended that
Auto Tuning
is run periodically
to ensure that all new services are added� All current
channels and settings, e�g� favourites and locked channels,
will be lost�
Note:
As new services are broadcast, it will be necessary
to retune the TV in order to view them.
1
From the
System Setup
menu, press s or r to
select
Auto Tuning
�
System Setup
Menu Language
Auto Tuning
ATV Manual Tuning
DTV Manual Tuning
Location
DTV Settings
Quick Setup
English
Auto
Software Upgrade
2
Press OK�
A screen will appear warning that previous settings
will be deleted�
Auto Tuning
Previous settings will be lost! EXIT for no
change.
DTV and ATVTuning Mode
Start Scan
3
Use
v
or w to select
DTV and ATV, DTV
or
ATV
�
Then, press s to select
Start Scan
and press OK to
continue with the
Auto Tuning
�
The TV will start to search for all available DTV and/
or ATV services�
You must allow the TV to complete the search. When the
search is complete, the
Auto Tuning
screen will display
the services found�
4
Use
s
or r to move through the list to select a
channel and press OK to view�
ATV Manual Tuning
- analogue -
Use the Manual Tuning operation if desired channels
cannot be preset by Auto Tuning or if you would like to
preset channels to specic position numbers one by one.
1
From the
System Setup
menu, press s or r to
select
ATV Manual Tuning
�
2
Press OK to display the
ATV Manual Tuning
menu�
Press r or s to select the position you want to set�
Pos. Label
ATV Manual Tuning
1
2
3
4
6
7
8
5
Channel
C2
C4
C5
C7
C12
C23
C27
C9
3
Press OK to display the settings menu� Press v or w
to select an item and press r or s to set the item as
shown below�
Position
ATV Manual Tuning
1
B/G
A C 2 0
A C G
B D H
I
E
F
A.Positionselection
B.System(Sound)
B/G
,
D/K, I or L
C.ColourSystem
A
: Automatic, P: PAL , S: SECAM,
N4
: NTSC 4�43 (MHz), N3: NTSC 3�58 (MHz)
If the colour of a certain channel is abnormal, the
automatic colour system selection (A) may have
malfunctioned or the sound system selection is
wrong� In this case, select another colour and/or
sound system�
D.Positionskipselection
Press
s
or r to turn the position skip option
on “8” or off “(”�The position will then be
skipped when you select channels with
P
U
or
P
u
�
The “8” mark will appear when you use the
Number
buttons on the remote control�
E.SignalClassselection
(
-
page 87)
Press s or r to select C or S�
C: 2 ch - 12 ch, 21 ch - 69 ch
S: 1 ch - 41 ch, 51 ch - 55 ch
F.Channelselection
Press
s
or r until your desired channel is
displayed (- page 87)�
18
G.Searchoperation
Press
r
to search up the band or s to search
down the band�
Press s or r repeatedly until your desired
channel is displayed�
NEVER PRESS ANY OTHER BUTTONS
WHILE THE SET IS TUNING�
H.ManualFineTuning
Press
s
or r until better picture and sound are
obtained�
I.Label
Station labels appear beside the position display
each time you turn on the TV, select a channel, or
press
�
Tochangeorcreatestationlabels:
1) Press
s
or r repeatedly to select a character for
the rst space, then press w�
*(blank space)
2) Repeat step 1) to enter the rest of the characters�
If you would like a blank space in the label
name, you must choose a blank space from the
list of characters�
Press OK to store your settings�
Sorting positions
- analogue -
ATV channels may be moved and stored to the position of
your choice�
1
From the
SETUP
menu, press s or r to select
ATV
Manual Tuning
�
2
With the list of channels now showing, press s or r
to select the channel you want to move and press w�
Pos. Label
ATV Manual Tuning
2
3
4
5
6
7
8
1
ABCD
EFGH
IJKL
MNOP
Channel
C2
C4
C5
C7
C12
C23
C27
C9
3
Use s or r to move through the list to your preferred
position� As you do so, the other channels will move
to make room�
4
Press v to store your move�
Repeat as necessary and press
EXIT
�
DTV Manual Tuning
- digital -
This feature is available for service engineers or can be used
for direct channel entry if the multiplex channel is known�
1
From the
System Setup
menu, press s or r to
select
DTV Manual Tuning
and press OK�
DTV Manual Tuning
WEAK
Signal Strength
Quality
Channel
GOOD
Start Scan
STRONGAVERAGE
22
Frequency
XXX.X MHz
2
Enter the multiplex number using the number buttons
or press v or w to adjust the number up or down�
Then press
s
to select
Start Scan
and press OK�
The TV will start to search for that multiplex�
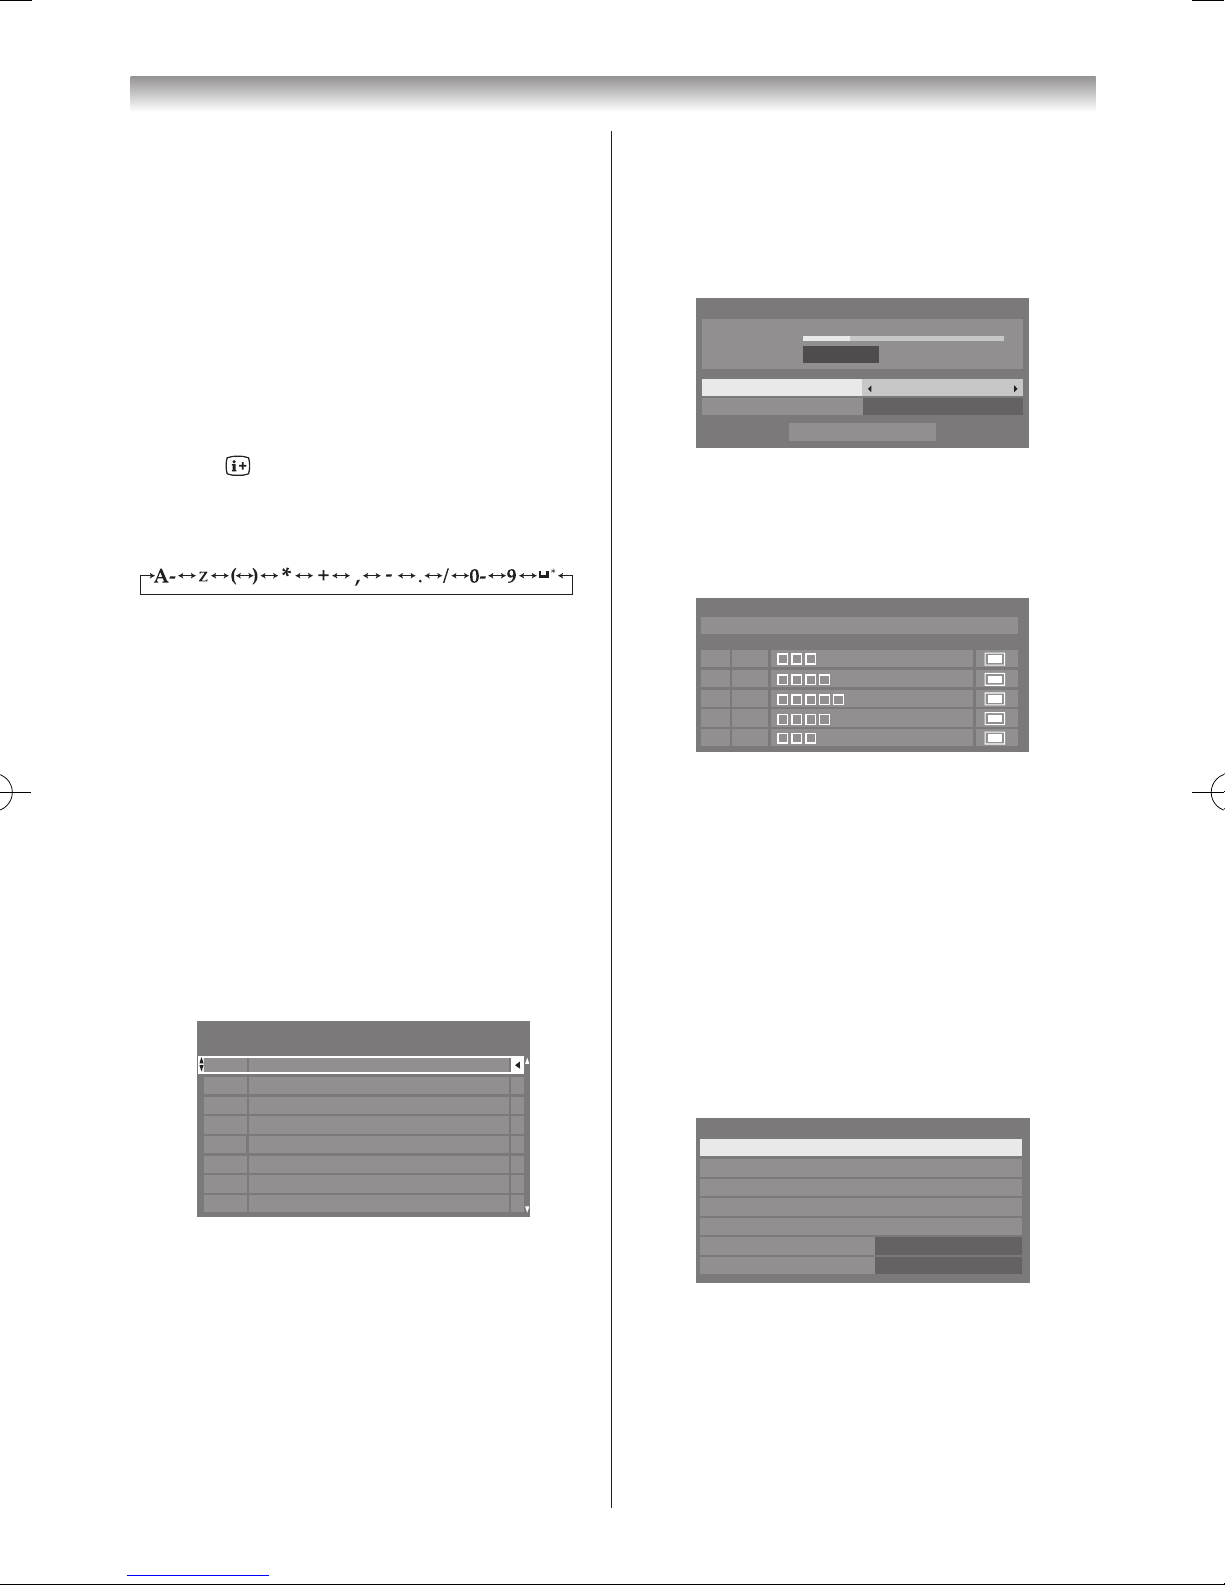
Pos. Name
0 New Channels - Total 6
DTV Manual Tuning
20
2
21
22
23
TypeNew
When the multiplex is found, any channels that are
not currently in the channel list will be added and the
channel information will be updated�
3
Repeat as necessary� Press
EXIT
to nish.
Sorting Channels
- digital -
The channel order may be changed to suit your personal
preference�
1
From the
System Setup
menu, press s or r to
select
DTV Settings
and press OK�
2
Press s or r to select
Channels
and press OK�
DTV Settings
Channels
Parental Control
Parental PIN Audio
Subtitle and Audio
Local Time Setting
Standby Channel Update On
Dynamic Scan On
3
For your convenience, you can jump to specic places
in the list by one of the following methods�
Getting started
19
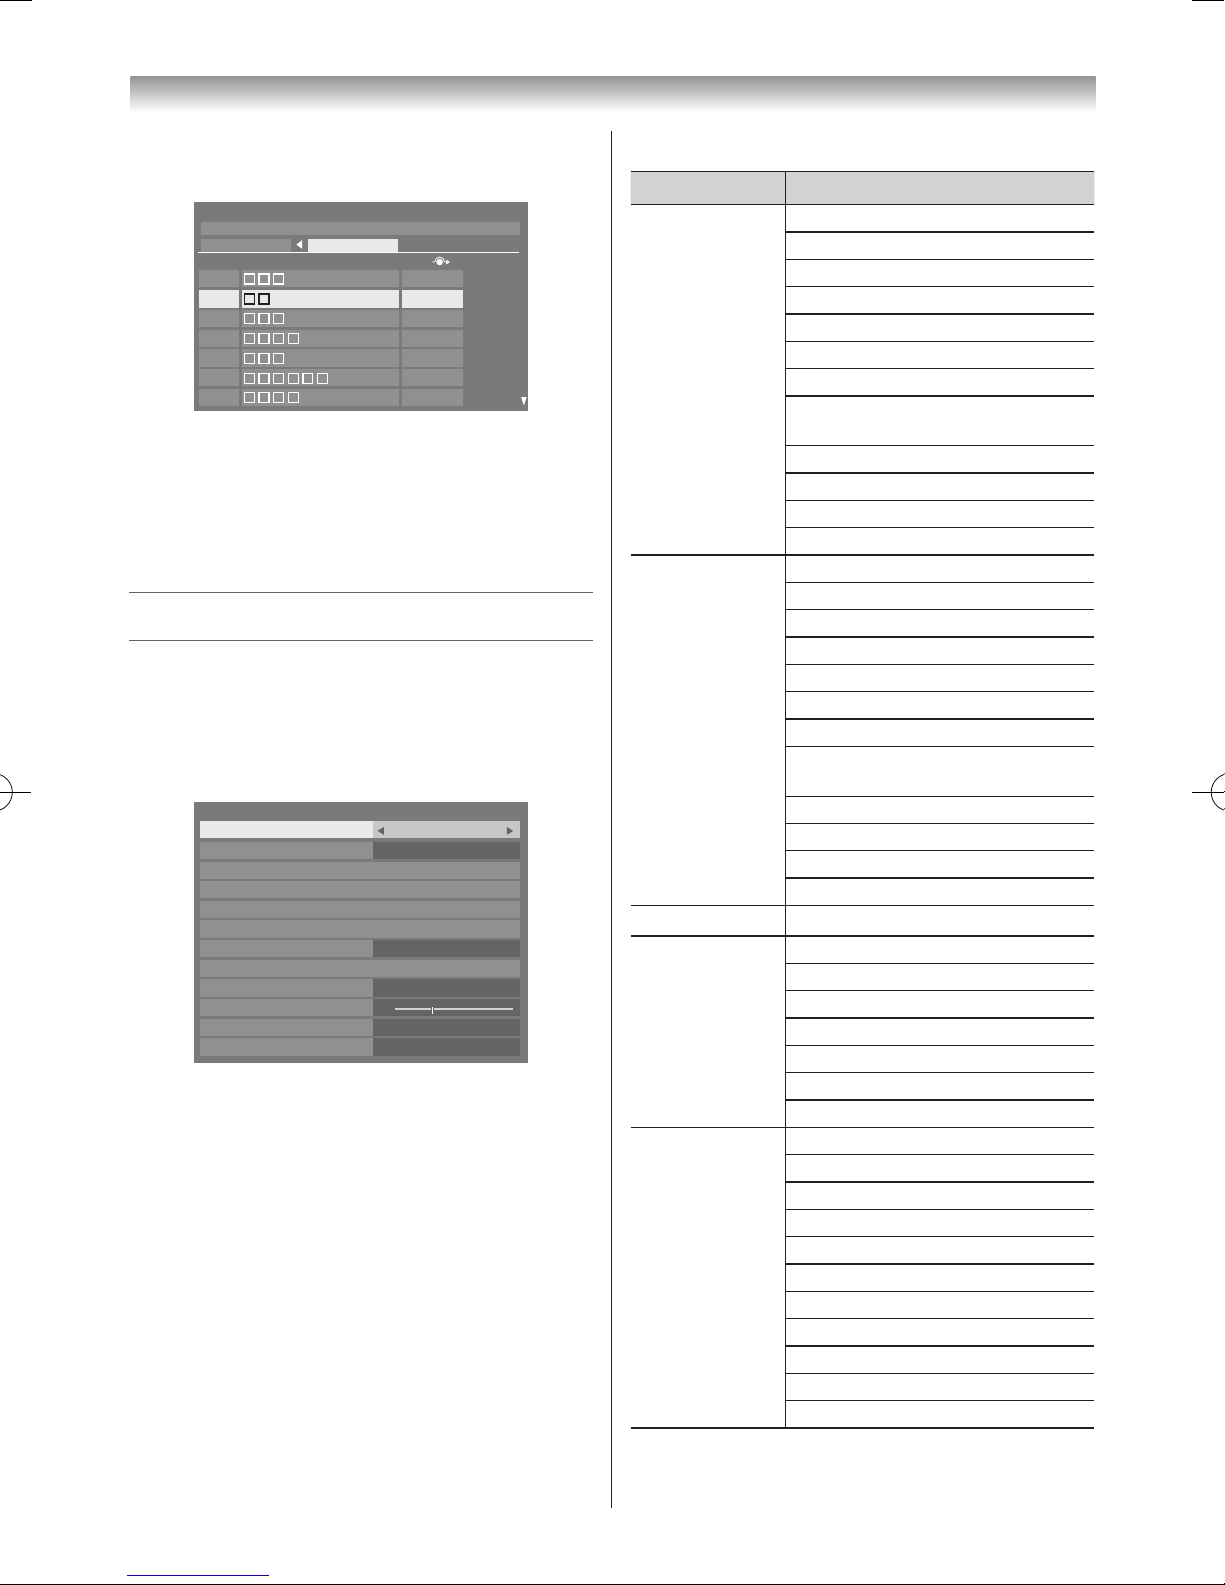
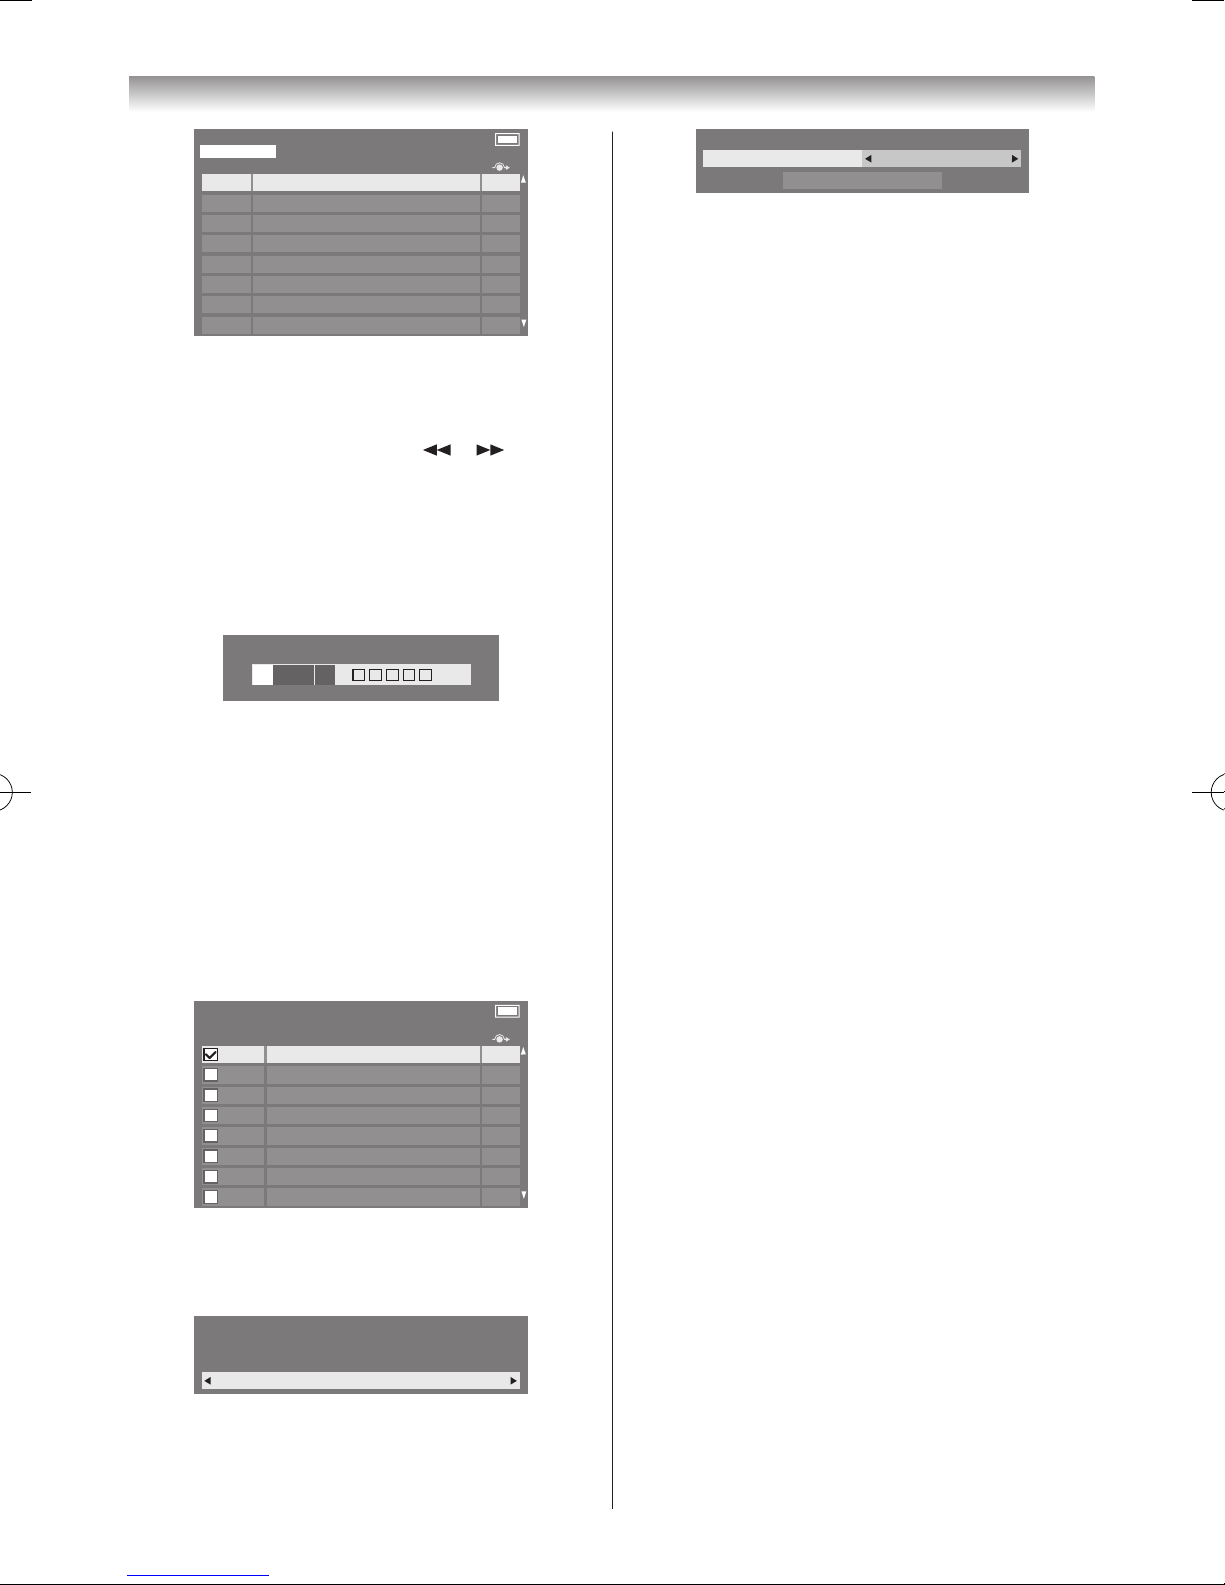
Pos. Name
Channels
20
2
21
22
23
Channels
Line No. 1/10
TV
1
□□□□□
2
□□□
Pos. Name
7
□□□□
30
□□□
40
□□□□□□
51
□□□□□
822
□□□□
823
□□□□□
Line Number Jump
— Press the
Number
button
to input the line number you want to select and press
OK
�
Station Letter Jump
— Press
or to jump to
the next station name with a different initial letter�
It is also possible to change the
Position
number of a
particular channel�
Renumber
— Press the
RED
button to renumber for
the selected channel� Edit the channel number using
the
Number
buttons and press
OK
�
Pos.
- - - -
Name
Move
— Press the
GREEN
button to activate
the
Move
feature� Press the
s
or r to select the
channel you wish to move and press OK to check� If
you wish to move multiple channels at once, select
another channel and check in the same way� Repeat as
necessary�
Once all desired channels have been checked, select
s
or r to place the focus at the position to which
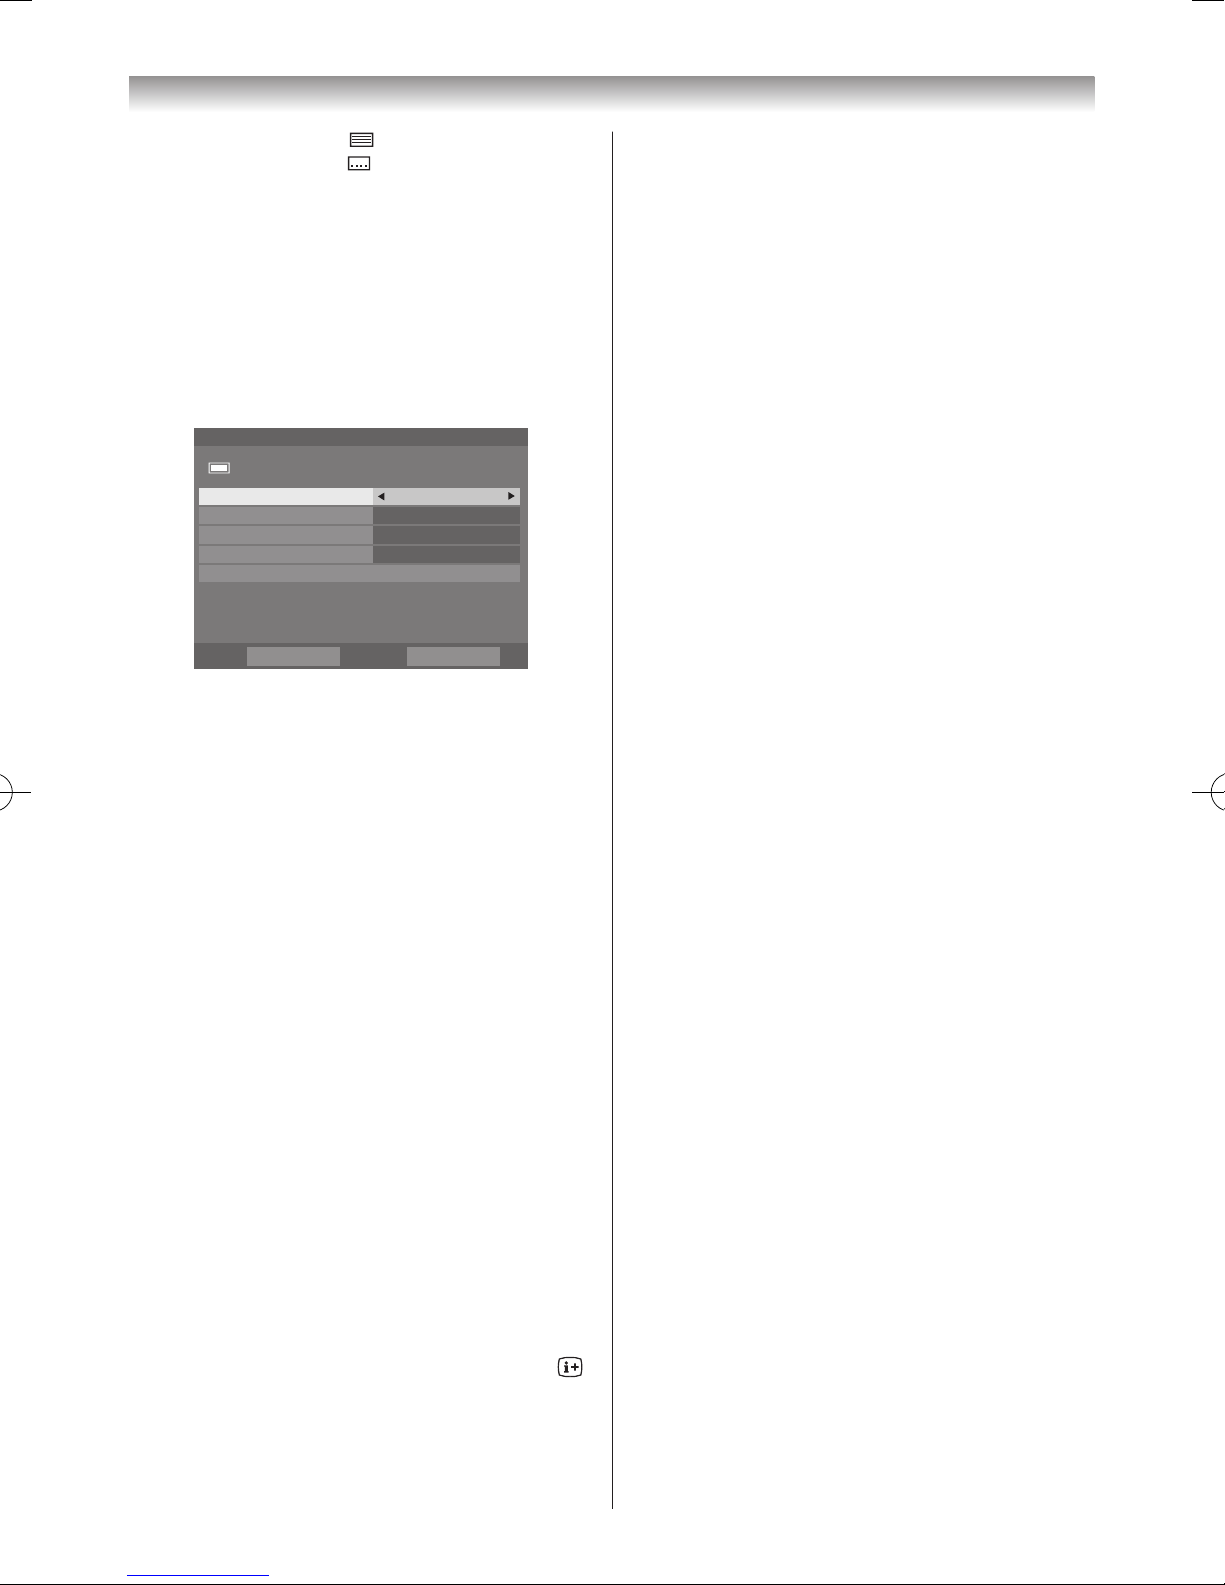
you wish to move the channels� The channels will
be inserted above the selected channels� Press the
GREEN
button to execute the move�
Channels
Line No. 1/10
TV
1
□□□□□
Pos. Name
822
□□□□
823
□□□□□
2
□□□
7
□□□□
30
□□□
40
□□□□□□
51
□□□□□
Sort
— Press the
YELLOW
button. A conrmation
window will appear� Press
v
or w to select
Yes
and
press OK�
Sort
Your existing channel order will be lost. Do you wish to
continue?
Yes
The
Sorting Type
selection window will appear�
Sorting Type Number
Sort
Sort
Press v or w to set the sorting rule�
Number
mode:
Position No� order (numerical sequence)
A-Z Sort
mode:
Station name order (A to Z)
Press
s
to select
Sort
and press OK�
Setting the Standby Channel Update
- digital -
If the
Standby Channel Update
is set to On, when the
TV is in standby mode, Digital Tuning is automatically
executed and any new channels are saved�
1
From the
System Setup
menu select
DTV
Settings
and press OK�
2
Press s or r to select
Standby Channel Update
and press v or w to select On�
Selecting Dynamic Scan
- digital -
If the broadcast information has changed in your DVB-T
receiving area, the TV screen will display the message
“
Broadcast information has changed. Would you
like to rescan now?
”� Please follow the message� If
you do not wish for the TV to detect changes and prompt
you to rescan, you should set this feature to
Off
�
1
From the
DTV Settings
menu, press
s
or
r
to
select
Dynamic Scan
�
2
Press v or w
to select On or
Off
�
Setting the Location
You can select either
Home
or
Store
mode�
Home
is
recommended for normal home use� Select
Store
when
using a TV for displaying in a shop, etc�
1
From the
System Setup
menu, press s or r until
Location
is selected�
2
Press v or w to select
Home
or
Store
�
Analogue switch-off
This is a
digital
TV which is integrated to allow the use
of both
digital
and
analogue
services� However, during
the lifetime of this set it is very likely that
analogue
services will be switched off to allow for more new
digital
services�
This ‘switch-off’ will happen in a number of phases,
which will be advertised in your area well in advance� It is
recommended that at each phase the television is re-tuned
to ensure that existing and new
digital
services can be
viewed without Standby Channel Update disruption�
Getting started

20
Watching TV programmes
Programme Selection
Digital programmes
After you have tuned the TV, you have several ways to
navigate through all programmes:
• Press the
Number
buttons. You may omit the leading
zeroes, which will be appended automatically�
• Press
P
U
/
P
u
to view the previous or next position�
The channels are arranged in ascending order according
to the channel number�
• Press
List
to display the
Channel List
and press
s
or
r
to select a channel and press OK to view the channel
(- page 39)�
Analogue programmes
1
Enter the desired position number using the
Number
buttons on the remote control�
For positions below 10, use 0 and the required number
e�g�, for position 1�
2
You can also change the position by using
P
U
or
P
u
�
Note:
Changing positions between different format
channels takes several seconds.
Switching between positions
You can switch positions without entering an actual
position number each time�
1
Select the rst position you want to view.
2
Select the second position with the
Number
buttons
(0-9)�
3
Press � The previous position will be displayed�
Each time you press
, the TV will switch back and forth
between the two positions�
Selecting the menu language
Choose from 2 different languages (English or Français)
for the On-Screen-Display�
1
From the
System Setup
menu, press s or r to
select
Menu Language
�
2
Press v or w to select the desired language�
Location
Quick Setup
Auto
USB 2 Port Setup
System Setup
Menu Language
Auto Tuning
ATV Manual Tuning
DTV Manual Tuning
DTV Settings
Antenna
English
Recorder
Displaying the on-screen information
- analogue -
1
Press to display the following on-screen
information�
ABCD4
Mono
The information will disappear in 6 seconds�
• Position or external input mode selected
• Label (if set)
• Mono/Stereo/Dual audio status
• Position skip on/off information
2
To close the display instantly, press again�
On-screen information
- digital -
When viewing in Digital TV mode, the on-screen
information will give the details of the programme
currently being viewed�
1
Press to display the on-screen information�
7 7 Digital
(Personal Name)
11:00 - 12:00
12:00 - 12:59
Now
Next
Change
Comprehensive coverage of local, national and international news
with analysis of the key stories of the day and a strong focus on
health, social and environmental issues.
News 31 min left
HD 16:9
11:20 Mon, 25 Apr
English
Side by Side
3D
REC
8888
The information will disappear in 60 seconds�
On-screen information contains the following
information:
• Current Channel Number
• Channel Name
• REC (if set)
• 3D mode (if set)
• Skip (if set) (
8
)
• Lock (if set) ( )
• Personal Name ( )
• Now and Next Programme Names
• Current date and time
• Video format of the current programme (SD/HD)
Getting started
21
Getting started
• Teletext availability ( )
• Subtitle availability ( )
• Parental rating: G, PG, M, MA, AV, R, etc.
• Dolby® Digital audio track availability (indicated by
Dolby D)
• Reminder Timer (if set) ( ✓)
2
Press s or r to select the “
Now
” or “
Next
”
information guide�
3
To set a reminder for the Next programme, select
“
Next
” and press OK� The
Set Timer
screen will
appear�
rpA 52 ,
Mon
05:01remiT Set
Seven Wonder4
□□□□□
10:55-12:30 Mon, 25 Apr
Timer Type
Recording
Programme Tracking
On
Protect
Off
Personal Grouping
None
Change Time
Set Timer Delete Timer
4
The details of the programme will have been added to
the timer (- page 74)� Select
Set Timer
and press
OK
to save�
To indicate that a timer has been set, a check mark
will be displayed in the
Next
eld of the information
screen (4)�
A check mark will appear if the timer is a Reminder
Timer (✓)�
Note:
The Programme Timer LED indicator (- page 9)
will appear orange when a timer is set.
Displaying the Clock Display
You will always see a time display on screen when using
this feature�
1
From the
Preferences
menu, press s or r until
Clock Display
is selected�
2
Press v or w to select On or
Off
�
Note:
This feature will not be available until a digital
channel has been tuned.
HDMI Information Display
When the HDMI Information Display feature is On and
you are watching an HDMI input source, pressing the
button displays the HDMI signal information banner�
1
From the
Preferences
menu, press s or r until
HDMI Information Display
is selected�
2
Press v or w to select
On or Off
�
HDMI signal information is as follows:
Resolution, Scan Type, Frame Rate*, Aspect, Bit
Depth, Colour Space, RGB/YUV, Chroma Format and
Content Type (if available)�
* If the HDMI input source is interlaced, “
Field
Rate
” will be displayed instead of “
Frame Rate
”�
22
Using the TV’s features (General)
• Most of the picture/sound controls and functions are
available in both digital and analogue modes� However,
features not available will be greyed out�
Picture adjustment
Selecting the picture size
1
Press to display the picture size list and press s or
r
to select the appropriate picture size (or press
repeatedly to select the desired picture size directly)�
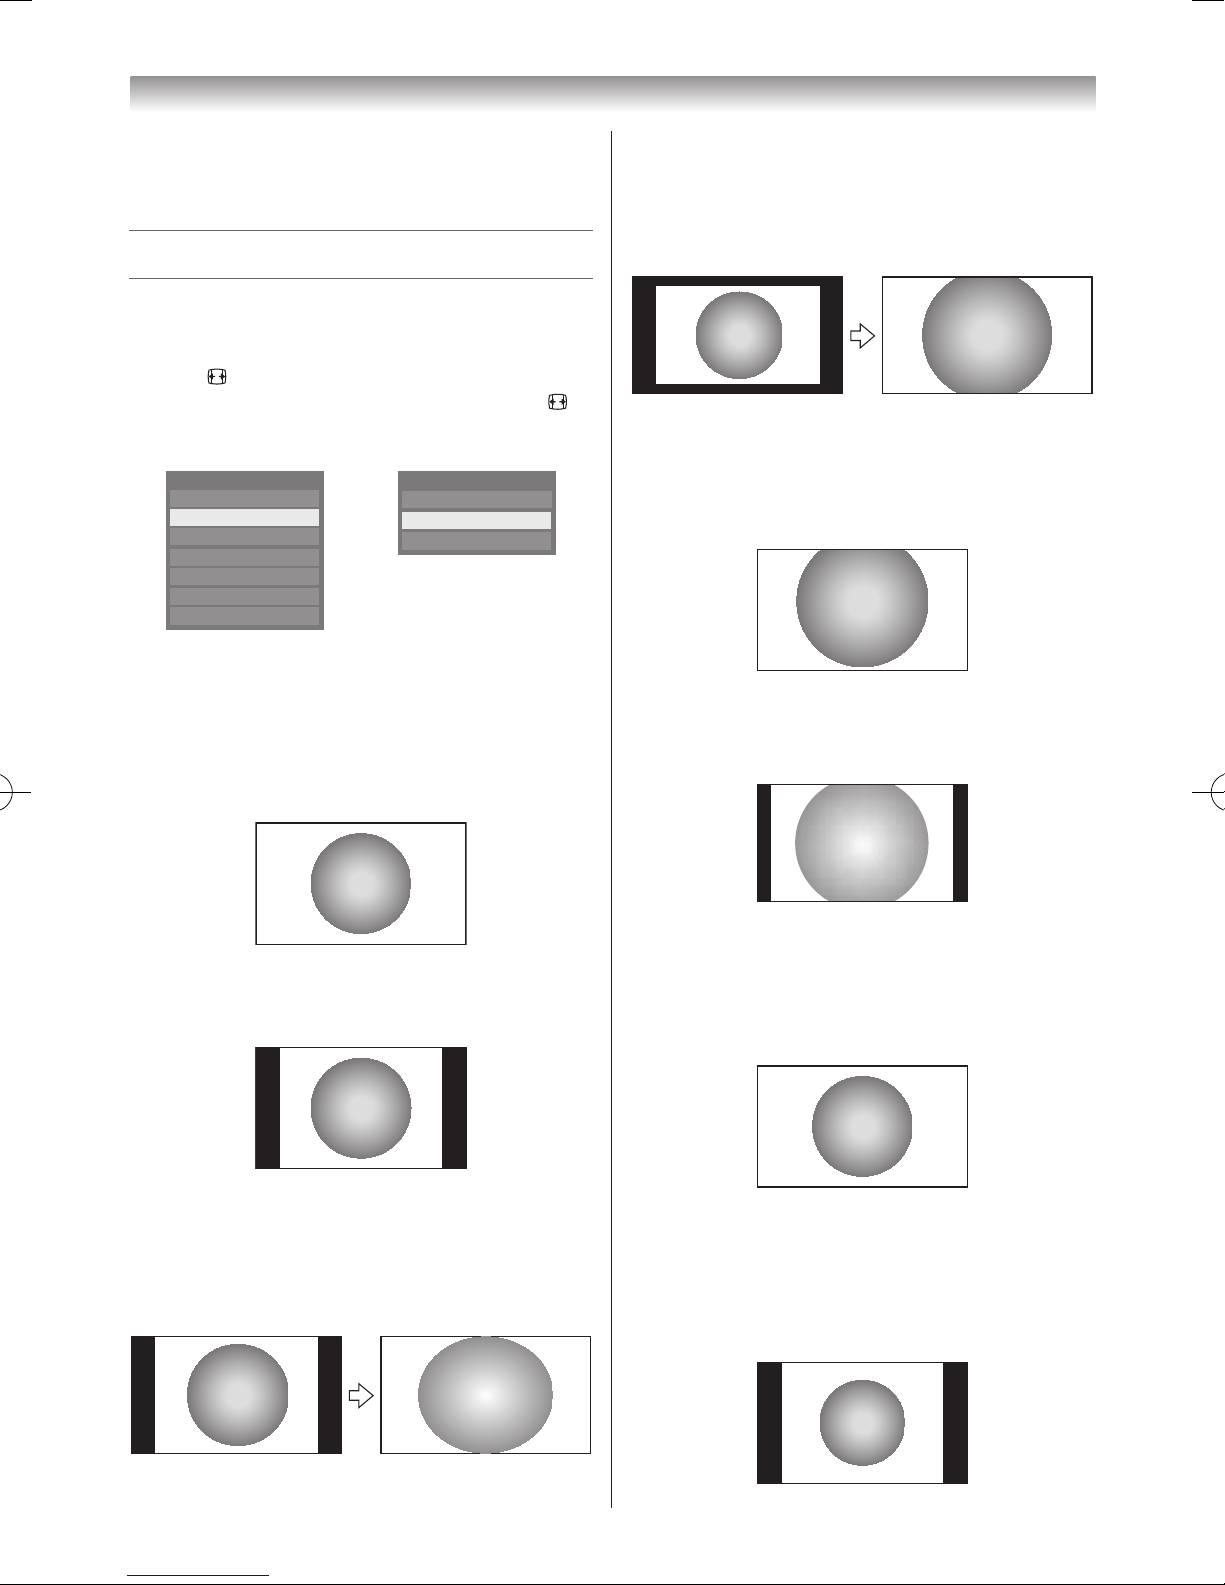
AVformat PCformat
Picture Size
4:3
Super Live
Cinema
Wide
Subtitle
Native
14:9
Picture Size
PC Wide
Dot by Dot
PC Normal
2
Press OK�
Wide
Use this setting when watching a wide-screen DVD, widescreen video tape or a 16:9 broadcast (when available)�
Due to the range of wide-screen formats (16:9, 14:9, 20:9
etc�), you may see bars on the top and bottom of the screen�
4:3
Use this setting to view a true 4:3 broadcast�
Super Live
This setting will enlarge a 4:3 image to t the screen by
stretching the image horizontally and vertically, holding
better proportions at the centre of the image� Some
distortion may occur�
Cinema
When watching “all sides panel format” lms/video tapes,
this setting will eliminate or reduce the black bars on all
sides of the screen by zooming in and selecting the image
without distortion�
Subtitle
When subtitles are included on a letterbox format
broadcast, this setting will raise the picture so that most of
the text is displayed�
Subtitle
14:9
Use this setting when watching a 14:9 broadcast�
Native
This setting will display the image correctly without
distortion or picture clipping� However, the playback
movie (Divx le) from the USB device is with over scan
PC Normal
Use this setting for a PC connected via HDMI or RGB/
PC terminal when receiving PC signal format� This setting
will display the image correctly without distortion or
picture clipping�
23
Using the TV’s features (General)
PC Wide
Use this setting for a PC connected via HDMI or RGB/
PC terminal when receiving PC signal format� This setting
will display the image without picture clipping�
Dot by Dot
“Dot by Dot” is a non-scaling display� Depending on the
input signal format, the picture is displayed with side
panels and/or bars at the top and bottom (i�e� VGA input
source)�
Notes:
• Using the special functions to change the size of
the displayed image (e.g. changing the height/
width ratio) for the purpose of public display or
commercial gain may infringe on copyright laws.
• If the aspect ratio of the selected format is different
from the one of the TV transmission or video
programme, it can cause a difference in display.
Change to the correct aspect ratio picture size to
fix this.
• When using a PC connected via HDMI or RGB/PC
terminal, moving image quality may deteriorate.
Using the picture still feature
• Press r to freeze the picture�
Even if an image is frozen on the TV screen, the pictures
are still running on the input source� Audio continues to be
output as well�
To return to a moving picture, press
r
again�
(Moving) (Still)
Note:
If you use this function except for the purpose of
your private viewing and listening, it may infringe
upon copyrights protected by copyright laws.
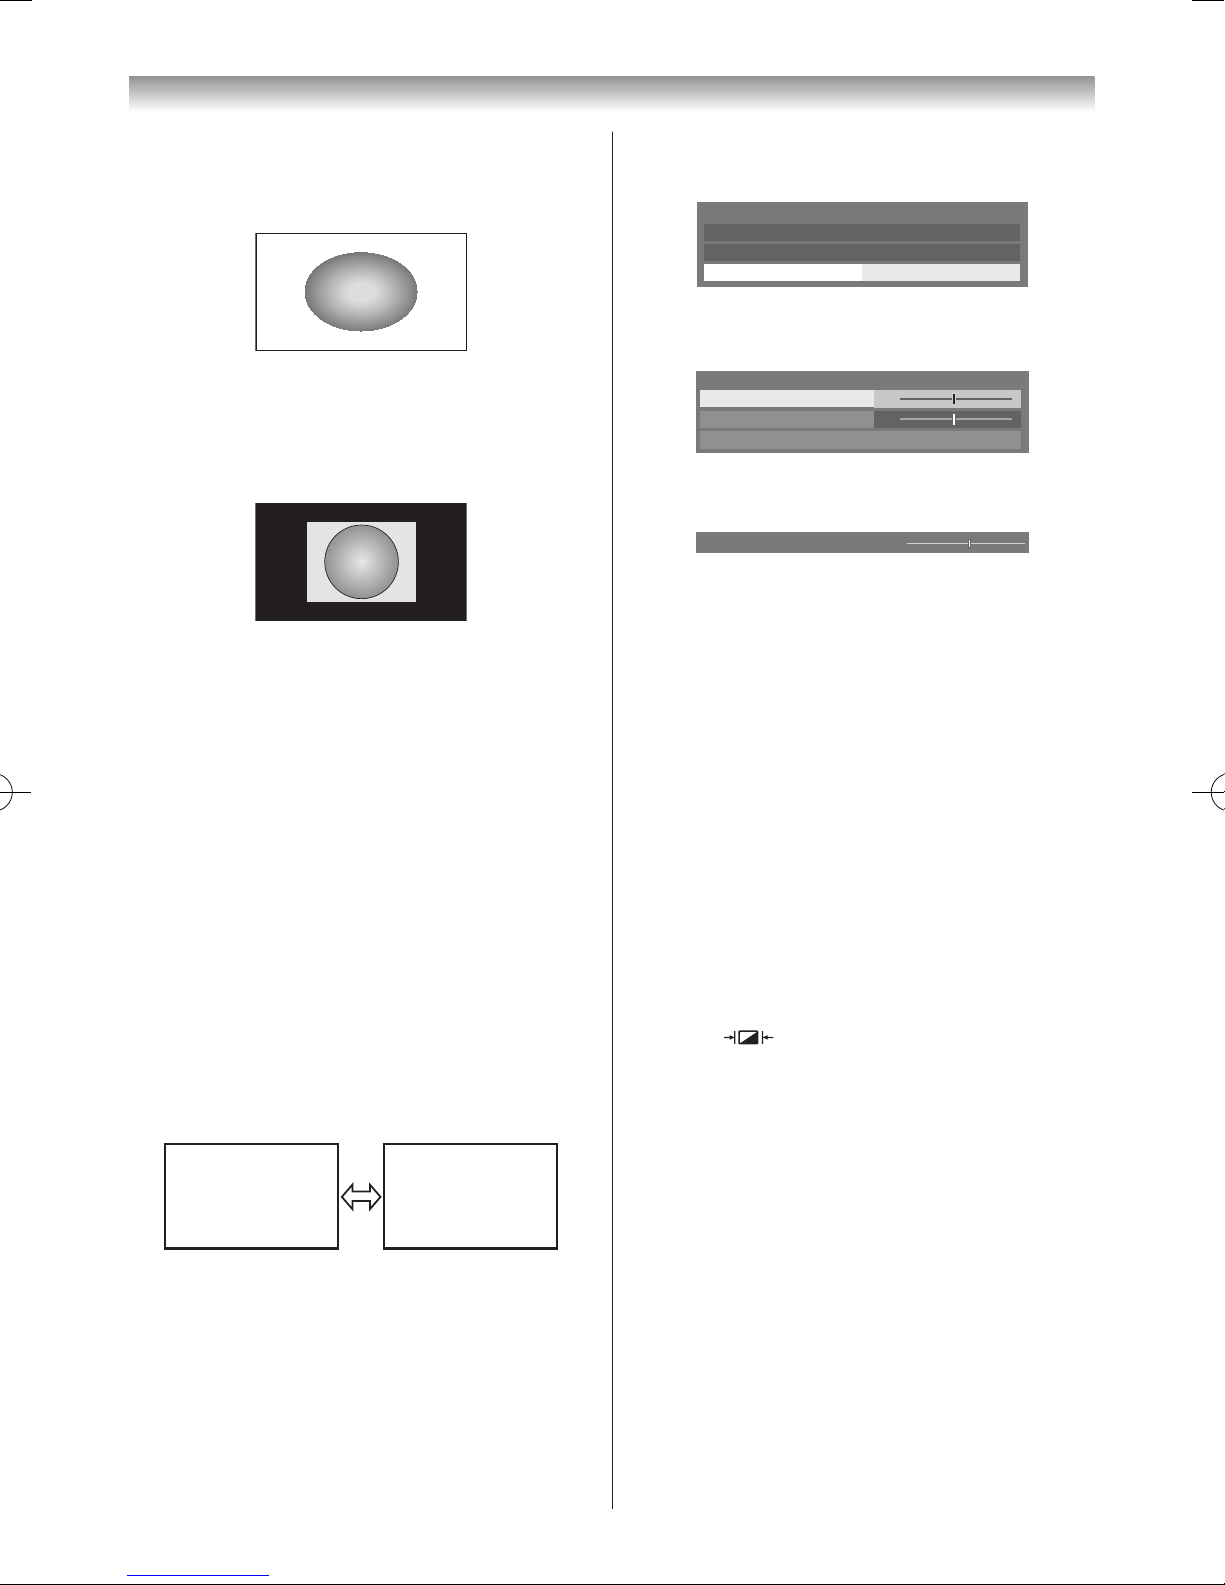
Adjusting the Picture Position
- analogue -
Adjustment to the position of the picture may be made to
suit your viewing preferences�
1
From the
Display Settings
in the
Preferences
menu, press s or r to select
Picture Position
�
Auto Format On
4:3 Stretch Off
Picture Position
Display Settings
2
Press OK and press s or r to select the item you
want to adjust�
0
0
Picture Position
Horizontal Position
Reset
Vertical Position
3
Press v or w to adjust the settings as desired�
Horizontal Position
0
Notes:
• When the picture size is in
Wide
or
4:3
mode, only
the Horizontal Position can be adjusted.
• When the picture size is in
Native, PC Wide, PC
Normal
or
Dot by Dot
mode, this function will not
be available.
Resetting the Picture Position
This function resets your picture position settings to the
factory settings�
1
From the
Picture Position
menu, press s or r to
select
Reset
�
2
Press OK�
Activating the Picture Mode
This TV offers the choice of personalising the picture
style� Press to view the different modes available�
AutoView, Dynamic, Standard, Movie Night, Movie
Day, Movie Pro, Store, Game
and PC are preset
options and affect many features/settings within the TV�
Notes:
• The
Picture Mode
menu can also be displayed at
any time from the
Picture
menu.
•
Store
mode is only available when
Location
is set
to
Store
.
•
Game
mode is available in external input mode
(other than aerial input). When you select
Game
mode, suitable widescreen formats will be
selected.
• PC mode is available in RGB/PC input mode or
HDMI input mode.
• The picture mode you select affects the current
input only. You can select a different picture mode
for each input.
24
Using the TV’s features (General)
• To set another
Picture Mode
, use the
Picture
menu.
Activating the picture preferences
You can customise current
Picture Mode
settings as
desired� For example, while selecting “
Dynamic
”, if
you change the following items, such as
Backlight
,
Contrast, Brightness, Colour, Tint, Sharpness
and the
Advanced Picture Settings
items, your new
setting are saved for “
Dynamic” Picture Mode
�
1
From the
Picture
menu, press s or r to select
either
Backlight, Contrast, Brightness, Colour
,
Tint
or
Sharpness
�
2
Press v or w to adjust the settings�
Note:
Contrast
is available when
Picture Mode
is set to
AutoView
.
Resetting the Picture Mode
This feature resets all picture settings to the factory
settings
Picture Mode
�
1
From the
Picture
menu, press s or r to select
Reset
and press OK�
2
A conrmation message will appear. Press v or w to
select
Yes
and press OK�
Adjusting Black/White Level
Black/White Level
improves the contrast of the picture�
1
From the
Picture
menu, press s or r until
Advanced Picture Settings
is selected�
0
0
0
0
100
PICTURE
Backlight
Contrast
Brightness
Colour
Tint
Advanced Picture Settings
Sharpness
0
Reset
70
Picture
2
Press OK and press s or r to select
Black/White
Level
�
7
0
100
PICTURE
Base Colour Adjustment
Colour Temperature
Auto Brightness Sensor Settings
LED Backlight Control
Black/White Level
Noise Reduction
Static Gamma
3D Colour Management
Advanced Picture Settings
Off
Middle
3
Press v or w to adjust the settings as required�
Using ClearScan 400Hz
This function eliminates motion blur without adding
icker or reducing image brightness and improves the
viewing quality of a motion picture�
1
From the
Advanced Picture Settings
menu, press
s
or r until
ClearScan 400Hz
is selected�
2
Press v or w to select
Smooth, Standard
or
Off
�
Adjusting the Colour Temperature
Colour Temperature
increases the ‘warmth’ or
‘coolness’ of the picture by increasing the red or blue tint�
1
From the
Advanced Picture Settings
menu, press
s
or r to select
Colour Temperature
�
2
Press v or w to adjust the settings as desired (0 (warm)
- 10 (cool))�
Note:
If
Picture Mode
is set to
AutoView
, the range will
be -5 to +5.
Adjusting the Auto Brightness Sensor
When the
Auto Brightness Sensor
is activated, it
will automatically optimise the backlighting levels to suit
ambient light conditions�
1
From the
Advanced Picture Settings
menu, press
s
to select
Auto Brightness Sensor Settings
and press OK�
2
Press v or w to select On�
Auto Brightness Sensor Settings
Backlight Adjustment Pro
Auto Brightness Sensor
On
3
Press s to select
Backlight Adjustment Pro
and
press OK�
4
The
Backlight Adjustment Pro
window will appear�
Press OK again to display the adjustment window�
5
Press v or w to select a point and press s or r to
adjust the level�
100
0
Backlight Adjustment Pro
Backlight Control Level
Control
Level
Ambient Light
48
Cancel
Reset
25
Using the TV’s features (General)
6
Press OK to conrm the adjustment.
To cancel the adjustment when selecting a point, select
Cancel
and press OK�
To return the settings of all points to the factory
defaults, select
Reset
and press OK�
Selecting LED Backlight Control
When LED Backlight Control is activated, it will
automatically optimise the backlighting levels for dark
scenes�
1
From the
Advanced Picture Settings
menu, press
s
or r to select
LED Backlight Control
�
2
Press v or w to select
High, Middle, Low
or
Off
�
Note:
When
Picture Mode
is set to
AutoView, Auto
mode
is available.
Adjusting 3D Colour Management
You can adjust picture colour quality by selecting from 6
base colour adjustments :
Red, Green, Blue, Yellow
,
Magenta
and
Cyan
�
1
From the
Advanced Picture Settings
menu, press
s
or r to select
3D Colour Management
and
press v or w to select On�
3D Colour Management
On
2
Press s or r to select
Base Colour Adjustment
�
3
Press OK and press s or r to select the item you
want to adjust�
Hue Saturation
Reset
Brightness
0Red
Green
Blue
Yellow
Magenta
Cyan
0 0
0 0 0
0 0 0
0 0 0
0 0 0
0 0 0
Base Colour Adjustment
4
Press w and press s or r to select
Hue
,
Saturation
or
Brightness
�
Hue Saturation Brightness
0Red 0 0
5
Press s or r to adjust the settings as required�
Note:
If you set
3D Colour Management
to
Off, Base
Colour Adjustment
will not be available.
Resetting Base Colour Adjustment
The reset function returns base colour adjustment to the
factory settings�
1
From the
Base Colour Adjustment
menu, press
s
or r to select
Reset
�
2
Press OK�
Activating MPEG NR (Noise Reduction)
If the incoming MPEG signal exhibits noise (is grainy),
depending on the compression and conversion, the noise
may be reduced when using this function�
1
From the
Advanced Picture Settings
menu, press
s
or r to select
Noise Reduction
and press
OK
�
Noise Reduction
DNR
MPEG NR
Low
Auto
2
Press v or w to select
Off, Low, Middle
or
High
�
Activating DNR (Digital Noise Reduction)
If the incoming signal is weak and the picture is blurry, the
picture may be improved when using this function�
1
From the
Noise Reduction
menu, press s or r to
select
DNR
�
2
Press v or w to select
Auto, Off, Low, Middle
or
High
�
Adjusting the Static Gamma
The static gamma feature allows you to adjust the levels
of black in the picture�
1
From the
Advanced Picture Settings
menu, press
s
or r to select
Static Gamma
�
2
Press v or w adjust the level�
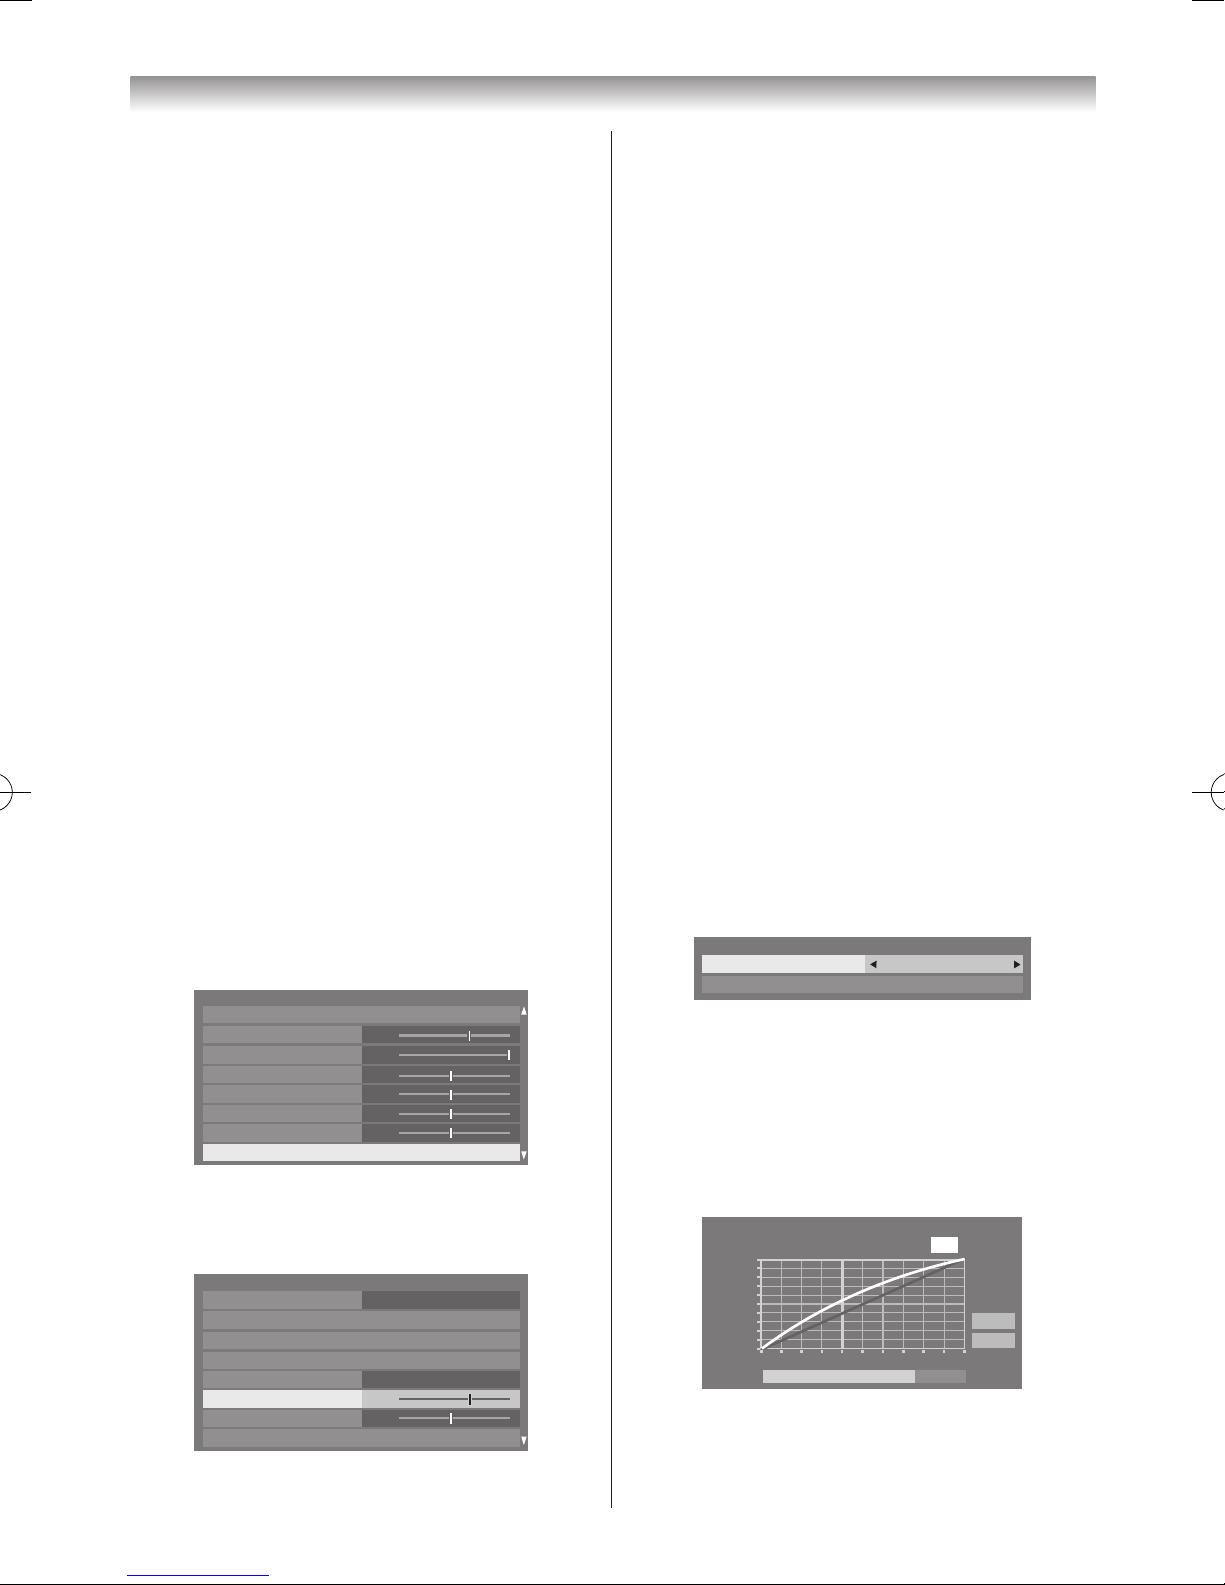
Adjusting Resolution+
The
Resolution+
feature allows you to adjust the clarity
levels for your desired picture settings�
1
From the
Advanced Picture Settings
menu, press
s
or r until
Resolution+
is selected and press OK�
2
In the
Resolution+
field, select
Auto
�
Resolution+
Level
Resolution+
Auto
3

26
Using the TV’s features (General)
3
Press s to select
Level
and press v or w to adjust
the level�
Notes:
• This feature may not work properly depending on
the content.
• Adjustable range varies according to the Picture
Mode you set.
• Noise may appear on the image depending on the
device connected to the TV (e.g. a device with a
specific enhancer function).
Motion Detection Range
This feature is to set the range of the adjustment of
movement in the double-scan processing� If you feel
uncomfortable in motion picture, select
Standard
�
1
From the
Advanced Picture Settings
menu, press
s
or r to select
Motion Detection Range
�
2
Press v or w to select
Wide
or
Standard
�
Wide:
double-scan effect for higher-speed motion
picture
Standard:
stabilized double-scan effect
Selecting the 3D Judder Cancellation
This feature will reduce 3D images blur without adding
icker.
1
From the
Advanced Picture Settings
menu, press
s
or r to select
3D Judder Cancellation
�
2
Press v or w to select
Auto
or
Off
�
Resetting the advanced picture settings
This feature allows you to reset the current
Advanced
Picture Settings
to the default values�
1
From the
Advanced Picture Settings
menu, press
s
or r until
Reset
is selected �
2
Press OK�
Expert Picture Settings
Test Pattern
When the
Test Pattern
is displayed on the screen,
you can navigate to other
Picture
submenus without
removing the image� This allows the test pattern to be used
as a reference when making picture setting adjustments�
When you move to a
non-Picture
menu, or close the
menu, normal video will be restored�
1
From the
Picture
menu, s or r until
Expert
Picture Settings
is selected and press OK�
2
Press s or r to select
Test Pattern
�
3
Press v or w to select On or
Off
�
RGB Filter
This feature individually enables or disables the red, green
and blue components of the picture to allow for more
accurate adjustment of each colour�
1
From the
Expert Picture Settings
menu, press s
or r to select
RGB Filter
and press OK�
2
Press s or r to select
Red, Green
or
Blue
and
press v or w to select On�
3
Press s or r to select
Colour
or
Tint
and press v
or w to adjust the settings as desired�
Note:
It is not possible to turn off all of these colours
simultaneously.
Colour Decoding
If you watch DVDs with this TV, the Colour Decoding
option may be set for ensuring the colourimetry
reproduction�
1
From the
Expert Picture Settings
menu, press s
or r to select
Colour Decoding
�
2
Press v or w to select
Auto, BT.709
or
BT.601
�
Note:
Normally set this feature to
Auto (BT.601
and
BT.709
modes changes for the better colourimetry.
When receiving a normal signal and selecting
BT.601
and
BT.709
modes, it may not be displayed
of correct colourimetry on the screen).
White Balance - Window Display
This feature displays a window pattern that allows you to
adjust the White Balance using a measuring device�
1
From the
Expert Picture Settings
menu, press s
or r to select
White Balance
and press OK�
2
Press s or r to select
Window Display
and press
v
or w to select On or
Off
�
White Balance - Setting Type
You can choose the method for adjusting the White
Balance settings�
1
From the
Expert Picture Settings
menu, press s
or r to select
White Balance
and press OK�
2
Press s or r to select
Setting Type
and press v or
w
to select 2P or
10P
�

27
Using the TV’s features (General)
When 2P is selected:
1
Press s to select
2P White Balance
�
2
Press s or r to select
Red-Offset, Green-Offset
,
Blue-Offset, Red-Gain, Green-Gain
or
Blue-
Gain
3
Press v or w to adjust the settings as desired�
When 10P is selected:
1
Press s to select
10P White Balance
�
2
Press s or r to select
IRE
(white level),
Red
,
Green
or
Blue
�
3
Press v or w to adjust the settings as desired�
Colour Calibration
The aim of Colour Calibration is to measure and/or adjust
the colour response(White Balance) of your LCD panel�
Colour Calibration is used by various elds, such as
gaming, photography, engineering, medical and more� In
order to calibrate a display correctly, you need a colour
analyzer
TPA-1
(not supplied)�
Apply Calibration
1
From the
Expert Picture Settings
menu, press s
or r to select
Colour Calibration
and press OK�
2
Press s or r to select
Apply Calibration
and press
v
or w to select
Enable
or
Disable
�
Manual Colour Calibration
1
From the
Colour Calibration
menu, press s or r
to select
Manual Colour Calibration
and press OK�
Manual Colour Calibration
Red
Green
Blue
0.640
0.300
0.330
0.060
Reset
x y
Start
0.150
0.600
Please input the value measured with the colour analyser.
2
Place the prove of the colour analyzer over the square
on screen to measure�
3
Input the value measured with the colour analyzer
using the
Number
buttons (0-9)�
Red
Green
Blue
0.640
0.300
0.330
0.060
x y
0.150
0.600
4
Press s, r ,v or w and input the values to ll all
RGBxy matrix table�
5
Highlight
Start
and press OK� Please wait until you
see “Manual Colour Calibration has been completed”
on screen�
To return to factory setting
Select
Reset
and press OK�
Auto Colour Calibration
1
From the
Colour Calibration
menu, press s or r
to select
Auto Colour Calibration
and press OK�
2
Place the prove of the USB colour analyzer over the
square on screen and connect USB colour analyzer for
the USB1 or USB2 port, and press OK�
Auto Colour
Calibration
will start� Please wait until you see “
Auto
Colour Calibration
has been completed”�
Gamma Calibration
1
In the
Expert Picture Settings menu
, press s or
r
to select
Gamma Calibration
and press OK�
2
Press s or r to select
Apply Calibration
and press
v
or w to select
Enable
or
Disable
�
3
Press s or r to select
Auto Gamma Calibration
and press OK�
4
Input the target value and place the USB colour
analyzer over the square on screen and, connect USB
colour analyzer for theUSB1 or USB2 port�
Auto Gamma Calibration
Target Colour Temperature
Target Gamma
0.313
2.4
0.329
x y
Start
Please input the target value and place the USB colour analyser over the square.
(D65)
Reset
5
Select
Start
and press OK� Auto Gamma Calibration
will start� Please wait until you see “Auto Gamma
Calibration has been completed” on screen�
To return to factory setting
Select
Reset
and press OK�
Resetting the Expert Picture Settings
This feature resets your
Expert Picture Settings
to the
factory settings�
28
Using the TV’s features (General)
1
From the
Expert Picture Settings
menu, press s
or r to select
Reset
and press OK�
2
A conrmation screen appears. Select
Yes
, press OK�
Viewing the Control Visualization
This feature displays the brightness histogram and control
curve of each scene�
1
From the
Picture
menu, press s or r until
Control
Visualization
is selected and press OK� The
histogram window will appear�
Brightness
Number
Of
Pixels
Output
Control Visualization
Distribution
Input
Control Curve
2
Press
BACK
to return to the previous menu�
Using Auto Format
When the TV receives a true HDMI signal picture and
Auto Format is On, the picture will automatically be
displayed in HDMI signal format, irrespective of the TV’s
previous setting� When in Digital TV mode, the display
format will follow the broadcasted format�
1
From the
Preferences
menu, press v or w until
Display Settings
is select�
2
Press OK and press s or r to select
Auto Format
3
Press v or w to select On or
Off
�
Sound adjustment
Selecting Dual 1 or Dual 2 mode
You can hear only Dual 1 or Dual 2 sound, when bilingual
programmes are received�
1
From the
Sound
menu, press sor r to select
Dual
�
0
Sound
Dual Dual 1
Low
Off
Balance
Advanced Sound Settings
Dolby Volume
Dynamic Range Control
Headphone Settings
Audio Description
Audio Level Offset
2
Press v or w to select
Dual 1
or
Dual 2
�
Note:
• The
Dual
menu setting status is stored even when
the TV is turned off.
Stereo and Bilingual transmissions
For ATV programmes
If stereo or dual language broadcasts are transmitted, the
word
Stereo
or
Dual
will appear on the screen each time
positions are changed, disappearing after a few seconds� If
the broadcast is not in stereo, the word Mono will appear�
Stereo
… Press
to select
Stereo
or
Mono
�
Bilingual
… Bilingual transmissions are rare� If they
are transmitted, the word
Dual
will display� Choose the
desired channel number, and if the word
Dual
appears,
press
to select
Dual 1, Dual 2, Mono
(NICAM)
or
Dual 1
or
Dual 2
(German stereo/bilingual broadcast)�
For DTV programmes
For stereo or dual mono broadcasts, press and use
v
or w to select settings�
Mode Display
Pressing
w
d
Stereo Stereo S Left S Right
j
Dual mono Dual 1 S Dual 2 S Dual
e
Mono
—
Surround
—
Adjusting the sound Balance
1
From the
Sound
menu, press s or r to select the
Balance
�
2
Press v or w to adjust the settings as desired�
Adjusting the Sound Navigation
You can customize the sound mode settings. Select the
appropriate mode in accordance with the installation
location of the TV (
Stand
or
Wall
) and adjust the
equalizer on-screen as desired�
 Loading...