

Toshiba 24 L18 Series, 40 L18 Series, 48 L18 Series, 43 L18 Series, 24 W18 Series Operating Instructions Manual
...
24/40/43/48/49 L18 Series
24/28/32 W18 Series
OPERATING INSTRUCTIONS

Contents
Safety Information ................................................... 2
Markings on the Product.......................................... 2
Environmental Information....................................... 4
Disposal Information ................................................ 4
REACH information ................................................. 5
EU Conformity Statement ........................................ 5
Features .................................................................. 6
Accessories Included............................................... 6
Standby Notications ............................................... 6
TV Control Switch & Operation................................ 6
Using Main TV Menu ............................................... 7
Inserting the Batteries into the Remote ................... 8
Power Connection ................................................... 8
Antenna Connection ................................................ 8
License Notication ................................................. 9
Remote Control ..................................................... 10
Connections........................................................... 11
Switching On/Off .................................................... 12
First Time Installation............................................. 12
Using Satellite Channel Table Feature .................. 13
Media Playback via USB Input .............................. 13
USB Recording (Optional) ..................................... 14
Media Browser....................................................... 15
CEC ....................................................................... 15
Settings Menu Contents ........................................ 16
General TV Operation ........................................... 20
Using the Channel List .......................................... 20
Conguring Parental Settings ................................ 20
Electronic Programme Guide ................................ 20
Teletext Services ................................................... 21
Software Upgrade.................................................. 21
Troubleshooting & Tips .......................................... 21
PC Input Typical Display Modes ............................22
AV and HDMI Signal Compatibility ........................22
Supported File Formats for USB Mode ................. 23
Supported DVI Resolutions ................................... 24
DVD Mode (Depending on the model) ..................25
Safety Information ................................................. 25
Notes on Discs ...................................................... 25
How to Watch a DVD ............................................. 25
DVD Control Panel Buttons ................................... 25
General Playback .................................................. 25
DVD Troubleshooting ............................................ 26
Disc Types Compatible with This Unit ...................27
Specications ........................................................ 27
English - 1 -
Overview of the Remote Control ........................... 28
General DVD Operation ........................................ 29
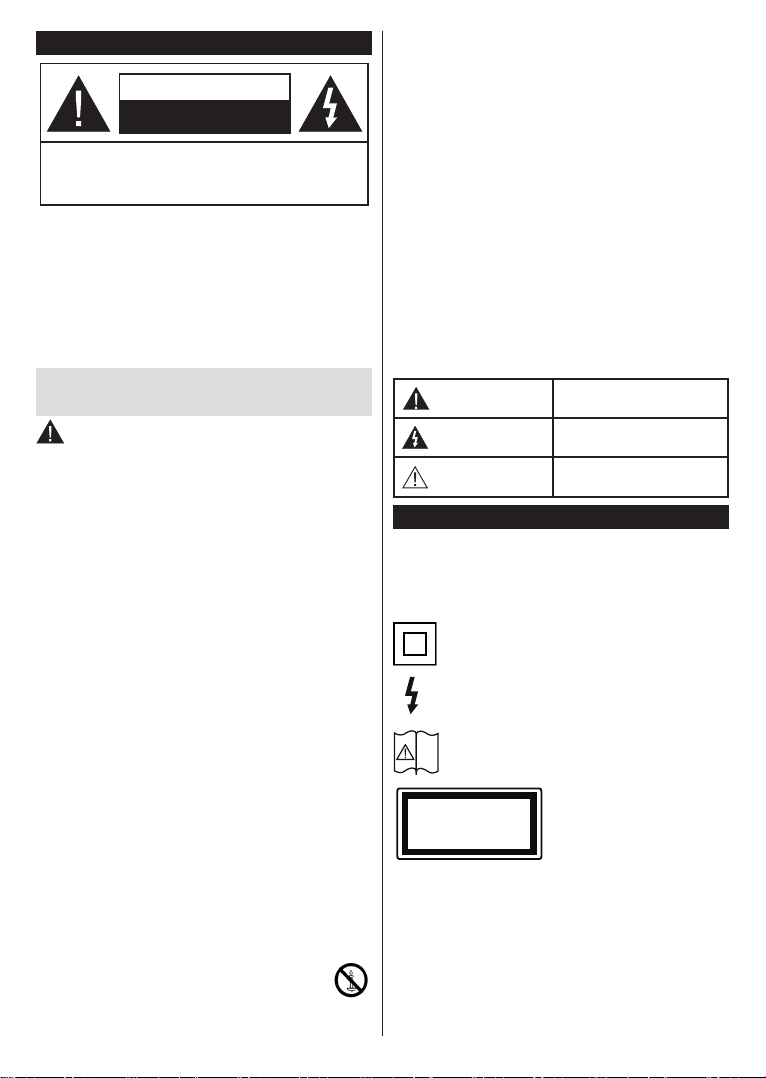
Safety Information
i
CAUTION
RISK OF ELECTRIC SHOCK
DO NOT OPEN
CAUTION: TO REDUCE THE RISK OF ELECTRIC SHOCK DO
NOT REMOVE COVER (OR BACK).
NO USER-SERVICEABLE PARTS INSIDE. REFER
SERVICING TO QUALIFIED SERVICE PERSONNEL.
In extreme weather (storms, lightning) and long inactivity
periods (going on holiday) disconnect the TV set from the
mains.
The mains plug is used to disconnect TV set from the mains
and therefore it must remain readily operable. If the TV set is
not disconnected electrically from the mains, the device will
still draw power for all situations even if the TV is in standby
mode or switched off.
Note: Follow the on screen instructions for operating the related
features.
IMPORTANT - Please read these instructions
fully before installing or operating
WARNING: This device is intended to be used
by persons (including children) who are
capable / experienced of operating such a device
unsupervised, unless they have been given
supervision or instruction concerning the use of
the device by a person responsible for their safety.
• Use this TV set at an altitude of less than 2000 meters
above the sea level, in dry locations and in regions
with moderate or tropical climates.
• The TV set is intended for household and similar
general use but may also be used in public places.
• For ventilation purposes, leave at least 5cm of free
space around the TV.
• The ventilation should not be impeded by covering
or blocking the ventilation openings with items, such
as newspapers, table-cloths, curtains, etc.
• The power cord plug should be easily accessible. Do
not place the TV, furniture, etc. on the power cord.
A damaged power cord/plug can cause re or give
you an electric shock. Handle the power cord by the
plug, do not unplug the TV by pulling the power cord.
Never touch the power cord/plug with wet hands as
this could cause a short circuit or electric shock.
Never make a knot in the power cord or tie it with
other cords. When damaged it must be replaced, this
should only be done by qualied personnel.
• Do not expose the TV to dripping or splashing of
liquids and do not place objects lled with liquids,
such as vases, cups, etc. on or over the TV (e.g., on
shelves above the unit).
• Do not expose the TV to direct sunlight or do
not place open ames such as lit candles on
the top of or near the TV.
• Do not place any heat sources such as electric
heaters, radiators, etc. near the TV set.
• Do not place the TV on the floor and inclined
surfaces.
• To avoid danger of suffocation, keep plastic bags
out of the reach of the babies, children and domestic
animals.
• Carefully attach the stand to the TV. If the stand is
provided with screws, tighten the screws rmly to
prevent the TV from tilting. Do not over-tighten the
screws and mount the stand rubbers properly.
• Do not dispose of the batteries in fire or with
hazardous or ammable materials.
Warning: Batteries must not be exposed to excessive
heat such as sunshine, re or the like.
WARNING - excessive sound pressure from earphones
or headphones can cause hearing loss.
ABOVE ALL - NEVER let anyone, especially
children, push or hit the screen, push anything
into holes, slots or any other openings in the case.
Caution
Risk of electric shock
Maintenance
Serious injury or death risk
Dangerous voltage risk
Important maintenance
component
Markings on the Product
The following symbols are used on the product as
a marker for restrictions and precautions and safety
instructions. Each explanation shall be considered
where the product bears related marking only. Note
such information for security reasons.
Class II Equipment: This appliance is
designed in such a way that it does not require
a safety connection to electrical earth.
Hazardous Live Terminal: The marked
terminal(s) is/are hazardous live under normal
operating conditions.
Caution, See Operating Instructions: The
marked area(s) contain(s) user replaceable
coin or button cell batteries.
Class 1 Laser Product: This
CLASS 1
LASER PRODUCT
product contains Class 1
laser source that is safe under
reasonably foreseeable
conditions of operation.
English - 2 -
WARNING
Do not ingest the battery, Chemical Burn Hazard
This product or the accessories supplied with the
product may contain a coin/button cell battery. If the
coin/button cell battery is swallowed, it can cause
severe internal burns in just 2 hours and can lead
to death.
Keep new and used batteries away from children.
If the battery compartment does not close securely,
stop using the product and keep it away from
children.
If you think batteries might have been swallowed or
placed inside any part of the body, seek immediate
medical attention.
WALL MOUNTING WARNINGS
• Read the instructions before mounting your TV
on the wall.
• The wall mount kit is optional. You can obtain from
your local dealer, if not supplied with your TV.
• Do not install the TV on a ceiling or on an inclined
wall.
• Use the specied wall mounting screws and other
accessories.
• Tighten the wall mounting screws rmly to prevent
the TV from fall. Do not over-tighten the screws.
WARNING
Never place a television set in unstable or inclined
locations. A television set may fall, causing serious
personal injury or death. Many injuries, particularly
to children, can be avoided by taking simple
precautions such as;
• Using cabinets or stands recommended by the
manufacturer of the television set.
• Only using furniture that can safely support the
television set.
• Ensuring the television set is not overhanging the
edge of the supporting furniture.
• Not placing the television set on tall furniture
(for example, cupboards or bookcases) without
anchoring both the furniture and the television set
to a suitable support.
• Not standing the television set on cloth or other
materials placed between the television and
supporting furniture.
• Educating children about the dangers of climbing
on furniture to reach the television set or its
controls. If your existing television set is being
retained and relocated, the same considerations
as above should be applied.
WARNING
Apparatus connected to the protective earthing
of the building installation through the MAINS
connection or through other apparatus with a
connection to protective earthing – and to a
television distribution system using coaxial cable,
may in some circumstances create a re hazard.
Connection to a television distribution system has
therefore to be provided through a device providing
electrical isolation below a certain frequency range
(galvanic isolator, see EN 60728-11)
Using the special functions to change the size of the
displayed image (i.e. changing the height/width ratio)
for the purposes of public display or commercial gain
may infringe on copyright laws.
The LCD display panels are manufactured using an
extremely high level of precision technology; however,
sometimes some parts of the screen may be missing
picture elements or have luminous spots. This is not
a sign of a malfunction.
The set should be operated only from a 220-240 V
AC 50 Hz outlet. Ensure that the television is not
standing on the mains lead. Do not cut off the mains
plug from this equipment, this incorporates a special
Radio Interference Filter, the removal of which will
impair its performance. It should only be replaced by
a correctly rated and approved type. IF IN DOUBT
PLEASE CONSULT A COMPETENT ELECTRICIAN.
English - 3 -
Specication is subject to change without notice
Environmental Information
This television is designed to be environment friendly. To reduce energy consumption, you can follow these steps:
If you set the Energy Saving to Minimum, Medium, Maximum or Auto the TV will reduce the energy
consumption accordingly. If you like to set the Backlight to a xed value set as Custom and adjust the
Backlight (located under the Energy Saving setting) manually using Left or Right buttons on the remote. Set
as Off to turn this setting off.
Note: Available Energy Saving options may differ depending on the selected Mode in the Settings>Picture menu.
The Energy Saving settings can be found in the Settings>Picture menu. Note that some picture settings will
be unavailable to be changed.
If pressed Right button or Left button consecutively, “Screen will be off in 15 seconds.” message will be
displayed on the screen. Select Proceed and press OK to turn the screen off immediately. If you don’t press
any button, the screen will be off in 15 seconds. Press any button on the remote or on the TV to turn the screen
on again.
Note: Screen Off option is not available if the Mode is set to Game.
When the TV is not in use, please switch off or disconnect the TV from the mains plug. This will also reduce
energy consumption.
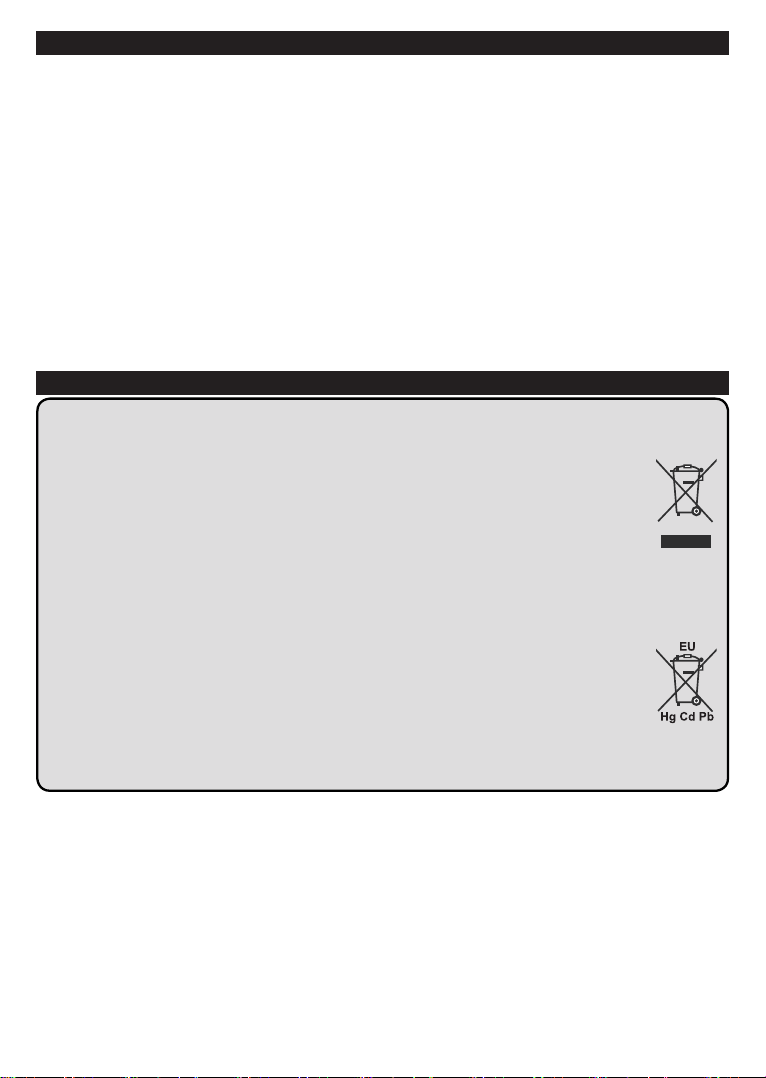
Disposal Information
The following information is only for EU-member states:
Disposal of products
The crossed out wheeIed dust bin symbol indicates that products must be collected and disposed of separately
from household waste. Integrated batteries and accumulators can be disposed of with the product. They will be
separated at the recycling centres.
The black bar indicates that the product was placed on the market after August 13, 2005.
By participating in separate collection of products and batteries, you will help to assure the proper disposal of
products and batteries and thus help to prevent potential negative consequences for the environment and human
health.
For more detailed information about the collection and recycling programmes available in your country, please
contact your local city ofce or the shop where you purchased the product.
Disposal of batteries and/or accumulators
The crossed out wheeled dust bin symboI indicates that batteries and/or accumulators must be collected and
disposed of separately from household waste.
If the battery or accumulator contains more than the specied values of lead (Pb), mercury (Hg), and/or cadmium
(Cd) dened in the European Battery Directive, then the chemical symbols for lead (Pb), mercury (Hg) and/or
cadmium (Cd) will appear below the crossed out wheeled dust bin symbol.
By participating in separate collection of batteries, you will help to assure the proper disposal of products and
batteries and thus help to prevent potential negative consequences for the environment and human health. For
more detailed information about the coIIection and recycling programmes available in your country, please contact
your local city ofce or the shop where you purchased the product.
English - 4 -
REACH information
The European Union (EU) chemical regulation, REACH (Registration, Evaluation, Authorization
and Restriction of Chemicals), entered into force on 1 June 2007, with phased deadlines to 2018.
Toshiba will meet all REACH requirements and is committed to provide our customers with information
about the presence in our articles of substances included on the candidate list according to REACH
regulation.
Please consult the following website www.toshiba-tv.com for information about the presence in our
articles of substances included on the candidate list according to REACH in a concentration above
0.1 % weight by weight.
EU Conformity Statement
This product is carrying the CE-Mark in accordance with the related European Directives.
Responsible for CE-Marking is Vestel UK, Langley, Berkshire, SL3 6EZ.
This product is labelled with the CE Mark in accordance with the related European Directives, notably
RoHS Directive 2011/65/EU. Furthermore the product complies with the Ecodesign Directive 2005/32/
EC (EuP) and 2009/125/EC (ErP) and its related implementing measures.
This equipment corresponds to requirements of the Technical Regulation on limitation of usage of certain
dangerous substances in electrical and electronic equipment.
English - 5 -
Features
• Remote controlled colour TV
• Fully integrated digital terrestrial/cable/satellite TV
(DVB-T-T2/C/S-S2)
• Fransat Installation Option
• HDMI inputs to connect other devices with HDMI
sockets
• USB input
• OSD menu system
• Scart socket for external devices (such as DVD
Players, PVR, video games, etc.)
• Stereo sound system
• Teletext
• Headphone connection
• Automatic programming system
• Manual tuning
• Automatic power down after up to eight hours
• Sleep timer
• Child lock
• Automatic sound mute when no transmission
• NTSC playback
• AVL (Automatic Volume Limiting)
• PLL (Frequency Search)
• PC input
• Game Mode (Optional)
• Picture off function
• Programme recording (Optional)
• Programme timeshifting (Optional)
Accessories Included
• Remote Control
• Batteries: 2 x AAA
• Quick Start Guide
• Product Fiche
• Side AV Connection Cable(**)
(**) Limited Models Only
Some features may not be available dependant on your
TV model, please check the product fiche for your
product specifications
For more detailed information on installation,
function and control refer to the full manual on our
the website at http://www.toshiba-tv.com
English - 6 -
Standby Notications
an aerial or HDMI source) for 3 minutes, it will go
into standby. When you next switch-on, the following
message will be displayed: “TV switched to stand-by
mode automatically because there was no signal
for a long time.”
The Auto TV OFF option(in the Settings>System
>More menu) could have been set to a value between
1 and 8 hours by default. If this setting is not set as Off
and the TV has been left on and not been operated
during the set time, it will switch into standby mode
after the set time has expired. When you next switch-on
the TV, the following message will be displayed. “TV
switched to stand-by mode automatically because
no operation was made for a long time.” Before the
TV switches into standby mode a dialogue window will
be displayed. If you do not press any button the TV
will switch into the standby mode after a waiting period
of about 5 minutes. You can highlight Yes and press
OK to switch the TV into standby mode immediately.
If you highlight No and press OK, the TV will remain
on. You can also choose to cancel the Auto TV OFF
function from this dialogue. Highlight Disable and
press OK, the TV will remain on and the function will
be cancelled. You can enable this function again by
changing the setting of the Auto TV OFF option from
the Settings>System>More menu.
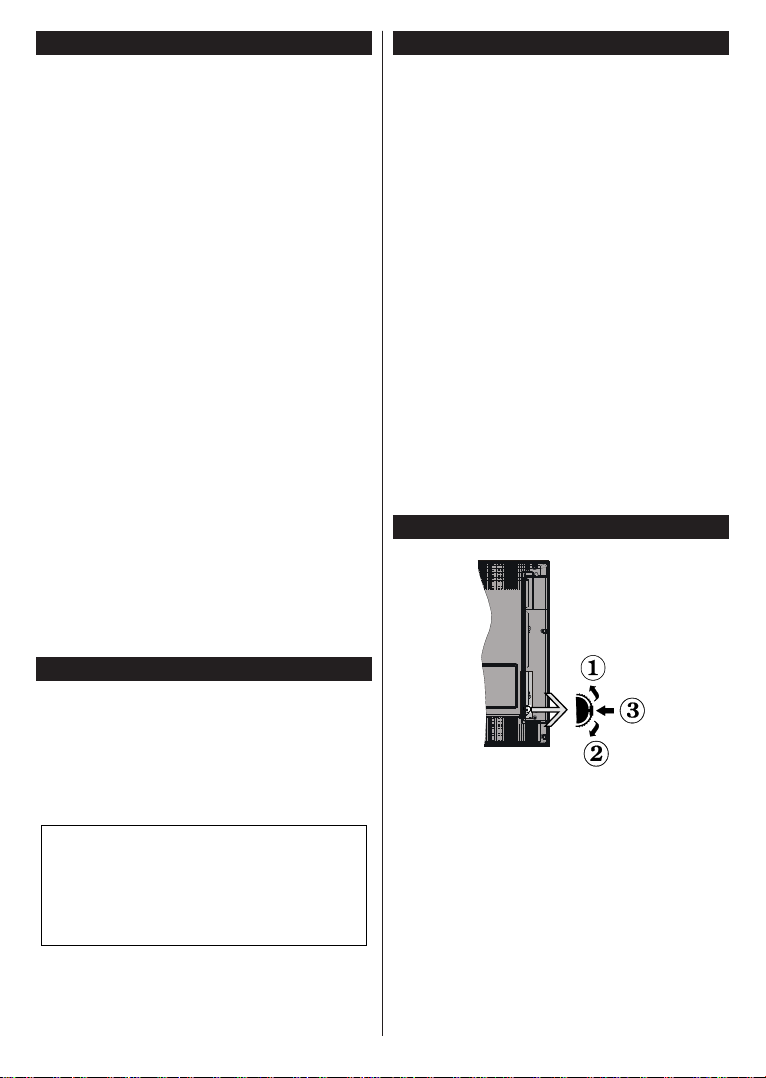
TV Control Switch & Operation
1. Up direction
2. Down direction
3. Volume / Info / Sources List selection and
Standby-On switch
The Control button allows you to control the Volume
/ Programme / Source and Standby-On functions of
the TV.
To change volume: Increase the volume by pushing
the button up. Decrease the volume by pushing the
button down.
To change channel: Press the middle of the button
in, the information banner will appear on the screen.
Scroll through the stored channels by pushing the
button up or down.

To change source: Press the middle of the button in
twice(for the second time in total), the source list will
appear on the screen. Scroll through the available
sources by pushing the button up or down.
To turn the TV off: Press the middle of the button in
and hold it down for a few seconds, the TV will turn
into standby mode.
To turn on the TV: Press the middle of the button in,
the TV will turn on.
Notes:
• If you turn the TV off, this cycle starts again beginning
with the volume setting.
• Main menu OSD cannot be displayed via control
button.
Operation with the Remote Control
Press the Menu button on your remote control to
display main menu. Use the directional buttons and
OK button to navigate and set. Press Return/Back
or Menu button to quit a menu screen.
Input Selection
Once you have connected external systems to your
TV, you can switch to different input sources. Press the
Source button on your remote control consecutively
to select the different sources.
Changing Channels and Volume
You can change the channel and adjust the volume
by using the Programme +/- and Volume +/- buttons
on the remote.
Using Main TV Menu
When the Menu button is pressed, the main TV menu
will appear at the bottom of the screen. You can
navigate through the menu items using the directional
buttons on the remote. To select an item or see the
sub-menu options of the highlighted menu press OK
button. When you highlight a menu option some of the
sub-menu items of this menu may appear on the upper
side of the menu bar for quick access. To use a quick
access item highlight it, press OK and set as desired
using the Left/Right directional buttons. When nished
press OK or Back/Return button to exit.
Press Exit button to close the main menu.
1. Home
When main menu is opened Home menu bar will
be highlighted. The content of the Home menu can
be customised by adding options from other menus.
Just highlight an option and press the Down direction
button on the remote. If you see Add to Home option
you can add it to the Home menu. Same way you can
delete or change the position of any item in the Home
menu. Press the Down direction button and select the
delete or move icon and press OK. In order to move
a menu item use the Right and Left direction buttons
to select the position that you want the item to move
to and press OK.
2. TV
2.1. Guide
You can access the electronic programme guide menu
using this option. Refer to Electronic Programme
Guide section for more information.
2.2. Channels
You can access the Channels menu using this option.
Refer to Using the Channel List section for more
information.
2.3. Timers
You can set timers for future events using the options of
this menu. You can also review the previously created
timers under this menu.
To add a new timer select the Add Timer tab using the
Left/Right buttons and press OK. Set the sub-menu
options as desired and when nished press OK. A new
timer will be created.
To edit a previously created timer, highlight that timer,
select the Edit Selected Timer tab and press OK.
Change the sub-menu options as desired and press
OK to save your settings.
To cancel an already set timer, highlight that timer,
select Delete Selected Timer tab and press OK. A
conrmation message will be displayed. Highlight Yes
and press OK to proceed. The timer will be cancelled.
It is not possible to set timers for two or more events
that will broadcasted in different channels at the same
time interval. In this case you will be asked to choose
one of these timers and cancel others. Highlight the
timer you want to cancel and press OK, Options menu
will be displayed. Then highlight Set/Cancel and press
OK to cancel that timer. You will have to save changes
after that. In order to do that press OK, highlight Save
Changes and press OK again.
2.4. Recordings (Optional)
You can manage your recordings using the options
of this menu. You can playback, edit, delete or sort
previously recorded events. Highlight a tab by using
the Left or Right direction button and press OK to see
available options.
Recording Settings
You can also congure your recording preferences
using the Settings tab in the Recordings menu.
Highlight Settings tab by using Left or Right button
and press OK. Then select the desired item in the
sub-menu and set by using Left or Right button.
Start early: You can set recording timer’s starting
time to start earlier by using this setting.
End late: You can set recording timer’s end time to
end later by using this setting.
English - 7 -
Max Timeshift: This setting allows you to set the
maximum duration for the timeshift recording.
Available options are approximate and the actual
recording time may change in practice depending on
the broadcast. The reserved and free storage space
values will change according to this setting. Make
sure that you have enough free space otherwise
instant recording may not be possible.
Auto discard: You can set the Discard type as
None, Oldest, Longest or Shortest. If it is not
set to None, you can set the Unplayed option as
Included or Excluded. These options determine
the preferences for deleting the recordings in order
to obtain more storage space for ongoing records.
Hard disk information: You can view detailed
information about the USB storage device connected
to your TV. Highlight and press OK to see and press
Back/Return to close.
Format Disk: If you want to delete all les on the
connected USB storage device and convert the disk
format to FAT32, you can use this option. Press OK
button while the Format Disk option is highlighted.
A menu will appear on the screen, requiring you
to enter the PIN(*). After you enter the PIN, a
conrmation message will be displayed. Select Yes
and press OK to start formatting the USB storage
device. Select No and press OK to cancel.
(*) Default PIN could have been set to 0000 or 1234. If you
have dened the PIN(is requested depending on the country
selection) during the First Time Installation use the PIN
that you have dened.
3. Settings
You can manage the settings of your TV using the options of this menu. Refer to Settings Menu Contents
section for more information.
4. Sources
You can manage your input source references using
the options of this menu. To change the current source
highlight one of the options and press OK.
4.1. Source Settings
Edit the names, enable or disable selected source
options.
Inserting the Batteries into the Remote
Remove the back cover to reveal the battery
compartment. Insert two size AAA batteries. Make
sure the (+) and (-) signs match (observe correct
polarity). Do not mix old and new batteries. Replace
only with same or equivalent type. Place the cover back
on. A message will be displayed on the screen when
the batteries are low and must be replaced.
Note that when the batteries are low, the performance
of the remote control may be impaired.
Power Connection
IMPORTANT: The TV set is designed to operate on a
220-240V AC, 50 Hz supply. After unpacking, allow the
TV set to reach the ambient room temperature before
you connect the set to the mains. Plug the power cable
to the mains socket outlet.
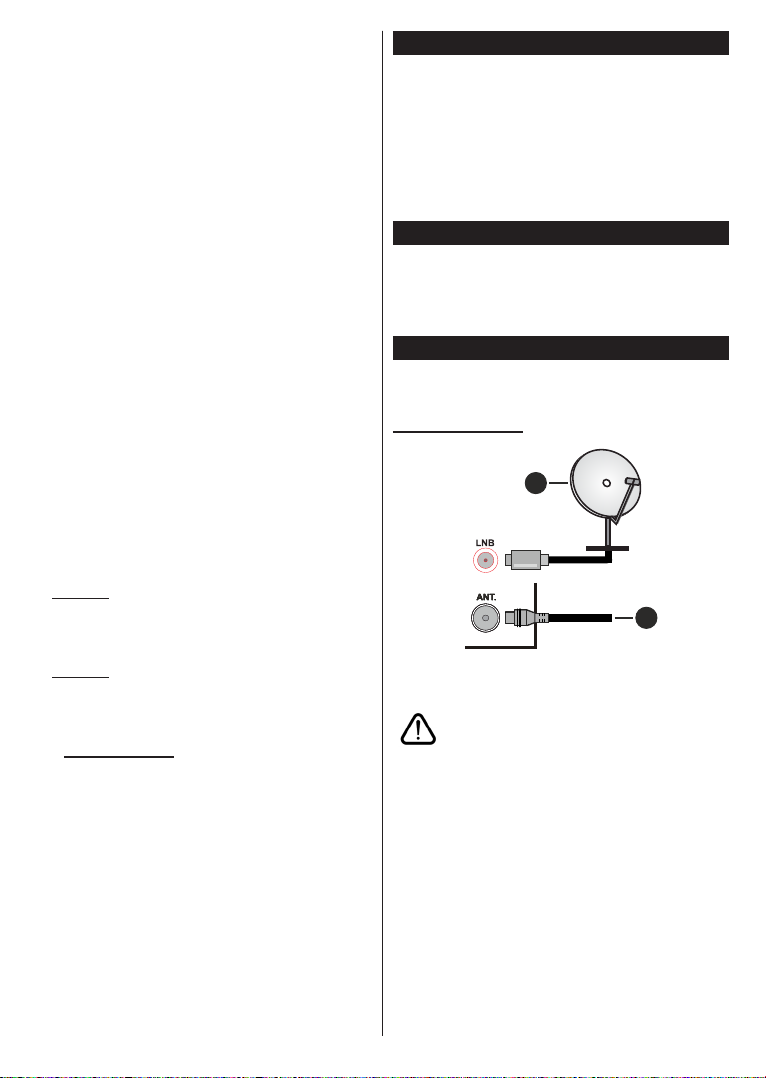
Antenna Connection
Connect the aerial or cable TV plug to the AERIAL
INPUT (ANT.) socket or satellite plug to the SATELLITE
INPUT (LNB) socket located on the rear side of the TV.
Rear side of the TV
1
2
1. Satellite
2. Aerial or cable
If you want to connect a device to the TV, make sure
that both the TV and the device are turned off before
making any connection. After the connection is done,
you can turn on the units and use them.
English - 8 -

License Notication
The terms HDMI and HDMI High-Denition Multimedia
Interface, and the HDMI Logo are trademarks or
registered trademarks of HDMI Licensing Administrator,
Inc. in the United States and other countries.
Manufactured under license from Dolby Laboratories.
Dolby Audio and the double-D symbol are trademarks
of Dolby Laboratories.
Dolby Audio™ (supporting Dolby Digital Plus™)
For DTS patents, see http://patents.dts.com.
Manufactured under license from DTS Licensing
Limited. DTS, the Symbol, & DTS and the Symbol
together are registered trademarks, and DTS
TruSurround is a trademark of DTS, Inc.© DTS, Inc.
All Rights Reserved.
For DTS patents, see http://patents.dts.com.
Manufactured under license from DTS Licensing
Limited. DTS, the Symbol, & DTS and the Symbol
together are registered trademarks, and DTS 2.0+Digital
Out is a trademark of DTS, Inc.© DTS, Inc. All Rights
Reserved.
DVB is a registered trademark of the DVB Project.
[1] EIA/CEA-861-D compliance covers the transmission
of uncompressed digital video with high-bandwidth
digital content protection, which is being standardized
for reception of high-denition video signals. Because
this is an evolving technology, it is possible that some
devices may not operate properly with the television.
This product incorporates copyright protection
technology that is protected by U.S. patents and
other intellectual property rights. Use of this copyright
protection technology must be authorized by Rovi
Corporation, and is intended for home and other limited
viewing uses only unless otherwise authorized by Rovi
Corporation. Reverse engineering and disassembly
are prohibited.
The “CI Plus” Logo is a trademark of CI Plus LLP.
For DTS patents, see http://patents.dts.com.
Manufactured under license from DTS Licensing
Limited. DTS, DTS-HD, the Symbol, & DTS or DTS-HD
and the Symbol together are registered trademarks of
DTS, Inc.© DTS, Inc. All Rights Reserved.
English - 9 -
 Loading...