

Toshi Satellite C50-B, Satellite Pro C50-B, Satellite C50D-B, Satellite C50t-B, SatelliteC50Dt-B User Manual
Page 1

User's Manual
Satellite C50-B/C50D-B/C50t-B/
C50Dt-B
Satellite Pro C50-B
Series
Page 2

Table of Contents
Chapter 1
Chapter 2
Chapter 3
TOSHIBA Legal, Regulatory, and Safety
Copyright, Disclaimer and Trademarks .............................................. 1-1
Regulatory Information ......................................................................... 1-2
Video Standard Notice .......................................................................... 1-8
OpenSSL Toolkit License Issues ......................................................... 1-8
FreeType License Issues .................................................................... 1-10
ENERGY STAR® Program .................................................................. 1-14
Disposing of the computer and the computer's batteries ............... 1-14
Optical disc drive safety instructions ............................................... 1-14
General Precautions ........................................................................... 1-15
Safety Icons ......................................................................................... 1-18
Getting Started
Equipment checklist ............................................................................. 2-1
Conventions ........................................................................................... 2-1
Using your computer for the first time ................................................ 2-2
Getting to know Windows ..................................................................... 2-7
Turning off the power ............................................................................ 2-8
System Recovery ................................................................................ 2-12
The Grand Tour
Front with the display closed ............................................................... 3-1
Left side .................................................................................................. 3-2
Right side ............................................................................................... 3-3
Back ........................................................................................................ 3-4
Underside ............................................................................................... 3-5
Front with the display open .................................................................. 3-5
Internal Hardware Components ........................................................... 3-8
Power Condition Descriptions ........................................................... 3-11
Chapter 4
User's Manual ii
Operating Basics
Using the Touch Screen ....................................................................... 4-1
Using the Touch Pad ............................................................................. 4-2
The Keyboard ......................................................................................... 4-2
Optical disc drive .................................................................................. 4-5
CyberLink PowerDVD for TOSHIBA ................................................... 4-11
3D Playback on an External 3D Device ............................................. 4-13
Battery .................................................................................................. 4-13
Page 3

LAN ....................................................................................................... 4-17
Memory media ..................................................................................... 4-18
External Display .................................................................................. 4-21
Security lock ........................................................................................ 4-25
Optional TOSHIBA Accessories ........................................................ 4-26
Sound System and Video mode ......................................................... 4-26
Chapter 5
Chapter 6
Chapter 7
Utilities and Advanced Usage
Utilities and Applications ...................................................................... 5-1
Special features ..................................................................................... 5-5
TOSHIBA Password Utility ................................................................... 5-7
TOSHIBA System Settings ................................................................. 5-10
TOSHIBA Media Player by sMedio TrueLink+ .................................. 5-11
TOSHIBA PC Health Monitor .............................................................. 5-12
TOSHIBA Product Improvement Program ........................................ 5-14
TOSHIBA Setup Utility ........................................................................ 5-15
Troubleshooting
Problem-solving process ..................................................................... 6-1
Hardware and system checklist ........................................................... 6-4
TOSHIBA support ................................................................................ 6-14
Appendix
Specifications ........................................................................................ 7-1
AC Power Cord and Connectors .......................................................... 7-2
Information for Wireless Devices ........................................................ 7-4
Legal Footnotes ................................................................................... 7-14
Glossary ............................................................................................... 7-16
Index
User's Manual
iii
Page 4

Chapter 1
TOSHIBA Legal, Regulatory, and
Safety
This chapter states the Legal, regulatory, and safety information applicable
to TOSHIBA computers.
Copyright, Disclaimer and Trademarks
Copyright
© 2015 by TOSHIBA Corporation. All rights reserved. Under the copyright
laws, this manual cannot be reproduced in any form without the prior
written permission of TOSHIBA. No patent liability is assumed, with respect
to the use of the information contained herein.
First edition June 2015
Copyright authority for music, movies, computer programs, databases and
other intellectual property covered by copyright laws belongs to the author
or to the copyright owner. Copyrighted material can be reproduced only for
personal use or use within the home. Any other use beyond that stipulated
above (including conversion to digital format, alteration, transfer of copied
material and distribution on a network) without the permission of the
copyright owner is a violation of copyright or author's rights and is subject
to civil damages or criminal action. Comply with copyright laws in making
any reproduction from this manual.
Disclaimer
Trademarks
User's Manual
This manual has been validated and reviewed for accuracy. The
instructions and descriptions it contains are accurate for your computer at
the time of this manual’s production. However, succeeding computers and
manuals are subject to change without notice. TOSHIBA assumes no
liability for damages incurred directly or indirectly from errors, omissions or
discrepancies between the computer and the manual.
Intel, Intel SpeedStep, Intel Core, and Centrino are trademarks or
registered trademarks of Intel Corporation.
AMD, the AMD Arrow logo, PowerPlay, Vari-Bright, and combinations
thereof are trademarks of Advanced Micro Devices, Inc.
1-1
Page 5

Windows, Microsoft, and Windows logo are registered trademarks of
Microsoft Corporation.
The Bluetooth® word mark and logos are registered trademarks owned by
Bluetooth SIG, Inc. and any use of such marks by Toshiba Corporation and
its affiliates is under license.
The terms HDMI and HDMI High-Definition Multimedia Interface, and the
HDMI Logo are trademarks or registered trademarks of HDMI Licensing
LLC in the United States and other countries.
sMedio and sMedio TrueLink+ are trademarks or registered trademarks of
sMedio, Inc.
CyberLink, CyberLink PowerDVD, and CyberLink MediaStory are
registered trademarks of CyberLink Corporation.
Secure Digital and SD are trademarks of SD Card Association.
MultiMediaCard and MMC are trademarks of MultiMediaCard Association.
DTS, the Symbol, & DTS and the Symbol together are registered
trademarks and DTS Studio Sound is a trademark of DTS, Inc. © DTS, Inc.
All Rights Reserved.
Realtek is a registered trademark of Realtek Semiconductor Corporation.
All other product names and service names in this manual might be
trademarks or registered trademarks of their respective companies.
Regulatory Information
FCC information
User's Manual
FCC notice "Declaration of Conformity Information"
This equipment has been tested and found to comply with the limits for a
Class B digital device, pursuant to part 15 of the FCC rules. These limits
are designed to provide reasonable protection against harmful interference
in a residential installation. This equipment generates, uses and can
radiate radio frequency energy and, if not installed and used in accordance
with the instructions, may cause harmful interference to radio
communications. However, there is no guarantee that interference will not
occur in a particular installation. If this equipment does cause harmful
interference to radio or television reception, which can be determined by
turning the equipment off and on, the user is encouraged to try to correct
the interference by one or more of the following measures:
Reorient or relocate the receiving antenna.
Increase the separation between the equipment and receiver.
Connect the equipment into an outlet on a circuit different from that to
which the receiver is connected.
Consult the dealer or an experienced radio/TV technician for help.
1-2
Page 6
Only peripherals complying with the FCC class B limits can be attached to
this equipment. Operation with non-compliant peripherals or peripherals not
recommended by TOSHIBA is likely to result in interference to radio and
TV reception. Shielded cables must be used between the external devices
and the computer’s external RGB monitor port, Universal Serial Bus (USB
2.0 and 3.0) ports, HDMI port, and Headphone/Microphone combo jack.
Changes or modifications made to this equipment, not expressly approved
by TOSHIBA or parties authorized by TOSHIBA could void the user’s
authority to operate the equipment.
FCC conditions
This device complies with part 15 of the FCC Rules. Operation is subject to
the following two conditions:
1. This device may not cause harmful interference.
2. This device must accept any interference received, including
interference that may cause undesired operation.
Contact
Address: TOSHIBA America Information Systems, Inc.
9740 Irvine Boulevard
Irvine, California 92618-1697
Telephone: (949) 583-3000
This information is only applicable for the countries/regions where it is
required.
EU Declaration of Conformity
CE compliance
This product is labeled with the CE Mark in accordance with the applicable
European Directives, notably RoHS Directive 2011/65/EU, Radio
User's Manual
This product is carrying the CE-Mark in
accordance with the related European Directives.
Responsible for CE-Marking is TOSHIBA EUROPE
GMBH, Hammfelddamm 8, 41460 Neuss,
Germany. The complete and official EU
Declaration of Conformity can be found on
TOSHIBA’s web site
http://epps.toshiba-teg.com on the Internet.
1-3
Page 7

Equipment and Telecommunications Terminal Directive 1999/5/EC,
Ecodesign Directive 2009/125/EC (ErP) and the related implementing
measures.
This product and the original options are designed to observe the related
EMC (Electromagnetic Compatibility) and safety standards. However,
TOSHIBA cannot guarantee that this product still observes these EMC
standards if options or cables not produced by TOSHIBA are connected or
implemented. In this case the persons who have connected/implemented
those options/cables have to provide assurance that the system (PC plus
options/cables) still fulfils the required standards. To avoid general EMC
problems, the following guidance should be noted:
Only CE marked options should be connected/implemented
Only best shielded cables should be connected
Working environment
This product was designed to fulfil the EMC (Electromagnetic Compatibility)
requirements to be observed for so-called “Residential, commercial and
light industry environments”. TOSHIBA do not approve the use of this
product in working environments other than the above mentioned
“Residential, commercial and light industry environments”.
For example, the following environments are not approved:
Industrial Environments (e.g. environments where a mains voltage of
380 V three-phase is used)
Medical Environments
Automotive Environments
Aircraft Environments
Any consequences resulting from the use of this product in working
environments that are not approved are not the responsibility of TOSHIBA.
The consequences of the use of this product in non-approved working
environments may be:
Interference with other devices or machines in the near surrounding
area.
Malfunction of, or data loss from, this product caused by disturbances
generated by other devices or machines in the near surrounding area.
Therefore TOSHIBA strongly recommend that the electromagnetic
compatibility of this product should be suitably tested in all non-approved
working environments before use. In the case of automobiles or aircraft,
the manufacturer or airline respectively should be asked for permission
before use of this product.
Furthermore, for general safety reasons, the use of this product in
environments with explosive atmospheres is not permitted.
User's Manual
1-4
Page 8
VCCI Class B Information (Japan Only)
この装置は、クラスB情報技術装置です。この装置は、家庭環境で使
用することを目的としていますが、この装置がラジオやテレビジョン
受信機に近接して使用されると、受信障害を引き起こすことがあります。
取扱説明書に従って正しい取り扱いをしてください。
VCCI-B
Canadian regulatory information (Canada only)
This digital apparatus does not exceed the Class B limits for radio noise
emissions from digital apparatus as set out in the Radio Interference
Regulation of the Canadian Department of Communications.
Note that Canadian Department of Communications (DOC) regulations
provide, that changes or modifications not expressly approved by
TOSHIBA Corporation could void your authority to operate this equipment.
This Class B digital apparatus meets all requirements of the Canadian
Interference-Causing Equipment Regulations.
Cet appareil numérique de la classe B respecte toutes les exigences du
Règlement sur le matériel brouilleur du Canada.
Following information is only valid for EU-member
States:
Disposal of products
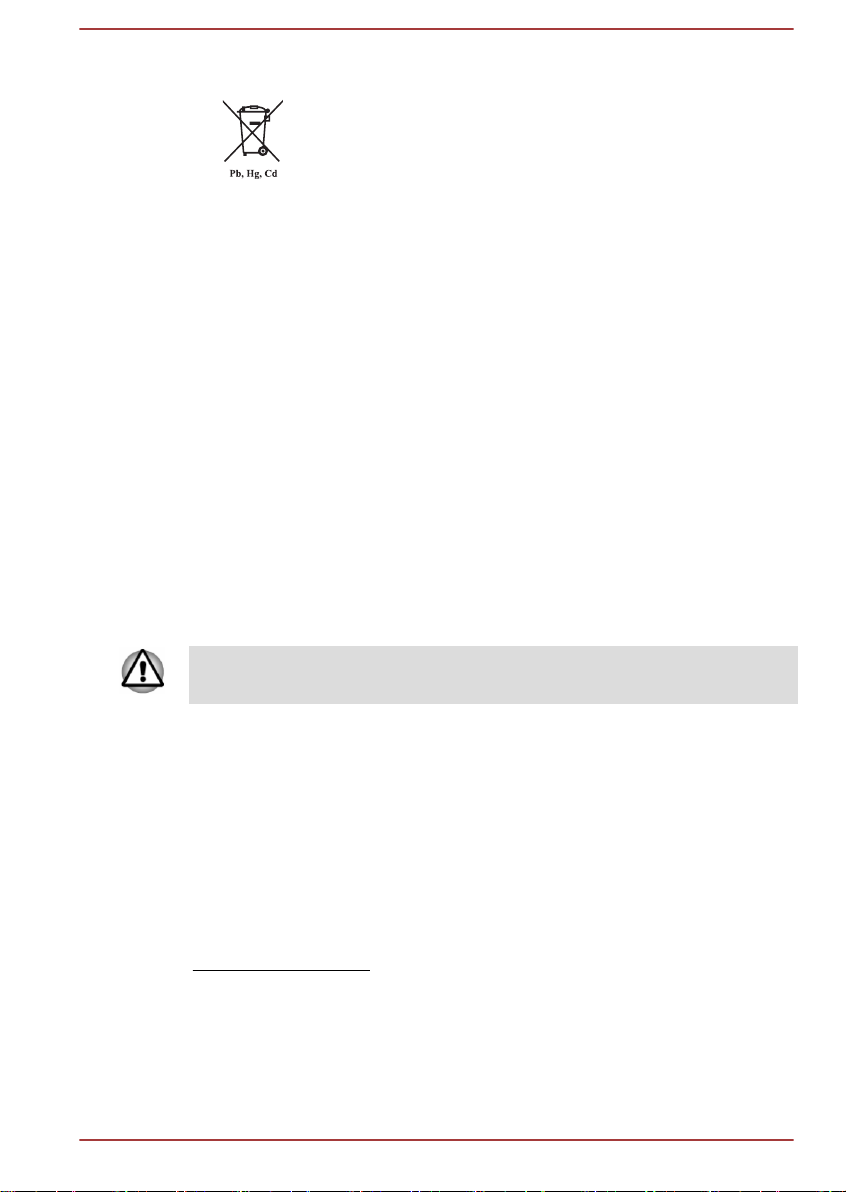
The crossed out wheeled dust bin symbol indicates that
products must be collected and disposed of separately
from household waste. Integrated batteries and
accumulators can be disposed of with the product. They
will be separated at the recycling centres.
The black bar indicates that the product was placed on the
market after August 13, 2005.
By participating in the separate collection of products and
batteries, you will help to assure the proper disposal of
products and batteries and thus help to prevent potential
negative consequences for the environment and human
health.
For more detailed information about the collection and
recycling programmes available in your country, please
visit our website
( www.toshiba.eu/recycling ) or contact your local council
office or the retail outlet where you purchased the product.
User's Manual 1-5
Page 9
Disposal of batteries and/or accumulators
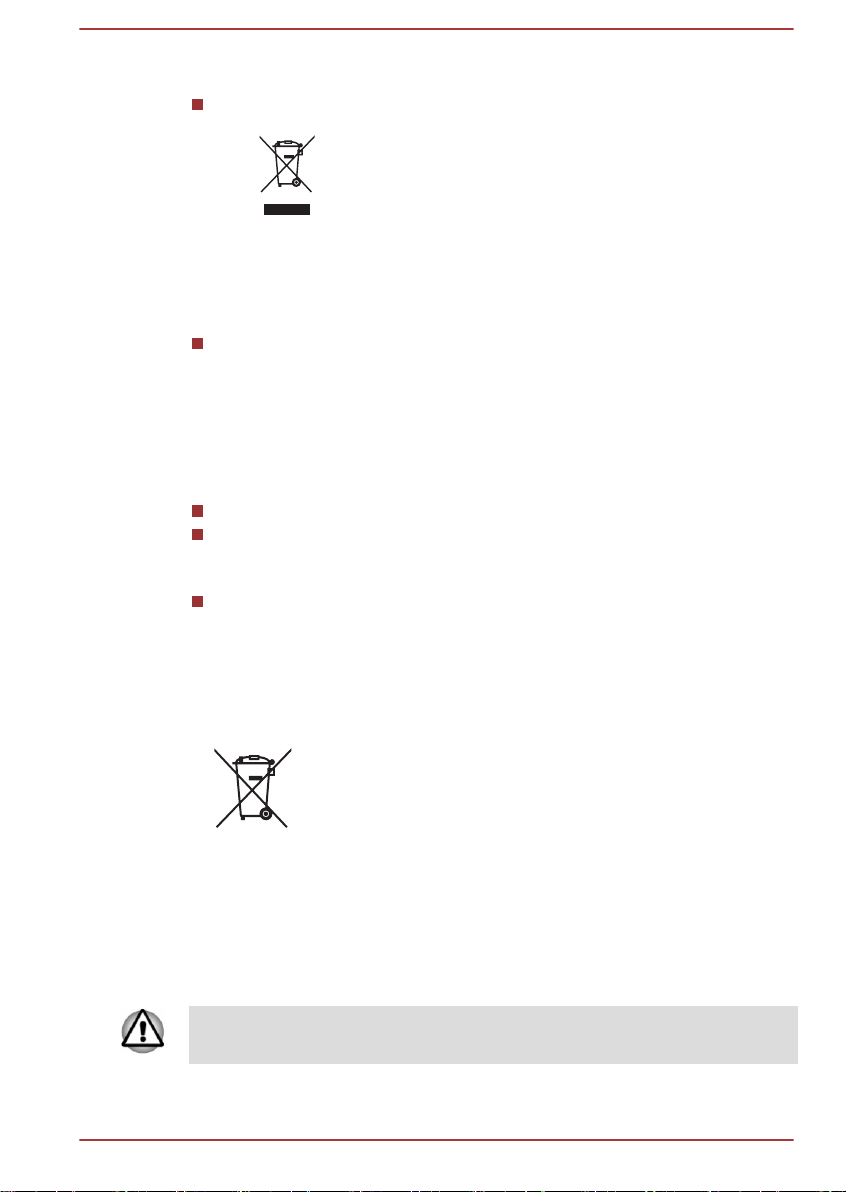
The crossed out wheeled dust bin symbol indicates that
batteries and/or accumulators must be collected and
disposed of separately from household waste.
If the battery or accumulator contains more than the
specified values of lead (Pb), mercury (Hg), and/or
cadmium (Cd) defined in the European Battery Directive,
then the chemical symbols for lead (Pb), mercury (Hg)
and/or cadmium (Cd) will appear below the crossed out
wheeled dust bin symbol.
By participating in the separate collection of batteries, you
will help to assure the proper disposal of products and
batteries and thus help to prevent potential negative
consequences for the environment and human health. To
achieve this you should take any battery and/or
accumulator to your local recycling site, or to a retail outlet
or facility that offers to collect these devices for
environmentally friendly disposal, ensuring that the
terminal contacts are covered by non-conductive tape.
For more detailed information about the collection and
recycling programmes available in your country, please
visit our website
( www.toshiba.eu/recycling ) or contact your local council
office or the retail outlet where you purchased the product.
These symbols might not stick depending on the country and region where
you purchased.
REACH - Compliance Statement
The European Union (EU) chemical regulation, REACH (Registration,
Evaluation, Authorization and Restriction of Chemicals), entered into force
on 1 June 2007, with phased deadlines to 2018.
Toshiba will meet all REACH requirements and is committed to provide our
customers with information about the presence in our articles of
substances included on the candidate list according to REACH regulation.
Please consult the following website
www.toshiba.eu/reach for information about the presence in our articles of
substances included on the candidate list according to REACH in a
concentration above 0.1 % weight by weight.
User's Manual
1-6
Page 10
Following information is only for Turkey:
Disposal of products:
The crossed wheelie bin symbol means that this
product should not be collected and disposed with
other household wastes. When product become waste
at the end-of-life, to protect environment and human
health, it should be given to nearest collection
recycling or disposal center. For more information
about collection and recycling programs in your
country please contact your local authority or the
retailer where the product was purchased.
Toshiba meets all requirements of Turkish regulation 28300
“Restriction of the use of certain hazardous substances in electrical
and electronic equipment”.
AEEE Yönetmeliğine Uygundur
Toshiba 28300 sayılı Türkiye ''Elektrikle çalişan ve elektronik
ekipmanda belirli tehlikeli maddelerin kullanimiyla ilgili kisitlama”
yönetmeliği gereklerini tamamen yerine getirmektedir.
Compliant with AEEE Directive.
The number of possible pixel failures of your display is defined
according to ISO 9241-307 standards. If the number of pixel failures is
less than this standard, they will not be counted as defect or failure.
Battery is a consumption product, since the battery time depends on
the usage of your computer. If the battery can not be charged at all,
then it is a defect or failure. The changes in battery time is not a defect
or failure.
Following information is only for India:
The use of this symbol indicates that this product may not
be treated as household waste.
By ensuring this product is disposed of correctly, you will
help prevent potential negative consequences for the
environment and human health, which could otherwise be
caused by inappropriate waste handling of this product.
For more detailed information about recycling of this
product, please visit our website
( http://www.toshiba-india.com ) or contact call center
(1800-200-8674).
These symbols might not stick depending on the country and region where
you purchased.
User's Manual 1-7
Page 11

Video Standard Notice
THIS PRODUCT IS LICENSED UNDER THE AVC, THE VC-1 AND
MPEG-4 VISUAL PATENT PORTFOLIO LICENSE FOR THE PERSONAL
AND NON-COMMERCIAL USE OF A CONSUMER FOR (I) ENCODING
VIDEO IN COMPLIANCE WITH THE ABOVE STANDARDS ("VIDEO")
AND/OR (II) DECODING AVC, VC-1 AND MPEG-4 VIDEO THAT WAS
ENCODED BY A CONSUMER ENGAGED IN A PERSONAL AND
NONCOMMERCIAL ACTIVITY AND/OR WAS OBTAINED FROM A
VIDEO PROVIDER LICENSED BY MPEG LA TO PROVIDE SUCH
VIDEO. NO LICENSE IS GRANTED OR SHALL BE IMPLIED FOR ANY
OTHER USE. ADDITIONAL INFORMATION INCLUDING THAT
RELATING TO PROMOTIONAL, INTERNAL AND COMMERCIAL USES
AND LICENSING MAY BE OBTAINED FROM MPEG LA, L.L.C. SEE
http://www.mpegla.com
OpenSSL Toolkit License Issues
LICENSE ISSUES
==============
The OpenSSL toolkit stays under a dual license, i.e. both the conditions of
the OpenSSL License and the original SSLeay license apply to the toolkit.
See below for the actual license texts. Actually both licenses are BSD-style
Open Source licenses. In case of any license issues related to OpenSSL
please contact [email protected].
OpenSSL License
------------------------
/*=====================================================
Copyright (c) 1998-2011 The OpenSSL Project. All rights reserved.
Redistribution and use in source and binary forms, with or without
modification, are permitted provided that the following conditions are met:
1. Redistributions of source code must retain the above copyright notice,
this list of conditions and the following disclaimer.
2. Redistributions in binary form must reproduce the above copyright
notice, this list of conditions and the following disclaimer in the
documentation and/or other materials provided with the distribution.
3. All advertising materials mentioning features or use of this software
must display the following acknowledgment:
"This product includes software developed by the OpenSSL Project for
use in the OpenSSL Toolkit."
( http://www.openssl.org/ )
4. The names "OpenSSL Toolkit" and "OpenSSL Project" must not be
used to endorse or promote products derived from this software
without prior written permission. For written permission, please contact
[email protected].
User's Manual
1-8
Page 12

5. Products derived from this software may not be called "OpenSSL" nor
may "OpenSSL" appear in their names without prior written permission
of the OpenSSL Project.
6. Redistributions of any form whatsoever must retain the following
acknowledgment:
"This product includes software developed by the OpenSSL Project for
use in the OpenSSL Toolkit"
( http://www.openssl.org/ )
THIS SOFTWARE IS PROVIDED BY THE OpenSSL PROJECT ``AS IS''
AND ANY EXPRESSED OR IMPLIED WARRANTIES, INCLUDING, BUT
NOT LIMITED TO, THE IMPLIED WARRANTIES OF MERCHANTABILITY
AND FITNESS FOR A PARTICULAR PURPOSE ARE DISCLAIMED. IN
NO EVENT SHALL THE OpenSSL PROJECT OR ITS CONTRIBUTORS
BE LIABLE FOR ANY DIRECT, INDIRECT, INCIDENTAL, SPECIAL,
EXEMPLARY, OR CONSEQUENTIAL DAMAGES (INCLUDING, BUT NOT
LIMITED TO, PROCUREMENT OF SUBSTITUTE GOODS OR
SERVICES; LOSS OF USE, DATA, OR PROFITS; OR BUSINESS
INTERRUPTION) HOWEVER CAUSED AND ON ANY THEORY OF
LIABILITY, WHETHER IN CONTRACT, STRICT LIABILITY, OR TORT
(INCLUDING NEGLIGENCE OR OTHERWISE) ARISING IN ANY WAY
OUT OF THE USE OF THIS SOFTWARE, EVEN IF ADVISED OF THE
POSSIBILITY OF SUCH DAMAGE.
=====================================================
This product includes cryptographic software written by Eric Young
([email protected]). This product includes software written by Tim
Hudson ([email protected]).
*/
Original SSLeay License
----------------------------------
/* Copyright (C) 1995-1998 Eric Young ([email protected])
All rights reserved.
This package is an SSL implementation written by Eric Young
([email protected]).
The implementation was written so as to conform with Netscapes SSL.
This library is free for commercial and non-commercial use as long as the
following conditions are aheared to. The following conditions apply to all
code found in this distribution, be it the RC4, RSA, lhash, DES, etc., code;
not just the SSL code. The SSL documentation included with this
distribution is covered by the same copyright terms except that the holder
is Tim Hudson ([email protected]).
Copyright remains Eric Young's, and as such any Copyright notices in the
code are not to be removed.
If this package is used in a product, Eric Young should be given attribution
as the author of the parts of the library used.
User's Manual
1-9
Page 13

This can be in the form of a textual message at program startup or in
documentation (online or textual) provided with the package.
Redistribution and use in source and binary forms, with or without
modification, are permitted provided that the following conditions are met:
1. Redistributions of source code must retain the copyright notice, this list
of conditions and the following disclaimer.
2. Redistributions in binary form must reproduce the above copyright
notice, this list of conditions and the following disclaimer in the
documentation and/or other materials provided with the distribution.
3. All advertising materials mentioning features or use of this software
must display the following acknowledgement:
"This product includes cryptographic software written by Eric Young
([email protected])"
The word 'cryptographic' can be left out if the rouines from the library
being used are not cryptographic related :-).
4. If you include any Windows specific code (or a derivative thereof) from
the apps directory (application code) you must include an
acknowledgement:
"This product includes software written by Tim Hudson
([email protected])"
THIS SOFTWARE IS PROVIDED BY ERIC YOUNG ``AS IS'' AND ANY
EXPRESS OR IMPLIED WARRANTIES, INCLUDING, BUT NOT LIMITED
TO, THE IMPLIED WARRANTIES OF MERCHANTABILITY AND
FITNESS FOR A PARTICULAR PURPOSE ARE DISCLAIMED. IN NO
EVENT SHALL THE AUTHOR OR CONTRIBUTORS BE LIABLE FOR
ANY DIRECT, INDIRECT, INCIDENTAL, SPECIAL, EXEMPLARY, OR
CONSEQUENTIAL DAMAGES (INCLUDING, BUT NOT LIMITED TO,
PROCUREMENT OF SUBSTITUTE GOODS OR SERVICES; LOSS OF
USE, DATA, OR PROFITS; OR BUSINESS INTERRUPTION) HOWEVER
CAUSED AND ON ANY THEORY OF LIABILITY, WHETHER IN
CONTRACT, STRICT LIABILITY, OR TORT (INCLUDING NEGLIGENCE
OR OTHERWISE) ARISING IN ANY WAY OUT OF THE USE OF THIS
SOFTWARE, EVEN IF ADVISED OF THE POSSIBILITY OF SUCH
DAMAGE.
The licence and distribution terms for any publically available version or
derivative of this code cannot be changed. i.e. this code cannot simply be
copied and put under another distribution licence [including the GNU Public
Licence.]
*/
FreeType License Issues
The FreeType Project LICENSE
----------------------------
2006-Jan-27
User's Manual
1-10
Page 14

Copyright 1996-2002, 2006 by
David Turner, Robert Wilhelm, and Werner Lemberg
Introduction
============
The FreeType Project is distributed in several archive packages; some of
them may contain, in addition to the FreeType font engine, various tools
and contributions which rely on, or relate to, the FreeType Project.
This license applies to all files found in such packages, and which do not
fall under their own explicit license. The license affects thus the FreeType
font engine, the test programs, documentation and makefiles, at the very
least.
This license was inspired by the BSD, Artistic, and IJG (Independent JPEG
Group) licenses, which all encourage inclusion and use of free software in
commercial and freeware products alike. As a consequence, its main
points are that:
We don't promise that this software works. However, we will be
interested in any kind of bug reports. (`as is' distribution)
You can use this software for whatever you want, in parts or full form,
without having to pay us. (`royalty-free' usage)
You may not pretend that you wrote this software. If you use it, or only
parts of it, in a program, you must acknowledge somewhere in your
documentation that you have used the FreeType code. (`credits')
We specifically permit and encourage the inclusion of this software, with or
without modifications, in commercial products.
We disclaim all warranties covering The FreeType Project and assume no
liability related to The FreeType Project.
Finally, many people asked us for a preferred form for a credit/disclaimer to
use in compliance with this license. We thus encourage you to use the
following text:
"""
Portions of this software are copyright (C) <year> The FreeType Project
www.freetype.org
All rights reserved.
"""
Please replace <year> with the value from the FreeType version you
actually use.
Legal Terms
============
0. Definitions
--------------
Throughout this license, the terms `package', `FreeType Project', and
`FreeType archive' refer to the set of files originally distributed by the
User's Manual
1-11
Page 15

authors (David Turner, Robert Wilhelm, and Werner Lemberg) as the
`FreeType Project', be they named as alpha, beta or final release.
`You' refers to the licensee, or person using the project, where `using' is a
generic term including compiling the project's source code as well as
linking it to form a `program' or `executable'. This program is referred to as
`a program using the FreeType engine'.
This license applies to all files distributed in the original FreeType Project,
including all source code, binaries and documentation, unless otherwise
stated in the file in its original, unmodified form as distributed in the original
archive. If you are unsure whether or not a particular file is covered by this
license, you must contact us to verify this.
The FreeType Project is copyright (C) 1996-2000 by David Turner, Robert
Wilhelm, and Werner Lemberg. All rights reserved except as specified
below.
1. No Warranty
--------------
THE FREETYPE PROJECT IS PROVIDED `AS IS' WITHOUT
WARRANTY OF ANY KIND, EITHER EXPRESS OR IMPLIED,
INCLUDING, BUT NOT LIMITED TO, WARRANTIES OF
MERCHANTABILITY AND FITNESS FOR A PARTICULAR PURPOSE. IN
NO EVENT WILL ANY OF THE AUTHORS OR COPYRIGHT HOLDERS
BE LIABLE FOR ANY DAMAGES CAUSED BY THE USE OR THE
INABILITY TO USE, OF THE FREETYPE PROJECT.
2. Redistribution
--------------
This license grants a worldwide, royalty-free, perpetual and irrevocable
right and license to use, execute, perform, compile, display, copy, create
derivative works of, distribute and sublicense the FreeType Project (in both
source and object code forms) and derivative works thereof for any
purpose; and to authorize others to exercise some or all of the rights
granted herein, subject to the following conditions:
Redistribution of source code must retain this license file (`FTL.TXT')
unaltered; any additions, deletions or changes to the original files must
be clearly indicated in accompanying documentation. The copyright
notices of the unaltered, original files must be preserved in all copies
of source files.
Redistribution in binary form must provide a disclaimer that states that
the software is based in part of the work of the FreeType Team, in the
distribution documentation. We also encourage you to put an URL to
the FreeType web page in your documentation, though this isn't
mandatory.
These conditions apply to any software derived from or based on the
FreeType Project, not just the unmodified files. If you use our work, you
must acknowledge us. However, no fee need be paid to us.
3. Advertising
User's Manual
1-12
Page 16

--------------
Neither the FreeType authors and contributors nor you shall use the name
of the other for commercial, advertising, or promotional purposes without
specific prior written permission.
We suggest, but do not require, that you use one or more of the following
phrases to refer to this software in your documentation or advertising
materials: `FreeType Project', `FreeType Engine', `FreeType library', or
`FreeType Distribution'.
As you have not signed this license, you are not required to accept it.
However, as the FreeType Project is copyrighted material, only this license,
or another one contracted with the authors, grants you the right to use,
distribute, and modify it. Therefore, by using, distributing, or modifying the
FreeType Project, you indicate that you understand and accept all the
terms of this license.
4. Contacts
--------------
There are two mailing lists related to FreeType:
Discusses general use and applications of FreeType, as well as future
and wanted additions to the library and distribution. If you are looking
for support, start in this list if you haven't found anything to help you in
the documentation.
Discusses bugs, as well as engine internals, design issues, specific
licenses, porting, etc.
Our home page can be found at
http://www.freetype.org
User's Manual
1-13
Page 17
ENERGY STAR® Program
Your Computer model may be ENERGY STAR
compliant. If the model you purchased is compliant, it uses
the Energy Star logo and the following information applies.
TOSHIBA is a partner in the ENERGY STAR Program and
has designed this computer to meet the latest ENERGY
STAR guidelines for energy efficiency. Your computer
ships with the power management options preset to a
configuration that will provide the most stable operating
environment and optimum system performance for both
AC power and battery modes.
To conserve energy, your computer is set to enter the lowpower Sleep Mode which shuts down the system and
display within 15 minutes of inactivity in AC power mode.
TOSHIBA recommends that you leave this and other
energy saving features active, so that your computer will
operate at its maximum energy efficiency. You can wake
the computer from Sleep Mode by pressing the power
button.
Your ENERGY STAR certified computer should be set by
default to enter a low-power "sleep mode" after a period of
inactivity. Simply touching the mouse or keyboard "wakes"
the computer in seconds. These sleep features can save
you up to $23 per year (200 kWh per year in electricity)
and prevent up to 300 pounds of greenhouse gas
emissions annually.To learn how to adjust or activate
these sleep settings on your computer, please go to:
www.energystar.gov/sleepinstructions
To activate sleep settings organization-wide quickly and
easily through network tools, please go to
www.energystar.gov/powermanagement
®
Disposing of the computer and the computer's
batteries
Contact an authorized TOSHIBA service provider for details regarding how
to dispose of the computer and the batteries.
Optical disc drive safety instructions
Be sure to check the precautions at the end of this section.
User's Manual 1-14
Page 18
The drive model employs a laser system. To ensure proper use of this
TOSHIBA SAMSUNG STORAGE
TECHNOLOGY KOREA
CORPORATION 14F, Bldg. No.102,
Digital empire2, 486 Sin-dong,
Yeongtong-gu, Suwon-si,
Gyeonggi-do, Korea, 443-734
product, read this instruction manual carefully and retain for future
reference. Should the unit ever require maintenance, contact an
authorized service location.
Use of controls, adjustments or the performance of procedures other
than those specified might result in hazardous radiation exposure.
To prevent direct exposure to the laser beam, do not try to open the
enclosure.
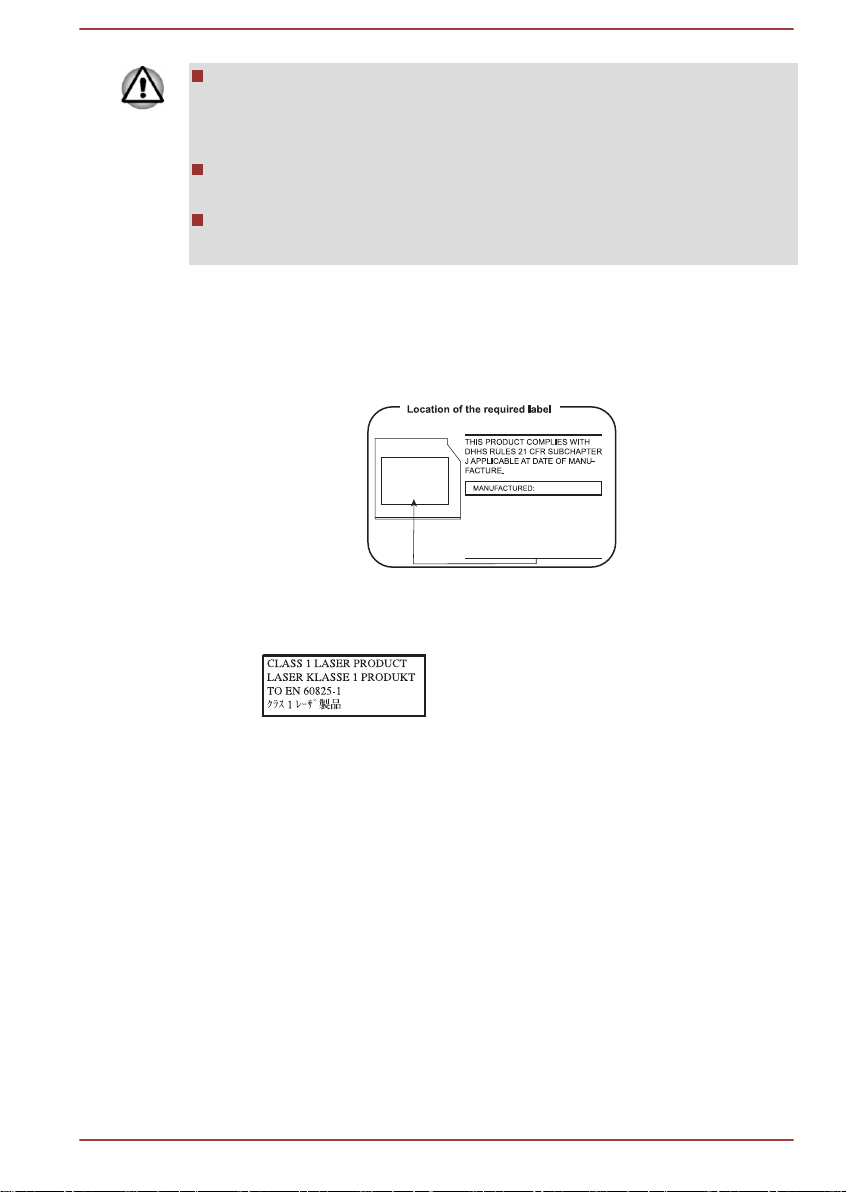
Location of the Required Label
(Sample shown below. Location of the label and manufacturing information
might vary.)
Precautions
General Precautions
TOSHIBA computers are designed to optimize safety, minimize strain, and
withstand the rigors of portability. However, certain precautions should be
observed to further reduce the risk of personal injury or damage to the
computer.
Be certain to read the following general precautions and to note the
User's Manual
cautions included in the text of the manual.
CAUTION: This appliance contains
a laser system and is classified as a
“CLASS 1 LASER PRODUCT.” To
use this model properly, read the
instruction manual carefully and
keep this manual for your future
reference. In case of any trouble
with this model, please contact your
nearest “AUTHORIZED service
station.” To prevent direct exposure
to the laser beam, do not try to
open the enclosure.
1-15
Page 19

Provide adequate ventilation
Always make sure that your computer and AC adaptor have adequate
ventilation and are protected from overheating when the power is turned on
or when an AC adaptor is connected to a power outlet (even if your
computer is in Sleep Mode). In this condition, observe the following:
Never cover your computer or AC adaptor with any object.
Never place your computer or AC adaptor near a heat source, such as
an electric blanket or heater.
Never cover or block the air vents including those at the base of the
computer.
Always operate your computer on a hard flat surface. Using your
computer on a carpet or other soft material can block the vents.
Always provide sufficient space around the computer.
Overheating your computer or AC adaptor could cause system failure,
computer or AC adaptor damage or a fire, possibly resulting in serious
injury.
Creating a computer-friendly environment
Place the computer on a flat surface that is large enough for the computer
and any other items you are using, such as a printer.
Leave enough space around the computer and other equipment to provide
adequate ventilation. Otherwise, they might overheat.
To keep your computer in prime operating condition, protect your work area
from:
Dust, moisture, and direct sunlight.
Equipment that generates a strong electromagnetic field, such as
stereo speakers (other than speakers that are connected to the
computer) or speakerphones.
Rapid changes in temperature or humidity and sources of temperature
change such as air conditioner vents or heaters.
Extreme heat, cold, or humidity.
Liquids and corrosive chemicals.
Stress injury
User's Manual
Carefully read the Instruction Manual for Safety and Comfort. It contains
information on the prevention of stress injuries to your hands and wrists
that can be caused by extensive keyboard use. It also includes information
on work space design, posture, and lighting that can help reduce physical
stress.
1-16
Page 20

Heat injury
Avoid prolonged physical contact with the computer. If the computer is
used for long periods, its surface can become very warm. While the
temperature will not feel hot to the touch, if you maintain physical
contact with the computer for a long time, for example if you rest the
computer on your lap or if you keep your hands on the palm rest, your
skin might suffer a low-heat injury.
If the computer has been used for a long time, avoid direct contact
with the metal plate supporting the various interface ports as this can
become hot.
The surface of the AC adaptor can become hot when in use but this
condition does not indicate a malfunction. If you need to transport the
AC adaptor, Disconnect it and let it cool before moving it.
Do not lay the AC adaptor on a material that is sensitive to heat as the
material could become damaged.
Pressure or impact damage
Do not apply heavy pressure to the computer or subject it to any form of
strong impact as this can damage the computer's components or otherwise
cause it to malfunction.
Cleaning the computer
To help ensure long, trouble-free operation, keep the computer free of dust
and dirt, and use care with all liquids around it.
Be careful not to spill liquids into the computer. If the computer does
get wet, turn the power off immediately and let the computer dry
completely . In these circumstances, you should get the computer
inspected by an authorized service provider in order to assess the
scope of any damage.
Clean the plastics of the computer using a cloth slightly dampened
with water.
You can clean the display screen by spraying a small amount of glass
cleaner onto a soft, clean cloth and then wiping the screen gently with
the cloth.
Never spray cleaner directly onto the computer or let liquid run into any part
of it. Never use harsh or caustic chemical products to clean the computer.
Moving the computer
While the computer is designed for flexible day-to-day usage, you should
exercise a few simple precautions when moving it in order to help ensure
trouble-free operation.
Make sure all disk/disc activity has ended before moving the
computer.
User's Manual
1-17
Page 21
Turn off (shut down) the computer.
Disconnect the AC adaptor and all peripherals before moving the
computer.
Close the display panel.
Do not pick up the computer by its display panel.
Before carrying your computer, shut it down, disconnect the AC
adaptor and allow it to cool down. A failure to follow this instruction
might result in minor heat injury.
Do not expose the computer to rapid temperature changes (for
example, in a situation where you carry the computer from a cold
environment to a warm room). Do not turn on the power until
condensation disappears.
Be careful not to subject the computer to impact or shock. A failure to
follow this instruction could result in damage to computer, computer,
failure, or loss of data.
Never transport your computer with any cards installed. This might
damage to either the computer and/or the card resulting in computer
failure.
Always use a suitable carry case when transporting the computer.
When carrying your computer, be sure to hold it securely so that it
does not fall or hit anything.
Do not carry your computer by holding any of its protruding elements.
Mobile phones
Be aware that the use of mobile phones can interfere with the audio
system. The operation of the computer will not be impaired in any way, but
it is recommended that a minimum distance of 30 cm is maintained
between the computer and a mobile phone that is in use.
Instruction Manual for Safety and Comfort
All important information on the safe and proper use of this computer is
described in the enclosed Instruction Manual for Safety and Comfort. Be
sure to read it before using the computer.
Safety Icons
Safety icons are used in this manual to bring important information to your
attention. Each type of message is identified as follows.
Indicates a potentially hazardous situation, which could result in death or
serious injury, if you do not follow instructions.
A caution informs you that improper use of equipment or failure to follow
instructions might cause data loss, equipment damage, or might result in
minor or moderate injury.
User's Manual 1-18
Page 22

Please read. A note is a hint or advice that helps you make best use of
your equipment.
User's Manual 1-19
Page 23
Getting Started
This chapter provides an equipment checklist, and basic information to
start using your computer.
If you use an operating system that was not pre-installed by TOSHIBA,
some of the features described in this manual might not function properly.
Equipment checklist
Carefully unpack your computer, taking care to save the box and
packaging materials for future use.
Hardware
Check to make sure that you have all the following items:
TOSHIBA Portable Personal Computer
AC adaptor and power cord (2-pin plug or 3-pin plug)
Documentation
User Information Guide
Instruction Manual for Safety and Comfort
If any of the items are missing or damaged, contact your dealer
immediately.
Chapter 2
Conventions
This manual uses the following formats to describe, identify, and highlight
terms and operating procedures.
Click Tap the Touch Pad or click the left Touch
Pad control button once.
Left-click the mouse once.
Tap the touch screen once (only for touch
screen models).
Right-click Click the right Touch Pad control button
once.
Right-click the mouse once.
Press and hold on the touch screen (only for
touch screen models).
User's Manual 2-1
Page 24
Double-click Tap the Touch Pad or click the left Touch
Pad control button twice.
Left-click the mouse twice.
Tap the touch screen twice (only for touch
screen models).
Start
All apps You can find a list of all your apps and programs
The word "Start" refers to the " " button in the
lower-left corner of the screen.
in the All apps.
To access it, click Start and select All apps (
) in the lower-left corner.
Using your computer for the first time
Be sure to read the enclosed Instruction Manual for Safety and Comfort for
information on the safe and proper use of this computer. It is intended to
help you be more comfortable and productive while using a notebook
computer. By following the recommendations in it, you can reduce your
chance of developing a painful or disabling injury to your hand, arms,
shoulders, or neck.
This section provides basic information to start using your computer. It
covers the following topics:
Connecting the AC adaptor
Opening the display
Turning on the power
Initial setup
Use a virus-check program and make sure that it is updated regularly.
Never format storage media without checking its content - formatting
destroys all stored data.
It is a good idea to back up the internal Hard Disk Drive or other main
storage device to external media periodically. General storage media
is not durable or stable over long periods of time and under certain
conditions might result in data loss.
Before you install a device or application, save any data in memory to
the Hard Disk Drive or other storage media. Failure to do so might
result in data loss.
Connecting the AC adaptor
Attach the AC adaptor when you want to charge the battery or operate from
AC power. The battery pack must be charged before you can operate from
battery power.
User's Manual
2-2
Page 25
The AC adaptor can automatically adjust to any voltage ranging from 100
volts to 240 volts and to a frequency of either 50 hertz or 60 hertz, enabling
you to use this computer in almost any country/region. The adaptor
converts AC power to DC power and reduces the voltage supplied to this
computer.
Always use the TOSHIBA AC adaptor that was included with your
computer, or use AC adaptors specified by TOSHIBA to avoid any risk
of fire or other damage to the computer. Use of an incompatible AC
adaptor could cause fire or damage to the computer possibly resulting
in serious injury. TOSHIBA assumes no liability for any damage
caused by use of an incompatible adaptor.
Never plug the AC adaptor into a power source that does not
correspond to both the voltage and the frequency specified on the
regulatory label of the unit. Failure to do so could result in a fire or
electric shock, possibly resulting in serious injury.
Always use or purchase power cables that comply with the legal
voltage and frequency specifications and requirements in the country
of use. Failure to do so could result in a fire or electric shock, possibly
resulting in serious injury.
The supplied power cord conforms to safety rules and regulations in
the region the computer is bought and should not be used outside this
region. For use in other regions, buy power cords that conform to
safety rules and regulations in the particular region.
Do not use a 3-pin to 2-pin conversion plug.
When you connect the AC adaptor to the computer, always follow the
steps in the exact order as described in this User’s Manual.
Connecting the power cable to a live electrical outlet should be the last
step otherwise the adaptor DC output plug could hold an electrical
charge and cause an electrical shock or minor bodily injury when
touched. As a general safety precaution, avoid touching any metal
parts.
Never place your computer or AC adaptor on a wooden surface,
furniture, or any other surface that could be marred by exposure to
heat since the computer base and the surface of the AC adaptor
increase in temperature during normal use.
Always place your computer or AC adaptor on a flat and hard surface
that is resistant to heat damage.
Refer to the enclosed Instruction Manual for Safety and Comfort for
detailed precautions and handling instructions.
User's Manual
1. Connect the power cord to the AC adaptor.
2-3
Page 26
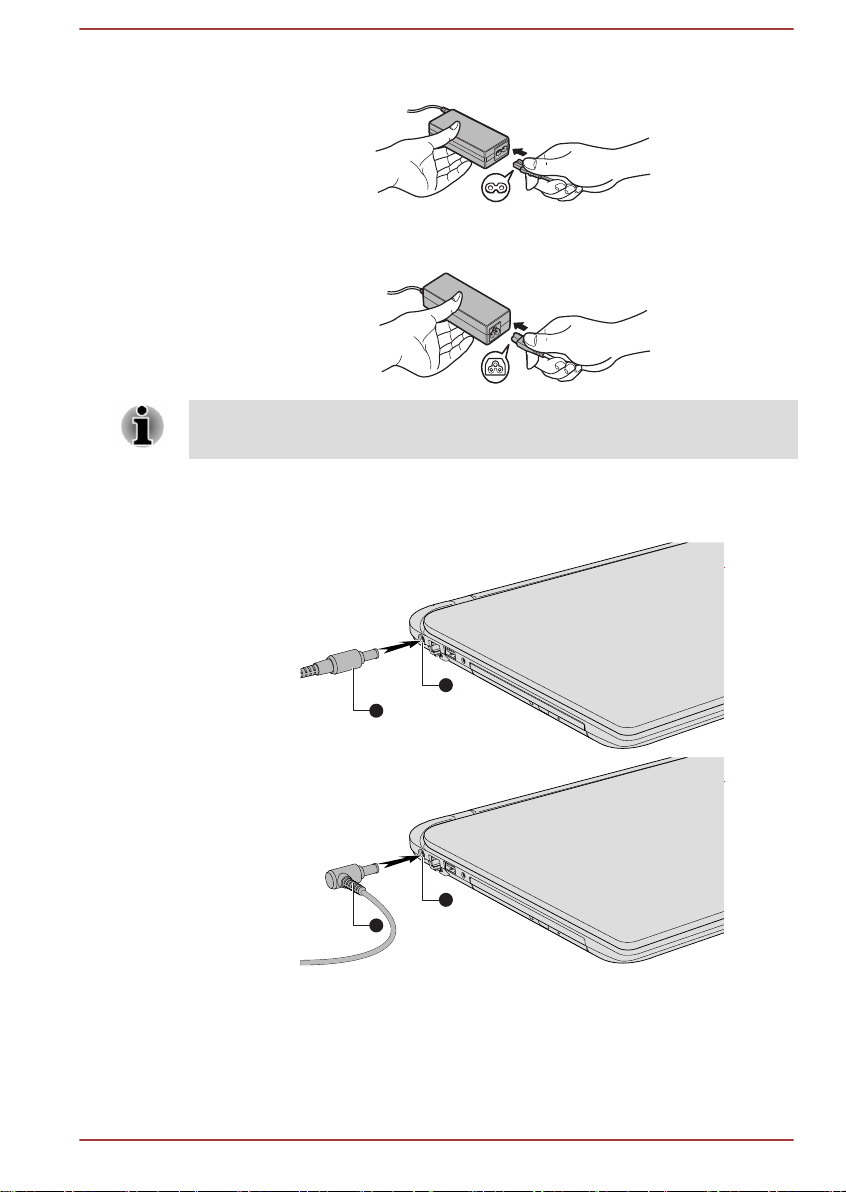
Figure 2-1 Connecting the power cord to the AC adaptor (2-pin plug)
121
2
Figure 2-2 Connecting the power cord to the AC adaptor (3-pin plug)
Either a 2-pin or 3-pin adaptor/cord is included with the computer
depending on the model.
2. Connect the DC output plug of the AC adaptor to the DC IN 19V jack
on your computer.
Figure 2-3 Connecting the DC output plug to the computer
User's Manual
1. DC IN 19V jack 2. DC output plug
Product appearance depends on the model you purchased.
3. Plug the power cord into a live wall outlet. The DC IN/Battery indicator
glows.
2-4
Page 27
Opening the display
1
The display panel can be opened to a wide range of angles for optimal
viewing.
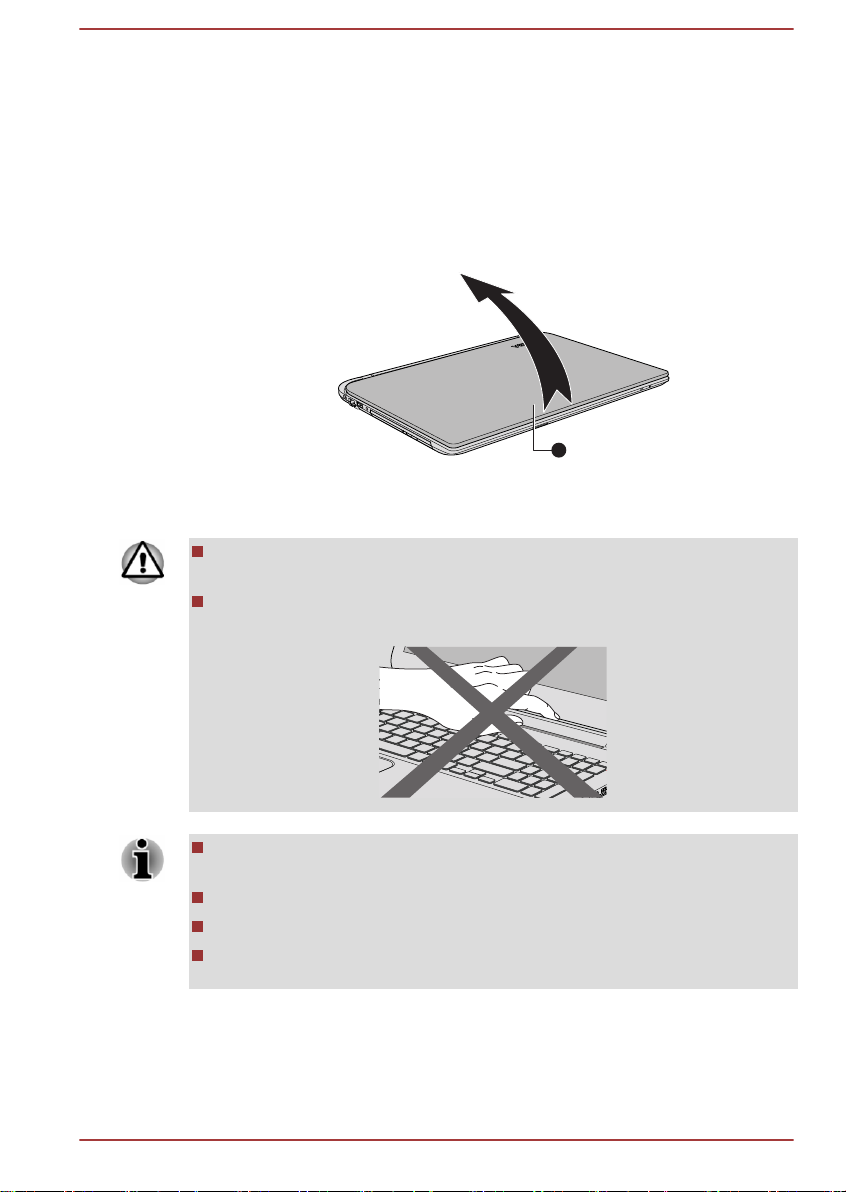
While holding down the palm rest with one hand so that the main body of
the computer is not raised, slowly lift the display panel. It allows the angle
of the display panel to be adjusted to provide optimum clarity.
Figure 2-4 Opening the display panel
1. Display panel
Product appearance depends on the model you purchased.
Open and close the display panel with reasonable care. Opening it
vigorously or slamming it shut could damage the computer.
Do not put your fingers in the gap between the LCD panel and battery
pack when closing your LCD, otherwise your fingers might get hurt.
Be careful not to open the display panel too far as this could put stress
on the display panel’s hinges and cause damage.
Do not press or push on the display panel.
Do not lift the computer by the display panel.
Do not close the display panel with pens or any other objects left in
between the display panel and the keyboard.
User's Manual 2-5
Page 28
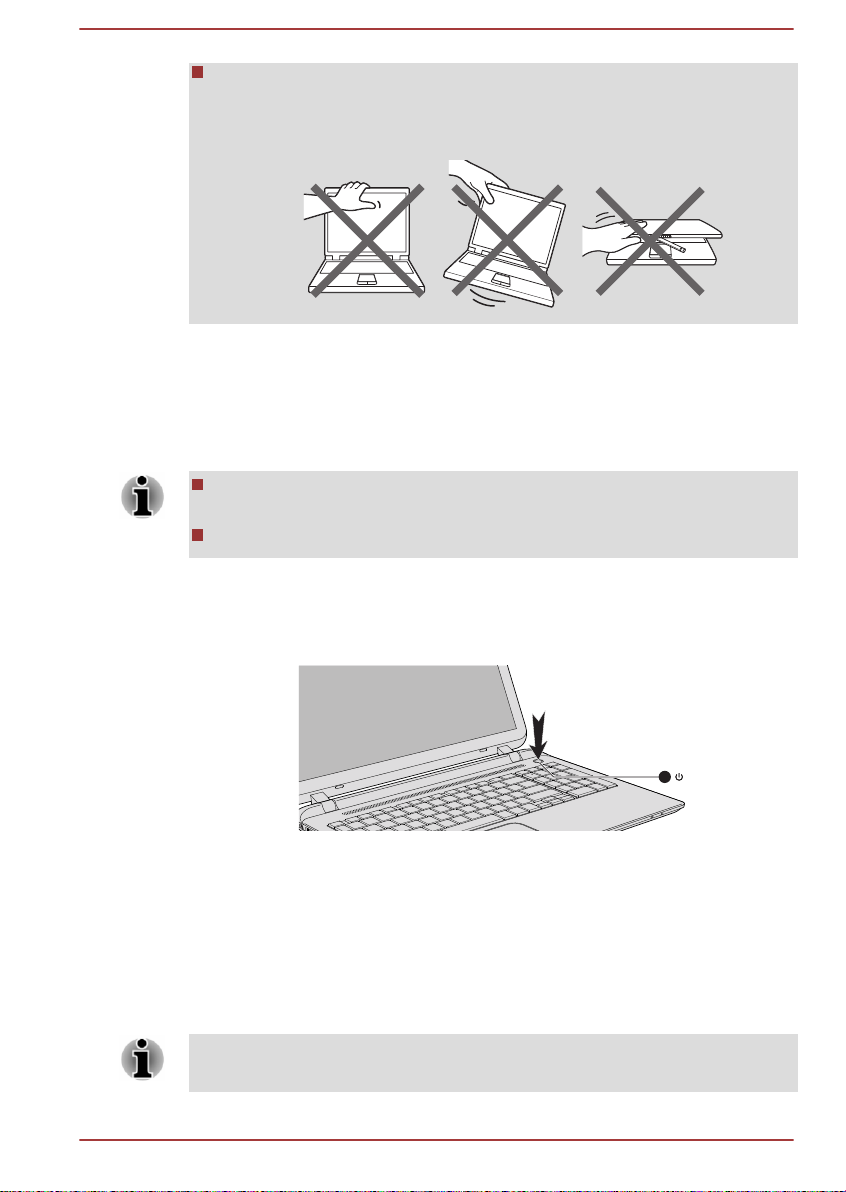
When opening or closing the display panel, place one hand on the
1
palm rest to hold the computer in place and use the other hand to
slowly open or close the display panel (Do not use excessive force
when opening or closing the display panel).
Turning on the power
This section describes how to turn on the power. The Power indicator
indicates the status. Refer to the Power Condition Descriptions section for
more information.
After you turn on the power for the first time, do not turn it off until you
have set up the operating system.
Volume cannot be adjusted during Windows Setup.
1. Open the display panel.
2. Press the power button.
Figure 2-5 Turning on the power
1. Power button
Product appearance depends on the model you purchased.
Initial setup
The Windows Startup Screen is the first screen displayed when you turn on
the power. To install the operating system properly, follow the on-screen
instructions on each screen.
When it is displayed, be sure to read the license terms and license
agreement carefully.
User's Manual 2-6
Page 29
Getting to know Windows
For detailed information on what is new and how to operate Windows, refer
to Get Started in the Start menu.
Start menu
The Start menu is the launching pad for everything you can do in the
Windows operating system, providing easy ways to access your apps,
programs, websites and other important information.
You can access the Start menu from an app or the desktop in the following
ways:
Click the Start button ( ) in the lower-left corner of the screen.
Press the Windows® logo key ( ) on your keyboard.
Most used allows quick access to your frequently used apps, and your
recently installed apps are highlighted under Recently added.
You can pin your favorite apps to the Start menu as tiles in grid-like pattern,
and also group them. Typical tiles are the People tile and the Mail tile for
instance. Tiles show you dynamic information from apps without having to
open them.
Windows taskbar
By default, the bottom of the desktop is Windows taskbar. You can see all
of your currently running apps on the Windows taskbar.
Task view
Search
User's Manual
Task view ( ) is launched from Windows taskbar at the bottom of the
screen. Task view allows you to view the apps that are currently running.
Also, you can create custom desktops so that running apps can be
grouped for entertainment, productivity, or what you just want.
To do this, click the Task view icon
Open the apps you want to use on that desktop. To switch between
desktops, click Task view again.
Search on the Windows taskbar allows you to find apps, files, settings, and
more on the computer. When Internet connection is available, it also shows
you the best search result from the Internet.
The personal assistant called Cortana might be available depending on
your country/region. You can ask questions or talk to Cortana in natural
voice, and Cortana answers your questions using information from the
Internet. To use Cortana, an internal or external microphone is required.
, and then click New desktop.
2-7
Page 30
Action center
You can review important notifications from apps or Windows in action
center, and take action without having to open apps. It also provides quick
action buttons to access to most-used settings instantly. Select the action
center icon
actions.
on the Windows taskbar to view your notifications and quick
Settings
Settings provides system settings including advanced settings in the
Control Panel. They are divided in categories so that you can configure,
optimize, or personalize Windows.
You can also type in the keyword, and use Search to find any setting.
To open Settings, click Start -> All apps -> Settings (
You can pin it to the Start menu as a tile by right-clicking on Settings and
selecting Pin to Start.
Windows Store
Although many apps are pre-installed in your computer, you can also
download many others from the Windows Store.
You can search for and browse thousands of apps, all grouped into easyto-find categories there.
Sign-in options
).
Windows offers a number of sign-in options including Password (
) and Picture password ( ) authentication to prevent from
(
unauthorized access. If you have multiple sign-in methods set for a user
account, you can select an option on the Windows login screen by clicking
sign-in options. Password authentication is the default sign-in option.
Tablet mode
Tablet mode enables touch-optimized working environment without
keyboard and mouse.
After switching to tablet mode, Start menu and apps are running in full
screen, giving you more space to work in. To use two apps side-by-side,
drag an app to one side. You will see any open apps that can snap next to
it. To close an app, drag it to the bottom of the screen.
Turning off the power
The power can be turned off in one of the following modes, either Shut
Down Mode, Sleep Mode or Hibernation Mode.
User's Manual
), PIN
2-8
Page 31
Shut Down Mode
When you turn off the power in Shut Down Mode, no data will be saved
and the computer will boot to the main screen of the operating system the
next time it is turned on.
1. If you have entered data, either save it to the Hard Disk Drive or to
other storage media.
2. Make sure all disk/disc activity has stopped before removing the disk/
disc.
If you turn off the power while a disk (disc) is being accessed, you
might lose data or damage the disk.
Never turn off the power while an application is running. Failure to do
so can cause data loss.
Never turn off the power, disconnect an external storage device, or
remove storage media during data read/write. Failure to do so can
cause data loss.
3. Click Start -> Power and then select Shut down.
4. Turn off any peripheral devices connected to your computer.
Do not turn the computer or peripheral devices back on immediately. Wait
a short period to avoid any potential damage.
Restarting the computer
Certain conditions require that you reset the computer, for example if:
You change certain computer settings.
To restart the computer, there are several ways this can be achieved:
Click Start -> Power and then select Restart.
Press CTRL, ALT, and DEL simultaneously (once) to display the
menu window, and then select Restart by clicking the power icon ( )
in the lower-right corner.
Sleep Mode
If you have to interrupt your work, you are able to turn off the power without
exiting from your software by placing the computer into Sleep Mode. In this
mode, data is maintained in the main memory of the computer. When you
turn on the power again, you can continue working right where you left off.
When you have to turn off your computer aboard an aircraft or in places
where electronic devices are regulated or controlled, always shut down the
computer. This includes turning off any wireless communication
functionalities, and canceling settings that reactivate the computer
User's Manual 2-9
Page 32
automatically, such as a timer recording function. Failure to shut down the
computer in this way could allow the operating system to reactivate and run
pre-programmed tasks or preserve unsaved data, which could interfere
with aviation or other systems, possibly causing serious injury.
Before entering Sleep Mode, be sure to save your data.
To prevent data loss, do not switch to Sleep Mode while transferring
data to external media, such as USB devices, memory media, or other
external memory devices.
When the AC adaptor is connected, the computer will go into Sleep
Mode according to the settings in the Power Options (to access it,
click Control Panel -> System and Security -> Power Options
under Windows System group in All apps).
To restore the operation of the computer from Sleep Mode, press and
hold the power button or any key on the keyboard for a short amount
of time. Note that keyboard keys can only be used if the Wake-up on
Keyboard option is enabled within the TOSHIBA System Settings.
If the computer enters Sleep Mode while a network application is
active, the application might not be restored when the computer is
next turned on and the system returns from Sleep Mode.
To prevent the computer from automatically entering Sleep Mode,
disable Sleep Mode within the Power Options.
To use the Hybrid Sleep function, configure it in the Power Options.
User's Manual
Benefits of Sleep Mode
The Sleep Mode feature provides the following benefits:
Restores the previous working environment more rapidly than the
Hibernation Mode feature.
Saves power by shutting down the system when the computer
receives no input or hardware access for the time period set by the
System Sleep Mode feature.
Allows the use of the panel power off feature.
Executing Sleep Mode
You can enter Sleep Mode in one of following ways:
Click Start -> Power and then select Sleep.
Close the display panel. Note that this feature must be enabled within
the Power Options.
Press the power button. Note that this feature must be enabled within
the Power Options.
2-10
Page 33

When you turn the power back on, you can continue where you left off
when you shut down the computer.
When the computer is in Sleep Mode, the Power indicator blinks white.
If you are operating the computer on battery power, you can lengthen
the overall operating time by turning it off into Hibernation Mode. Sleep
Mode consumes more power while the computer is off.
Sleep Mode limitations
Sleep Mode will not function under the following conditions:
Power is turned back on immediately after shutting down.
Memory circuits are exposed to static electricity or electrical noise.
Hibernation Mode
The Hibernation Mode feature saves the contents of memory to the Hard
Disk Drive when the computer is turned off so that, the next time it is turned
on, the previous state is restored. Note that the Hibernation Mode feature
does not save the status of any peripheral devices connected to the
computer.
Save your data. While entering Hibernation Mode, the computer saves
the contents of memory to the Hard Disk Drive. However, for safety
sake, it is best to save your data manually.
Data will be lost if you disconnect the AC adaptor before the save is
completed.
To prevent data loss, do not switch to Hibernation Mode while
transferring data to external media, such as USB devices, memory
media, or other external memory devices.
User's Manual
Benefits of Hibernation Mode
The Hibernation Mode feature provides the following benefits:
Saves data to the Hard Disk Drive when the computer automatically
shuts down because of a low battery condition.
You can return to your previous working environment immediately
when you turn on the computer.
Saves power by shutting down the system when the computer
receives no input or hardware access for the time period set by the
System Hibernate feature.
Allows the use of the panel power off feature.
Starting Hibernation Mode
To enter Hibernation Mode, click Start -> Power and then select
Hibernate.
2-11
Page 34

To show Hibernate in Power menu, set up according to the following
steps:
1. Click Control Panel -> System and Security -> Power Options under
Windows System group in All apps.
2. Click Choose what the power button does or Choose what closing
the lid does.
3. Click Change settings that are currently unavailable.
4. Select the Hibernate check box from Shutdown settings.
5. Click the Save changes button.
Automatic Hibernation Mode
The computer can be configured to enter Hibernation Mode automatically
when you press the power button or close the lid. To define these settings,
do the following:
1. Click Power Options and then click Choose what the power button
does or Choose what closing the lid does.
2. Enable the desired Hibernation Mode settings for When I press the
power button and When I close the lid.
3. Click the Save changes button.
Data save in Hibernation Mode
When you turn off the power in Hibernation Mode, the computer takes a
moment to save the current data in memory to the Hard Disk Drive.
After you turn off the computer, and the content of memory has been saved
to the Hard Disk Drive, turn off the power to any peripheral devices.
Do not turn the computer or devices back on immediately. Wait a moment
to let all capacitors fully discharge.
System Recovery
There is a recovery image allocated on the Hard Disk Drive for the System
Recovery Options in the event of a problem.
The following items are described in this section:
Creating Recovery Media
Restoring the pre-installed software from your created Recovery
Media
Restoring the pre-installed software from the Hard Disk Drive
If you choose TOSHIBA Maintenance Utility to erase the hard disk drive, all
data including the operating system and recovery image will be deleted. In
User's Manual 2-12
Page 35
that case, you cannot create recovery media or restore the pre-installed
software from the recovery image. Make sure that you have already
created recovery media before you start TOSHIBA Maintenance Utility.
This recovery media can be used to restore your system after you have
erased your hard disk drive.
Creating Recovery Media
This section describes how to create Recovery Media.
Be sure to connect the AC adaptor when you create Recovery Media.
Be sure to close all other software programs.
Do not run software such as screen savers which can put a heavy
load on the CPU.
Operate the computer at full power.
Do not use power-saving features.
Do not write to the media when the virus check software is running.
Wait for it to finish, then disable virus detection programs including any
software that checks files automatically in the background.
Do not use utilities, including those intended to enhance Hard Disk
Drive access speed. They might cause unstable operation and
damage data.
Do not shut down/log off or Sleep/Hibernate while writing or rewriting
the media.
Set the computer on a level surface and avoid places subjected to
vibrations such as airplanes, trains, or cars.
Do not use on an unstable surface such as a stand.
User's Manual
A recovery image of the software on your computer is stored on the Hard
Disk Drive, and can be copied to either disc media or USB Flash Memory
by using the following steps:
1. Select either blank disc or USB Flash Memory.
Some of the disc media might not be compatible with the optical disc
drive connected to your computer. You should therefore verify that the
optical disc drive supports the blank media you have chosen before
proceeding.
USB Flash Memory will be formatted and all the data in the USB Flash
Memory will be lost when proceeding.
2. Turn on your computer and allow it to load the Windows operating
system from the Hard Disk Drive as normal.
3. Insert the first blank disc into the optical disc drive tray, or insert the
USB Flash Memory into one available USB port.
2-13
Page 36

Restoring the pre-installed software from the Hard
Disk Drive
A portion of the total Hard Disk Drive space is used to store the recovery
image which can be used to restore pre-installed software in the event of a
problem.
Make sure that the AC adaptor is connected during the restoring process.
When you reinstall the Windows operating system, the hard disk will be
reformatted and all data will be lost.
1. Click Start -> Power and then select Restart.
2. Hold down 0 (zero) key and then release this key one second after the
computer is power on.
3. Select Troubleshoot.
4. Select Reset your PC.
5. Follow the on-screen instructions to finish the recovery.
You can also perform the restoration through PC settings in the operating
system:
1. Got to Settings and click Update & security -> Recovery.
2. Click Get started under Reset this PC.
3. Follow the on-screen instructions to finish the recovery.
User's Manual
2-15
Page 37

The Grand Tour
1 2 3
This chapter identifies the various components of the computer. It is
recommended that you become familiar with each before you operate the
computer.
Legal Footnote (Non-applicable Icons)
For more information regarding Non-applicable Icons, refer to the Legal
Footnotes section.
Handle your computer carefully to avoid scratching or damaging the
surface.
Front with the display closed
The following figure shows the front of the computer with the display panel
in the closed position.
Figure 3-1 Front of the computer with display panel closed
Chapter 3
1. Memory media slot
2. DC IN/Battery indicator
Memory media slot This slot lets you insert an SD™/SDHC™/
SDXC™ memory card, miniSD™/microSD™
Card and MultiMediaCard™. Refer to the
Memory media section for more information.
Keep foreign metal objects, such as screws, staples, and paper clips, out of
the Memory media slot. Foreign metal objects can create a short circuit,
which can cause damage and fire, possibly resulting in serious injury.
User's Manual 3-1
3. Wireless communication indicator
Page 38

DC IN/Battery
1 53 42
indicator
The DC IN/Battery indicator shows the condition
of the DC IN and the battery charge status. White
indicates that the battery is fully charged while
the power is being correctly supplied from the AC
power adaptor.
Refer to the Power Condition Descriptions
section for more information on this feature.
Left side
Wireless
communication
indicator
The Wireless communication indicator glows
amber when the Bluetooth or Wireless LAN
functions are turned on.
Only some models are equipped with Bluetooth
and Wireless LAN functions.
The following figure shows the left side of the computer.
Figure 3-2 The left side of the computer
1. DC IN 19V jack 4. Headphone/Microphone combo jack
2. LAN jack 5. Optical disc drive
3. Universal Serial Bus (USB 2.0) port
DC IN 19V jack The AC adaptor connects to this jack in order to
power the computer and charge its internal
batteries. Note that you must only use the model
of AC adaptor supplied with the computer at the
time of purchase. Using the wrong AC adaptor
can damage the computer.
LAN jack This jack lets you connect to a LAN. The adaptor
has built-in support for Ethernet LAN (10
megabits per second, 10BASE-T), or Fast
Ethernet LAN (100 megabits per second,
100BASE-TX). Some models are equipped with
a Gigabit Ethernet LAN (1000 megabits per
second, 1000BASE-T). Refer to Operating
Basics, for details.
User's Manual 3-2
Page 39
Do not connect any cable other than a LAN cable to the LAN jack. It could
1 4 5 632
cause damage or malfunction.
Universal Serial Bus
(USB 2.0) port
One Universal Serial Bus port, which complies to
the USB 2.0 standard, is provided on the right
side of the computer.
The USB 2.0 port is not compatible with USB 3.0
devices.
Note that it is not possible to confirm the operations of all functions of
all USB devices that are available. Some functions associated with a
specific device might not operate properly.
Before removing a USB device from the USB port of your computer,
click the Safely Remove Hardware and Eject Media icon on the
Windows Taskbar, and then select the USB device that you want to
remove.
Keep foreign metal objects, such as screws, staples, and paper clips, out of
the USB port. Foreign metal objects can create a short circuit, which can
cause damage and fire, possibly resulting in serious injury.
Headphone/
Microphone combo
jack
A 3.5 mm mini headphone/microphone combo
jack enables connection of a monaural
microphone or stereo headphones.
Optical disc drive The computer might be configured with a DVD
Super Multi drive.
2.6GB and 5.2GB DVD-RAM media cannot be read from or written to.
Right side
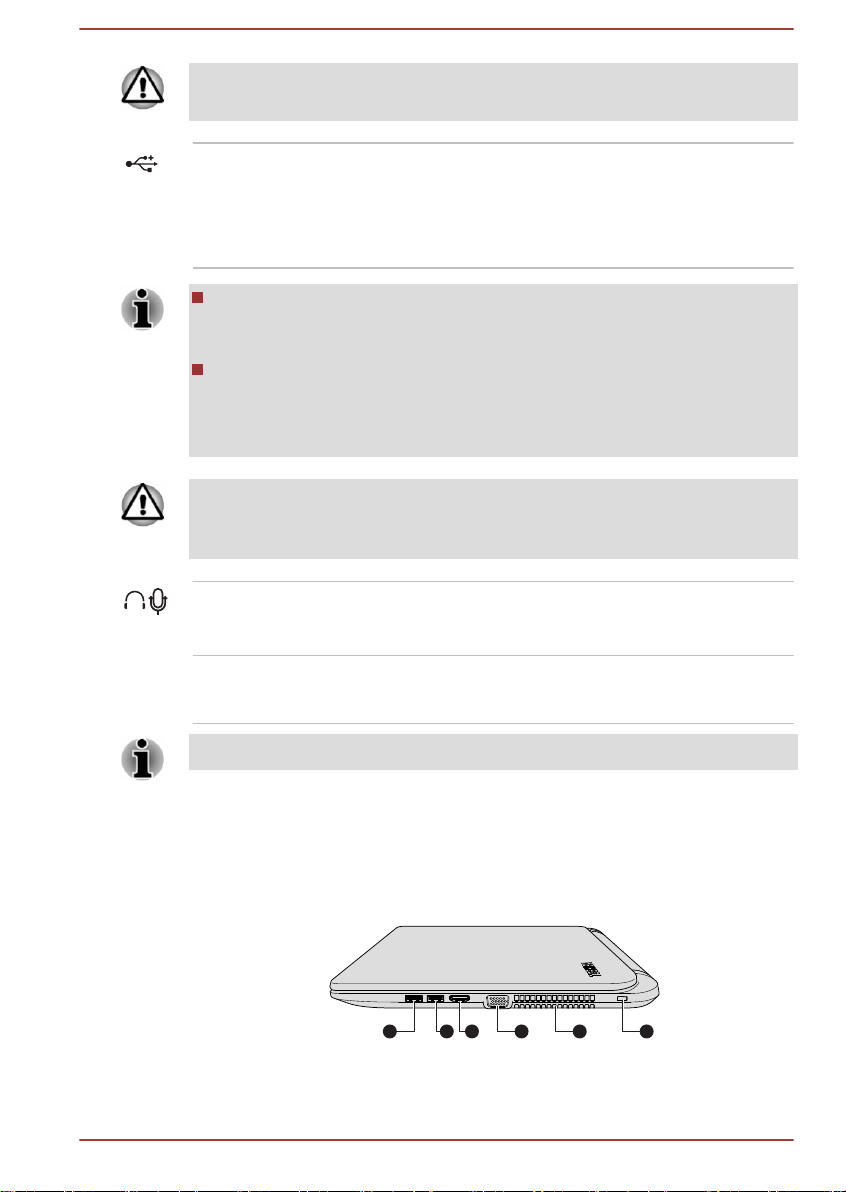
The following figure shows the right side of the computer.
Figure 3-3 The right side of the computer
1. Universal Serial Bus (USB 3.0) port
2. Universal Serial Bus (USB 2.0) port 5. Cooling vents
3. HDMI out port 6. Security lock slot
User's Manual 3-3
4. External RGB monitor port
Page 40

Universal Serial Bus
(USB 3.0) port
USB 3.0 port(s) might work as USB 2.0 port(s) when operating in USB
Legacy Emulation mode.
Before removing a USB device from the USB port of your computer,
click the Safely Remove Hardware and Eject Media icon on the
Windows Taskbar, and then select the USB device that you want to
remove.
One Universal Serial Bus port, which complies to
the USB 3.0 standard, is provided on the right
side of the computer.
The USB 3.0 port is compliant with USB 3.0
standard and backward compatible with USB 2.0
devices. The port with blue color is USB 3.0 port.
Back
Universal Serial Bus
(USB 2.0) port
HDMI out port HDMI out port can connect with Type A
External RGB monitor
port
Cooling vents The cooling vents help the processor to avoid
Security lock slot A security cable can be attached to this slot and
The following figure shows the back of the computer.
One Universal Serial Bus port, which complies to
the USB 2.0 standard, is provided on the right
side of the computer.
The USB 2.0 port is not compatible with USB 3.0
devices.
connector HDMI cable.
This port provides 15-pin, analog RGB port.
Refer to the External RGB monitor port pin
assignment section for information on external
RGB monitor port pin assignment. This port
allows you to connect an external RGB monitor
to the computer.
overheating.
then connected to a desk or other large object in
order to deter theft of the computer.
Figure 3-4 The back of the computer
User's Manual
3-4
Page 41
Underside
1
2
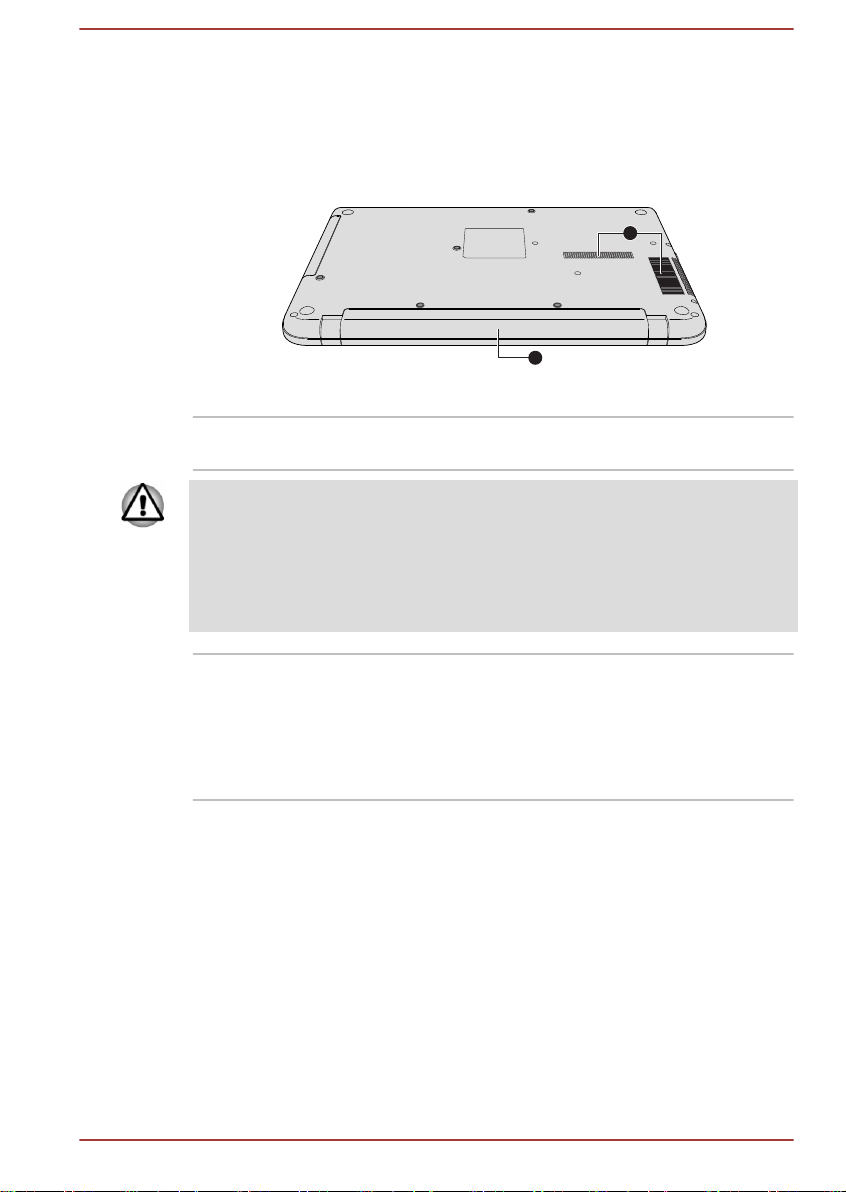
The following figure shows the underside of the computer. Ensure that the
display is closed before the computer is turned over to avoid causing any
damage.
1. Cooling vents 2. Battery pack
Cooling vents The cooling vents help the processor to avoid
Do not block the cooling vents. Keep foreign metal objects, such as
screws, staples, and paper clips, out of the cooling vents. Foreign metal
objects can create a short circuit, which can cause damage and fire,
possibly resulting in serious injury.
Carefully clean the dust on the surface of the cooling vents using a soft
cloth.
Figure 3-5 The underside of the computer
overheating.
Battery pack The rechargeable lithium-ion battery pack
provides power to the computer when the AC
adaptor is not connected.
For more detailed information on the use and
operation of the battery pack, refer to the Battery
section.
Front with the display open
This section shows the computer with the display panel open. In order to
open the display, lift up the display panel up and position it at a comfortable
viewing angle for you.
User's Manual
3-5
Page 42

Figure 3-6 The front of the computer with the display panel open
5
1
8
8
9
7
6
11
12
2
4
3
10
13
5
1
2
4
3
Figure 3-7 Top side of the touch screen model
1. Microphone 8. Display hinges
2. Web Camera LED 9. Power button
3. Web Camera 10. Power indicator
4. Microphone* 11. Keyboard
5. Wireless communication antennas
12. Touch Pad
(not shown)
6. Display screen 13. Touch Pad control buttons
7. Stereo speakers
* Provided with some models.
Product appearance depends on the model you purchased.
Microphone The built-in microphone allows you to import and
record sounds for your application. Refer to the
Sound System and Video mode section for more
information.
Web Camera LED The Web Camera LED glows when the Web
User's Manual 3-6
Web Camera Web Camera is a device that allows you to
Camera is operating.
record video or take photographs with your
computer. You can use it for video chatting or
video conferences using a communication tool.
Page 43
Do not point the web camera directly at the sun.
Do not touch or press strongly on the web camera lens. Failure to do
so might reduce image quality. Use an eyeglass cleaner (cleaner
cloth) or other soft cloth to clean the lens if it becomes dirty.
Wireless
communication
antennas
Depending on the configuration of your
computer, one or all of the following antennas are
built-in:
Wireless LAN
Wireless LAN/Bluetooth
Legal Footnote (Wireless LAN)
For more information regarding Wireless LAN, refer to the Legal Footnotes
section.
Display screen 39.6 cm (15.6") LCD screen, configured with the
following resolution:
HD, 1366 horizontal x 768 vertical pixels
Be aware that, when the computer is operating
on the AC adaptor, the image displayed on the
internal screen is somewhat brighter than when it
operates on battery power. This difference in
brightness levels is intended to save power when
operating on batteries.
Legal Footnote (LCD)
For more information regarding LCD, refer to the Legal Footnotes section.
Stereo speakers The speakers emit sound generated by your
software as well as audio alarms, such as low
battery condition, generated by the system.
Display hinges The display hinges allow the display panel to be
positioned at a variety of easy-to-view angles.
Power button Press this button to power on/off the computer.
Power indicator The Power indicator glows white when the
computer is turned on. However, if you turn off
the computer into Sleep Mode, this indicator
blinks white.
User's Manual 3-7
Page 44

Keyboard The keyboard contains character keys, control
keys, function keys, and special Windows keys,
providing all the functionality of a full-size
keyboard.
Refer to the The Keyboard section for details.
Touch Pad The Touch Pad located in the palm rest is used
to control the movement of the on-screen pointer.
To use the Touch Pad, simply touch and move
your fingertip across it in the direction you want
the on-screen pointer to go.
Touch Pad control
buttons
The two buttons located on the bottom of the
Touch Pad are used like the buttons on a
standard mouse. Press the left button to select a
menu item or to manipulate text or graphics
designated by the pointer, and press the right
button to display a menu or other function
depending on the software you are using.
Internal Hardware Components
This section describes the internal hardware components of your computer.
The actual specifications might vary depending on the model you
purchased.
Battery pack This computer includes a battery pack inside.
However, do not attempt to dismount or replace it
by yourself. Contact an authorized TOSHIBA
service provider, if necessary.
The rechargeable lithium-ion battery pack
provides power to the computer when the AC
adaptor is not connected.
For more detailed information on the use and
operation of the battery pack, refer to the Battery
section.
CPU The processor type varies depending on model.
To check which type of processor is included in
your model, click Control Panel -> System and
Security -> System under Windows System
group in All apps.
Legal Footnote (CPU)
For more information regarding CPU, refer to the Legal Footnotes section.
User's Manual 3-8
Page 45

Hard Disk Drive or
Solid-State Drive
The capacity of the hard disk drive varies
depending on the model.
Note that part of the hard disk overall capacity is
reserved as administration space.
Some models are equipped with a "Solid-State Drive (SSD)" instead of
a hard disk drive. In this manual, the word "HDD" or "Hard disk drive"
also refers to the SSD unless otherwise stated.
SSD is a large-capacity storage device which uses Solid-State
Memory in place of a magnetic disk of the hard disk.
Under certain unusual conditions of prolonged non-use and/or exposure to
high temperatures, the SSD might be vulnerable to data retention errors.
Legal Footnote (Hard Disk Drive (HDD) Capacity)
For more information regarding Hard Disk Drive (HDD) Capacity, refer to
the Legal Footnotes section.
Video RAM The memory in the graphics adaptor of the
computer, used to store the image displayed on a
bitmap display.
The amount of Video RAM available depends on
the system memory of the computer.
Click Control Panel -> Appearance and
Personalization -> Display -> Adjust
resolution under Windows System in All apps.
The amount of Video RAM can be verified by
clicking the Advanced settings button in the
Screen Resolution window.
Memory module The memory module is installed in the computer.
Legal Footnote (Memory (Main System))
For more information regarding Memory (Main System), please refer to the
Legal Footnotes section.
Graphics Processing
Unit
Graphics processing unit (GPU) performance
might vary depending on product model, design
configuration, applications, power management
settings and features utilized. GPU performance
is only optimized when operating in AC power
mode and might decrease considerably when
operating in battery power mode.
User's Manual 3-9
Page 46

Legal Footnote (Graphics Processing Unit (GPU))
For more information regarding Graphics Processing Unit (GPU), please
refer to the Legal Footnotes section.
Intel® Display Power Saving Technology
Intel GPU models might include the Display Power Saving Technology
feature that can save the power consumption of the computer by optimizing
picture contrast on the internal LCD.
This feature can be used if the computer is:
Running under battery mode
Using the internal LCD display only
The Display Power Saving Technology feature is enabled as the factory
default. If you want to turn off this feature, change it in the settings
accordingly in the Intel® HD Graphics Control Panel.
The Display Power Saving Technology feature can be disabled in the Intel
HD Graphics Control Panel/Intel® Graphics and Media Control Panel.
You can access this control panel in the following way:
1. Right-click on the desktop and click Graphics Properties...
2. Click Power and then click On battery in the upper-left corner.
3. Click Disable under Display Power Saving Technology.
4. Click Apply.
If you want to enable this feature, click Enable under Display Power
Saving Technology.
®
AMD® Vari-Bright
AMD GPU models might include the AMD® Vari-Bright™ feature that can
save the power consumption of the computer by optimizing picture contrast
on the internal LCD.
This feature can be used if the computer is:
The Vari-Bright feature can be enabled in the AMD VISION Engine Control
Center/Catalyst Control Center. You can access the center in the following
way:
In this control panel:
1. Select PowerPlay™ under Power.
2. Select Enable PowerPlay™ check box, and then select the Enable
User's Manual
™
running under battery mode
using the internal LCD display only
Right-click on the desktop and click AMD VISION Engine Control
Center/Catalyst Control Center.
Vari-Bright™ check box.
3-10
Page 47

If you want to improve the picture quality under the conditions mentioned
above, adjust the setting towards Maximize Quality or disable this feature.
Power Condition Descriptions
The computer operating capability and battery charge status are affected
by different power conditions, including whether an AC adaptor is
connected and what the charge level is.
DC IN/Battery indicator
Check the DC IN/Battery indicator to determine the status of the battery
pack and the power status with the AC adaptor connected. The following
indicator conditions should be noted:
Flashing amber The battery charge is low. The AC adaptor must
be connected to recharge the battery.
Amber Indicates that the AC adaptor is connected and
the battery is charging.
White Indicates that the AC adaptor is connected and
the battery is fully charged.
No light Under any other conditions, the indicator does
not light.
If the battery pack becomes too hot while it is being charged, the charge
stops and the DC IN/Battery indicator goes out. When the temperature of
the battery pack falls to a normal range, charging will resume. This process
occurs regardless of whether the computer's power is on or off.
Power indicator
Check the Power indicator to determine the power status of the computer.
The following indicator conditions should be noted:
White Indicates that power is being supplied to the
computer and the computer is turned on.
Flashing white Indicates that the computer is in Sleep Mode and
that there is sufficient power available (AC
adaptor or battery) to maintain this condition.
No light Under any other conditions, the indicator does
not light.
User's Manual 3-11
Page 48

Operating Basics
This chapter describes the basic operations of your computer, and
highlights the precautions that must be taken when using it.
Using the Touch Screen
Some models are equipped with a touch screen.
You can use your finger to manipulate icons, buttons, menu items, the
onscreen keyboard, and other items on the touch screen.
Tap Simply tap your finger once on the touch screen
to activate an item, such as an app.
Press and hold Press your finger down and leave it there for a
few seconds. This will show information to help
you learn more about an item or will open a
menu specific to what you are doing.
Pinch or stretch Touch the screen or an item with two or more
fingers, and then move the fingers toward each
other (pinch) or away from each other (stretch).
This shows different levels of information or
visually zooms in or out.
Chapter 4
Rotate Put two or more fingers on an item and then turn
your hand to rotate things in the direction you
turn your hand. Only some items can be rotated.
Slide Drag your finger on the touch screen to move
through what's on the screen.
User's Manual 4-1
Page 49
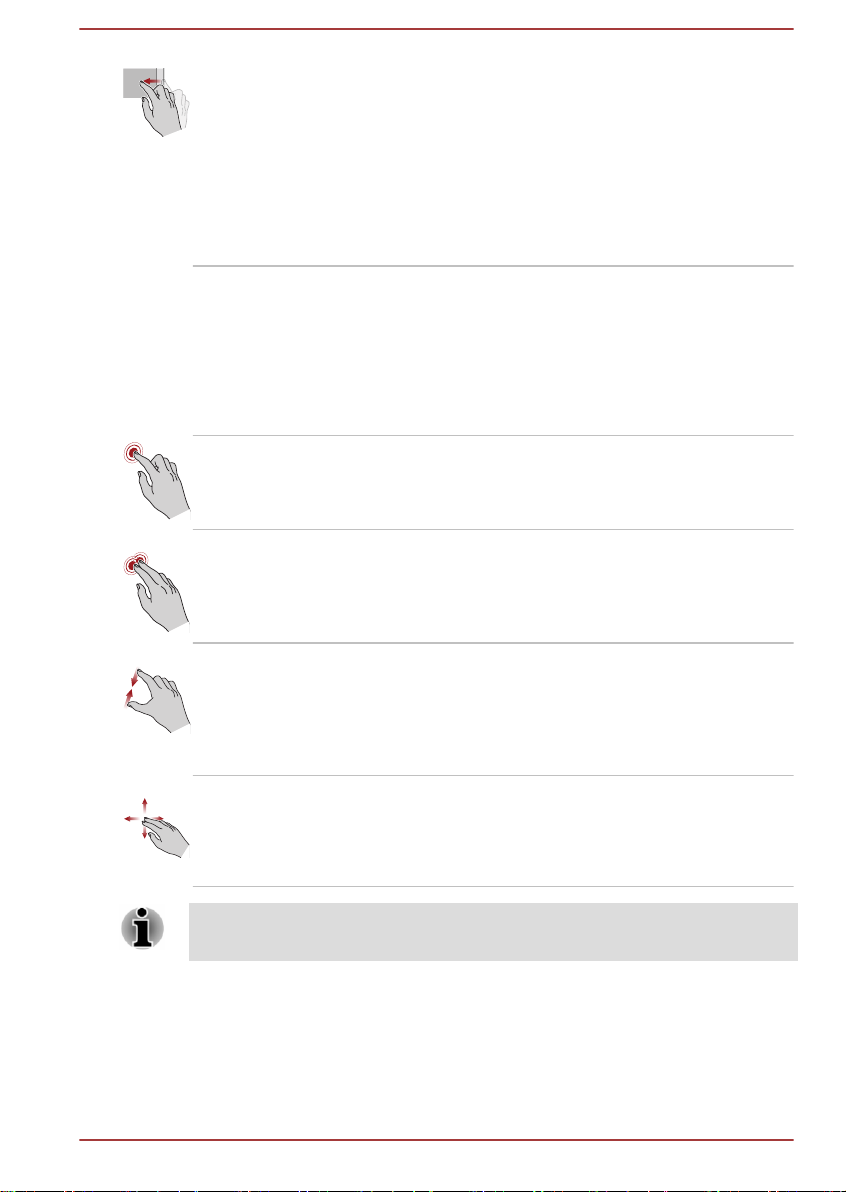
Swipe Quickly move your finger in from the edge of the
For details and more advanced touch screen gestures to interact with
Windows operating system, please refer to the Get Started.
Using the Touch Pad
The Touch Pad located in the palm rest may support the following
gestures:
Tap Tap once on the Touch Pad to activate an item,
Two-Finger Tap Tap once on the Touch Pad with two fingers
screen, without pausing when you first touch it.
Swipe from the left edge: views all your open
apps in task view.
Swipe from the right edge: opens the Action
center.
Swipe from the top edge: views title bars for fullscreened apps.
such as an app.
together to display a menu or other function
depending on the software you are using.
(Similar to right-click)
Pinch or stretch Place two or more fingers down on the Touch
Two-Finger Scroll Place two fingers down and slide them vertically
Some of the Touch Pad operations described in this section are only
supported in certain applications.
The Keyboard
The number of keys available on your keyboard depends on which country/
region your computer is configured for, with keyboards being available for
numerous languages.
User's Manual
Pad and move them toward each other (pinch) or
away from each other (stretch). This will show
different levels of information or visually zooms in
or out.
or horizontally from anywhere on the Touch Pad.
This allows you to operate the scroll bars of a
window.
4-2
Page 50

There are different types of keys, specifically typewriter keys, function keys,
2
1
soft keys, Windows special keys and the keypad overlay.
Never remove the key caps on your keyboard. Failure to do so could
damage the parts under the key caps..
Keyboard indicator
The following figure shows the position of the CAPS LOCK indicator and
NUM LOCK indicator which show the following conditions:
When the CAPS LOCK indicator glows, the keyboard produces
capitals when any letter is typed.
When the NUM LOCK indicator glows, the ten key allows you to enter
numbers.
Figure 4-1 Keypad indicators
1. CAPS LOCK indicator 2. NUM LOCK indicator
Function Keys
User's Manual
CAPS LOCK This indicator glows green when letter keys are
locked into their uppercase format.
NUM LOCK When the NUM LOCK indicator glows, you can
use the number keys on the keyboard for number
entry.
The function keys (F1 ~ F12) are the 12 keys at the top of your keyboard.
You can configure the function keys’ mode as "Special function mode" or
"Standard F1-F12 mode" by clicking System Settings -> Function Key
under TOSHIBA group in All apps.
"Special function mode" allows you to use special functions without
pressing the FN key.
4-3
Page 51

Special
function mode
Standard F1F12 mode
Function
F1 FN + F1 Launches the help file supplied with
the software.
F2 FN + F2 Decreases the computer's display
panel brightness in individual steps.
F3 FN + F3 Increases the computer's display
panel brightness in individual steps.
F4 FN + F4 Changes the active display device.
To use a simultaneous mode, you
must set the resolution of the internal
display panel to match the resolution
of the external display device.
F5 FN + F5 Enables or disables the Touch Pad.
F6 FN + F6 Moves media backward.
F7 FN + F7 Plays or pauses media playback.
F8 FN + F8 Moves media forward.
F9 FN + F9 Decreases the computer's volume.
F10 FN + F10 Increases the computer's volume.
F11 FN + F11 Turns the sound on or off.
F12 FN + F12 Turns the Airplane mode on or off.
FN + 1 FN + 1 Reduces the icon size on the desktop
or the font sizes within one of the
supported application windows.
FN + 2 FN + 2 Enlarges the icon size on the desktop
or the font sizes within one of the
supported application windows.
FN + Space FN + Space Changes the display resolution.
Some functions shows the toast notification at the edges of the screen.
Those toast notifications are enabled by default. You can disable them in
the Function Key settings.
To access it, click System Settings -> Function Key under TOSHIBA
group in All apps.
User's Manual 4-4
Page 52

Windows special keys
The keyboard provides two keys that have special functions in Windows,
the Windows® logo key activates the Start memu while the application key
has the same function as the secondary (right) mouse button.
This key activates the Windows Start menu.
This key has the same function as the secondary (right) mouse button.
Generating ASCII characters
Not all ASCII characters can be generated using normal keyboard
operation, but you are able to generate these characters using their
specific ASCII codes.
1. Hold down the ALT key.
2. Using the numeric keypad, type the ASCII code of the character you
require.
3. Release ALT - the ASCII character will appear on the display screen.
Optical disc drive
The computer may be installed with a DVD Super Multi drive. When the
computer is accessing an optical disc, the indicator on the drive glows.
Formats
The drives support the following formats.
DVD Super Multi drive
The drive supports the following formats: CD-ROM, DVD-ROM, DVDVideo, CD-DA, CD-Text, Photo CD™ (single/multi-session), CD-ROM
Mode 1/Mode 2, CD-ROM XA Mode 2 (Form1, Form2), Enhanced CD (CDEXTRA), Addressing Method 2, DVD-R, DVD-RW, DVD+R, DVD+RW,
DVD-RAM, DVD-R DL (Format1), DVD+R DL.
Using the optical disc drive
The full-size drive provides high-performance execution of disc based
programs. You can run either 12 cm (4.72") or 8 cm (3.15") discs without
an adaptor.
Use the DVD playback application to view DVD-Video discs.
For precautions on writing to discs, refer to the Writing discs section.
User's Manual
4-5
Page 53

To load discs, do the following:
2
1
1
1. When the computer’s power is on, press the eject button to open the
disc tray slightly.
2. Grasp the disc tray gently and pull until it is fully opened.
Figure 4-2 Pressing the eject button and pulling the disc tray open
1. Eject button 2. Disc tray
3. Lay the disc, label side up, in the disc tray.
Figure 4-3 Inserting a disc
User's Manual
1. Laser lens
When the disc tray is fully opened, the edge of the computer covers the
disc tray slightly. Therefore, you must turn the disc at an angle when you
place it in the disc tray. After seating the disc, however, make sure it lies
flat.
Do not touch the laser lens or any portion of its surrounding casing as
this could cause misalignment.
Prevent foreign objects from entering the drive. Check the surface of
the disc tray, especially the area behind the front edge of the disc tray,
to make sure there are no such objects before closing the drive.
4. Press gently at the center of the disc until you feel it click into place.
The disc should lie below the top of the spindle, flush with the spindle
base.
5. Push the center of the disc tray to close it. Press gently until it locks
into place.
4-6
Page 54
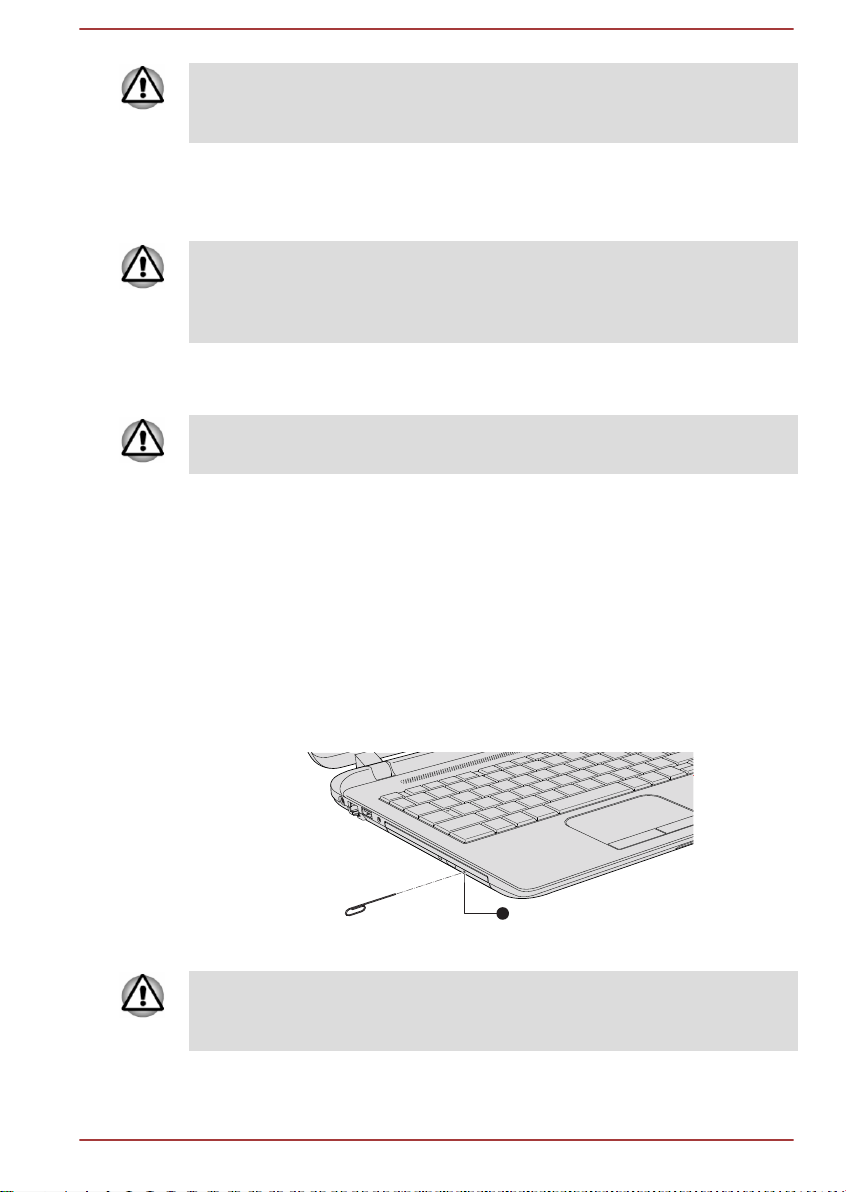
If the disc is not seated properly when the disc tray is closed, the disc might
1
Φ1.0mm
be damaged. Also, the disc tray might not open fully when you press the
eject button.
Removing discs
To remove the disc, do the following:
Do not press the eject button while the computer is accessing the optical
disc drive. Wait for the optical disc drive indicator to go out before you open
the disc tray. Also, if the disc is spinning when you open the disc tray, wait
for it to stop before you remove it.
1. To pop the disc tray partially open, press the eject button. Gently pull
the disc tray out until it is fully opened.
When the disc tray pops open slightly, wait a moment to make sure the
disc has stopped spinning before pulling the disc tray fully open.
2. The disc extends slightly over the sides of the disc tray so you can
grasp it. Gently lift out the disc.
3. Push the center of the disc tray to close it. Press gently until it locks
into place.
How to remove disc when the disc tray will not open
Pressing the eject button will not open the disc tray when the computer
power is off. If the power is off, you can open the disc tray by inserting a
slender object (about 20 mm) such as a straightened paper clip into the
manual eject hole near the eject button.
Figure 4-4 Manual release with the eject hole
1. Manual eject hole
Turn off the power before you use the manual eject hole. If the disc is
spinning when you open the disc tray, the disc could fly off the spindle and
cause injury.
User's Manual 4-7
Page 55

Writable discs
This section describes the types of writable discs. Check the specifications
of your drive to see the types of discs it can write.
CDs
CD-R discs can be written only once. The recorded data cannot be
erased or changed.
CD-RW discs including multi speed CD-RW discs, high-speed CD-RW
discs and ultra-speed CD-RW discs can be recorded more than once.
DVDs
DVD-R, DVD+R, DVD-R DL and DVD+R DL discs can be written only
once. The recorded data cannot be erased or changed.
DVD-RW, DVD+RW and DVD-RAM discs can be recorded more than
once.
Writing discs
You can use the DVD Super Multi drive to write data to either CD-R, CDRW, DVD-R, DVD-R DL, DVD-RW, DVD+R, DVD+R DL, DVD+RW or
DVD-RAM discs.
When writing information to media using an optical drive, you should
always ensure that you connect the AC adaptor to a live electrical outlet. It
is possible that, if data is written while powered by the battery pack, the
write process might sometimes fail due to low battery power. In these
instances, data loss might occur.
User's Manual
Important message
Before you write or rewrite to any of the media supported by the optical
disc drive, please read and follow all of the setup and operating instructions
in this section. If you fail to do so, you may find that the optical disc drive
may not function properly, and you may fail to write or rewrite information
successfully - this may cause you to either lose data or incur other damage
to the drive or media.
Disclaimer
TOSHIBA does not assume responsibility for the following:
Damage to any disc that might be caused by writing or rewriting with
this product.
Any change or loss of the recorded contents of media that might be
caused by writing or rewriting with this product, or for any business
profit loss or business interruption that might be caused by the change
or loss of the recorded contents.
4-8
Page 56

Damage that might be caused by using third party equipment or
software.
Given the technological limitations of current optical disc writing drives, you
might experience unexpected writing or rewriting errors due to disc quality
or problems with hardware devices. In view of this, it is good practice to
make two or more copies of important data, in case of any undesired
change or loss of the recorded contents.
Before writing or rewriting
Based on TOSHIBA limited compatibility testing, we suggest the
following manufacturers of disc media, however, it must be noted that
disc quality can affect write or rewrite success rates. Also be aware
that in no event does TOSHIBA guarantee the operation, quality or
performance of any disc.
CD-R:
TAIYO YUDEN CO., Ltd.
MITSUBISHI KAGAKU MEDIA CO., LTD.
CD-RW: (Multi-Speed, High-Speed and Ultra-Speed)
MITSUBISHI KAGAKU MEDIA CO., LTD.
DVD-R:
DVD Specifications for Recordable Disc for General Version 2.0
TAIYO YUDEN Co.,Ltd. (for 8x and 16x speed media)
MITSUBISHI KAGAKU MEDIA CO., LTD. (for 8x and 16x speed media)
DVD-R DL:
MITSUBISHI KAGAKU MEDIA CO., LTD. (for 4x and 8x speed media)
DVD+R:
MITSUBISHI KAGAKU MEDIA CO., LTD. (for 8x and 16x speed media)
DVD+R DL:
MITSUBISHI KAGAKU MEDIA CO., LTD. (for 8x speed media)
DVD-RW:
DVD Specifications for Recordable Disc for Version 1.1 or version
1.2
MITSUBISHI KAGAKU MEDIA CO., LTD. (for 4x and 6x speed media)
DVD+RW:
MITSUBISHI KAGAKU MEDIA CO., LTD. (for 4x and 8x speed media)
User's Manual 4-9
Page 57

DVD-RAM: (DVD Super Multi drive only)
DVD Specifications for DVD-RAM Disc for Version 2.0, Version 2.1 or
Version 2.2
Panasonic Corporation (for 3x and 5x speed media)
Some types and formats of DVD-R DL and DVD+R DL discs might be
unreadable.
Disc created in DVD-R DL format4 (Layer Jump Recording) cannot be
read.
When writing or rewriting
Please observe the following points while you write or rewrite data to a
media:
Always copy data from the hard disk drive to the optical media. Do not
use the cut-and-paste function as the original data will be lost if there
is a write error.
Do not perform any of the following actions:
Change users in the Operating Systems.
Operate the computer for any other function, including such tasks
as using a mouse or Touch Pad, or closing/opening the display
panel.
Start a communication application.
Apply impact or vibration to the computer.
Install, remove or connect external devices, including such items
as a memory media card, USB device, external monitor or an
optical digital device.
Use the audio/video control button to reproduce music or voice.
Open the optical disc drive.
Do not use shut down, log off, Sleep Mode or Hibernation Mode
functions while writing or rewriting.
Make sure that the write/rewrite operation is completed before going
into either Sleep Mode or Hibernation Mode (You can remove an
optical media on the optical disc drive after writing is completed).
If the media is of poor quality, or is dirty or damaged, writing or
rewriting errors might occur.
Set the computer on a level surface and avoid places subject to
vibration such as airplanes, trains or cars. In addition, do not use the
computer on an unstable surface such as a stand.
Keep mobile phones and other wireless communication devices away
from the computer.
User's Manual
4-10
Page 58

CyberLink PowerDVD for TOSHIBA
Please be aware of the following limitations when you use the CyberLink
PowerDVD for TOSHIBA:
Notes on use
This software can only be used on Windows operating system.
CyberLink PowerDVD for TOSHIBA is only provided with models
configured with a DVD Super Multi drive.
CyberLink PowerDVD for TOSHIBA software is supported for
playback of DVD and video file.
Frame dropping, audio skipping or out of sync audio and video may
occur during playback of some video titles.
Close all other applications when using the CyberLink PowerDVD for
TOSHIBA. Do not open any other applications or carry out any other
operations during video playback. Playback may stop or not function
properly in some situations.
Unfinalized DVDs created on home DVD recorders may not be
playable on the computer.
Use DVD-Video discs with a region code which is either "the same as
the factory default setting" (if applicable) or "ALL".
Do not playback video while watching or recording television programs
using other applications. Doing so may cause video playback or
television program recording errors. In addition, if prescheduled
recording starts during video playback it may cause video playback or
television program recording errors. Please view video during times
when there is no recording prescheduled.
The resume function cannot be used with some discs on the
CyberLink PowerDVD for TOSHIBA.
It is recommended the AC adaptor be connected when playing video.
Power saving features may interfere with smooth playback. When
playing video using battery power, set the Power Options to "Balance".
The screen saver is disabled during video playback using the
CyberLink PowerDVD for TOSHIBA. The computer will not
automatically go into Hibernation, or Sleep mode.
Do not configure the Display automatic power off function to run while
the CyberLink PowerDVD for TOSHIBA is running.
Do not switch to Hibernation or Sleep Mode when running the
CyberLink PowerDVD for TOSHIBA.
Do not lock the computer using the Windows logo ( ) + L keys
when running the CyberLink PowerDVD for TOSHIBA.
The CyberLink PowerDVD for TOSHIBA does not have a parental
control function.
Carry out the installation/uninstallation of the CyberLink PowerDVD for
TOSHIBA under a user account with administrator rights.
Do not change Windows Users while CyberLink PowerDVD for
TOSHIBA is running.
User's Manual
4-11
Page 59

For some DVD or video files, using the control window to change the
audio track will also change the subtitle track.
The playback of some media files may not be normal by this player.
This may also happen when using Windows Media Player and Video
app.
Display Devices & Audio
If the video image is not displayed on an external display or television,
stop the CyberLink PowerDVD for TOSHIBA, and change the screen
resolution. To change the screen resolution, click Control Panel ->
Appearance and Personalization -> Display -> Adjust resolution
under Windows System group in All apps. However, video cannot be
output to some external displays and televisions due to output or
playback conditions.
When viewing video on an external display or TV, change the display
device before playing. Video can be played only on internal LCD
displays or external displays. In Clone mode (Dual View), CyberLink
PowerDVD for TOSHIBA might not function properly.
Do not change the screen resolution while running the CyberLink
PowerDVD for TOSHIBA.
Do not change the display device while running the CyberLink
PowerDVD for TOSHIBA.
Starting CyberLink PowerDVD for TOSHIBA
Use the following procedure to start CyberLink PowerDVD for TOSHIBA.
1. Insert a DVD-Video in the optical disc drive while the operating system
is running.
When a DVD-Video disc is set in the DVD drive (for models with DVD
drive), CyberLink PowerDVD for TOSHIBA might start automatically.
2. Click CyberLink PowerDVD for TOSHIBA under TOSHIBA group in
All apps to start CyberLink PowerDVD for TOSHIBA.
Operating CyberLink PowerDVD for TOSHIBA
Notes on Using CyberLink PowerDVD for TOSHIBA.
Screen display and available features might vary amongst videos and
scenes.
Open CyberLink PowerDVD for TOSHIBA Manual
CyberLink PowerDVD for TOSHIBA features and instructions are detailed
in CyberLink PowerDVD for TOSHIBA Help. Use the following procedure to
open CyberLink PowerDVD for TOSHIBA Help.
Press the F1 key when CyberLink PowerDVD for TOSHIBA is launched.
User's Manual
4-12
Page 60

3D Playback on an External 3D Device
3D playback on an external 3D device feature is only provided with some
models.
Effect of 3D can be shown only on an external 3D devices connected via
an HDMI output. It cannot be shown on the internal display. In order for 3D
playback to work on external display/TV, you need a 3D enabled display/
TV that has an HDCP compliant HDMI port.
3D playback feature supports the following resolutions:1920x1080 24Hz
and 1280x720 60Hz.
Please change the Screen Resolution to one of the above before using 3D
playback function.
Important Safety Information for 3D Function
Please refrain from or stop viewing if you feel ill or experience
discomfort before or while watching 3D video images.
Please refrain from viewing 3D video images if you experience
convulsions, photosensitivity reaction, or heart disease.
Due to the possibility of impact on vision development, viewers of 3D
video images should be aged 6 or older. Children and teenagers may
be more susceptible to health issues associated with viewing in 3D
and should be closely supervised to avoid prolonged viewing without
rest.
Avoid use of the 3D function when under the influence of alcohol.
Please read the user’s manual that comes with the computer carefully
before using the 3D playback function.
The 3D effect differs between individuals.
Battery
Battery pack
User's Manual
This section explains battery types, use, recharging methods and handling.
When the AC adaptor is not connected, the main power source of the
computer is this lithium ion battery pack, also referred to in this manual as
the main battery.
Real-Time Clock (RTC) function
The Real-Time Clock (RTC) function is supported. The main battery
provides power for the internal real-time clock and calendar function and
also maintains the system configuration while the computer is turned off. If
the RTC lasting time completely runs out, the system will lose this
information and the real-time clock and calendar will stop working.
4-13
Page 61

You can change the Real-Time Clock settings in the BIOS setup utility.
Refer to Troubleshooting for further information.
Care and use of the battery pack
This section provides the important safety precautions in order to handle
your battery pack properly.
Refer to the enclosed Instruction Manual for Safety and Comfort for
detailed precautions and handling instructions.
Charge the battery pack only in an ambient temperature from 5 through 35
degrees Celsius. Otherwise, the electrolyte solution might leak, battery
pack performance might deteriorate, and the battery life might be
shortened.
Charging the batteries
When the power in the battery pack becomes low, the DC IN/Battery
indicator flashs amber to indicate that only a few minutes of battery power
remain. If you continue to use the computer while the DC IN/Battery
indicator flashes, the computer enables Hibernation Mode so that you do
not lose any data, and automatically turn itself off.
You must recharge a battery pack when it becomes discharged.
Procedures
To recharge a battery pack, connect the AC adaptor to the DC IN 19V jack
and plug the other end into a working outlet.The DC IN/Battery indicator
glows amber while the battery is being charged.
Charging Time
The following table shows the approximate time required to charge an
exhausted battery fully.
Battery type Power off Power on
Battery pack (32Wh, 4
cell)
Battery pack (45Wh, 4
cell)
Be aware that the charging time when the computer is on is affected by
ambient temperature, the temperature of the computer and how you are
using the computer. If you make heavy use of external devices for
example, the battery might scarcely charge at all during operation.
User's Manual 4-14
about 3 hours about 12 hours
about 4 hours about 12 hours
Page 62

Battery charging notice
The battery might not begin charging immediately under the following
conditions:
The battery is extremely hot or cold (if the battery is extremely hot, it
might not charge at all). To ensure the battery charges to its full
capacity, charge it at room temperature of between 5°C to 35°C (41–
95°F).
The battery is nearly completely discharged. In this instance, leave the
AC adaptor connected for a few minutes and the battery should begin
charging.
The DC IN/Battery indicator might show a rapid decrease in battery
operating time when you try to charge a battery under the following
conditions:
The battery has not been used for a long time.
The battery has completely discharged and been left in the computer
for a long time.
In such cases, do the following:
1. Fully discharge the battery by leaving it in the computer with the power
on until the system automatically turns itself off.
2. Connect the AC adaptor to the DC IN 19V jack of the computer, and to
a wall outlet that is supplying power.
3. Charge the battery until the DC IN/Battery indicator glows white.
Repeat these steps two or three times until the battery recovers normal
capacity.
Monitoring battery capacity
Remaining battery power can be monitored using the following methods.
Clicking the battery icon on the Windows Taskbar
Via the Battery Status in the Windows Mobility Center window
Wait at least 16 seconds after turning on the computer before trying to
monitor the remaining operating time. This is because the computer
needs this time to check the remaining capacity of the battery and
then calculate the remaining operating time, based on this together
with the current power consumption.
Be aware that the actual remaining operating time might differ slightly
from the calculated time.
With repeated discharges and recharges, the battery capacity will
gradually decrease. In view of this, it is noted that an often used, older
battery will not operate for as long as a new battery even when both
are fully charged.
User's Manual 4-15
Page 63

Maximizing battery operating time
The usefulness of a battery depends on how long it can supply power on a
single charge, while how long the charge lasts in a battery depends on:
Processor speed
Screen brightness
System Sleep Mode
System Hibernation Mode
Display power off period
Hard Disk Drive power off period
How often and for how long you use the Hard Disk Drive and external
disk drives, for example, optical disc
How much charge the battery contained to begin with
How you use optional devices, such as a USB device, to which the
battery supplies power
Whether you enable Sleep Mode, which can conserve battery power if
you are frequently turning the computer off and on
Where you store your programs and data.
Whether you close the display panel when you are not using the
keyboard - closing the display saves power.
The environmental temperature - operating time decreases at low
temperatures.
Whether you enable Sleep and Charge function.
Batteries exhausted time
When you turn off the power of your computer with batteries fully charged,
the batteries exhaust within the following approximate period.
Battery type Sleep Mode Shut Down Mode
Battery pack (32Wh, 4
cell)
Battery pack (45Wh, 4
cell)
Extending battery life
To maximize the life of your battery packs, do the following at least once a
month.
1. Turn off the computer's power.
2. Disconnect the AC adaptor and turn on the computer's power. If it
does not turn on then go to Step 4.
User's Manual
about 1~4 days
(depends on the model
you purchase)
about 1.5~5 days
(depends on the model
you purchase)
about 22 days
about 30 days
4-16
Page 64

LAN
3. Operate the computer on battery power for five minutes. If you find
that the battery pack has at least five minutes of operating time,
continue operating until the battery pack is fully discharged. However,
if the DC IN/Battery indicator flashes or there is some other warning
to indicate a low battery condition, go to Step 4.
4. Connect the AC adaptor to the DC IN 19V jack of the computer, and to
a wall outlet that is supplying power. The DC IN/Battery indicator
glows orange to indicate that the battery pack is being charged.
However, if DC IN/Battery indicator does not glow, this indicates that
power is not being supplied. Check the connections for the AC adaptor
and the power cord.
5. Charge the battery pack until the DC IN/Battery indicator glows white.
The computer has built-in support for Ethernet LAN (10 megabits per
second, 10BASE-T), Fast Ethernet LAN (100 megabits per second,
100BASE-TX) or Gigabit Ethernet LAN (1000 megabits per second,
1000BASE-T).
This section describes how to connect/disconnect to a LAN.
The Wake-up on LAN function consumes power even when the
system is off. Leave the AC adaptor connected while using this
feature.
The Link speed (10/100/1000 megabits per second) changes
automatically depending on the network conditions (connected device,
cable or noise and so on).
LAN cable types
The computer must be configured properly before connecting to a LAN.
Logging onto a LAN using the computer’s default settings could cause a
malfunction in LAN operation. Check with your LAN administrator regarding
set-up procedures.
If you are using Gigabit Ethernet LAN (1000 megabits per second,
1000BASE-T), be sure to connect with a CAT5e cable or higher. You
cannot use a CAT3 or CAT5 cable.
If you are using Fast Ethernet LAN (100 megabits per second, 100BASETX), be sure to connect with a CAT5 cable or higher. You cannot use a
CAT3 cable.
If you are using Ethernet LAN (10 megabits per second, 10BASE-T), you
can connect with a CAT3 or higher cable.
Connecting the LAN cable
To connect the LAN cable, do the following:
User's Manual
4-17
Page 65
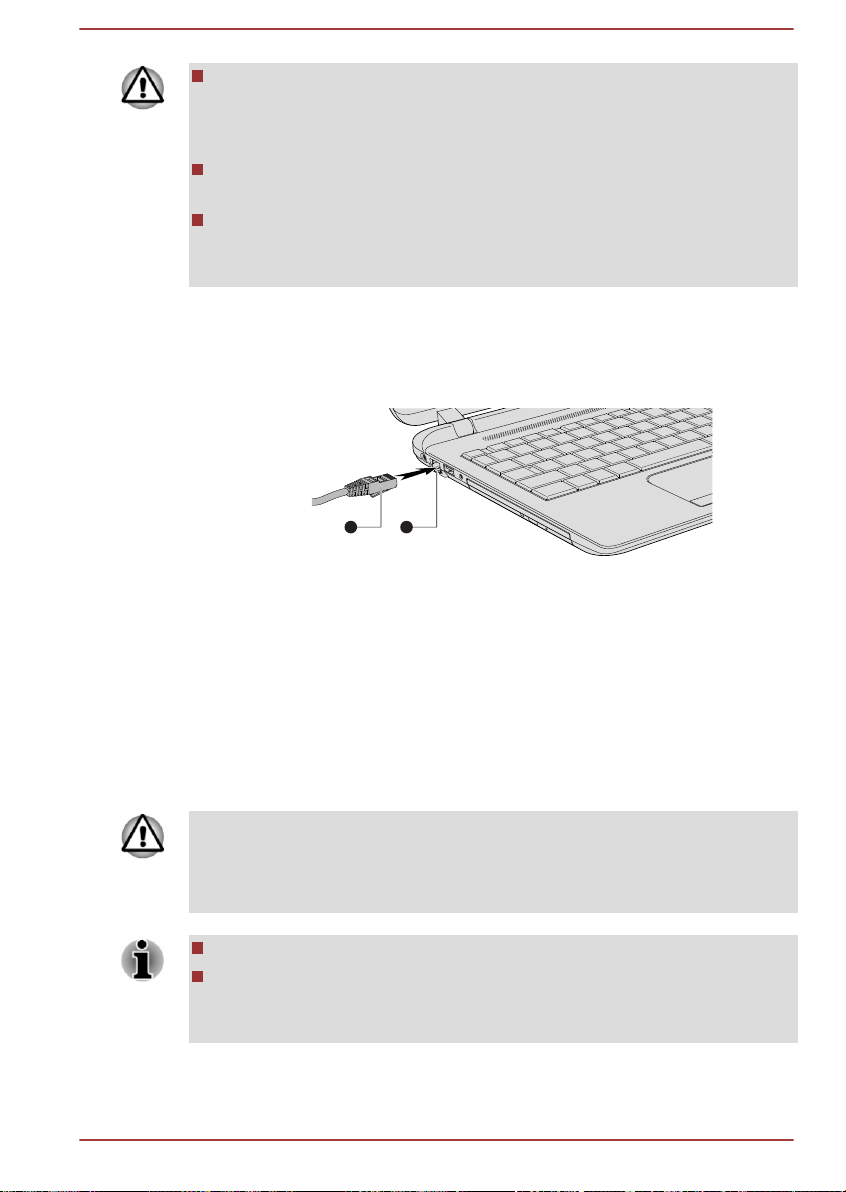
Connect the AC adaptor before connecting the LAN cable. The AC
2 1
adaptor must remain connected during LAN use. If you disconnect the
AC Adaptor while the computer is accessing a LAN, the system might
hang up.
Do not connect any other cable to the LAN jack except the LAN cable.
Otherwise, malfunctions or damage might occur.
Do not connect any power supplying device to the LAN cable that is
connected to the LAN jack. Otherwise, malfunctions or damage might
occur.
1. Turn off the power to all external devices connected to the computer.
2. Plug one end of the cable into the LAN jack. Press gently until you
hear the latch click into place.
Figure 4-5 Connecting the LAN cable
1. LAN jack 2. LAN cable
3. Plug the other end of the cable into a LAN hub connector or router.
Check with your LAN administrator and hardware or software vendor
before using or configuring a network connection.
Memory media
The computer is equipped with a memory media slot that can
accommodate some kinds of memory media with various memory
capacities so that you can easily transfer data from devices, such as digital
cameras and Personal Digital Assistants.
Keep foreign objects out of the memory media slot. Never allow metal
objects, such as screws, staples and paper clips, to enter the computer or
Keyboard. Foreign metal objects can create a short circuit, which can
cause computer damage and fire, possibly resulting in serious injury.
An adaptor is required to use miniSD/microSD Card.
Note that not all memory media have been tested and verified to work
correctly. Therefore, it is not possible to guarantee that all memory
media can operate properly.
User's Manual 4-18
Page 66

Figure 4-6 Examples of memory media
Secure Digital (SD) Card microSD card adaptor and
microSD card
MultiMediaCard (MMC)
Points to note about the memory media card
SD/SDHC/SDXC memory cards comply with SDMI (Secure Digital Music
Initiative), which is a technology adopted to prevent unlawful copy or
playback of digital music. For this reason, you cannot copy or play back
protected material on another computer or other device, and you cannot
reproduce any copyrighted material except for your personal enjoyment.
The following is a simple explanation for distinguishing SD memory cards
from SDHC memory cards and SDXC memory cards.
SD, SDHC and SDXC memory cards appear the same externally.
However, the logo on memory cards is different, so pay careful
attention to the logo when purchasing.
The SD memory card logo is (
The SDHC memory card logo is ( ).
The SDXC memory card logo is ( ).
).
The maximum capacity of SD memory cards is 2 GB. The maximum
capacity of SDHC memory cards is 32 GB. The maximum capacity of
SDXC memory cards is 128 GB.
Memory media format
New media cards are formatted according to specific standards. If you wish
to reformat a media card, be sure to do so with a device that uses media
cards.
Formatting a memory media card
Memory media cards are sold already formatted in conformity to specific
standards. If you reformat a memory card, be sure to reformat it with a
device such as digital camera or digital audio player that uses the memory
cards, not with the format command provided within Windows.
User's Manual
4-19
Page 67
To format all areas of the memory card, including the protected area, you
must to obtain an appropriate application that applies the copy protection
system.
Media care
Observe the following precautions when handling the card.
Do not twist or bend cards.
Do not expose cards to liquids or store in humid areas or lay media
close to containers of liquid.
Do not touch the metal part of a card or expose it to liquids or let it get
dirty.
After using card, return it to its case.
The card is designed so that it can be inserted only one way. Do not
try to force the card into the slot.
Do not leave a card partially inserted in the slot. Press the card until
you hear it click into place.
Set the write-protect switch to the lock position, if you do not want to
record data.
Memory cards have a limited lifespan, so it is important to back up
important data.
Do not write to a card if the battery power is low. Low power could
affect writing accuracy.
Do not remove a card while read/write is in progress.
For more details on using memory cards, see manuals accompanying the
cards.
About the write-protect feature
Memory media cards have a write-protect function.
SD Card (SD memory card, SDHC memory card and SDXC memory
card)
Set the write-protect switch to the lock position, if you do not want to record
data.
Inserting memory media
The following instructions apply to all types of supported media devices. To
insert memory media, do the following:
1. Turn the memory media so that the contacts (metal areas) face down.
2. Insert the memory media into the memory media slot on the computer.
User's Manual
4-20
Page 68
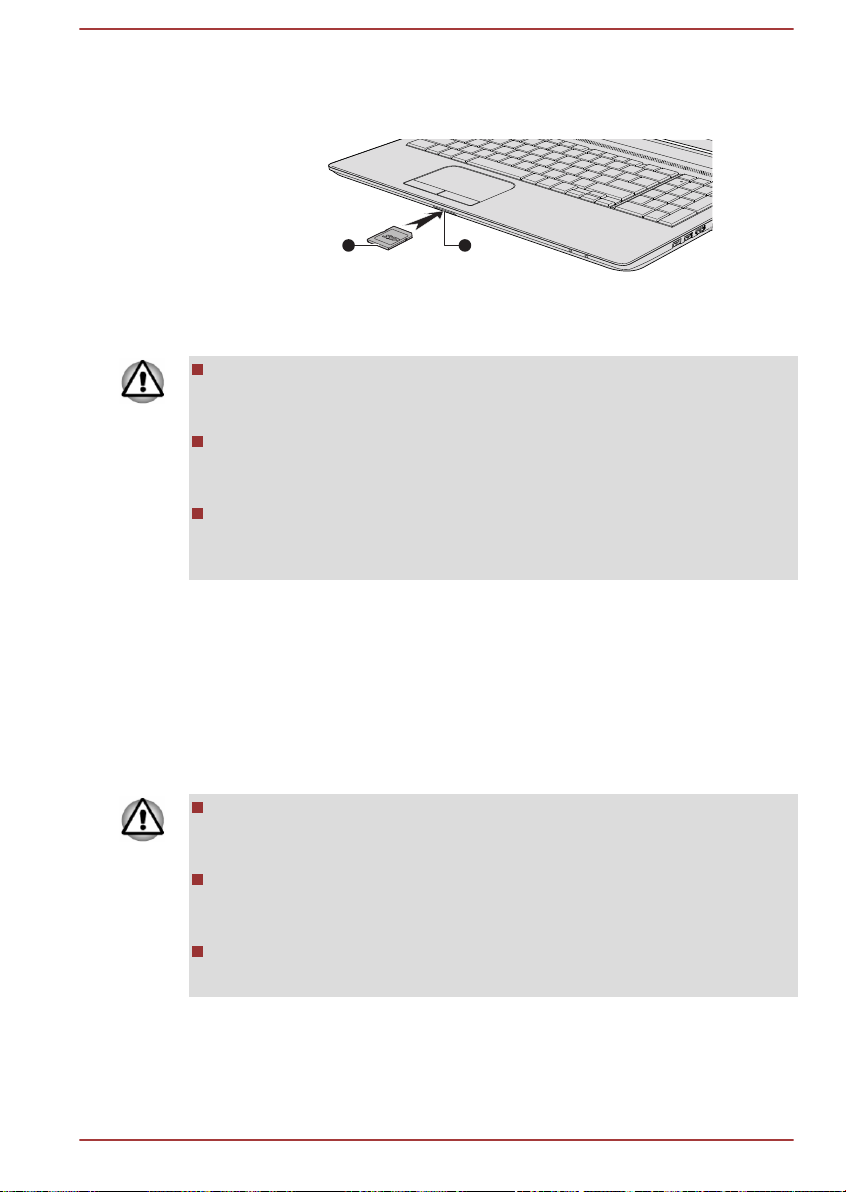
3. Press the memory media gently to ensure a firm connection is made.
12
The memory media will be partially out of the slot.
Figure 4-7 Inserting memory media
1. Memory media slot 2. Memory media
Product appearance depends on the model you purchased.
Make sure that the memory media is oriented properly before you
insert it. If you insert the media in wrong direction, you might not be
able to remove it.
When inserting the memory media, do not touch the metal contacts.
You could expose the storage area to static electricity, which can
destroy data.
Do not tturn off the computeror switch to Sleep Mode or Hibernation
Mode while files are being copied . Failure to do so might cause data
loss.
Removing memory media
The following instructions apply to all types of supported media devices. To
remove memory media, do the following:
1. Click the Safely Remove Hardware and Eject Media icon on the
Windows Taskbar.
2. Select memory media.
3. Grasp the media and remove it.
If you remove the memory media or turn off the power while the
computer is accessing the memory media, you might lose data or
damage the media.
Do not remove the memory media while the computer is in Sleep or
Hibernation Mode. The computer could become unstable or data in
the memory media could be lost.
Do not remove only the miniSD/microSD Card while leaving the
adaptor in the memory media slot.
External Display
Your computer video capabilities can be enhanced with additional displays.
User's Manual
4-21
Page 69
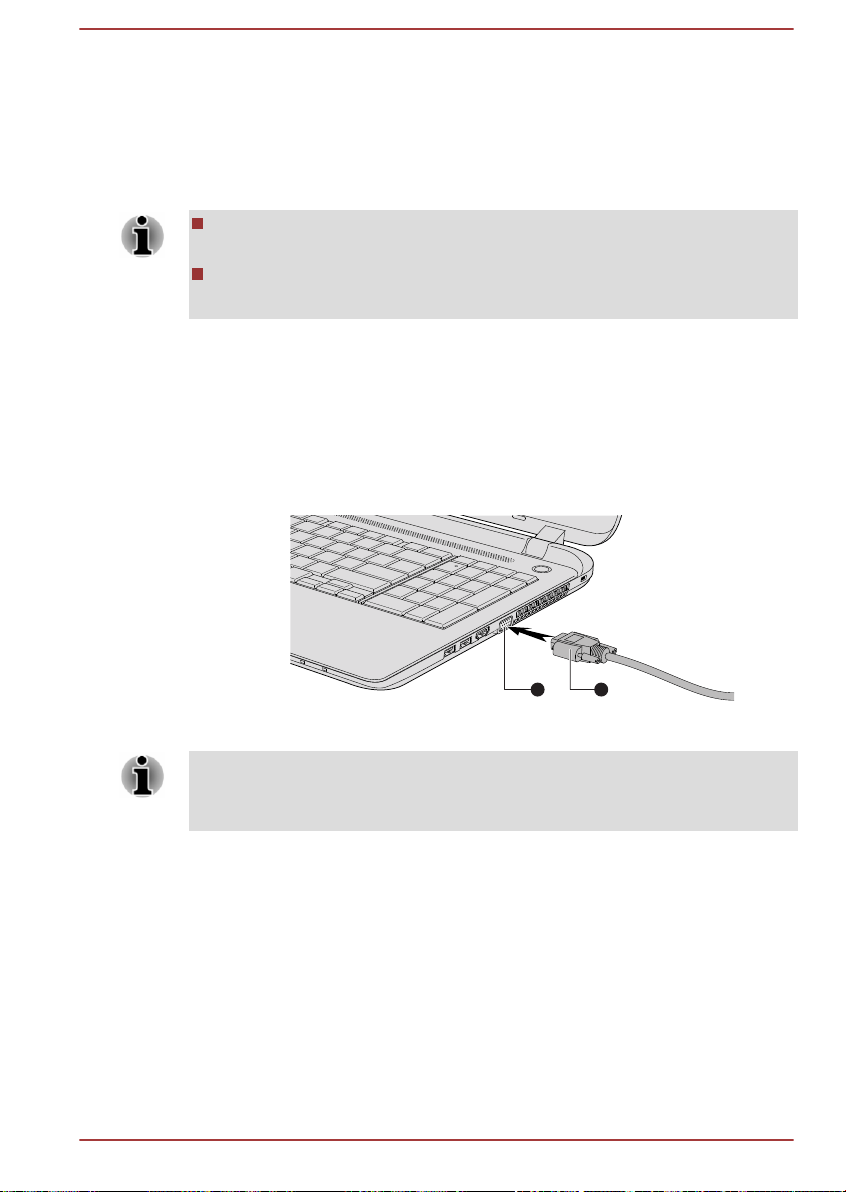
External displays allow you to share your desktop or extend the desktop
21
area.
Connecting an external display
Your computer comes with a built-in display, but you can also connect
other external displays via available ports on the computer.
Some models might include the Triple Monitor function that can
display image on Triple Monitor independently.
As the port operation of all external display devices have not been
confirmed, some devices may not function properly.
External RGB monitor port
An external analog monitor can be connected to the External RGB monitor
port on the computer. To connect an external analog monitor, do the
following:
1. Connect the RGB cable to the External RGB monitor port.
Figure 4-8 Connecting the RGB cable to the External RGB monitor port
User's Manual
1. External RGB monitor port 2. RGB cable
There are no fastening screws for an external monitor cable on the
External RGB monitor port. However, external monitor cables which have
connectors with fastening screws can still be used.
2. Turn the external monitor's power on.
When you turn on the power, the computer automatically recognizes the
monitor and determines whether it is a color or monochrome device.
When displaying desktop on an external analog monitor, desktop is
sometimes displayed on the center of the monitor with black bars around
desktop (with small size).
At that time, please read the manual of the monitor and set the display
mode which is supporting at the monitor. Then it will be displayed with
suitable size with correct aspect ratio.
4-22
Page 70
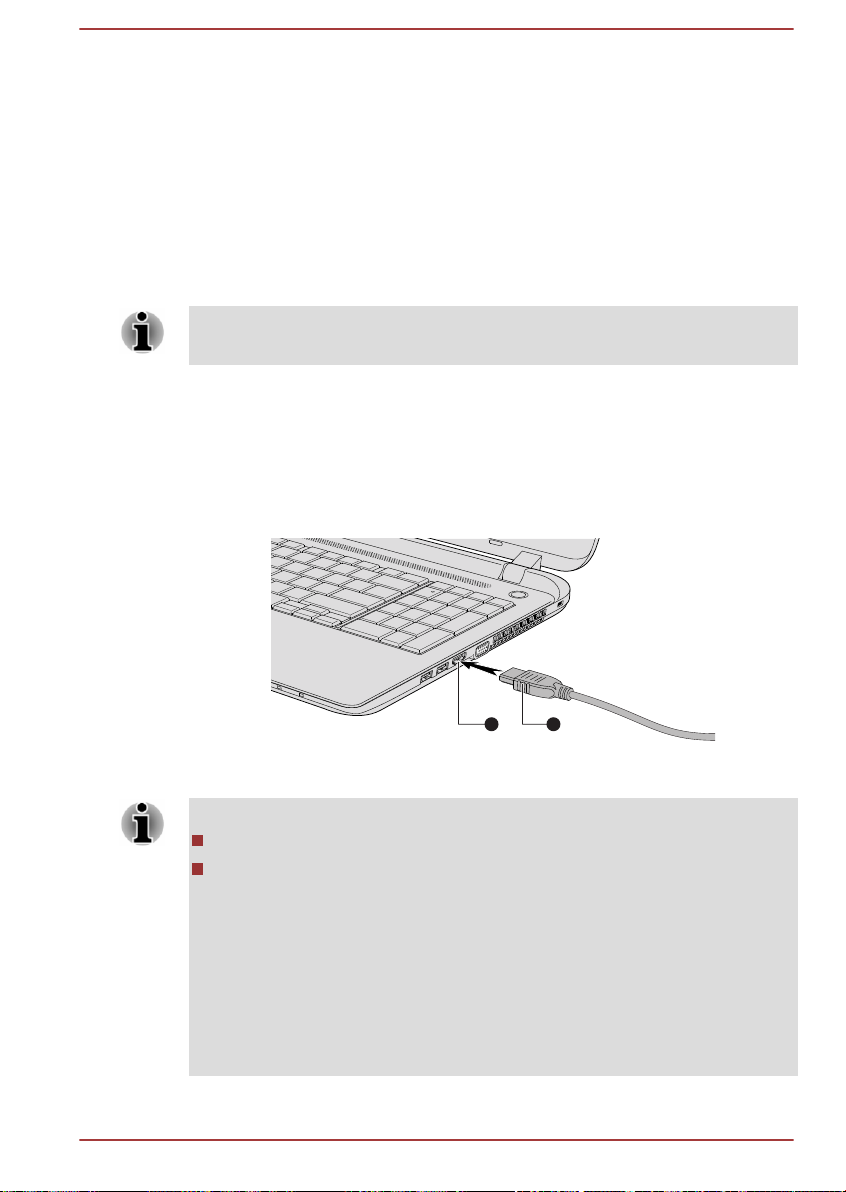
The HDMI out port
21
HDMI (High-Definition Multimedia Interface) port digitally transfers both
video and audio data without reducing the quality. HDMI-compatible
external display devices including televisions can be connected via the
HDMI port.
Some models can support ultra high definition (3840 x 2160 pixels) display
on compatible external display devices via HDMI output port. To use this
function, you must purchase an HDMI cable (corresponding to 3840x2160
pixels or higher).
To connect an HDMI-compatible display device, do the following:
To connect a device to the HDMI out port, you must purchase a suitable
HDMI cable.
1. Plug one end of the HDMI cable into the HDMI in port of the HDMI
display device.
2. Plug the other end of the HDMI cable into the HDMI out port on your
computer.
3. Turn the HDMI display device's power on.
Figure 4-9 Connecting the HDMI out port
1. HDMI out port 2. HDMI cable
Do not plug/unplug an HDMI device under the following conditions:
The system is starting up.
The system is shutting down.
When you connect a television or external monitor to the HDMI port, the
display output device is set to HDMI.
When you unplug the HDMI cable and re-plug it, please wait at least 5
seconds before you re-plug the HDMI cable again.
When you change the display output device, the playback device may not
switch automatically. In this case, in order to set the playback device to the
same device as the display output device, please adjust the playback
device manually by the following steps:
User's Manual 4-23
Page 71

1. Click Control Panel -> Hardware and Sound -> Sound under
Windows System group in All apps.
2. In the Playback tab, select the playback device which you want to
switch to.
3. To use the internal speakers on your computer, select Speakers. To
use the television or the external monitor that you have connected to
the computer, select a different playback device.
4. Click the Set Default button.
5. Click OK to close the Sound dialog.
Settings for display video on HDMI
To view video on the HDMI display device, be sure to configure the
following settings otherwise you may find that nothing is displayed.
Be sure to use the function key to select the display device before starting
to play video. Do not change the display device while playing video.
Do not change the display device under the following conditions.
While data is being read or written
While communication is being carried out
Selecting HD Format
To select the display mode, do the following:
1. Click Control Panel -> Appearance and Personalization -> Display
-> Change display settings -> Advanced settings -> List All
Modes under Windows System group in All apps.
2. Select one of the modes at List All Modes.
Wireless display
Your computer may support Wireless display, a wireless technology which
utilizes Wi-Fi to allow the computer to be wirelessly connected to external
displays including TVs as extended screens. With Wireless display,
documents, streamed/local media contents or other online contents can be
shared wirelessly with others.
To use Wireless display, either one of the following devices is required:
To connect to an external display wirelessly, do the following:
1. Go to Settings and click Devices -> Connected devices.
User's Manual
A compatible external display with built-in support for Wireless display.
An external display with HDMI port and a Wireless display adaptor.
The Wireless display adaptor is a device that connects to the external
display via HDMI port and can receive Wi-Fi signals from your
computer.
4-24
Page 72

2. Click Add a device. Your computer starts searching for the Wireless
1
2
display device.
3. After the Wireless display device is searched, follow the on-screen
instructions to finish connection.
After the connection is established, the name of the Wireless display
device will appear under Projectors.
To disconnect the Wireless display device, click the Wireless display
device name and then click Remove device.
Changing the display settings
After one or more external displays are connected, the operating system
can automatically detect, identify, and set up the display settings.
You can also manually manage how the external displays will work and
change the display settings by pressing P while holding down the
Windows (
) key. If you disconnect the external display before you turn
off the computer's power, be sure to switch to the internal display.
Security lock
A security lock enables you to anchor your computer to a desk or other
heavy object in order to help prevent unauthorized removal or theft. The
computer has a security lock slot on its right side into which you can attach
one end of the security cable, while the other end attaches to a desk or
similar object. The methods used for attaching security cables differ from
product to product. Refer to the instructions for the product you are using
for more information.
Connecting the security lock
In order to connect a security cable to the computer, do the following:
1. Turn the computer so its right side faces you.
2. Align the security cable with the lock slot and secure it in place.
Figure 4-10 Security lock
1. Security lock slot
User's Manual 4-25
2. Security lock
Page 73

Optional TOSHIBA Accessories
To make your computer even more powerful and convenient to use, you
can add a number of options and accessories. For reference, the following
list details some of the items that are available from your reseller or
TOSHIBA dealer:
Universal AC Adaptor If you frequently use your computer at more than
one site, it might be convenient to purchase an
additional AC adaptor to be kept at each site in
order to remove the need to carry the adaptor
with you always.
Sound System and Video mode
This section describes some of the audio control functions.
Volume Mixer
The Volume Mixer utility lets you control the audio volume for playback of
devices and applications under Windows.
To launch the Volume Mixer utility, and right-click on the speaker icon
on the Windows Taskbar, and then select Open Volume Mixer from
the sub menu.
To adjust the volume level of speakers or headphones, move the
Speakers slider.
To adjust the volume level of an application that you are using, move
the slider for the corresponding application.
Microphone Level
To change the microphone recording level, do the following:
1. Right-click on the speaker icon on the Windows Taskbar, and select
Recording devices from the sub menu.
2. Select Microphone, and click Properties.
3. On the Levels tab, move the Microphone slider to increase or
decrease the microphone volume level.
If you feel the microphone volume level is inadequate, move the
Microphone Boost slider to a higher level.
Audio Enhancements
To apply the sound effects for your current speaker, do the following:
1. Right-click on the Speakers icon on the Windows Taskbar, and then
select Playback devices from the sub menu.
2. Select Speakers, and click Properties.
3. On the Enhancements tab, select the sound effects you would like,
and click Apply.
User's Manual
4-26
Page 74

Realtek HD Audio Manager
You can confirm and change the audio configuration using the Realtek HD
Audio Manager. To launch the Realtek HD Audio Manager:
Click Control Panel -> Hardware and Sound -> Realtek HD Audio
Manager under Windows System group in All apps.
When you first launch the Realtek HD Audio Manager, you can see two
device tabs. Speakers is the default output device. Microphone is the
default input device. To change the default device, click the Set Default
Device button under the chosen device tab.
Information
Click the Information button to view hardware information, software
information, and language setting.
Power Management
The audio controller in your computer can be turned off when the audio
function is not used. To adjust the configuration of audio power
management, click the Power Management button
When audio power management is enabled, the circle button at the
upper left of the Power Management is blue and convex.
When audio power management is disabled, the button is black and
concave.
Speaker Configuration
.
DTS Sound
User's Manual
Click the Auto Test button to confirm the internal speakers or the
headphone sound is coming from the right direction.
Default Format
You can change the sample rate and bit depth of sound.
Headphone/Microphone selection
To change the type of headphone or microphone, do the following:
1. Plug a headphone or microphone into the headphone/microphone
combo jack.
2. Double-click on the circle button in the right side of the Realtek HD
Audio Manager main screen.
3. Select one from the device list for the device you plugged into.
DTS Sound™ utilizes advanced patented techniques to retrieve audio cues
buried in the original source material and deliver immersive surround sound
complete with deep, rich bass and crystal clear dialog.
4-27
Page 75

DTS Sound is provided with some models. It provides the following
features:
Immersive surround sound with bass and dialog enhancement
Broad sweet spot with elevated sound image
Improved volume output delivering maximum volume without creating
clipping or distortion
Dialog enhancement for clear and intelligible vocals
Bass enhancement for rich, low frequency production
High frequency definition for crisp details
To access the utility, Click DTS Sound under DTS, Inc in All apps.
U.S. patents apply to this product. See
http://patents.dts.com
Manufactured under license from DTS Licensing Limited.
Video mode
Video mode settings are configured via the Screen Resolution dialog.
To open the Screen Resolution dialog, click Control Panel ->
Appearance and Personalization -> Display -> Change display
settings under Windows System in All apps.
If you are running some applications (for example a 3D application or video
playback), you may see some disturbance, flickering or frame dropping on
your screen.
If that occurs, adjust the resolution of display, lowering it until the screen is
displayed properly.
User's Manual 4-28
Page 76

Chapter 5
Utilities and Advanced Usage
This chapter describes the utilities and special features of this computer,
and the advanced usage of some utilities.
Utilities and Applications
This section describes the pre-installed utilities that come with the
computer and details how to start them. For further information on their
operation, refer to online manual, help files, or README.TXT file (if
applicable) of each utility.
TOSHIBA Display
Utility
TOSHIBA Password
Utility
TOSHIBA System
Settings
CyberLink PowerDVD
for TOSHIBA
TOSHIBA Setup
Utility
TOSHIBA Display Utility includes Resolution+
settings. Resolution+ is an image processor that
performs high-quality image enhancements such
as Color Correction and Sharpness on video
playbacks.
This utility is only provided with some models.
To access this utility, click Display Utility under
TOSHIBA group in All apps.
For details on this utility, see the help file.
This utility allows you to set a password in order
to restrict access to the computer.
To access this utility, click Password Utility
under TOSHIBA group in All apps.
This utility allows you to customize your
hardware settings according to the way you work
with the computer and the peripherals you use.
To access this utility, click System Settings
under TOSHIBA group in All apps.
This software is provided for playback of DVD
Video. To access this utility, click CyberLink
PowerDVD for TOSHIBA under TOSHIBA
group in All apps.
For details on how to use CyberLink PowerDVD
for TOSHIBA, see the help file.
TOSHIBA Setup Utility is a BIOS setup utility that
provides you a menu-based user interface so
that you can easily view and change BIOS
settings.
User's Manual 5-1
Page 77

TOSHIBA eco Utility This computer is equipped with "eco mode". This
mode slightly lowers performance of some
devices to reduce electric power consumption.
You can realize measurable power savings by
using it continuously.
TOSHIBA eco Utility helps control the power
consumption of your computer. Various
information can help you understand your degree
of contribution to the environment.
Furthermore, this utility contains Peak shift
function that can help reduce power usage during
periods of peak demand by shifting some power
consumption to periods when demand is lower.
The utility also supports "eco charge mode". The
battery will not be fully charged in this mode, thus
extending the life cycle of the battery.
It is recommended using the computer with AC
adaptor connected as the battery operating time
is comparatively short in this mode.
Depending on the usage situation, the life cycle
of the battery might not be extended properly.
To access this utility, click eco Utility under
TOSHIBA group in All apps.
For details on TOSHIBA eco utility, see the help
file.
TOSHIBA Media
Player by sMedio
TrueLink+
This software is a multimedia player which can
be used to play back video, music, and photo.
TOSHIBA Media Player can play back contents
on a local library/home network/OneDrive.
To access it, click the TOSHIBA Media Player
by sMedio TrueLink+ in All apps.
For details, please refer to the Online help.
User's Manual 5-2
Page 78

CyberLink MediaStory CyberLink MediaStory helps you to manage and
share your multimedia content quickly. Your
photos and videos are organized by event, date
in a calendar, geographical places, and by
people's faces. You can easily create a polished
slideshow or video of your digital life utilizing your
photos and videos.
This utility is only provided with some models.
To access it, click CyberLink MediaStory under
CyberLink MediaStory group in All apps.
For details on how to use CyberLink MediaStory,
check out the tutorials by clicking Preferences (
) in the main window and then clicking
Tutorials.
Do not change the display device while running CyberLink MediaStory.
TOSHIBA Service
Station
TOSHIBA PC Health
Monitor
This application allows your computer to
automatically search for TOSHIBA software
updates or other alerts from TOSHIBA that are
specific to your computer system and its
programs. When enabled, this application
periodically transmits to our servers a limited
amount of system information, which will be
treated in strict accordance with the rules and
regulations as well as applicable data protection
law.
To access this utility, click Service Station under
TOSHIBA group in All apps.
The TOSHIBA PC Health Monitor application
proactively monitors a number of system
functions such as power consumption, battery
health, and system cooling, informing you of
significant system conditions. This application
recognizes the system and individual component
serial numbers and tracks specific activities
related to their usage.
To access this utility, click PC Health Monitor
under TOSHIBA group in All apps.
This utility is only provided with some models.
For details on TOSHIBA PC Health Monitor, see
the help file.
User's Manual 5-3
Page 79

TOSHIBA Product
Improvement
Program
The TOSHIBA Product Improvement Program
recognizes the system and individual component
serial numbers and will track specific activities
related to the computer and their usage.
This utility does not provide the user interface.
You can enable or disable the monitoring
operation by clicking Product Improvement
Program under TOSHIBA group in All apps.
This utility is only provided with some models.
TOSHIBA Audio
Enhancement
TOSHIBA Audio Enhancement provides you the
function of audio source filtering, earphone audio
enhancement, or speaker audio enhancement.
To change the settings, click Audio
Enhancement under TOSHIBA group in All
apps.
Bluetooth® Link Bluetooth® Link allows you to use the keyboard
and touchpad of your computer as a Bluetooth
keyboard and mouse. Your computer can also be
used to operate a Smartphone in hands free
mode and speaker.
To access this utility, click Bluetooth(R) Link
under TOSHIBA group in All apps.
For details on this utility, see the help file.
User's Manual 5-4
Page 80

TOSHIBA
Maintenance Utility
TOSHIBA Maintenance Utility is provided to
erase the hard disk drive. This utility allows you
to delete all data and partitions, and also
overwrite all sectors on the hard disk drive.
If there is an external hard disk drive connected
to your computer, it can also be erased.
However, if you do not want to delete the data
from the external hard disk drive, disconnect it
from your computer.
To access this utility:
1. Go to Settings and click Update & security
-> Recovery.
2. Click Restart now under Advanced
startup.
3. Click Troubleshoot -> TOSHIBA
Maintenance Utility
If you select the deletion method and continue
with the operation, you will lose all data (including
the operating system and recovery image) on the
hard disk drive. Make sure that you have already
created recovery media if you want to use the
computer after erasing your hard disk drive(s).
You might not have all the software listed in this section depending on the
model you purchased.
To access the setup files of the drivers/utilities, click Applications and
Drivers under TOSHIBA group in All apps.
TOSHIBA Media Player by sMedio TrueLink+ application is not included in
the setup files above but can be downloaded from Windows Store.
Special features
The following features are either unique to TOSHIBA computers or are
advanced features which make the computer more convenient to use.
Access each function using the following procedures.
*1
To access the Power Options, click Control Panel -> System and
Security -> Power Options under Windows System group in All apps.
Display automatic
power off
User's Manual 5-5
*1
This feature automatically cuts off power to the
computer's display panel when there is no
keyboard input for a specified time, with power
being restored the next time a key is pressed.
This can be specified in the Power Options.
Page 81

HDD automatic power
*1
off
This feature automatically cuts off power to the
hard disk drive when it is not accessed for a
specified time, with power being restored when
the hard disk drive is next accessed. This can be
specified in the Power Options.
System automatic
Sleep/Hibernation
*1
Mode
This feature automatically shuts down the system
into either Sleep Mode or Hibernation Mode
when there is no input or hardware access for a
specified time. This can be specified in the Power
Options.
Power on password Two levels of password security, supervisor and
user, are available to prevent unauthorized
access to your computer.
Intelligent power
supply
*1
A microprocessor in the computer's intelligent
power supply detects the battery charge,
automatically calculates the remaining battery
capacity, and protects electronic components
from abnormal conditions such as a voltage
overload from the AC adaptor. This can be
specified in the Power Options.
*1
Battery save mode
This feature lets you configure the computer in
order to save battery power. This can be
specified in the Power Options.
*1
Panel power on/off
This feature automatically turns power to the
computer off when the display panel is closed,
and turns it back on when the display panel is
opened. This can be specified in the Power
Options.
Low battery
automatic Hibernation
*1
Mode
When battery power is exhausted to the point
that computer operation cannot be continued, the
system automatically enters Hibernation Mode
and shuts itself down. This can be specified in
the Power Options.
Sleep Mode If you have to interrupt your work, you can use
this feature to allow you to turn off power to the
computer without exiting from your software.
Data is maintained in the computer's main
memory so that when you next turn on the
power, you can continue working right where you
left off.
User's Manual 5-6
Page 82

Hibernation Mode This feature lets you turn off the power to the
computer without exiting from your software. The
contents of main memory are automatically
saved to the Hard Disk Drive so that when you
next turn on the power again, you can continue
working right where you left off. You must enable
the Hibernation Mode before using this feature.
Refer to the Starting Hibernation Mode section
for more details.
USB Wakeup function This function restores the computer from Sleep
Mode depending on the external devices
connected to the USB ports.
For example, if a mouse or USB keyboard is
connected to a USB port, clicking the mouse
button or pressing the keyboard will wakeup the
computer.
Heat dispersal
*1
To protect against overheating, the processor is
equipped with an internal temperature sensor
which activates a cooling fan or lowers the
processing speed if the computer's internal
temperature rises to a certain level. You are able
to select whether to control this temperature by
either turning on the fan first, then if necessary
lowering the processor speed, or by lowering the
processor speed first, then if necessary turning
on the fan. Both of these functions are controlled
through the Power Options.
When the processor's temperature falls within
normal range, the fan and the processor
operation returns to its standard speed.
If the processor's temperature reaches an
unacceptably high level with either setting, the
computer automatically shuts down to prevent
any damage. In this instance, all unsaved data in
memory will be lost.
TOSHIBA Password Utility
The TOSHIBA Password Utility provides two levels of password security:
User and Supervisor.
Passwords set by the TOSHIBA Password Utility function are different from
the Windows password.
User's Manual 5-7
Page 83

User Password
To start the utility, click the following items under TOSHIBA group in All
apps:
Password Utility -> User Password
User authentication might be required to validate user rights when using
TOSHIBA Password Utility to delete or change passwords, and so on.
Set (button)
Click this button to register a password. After a password is set, you
are prompted to enter it when you start the computer.
After you set the password, a dialog box appears asking whether you
want to save it to other media. If you forget the password, you can
open the password file on another computer. Be sure to keep the
media in a safe place.
When entering the character string to register the password, enter
from the keyboard character by character and do not enter as ASCII
code or copy-and-paste the character string. In addition, ensure that
the registered password is correct by outputting the character string to
the password file.
When entering a password, do not enter any characters (for example
"!" or "#") produced by pressing the SHIFT or ALT keys.
Delete (button)
Click this button to delete a registered password. Before you can
delete a password, you must first enter the current password correctly.
Change (button)
Click this button to change a registered password. Before you can
change a password, you must first enter the current password
correctly.
Owner String (text box)
You can use this box to associate text with the password. After you
enter text, click Apply or OK. When the computer is started, this text
is displayed together with the prompt asking you to enter a password.
You can launch TOSHIBA Setup Utility to set, change, or delete the HDD
Password or HDD Master Password. Refer to the TOSHIBA Setup Utility
section for further information..
User's Manual 5-8
Page 84
If you forget your HDD User Password, TOSHIBA will NOT be able to
assist you, and your HDD will be rendered COMPLETELY and
PERMANENTLY INOPERABLE. TOSHIBA will NOT be held
responsible for any loss of any data, any loss of use or access to your
HDD, or for any other losses to you or any other person or
organization that result from the loss of access to your HDD. If you
cannot accept this risk, do not register the HDD User Password.
When saving the HDD User Password shut down or restart the
computer. If the computer is not shut down or restarted, the saved
data might not be correctly reflected. For more information on shutting
down or restarting the computer, refer to Turning on the power.
Supervisor Password
If you set a Supervisor Password, some functions might be restricted when
a user logs on with the User Password. To set a Supervisor Password:
Click Password Utility -> Supervisor Password under TOSHIBA group
in All apps.
This utility lets you do the following:
Register or delete the Supervisor Password.
Specify restrictions for general users.
Starting the computer using a password
If you have already registered a user password, there is one way to start
the computer:
Enter the password manually.
The password is necessary only if the computer was shut down in
Hibernation mode or boot mode. It is not needed in Sleep mode and
Restart.
User's Manual
To enter a password manually, do the following:
1. Turn on the power as described in the Getting Started section. The
following message appears in the screen:
Enter Password
At this point, the function keys do not work. They will function after you
enter the password.
2. Enter the Password.
5-9
Page 85

3. Press ENTER.
If you enter the password incorrectly three times in a row, or if you do not
enter the password within 1 minute, the computer shuts off. In this case,
some features that can power on the computer automatically (Wake-up on
LAN, Task Scheduler, etc) might not work. You must turn the computer
back on to retry password entry.
TOSHIBA System Settings
TOSHIBA System Settings is the TOSHIBA configuration management tool
available through the Windows operating system.
To run TOSHIBA System Settings, click System Settings under TOSHIBA
group in All apps.
The TOSHIBA System Settings window contains a number of tabs to allow
specific functions of the computer to be configured.
In addition there are also three buttons: OK, Cancel and Apply.
OK Accepts your changes and closes the TOSHIBA
System Settings window.
Cancel Closes the window without accepting your
changes.
Apply Accepts all your changes without closing the
TOSHIBA System Settings window.
Some options shown in gray are possible to confirm their status.
TOSHIBA System Settings screen might have the following tabs:
General—Allows you to view the current BIOS version or change
certain settings back to their default values
Display—Allows you to select the internal LCD and/or external monitor
when the computer boots up
Boot Options—Allows you to change the sequence in which your
computer searches the drives for the operating system
Keyboard—Allows you to access the wake-on keyboard function
Function Key—Allows you to configure the function key options
USB—Allows you to set conditions for USB
SATA—Allows you to set conditions for SATA
LAN—Allows you to set conditions for LAN
The settings or options explained here might vary depending on the model
you purchased.
User's Manual 5-10
Page 86

After you changed the settings, a dialog box might appear to prompt you
that the changes will take effect after the computer is restarted. Make sure
to restart your computer immediately to apply these changes.
TOSHIBA Media Player by sMedio TrueLink+
Be aware of the following limitations when you use the TOSHIBA Media
Player by sMedio TrueLink+:
Notes on use
TOSHIBA Media Player by sMedio TrueLink+ is a multimedia player which
can be used to play back video, music, and photo.
This software is only provided with some models.
It is recommended that the AC adaptor be connected while TOSHIBA
Media Player is running. Power saving features might interfere with
smooth playback. When TOSHIBA Media Player is used with a battery
power, set the Power Options to "Balance".
The screen saver is disabled while TOSHIBA Media Player is playing
a video file or slideshows of photos.
The computer will not enter Sleep and Hibernation mode
automatically, while TOSHIBA Media Player is running.
The display automatic power off function is disabled while TOSHIBA
Media Player is playing a video file or slideshows of photos.
The Resolution+ function was specially adjusted for the internal
monitor. Hence, turn OFF Resolution+ when viewing on external
monitor.
The Resolution+ feature for video playback is supported only on some
models. Resolution+ can only be enabled for video/photo playback if
Enhance Video/Photo Quality is displayed. Resolution+ can be
enabled only for photo playback if Enhance Photo Quality is
displayed.
The “Save with Resolution+ On” feature saves pictures with
Resolution+ On regardless of the current Resolution+ setting (On/Off/
Demo). Since the picture is saved in a size appropriate for posting to
SNS (largest edge of width/height is 2048 pixels), the saved picture
might look different than when browsing the original picture with
Resolution+ On.
User's Manual
5-11
Page 87

Playback of video/music/slideshow can be controlled using the media
buttons on the preview window which is invoked when the mouse
cursor is moved over the TOSHIBA Media Player icon on the Windows
Taskbar.
Video/Slideshow playback can only be controlled when the application
is in the foreground.
Music playback can be controlled even when the application is in the
background.
This feature might not be supported depending on the operating
system version.
Playback of high bit rate content may cause frame dropping, audio
skipping or decrease in computer performance.
The above problems could be remedied by turning Resolution+ off.
Tap/click the Refresh button on app commands to refresh the content
displayed on Library Screen. It will not be refreshed automatically.
If sleep, hibernation, shutdown, or reboot operation is in process
during uploading the files to OneDrive, the operation will not be
properly completed.
This app does not support to play back content protected by DRM. If
you try to play DRM protected content with Resolution+ On state, this
app might be closed.
This app does not support DMS.
The playback of some media files might not be normal by this player.
This might also happen when using Windows Media Player and Video
app.
Do not change the display device while running TOSHIBA Media
Player by sMedio Truelink+.
User Interface and operational procedures might differ depending on
the application version. Refer to the Help of TOSHIBA Media Player
by sMedio TrueLink+ for details.
Opening TOSHIBA Media Player by sMedio TrueLink+
Manual
The features and operations about TOSHIBA Media Player are explained
in the TOSHIBA Media Player Manual.
Use the following procedure to open TOSHIBA Media Player Online help:
When TOSHIBA Media Player is running, click
corner and select Settings -> Help.
icon on the upper-left
TOSHIBA PC Health Monitor
The TOSHIBA PC Health Monitor application proactively monitors a
number of system functions such as power consumption, battery health (for
models with battery), and the system cooling, informing you of significant
system conditions. This application recognizes the system and individual
User's Manual
5-12
Page 88

component serial numbers, and tracks specific activities related to the
computer and their usage.
The collected information includes basic computer information (that is:
product name, model number, part number, serial number, BIOS version,
FW version), basic components information (that is: Video device, Sound
device, Network device, HDD/SSD, Optical Disc drive), operating system
information (that is: OS version, settings (power button action, lid close
action, property of taskbar, file extension settings, user profile number),
error information (BSoD, application error) ), device operation time and
number of actuations or status changes (that is: number of power button
and FN key combination uses, AC adaptor, battery (for models with
battery), LCD, fan (for models with fan), HDD/SSD, sound volume, wireless
communication functionalities and USB information), usage of TOSHIBA
provided features/applications (that is: settings, operation, install state and
launch times), date of initial system use, and also computer and device
usage (that is: power settings, battery temperature and recharging (for
models with battery), CPU, memory, backlight illumination time, and
temperatures for various devices). The collected information is not limited
to the examples specified here. The stored data uses a very small portion
of the total hard disk capacity, approximately 20 MB or less per year.
This information is used to identify and provide a notification of system
conditions which might affect the performance of your TOSHIBA computer.
It might also be used to help diagnose problems should the computer
require service by TOSHIBA or TOSHIBA authorized service providers.
Additionally, TOSHIBA might also use this information for quality assurance
analysis.
Subject to the use restrictions above, the data on the internal storage drive
logged might be transferred to entities located outside of your country or
region of residence (for example, European Union). Those countries might
or might not have the same data protection laws or data protection levels
as required by your home country or region.
You can disable the TOSHIBA PC Health Monitor at any time by
uninstalling the software via Uninstall a program in the Control Panel.
Doing so will automatically delete all collected information from the internal
storage drive.
The TOSHIBA PC Health Monitor software does not extend or modify
TOSHIBA obligations under its standard limited warranty in any way.
TOSHIBA standard limited warranty terms and limitations apply.
Starting the TOSHIBA PC Health Monitor
The TOSHIBA PC Health Monitor can be opened by clicking PC Health
Monitor under TOSHIBA group in All apps.
The TOSHIBA PC Health Monitor main screen is displayed.
This utility might be disabled by default on your computer. You can enable
it by clicking Please click here to enable TOSHIBA PC Health Monitor.
The "PC Health Monitor Software Notice & Acceptance" screen is
User's Manual
5-13
Page 89

displayed. Carefully read the information displayed. Selecting ACCEPT
and clicking OK enables the program. By enabling the TOSHIBA PC
Health Monitor software, you agree with these terms and conditions and to
the use and sharing of the collected information. Once the program is
enabled, the TOSHIBA PC Health Monitor screen is displayed, and the
program begins monitoring system functions and collecting information.
A message is displayed if any changes which might interfere with the
operation of the program are detected. Follow the instructions displayed
on-screen in the message.
TOSHIBA Product Improvement Program
The TOSHIBA Product Improvement Program recognizes the system and
individual component serial numbers and will track specific activities related
to the computer and their usage.
The collected information includes basic computer information (that is:
product name, model number, part number, serial number, BIOS version,
FW version), basic components information (that is: Video device, Sound
device, Network device, HDD/SSD, Optical Disc drive), operating system
information (that is: OS version, settings (power button action, lid close
action, property of taskbar, file extension settings, user profile number),
error information (BSoD, application error) ), device operation time and
number of actuations or status changes (that is: number of power button
and FN key combination uses, AC adaptor, battery (for models with
battery), LCD, fan (for models with fan), HDD/SSD, sound volume, wireless
communication functionalities and USB information), usage of TOSHIBA
provided features/applications (that is: settings, operation, install state and
launch times), date of initial system use, and also computer and device
usage (that is: power settings, battery temperature and recharging (for
models with battery), CPU, memory, backlight illumination time, and
temperatures for various devices). The collected information is not limited
to the examples specified here. The stored data uses a very small portion
of the total hard disk capacity, approximately 20 MB or less per year.
Transmission of collected data is performed when the data transfer feature
is enabled. The transferred information will be analyzed statistically, and it
will be used for the better product planning and development such as
improvement of application software.
Subject to the use restrictions noted above, the stored data may be made
available to entities located outside of your country or region of residence
and those countries might or might not have the same data protection laws
or data protection levels as required by your home country or region.
Once enabled, you can select to disable the monitoring operation at any
time by clicking Product Improvement Program under TOSHIBA group in
All apps and uninstall the application by using the "Uninstall a program"
utility in the Control Panel. Uninstalling the Product Improvement Program
User's Manual
5-14
Page 90

will automatically delete all of the data previously collected and stored by
the application.
The TOSHIBA Product Improvement Program or it's use does not in any
way expand or modify TOSHIBA obligations under its standard limited
warranty. TOSHIBA standard limited warranty terms and limitations apply.
TOSHIBA Setup Utility
TOSHIBA Setup Utility is a BIOS setup utility that provides you a menubased user interface so that you can easily view and change BIOS
settings.
To enter the TOSHIBA Setup Utility, do the following:
1. Save your work.
2. Click Start -> Power and then select Restart.
3. Hold down the F2 key and then release this key one second after the
computer is power on.
4. Follow the on-screen instructions to proceed.
User's Manual 5-15
Page 91

Troubleshooting
TOSHIBA has designed this computer for durability, however, should
problems occur you are able to use the procedures detailed in this chapter
to help determine the cause.
You should become familiar with this chapter as knowing what might go
wrong can help prevent problems from occurring in the first place.
Problem-solving process
If you observe the following guidelines, resolving problems will be much
easier.
Stop immediately when you recognize a problem exists as taking
further action might result in data loss or damage, or you might
destroy valuable problem-related information that can help solve the
problem.
Observe what is happening. Write down what the system is doing and
what actions you performed immediately before the problem occurred.
Make a screenshot of the current display.
Also be aware that the questions and procedures described in this chapter
are meant only as a guide, they are not definitive problem-solving
techniques. In reality many problems can be solved simply, but a few might
require help from TOSHIBA Support. If you find you need to consult others,
be prepared to describe the problem in as much detail as possible.
Chapter 6
Preliminary checklist
You should always consider the simplest solution first. The items detailed
in this checklist are easy to fix and yet can cause what appears to be a
serious problem:
Make sure that you turn on all peripheral devices before you turn on
the computer - this includes your printer and any other external device
you are using.
Before you attach an external device you should first turn off the
computer, then when you turn the computer back on it recognizes the
new device.
Make sure that all optional accessories are configured properly in the
computer's setup program and that all required driver software has
been loaded (refer to the documentation included with the optional
accessories for further information on its installation and
configuration).
User's Manual
6-1
Page 92

Check all cables to ensure that they are correctly and firmly attached
to the computer - loose cables can cause signal errors.
Inspect all connecting cables for loose wires and all connectors for
loose pins.
Check that your disc media is correctly loaded
Always try to make detailed notes of your observations and keep them in a
permanent error log - this helps you to describe your problems to TOSHIBA
Support. In addition, if a problem recurs, the log you have made helps to
identify the problem faster.
Analyzing the problem
Sometimes the computer gives you clues that can help you identify why it
is malfunctioning. In view of this, keep the following questions in mind:
Which part of the computer is not operating properly - keyboard, Hard
Disk Drive, display panel, Touch Pad, Touch Pad control buttons - as
each device produces different symptoms.
Check the options within the operating system to ensure that its
configuration is set properly.
What appears on the display? Does it display any messages or
random characters? Make a screenshot of the current display and, if
possible, look up the messages in the documentation included with the
computer, software or operating system.
Check that all connecting cables are correctly and firmly attached as
loose cables can cause erroneous or intermittent signals.
Do any indicators light, if so, which ones, what color are they and do
they stay on or blink? Write down what you see.
Do you hear any beeps, if so how many, are they long or short and are
they high pitched or low pitched? In addition, is the computer making
any unusual noises? Write down what you hear.
Record your observations so you can describe them in detail to TOSHIBA
Support.
Software The problems might be caused by your software
or disk. If you cannot load a software package,
the media might be damaged or the program
might be corrupted. In these instances try loading
another copy of the software if possible.
If an error message appears while you are using
a software package, you should refer to the
documentation supplied with it as this usually
includes a problem-solving section or a summary
of error messages.
Next, check any error messages against the
operating system documentation.
User's Manual 6-2
Page 93

Hardware If you cannot find a software problem, you should
then check the setup and configuration of your
hardware. First run through the items in the
preliminary checklist as described previously
then, if you still cannot correct the problem, try to
identify the source. Tthe next section provides
checklists for individual components and
peripherals.
Before using a peripheral device or application software that is not an
authorized TOSHIBA part or product, make sure that the device or software
can be used with your computer. Use of incompatible devices might cause
injury or might damage your computer.
If something goes wrong
Your computer does not respond to the keyboard commands
If an error occurs and the computer does not respond to your keyboard
commands, do the following:
Press the power button and hold it down for five seconds. Once the
computer has turned itself off, wait 10-15 seconds before turing on the
power again by pressing the power button.
Your program stops responding
If you are working with a program that suddenly freezes all operations,
chances are the program has stopped responding. You can exit the failed
program without shutting down the operating system or closing other
programs.
To close a program that has stopped responding:
1. Press CTRL, ALT, and DEL simultaneously (once), then click Task
Manager. The Windows Task Manager window appears.
2. Select the program you want to close, then click End Task. Closing
the failed program should allow you to continue working. If it does not,
continue with the next step.
3. Close the remaining programs one by one by selecting the program
name, then End Task. Closing all programs should allow you to
continue working. If it does not, power off your computer and then
restart it.
User's Manual
The computer does not start
Make sure that you attached the AC adaptor and power cord/cable
properly.
If you are using the AC adaptor, check that the wall outlet is working by
plugging in another device, such as a lamp.
6-3
Page 94

Verify that the computer is on by looking at the Power indicator.
If the indicator is glowing, the computer is on. Also, try turning the computer
off and then on.
If you are using an AC adaptor, verify that the computer is receiving power
from the external power source by looking at the DC IN/Battery indicator. If
the indicator is glowing, the computer is connected to a live external power
source.
The computer does not load advanced options during
startup
By holding down one of the following keys during startup, your computer
can load the following advanced options.
Key Advanced option
F2 TOSHIBA Setup Utility
F12 Boot Menu
0 (zero) Recovery options
If your computer starts to load the Operating System instead of desired
advanced options, do the following:
1. Click Start -> Power and then select Restart.
2. Hold down the corresponding key and then release this key one
second after the computer is power on.
3. Follow the on-screen instructions to proceed.
Hardware and system checklist
This section discusses problems caused by your computer’s hardware or
attached peripherals. Basic problems might occur in the following areas:
Power
Keyboard
Internal display panel
Hard Disk Drive
Optical Disc Drive
Memory Media Card
Pointing Device
Power
When the computer is not plugged into an AC power outlet, the battery
pack is the primary power source. However, your computer also has a
number of other power resources, including the Real-Time Clock (RTC)
function, all of which are interrelated with any one having the ability to
produce apparent power problems.
User's Manual
USB device
Sound system
External monitor
LAN
Wireless LAN
Bluetooth
6-4
Page 95

Overheating power down
If the processor's temperature reaches an unacceptably high level with
either setting, the computer automatically shuts down to prevent any
damage. In this instance all unsaved data in memory is lost.
Problem Procedure
Computer shuts
down automatically.
Leave the computer off until the it reaches room
temperature. If the computer has reached room
temperature and it still does not start, or if it starts
but shuts down quickly, contact TOSHIBA Support.
AC power
If you have trouble turning on the computer with the AC adaptor connected,
check the status of the DC IN/Battery indicator. Refer to the Power
Condition Descriptions section for further information.
Problem Procedure
AC adaptor does not
power the computer
Check the connections to make sure that the
power cord/adaptor is firmly connected to the
computer and a working power outlet.
Check the condition of the cord and terminals. If
the cord is frayed or damaged it should be
replaced, while if the terminals are soiled, they
should be cleaned with a clean cotton cloth.
If the AC adaptor still does not power the
computer, you should contact TOSHIBA Support.
Battery
If you suspect a problem with the battery, you should check the status of
the DC IN/Battery indicator.
Problem Procedure
Battery does not
power the computer
Battery does not
charge when the AC
adaptor is attached.
User's Manual 6-5
The battery might be discharged. Connect the AC
adaptor to recharge the battery.
If the battery is completely discharged, it will not
begin charging immediately. In these instances,
wait a few minutes before trying again. If the
battery still does not charge, you should check that
the power outlet the AC adaptor is connected to is
supplying power. This can be tested by plugging
another appliance into it.
Page 96

Problem Procedure
Battery does not
power the computer
as long as expected
If you frequently recharge a partially charged
battery, the battery might not charge to its full
potential. In these instances you should fully
discharge the battery and then attempt to charge it
again.
Check the Power saver option under Choose or
customize a power plan in the Power Options.
Real-Time Clock
Problem Procedure
The BIOS setting
and system date/
time are lost.
The lasting time of the Real-Time Clock (RTC) has
run out. You must set the date and time in the
TOSHIBA Setup Utility by using the following
steps:
1. Launch the TOSHIBA Setup Utility. Refer to
the TOSHIBA Setup Utility section for further
information.
2. Set the date in the System Date field.
3. Set the time in the System Time field.
4. Follow the on-screen instructions to proceed.
Keyboard
Keyboard problems can be caused by the setup and configuration of the
computer. Refer to the The Keyboard section for further information.
Problem Procedure
Output to screen is
garbled
Internal display panel
Apparent problems of the computer's display panel might be related to
setup and configuration of the computer.
User's Manual
Refer to your software documentation to ensure
that it is not remapping the keyboard in any way
(remapping involves changing or reassigning the
function of each key).
If you are still unable to use the keyboard, you
should contact TOSHIBA Support.
6-6
Page 97
Problem Procedure
No display Press the function keys to adjust the display
priority, and to make sure that it is not set for
output to an external monitor.
Markings appear on
the computer's
display panel.
Hard Disk Drive
Problem Procedure
Computer does not
boot from Hard Disk
Drive
Slow performance The files on the Hard Disk Drive might be
These marks might have come from contact with
the keyboard and Touch Pad while the display
panel has been closed. Try to remove the marks
by gently wiping the display panel with a clean dry
cloth or, if this fails, with a good quality LCD screen
cleaner. In this latter instance, you should always
follow the instructions with the screen cleaner and
always ensure that you let the display panel dry
properly before closing it.
Check to see whether there is a disc in the optical
disc drive - if so remove it and try to start the
computer again.
If this has no effect, check the Boot Priority
Options setting within the TOSHIBA System
Settings.
fragmented. In this instance, you should run the
disk Defragmentation utility to check the condition
of your files and the Hard Disk Drive. Refer to the
operating system's documentation or online Help
File for further information on operating and using
the Defragmentation utility.
As a last resort, you should reformat the Hard Disk
Drive and then reload the operating system and all
other files and data. If you are still unable to
resolve the problem, contact TOSHIBA Support.
Optical Disc Drive
For further information, refer to Operating Basics.
User's Manual
6-7
Page 98

Problem Procedure
You cannot access a
CD/DVD Disc in the
drive
Make sure the drive’s disc tray is securely closed.
Press gently until it clicks into place.
Open the disc tray and make sure the disc is
properly seated. It should lie flat with the label
facing up.
A foreign object in the disc tray could block laser
light from reading the disc. Make sure there is no
obstruction. Remove any foreign object.
Check whether the disc is dirty. If it is, wipe it with
a clean cloth dipped in water or a neutral cleaner.
Memory Media Card
For further information, refer to Operating Basics.
Problem Procedure
Memory media card
error occurs
Remove the memory media card from the
computer and then reinsert it in order to ensure
that it is firmly connected.
If the problem persists, then you should refer to the
documentation supplied with your memory media
card for further information.
You cannot write to
a memory media
card
You cannot read a
file
Remove the memory media card from the
computer and check to ensure that it is not write
protected.
Check to ensure the required file is actually on the
memory media card that is inserted into the
computer.
If you are still unable to resolve the problem,
contact TOSHIBA Support.
Pointing device
If you are using a USB mouse, you should also refer to both the USB
mouse section and the documentation supplied with your mouse.
Touch Pad
Problem Procedure
The Touch Pad does
not work.
User's Manual 6-8
Check the Device Select settings.
Click Control Panel -> Hardware and Sound ->
Mouse under Windows System in All apps.
Page 99

Problem Procedure
On-screen pointer
does not respond to
pointing device
In this instance, the system might be busy. Try
moving the mouse again after waiting a short
while.
operation
Double-tapping
(Touch Pad) does
not work
The on-screen
pointer moves too
fast or too slow
The reaction of
Touch Pad is either
too sensitive or not
sensitive enough.
In this instance, you should initially try changing
the double-click speed setting within the Mouse
Control utility.
1. To access this utility, click Control Panel ->
Hardware and Sound -> Mouse under
Windows System group in All apps.
2. Within the Mouse Properties window, click the
Buttons tab.
3. Set the double-click speed as required and
click OK.
In this instance, you should initially try changing
the speed setting within the Mouse Control utility.
1. To access this utility, click Control Panel ->
Hardware and Sound -> Mouse under
Windows System group in All apps.
2. Within the Mouse Properties window, click the
Pointer Options tab.
3. Set the pointer speed as required and click
OK.
Adjust the touch Sensitivity.
To access it, click Control Panel -> Hardware
and Sound -> Mouse under Windows System
group in All apps.
If you are still unable to resolve the problem,
contact TOSHIBA Support.
USB mouse
Problem Procedure
On-screen pointer
does not respond to
mouse operation
In this instance, the system might be busy. Try
moving the mouse again after waiting a short
while.
Remove the mouse from the computer and then
reconnect it to a free USB port in order to ensure
that it is firmly attached.
User's Manual 6-9
Page 100

Problem Procedure
Double-clicking does
not work
In this instance, you should initially try changing
the double-click speed setting within the Mouse
Control utility.
1. To access this utility, click Control Panel ->
Hardware and Sound -> Mouse under
Windows System group in All apps.
2. Within the Mouse Properties window, click the
Buttons tab.
3. Set the double-click speed as required and
click OK.
The on-screen
pointer moves too
fast or too slow
The on-screen
pointer moves
erratically
In this instance, you should initially try changing
the speed setting within the Mouse Control utility.
1. To access this utility, click Control Panel ->
Hardware and Sound -> Mouse under
Windows System group in All apps.
2. Within the Mouse Properties window, click the
Pointer Options tab.
3. Set the pointer speed as required and click
OK.
The elements of the mouse responsible for
detecting movement might be dirty. Refer to the
documentation supplied with the mouse for
instructions on how to clean it.
If you are still unable to resolve the problem,
contact TOSHIBA Support.
USB device
In addition to the information in this section, also refer to the documentation
supplied with your USB device.
Problem Procedure
USB device does not
work
Remove the USB device from the computer and
then reconnect it to a free port in order to ensure
that it is firmly attached.
Ensure that any required USB device drivers are
properly installed. To achieve this, you should refer
to both the device documentation and the
operating system documentation.
User's Manual 6-10
 Loading...