

Page 1
TimeMaster™30inLawnMower
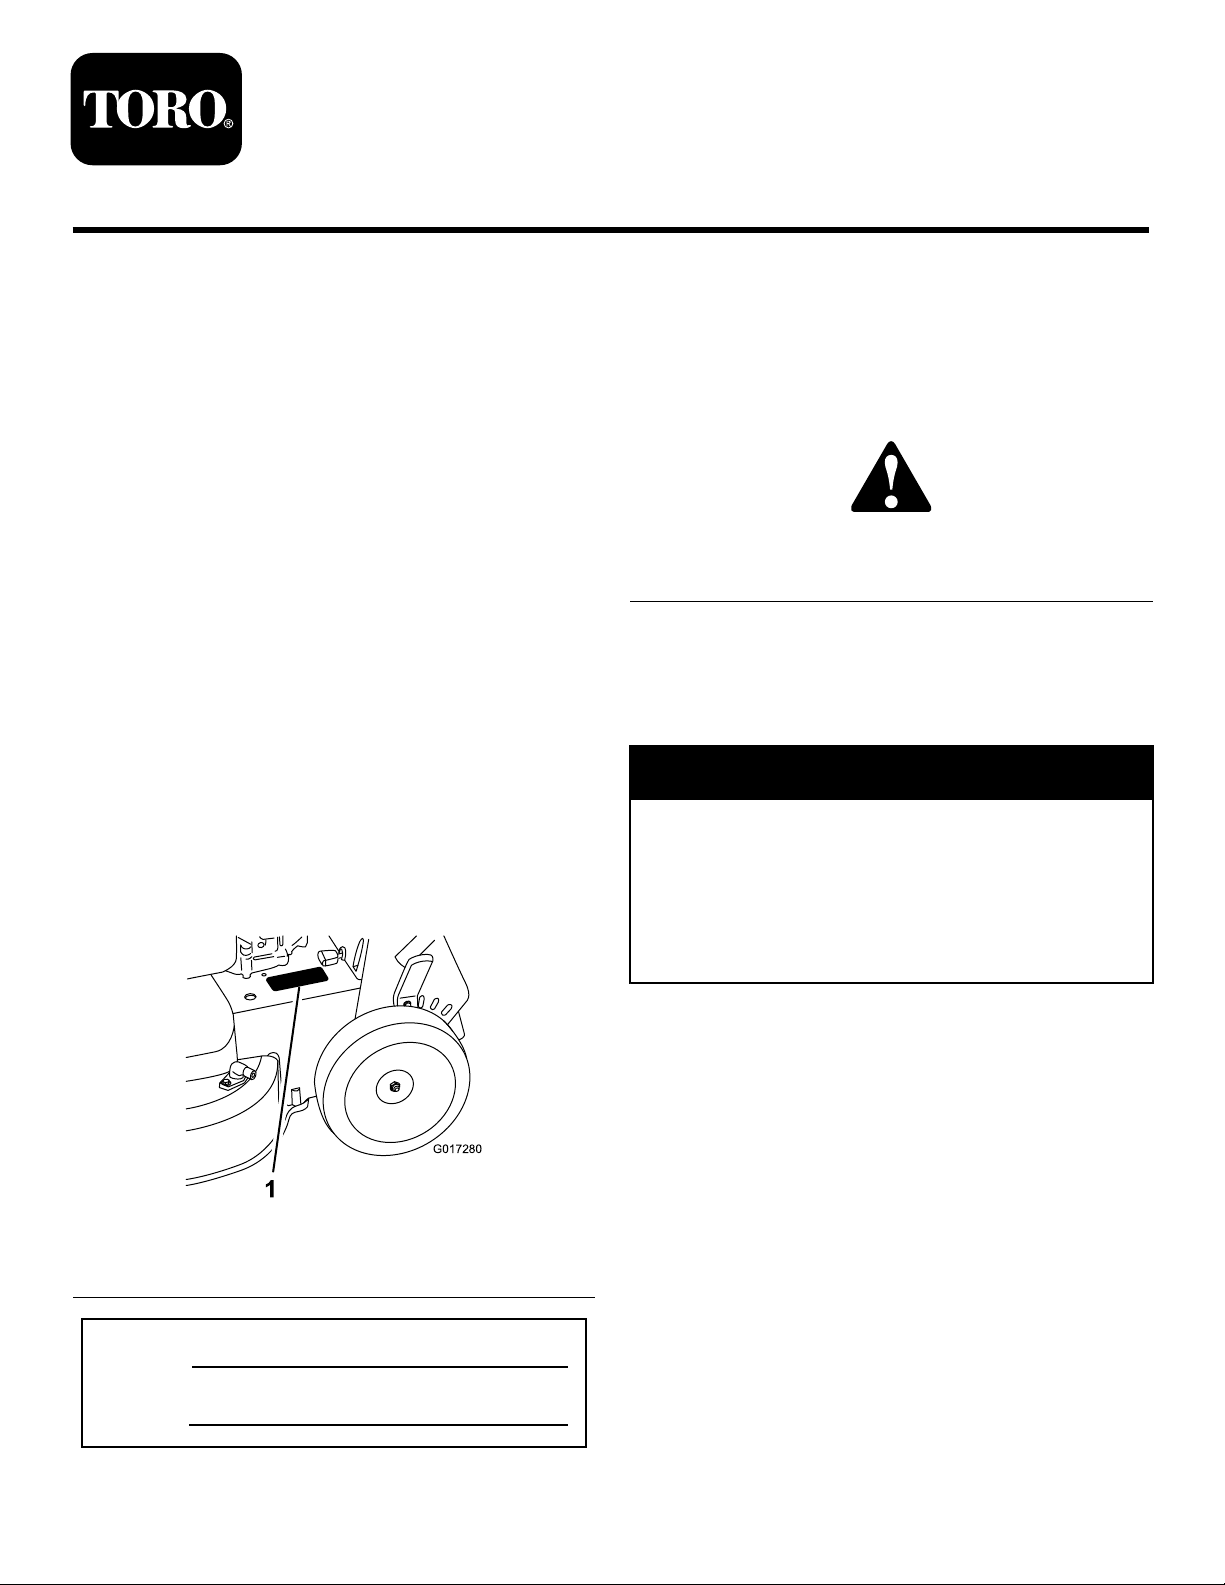
1
G017280
ModelNo.20199—SerialNo.31200001andUp
ModelNo.20200—SerialNo.31200001andUp
FormNo.3369-191RevA
Operator'sManual
Introduction
Thisrotary-blade,walk-behindlawnmoweris
intendedtobeusedbyresidentialhomeowners.
Itisdesignedprimarilyforcuttinggrasson
well-maintainedlawnsonresidentialproperties.It
isnotdesignedforcuttingbrushorforagricultural
uses.
Readthisinformationcarefullytolearnhowtooperate
andmaintainyourmachineproperlyandtoavoid
injuryandequipmentdamage.Youareresponsiblefor
operatingthemachineproperlyandsafely.
YoumaycontactTorodirectlyatwww .T oro.comfor
productandaccessoryinformation,helpndingadealer,
ortoregisteryourproduct.
Wheneveryouneedservice,genuineToroparts,
oradditionalinformation,contactanAuthorized
ServiceDealerorToroCustomerServiceandhave
themodelandserialnumbersofyourmachineready.
Figure1identiesthelocationofthemodelandserial
numbersontheproduct.Writethenumbersinthe
spaceprovided.
Thismanualidentiespotentialhazardsandhassafety
messagesidentiedbythesafetyalertsymbol(Figure2),
whichsignalsahazardthatmaycauseseriousinjury
ordeathifyoudonotfollowtherecommended
precautions.
Figure2
1.Safetyalertsymbol
Thismanualuses2wordstohighlightinformation.
Importantcallsattentiontospecialmechanical
informationandNoteemphasizesgeneralinformation
worthyofspecialattention.
WARNING
CALIFORNIA
Proposition65Warning
Theengineexhaustfromthisproduct
containschemicalsknowntotheStateof
Californiatocausecancer,birthdefects,
orotherreproductiveharm.
1.Modelandserialnumberplate
ModelNo.
SerialNo.
©2011—TheToro®Company
8111LyndaleAvenueSouth
Bloomington,MN55420
Figure1
Registeratwww.Toro.com.
Important:Thisengineisnotequippedwitha
sparkarrestermufer.ItisaviolationofCalifornia
PublicResourceCodeSection4442touseoroperate
theengineonanyforest-covered,brush-covered,or
grass-coveredland.Otherstatesorfederalareas
mayhavesimilarlaws.
ThissparkignitionsystemcomplieswithCanadian
ICES-002.
Theenclosed
Engine Owner's Man ual
issupplied
forinformationregardingtheUSEnvironmental
ProtectionAgency(EPA)andtheCalifornia
EmissionControlRegulationofemissionsystems,
maintenance,andwarranty.Replacementsmaybe
orderedthroughtheenginemanufacturer.
Formodelswithstatedenginehorsepower,thegross
horsepoweroftheenginewaslaboratoryratedbythe
OriginalInstructions(EN)
PrintedintheUSA
AllRightsReserved
Page 2

enginemanufacturerinaccordancewithSAEJ1940.
Asconguredtomeetsafety,emission,andoperating
requirements,theactualenginehorsepoweronthisclass
oflawnmowerwillbesignicantlylower.
Safety
Donottamperwiththeenginecontrolsoralterthe
governorspeed;doingsomaycreateanunsafecondition
resultinginpersonalinjury.
ThismachinemeetsorexceedstheCPSCbladesafety
requirementsforwalk-behindrotarylawnmowersand
theB71.1specicationsoftheAmericanNational
StandardsInstituteineffectatthetimeofproduction.
Readandunderstandthecontentsofthismanual
beforeyoustarttheengine.
Thesafetyalertsymbol(
topotentialpersonalinjuryhazards.Obeyallsafety
messagesthatfollowthissymboltoavoidpossibleinjury
ordeath.Improperlyusingormaintainingthismachine
couldresultininjuryordeath.Toreducethispotential,
complywiththefollowingsafetyinstructions.
Thefollowinginstructionshavebeenadaptedfromthe
ANSI/OPEIstandardB71.1-2003.
Thiscuttingmachineiscapableofamputating
handsandfeetandofthrowingobjects.Failure
toobservethefollowingsafetyinstructionscould
resultinseriousinjuryordeath.
Figure2)isusedtoalertyou
GeneralOperation
•Read,understand,andfollowallinstructionsonthe
machineandinthemanual(s)beforestarting.
•Donotputhandsorfeetnearorunderthemachine.
Keepclearofthedischargeopeningatalltimes.
•Onlyallowresponsibleadults,whoarefamiliarwith
theinstructions,tooperatethemachine.
•Cleartheareaofobjectssuchasrocks,wire,toys,
etc.,whichcouldbethrownbytheblades.Stay
behindthehandlewhentheengineisrunning.
•Besurethattheareaisclearofbystandersbefore
operating.Stopthemachineifanyoneentersthe
area.
•Donotoperatethemachinebarefootedorwhile
wearingsandals.Alwayswearsubstantialfootwear.
•Donotpullthemachinebackwardunlessitis
absolutelynecessary.Alwayslookdownandbehind
beforeandwhilemovingbackward.
•Neverdirectdischargedmaterialtowardanyone.
Avoiddischargingmaterialagainstawallor
obstruction.Materialmayricochetbacktoward
theoperator.Stopthebladeswhencrossinggravel
surfaces.
•Donotoperatethemachinewithouttheentiregrass
catcher,dischargeguard,rearguard,orothersafety
protectivedevicesinplaceandworking.
•Neverleavearunningmachineunattended.
•Stoptheengineandwaituntilthebladescome
toacompletestopbeforecleaningthemachine,
removingthegrasscatcher,oruncloggingthe
dischargeguard.
•Operatethemachineonlyindaylightorgood
articiallight.
•Donotoperatethemachinewhileunderthe
inuenceofalcoholordrugs.
•Neveroperatethemachineinwetgrass.Alwaysbe
sureofyourfooting.Walk,neverrun.
•Disengagethedrivesystem,ifsoequipped,before
startingtheengine.
•Ifthemachineshouldstarttovibrateabnormally,
stoptheengineandcheckforthecauseimmediately.
Vibrationisgenerallyawarningoftrouble.
•Alwaysweareyeprotectionwhenoperatingthe
machine.
•Lightningcancausesevereinjuryordeath.Ifyousee
lightningorhearthunderinthearea,donotoperate
themachine;seekshelter.
•Seemanufacturer'sinstructionsforproperoperation
andinstallationofaccessories.Onlyuseaccessories
approvedbythemanufacturer.
SlopeOperation
Slopesareamajorfactorrelatedtoslip-and-fall
accidents,whichcanresultinsevereinjury.Operation
onallslopesrequireextracaution.Ifyoufeeluneasy
onaslope,donotmowit.
•Mowacrossthefaceofslopes;neverupanddown.
Exerciseextremecautionwhenchangingdirection
onslopes.
•Watchforholes,ruts,bumps,rocks,orotherhidden
objects.Uneventerraincouldcauseaslip-and-fall
accident.Tallgrasscanhideobstacles.
2
Page 3

•Donotmowonwetgrassorexcessivelysteepslopes.
Poorfootingcouldcauseaslip-and-fallaccident.
•Donotmowneardrop-offs,ditches,or
embankments.Youcouldloseyourfootingor
balance.
Children
•Keepthenozzleincontactwiththerimofthefuel
tankorcontaineropeningatalltimesuntilfuelingis
complete.Donotuseanozzlelock-opendevice.
•Iffuelisspilledonclothing,changeclothing
immediately.
•Neveroverllthefueltank.Replacethefueltank
capandtightenitsecurely.
Tragicaccidentscanoccuriftheoperatorisnotalertto
thepresenceofchildren.Childrenareoftenattractedto
themachineandthemowingactivity.Neverassume
thatchildrenwillremainwhereyoulastsawthem.
•Keepchildrenoutofthemowingareaandunderthe
watchfulcareofaresponsibleadultotherthanthe
operator.
•Bealertandturnmachineoffifachildentersthe
area.
•Neverallowchildrentooperatethemachine.
•Useextracarewhenapproachingblindcorners,
shrubs,trees,orotherobjectsthatmayblockyour
viewofachild.
Service
SafeHandlingofGasoline
Toavoidpersonalinjuryorpropertydamage,use
extremecareinhandlinggasoline.Gasolineis
extremelyammableandthevaporsareexplosive.
•Extinguishallcigarettes,cigars,pipes,andother
sourcesofignition.
•Useonlyanapprovedgasolinecontainer.
WARNING
Exhaustcontainscarbonmonoxide,anodorless,
deadlypoisonthatcankillyou.
Donotruntheengineindoorsorinanenclosed
area.
GeneralService
•Neveroperatethemachineinanenclosedarea.
•Keepallnutsandboltstighttoensurethatthe
equipmentisinsafeworkingcondition.
•Nevertamperwithsafetydevices.Checktheir
properoperationregularly .
•Keepthemachinefreeofgrass,leaves,orother
debris.Cleanupoilorfuelspillsandremoveany
fuel-soakeddebris.Allowthemachinetocoolbefore
storing.
•Ifyoustrikeaforeignobject,stopandinspectthe
machine.Repairthemachine,ifnecessary,before
starting.
•Nevermakeanyadjustmentsorrepairswiththe
enginerunning.Disconnectthespark-plugwireand
groundagainsttheenginetopreventunintended
starting.
•Neverremovethefueltankcaporaddfuelwiththe
enginerunning.Allowtheenginetocoolbefore
refueling.
•Neverrefuelthemachineindoors.
•Neverstorethemachineorfuelcontainerwhere
thereisanopename,spark,orpilotlight,suchas
onawaterheateroronotherappliances.
•Neverllcontainersinsideavehicleoronatruck
ortrailerbedwithaplasticliner.Alwaysplace
containersonthegroundawayfromyourvehicle
beforelling.
•Removegas-poweredequipmentfromthetruck
ortrailerandrefuelitontheground.Ifthisisnot
possible,thenrefuelsuchequipmentwithaportable
containerratherthanfromagasolinedispenser
nozzle.
•Checkthegrasscatchercomponentsandthe
dischargeguardfrequentlyandreplacethemwith
manufacturer'srecommendedpartswhennecessary.
•Mowerbladesaresharp.Wrapthebladesorwear
gloves,anduseextracautionwhenservicingthem.
•Donotchangetheenginegovernorsettingor
overspeedtheengine.
•Maintainorreplacesafetyandinstructionlabelsas
necessary.
3
Page 4
SafetyandInstructionalDecals
Important:Safetyandinstructiondecalsarelocatednearareasofpotentialdanger.Replacedamaged
decals.
Manufacturer'sMark
1.Indicatesthatthebladeisidentiedasapartfromthe
originalmachinemanufacturer .
114-7982
1.Warning—readtheOperator'sManual.
2.Thrownobjecthazard—keepbystandersasafedistance
fromthemachine.
3.Cutting/dismembermenthazardofhandorfoot,mower
blade—disconnectthespark-plugwireandreadthe
instructionsbeforeservicingorperformingmaintenance.
4.Cutting/dismembermenthazardofhandorfoot,mower
blade—stayawayfrommovingparts.
5.Cutting/dismembermenthazardofhandorfoot,mower
blade—donotoperateupanddownslopes;operatesideto
sideonslopes;stoptheenginebeforeleavingtheoperating
position;andlookbehindyouwhenbackingup.
94-8072
Electric-startmodelonly
1.Engine—stop3.Engine—start
2.Engine—run
117–2718
108-8117
120-9570
1.Warning—stayawayfrommovingparts,keepallguards
andshieldsinplace.
108-9751
4
Page 5
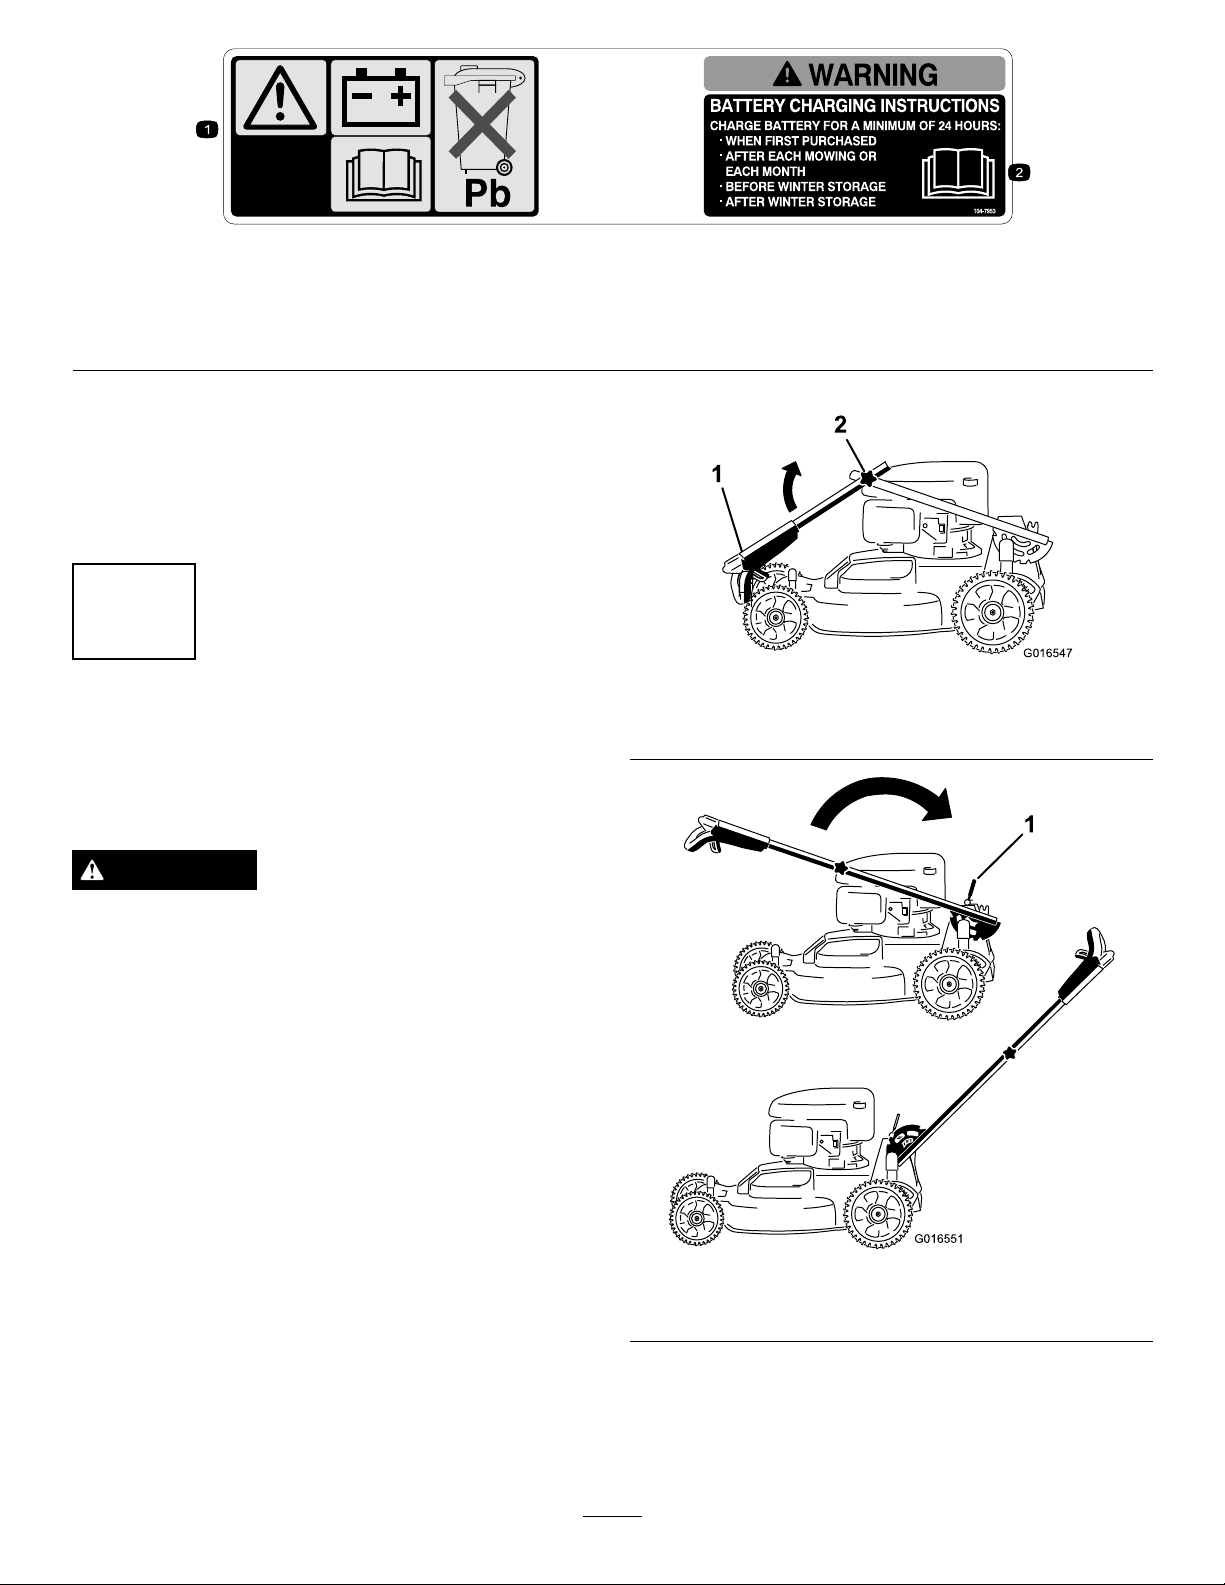
104-7953
1
G016547
2
1
G016551
Electric-startmodelonly
1.Warning—readtheOperator'sManualforinformationonchargingthebattery;containslead;donotdiscard.
2.ReadtheOperator'sManual.
Setup
Important:Removeanddiscardtheprotective
plasticsheetthatcoverstheengine.
1
AssemblingtheHandle
NoPartsRequired
Procedure
WARNING
Assemblingandunfoldingthehandleimproperly
candamagethecables,causinganunsafeoperating
condition.
•Donotdamagethecableswhenunfoldingthe
handle.
•Ifacableisdamaged,contactanAuthorized
ServiceDealer.
1.Rotatetheupperhandlesothatitneststogether
withthelowerhandle(Figure3),andtightenboth
knobsonthehandletolocktheupperhandlein
place(Figure4).
1.Upperhandle
Figure3
2.Knob(2)
Figure4
1.Handle-locklever
2.Releasethehandle-locklever(Figure4).
3.Pullthehandlerearwardandlockitintoposition
(Figure4).
5
Page 6
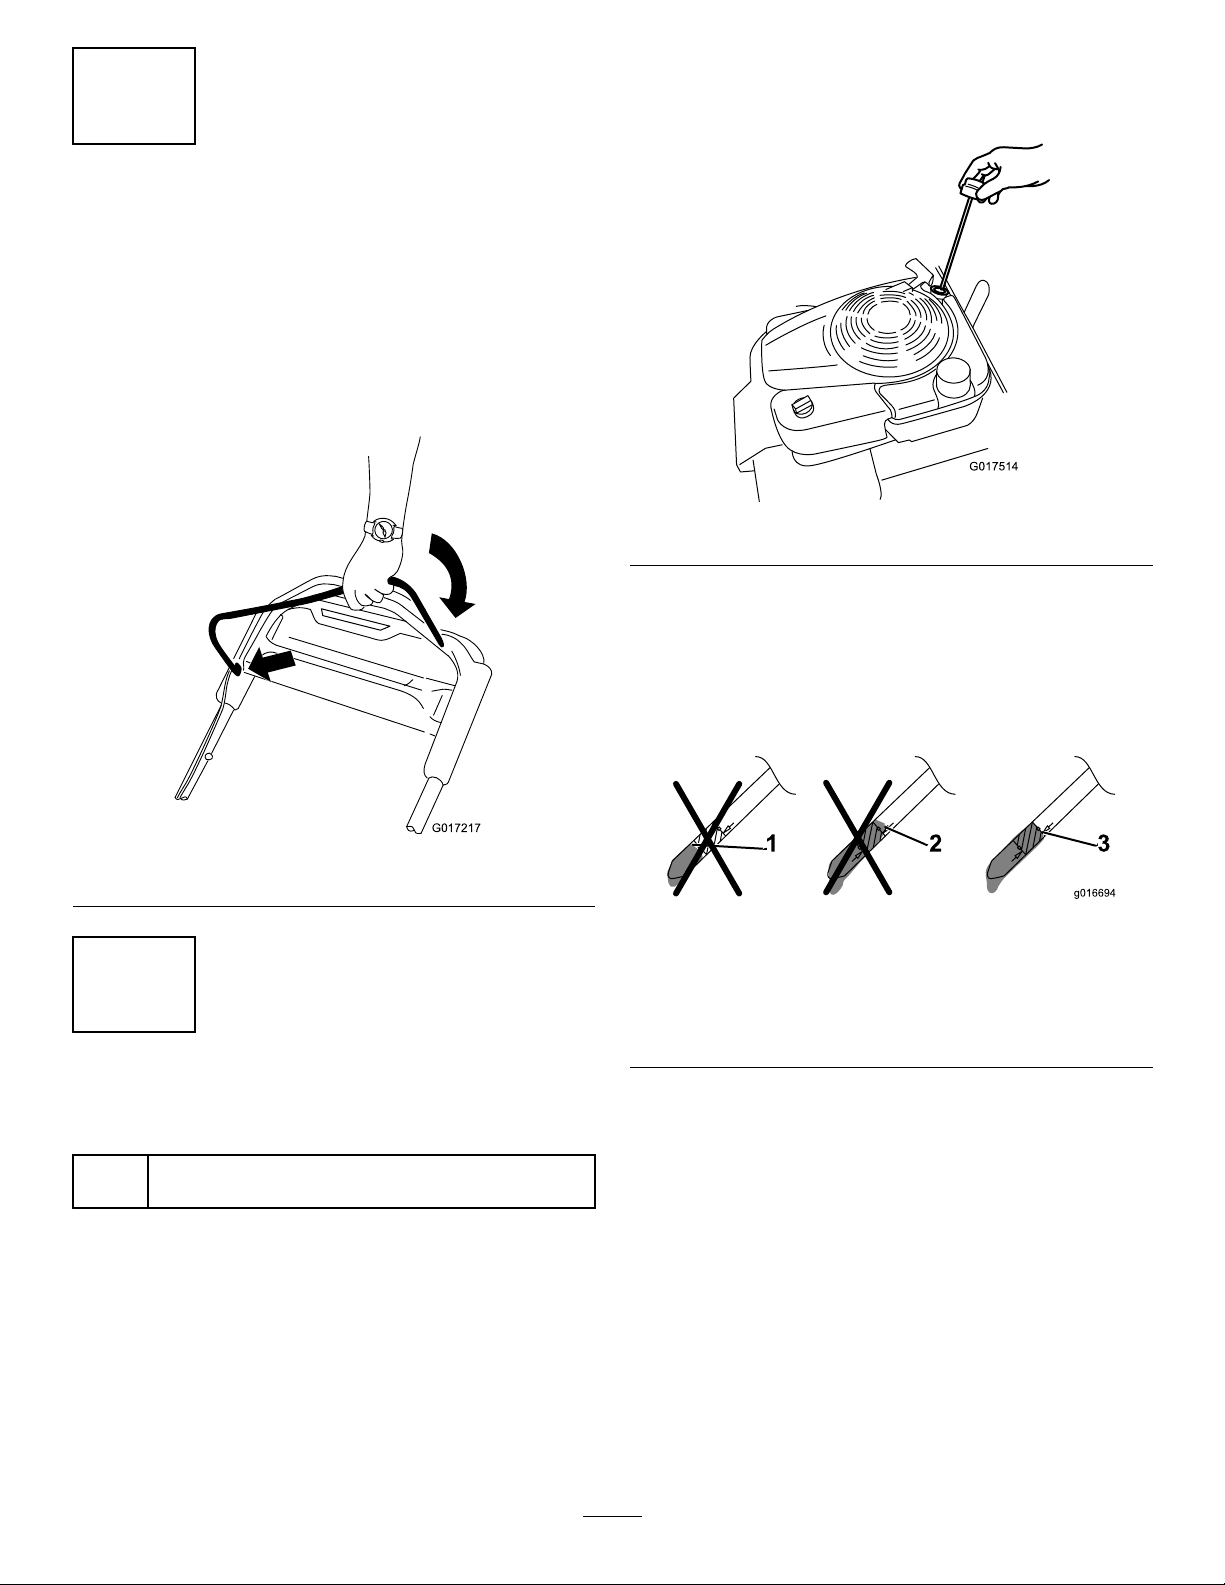
2
G017217
G017514
InstallingtheBlade-control
Bar
NoPartsRequired
Procedure
Installtheblade-controlbarintotheupperhandle
(Figure5).
Note:Max.ll:20oz.(0.59l),type:SAE30
detergentoilwithanAPIserviceclassicationofSF,
SG,SH,SJ,SL,orhigher.
Figure6
3.Wipeoffthedipstickendwithacleancloth.
4.Insertthedipstickintotheoil-lltube,andscrewit
inuntilitstops.
Figure5
3
FillingtheEnginewithOil
Partsneededforthisprocedure:
20.
Procedure
Important:Thismachine
intheengine.Beforestartingtheengine,llthe
enginewithoil.
1.Movethemachinetoalevelsurface.
Engineoil
oz.
does not
comewithoil
5.Removethedipstickandreadtheoillevelonthe
dipstick;refertoFigure7.
Figure7
1.Theoillevelistoolow;
addoiltothecrankcase.
2.Theoillevelistoohigh;
removeoilfromthe
crankcase.
•Iftheoillevelistoolow,addasmallamountof
oilslowlytotheoil-lltube,andthenrepeat
steps3through5untiltheoilleveliscorrectas
showninFigure7.
•Iftheoillevelistoohigh,draintheexcess
oiluntilyouobtainthecorrectoillevelon
thedipstick.Todraintheexcessoil,referto
ChangingtheEngineOil(page17).
Important:Iftheoillevelinthecrankcaseis
toolowortoohighandyouruntheengine,
youmaydamagetheengine.
3.Theoilleveliscorrect.
2.Removethedipstick(Figure6)andpourabout3/4
ofthecrankcasecapacityofoilintotheoil-lltube.
6.Installthedipsticksecurelybyhand.
6
Page 7
4
2
14
1
13
3
4
5
6
7
8
9
10
11
12
g016439
15
16
2
1
3
4
g017218
g017219
1
2
34
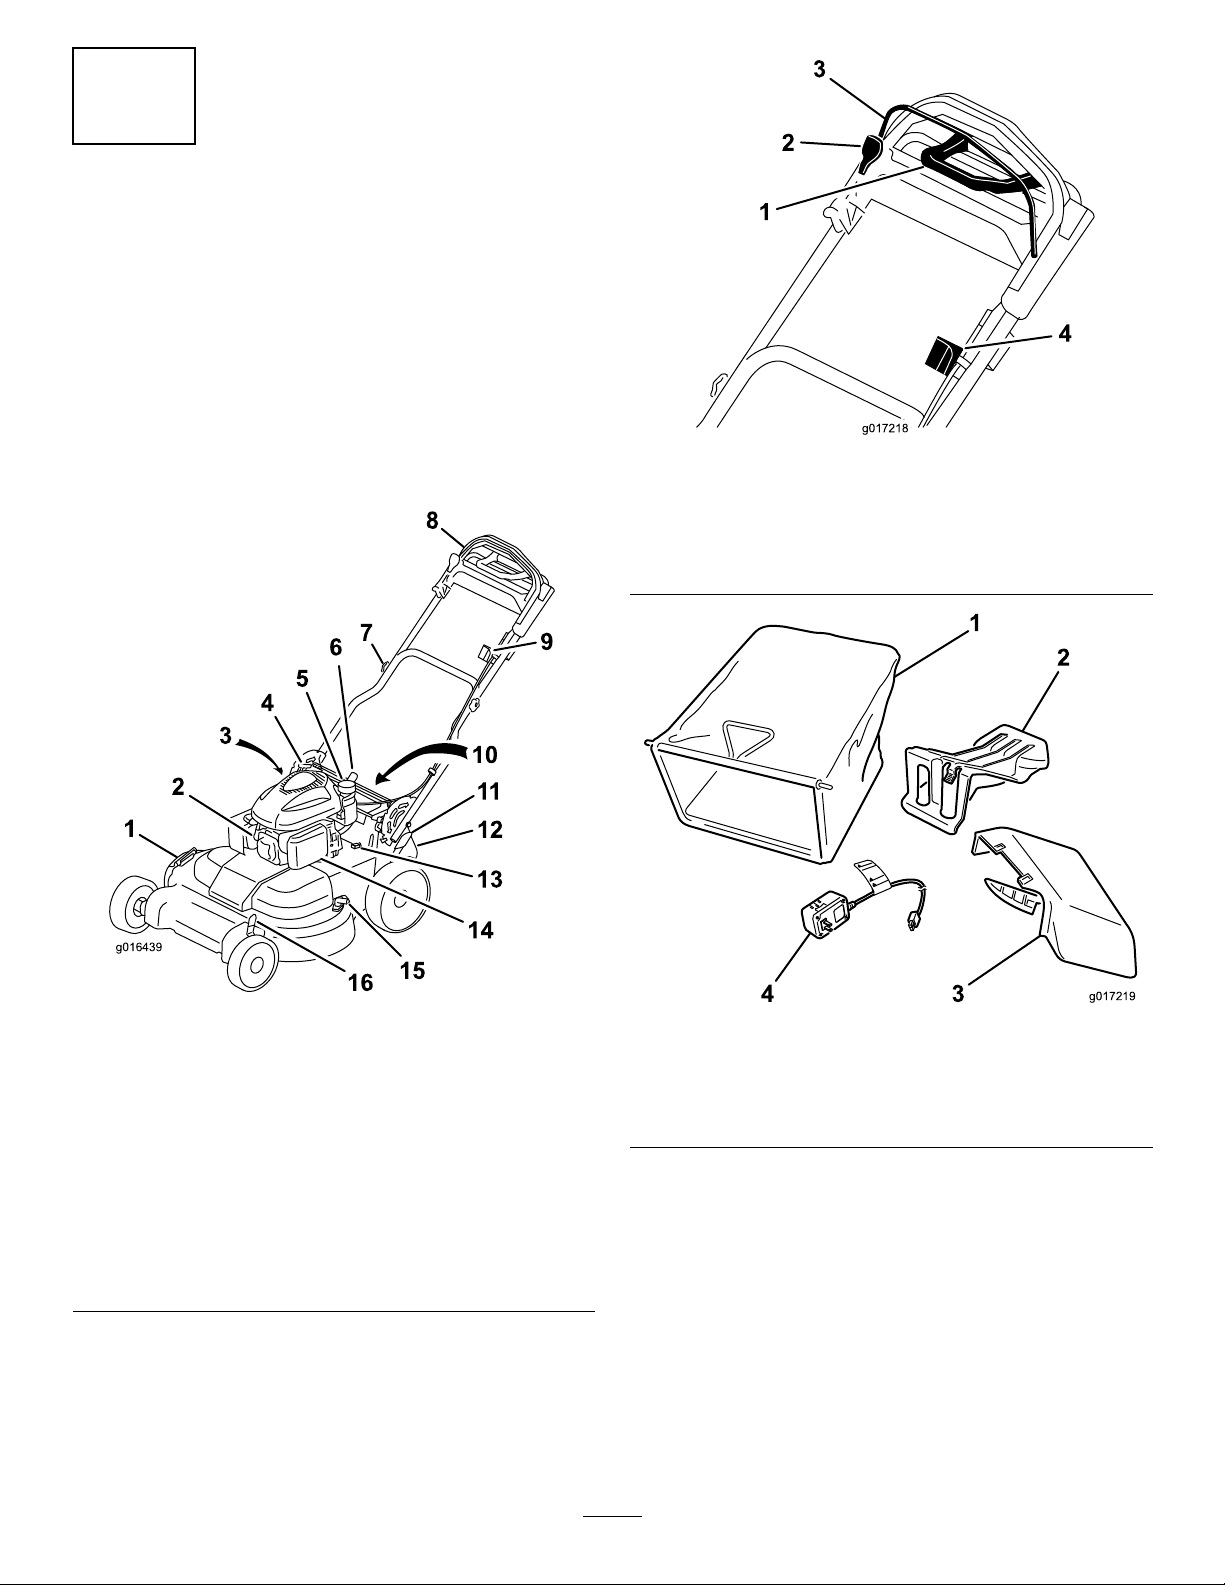
ChargingtheBattery
NoPartsRequired
Procedure
Electric-startmodelonly
RefertoChargingtheBattery(page18).
ProductOverview
Figure8
1.Side-dischargedeector
2.Sparkplug10.Battery(notshown;
3.Dipstick/oil-lltube(not
shown)
4.Recoil-starthandle
5.Fuel-tankcap13.Fuse
6.Handle-locklever
7.Handleknob(2)
8.Upperhandle16.Frontcutting-heightlever
9.Ignitionswitch
electric-startmodelonly)
11.Rearcutting-heightlever
12.Rear-dischargedeector
14.Airlter
15.Washoutport
Figure9
Upperhandle
1.Traction-assisthandle3.Blade-controlbar
2.Blade-controlbarlock4.Ignitionswitch
Figure10
1.Grassbag3.Side-dischargechute
2.Rear-dischargeplug
(installed)
4.Batterycharger
(electric-startmodelonly)
7
Page 8
Operation
1/4 inch (6 mm)
G017515
BeforeStarting
RecommendedFuel
DANGER
UsingFuel
Stabilizer/Conditioner
Useafuelstabilizer/conditionerinthemachineto
providethefollowingbenets:
•Itkeepsgasolinefreshduringstorageupto90days.
Whenstoringthemachineformorethan90days,
drainthefueltank.
Gasolineisextremelyammableandexplosive.A
reorexplosionfromgasolinecanburnyouand
others.
•Topreventastaticchargefromignitingthe
gasoline,placethecontainerand/ormower
directlyonthegroundbeforelling,notina
vehicleoronanobject.
•Fillthetankoutdoorswhentheengineiscold.
Wipeupspills.
•Donothandlegasolinewhensmokingoraround
anopenameorsparks.
•Storegasolineinanapprovedfuelcontainer,out
ofthereachofchildren.
•Forbestresults,useonlyclean,fresh,unleaded
gasolinewithanoctaneratingof87orhigher
((R+M)/2ratingmethod).
•Oxygenatedfuelwithupto10%ethanolor15%
MTBEbyvolumeisacceptable.
•Donotuseethanolblendsofgasoline,suchasE15
orE85,withmorethan10%ethanolbyvolume.
Performanceproblemsand/orenginedamagemay
result,whichmaynotbecoveredunderwarranty.
•Itcleanstheenginewhileitisrunning.
•Iteliminatesgum-likevarnishbuildupinthefuel
systems,whichcauseshardstarting.
Addthecorrectamountoffuelstabilizer/conditionerto
thegasolineasrecommendedontheproductlabel.
Note:Afuelstabilizer/conditionerismosteffective
whenitismixedwithfreshgasoline.T oprevent
varnishdepositsinthefuelsystem,useafuel
stabilizer/conditioneratalltimes.
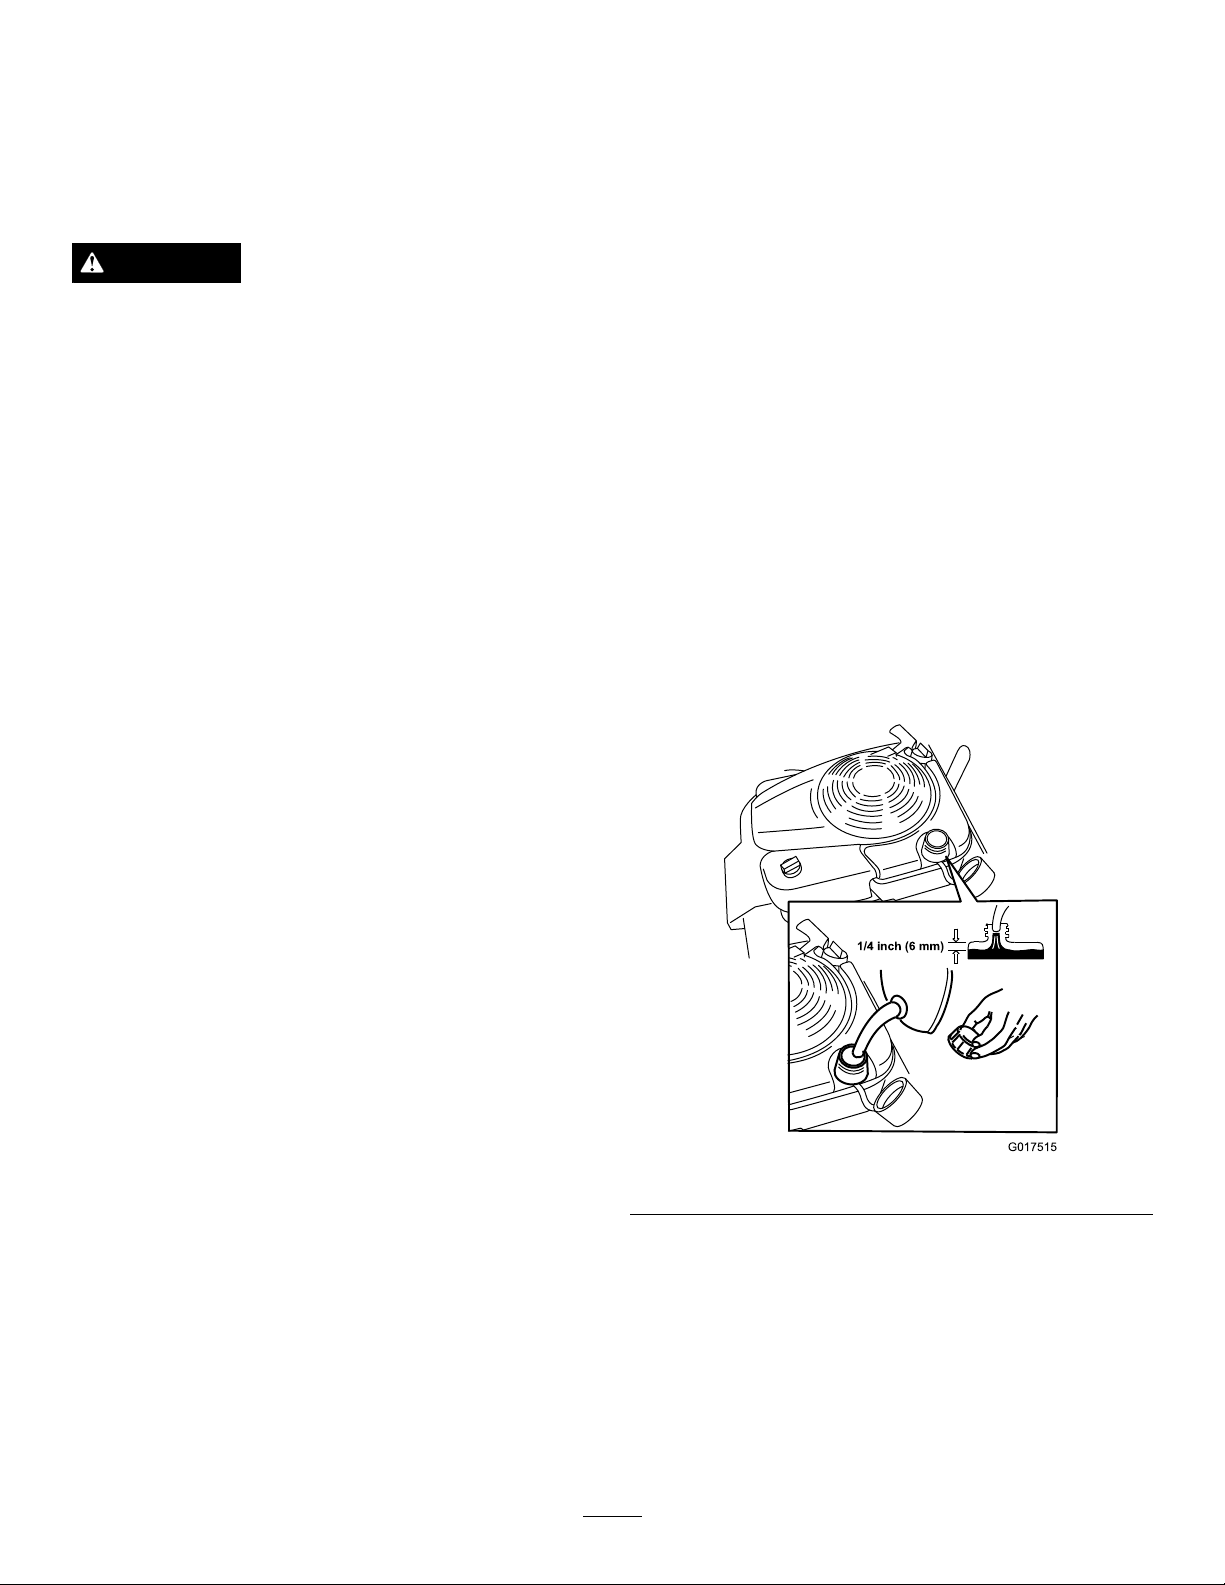
FillingtheFuelTank
1.Cleanaroundthefueltankcap,andremovethecap
fromthetank(Figure11).
•Donotusegasolinecontainingmethanol.
•Donotstorefueleitherinthefueltankorinfuel
containersoverthewinterunlessfuelstabilizerhas
beenaddedtothefuel.
•Donotaddoiltogasoline.
Figure11
2.Fillthefueltank,leavingatleast1/4inch(6mm)
fromthebottomoftheneckemptytoallowthe
gasolineroomtoexpand(Figure11).
3.Installthefueltankcapandtightenitsecurelyby
hand.
8
Page 9
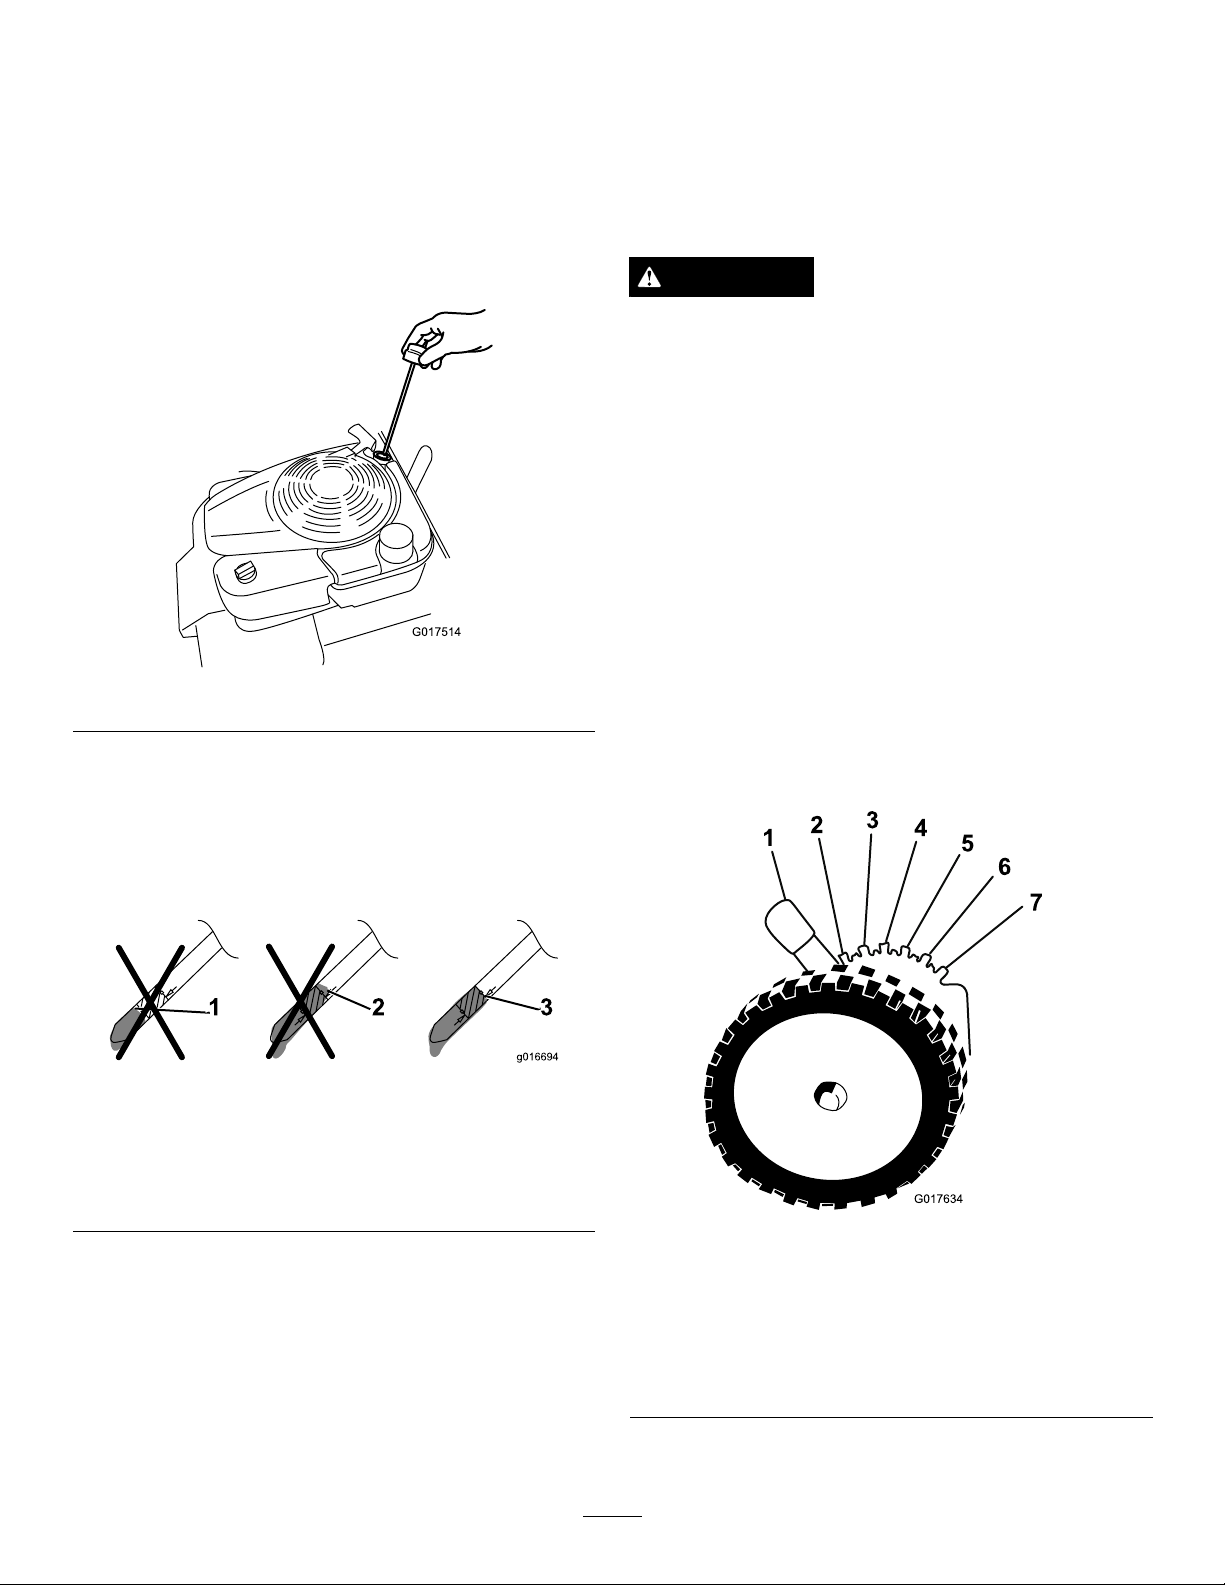
CheckingtheEngineOilLevel
G017514
1
2
3
4
5
6
7
G017634
ServiceInterval:Beforeeachuseordaily
Important:Iftheoillevelinthecrankcaseis
toolowortoohighandyouruntheengine,
youmaydamagetheengine.
Max.ll:20oz.(0.59l),type:SAE30detergentoil
withanAPIserviceclassicationofSF ,SG,SH,SJ,SL,
orhigher.
1.Movethemachinetoalevelsurface.
2.Removethedipstick(Figure12).
Figure12
3.Wipeoffthedipstickendwithacleancloth.
6.Installthedipsticksecurelybyhand.
AdjustingtheCuttingHeight
WARNING
Adjustingthecuttingheightmaybringyouinto
contactwiththemovingblades,causingserious
injury.
•Stoptheengineandwaitforallmovingparts
tostop.
•Donotputyourngersunderthehousingwhen
adjustingthecuttingheight.
Adjustthecuttingheightasdesired;referto
Figure14andFigure15.
Note:Toraisethemachine,movethefrontandrear
cuttingheightleversforward;tolowerthemachine,
movethecuttingheightleversrearward.Setthefront
andrearwheelstothesameheightunlessspecial
circumstancesrequireotherwise;refertoCuttingGrass
andCuttingLeavesin
OperatingTips(page15).
4.Insertthedipstickintotheoil-lltubeandscrewit
inuntilitstops.(Figure12).
5.Removethedipstickandreadtheoillevel;referto
Figure13.
Figure13
1.Theoillevelistoolow;
addoiltothecrankcase.
2.Theoillevelistoohigh;
removeoilfromthe
crankcase.
3.Theoilleveliscorrect.
•Iftheoillevelistoolow,addasmallamountof
oilslowlytotheoil-lltube,andthenrepeat
steps
3through5untiltheoilleveliscorrectas
showninFigure7.
•Iftheoillevelistoohigh,draintheexcess
oiluntilyouobtainthecorrectoillevelon
thedipstick;todraintheexcessoil,referto
ChangingtheEngineOil(page17).
Figure14
Frontcutting-heightlever
1.1inch(2.5cm)5.3inches(7.6cm))
2.1-1/2inches(3.8cm)6.3-1/2inches(8.9cm))
3.2inches(5.1cm)7.4inches(10.2cm)
4.2-1/2inches(6.4cm)
9
Page 10

1
2
3
4
5
6
7
G017635
Figure15
2
G016488
3
1
Rearcutting-heightlever
AdjustingtheHandleHeight
Youcanraiseorlowerthehandletoapositionmore
comfortableforyou.
1.Pullthehandle-lockleverrearwardtodisengagethe
handle-lockpins(
Figure16).
Figure16
1.1inch(2.5cm)5.3inches(7.6cm))
2.1-1/2inches(3.8cm)6.3-1/2inches(8.9cm))
3.2inches(5.1cm)7.4inches(10.2cm)
4.2-1/2inches(6.4cm)
1.Handle-locklever3.Notches
2.Handle-lockpin(2)
2.Rotatethehandleandalignthedesirednotchin
thehandlebrackettothehandle-lockpins;referto
Figure16.
3.Releasethehandle-locklevertosecurethehandle
inplace.
StartingtheEngine
StandardModel
Pulltherecoilhandleslowlyuntilyoufeelresistance,
thenpullitsharply.Allowtheropetoreturntothe
engineslowly.
Note:Ifthemachinedoesnotstartafterseveral
attempts,contactanAuthorizedServiceDealer.
Electric-startModel
Youcanstarttheengineonanelectric-startmodelby
usingeithertheignitionkeyortherecoil-starthandle.
•IgnitionKey:Turnandholdtheignitionkeytothe
Startposition(Figure17);whentheenginestarts,
releasethekey .
Important:Donotattempttostarttheengine
withtheblade-controlbarengaged;otherwise,
youmayblowthefuse.
10
Page 11

Note:DonotholdtheignitionkeyintheStart
G017516
G017595
G017636
G017517
positionforlongerthan5secondstoprevent
burningoutthestartermotor.
StoppingtheEngine
StandardModel
Pressthetoggleswitch(Figure19)totheStopposition,
andwaitfortheenginetostop.
Figure17
•Recoil-startHandle:
1.TurntheignitionkeytotheRunposition
(Figure17).
2.Pulltherecoilhandleslowlytotherearuntilyou
feelresistance,thenpullsharply.Allowtherope
toreturntotheengineslowly.
UsingtheSelf-propelDrive
Tooperatetheself-propeldrive,simplywalkwithyour
handsgrippingtheupperhandleandyourelbowsat
yoursides,andthemachinewillautomaticallykeeppace
withyou(
Note:Youcanself-propelthemachinewiththeblades
engagedordisengaged.
Figure18).
Figure19
Electric-startModel
1.TurnthekeytotheOffposition(Figure20).
Figure20
Figure18
Note:Usethetraction-assisthandleinsituations
whenyouneedmorecontrolthanyouhavewiththe
self-propeldrivealone.
2.Whentheenginestops,removetheignitionkeyand
takeitwithyouwhenyouleavethemachine.
EngagingtheBlade
Whenyoustartyourengine,thebladesdonotturn.You
mustengagethebladestomow.
1.Pulltheblade-control-barlockbacktothe
blade-controlbar,andtheblade-controlbarbackto
thehandle(Figure21).
11
Page 12

g016484
1
2
Figure21
g016485
G017596
1.Blade-controlbarlock2.Blade-controlbar
2.Holdtheblade-controlbaragainstthehandle
(Figure22).
UsingtheGrassBag
ServiceInterval:Beforeeachuseordaily
Youcanusethegrassbagtochecktheblade-stop
system.
1.Removetherear-dischargeplug.
2.Installtheemptygrassbagonthemachine.
3.Starttheengine.
4.Engagetheblades.
Note:Thebagshouldbegintoinate,indicating
thatthebladesarerotating.
5.Whilewatchingthebag,releasetheblade-controlbar.
Note:Ifthebagdoesnotdeatewithin3seconds
ofreleasingtheblade-controlbar,theblade-stop
systemmaybedeterioratingand,ifignored,could
resultinanunsafeoperatingcondition.Havethe
machineinspectedandservicedbyanAuthorized
ServiceDealer.
Figure22
DisengagingtheBlade
Releasetheblade-controlbar(Figure23).
Figure23
Important:Whenyoureleasetheblade-control
bar,thebladesshouldstopwithin3seconds.If
theydonotstopproperly,stopusingyourmachine
immediatelyandcontactanAuthorizedService
Dealer.
6.Stoptheengineandwaitforallmovingpartstostop.
NotUsingtheGrassBag
1.Movethemachineontoapavedsurfaceina
non-windyarea.
2.Setall4wheelstothe3-1/2inch(89mm)cutting
heightsetting.
3.Takeahalfsheetofnewspaperandcrumpleitintoa
ballsmallenoughtogounderthemachine(about3
inchesor75mmindiameter).
4.Placethenewspaperballabout5inches(13cm)in
frontofthemachine.
5.Starttheengine.
6.Engagetheblades.
7.Releasetheblade-controlbarandbegincountingout
3seconds.
8.Onthecountof3,pushthemachinequicklyforward
overthenewspaper.
9.Stoptheengineandwaitforallmovingpartstostop.
10.Gotothefrontofthemachineandcheckthe
newspaperball.
CheckingtheBlade-stop
Note:Ifthenewspaperballdidnotgounderthe
machine,repeatsteps
4through10.
SystemOperation
11.Ifthenewspaperisunravelledorshredded,the
Beforeeachuse,checkthatthebladesstopwithin3
secondsofreleasingtheblade-controlbar.
12
bladesdidnotstopproperly,whichcouldresultinan
Page 13

unsafeoperatingcondition.ContactanAuthorized
1
2
G016490
3
1
2
G017408
3
ServiceDealer.
RecyclingtheClippings
Thismachinecomesfromthefactoryreadytorecycle
grassandleafclippingsbackintothelawn.Toprepare
themachinetorecycle:
WARNING
Aworngrassbagcouldallowsmallstonesandother
similardebristobethrowntowardtheoperatoror
bystandersandresultinseriouspersonalinjuryor
death.
Checkthegrassbagfrequently.Ifitisdamaged,
installanewTororeplacementbag.
•Iftheside-dischargechuteisonthemower,remove
itandlowertheside-dischargedeector;refer
RemovingtheSide-dischargeChute(page14).
to
•Ifthegrassbagisonthemachine,removeit;refer
to(page9).
•Iftherear-dischargeplugisnotinstalled,gripitby
thehandle,raisethereardeector,andinsertitinto
therear-dischargechuteuntilthelatchlocksinto
place;referto
Figure24.
Iftheside-dischargechuteisonthemower,
removeitbeforebaggingtheclippings;referto
RemovingtheSide-dischargeChute(page14).
WARNING
Thebladesaresharp;contactingthebladescan
resultinseriouspersonalinjury.
Stoptheengineandwaitforallmovingpartstostop
beforeleavingtheoperatingposition.
InstallingtheGrassBag
1.Raiseandholdupthereardeector(Figure25).
Figure24
1.Reardeector
2.Inserttherear-discharge
plug
3.Therear-dischargeplug
installed
1.Reardeector
2.Rear-dischargeplug
Figure25
3.Latch
WARNING
Ensurethattherear-dischargeplugisinplace
beforeyourecycletheclippings.Neverengagethe
bladeswithouteithertherear-dischargeplugorthe
grassbaginstalled.
BaggingtheClippings
Usethegrassbagwhenyouwanttocollectgrassand
leafclippingsfromthelawn.
2.Removetherear-dischargeplugbypullingdownon
thelatchwithyourthumbandpullingtheplugout
fromthemachine(Figure25).
3.Installthebagrodintothenotchesatthebaseofthe
handleandrockthebagbackandforthtoensure
thattherodisseatedatthebottomofbothnotches;
refertoFigure26.
13
Page 14

G016513
1
2
Figure26
G017521
1
2
G017522
1.Bagrod
2.Notch(2)
4.Lowerthereardeectoruntilitrestsonthegrassbag.
RemovingtheGrassBag
Toremovethebag,reversethestepsinInstallingthe
GrassBagabove.
Side-dischargingtheClippings
Usethesidedischargeforcuttingverytallgrass.
Ifthebagisonthemachine,removeitandinsert
therear-dischargeplug;referto
side-dischargingtheclippings.
Important:Ensurethattherear-dischargeplugis
inplacebeforeyourecycletheclippings(Figure24).
WARNING
Thebladeissharp;contactingthebladecanresult
inseriouspersonalinjury.
Stoptheengineandwaitforallmovingpartstostop
beforeleavingtheoperatingposition.
(page9)before
Figure27
1.Side-dischargedeector2.Side-dischargechute
2.Installtheside-dischargechuteasshownin
Figure27andFigure28,andclosethedeectoronto
thechute.
Figure28
InstallingtheSide-dischargeChute
Withthechuteinyourrighthand:
1.Liftopentheside-dischargedeector(Figure27).
RemovingtheSide-dischargeChute
Toremovetheside-dischargechute,reversethestepsin
InstallingtheSide-dischargeChuteabove.
14
Page 15

OperatingTips
GeneralMowingTips
•Cleartheareaofloosesticks,branches,stones,wire,
twine,andotherdebristhatthebladescouldhit.
•Avoidstrikingsolidobjectswiththeblades.Never
deliberatelymowoveranyobject.
CuttingLeaves
•Aftercuttingaleaf-coveredlawn,ensurethatatleast
halfofthelawnshowsthroughthecutleaves.You
mayneedtomowtheleavesagain.
•Iftherearemorethan5inches(13cm)ofleaveson
thelawn,setthefrontcuttingheight1or2notches
higherthantherearcuttingheight.
•Ifthemachinestrikesanobjectorstartstovibrate,
immediatelystoptheengine,disconnectthewire
fromthesparkplug,andexaminethemachinefor
damage.
•Forbestperformance,installnewTororeplacement
bladesforyourmodelbeforethecuttingseason
begins.
•ReplacethebladeswhennecessarywithToro
replacementblades.
CuttingGrass
•Cutonlyaboutathirdofthegrassbladeata
time.Donotcutbelowthe2inch(51mm)
settingunlessthegrassissparseoritislatefall
whengrassgrowthbeginstoslowdown;referto
AdjustingtheCuttingHeight(page9).
•Whencuttinggrassover6inches(15cm)tall,mow
atthehighestcuttingheightsettingandwalkslower;
thenmowagainatalowersettingforthebestlawn
appearance.Ifthegrassistoolong,themachinemay
plugandcausetheenginetostall.
•Slowdownyourmowingspeedifthemowerdoes
notcuttheleavesnelyenough.
•Alternatethemowingdirection.Thishelpsdisperse
theclippingsoverthelawnforevenfertilization.
•Ifthenishedlawnappearanceisunsatisfactory,try
oneormoreofthefollowing:
–Replacethebladesorhavethemsharpened.
–Walkataslowerpacewhilemowing.
–Raisethecuttingheightonyourmachine.
–Overlapcuttingswathsinsteadofcuttingafull
swathwitheachpass.
–Setthecuttingheightonthefrontwheelsanotch
lowerthantherearwheels.
–Cutthegrassmorefrequently.
•Cutonlydrygrassorleaves.Wetgrassandleaves
tendtoclumpontheyardandcancausethemachine
toplugortheenginetostall.
WARNING
Mowingwetgrassorleavescanleadtoserious
injuryifyouslipandcontacttheblade.Mow
onlyindryconditions.
15
Page 16

Maintenance
G017520
1
Note:Determinetheleftandrightsidesofthemachinefromthenormaloperatingposition.
RecommendedMaintenanceSchedule(s)
MaintenanceService
Interval
Aftertherst5hours
Beforeeachuseordaily
Every25hours
Every50hours
Beforestorage
Yearly
Important:Refertothe
MaintenanceProcedure
•Changetheengineoil.
•Checktheengineoillevel.
•Checktheblade-stopsystemoperation.
•Checktheaircleanerandcleanorreplaceit,ifnecessary .
•Checkthecuttingblades.
•Washunderneaththemachine.
•Chargethebattery(electric-startmodelonly).
•Changetheengineoil.
•Servicetheblade-drivesystem.
•Chargethebattery(electric-startmodelonly).
•Emptythefueltankbeforerepairsasdirectedandbeforeannualstorage.
•Servicetheairlter;replaceitmorefrequentlyindustyoperatingconditions.
•Changetheengineoil.
•Replacethebladesorhavethemsharpened(morefrequentlyifthebladeedges
dullquickly).
•Checkthesparkplug;refertotheEngineOperator’sManual.
•RefertoyourEngineOperator’sManualforadditionalmaintenanceprocedures.
Engine Operator’ s Man ual
foradditionalmaintenanceprocedures.
PreparingforMaintenance
1.Stoptheengineandwaitforallmovingpartstostop.
2.Disconnectthespark-plugwirefromthesparkplug
(Figure29).
Figure29
1.Spark-plugwire
Important:Beforetippingthemowertochange
theoilorreplacetheblades,allowthefueltank
torundrythroughnormalusage.Ifyoumust
tipthemowerpriortorunningoutoffuel,usea
handfuelpumptoremovethefuel.Alwaystip
themowerontoitssidesothattheairlteris
upintheair.
WARNING
Tippingthemachinemaycausethefueltoleak.
Gasolineisammable,explosive,andcancause
personalinjury.
16
Page 17

ServicingtheAirFilter
G017216
2
1
3
4
G017281
ChangingtheEngineOil
ServiceInterval:Yearly
Beforeeachuseordaily
1.Loosenthefastenerandremovetheairltercover
Figure30).
(
Figure30
1.Cover
2.Fastener4.Base
3.Filter
ServiceInterval:Aftertherst5hours
Every50hours
Yearly
Max.ll:20oz.(0.59l),type:SAE30detergentoil
withanAPIserviceclassicationofSF ,SG,SH,SJ,SL,
orhigher.
1.Ensurethatthefueltankcontainslittleornofuelso
thatfueldoesnotleakoutwhenyoutipthemower
ontoitsside.
2.Runtheengineafewminutesbeforechangingthe
oiltowarmit.
Note:Warmoilowsbetterandcarriesmore
contaminants.
3.Disconnectthewirefromthesparkplug.Referto
PreparingforMaintenance(page16).
4.Tipthemowerontoitsside,withthedipstickdown,
untiltheupperhandlerestsontheground.
5.Setanoil-drainpanunderthedipstick.
6.Removethedipstickanddraintheusedoilintoan
oil-drainpan(Figure31).
2.Removeandinspectthelter.
•Ifthelterisdamagedoriswetwithoilorfuel,
replaceit.
•Ifthelterisdirty,tapitonahardsurface
severaltimesorblowthedebrisoutwardfrom
theinteriorofthelterusingcompressedairat
lessthan30psi(207kPa).
Note:Donotbrushorblowdirtfromthe
Figure31
outsideofthelter;eitherforcesdirtintothe
bers.
3.Cleantheairlterbodyandcoverusingadamprag.
Keepdirtawayfromtheairopening.
4.Installthelterontothebase.
7.Afterdrainingtheusedoil,returnthemowertothe
operatingposition.
8.Removethedipstick(Figure32)andpourabout3/4
ofthecrankcasecapacityofoilintotheoil-lltube.
5.Installthecoverandscrewthefastenerdown
securely.
Note:Max.ll:20oz.(0.59l),type:SAE30
detergentoilwithanAPIserviceclassicationofSF,
SG,SH,SJ,SL,orhigher.
17
Page 18

G017514
ChargingtheBattery
G017518
ServiceInterval:Every25hours
Beforestorage
Electric-startmodelonly
WARNING
Batteryposts,terminals,andrelatedaccessories
containleadandleadcompounds,chemicals
knowntotheStateofCaliforniatocausecancer
andreproductiveharm.
batter y .
W ash hands after handling
Figure32
9.Wipeoffthedipstickendwithacleancloth.
10.Insertthedipstickintotheoil-lltube,andscrewit
inuntilitstops.
11.Removethedipstickandreadtheoillevelonthe
dipstick;refertoFigure33.
Figure33
1.Theoillevelistoolow;
addoiltothecrankcase.
2.Theoillevelistoohigh;
removeoilfromthe
crankcase.
3.Theoilleveliscorrect.
•Iftheoillevelistoolow,addasmallamountof
oilslowlytotheoil-lltube,andthenrepeat
9through11untiltheoilleveliscorrect
steps
asshowninFigure33.
•Iftheoillevelistoohigh,draintheexcess
oiluntilyouobtainthecorrectoillevelon
thedipstick.Todraintheexcessoil,referto
ChangingtheEngineOil(page17).
Chargethebatteryfor24hoursinitially,thenmonthly
(every25starts)orasneeded.Alwaysusethecharger
inashelteredarea,andchargethebatteryatroom
temperature(about70°F,or22°C)wheneverpossible.
Note:Themachineisequippedwithanalternator
chargingsystem.
1.Connectthechargertothewireharness,whichis
locatedbelowtheignitionkey(
Figure34
Figure34).
2.Plugthechargerintoawalloutlet.
Note:Whenthebatterynolongerholdsacharge,
recyclethelead-acidbatteryaccordingtolocalcodes.
Important:Iftheoillevelinthecrankcaseis
toolowortoohighandyouruntheengine,
youmaydamagetheengine.
12.Installthedipsticksecurelybyhand.
13.Recycletheusedoil.
18
Page 19

ReplacingtheFuse
1
g016487
G017523
1
Electric-startmodelonly
Ifthebatterydoesnotchargeortheenginedoesnot
turnwiththeelectricstarter,thefusemaybeblown;
replaceitwitha40-ampplug-intypefuse.
Important:Y oucannotstartthemachinewith
theelectricstarterorchargethebatteryunlessa
workingfuseisinstalled.
1.Openthesealedfuseholderandreplacethefuse
Figure35).
(
Figure35
Figure36
1.Rear-deectorandhandle-lockleverassembly
8.Removethecoverfromthebattery.
9.Disconnecttheleadsfromthebattery.
10.Removeandbatteryandrecycleit.
Note:Recyclethebatteryaccordingtoyourstate
andlocalregulations.
1.Fuseholder
2.Closethecovertothefuseholder,andensurethatit
issealedtightly.
ReplacingtheBattery
Electric-startmodelonly
RemovingtheOldBattery
1.ContactanAuthorizedPartsDealertoobtaina
replacementbattery.
2.Removethebeltcover;refertostep
ServicingtheBlade-driveSystem(page20).
3.Removetherear-dischargeplug.
4.Movethehandletotheverticalposition.
5.Removethe4smallboltsthatholdtherear-deector
andhandle-lockleverassemblyinplace.
6.Foldthehandleallthewayforward.
7.Removetherear-deectorandhandle-locklever
assembly(
Figure36).
1of
InstallingtheNewBattery
1.Cleanthebattery-holdingareaonthemower
housing.
2.Setthenewbatteryinplaceonthemowerhousing.
3.Connecttheleadstothenewbattery.
Note:Ensurethatyouconnecttheblack(negative)
wiretothenegative(-)terminalandthered(positive)
wiretothepositive(+)terminal.
4.Installthecoverontothebattery.
Note:Ensurethatthecovertsproperlyoverthe
wiringharness.
5.Installtherear-deectorandhandle-locklever
assemblyontothemachine.
6.Raisethehandletotheverticalposition.
7.Securetheshroudwiththe4smallboltsthatyou
removedinstep
8.Installtherear-dischargeplug.
9.Returnthehandletotheoperatingposition.
5ofRemovingtheOldBattery.
19
Page 20

AdjustingtheSelf-propelDrive
G016491
1
2
g017221
2
1
3
4
5
6
ServicingtheBlade-drive
Cable
Wheneveryouinstallanewself-propelcable,orif
theself-propeldriveisoutofadjustment,adjustthe
self-propel-drivecable.
1.Loosenthecablesupportnut(
Figure37
2.Pulldownthecablejacket(towardthemower)until
thereisnoslackinthecable(Figure38).
Figure37).
System
ServiceInterval:Every50hours
1.Removetheblade-drivesystemcover(Figure39).
Figure39
1.Bolts
2.Brushorblowoutdebrisfromtheinsideofthe
shieldandaroundalltheparts.
2.Cover
Figure38
3.Tightenthenutonthecablesupport.
3.Holda0.010-inchfeelergauge,apieceofpaper,ora
notecardagainstthewallandslideitdownbehind
thebelttensionspring.
Note:Ifthereisavisiblegapbetweenthegauge
andthespring,tightentheadjustingboltandthenut
untilthepaperbarelyslidesfreelyinandoutofthe
Figure40).
gap(
Figure40
1.Belt-tensionspring4.Adjustingnut
2.Adjustingbolt5.Blade-drivebelt
3.Gap
6.Wall
20
Page 21

Important:Donotovertightentheadjusting
1
G016519
g017223
bolt.Thiscoulddamagetheblade-drivebelt.
4.Installtheblade-drivesystemcoverthatyou
previouslyremoved.
ServicingtheCuttingBlades
ServiceInterval:Yearly
Important:
the blades pr oper l y
Y ou will need a torque wr ench to install
.Ifyoudonothaveatorque
wrenchorareuncomfortableperformingthis
procedure,contactanAuthorizedServiceDealer.
Examinethebladesforsharpnessandanywearor
damagewheneveryourunoutofgasoline;refer
toInspectingtheBlades(page21).Ifthebladeedge
isdullornicked,haveitsharpenedorreplaceit.Ifthe
bladeisworn,bent,damagedorcracked,replaceit
immediatelywithagenuineTororeplacementblade.
DANGER
Awornordamagedbladecanbreak,andapiece
ofthebladecouldbethrowntowardtheoperator
orabystander,resultinginseriouspersonalinjury
ordeath.
•Inspectthebladesperiodicallyforwearor
damage.
•Replaceawornordamagedblade.
Figure41
1.Handlelockedintheverticalposition
2.Tipthemachineontoitsside,withtheairlterupin
theair,untiltheupperhandlerestsontheground.
WARNING
Thebladesaresharp;contactingabladecould
resultinseriouspersonalinjury.
•Disconnectthewirefromthesparkplug .
•Weargloveswhenservicingtheblade.
Note:Maintainsharpbladesthroughoutthecutting
season,becausesharpbladescutcleanlywithouttearing
orshreddingthegrassblades.Tearingandshredding
turnsgrassbrownattheedges,whichslowsgrowthand
increasesthechanceofdisease.
PreparingtoServicetheCuttingBlades
1.Lockthehandleintheverticalposition(Figure41);
refertoAdjustingtheHandleHeight(page10).
InspectingtheBlades
ServiceInterval:Beforeeachuseordaily
1.Inspectthecuttingedges(Figure42).Iftheedges
arenotsharporhavenicks,removethebladesand
havethemsharpenedorreplacethem.
2.Inspectthebladesthemselves,especiallythecurved
Figure42).Ifyounoticeanydamage,wear,or
area(
aslotforminginthisarea(Figure42),immediately
replaceitwithanewblade.
Figure42
1.Cuttingedge3.Wear/slotforming
2.Curvedarea4.Crack
21
Page 22

DANGER
B
B
2
1
3
g016532
Ifyouallowabladetowear,aslotwillform
betweenthesailandatpartoftheblade.
Eventuallyapieceoftheblademaybreakoff
andbethrownfromunderthehousing,possibly
resultinginseriousinjurytoyouorbystanders.
•Inspectthebladeperiodicallyforwearor
damage.
•Nevertrytostraightenabladethatisbentor
weldabrokenorcrackedblade.
•Replaceawornordamagedblade.
referto
RemovingtheBlades(page22)and
InstallingtheBlades(page23).
WARNING
Abladethatisbentordamagedcouldbreak
apartandcouldseriouslyinjureorkillyouor
bystanders.
•Alwaysreplaceabentordamagedbladewith
anewblade.
•Neverleorcreatesharpnotchesinthe
edgesorsurfacesofablade.
3.Checkforbentblades;referto
CheckingforBentBlades(page22).
CheckingforBentBlades
1.Rotatethebladesuntiltheyarepositionedasshown
inFigure43.
RemovingtheBlades
Replacethebladeswhenthemachinehitsasolidobject
orwhenabladeisoutofbalanceorbent.Useonly
genuineTororeplacementblades.
1.Useablockofwoodtoholdeachbladesteadyand
turnthebladeboltcounterclockwiseasshownin
Figure44.
Figure43
1.Frontofcuttingdeck3.Measurefromthecutting
2.MeasureatlocationsA
andB
2.Measurefromalevelsurfacetothecuttingedges
atlocationsAandB,(
Figure43),andrecordboth
edgetoasmooth,level
surface
dimensions.
3.Rotatethebladessothattheiroppositeendsareat
locationsAandB.
4.Repeatthemeasurementsinstep2andrecordthem.
Note:IfthedifferencebetweenthedimensionsA
andBobtainedinsteps2and4exceeds1/8inch
(3mm),thebladeisbentandmustbereplaced;
Figure44
2.RemoveeachbladeasshowninFigure45.
22
Page 23

G016530
1
2
3
4
Figure45
g016537
g01 6536
1
1.Spindle(2)3.Blade(2)
2.Bladedriver(2)4.Bladebolt(2)
3.Inspectthepinsonthebladedriversforwearand
damage.
InstallingtheBlades
1.Installtherstbladesothatitishorizontal,along
withallmountinghardwareasshowninFigure45.
Note:Tightentheboltwithyourngers.
Important:Positionthecurvedendsofthe
bladestopointtowardthemachinehousing.
Besuretonesttheraisedareasoneachblade
driverwiththerecessesintheheadofits
correspondingspindle,andthepinsontheother
sideofeachbladedriverwiththeholesinits
correspondingblade.
2.Steadyeachbladewithaboardandturntheblade
boltclockwisewithatorquewrenchasshownin
Figure46;torquethebladeboltto60ft-lb(82N-m).
Important:Abolttorquedto60ft-lb(82N-m)
isverytight.Putyourweightbehindthewrench
andtightentheboltsecurely.Thisboltisvery
difculttoovertighten.
Figure46
3.Rotatetheinstalledblade1/4turnuntilitisvertical,
andinstalltheotherbladeinthesamemanneras
therst(refertostep1).
Note:Thebladesshouldbeperpendicular,forming
aninverted“T”asshownin
Figure47
1.Blade(2)
Figure47.
4.Tightenthesecondblade;refertostep2.
5.Rotatethebladesbyhandafull360°turntoensure
thattheydonottouch.
Note:Ifthebladestoucheachother,theyarenot
mountedcorrectly.Repeatsteps1through3,until
thebladesnolongertoucheachother.
23
Page 24

WARNING
WARNING
Incorrectlyinstallingthebladescoulddamage
themachineorcauseaninjurytotheoperator
ortobystanders.
WashingUnderneaththe
Machine
ServiceInterval:Beforeeachuseordaily—Wash
underneaththemachine.
1.Movethemachinetoalevelsurface.
2.Stoptheengineandwaitforallmovingpartstostop
beforeleavingtheoperatingposition.
3.Lowerthemachinetothelowestheight-of-cut.
4.Attachahosetothewashouttting,andturnthe
wateronhigh(
Note:Spreadpetroleumjellyonthewashouttting
O-ringtomakethecouplingslideoneasierand
protecttheO-ring.
Figure48).
Abrokenormissingwashoutttingcould
exposeyouandotherstothrownobjectsorblade
contact.Contactwithabladeorthrowndebris
cancauseinjuryordeath.
•Replaceabrokenormissingwashouttting
immediately,beforeusingthemachine
again.
•Neverputyourhandsorfeetunderthe
machineorthroughopeningsinthemower.
Figure48
1.Washouttting3.O-ring
2.Hose
5.Starttheengine,engagetheblade-controllever,and
letthemachinerunfor1to3minutes.
6.Disengagetheblade-controllever,stoptheengine,
andwaitforallmovingpartstostop.
7.Shutoffthewaterandremovethecouplingfrom
thewashouttting.
Note:Ifthemachineisnotcleanafterasingle
washing,soakitandletitstandfor30minutes.Then
repeattheprocess.
8.Runthemachineagainandengagethebladesfor1
to3minutestoremovetheexcesswater.
4.Coupling
24
Page 25

Storage
1.Runthemachineuntiltheenginestopsfromrunning
outoffuel.
Storethemachineinacool,clean,dryplace.
GeneralInformation
1.Performtherecommendedannualmaintenance
procedures;refertotheRecommendedMaintenance
ScheduleunderMaintenance(page16).
2.Cleanunderthemachine;referto
WashingUnderneaththeMachine(page24).
3.Removechaff,dirt,andgrimefromtheexternal
partsoftheengine,theshrouding,andthetopof
themachine.
4.Checktheconditionoftheblades;referto
InspectingtheBlades(page21).
5.Servicetheairlter;referto
ServicingtheAirFilter(page17).
6.Tightenallnuts,bolts,andscrews.
7.Touchupallrustedorchippedpaintsurfaceswith
paintavailablefromanAuthorizedServiceDealer.
8.Chargethebatteryfor24hours,thenunplugthe
batterychargerandstorethemachineinanunheated
area.Ifyoumuststorethemachineinaheated
area,youmustchargethebatteryevery90days
(electric-startmodelonly).
9.Foldthehandleforstorage;referto
AdjustingtheHandleHeight(page10).
PreparingtheFuelSystem
WARNING
Gasolinecanvaporizeifyoustoreitoverlong
periodsoftimeandexplodeifitcomesintocontact
withanopename.
•Donotstoregasolineoverlongperiodsoftime.
•Donotstorethemachinewithgasolineinthe
fueltankorthecarburetorinanenclosurewith
anopename.(Forexample,afurnaceora
waterheaterpilotlight.)
•Allowtheenginetocoolbeforestoringitinany
enclosure.
2.Starttheengineagain.
3.Allowtheenginetorununtilitstops.Whenyoucan
nolongerstarttheengine,itissufcientlydry.
PreparingtheEngine
1.Whiletheengineisstillwarm,changetheengineoil;
refertoChangingtheEngineOil(page17).
2.Removethesparkplug.
3.Usinganoilcan,addabout1oz.(30ml),ofmotor
oiltotheenginethroughthespark-plughole.
4.Slowlypullthestarterropeseveraltimestodistribute
oilthroughoutthecylinder.
5.Installthesparkplugbutdonotconnectthewireto
thesparkplug.Securethewiresothatitdoesnot
comeintocontactwiththesparkplug.
RemovingtheMachinefrom
Storage
1.Unfoldthehandle;referto
AdjustingtheHandleHeight(page10).
2.Checkandtightenallfasteners.
3.Removethesparkplugandspintheenginerapidly
usingthestartertoblowexcessoilfromthecylinder.
4.Inspectthesparkplugandreplaceitifitisdirty,
worn,orcracked;refertotheEngineOperator’sManual.
5.Installthesparkplugandtightenittothe
recommendedtorqueof180in-lb(20N-m).
6.Performanyneededmaintenanceprocedures;refer
Maintenance(page16).
to
7.Checktheengineoillevel;referto
CheckingtheEngineOilLevel(page9).
8.Fillthefuelinthefueltankwithfreshgasoline;refer
toRecommendedFuel(page8).
9.Chargethebattery;referto
ChargingtheBattery(page18)(electric-start
modelonly).
10.Connectthewiretothesparkplug.
Onthelastrefuelingoftheyear,addfuelstabilizerto
thefuelasdirectedbytheenginemanufacturer.Empty
thefueltankwhenmowingthelasttimebeforestoring
themachine.
25
Page 26

Notes:
26
Page 27

Notes:
27
Page 28

TheToroTotalCoverageGuarantee
A3-Y earFullWarranty(45DayLimitedWarrantyforCommercialUse)
TheToroGTSStartingGuarantee
A3-YearFullWarranty(NotApplicableforCommercialUse)
TimeMaster
WalkPowerMowers
ConditionsandProductsCovered
TheToroCompanyanditsafliate,ToroWarrantyCompany ,pursuantto
anagreementbetweenthem,jointlypromisetorepairtheT oroProduct
listedbelowifusedforresidentialpurposes*;ifitisdefectiveinmaterials
orworkmanshiporifitstopsfunctioningduetothefailureofacomponent;
oriftheT oroGTS(GuaranteedtoStart)enginewillnotstartontherstor
secondpull,providedtheroutinemaintenancerequiredintheOperator's
Manualhavebeenperformed.
Thiswarrantycoversthecostofpartsandlabor,butyoumustpay
transportationcosts.
Thefollowingtimeperiodsapplyfromthedateofpurchase:
ProductsWarrantyPeriod
TimeMasterMowerandAttachments
GTS(GuaranteedtoStart)3-yearfullwarranty
Battery1-year
3-yearfullwarranty
LimitedWarrantyforCommercialUse*
TheseT oroProductsusedforcommercial,institutional,orrentaluse,
arewarrantedfor45daysagainstdefectsinmaterialsorworkmanship.
Componentsfailingduetonormalweararenotcoveredbythiswarranty.
TheToroGTS(GuaranteedtoStart)StartingGuaranteedoesnotapply
whentheproductisusedcommercially*.
InstructionsforObtainingWarrantyService
IfyouthinkthatyourT oroProductcontainsadefectinmaterialsor
workmanship,orifanormal,able-bodiedadultcannolongerstartyour
product'sengineinoneortwopulls,followthisprocedure:
1.ContactanyAuthorizedT oroServiceDealertoarrangeserviceattheir
dealership.Tolocateadealerconvenienttoyou,refertotheY ellow
Pagesofyourtelephonedirectory(lookunder“LawnMowers”)or
accessourwebsiteatwww.Toro.com.Youmayalsocallthenumbers
listedinitem#3tousethe24-hourToroDealerlocatorsystem.
2.Bringtheproductandyourproofofpurchase(salesreceipt)tothe
ServiceDealer.Thedealerwilldiagnosetheproblemanddetermine
ifitiscoveredunderwarranty.
3.IfforanyreasonyouaredissatisedwiththeServiceDealer’s
analysisorwiththeassistanceprovided,contactusat:
CustomerCareDepartment,RLCDivision
TheT oroCompany
811 1LyndaleAvenueSouth
Bloomington,MN55420-1196
Tollfreeat866-214-9807(U.S.customers)
Tollfreeat866-214-9808(Canadiancustomers)
OwnerResponsibilities
YoumustmaintainyourT oroProductbyfollowingthemaintenance
proceduresdescribedintheOperator'sManual.Suchroutine
maintenance,whetherperformedbyadealerorbyyou,isatyourexpense.
ItemsandConditionsNotCovered
Thereisnootherexpresswarrantyexceptforspecialemissionsystem
coverageandenginewarrantycoverageonsomeproducts.Thisexpress
warrantydoesnotcoverthefollowing:
•Costofregularmaintenanceserviceorparts,suchaslters,fuel,
lubricants,oilchanges,sparkplugs,airltersbladesharpening
orwornblades,cable/linkageadjustments,orbrakeandclutch
adjustments
•Anyproductorpartwhichhasbeenalteredormisusedandrequires
replacementorrepairduetoaccidentsorlackofpropermaintenance
•Repairsnecessaryduetofailuretousefreshfuel(lessthanone
monthold),orfailuretoproperlypreparetheunitpriortoanyperiod
ofnon-useoveronemonth
•Pickupanddeliverycharges
•Operationalmisuse,neglect,oraccidents
•RepairsorattemptedrepairsbyanyoneotherthananAuthorized
ToroServiceDealer
•Repairsoradjustmentstocorrectstartingdifcultiesduetothe
following:
–failuretofollowpropermaintenanceprocedures
–rotarymowerbladestrikinganobject
–contaminantsinthefuelsystem
–improperfuel(consultyourOperator'sManualifindoubt)
–failuretodrainthefuelsystempriortoanyperiodofnon-use
overonemonth
•Specialoperationalconditionswherestartingmayrequiremorethan
twopulls:
–rsttimestartsafterextendedperiodofnon-useoverthree
monthsorseasonalstorage
–cooltemperaturestartssuchasthosefoundinearlyspringand
lateautumn
–improperstartingprocedures-ifyouarehavingdifcultystarting
yourunit,pleasechecktheOperator'sManualtoensurethat
youareusingthecorrectstartingprocedures.Thiscansavean
unnecessaryvisittoanAuthorizedT oroServiceDealer .
GeneralConditions
Allrepairscoveredbythesewarrantiesmustbeperformedbyan
AuthorizedToroServiceDealerusingToro-approvedreplacementparts.
RepairbyanAuthorizedToroServiceDealerisyoursoleremedyunder
thiswarranty .
NeitherTheT oroCompanynorT oroWarrantyCompanyisliablefor
indirect,incidental,orconsequentialdamagesinconnectionwiththe
useoftheT oroProductscoveredbythesewarranties,includingany
costorexpenseofprovidingsubstituteequipmentorserviceduring
reasonableperiodsofmalfunctionornon-usependingcompletionof
repairsunderthesewarranties.
Somestatesdonotallowexclusionsofincidentalorconsequential
damages,sotheaboveexclusionsmaynotapplytoyou.
Thiswarrantygivesyouspeciclegalrights,andyoumayalsohaveother
rightswhichvaryfromstatetostate.
CountriesOtherthantheUnitedStatesorCanada
CustomerswhohavepurchasedToroproductsexportedfromtheUnitedStatesorCanadashouldcontacttheirToroDistributor(Dealer)toobtain
guaranteepoliciesforyourcountry,province,orstate.IfforanyreasonyouaredissatisedwithyourDistributor'sserviceorhavedifcultyobtaining
guaranteeinformation,contacttheT oroimporter.Ifallotherremediesfail,youmaycontactusatT oroWarrantyCompany.
*Residentialpurposesmeansuseoftheproductonthesamelotasyourhome.Useatmorethanonelocation,orinstitutionalorrentaluse,isconsidered
commercialuse,andthecommercialusewarrantyapplies.
374-0283RevA
 Loading...