

Page 1
HoverPro
g017365
1
ModelNo.02604—SerialNo.400000000andUp
ModelNo.02606—SerialNo.400000000andUp
®
500Machine
FormNo.3414-486RevB
Operator'sManual
Introduction
Readthisinformationcarefullytolearnhowtooperate
andmaintainyourproductproperlyandtoavoid
injuryandproductdamage.Youareresponsiblefor
operatingtheproductproperlyandsafely.Keepthis
manualforfuturereference.
YoumaycontactT orodirectlyatwww.T oro.comfor
productandaccessoryinformation,helpndinga
dealer,ortoregisteryourproduct.
Wheneveryouneedservice,genuineToroparts,or
additionalinformation,contactanAuthorizedService
DealerorToroCustomerServiceandhavethemodel
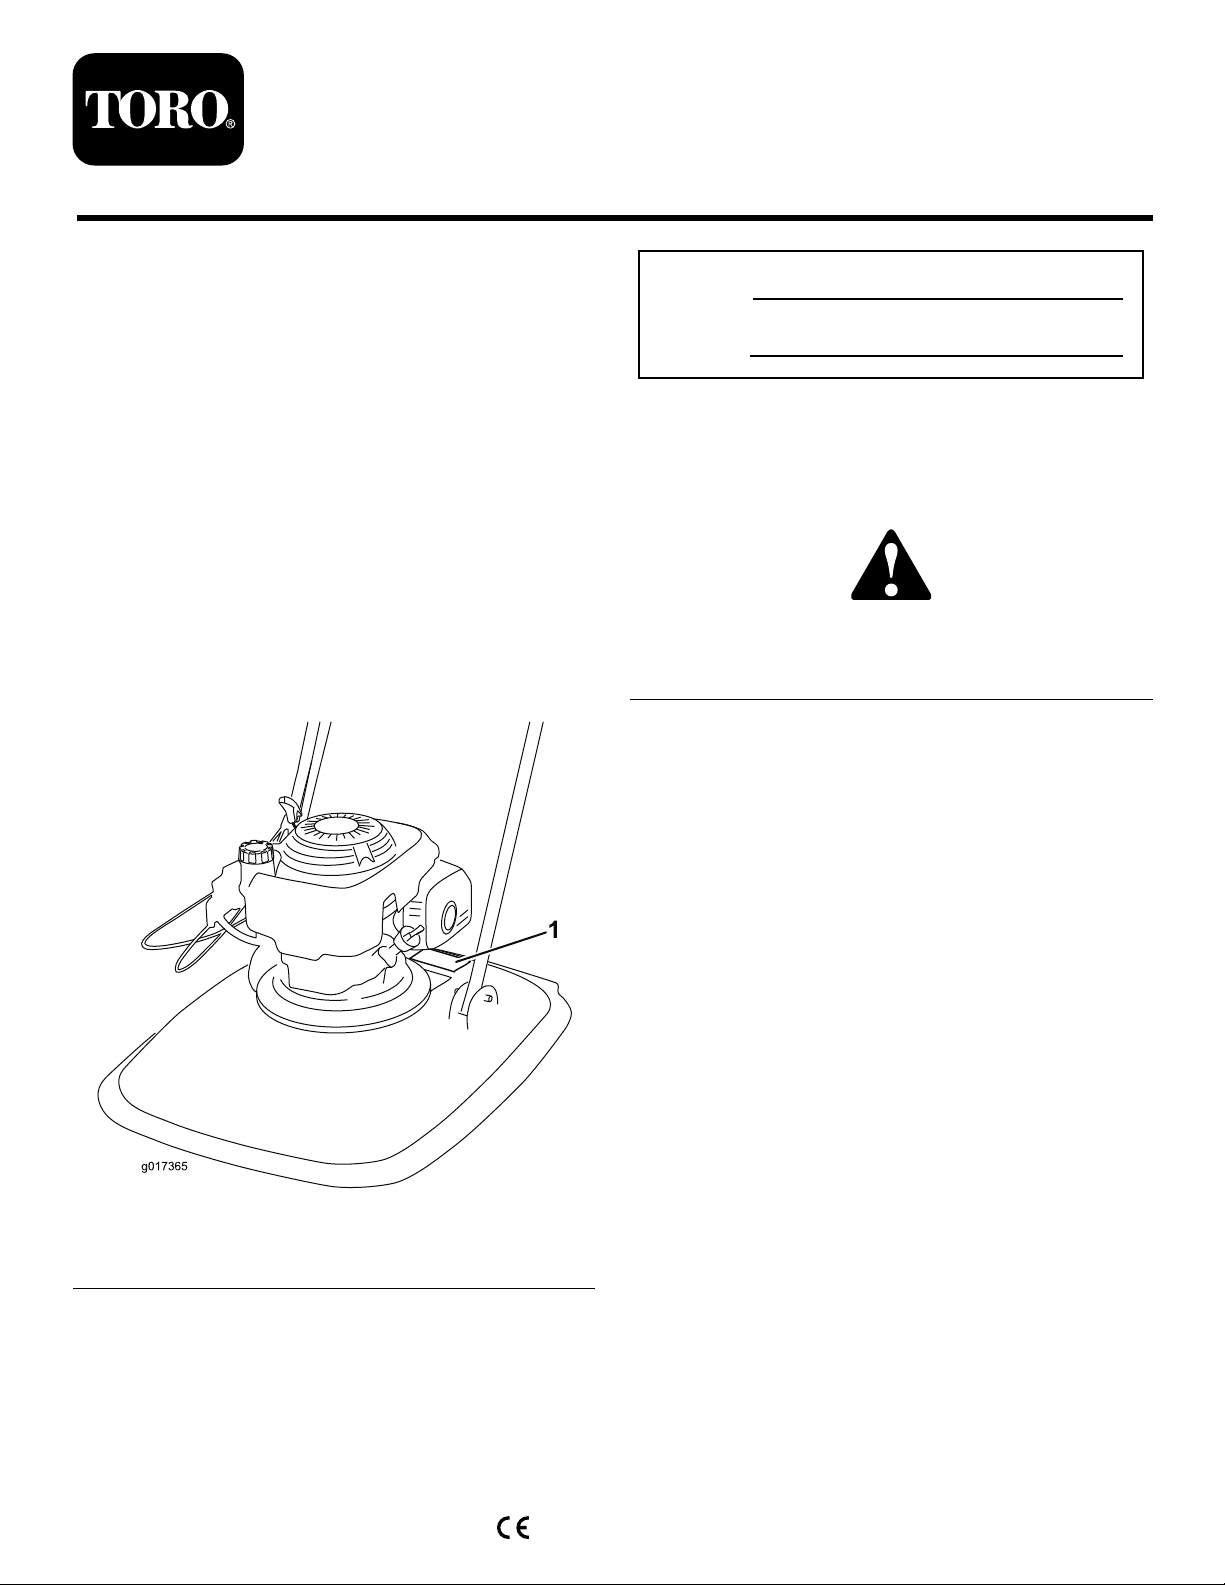
andserialnumbersofyourproductready .Figure1
identiesthelocationofthemodelandserialnumbers
ontheproduct.
ModelNo.
SerialNo.
Thismanualidentiespotentialhazardsandhas
safetymessagesidentiedbythesafety-alertsymbol
(Figure2),whichsignalsahazardthatmaycause
seriousinjuryordeathifyoudonotfollowthe
recommendedprecautions.
g000502
Figure2
1.Safety-alertsymbol
Thismanualuses2wordstohighlightinformation.
Importantcallsattentiontospecialmechanical
informationandNoteemphasizesgeneralinformation
worthyofspecialattention.
Formodelswithstatedenginehorsepower,thegross
horsepoweroftheenginewaslaboratoryratedbythe
enginemanufacturerinaccordancewithSAEJ1349.
Asconguredtomeetsafety,emission,andoperating
requirements,theactualenginehorsepoweronthis
classmachinewillbesignicantlylower.
Figure1
1.Modelandserialnumberplate
Writetheproductmodelandserialnumbersinthe
spacebelow:
©2017—TheT oro®Company
8111L yndaleAvenueSouth
Bloomington,MN55420
Registeratwww.Toro.com.
Contents
Introduction...............................................................1
Safety.......................................................................2
GeneralSafety...................................................2
BeforeOperationSafety.....................................2
g017365
DuringOperatingSafety.....................................3
AfterOperatingSafety........................................4
MaintenanceSafety............................................4
SafetyandInstructionalDecals..........................4
Setup........................................................................6
1AssemblingtheHandle....................................6
2InstallingtheFootstop......................................6
3FillingtheEnginewithOil.................................7
ProductOverview.....................................................8
Specications....................................................9
Operation..................................................................9
FillingtheFuelT ank............................................9
OriginalInstructions(EN)
PrintedintheUK
AllRightsReserved
*3414-486*B
Page 2

CheckingtheEngine-OilLevel..........................10
AdjustingtheCuttingHeight.............................10
StartingtheEngine............................................11
AdjustingtheChoke..........................................12
ShuttingOfftheEngine.....................................12
Hauling.............................................................12
OperatingTips.................................................13
Maintenance...........................................................14
RecommendedMaintenanceSchedule(s)...........14
PreparingforMaintenance...............................14
ReplacingtheAirCleaner.................................15
ChangingtheEngineOil...................................15
ServicingtheSparkPlug...................................16
ReplacingtheBlade..........................................16
CleaningtheMachine.......................................17
Troubleshooting......................................................18
Safety
Thismachinehasbeendesignedinaccordancewith
ENISO5395.
GeneralSafety
Thisproductiscapableofamputatinghandsand
feetandofthrowingobjects.Alwaysfollowallsafety
instructionstoavoidseriouspersonalinjury .
Usingthisproductforpurposesotherthanitsintended
usecouldprovedangeroustoyouandbystanders.
•Readandunderstandthecontentsofthis
Operator’sManualbeforestartingtheengine.
•Donotputyourhandsorfeetnearmoving
componentsofthemachine.
•Donotoperatethemachinewithoutallguards
andothersafetyprotectivedevicesinplaceand
workingonthemachine.
•Keepclearofanydischargeopening.Keep
bystandersasafedistanceawayfromthe
machine.
•Keepchildrenoutoftheoperatingarea.Never
allowchildrentooperatethemachine.
•Stopthemachineandshutofftheenginebefore
servicing,fueling,oruncloggingthemachine.
Improperlyusingormaintainingthismachinecan
resultininjury.Toreducethepotentialforinjury,
complywiththesesafetyinstructionsandalwayspay
attentiontothesafety-alertsymbol,whichmeans
Caution,Warning,orDanger—personalsafety
instruction.Failuretocomplywiththeseinstructions
mayresultinpersonalinjuryordeath.
Youcanndadditionalitemsofsafetyinformationin
theirrespectivesectionsthroughoutthismanual.
BeforeOperationSafety
GeneralSafety
•Alwaysinspectthemachinetoensurethatthe
blades,bladebolts,andcuttingassemblyarenot
wornordamaged.
•Inspecttheareawhereyouwillusethemachine
andremoveallobjectsthatthemachinecould
throw.
•Becomefamiliarwiththesafeoperationofthe
equipment,operatorcontrols,andsafetysigns.
•Checkthatallguardsandsafetydevicesarein
placeandworkingproperly.
•Adjustingthecuttingheightmaybringyouinto
contactwiththemovingblade,causingserious
injury.
2
Page 3

–Shutofftheengineandwaitforallmoving
partstostop.
–Disconnectthespark-plugwirefromthespark
plugwhenadjustingcuttingheight.
FuelSafety
DANGER
Fuelisextremelyammableandhighly
explosive.Areorexplosionfromfuel
canburnyouandothersandcandamage
property.
•Topreventastaticchargefromignitingthe
fuel,placethecontainerand/ormachine
directlyonthegroundbeforelling,notin
avehicleoronanobject.
•Fillthefueltankoutdoors,inanopenarea,
whentheengineiscold.Wipeupanyfuel
thatspills.
•Donothandlefuelwhensmokingor
aroundanopenameorsparks.
•Storefuelinanapprovedcontainerand
keepitoutofthereachofchildren.
stopwithin3seconds.Ifnot,stopusingyour
machineimmediatelyandcontactanAuthorized
ServiceDealer.
•Operatethemachineonlyingoodvisibilityand
appropriateweatherconditions.Donotoperate
themachinewhenthereistheriskoflighting.
•Wetgrassorleavescancauseseriousinjuryifyou
slipandcontacttheblade.Avoidmowinginwet
conditions,ifpossible.
•Useextremecarewhenapproachingblind
corners,shrubs,trees,orotherobjectsthatmay
blockyourview.
•Watchforholes,ruts,bumps,rocks,orother
hiddenobjects.Uneventerraincouldcausea
slip-and-fallaccident.
•Stopthemachineandinspectthebladesafter
strikinganobjectorifthereisanabnormal
vibrationinthemachine.Makeallnecessary
repairsbeforeresumingoperation.
•Beforeleavingtheoperatingposition,shutoffthe
engine,andwaitforallmovingpartstostop.
•Iftheenginehasbeenrunningthemuferwillbe
hotandcanseverelyburnyou.Keepawayfrom
thehotmufer.
•Useaccessoriesandattachmentsapprovedby
TheToro®Companyonly .
WARNING
Fuelisharmfulorfatalifswallowed.
Long-termexposuretovaporscancause
seriousinjuryandillness.
•Avoidprolongedbreathingofvapors.
•Keepyourhandsandfaceawayfromthe
nozzleandthefuel-tankopening.
•Keepfuelawayfromyoureyesandskin.
DuringOperatingSafety
GeneralSafety
•Wearappropriateclothing,includingeye
protection;slip-resistant,substantialfootwear;and
hearingprotection.Tiebacklonghairanddonot
wearjewelry .
•Donotoperatethemachinewhileill,tired,or
undertheinuenceofalcoholordrugs.
•Thebladeissharp;contactingthebladecanresult
inseriouspersonalinjury.Shutofftheengine,and
waitforallmovingpartstostopbeforeleavingthe
operatingposition.
•Whenyoureleasetheoperator-presencecontrol,
theengineshouldshutoffandthebladeshould
SlopeSafety
WARNING
Runningtheengineonslopesofmorethan45
degreeswillcausesevereenginedamagedue
toalackoflubrication.Someofthepotential
damagecouldincludestuckvalves,scored
pistons,orburnedcrankbearings.
•Beforeoperatingonanyslope,asite
surveyshouldbecompletedtodetermine
theactualslopewheretheunitwillbe
operating.
•Donotrunthe4cycleHondaengineinthis
productonslopesofmorethan45degrees.
•Avoidmowingwetgrass.Poorfootingcouldcause
aslip-and-fallaccident.
•Mowwithcautionneardrop-offs,ditches,or
embankments.
•Whenusingthemachine,alwayskeepbothhands
onthehandlebar.
•Whencuttingfromthetopofasteepslopeand
youneedlongerreach,useanapprovedextended
handlebarifyouneedalongerreach.
3
Page 4
AfterOperatingSafety
GeneralSafety
•Cleangrassanddebrisfromthemachinetohelp
preventres.Cleanupoilorfuelspills.
•Allowtheenginetocoolbeforestoringthemachine
inanyenclosure.
•Neverstorethemachineorfuelcontainerwhere
thereisanopename,spark,orpilotlight,such
asonawaterheateroronotherappliances.
HaulingSafety
•Usecarewhenloadingorunloadingthemachine.
•Securethemachine.
•Theengineisnottobeusedtoliftthemachine,as
sharpedgescouldcauseinjury.
SafetyandInstructionalDecals
MaintenanceSafety
•Disconnectthespark-plugwirefromthesparkplug
beforeperforminganymaintenanceprocedure.
•Wearglovesandeyeprotectionwhenservicing
themachine.
•Thebladeissharp;contactingthebladecanresult
inseriouspersonalinjury .Weargloveswhen
servicingtheblade.
•Nevertamperwithsafetydevices.Checktheir
properoperationregularly .
•Tippingthemachinemaycausethefueltoleak.
Fuelisammableandexplosive,andcancause
personalinjury.Runtheenginedrytoremovethe
fuelwithahandpump;neversiphonthefuel.
Important:Safetydecalsandinstructionsareeasilyvisibletotheoperatorandarelocatednearany
areaofpotentialdanger.Replaceanydecalthatisdamagedormissing.
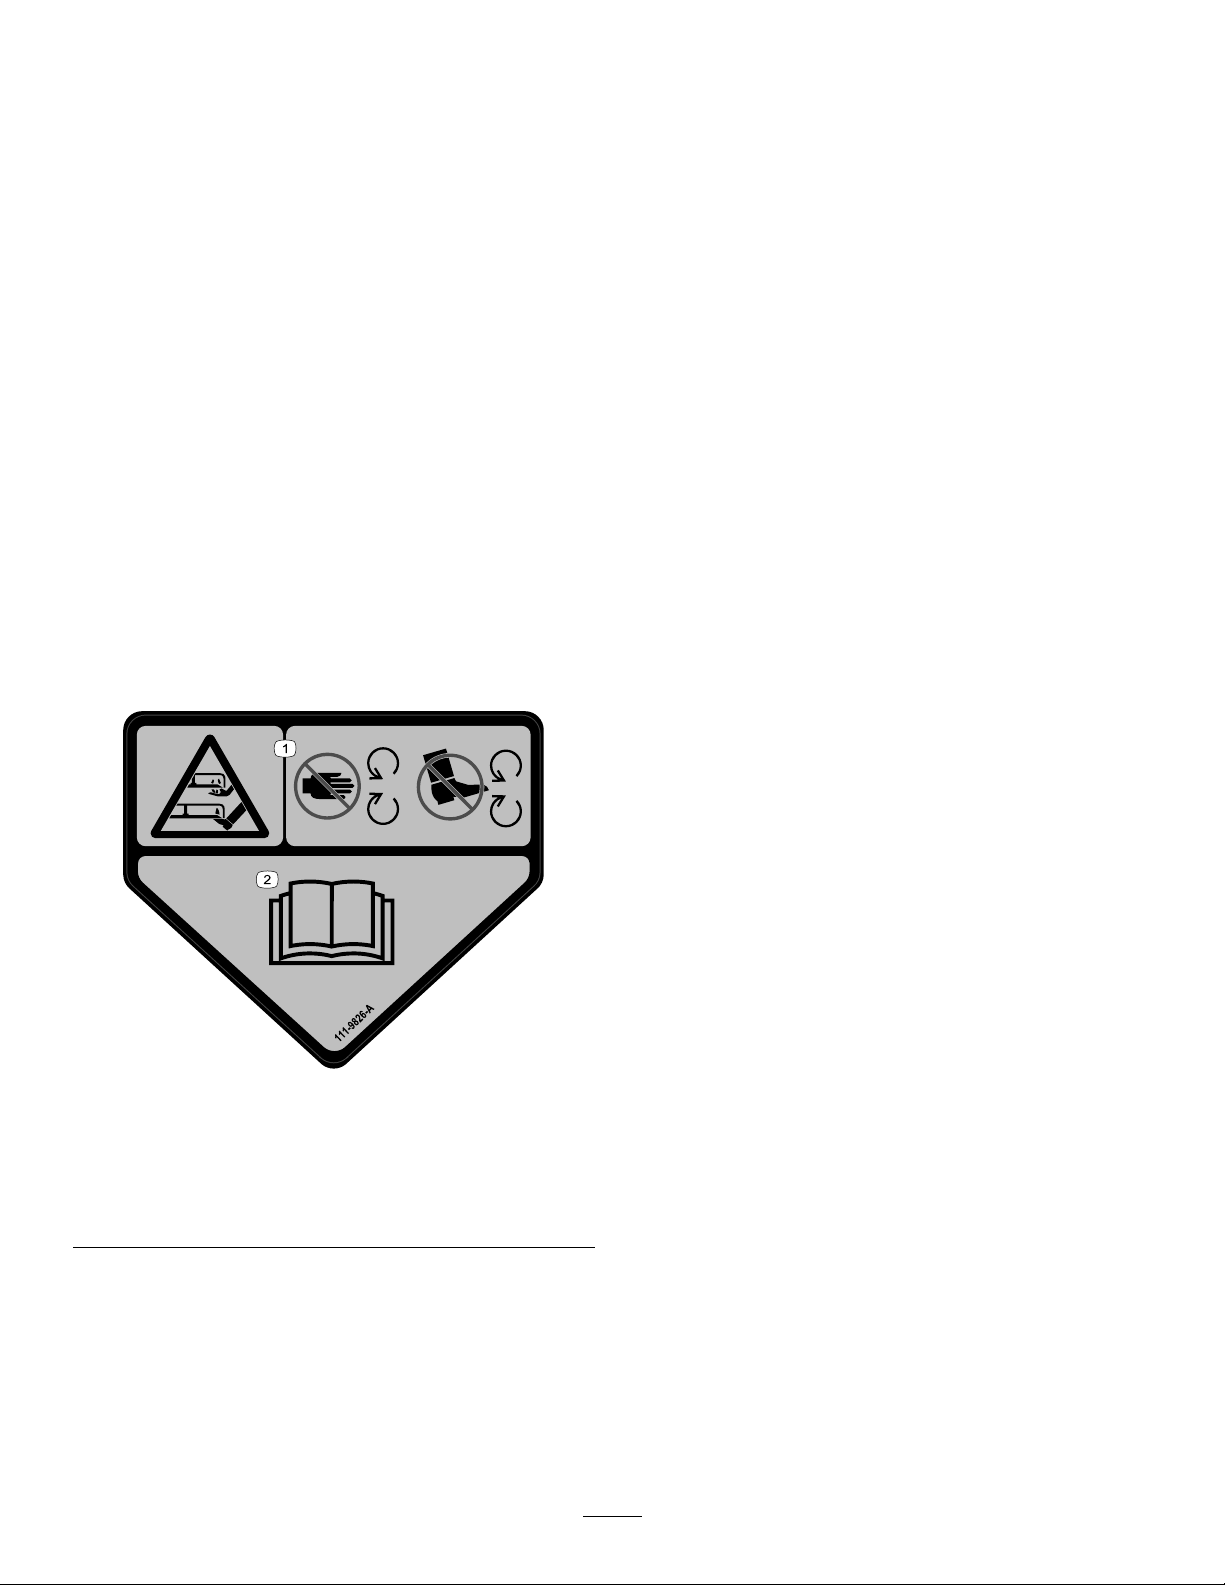
decal11 1-9826
111–9826
1.Cutting/dismemberment
hazardofhandorfoot,
cuttingunit—keepyour
handsandfeetawayfrom
movingparts.
2.ReadtheOperator’s
Manual.
4
Page 5
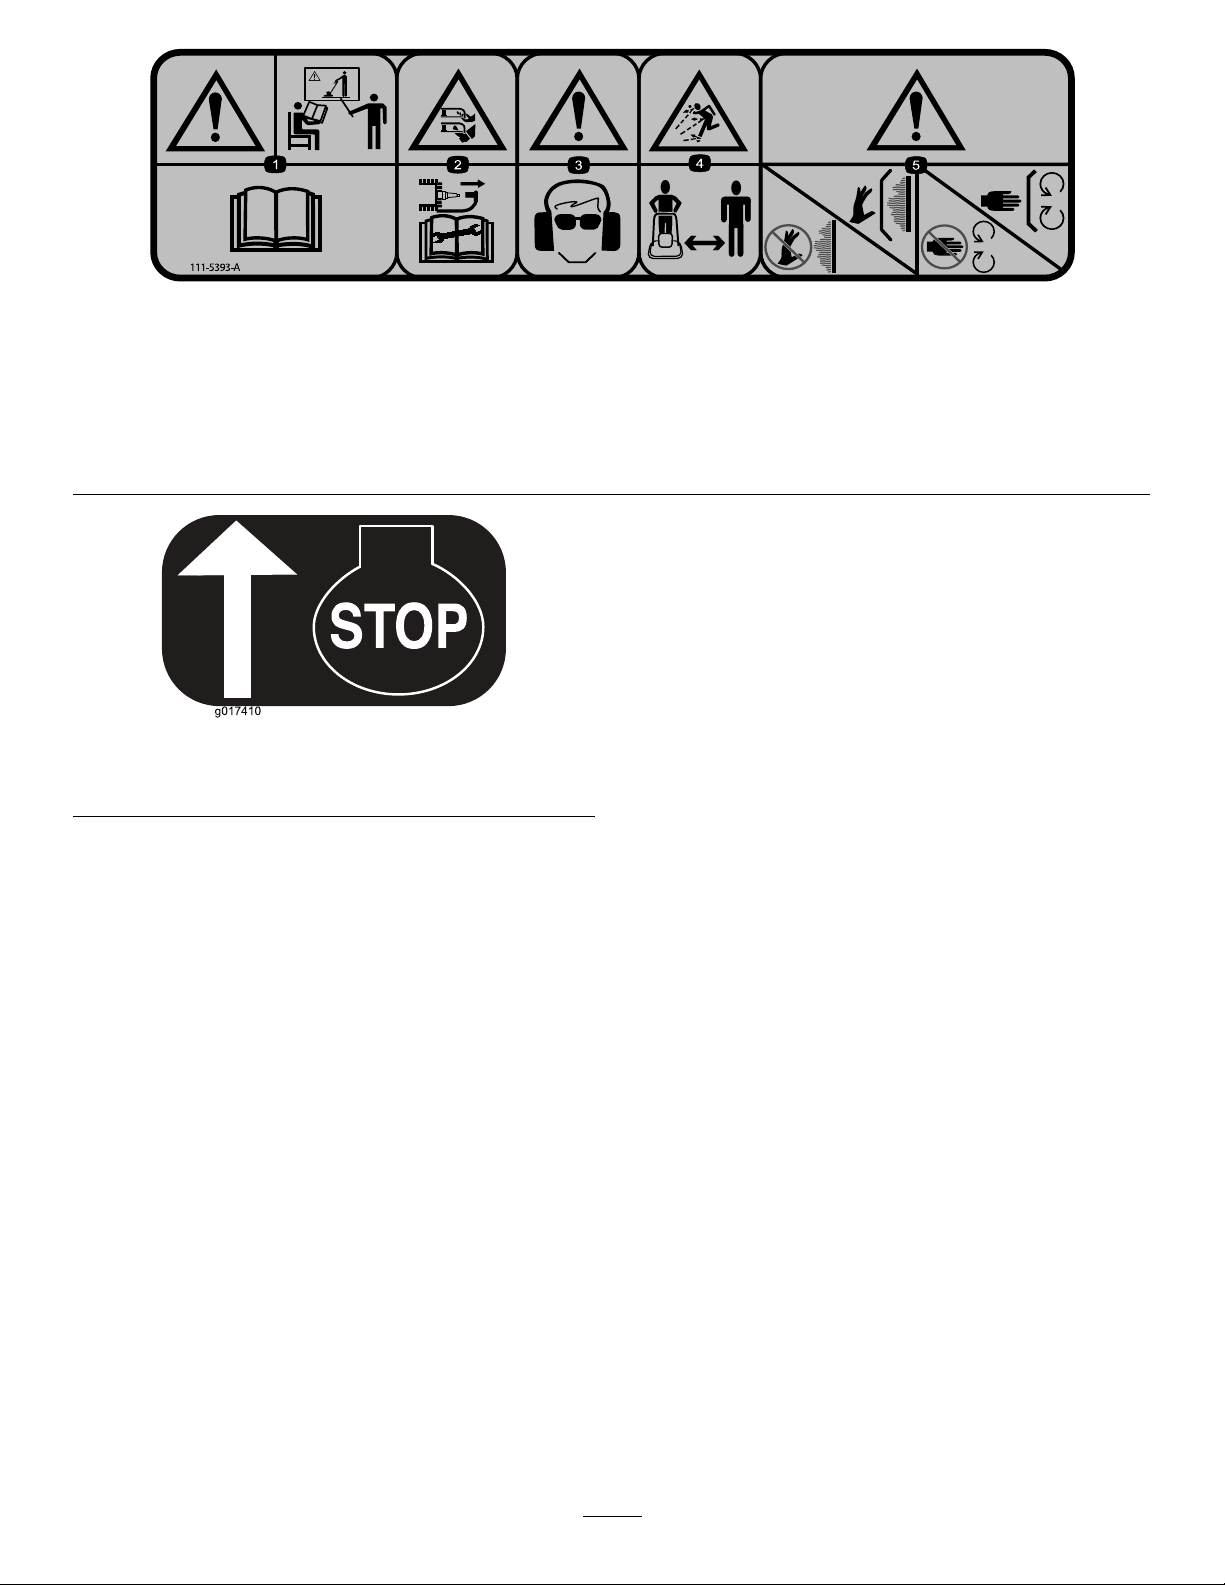
decal11 1-5393
g017410
111-5393
1.Warning—Receivetrainingontheproduct;readthe
Operator’sManual.
2.Cutting/dismembermenthazardofhandorfoot,mowerblade;
disconnectthewirefromthesparkplugbeforeworkingonthe
machine;nevertmetalcuttingparts.
3.Warning—weareyeandhearingprotection.
H295159
1.Enginestop(shutoff)
4.Thrownobjecthazard;keepbystandersawayfromthe
machine.
5.Warning—donottouchhotsurfaces;keepguardsinplace;
Stayawayfrommovingparts;keepguardsinplace.
g017410
5
Page 6
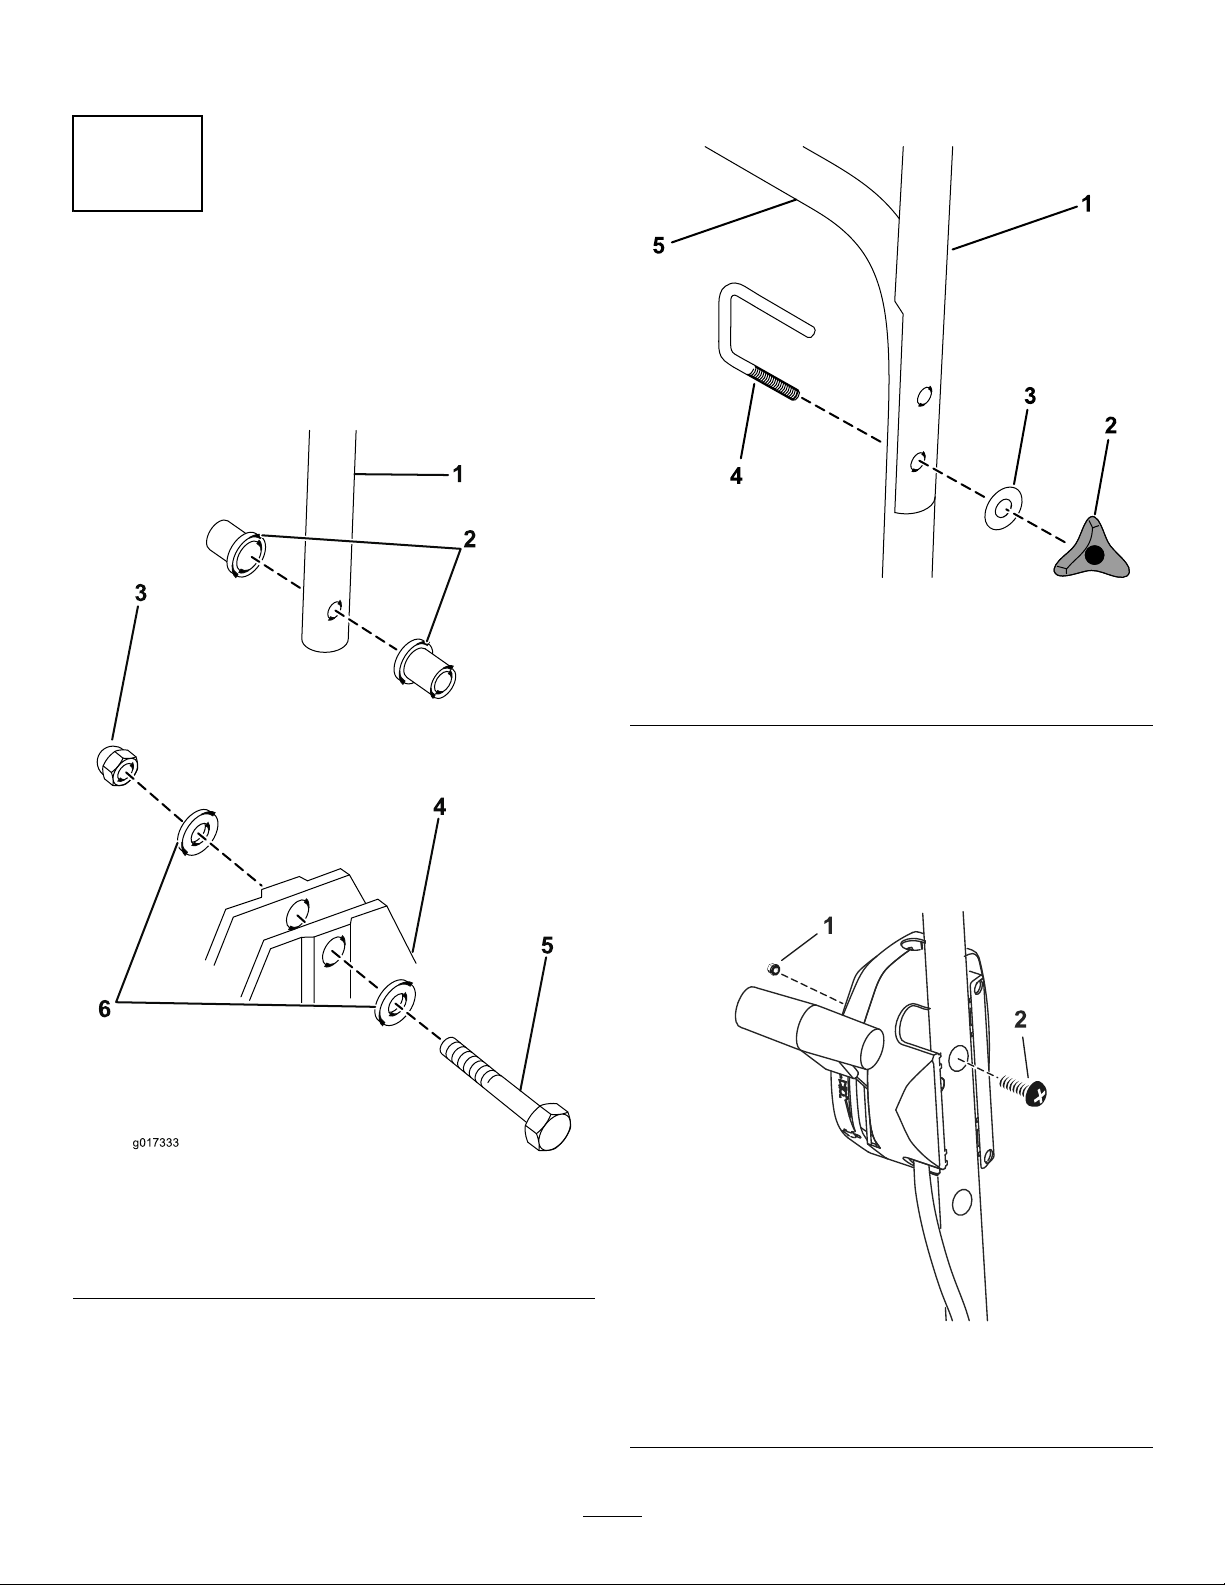
Setup
g017333
1
2
3
4
5
6
1
AssemblingtheHandle
NoPartsRequired
Procedure
1.Slide2bushingsintotheframe.
3.Repeatfortheoppositeside.
4.Aligntheholesontheupperhandlewiththe
lowerhandle.
g209291
Figure4
1.Lowerhandle4.Frame
2.Bushings5.Bolt
3.Nut6.Washers
1.Upperhandle4.U-bolt
2.Handwheel5.Lowerhandle
3.Washer
5.FittheU-boltthroughtheupperandlower
handleandsecureitwithawasherandahand
wheel.
6.Attachthethrottleassemblytotheoutsideofthe
handlebarandsecureitwithanutandapan
screw.
g017333
Figure3
2.Placethelowerhandlebetweenthebushings
andsecureitwith1handlebarbolt,2washers,
and1nut.
Note:Placethelowerhandlebetweenthe
bushingswiththekickstopassemblyattheright
side.
1.Nut2.Panscrew
6
Figure5
g209280
Page 7

2
1
2
3
g017332
3
InstallingtheFootstop
NoPartsRequired
Procedure
Securethefootstoptotheboltontherightsideofthe
lowerhandleusinganutand2washers(Figure6).
Note:Installthefootstopusingthelowerholeinthe
footstopasshowninFigure6.
FillingtheEnginewithOil
NoPartsRequired
Procedure
Important:Yourmachinedoesnotcomewithoil
intheengine.Beforestartingtheengine,llthe
enginewithoil.
Max.ll:0.59L(20oz),type:MultigradeMineral
10W-30oilwithanAPIserviceclassicationofSF,
SG,SH,SJ,SL,orhigher.
1.Movethemachinetoalevelsurface.
2.Removethedipstick(Figure7).
Figure6
1.Footstop4.Bolt
2.Nut5.Lowerhandle
3.Washer
g017332
Figure7
1.Theoillevelisatits
g027870
maximum.
2.Theoillevelistoo
high—removeoilfrom
thecrankcase.
3.Slowlypouroilintotheoil-llhole,wait3
minutes,andchecktheoillevelonthedipstick
bywipingthedipstickcleanandtheninserting,
butnotscrewingin,theoil-llcapintothehole
(Figure8).
3.Theoillevelistoo
low—addoiltothe
crankcase.
7
Page 8

g017338
Figure8
g017341
1
2
3
4
5
6
7
8
9
1
2
3
7
8
9
g017335
4
5
6
Note:Filltheenginecrankcasewithoiluntil
thedipstickindicatesthattheengine-oillevel
iscorrectasshowninFigure7.Ifyouoverll
theenginewithoil,removetheexcessoilas
directedinChangingtheEngineOil(page15).
4.Installthedipstickandhandtightenitsecurely.
Important:Changetheengineoilafterthe
rst5operatinghours;changeityearly
thereafter.RefertoChangingtheEngineOil
(page15).
ProductOverview
g017338
g017341
Figure9
1.Fuelcap6.Handlebarsecuringknob
2.Enginestart7.Enginecover
3.Throttlecontrol8.Exhaustguard
4.Operator-presencecontrol
5.Handlebar
1.Sparkplug
2.Exhaustguard7.Fingerguard
3.Exhaust8.Aircleaner
4.Dipstick
5.Startergrip
9.Dipstick
g017335
Figure10
6.Fuelcap
9.Carburetor
8
Page 9

Specications
g017340
Model
02604
02606
Cuttingwidth
510mm(20inches)635mm(25inches)
535mm(21inches)635mm(25inches)
Productwidth
Operation
FillingtheFuelTank
•Forbestresults,useonlyclean,fresh,unleaded
gasolinewithanoctaneratingof87orhigher
((R+M)/2ratingmethod).
•Oxygenatedfuelwithupto10%ethanolor15%
MTBEbyvolumeisacceptable.
•Donotuseethanolblendsofgasoline,such
asE15orE85,withmorethan10%ethanolby
volume.Performanceproblemsand/orengine
damagemayresult,whichmaynotbecovered
underwarranty.
•Donotusegasolinecontainingmethanol.
•Donotstorefueleitherinthefueltankorinfuel
containersoverthewinterunlessfuelstabilizer
hasbeenaddedtothefuel.
•Donotaddoiltogasoline.
Fillthefueltankwithfreshunleadedregulargasoline
fromamajorname-brandservicestation(Figure11).
Important:Toreducestartingproblems,addfuel
stabilizertothefuelallseason,mixingitwith
gasolinelessthan30daysold.
Refertoyourengineowner’smanualforadditional
information.
g017340
Figure11
9
Page 10

CheckingtheEngine-Oil
1
2
3
g017332
AdjustingtheCutting
Level
ServiceInterval:Beforeeachuseordaily
1.Movethemachinetoalevelsurface.
2.Removethedipstickandwipeitwithaclean
cloth.
3.Insert,butdonotscrewin,thedipstickintothe
oil-llhole.
4.Removethedipstickandcheckit.
5.Todeterminetheproperoillevelonthedipstick,
refertoFigure12).
Height
WARNING
Adjustingthecuttingheightmaybringyou
intocontactwiththemovingblade,causing
seriousinjury.
•Shutofftheengineandwaitforallmoving
partstostop.
•Weargloveswhilehandlingthecutting
unit.
CAUTION
Iftheenginehasbeenrunning,themufer
willbehotandcanseverelyburnyou.Keep
awayfromthehotmufer.
Adjustthecuttingheightasdesired.
1.TurnthefuelswitchtotheOFFposition.
2.Disconnectthewirefromthesparkplug.
Figure12
1.Theoillevelisatits
maximum.
2.Theoillevelistoo
high—removeoilfrom
thecrankcase.
6.Iftheoillevelislow,slowlypouroilintothe
oil-llhole,wait3minutes,andchecktheoil
levelonthedipstickbywipingthedipstickclean
andtheninserting,butnotscrewingin,the
oil-llcapintothehole.
3.Theoillevelistoo
low—addoiltothe
crankcase.
Note:Max.ll:0.59L(20oz)Multigrade
Mineral10W-30oilwithanAPIservice
classicationofSF,SG,SH,SJ,SL,orhigher.
Note:Filltheenginecrankcasewithoiluntil
thedipstickindicatesthattheengine-oillevel
iscorrectasshowninFigure12.Ifyouoverll
theenginewithoil,removetheexcessoilas
directedinChangingtheEngineOil(page15).
3.Tipthemachineonitsside,withthedipstick
down.
g017332
4.Wearingprotectivegloves,removetheblade
boltandcuttingunit.
5.Repositionthespacerstothedesiredheight,
thenreinstallthecuttingunitasshowninFigure
13.
Figure13
1.Cutterbar
2.Spacers
3.Bladeretainer
4.Bladebolt
5.Largespacer
g017336
7.Installthedipstickandhandtightenitsecurely.
Important:Changetheengineoilafterthe
rst5operatinghours;changeityearly
thereafter.RefertoChangingtheEngineOil
(page15).
Note:Thelargespacermustbedirectlybelow
theimpelleratalltimes.
6.Useatorquewrenchtotightenthebladeboltto
25N-m(18ft-lb).
10
Page 11

StartingtheEngine
OFF
ON
g017346
g017334
1
2
g017329
1.Placethethrottlecontroltothechokeposition,
ensurethatthefuelswitchisintheONposition.
Figure14
2.Holdtheoperator-presencecontrolagainstthe
handle.
Figure15
g017346
Figure16
g017329
4.Pulltherecoil-starthandle.
Note:Ifthemachinedoesnotstartafterseveral
attempts,contactanAuthorizedServiceDealer.
g017334
1.Handle
3.Placeyourfootonthedeckandtiltthemachine
towardyou(Figure16).
2.Operator-presencecontrol
11
Page 12

AdjustingtheChoke
g017367
1
2
g017366
ShuttingOfftheEngine
Usethethrottleassemblytoadjustthechoke(Figure
17).
ServiceInterval:Beforeeachuseordaily
Toshutofftheengine,releasetheoperator-presence
control(Figure18).
Important:Whenyoureleasethe
operator-presencecontrol,boththeengine
andbladeshouldstopwithin3seconds.Ifthey
donotstopproperly,stopusingyourmachine
immediatelyandcontactanAuthorizedService
Dealer.
g017366
Figure18
g017367
Figure17
1.Chokeon2.Chokeoff
Hauling
•Usecarewhenloadingorunloadingthemachine
intoatraileroratruck.
•Tiethemachinedownsecurelyusingstraps,
chains,cable,orropes.Boththefrontandtherear
strapsshouldbedirecteddownandoutwardfrom
themachine.
12
Page 13

OperatingTips
GeneralMowingTips
•Inspecttheareawhereyouwillusethemachine
andremoveallobjectsthatthemachinecould
throw.
•Avoidstrikingsolidobjectswiththeblade.Never
deliberatelymowoveranyobject.
•Ifthemachinestrikesanobjectorstartstovibrate,
immediatelyshutofftheengine,disconnect
thewirefromthesparkplug,andexaminethe
machinefordamage.
•Forbestperformance,installanewbladebefore
thecuttingseasonbegins.
•ReplacethebladewhennecessarywithaToro
replacementblade.
CuttingGrass
•Cutonlyaboutathirdofthegrassbladeatatime.
Donotcutbelowthehighestsetting(34mmor1.3
inches)unlessthegrassissparseoritislatefall
whengrassgrowthbeginstoslowdown.Referto
AdjustingtheCuttingHeight(page10).
CuttingLeaves
•Aftercuttingthelawn,ensurethathalfofthelawn
showsthroughthecutleafcover.Youmayneed
tomakemorethanasinglepassovertheleaves.
•Mowinggrassover15cm(6inches)inlengthis
notrecommended.Iftheleafcoveristoothick,the
machinemayplugandcausetheenginetostall.
•Slowdownyourmowingspeedifthemachine
doesnotcuttheleavesnelyenough.
•Mowinggrassover15cm(6inches)inlengthis
notrecommended.Ifthegrassistoolong,the
machinemayplugandcausetheenginetostall.
•Wetgrassandleavestendtoclumpontheyard
andcancausethemachinetoplugortheengine
tostall.Mowonlyindryconditions,ifpossible.
WARNING
Wetgrassorleavescancauseserious
injuryifyouslipandcontactthecutting
line.Mowonlyindryconditions,if
possible.
•Beawareofapotentialrehazardinverydry
conditions,followalllocalrewarnings,andkeep
themachinefreeofdrygrassandleafdebris.
•Ifthenishedlawnappearanceisunsatisfactory,
try1ormoreofthefollowing:
–Replacethebladeorhaveitsharpened.
–Walkataslowerpacewhilemowing.
–Raisethecuttingheightonyourmachine.
–Cutthegrassmorefrequently.
–Overlapcuttingswathsinsteadofcuttingafull
swathwitheachpass.
13
Page 14

Maintenance
g017342
Note:Determinetheleftandrightsidesofthemachinefromthenormaloperatingposition.
RecommendedMaintenanceSchedule(s)
MaintenanceService
Interval
Aftertherst5hours
Beforeeachuseordaily
Aftereachuse
Every100hours
Yearly
MaintenanceProcedure
•Changetheengineoil.
•Checktheengine-oillevel.
•Ensurethattheengineshutsoffwithin3secondsafterreleasingthe
operator-presencecontrol.
•Cleangrassclippingsanddirtfromtheentiremachine.
•Cleangrassclippingsanddirtfromtheentiremachine.
•Checkthesparkplugandreplaceitifnecessary.
•Replacetheairlter;replaceitmorefrequentlyindustyoperatingconditions.
•Changetheengineoil.
•Replacethebladeorhaveitsharpened(morefrequentlyiftheedgedullsquickly).
PreparingforMaintenance
WARNING
Tippingthemachinemaycausethefuelto
leak.Fuelisammable,explosiveandcan
causepersonalinjury.
Runtheenginedryorremovethefuelwitha
handpump;neversiphon.
1.Shutofftheengineandwaitforallmovingparts
tostop.
2.Disconnectthespark-plugwirefromthe
sparkplug(Figure19)beforeperformingany
maintenanceprocedure.
Important:Alwaystipthemachineontoits
side,withthedipstickdown.Ifthemachine
istippedinanotherdirection,oilmayllthe
valvetrain,requiringatleast30minutesto
drain.
g017342
Figure19
1.Spark-plugwire
3.Afterperformingthemaintenanceprocedure(s),
connectthespark-plugwiretothesparkplug.
14
Page 15

ReplacingtheAirCleaner
1
2
3
g017339
1
2
3
g017332
ChangingtheEngineOil
ServiceInterval:Y early
1.Pressdownonthelatchtabsontopofthe
air-cleanercover(Figure20).
Figure20
1.Cover
2.Latchtabs
3.Filter
2.Openthecover.
3.Removethelter(Figure20).
4.Inspectthelter,andreplaceitifitisdamaged
orexcessivelydirty.
5.Inspectthepaperairlter.
A.Ifthelterisdamagedoriswetwithoilor
fuel,replaceit.
B.Ifthelterisdirty,tapitonahardsurface
severaltimesorblowcompressedairless
than207kPa(30psi)throughthesideof
thelterthatfacestheengine.
ServiceInterval:Aftertherst5hours
Yearly
1.Runtheengineafewminutesbeforechanging
theoiltowarmit.
Note:Warmoilowsbetterandcarriesmore
contaminants.
2.Ensurethatthefueltankcontainslittleornofuel
sothatthefueldoesnotleakwhenyoutipthe
machineontoitsside.
3.Disconnectthewirefromthesparkplug.Refer
toPreparingforMaintenance(page14).
4.Removethedipstick.
5.Tipthemachineontoitsside,withthedipstick
down,todraintheusedoiloutthroughtheoil-ll
tube.
g017339
6.Returnthemachinetotheoperatingposition.
7.Slowlypouroilintotheoil-llhole,wait3
minutes,andchecktheoillevelonthedipstick
bywipingthedipstickcleanandtheninserting,
butnotscrewingin,theoil-llcapintothehole.
Note:Max.ll:0.59L(20oz),type:
MultigradeMineral10W-30oilwithanAPI
serviceclassicationofSF ,SG,SH,SJ,SL,or
higher.
Note:Filltheenginecrankcasewithoiluntil
thedipstickindicatesthattheengine-oillevelis
correctasshownin(Figure21).Ifyouoverll
theenginewithoil,removetheexcessoilas
directedin5.
Note:Donotbrushthedirtoffthelter;
brushingforcesdirtintothebers.
6.Removedirtfromtheair-cleanerbodyandcover
usingamoistrag.
Important:Donotwipedirtintotheairduct.
7.Insertthelterintotheaircleaner.
8.Installthecover.
Figure21
1.Theoillevelisatits
15
maximum.
2.Theoillevelistoo
high—removeoilfrom
thecrankcase.
3.Theoillevelistoo
low—addoiltothe
crankcase.
g017332
Page 16

8.Installthedipstickandhandtightenitsecurely.
G017548
9.Disposeoftheusedoilproperlyatalocal
recyclingcenter.
ServicingtheSparkPlug
ServiceInterval:Every100hours
ReplacingtheBlade
ServiceInterval:Y early
Important:Youwillneedatorquewrenchto
installthebladeproperly.Ifyoudonothavea
torquewrenchorareuncomfortableperforming
thisprocedure,contactanAuthorizedService
Dealer.
UseanChampionRN9YCsparkplugorequivalent.
1.Shutofftheengineandwaitforallmovingparts
tostop.
2.Disconnectthewirefromthesparkplug.
3.Cleanaroundthesparkplug.
4.Removethesparkplugfromthecylinderhead.
Important:Replaceacracked,fouled,or
dirtysparkplug.Donotcleantheelectrodes
becausegritenteringthecylindercan
damagetheengine.
5.Setthegapontheplugto0.76mm(0.030inch)
asshowninFigure22.
Examinethebladewheneveryourunoutoffuel.Ifthe
bladeisdamagedorcracked,replaceitimmediately.
Ifthebladeedgeisdullornicked,haveitsharpened
orreplaceit.
WARNING
Thebladeissharp;contactingthebladecan
resultinseriouspersonalinjury.
•Disconnectthewirefromthesparkplug.
•Weargloveswhenservicingtheblade.
1.Disconnectthespark-plugwirefromthespark
plug.RefertoPreparingforMaintenance.
2.Tipthemachineontoitsside,withthedipstick
down.
3.Useablockofwoodtoholdthebladesteady.
Figure22
1.Center-electrodeinsulator
2.Sideelectrode
3.Airgap(nottoscale)
6.Installthesparkplugandthegasketseal.
7.Torquetheplugto20N-m(15ft-lb).
8.Connectthewiretothesparkplug.
g017548
g209201
Figure23
4.Removetheblade(turnthebladebolt
counterclockwise),savingallthemounting
hardware.
5.Installthenewblade(turnthebladebolt
clockwise)andallmountinghardware.
Important:Positionthecurvedendsofthe
bladetopointtowardthemachinehousing.
6.Useatorquewrenchtotightenthebladebolt
to25N-m(18ft-lb).
Important:Abolttorquedto25N-m(18
ft-lb)isverytight.Whileholdingtheblade
withablockofwood,putyourweight
16
Page 17

behindtheratchetorwrenchandtightenthe
boltsecurely.Thisboltisverydifcultto
overtighten.
CleaningtheMachine
ServiceInterval:Beforeeachuseordaily
Aftereachuse
WARNING
Themachinemaydislodgematerialfrom
underthemachinehousing.
•Weareyeprotection.
•Stayintheoperatingposition(behindthe
handle).
•Donotallowbystandersinthearea.
1.Tipthemachineonitssidewiththedipstick
down.
2.Useabrushorcompressedairtoremovegrass
anddebrisfromtheexhaustguard,thetopcowl,
andthesurroundingdeckareas.
17
Page 18

Troubleshooting
Problem
Theenginedoesnotstart.
Theenginestartshardorlosespower.
PossibleCauseCorrectiveAction
1.Thewireisnotconnectedtothespark
plug.
2.Theholeinthefuel-capventis
plugged.
3.Thesparkplugispitted,fouled,orthe
gapisincorrect.
4.Thefueltankisemptyorthefuel
systemcontainsstalefuel.
1.Theholeinthefuel-capventis
plugged.
2.Theairlterelementisdirtyandis
restrictingtheairow.
3.Theundersideofthemachinehousing
containsclippingsanddebris.
4.Thesparkplugispitted,fouled,orthe
gapisincorrect.
5.Theengineoil-levelistoolow,too
high,orexcessivelydirty.
6.Thefueltankcontainsstalefuel.6.Drainandllthefueltankwithfresh
1.Connectthewiretothesparkplug.
2.Cleantheholeinthefuel-capventor
replacethefuelcap.
3.Checkthesparkplugandadjustthe
gapifnecessary .Replacethespark
plugifitispitted,fouled,orcracked.
4.Drainand/orllthefueltankwithfresh
fuel.Iftheproblempersists,contactan
AuthorizedServiceDealer.
1.Cleantheholeinthefuel-capventor
replacethefuelcap.
2.Cleantheairlterpre-cleanerand/or
replacethepaperairlter.
3.Cleanunderthemachinehousing.
4.Checkthesparkplugandadjustthe
gapifnecessary .Replacethespark
plugifitispitted,fouled,orcracked.
5.Checktheengineoil.Changetheoilif
itisdirty;addordraintheoiltoadjust
theoilleveltotheFullmarkonthe
dipstick.
fuel.
Theenginerunsrough.
Themachineorenginevibrates
excessively.
Thereisanunevencuttingpattern.
1.Thewireisnotconnectedtothespark
plug.
2.Thesparkplugispitted,fouled,orthe
gapisincorrect.
3.Theairlterelementisdirtyandis
restrictingtheairow.
1.Theundersideofthemachinehousing
containsclippingsanddebris.
2.Theenginemountingboltsareloose.2.Tightentheenginemountingbolts.
3.Theblademountingboltloose.3.Tightentheblademountingbolt.
4.Thebladeisbentorisoutofbalance.4.Balancetheblade.Ifthebladeisbent,
1.Youaremowinginthesamepattern
repeatedly.
2.Theundersideofthemachinehousing
containsclippingsanddebris.
3.Thebladeisdull.
1.Connectthewiretothesparkplug.
2.Checkthesparkplugandadjustthe
gapifnecessary .Replacethespark
plugifitispitted,fouled,orcracked.
3.Cleantheairlterpre-cleanerand/or
replacethepaperairlter.
1.Cleanunderthemachinehousing.
replaceit.
1.Changethemowingpattern.
2.Cleanunderthemachinehousing.
3.Sharpenandbalancetheblade.
18
Page 19

EuropeanPrivacyNotice
TheInformationT oroCollects
ToroWarrantyCompany(T oro)respectsyourprivacy .Inordertoprocessyourwarrantyclaimandcontactyouintheeventofaproductrecall,weaskyou
tosharecertainpersonalinformationwithus,eitherdirectlyorthroughyourlocalT orocompanyordealer .
TheTorowarrantysystemishostedonserverslocatedwithintheUnitedStateswhereprivacylawmaynotprovidethesameprotectionasapplies
inyourcountry.
BYSHARINGYOURPERSONALINFORMATIONWITHUS,YOUARECONSENTINGTOTHEPROCESSINGOFYOURPERSONALINFORMATION
ASDESCRIBEDINTHISPRIV ACYNOTICE.
TheWayToroUsesInformation
Toromayuseyourpersonalinformationtoprocesswarrantyclaims,tocontactyouintheeventofaproductrecallandforanyotherpurposewhichwetell
youabout.T oromayshareyourinformationwithT oro'safliates,dealersorotherbusinesspartnersinconnectionwithanyoftheseactivities.Wewillnot
sellyourpersonalinformationtoanyothercompany .Wereservetherighttodisclosepersonalinformationinordertocomplywithapplicablelawsand
withrequestsbytheappropriateauthorities,tooperateoursystemsproperlyorforourownprotectionorthatofotherusers.
RetentionofyourPersonalInformation
Wewillkeepyourpersonalinformationaslongasweneeditforthepurposesforwhichitwasoriginallycollectedorforotherlegitimatepurposes
(suchasregulatorycompliance),orasrequiredbyapplicablelaw.
Toro'sCommitmenttoSecurityofY ourPersonalInformation
Wetakereasonableprecautionsinordertoprotectthesecurityofyourpersonalinformation.Wealsotakestepstomaintaintheaccuracyandcurrent
statusofpersonalinformation.
AccessandCorrectionofyourPersonalInformation
Ifyouwouldliketorevieworcorrectyourpersonalinformation,pleasecontactusbyemailatlegal@toro.com.
AustralianConsumerLaw
AustraliancustomerswillnddetailsrelatingtotheAustralianConsumerLaweitherinsidetheboxoratyourlocalToroDealer .
374-0282RevC
Page 20

TheT oroWarranty
ATwo-YearLimitedWarranty
ConditionsandProductsCovered
TheT oroCompanyanditsafliate,T oroWarrantyCompany,pursuant
toanagreementbetweenthem,jointlywarrantyourT oroCommercial
product(“Product”)tobefreefromdefectsinmaterialsorworkmanship
fortwoyearsor1500operationalhours*,whicheveroccursrst.This
warrantyisapplicabletoallproductswiththeexceptionofAerators
(refertoseparatewarrantystatementsfortheseproducts).Wherea
warrantableconditionexists,wewillrepairtheProductatnocosttoyou
includingdiagnostics,labor,parts,andtransportation.Thiswarranty
beginsonthedatetheProductisdeliveredtotheoriginalretailpurchaser.
*Productequippedwithanhourmeter.
InstructionsforObtainingWarrantyService
YouareresponsiblefornotifyingtheCommercialProductsDistributoror
AuthorizedCommercialProductsDealerfromwhomyoupurchasedthe
Productassoonasyoubelieveawarrantableconditionexists.Ifyouneed
helplocatingaCommercialProductsDistributororAuthorizedDealer,or
ifyouhavequestionsregardingyourwarrantyrightsorresponsibilities,
youmaycontactusat:
ToroCommercialProductsServiceDepartment
ToroWarrantyCompany
811 1LyndaleAvenueSouth
Bloomington,MN55420-1196
952–888–8801or800–952–2740
E-mail:commercial.warranty@toro.com
OwnerResponsibilities
AstheProductowner ,youareresponsibleforrequiredmaintenanceand
adjustmentsstatedinyourOperator'sManual.Failuretoperformrequired
maintenanceandadjustmentscanbegroundsfordisallowingawarranty
claim.
ItemsandConditionsNotCovered
Notallproductfailuresormalfunctionsthatoccurduringthewarranty
periodaredefectsinmaterialsorworkmanship.Thiswarrantydoesnot
coverthefollowing:
•Productfailureswhichresultfromtheuseofnon-T ororeplacement
parts,orfrominstallationanduseofadd-on,ormodiednon-T oro
brandedaccessoriesandproducts.Aseparatewarrantymaybe
providedbythemanufactureroftheseitems.
•Productfailureswhichresultfromfailuretoperformrecommended
maintenanceand/oradjustments.Failuretoproperlymaintainyour
ToroproductpertheRecommendedMaintenancelistedinthe
Operator’sManualcanresultinclaimsforwarrantybeingdenied.
•ProductfailureswhichresultfromoperatingtheProductinanabusive,
negligent,orrecklessmanner.
•Partssubjecttoconsumptionthroughuseunlessfoundtobedefective.
Examplesofpartswhichareconsumed,orusedup,duringnormal
Productoperationinclude,butarenotlimitedto,brakepadsand
linings,clutchlinings,blades,reels,rollersandbearings(sealedor
greasable),bedknives,sparkplugs,castorwheelsandbearings,tires,
lters,belts,andcertainsprayercomponentssuchasdiaphragms,
nozzles,andcheckvalves,etc.
•Failurescausedbyoutsideinuence.Conditionsconsideredtobe
outsideinuenceinclude,butarenotlimitedto,weather,storage
practices,contamination,useofunapprovedfuels,coolants,lubricants,
additives,fertilizers,water,orchemicals,etc.
•Failureorperformanceissuesduetotheuseoffuels(e.g.gasoline,
diesel,orbiodiesel)thatdonotconformtotheirrespectiveindustry
standards.
•Normalnoise,vibration,wearandtear,anddeterioration.
•Normal“wearandtear”includes,butisnotlimitedto,damagetoseats
duetowearorabrasion,wornpaintedsurfaces,scratcheddecalsor
windows,etc.
Parts
Partsscheduledforreplacementasrequiredmaintenancearewarranted
fortheperiodoftimeuptothescheduledreplacementtimeforthatpart.
Partsreplacedunderthiswarrantyarecoveredforthedurationofthe
originalproductwarrantyandbecomethepropertyofT oro.T orowillmake
thenaldecisionwhethertorepairanyexistingpartorassemblyorreplace
it.Toromayuseremanufacturedpartsforwarrantyrepairs.
DeepCycleandLithium-IonBatteryWarranty:
DeepcycleandLithium-Ionbatterieshaveaspeciedtotalnumberof
kilowatt-hourstheycandeliverduringtheirlifetime.Operating,recharging,
andmaintenancetechniquescanextendorreducetotalbatterylife.Asthe
batteriesinthisproductareconsumed,theamountofusefulworkbetween
chargingintervalswillslowlydecreaseuntilthebatteryiscompletelyworn
out.Replacementofwornoutbatteries,duetonormalconsumption,
istheresponsibilityoftheproductowner.Batteryreplacementmaybe
requiredduringthenormalproductwarrantyperiodatowner’sexpense.
Note:(Lithium-Ionbatteryonly):ALithium-Ionbatteryhasapartonly
proratedwarrantybeginningyear3throughyear5basedonthetime
inserviceandkilowatthoursused.RefertotheOperator'sManualfor
additionalinformation.
MaintenanceisatOwner’sExpense
Enginetune-up,lubrication,cleaningandpolishing,replacementoflters,
coolant,andcompletingrecommendedmaintenancearesomeofthe
normalservicesToroproductsrequirethatareattheowner’sexpense.
GeneralConditions
RepairbyanAuthorizedToroDistributororDealerisyoursoleremedy
underthiswarranty.
NeitherTheT oroCompanynorToroWarrantyCompanyisliablefor
indirect,incidentalorconsequentialdamagesinconnectionwiththe
useoftheToroProductscoveredbythiswarranty,includingany
costorexpenseofprovidingsubstituteequipmentorserviceduring
reasonableperiodsofmalfunctionornon-usependingcompletion
ofrepairsunderthiswarranty.ExceptfortheEmissionswarranty
referencedbelow,ifapplicable,thereisnootherexpresswarranty .All
impliedwarrantiesofmerchantabilityandtnessforusearelimitedto
thedurationofthisexpresswarranty.
Somestatesdonotallowexclusionsofincidentalorconsequential
damages,orlimitationsonhowlonganimpliedwarrantylasts,sotheabove
exclusionsandlimitationsmaynotapplytoyou.Thiswarrantygivesyou
speciclegalrights,andyoumayalsohaveotherrightswhichvaryfrom
statetostate.
Noteregardingenginewarranty:
TheEmissionsControlSystemonyourProductmaybecoveredby
aseparatewarrantymeetingrequirementsestablishedbytheU.S.
EnvironmentalProtectionAgency(EP A)and/ortheCaliforniaAirResources
Board(CARB).Thehourlimitationssetforthabovedonotapplytothe
EmissionsControlSystemWarranty.RefertotheEngineEmissionControl
WarrantyStatementsuppliedwithyourproductorcontainedintheengine
manufacturer’sdocumentationfordetails
CountriesOtherthantheUnitedStatesorCanada
CustomerswhohavepurchasedT oroproductsexportedfromtheUnitedStatesorCanadashouldcontacttheirT oroDistributor(Dealer)toobtain
guaranteepoliciesforyourcountry ,province,orstate.IfforanyreasonyouaredissatisedwithyourDistributor'sserviceorhavedifcultyobtaining
guaranteeinformation,contacttheT oroimporter.
374-0253RevD
 Loading...