

Hitch Kit
Z100 and Z400 Series Z Master Mowers
Part No. 99–8924
Installation Instructions
Loose Parts
Note: Use the chart below to identify parts for assembly.
DESCRIPTION QTY. USE
Form No. 3352-996
Hitch
Bolt, 5/16 x 1 inch
Locknut
Bolt, 5/16 x 2 inch
Installing the Hitch
1. Disengage the PTO and set the parking brake.
2. Stop the engine, remove the key, and wait for all
moving parts to stop before leaving the operating
position.
3. Remove any existing hardware in the bottom four holes
in the rear bumper (Fig. 1 and Fig. 2).
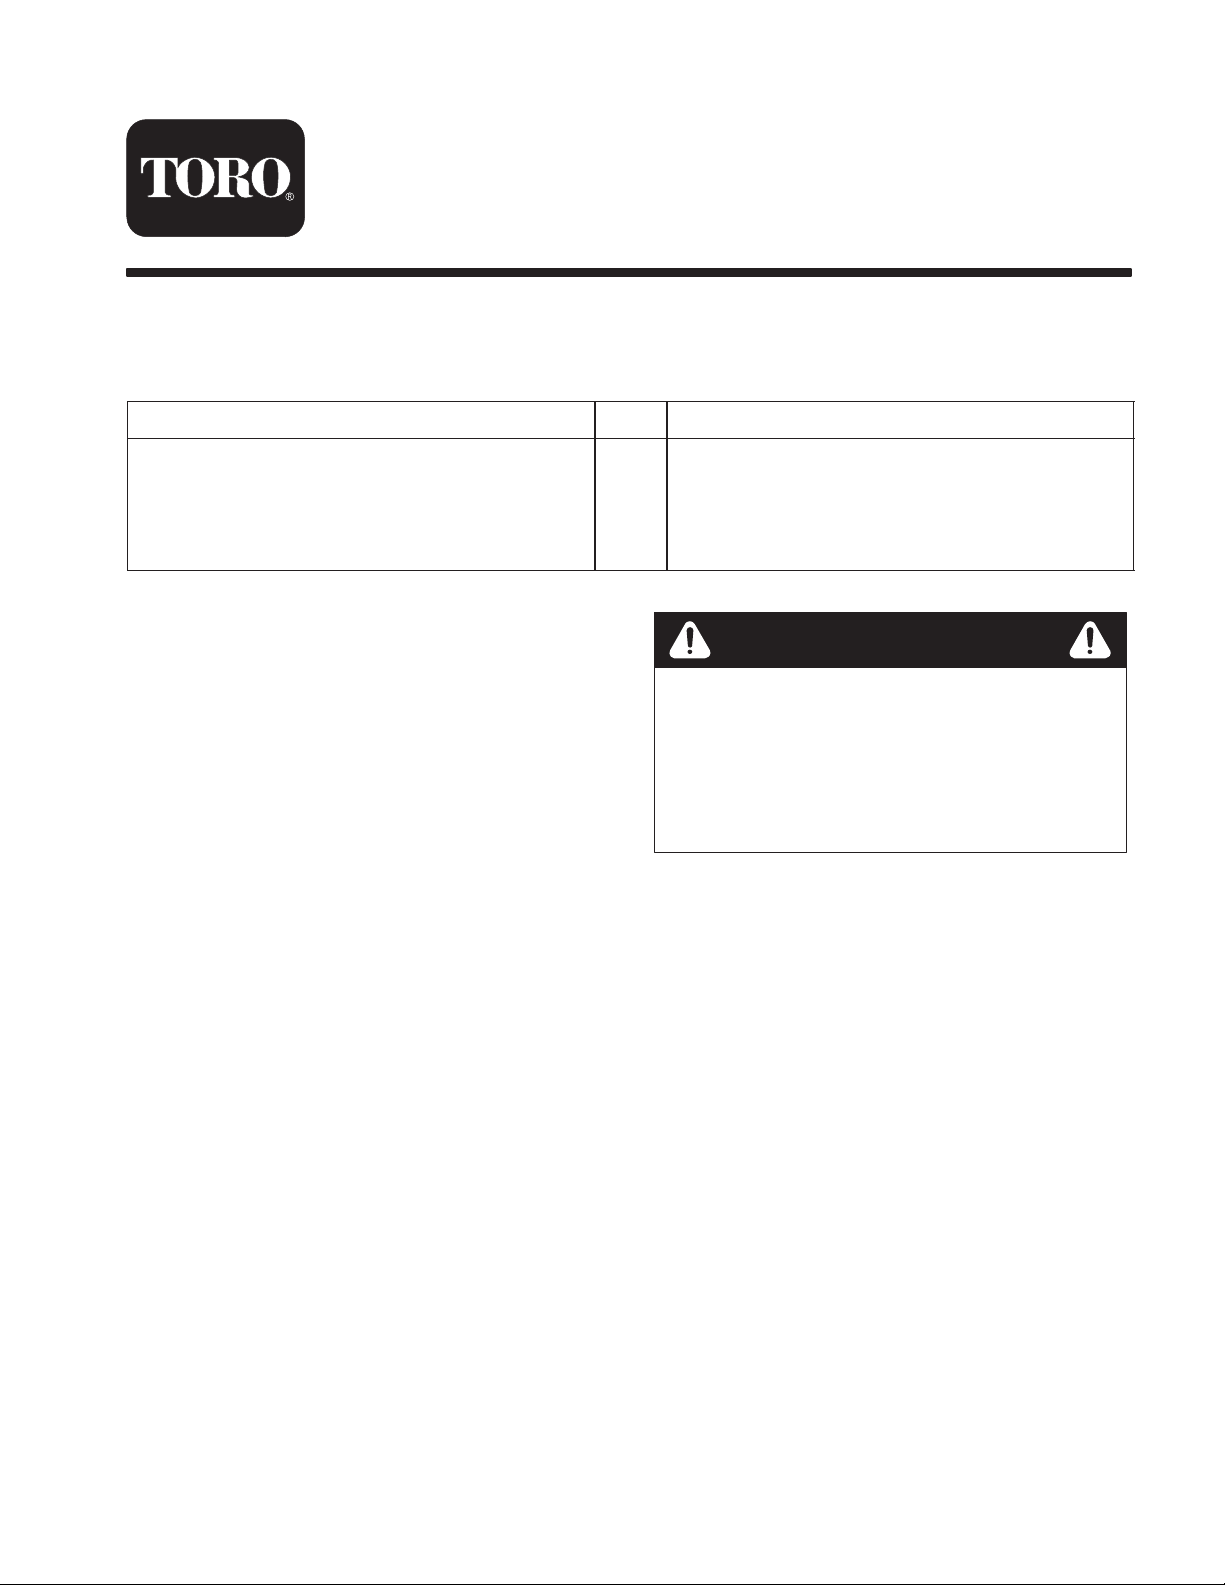
4. To install the hitch on a tractor with a rear
counterweight, align the holes and tighten the locknuts
and bolts (5/16 x 2 inch) (Fig. 1).
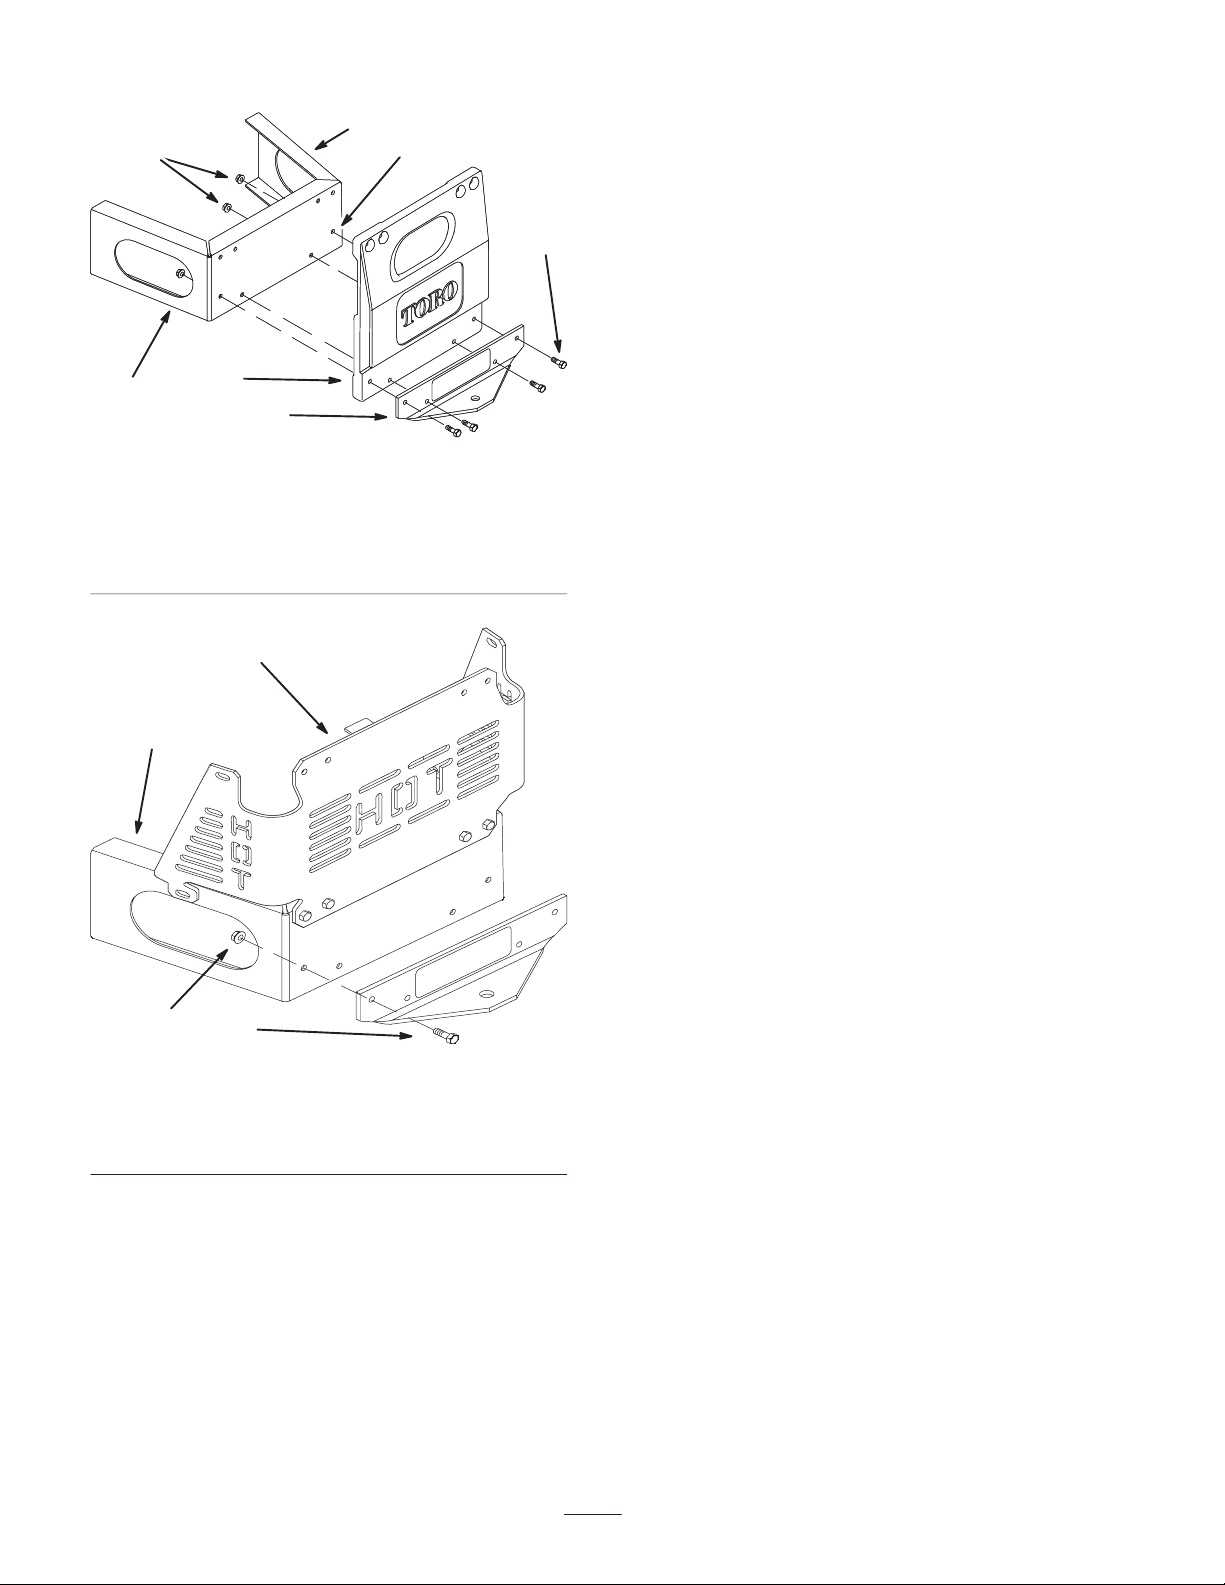
5. To install the hitch on a tractor with a heat shield, align
the holes and tighten the locknuts and bolts (5/16 x
1 inch) (Fig. 2).
6. Torque the bolts to 200 in–lbs (22.6 N–m).
1
4
4
4
Installing the hitch
Warning
Components around engine will be hot if the
engine has been running. Touching hot
components can cause burns.
• Do not touch engine components when hot.
• Allow the machine to cool before performting
maintenance.
2004 by The Toro Company
8111 Lyndale Avenue South
Bloomington, MN 55420-1196
Original Instructions (EN)
Contact us at www.Toro.com
All Rights Reserved
Printed in the USA
7
3
6
4
1. Hitch
2. Bolt, 5/16 x 2 inch
3. Locknut
4. Machine frame
5
4
121
m–7884
Figure 1
5. Counterweight
6. Bottom holes
7. Rear bumper
5
3
1. Hitch
2. Bolt, 5/16 x 1 inch
3. Locknut
1
2
Figure 2
4. Machine frame
5. Heat shield
2
 Loading...