

Page 1
HEADLIGHT KIT
I
dligh
for Lawn Tractor
FORM NO. 3323-210
MODEL NO. 79180
INSTALLATION
INSTRUCTIONS
Loose Parts
DESCRIPTION QTY. USE
Screw, 10-14 x 5/8” (16 mm) 2
Reflector & Lamp Assembly 1
Headlight Wire Harness 1 Install wire harness.
Decal – Ignition/Lights 1
Decal – Ignition/Lights, International 1
Switch 1
nstall hea
Install switch.
ts.
Printed in USA
Page 2
Installation Instructions
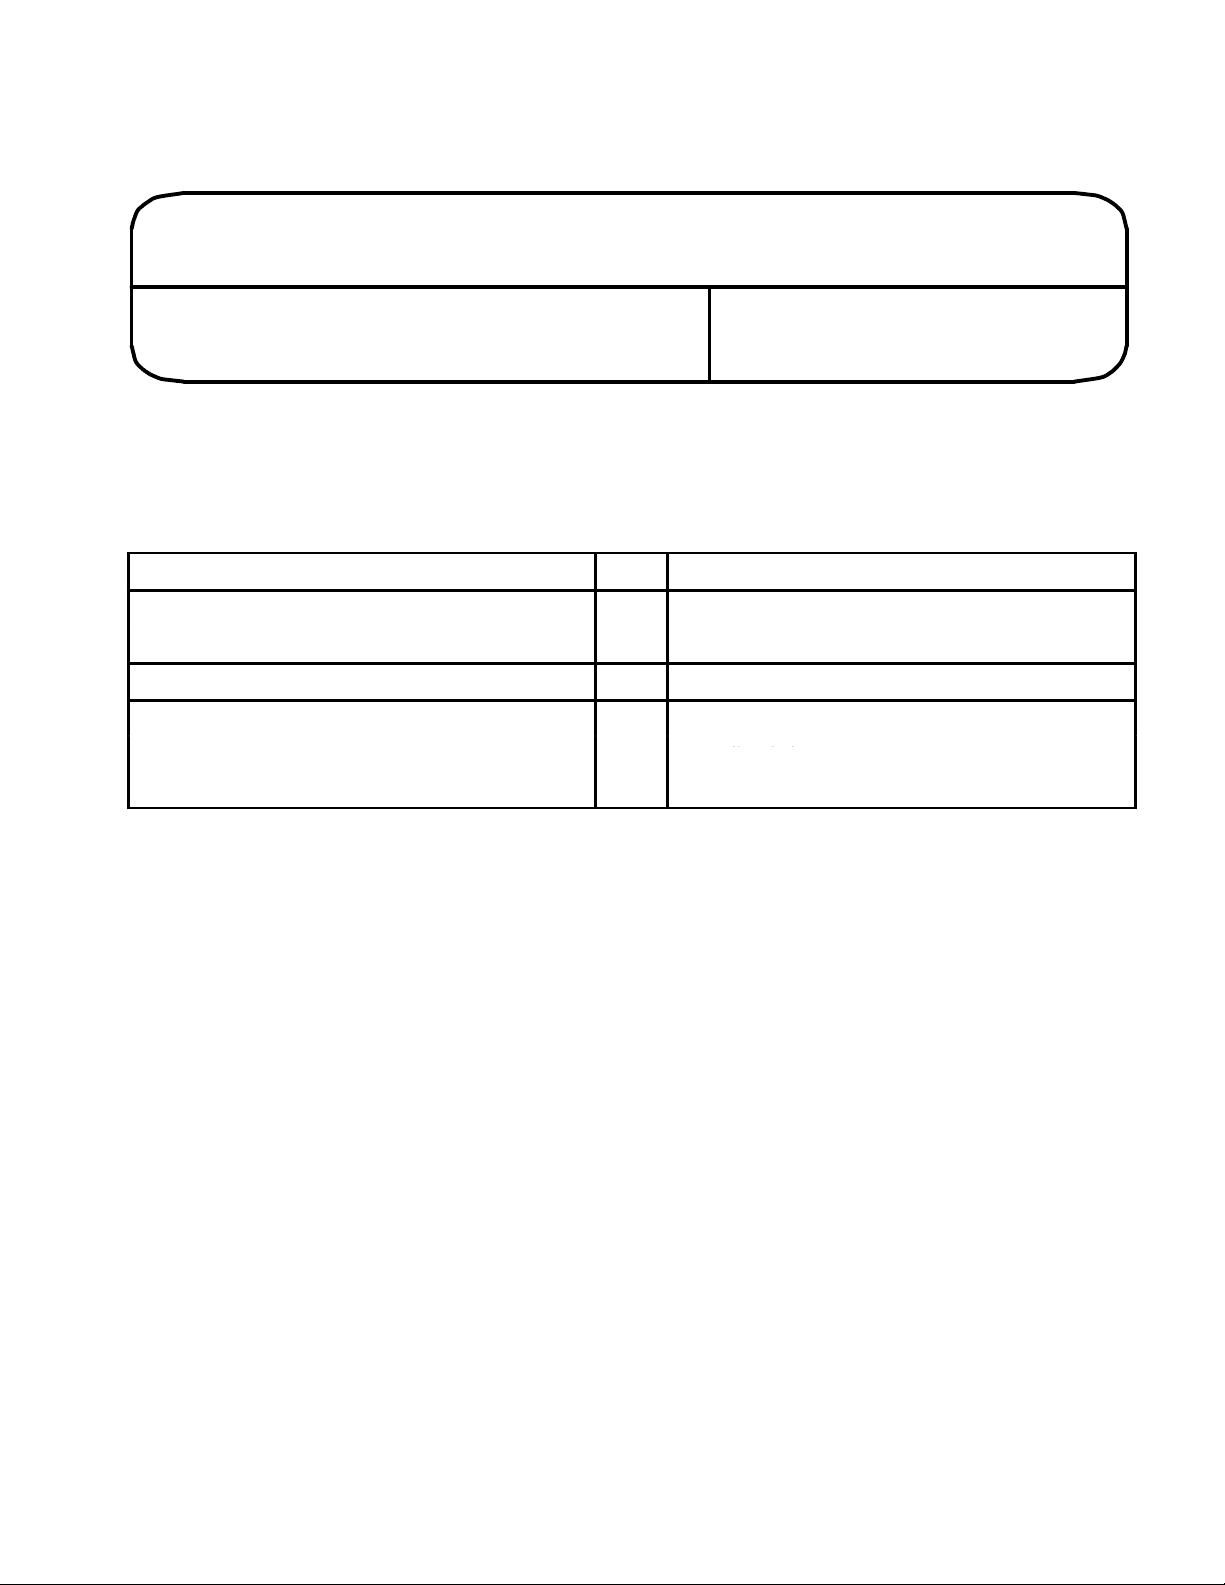
Install Headlights
Locate the headlight reflector assembly over lens tabs
inside the hood and secure with 10-14 x 5/8” (16
mm) screws (Fig. 1).
2
3
1
Figure 1
1. Headlight reflector
assembly
2. Lens tabs
3. Screw, 10-14 x 5/8” (16
mm)
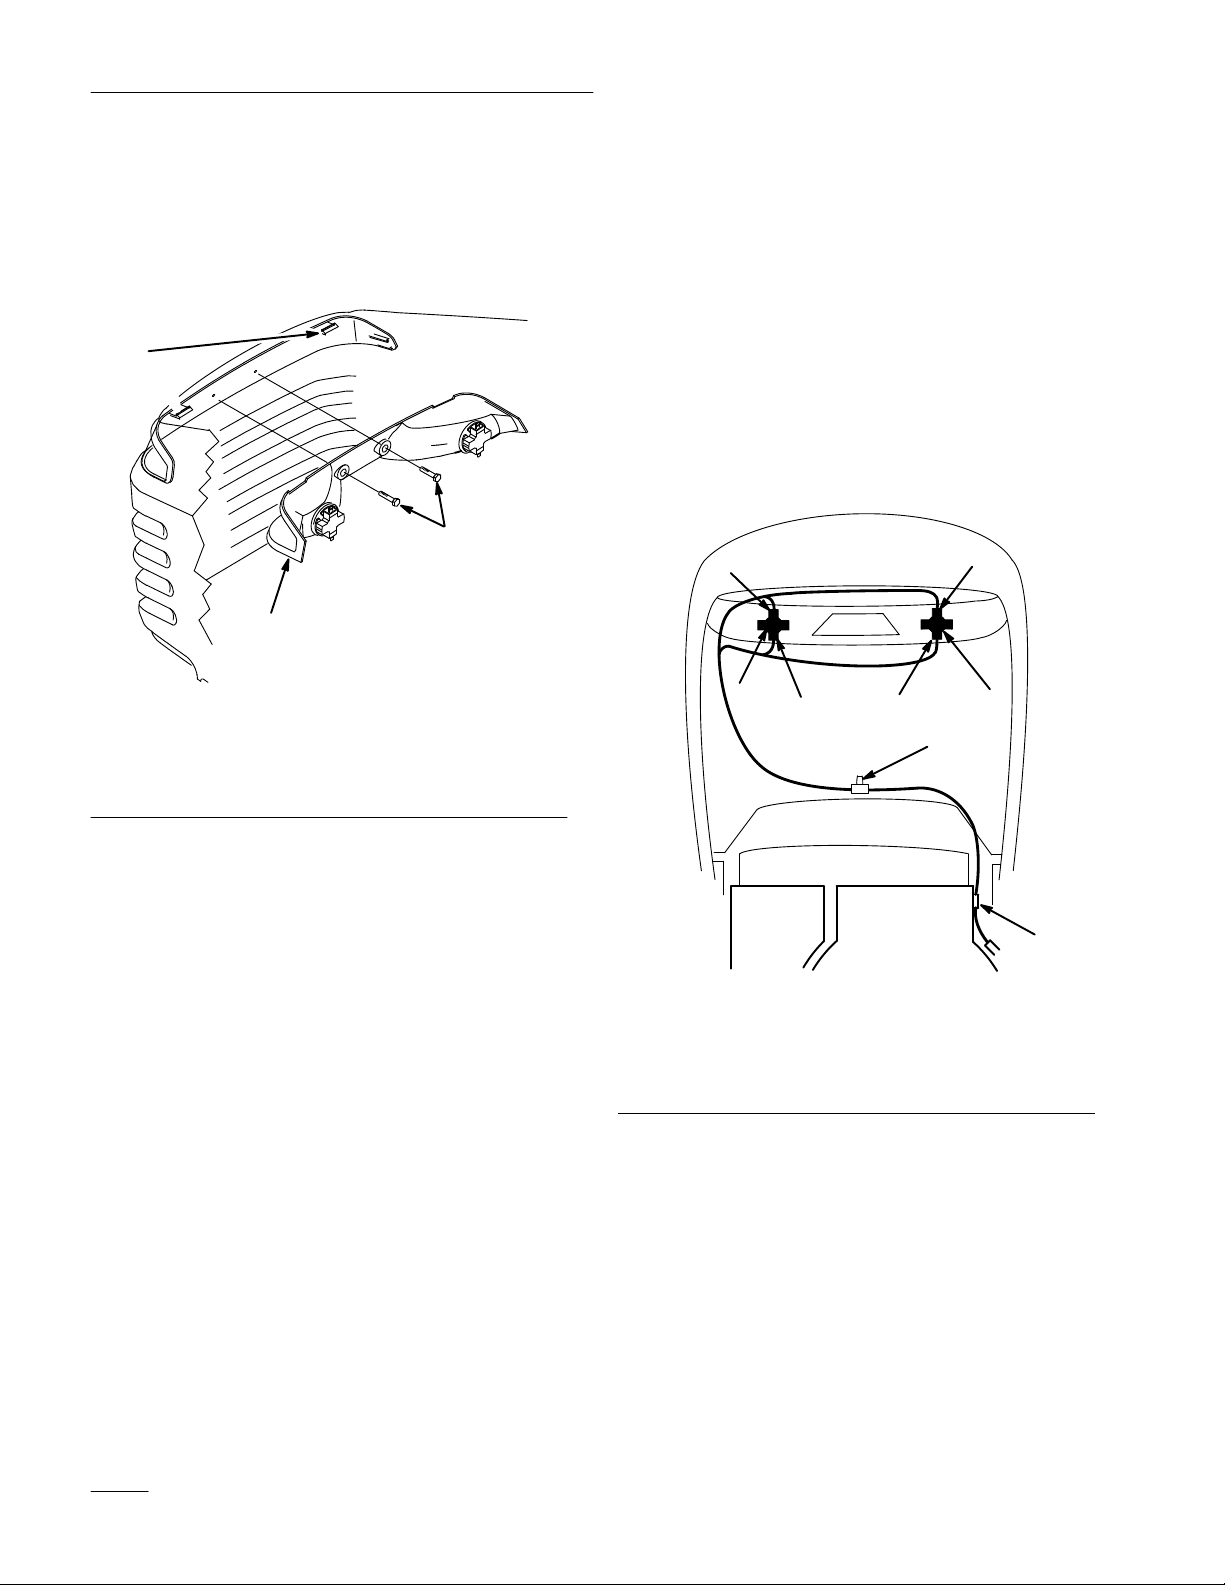
Install Wire Harness
Attach the headlight wire harness to the light
receptacles starting with the longer leads to the right
hand side. The terminals are the same so the wire
connectors may be attached to either side of
receptacle (Fig. 2).
Route the headlight wire harness across the lower
side of the air intake duct and along the right hand
side of the engine (Fig. 2).
3
2
3
3
3
2
5
4
Figure 2
1. Headlight wire harness
2. Light receptacle
3. Terminal
4. Clip
5. Push–in clip
Secure the push–in clip (closest to the headlight
terminals) into the 1/4” diameter hole in the lower
side of the air duct (Fig. 3). On early model tractors
this hole will have to be added. If necessary, drill a
1/4” diameter hole aligned with the center of the air
duct inlet and up from the bottom, 2 5/8”.
2
Page 3

Installation Instructions
Attach the clip, closest to the harness connector, to
the bottom edge of the heat shield on the right hand
side of the engine as shown (Fig. 3).
Plug the head light wire harness connector into the
tractor wire harness connector near the starter (Fig.
3).
1
6
2
3
5
m–4506
Install Switch
Drain the fuel tank; refer to operator’s manual.
POTENTIAL HAZARD
4
• In certain conditions gasoline is extremely
flammable and highly explosive.
WHAT CAN HAPPEN
• A fire or explosion from gasoline can burn
you, others, and cause property damage.
•
HOW TO AVOID THE HAZARD
• Drain gasoline from the fuel tank when the
engine is cold. Do this outdoors in an open
area. Wipe up any gasoline that spills.
• Never drain gasoline near an open flame or
where gasoline fumes may be ignited by a
spark.
• Never smoke a cigarette, cigar or pipe.
1. Headlight wire harness
2. Clip
3. Push–in clip
4. 1/4” diameter hole
5. Tractor wire harness
connector
Figure 3
6. Headlight connector
terminals (4)
Remove the left side screw securing the fuel tank rod
and tilt rod up. Set the fuel tank on engine to gain
access to the back side of the dash (Fig. 4).
3
1
2
Figure 4
1. Fuel tank rod
2. Screw
3. Dash
3
Page 4

Installation Instructions
Remove the nut and washer securing the ignition
switch to the dash and set aside (Fig. 5). Do not
discard, they will be needed for assembly.
Locate the opening in the dash for the light switch
and cut the decal out of hole (Fig. 5).
Install the two tractor wire harness terminals to the
headlight switch (Fig. 6). The terminals are the same
size so the wires may be attached to either terminal.
3
Note: On pre–4900001 serial number tractors
lengthen the headlight switch hole to
1-1/16 – 1-1/8 inch with a file.
Clean surface so new decal sticks securely.
2
2
ON
OFF
START
IGNITION
4
Figure 5
1. Nut and washer
2. Cut decal out
3. Headlight switch
4. Operating–in–Reverse
light (some models)
2
1
3
3
1
1
1. Tractor wire harness
terminals
Figure 6
2. Terminals
3. Headlight switch
Install the fuel tank securing with fuel tank rod and
M-4509
screws removed previously (Fig. 4).
Close hood, start engine and test headlights for proper
operation. For starting instructions and bulb
replacement procedure; refer to operator’s manual.
Choose matching decal from the headlight kit and
install onto right side of the dash. Line up the decal
and hold one half in place while removing backing
from the other half. Press adhesive smoothly and
firmly into position then repeat for the other half of
the decal.
Insert the ignition switch through from rear of dash
and secure with washer and nut removed previously
(Fig. 5).
Push the headlight switch through the front of the
dash until tabs on switch lock into dash to retain in
position.
4
 Loading...